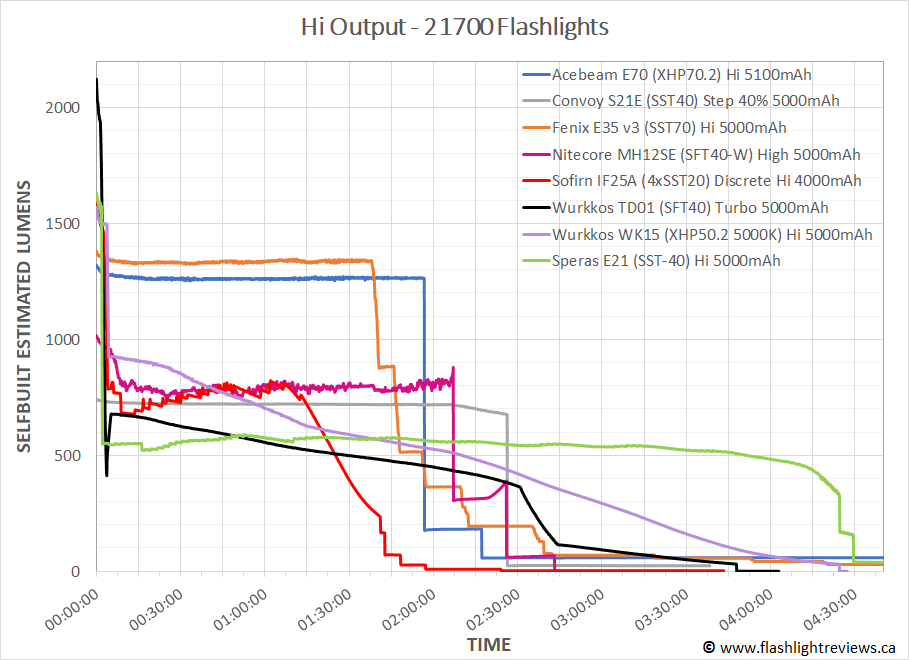
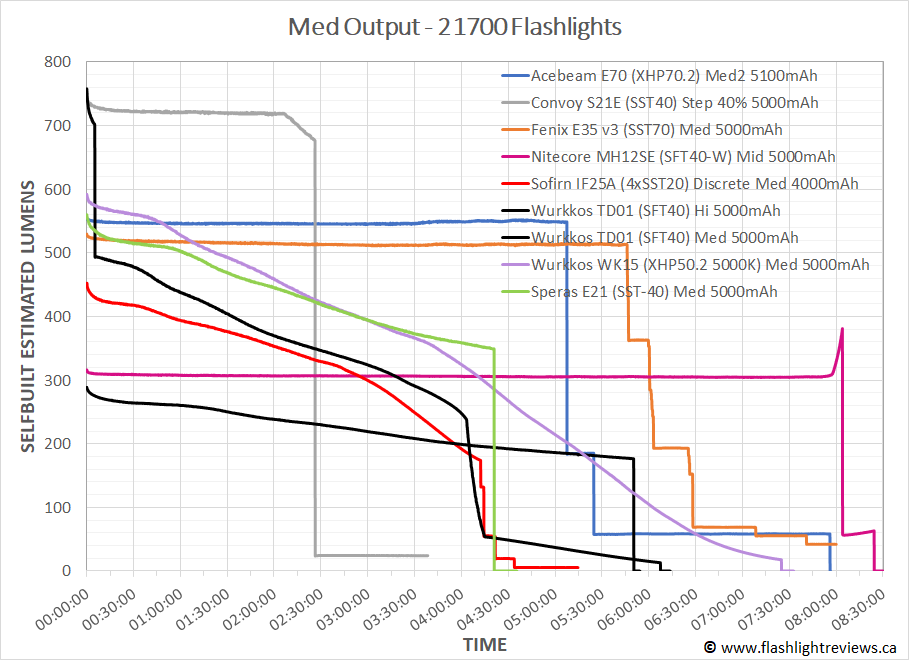
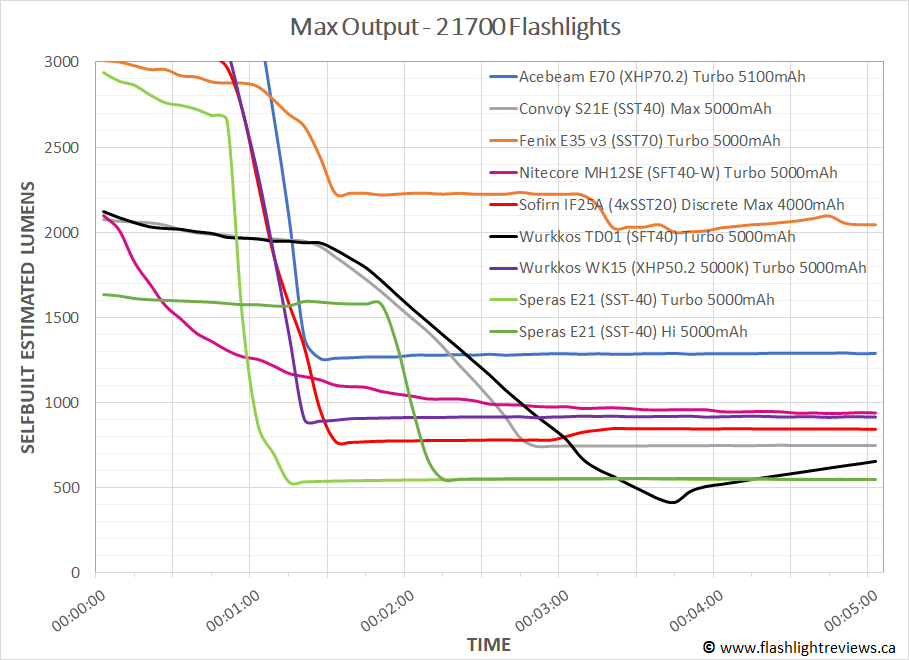
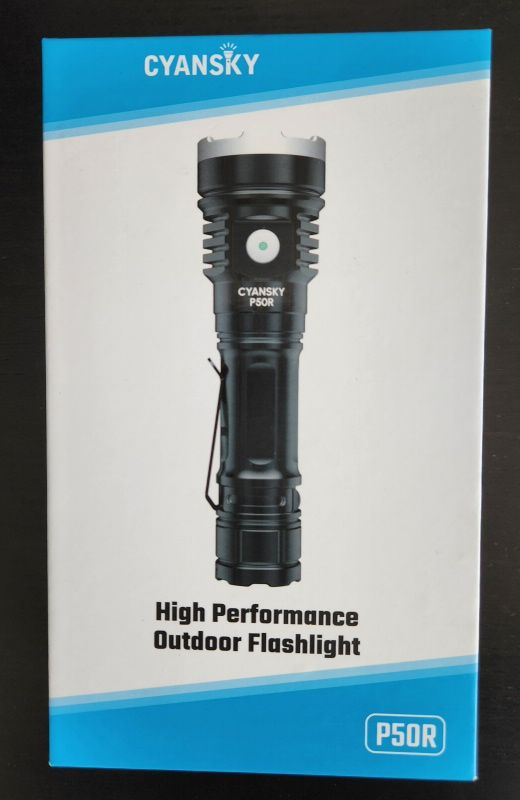
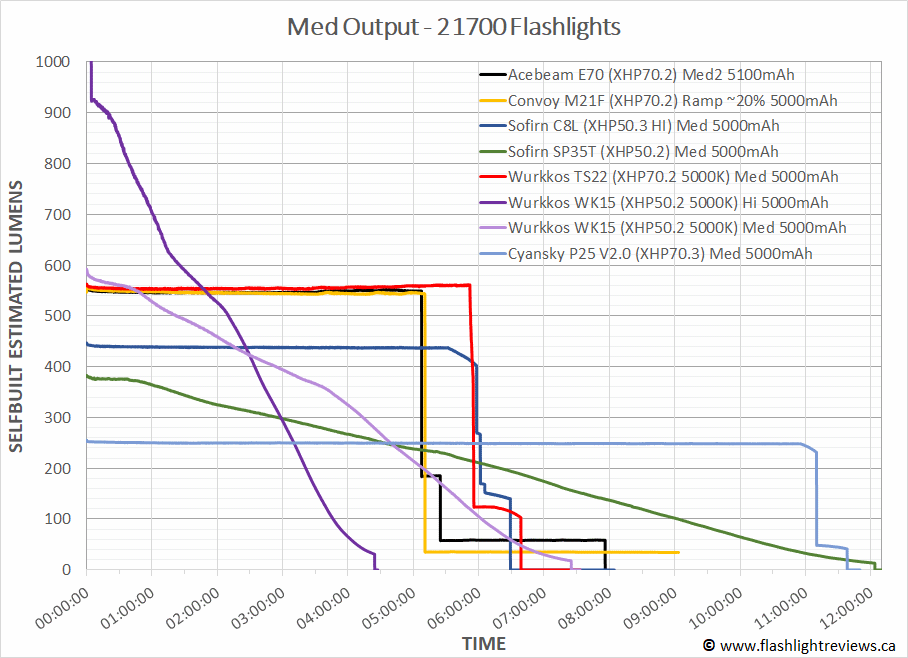
Tag Archives: 21700

Cyansky P25 V2.0

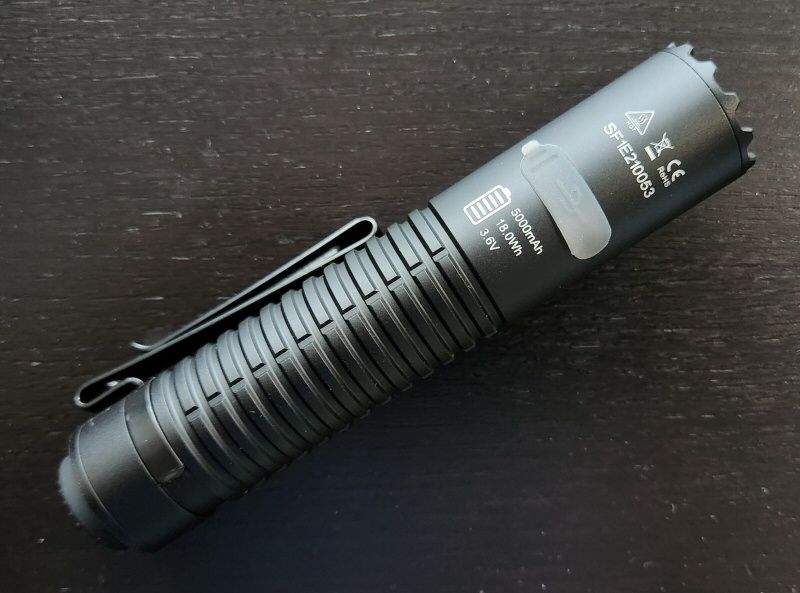
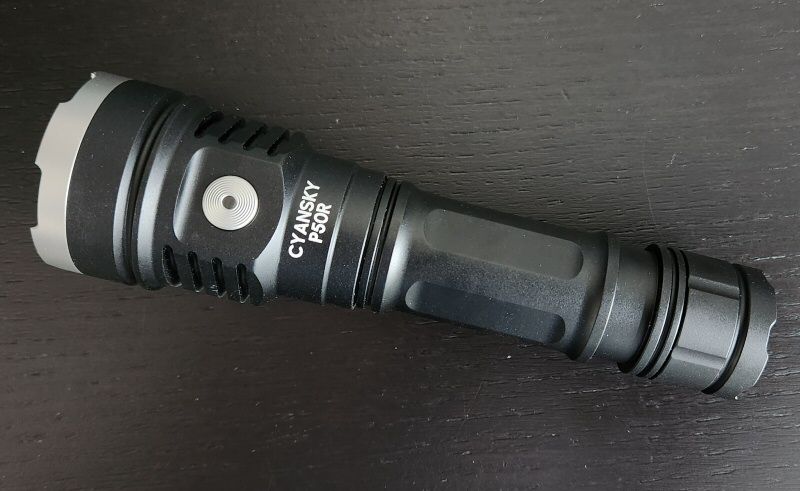
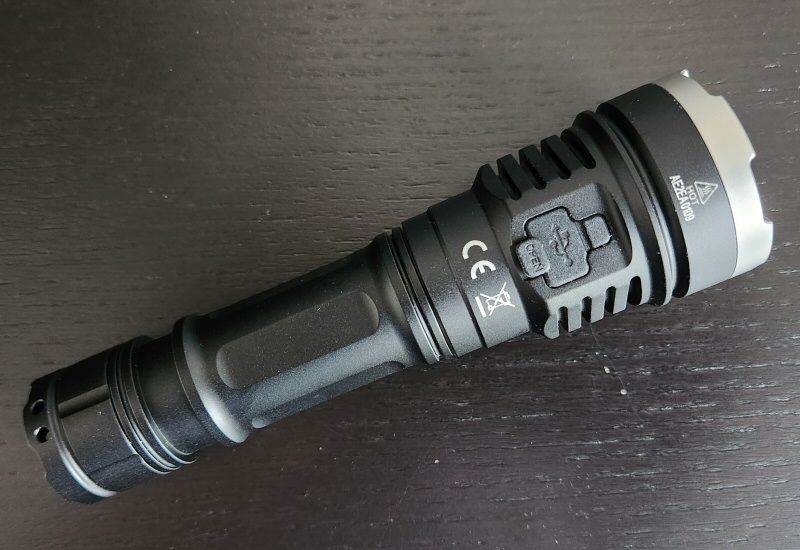
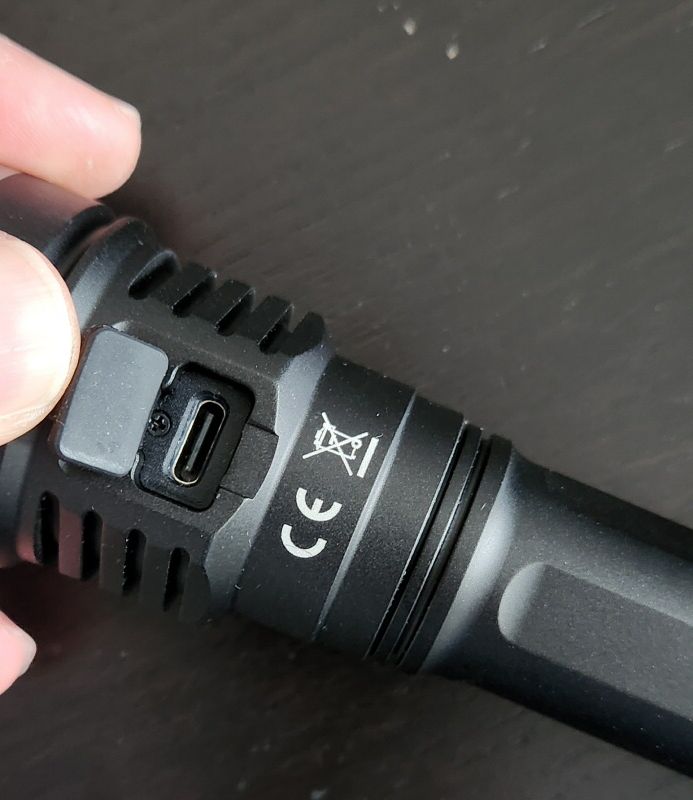
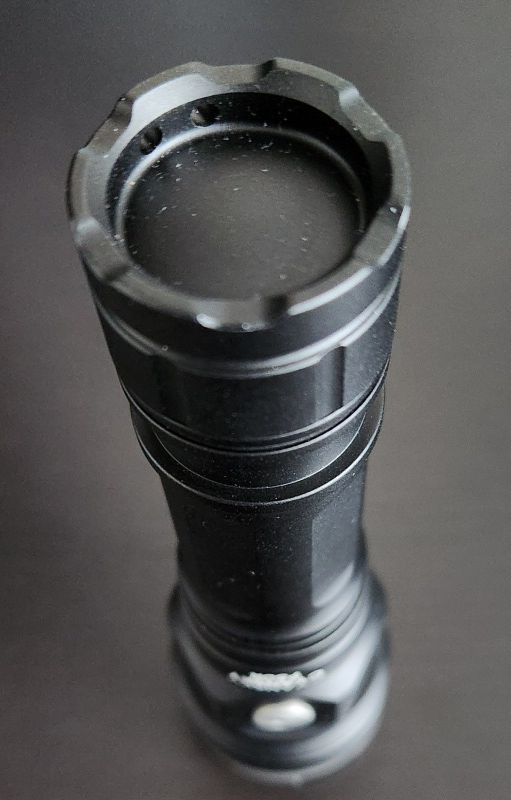
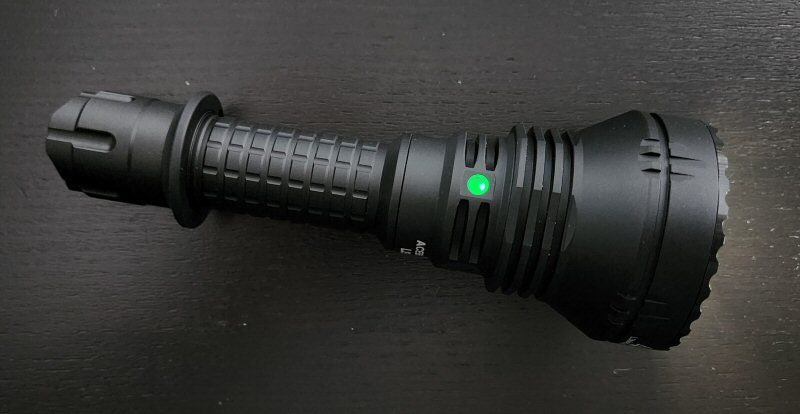
The P25 is a tactical-style, general-purpose flashlight running on a single included 21700 battery. It features the high output XHP70.3 emitter, in cool white.

  1. Introduction
  2. Manufacturer Specifications
  3. Package Details
  4. Build
  5. User Interface
  6. Circuit Measures
  7. Emitter Measures
  8. Beamshots
  9. Testing Results
  10. Runtimes
  11. Pros and Cons
  12. Overall Rating
  13. Preliminary Conclusions
  14. Acknowledgement

Introduction

This is the first Cyansky light that I’ve reviewed since my recent return to reviewing. Cyansky is another in a line of new makers that has sprung up in recent years. I’ve heard good things about their models, so was curious to test out this new version of the P25.

According to the specs, the P25 v2.0 features the XHP70.3 emitter (HD version, from the appearance), and is rated for relatively high output in the 1×21700 class. What really caught my eye here though was the tactical tailcap switch, in addition to the electronic side switch. That’s not something you see commonly any more.

Let’s see how it performs in my testing.

Manufacturer Specifications

Note: as always, these are simply what the manufacturer provides – scroll down to see my actual runtimes.

FeatureSpecs
MakerCyansky
ModelP25 V2.0
EmitterXHP70.3
TintCool
Max Output (Lumens)3,600
Min Output (Lumens)5
Max Runtime80 hours
Max Beam Intensity (cd)10,800 cd
Max Beam Distance (m)208 m
Constant Levels5
FlashingStrobe, SOS
Battery1x21700
Weight (w/o battery)98 g
Weight (with battery)-
Length145.4 mm
Head Diameter30 mm
Body Diameter24.4 mm
WaterproofIPX8 2m

Package Details


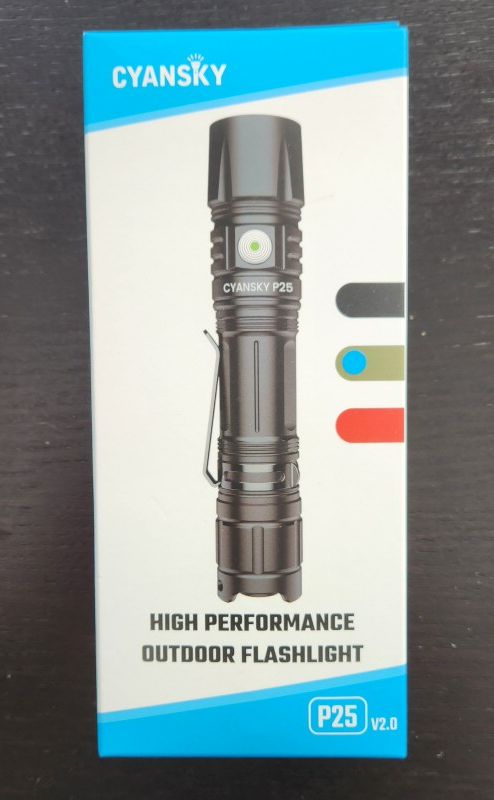
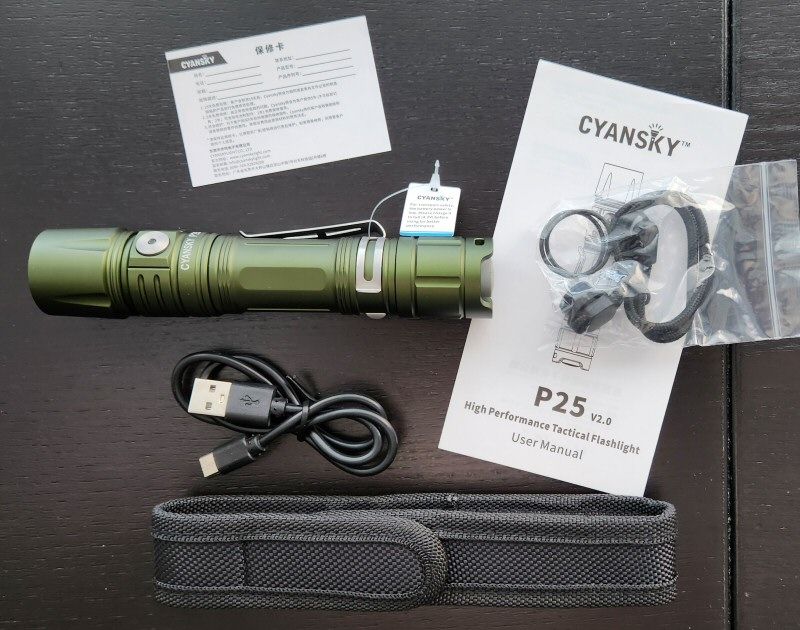
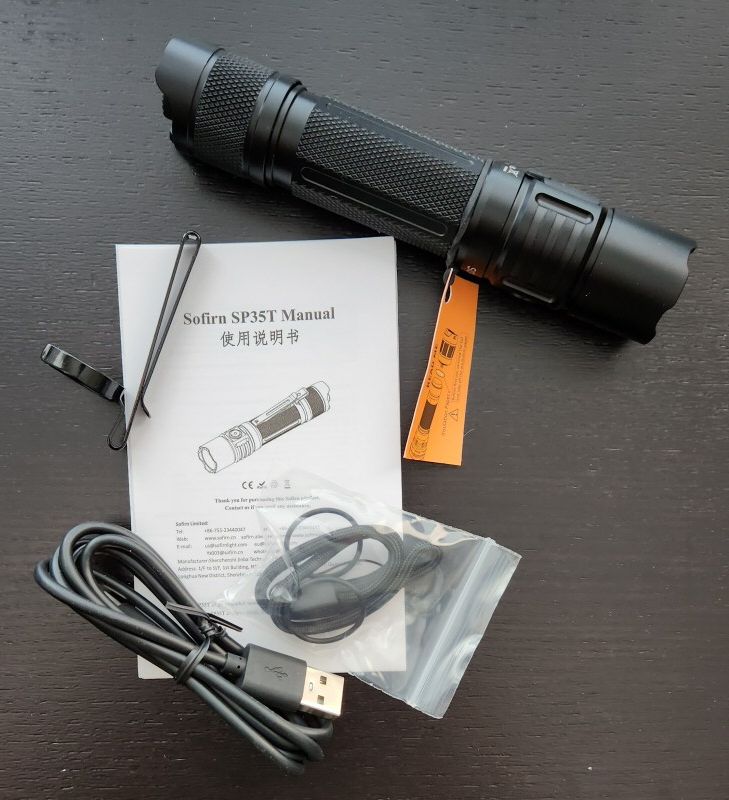
The P25 comes in fairly basic packaging, nothing too fancy in its appearance. Inside the box I found:

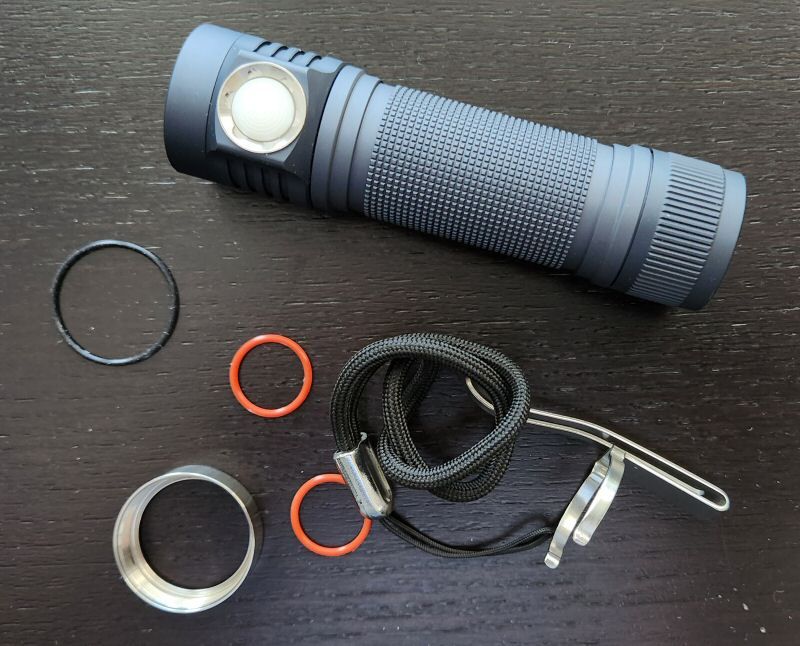
  • Cyansky P25 V2.0 flashlight, in green for my sample (also comes in red or black)
  • Cyansky-branded 5000mAh 21700 battery
  • Pocket clip
  • Holster with velcro closing flap
  • Wrist lanyard
  • USB-C charging cable
  • 2 Spare O-rings
  • Manual

It’s a very decent package, and I am glad to see the holster included – very rare these days.

Build


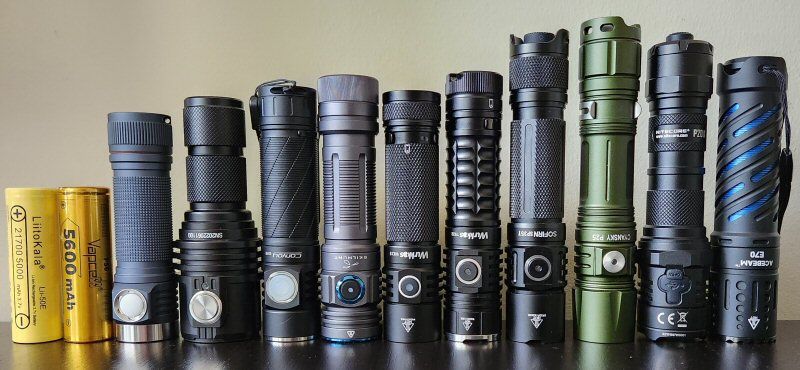
From left to right: LiitoKala 21700 (5000mAh), Vapcell 21700 F56 (5600mAh), Emisar D4K, Imalent MS03, Convoy S21E, Skilhunt M300, Wurkkos WK15, Wurkkos TS22, Sofirn SP35T, Cyansky P25, Nitecore P20iX, Acebeam E70.


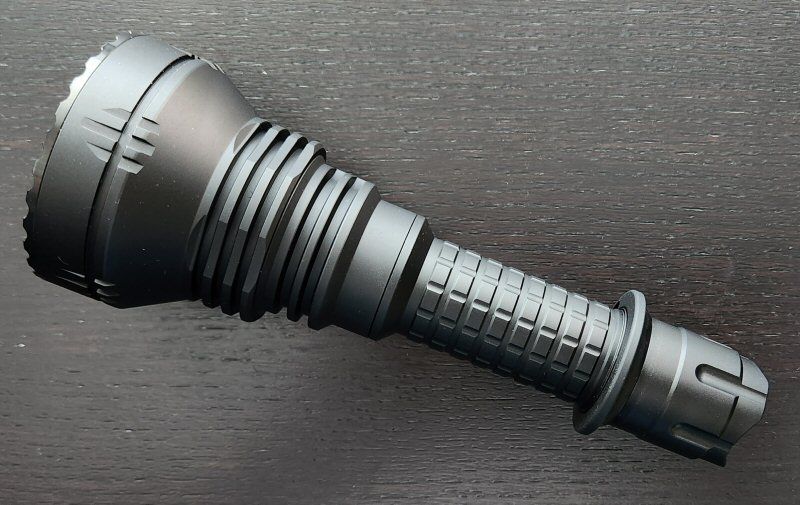
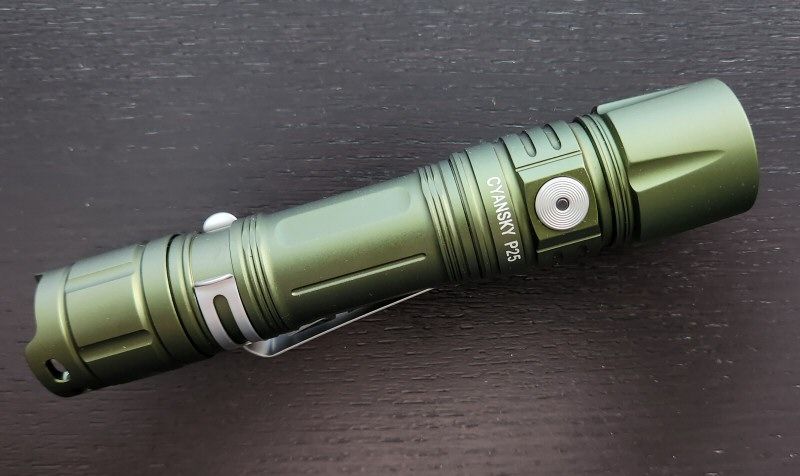
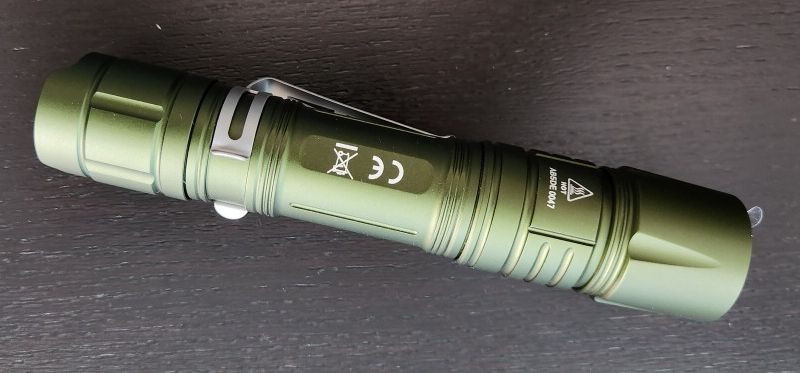
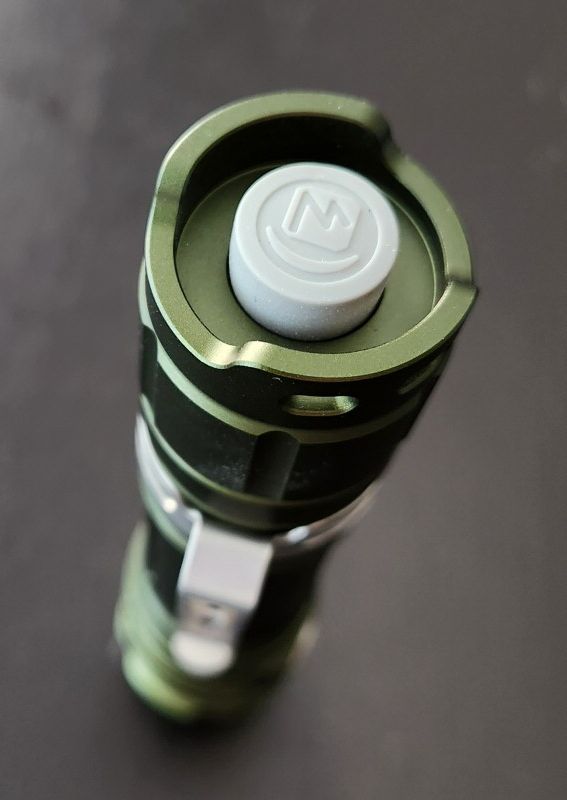
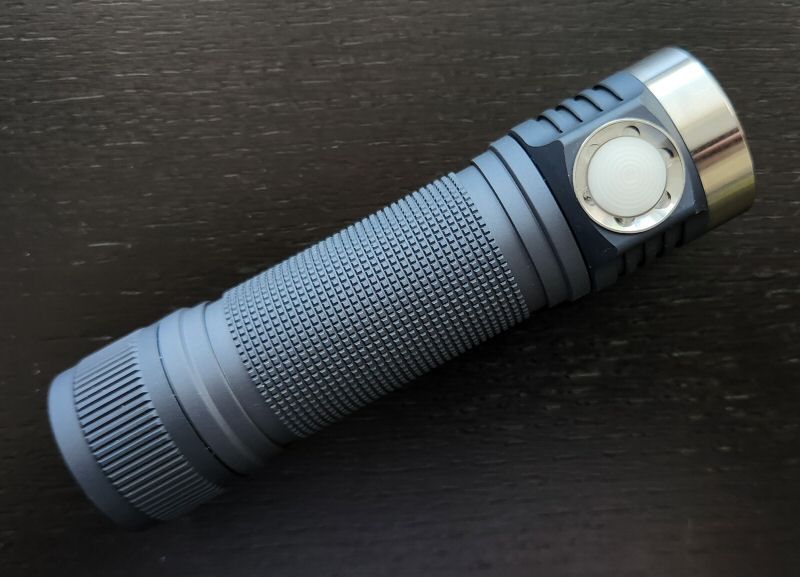
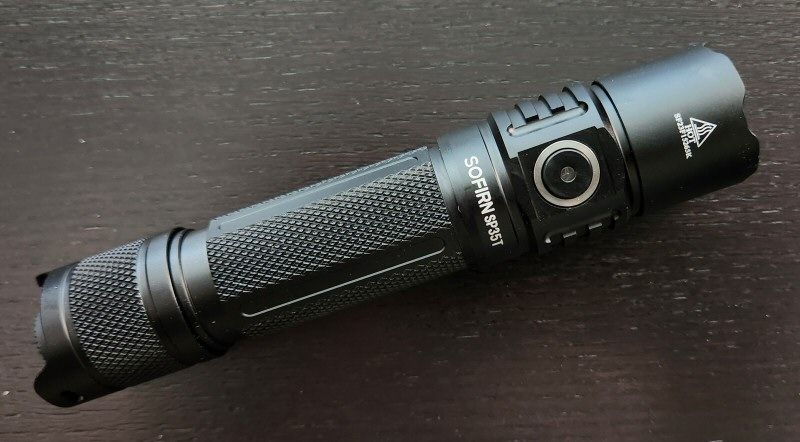
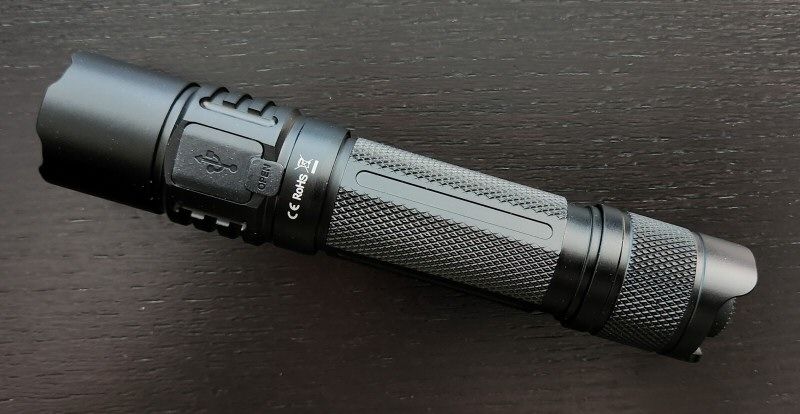
At 145mm, the P25 is one of the longest lights I’ve tested in the general-purpose 1×21700 class. This is in part due to the tactical forward clicky switch. This makes the light very suitable for tactical purposes, but it does mean you have to accept greater length. As someone with above-average sized hands with long fingers, I find the light comfortable to hold and use in either overhand or underhand grip – but some may find it long.

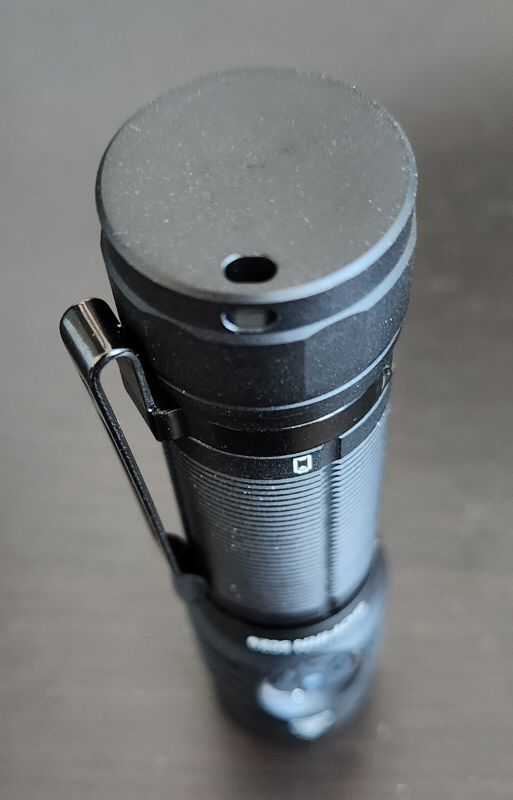
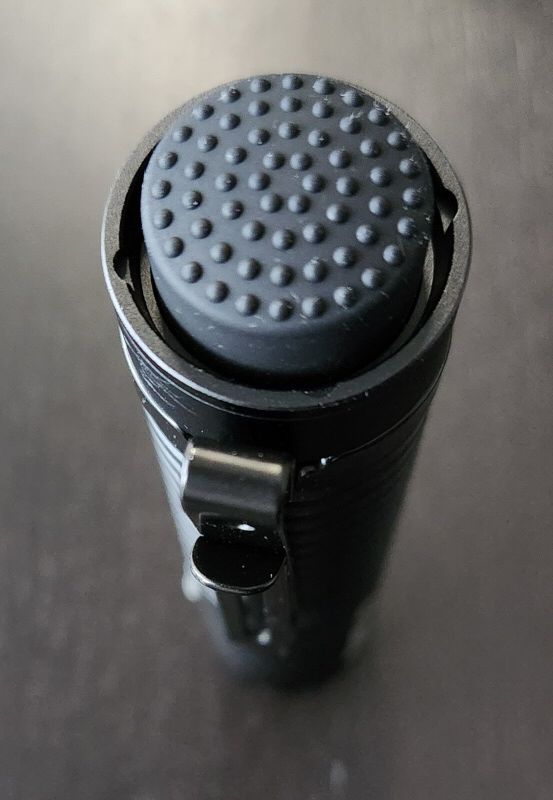
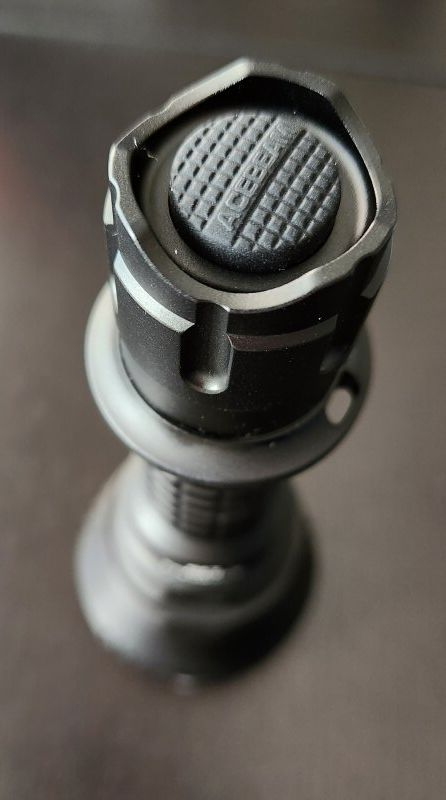
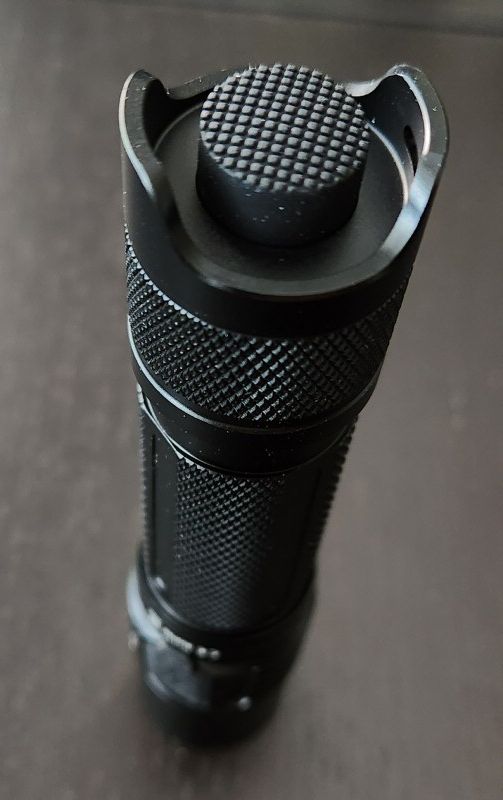
The tailcap physical forward clicky switch has a pleasantly firm action, with a solid click and predictable firm traverse. There are two raised tailcap guards that can serve as the lanyard attachment point. My sample is able to tailstand stably.

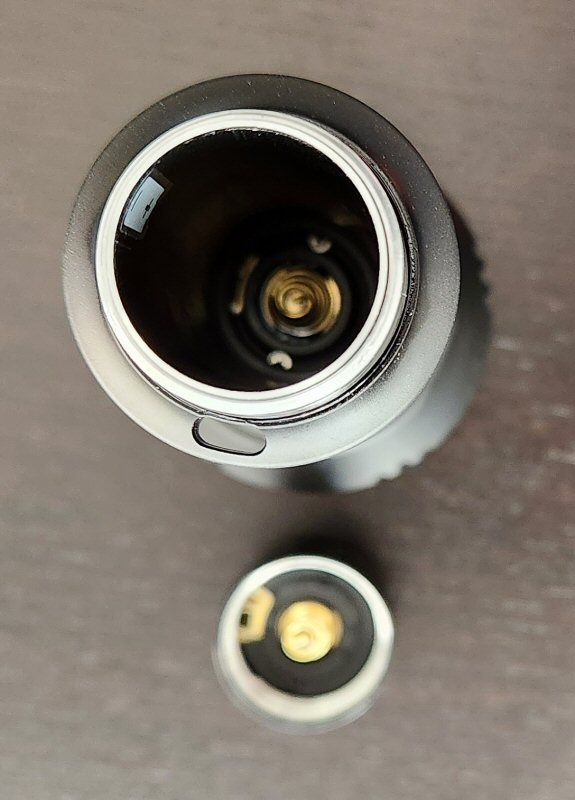
Tailcap threads are square-cut and anodized, with good feel. Thanks to the anodized tailcap threads, you can easily lock-out this light by a simple twist of the tailcap.

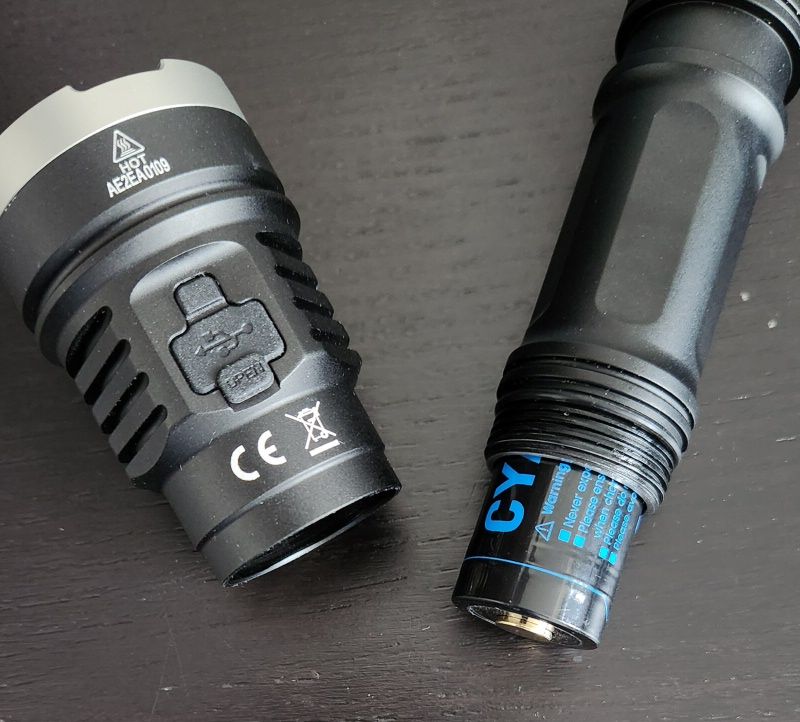
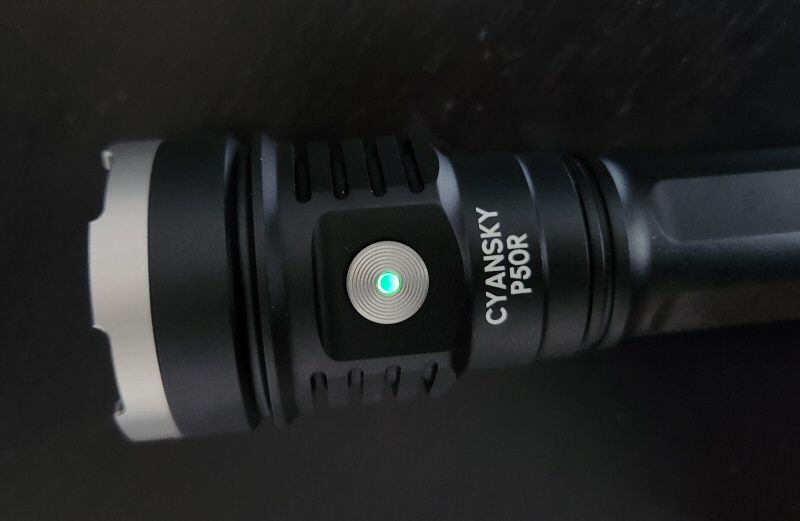
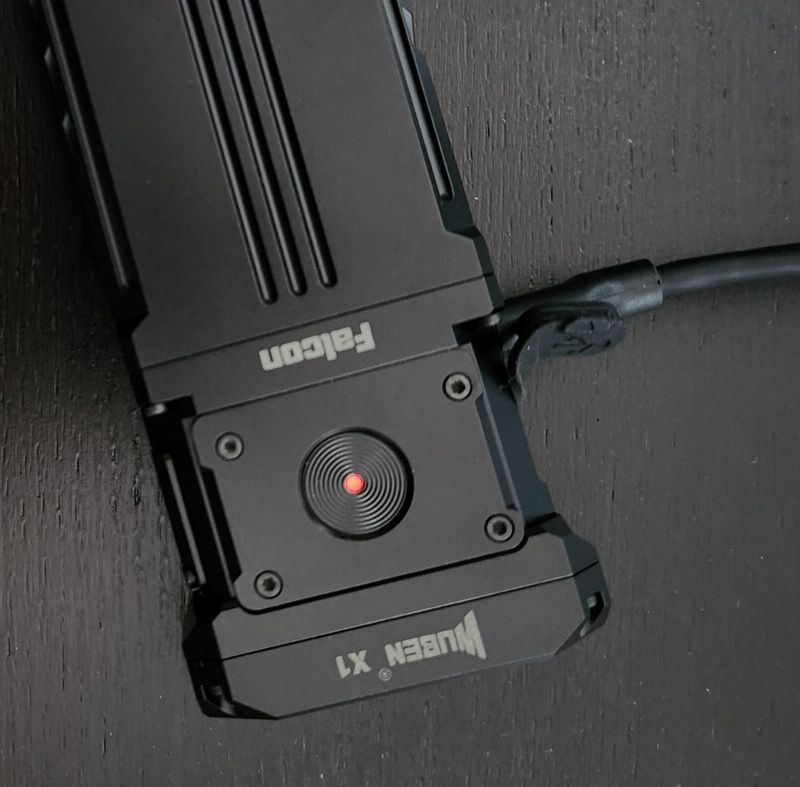
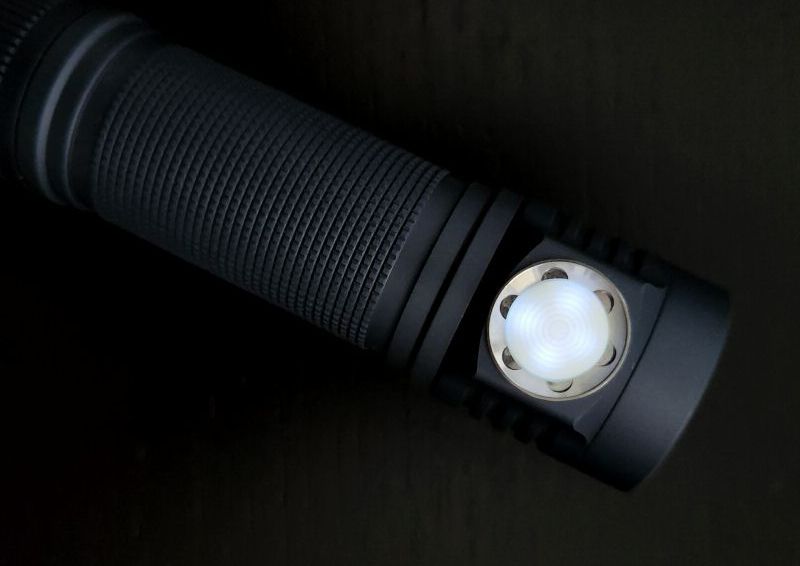
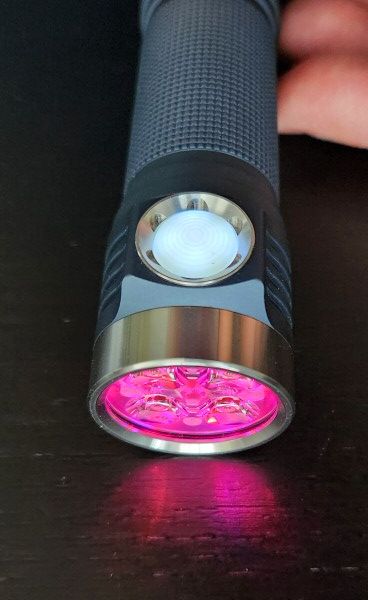
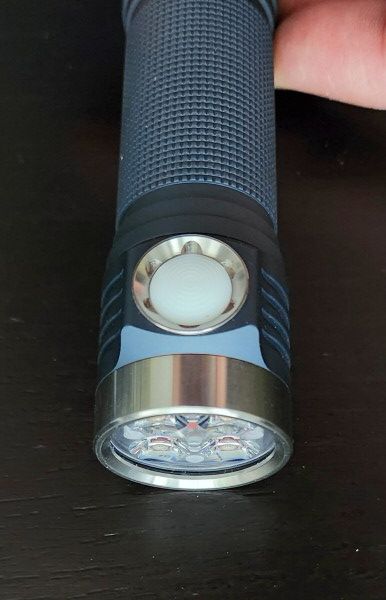
There is a raised side-mounted electronic switch on the side of the head, with red and green LEDs underneath to show battery charge status. Feel and traverse of the electronic switch is very similar to a lot of modern lights.

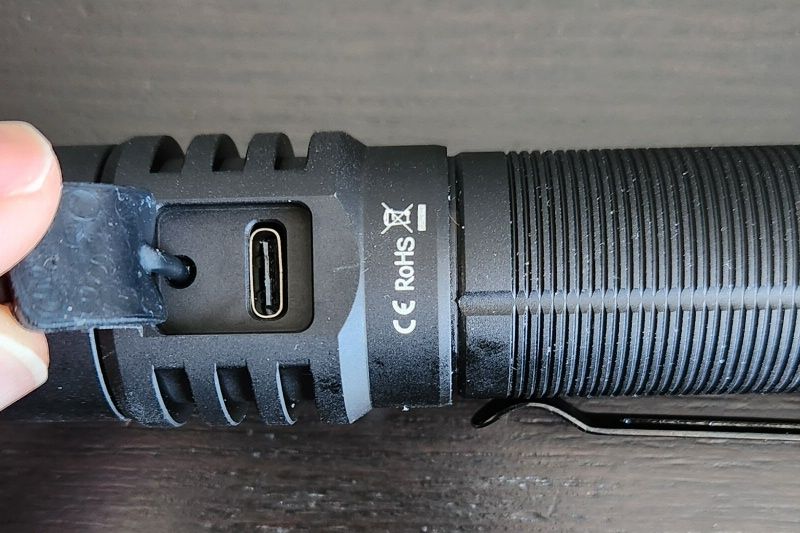
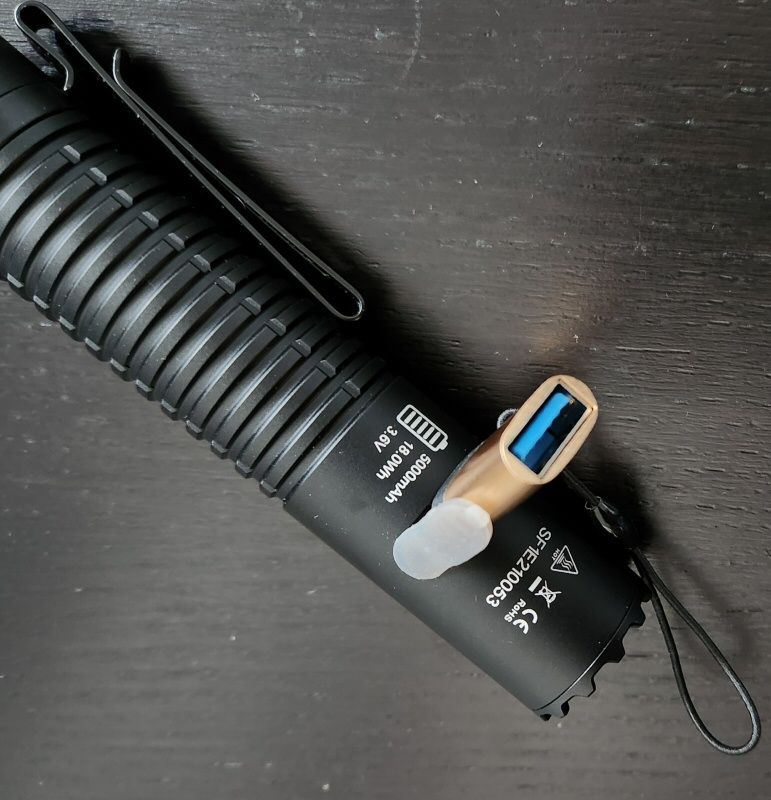
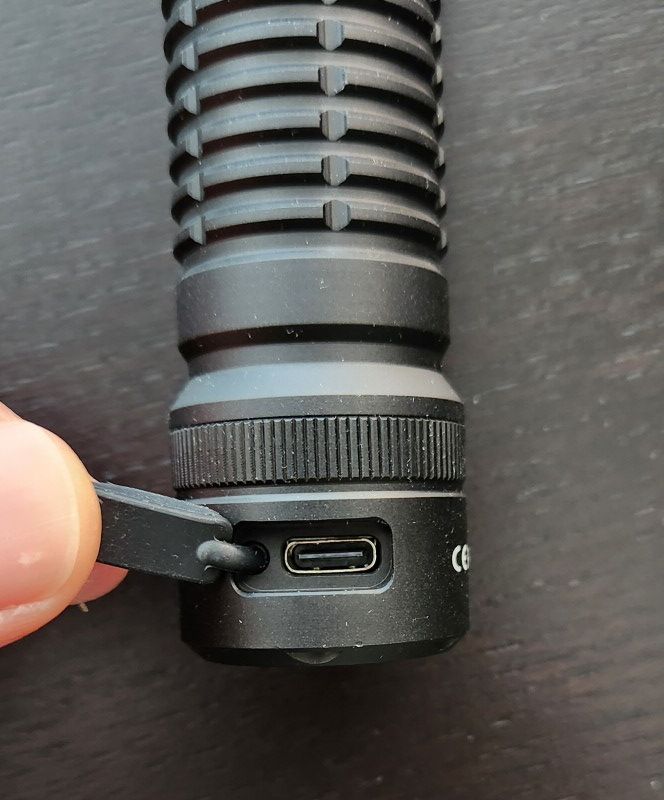
As there is no in-light USB charging (i.e., you charge the cell directly), I expected waterproofness is excellent here.

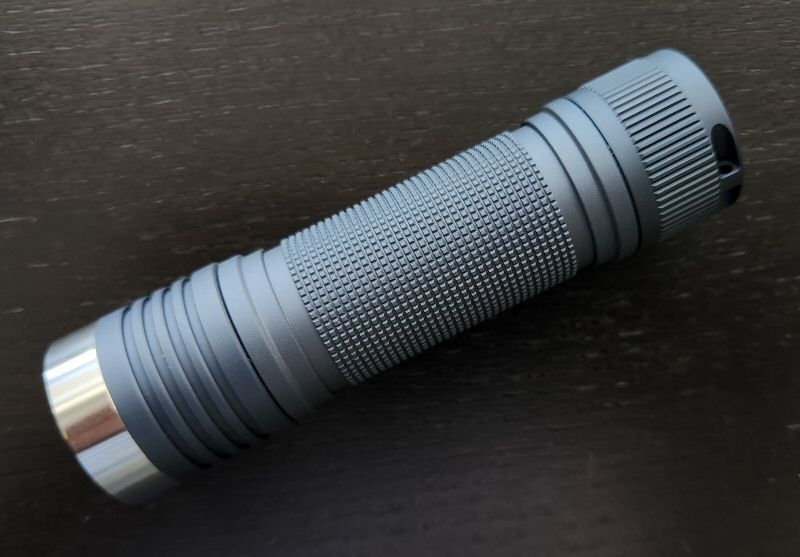
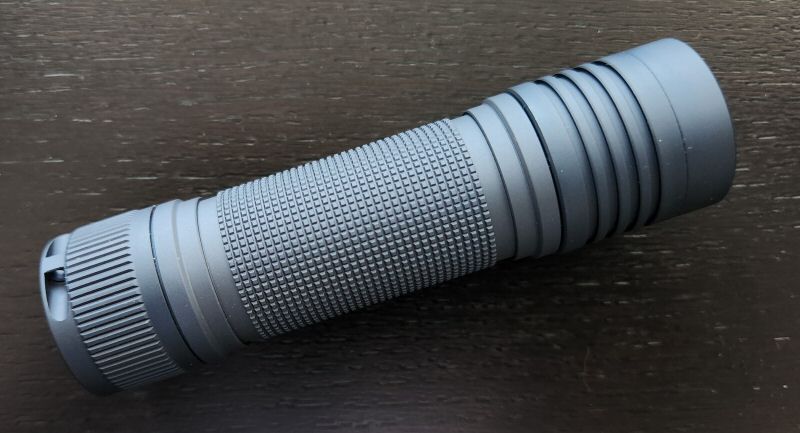
There is no real knurling on the light, but there are a lot of cut-outs to help with grip. The slightly raised side switch helps limit the ability of the light to roll somewhat – but the pocket clip is particularly recommended in that regard.  Anodizing looks to be good quality for type II (presumed, given the colour range available). I would describe the finish as satin.

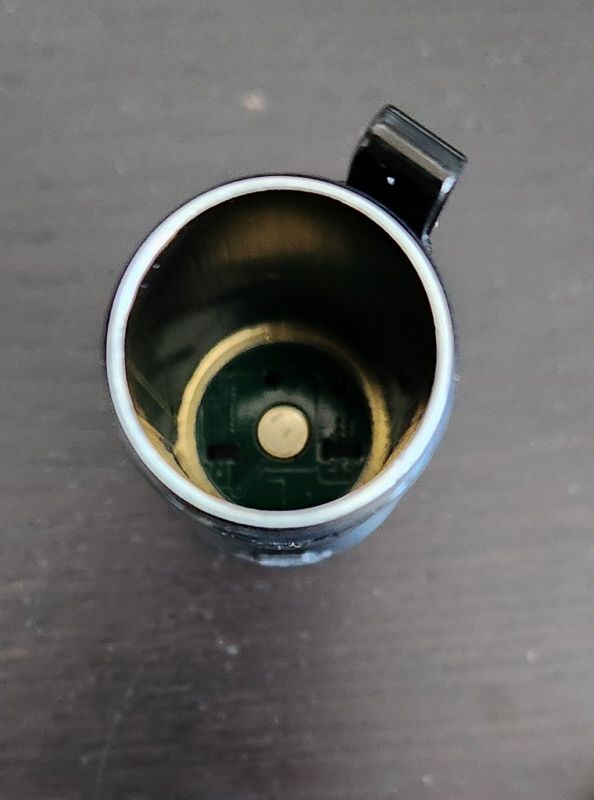
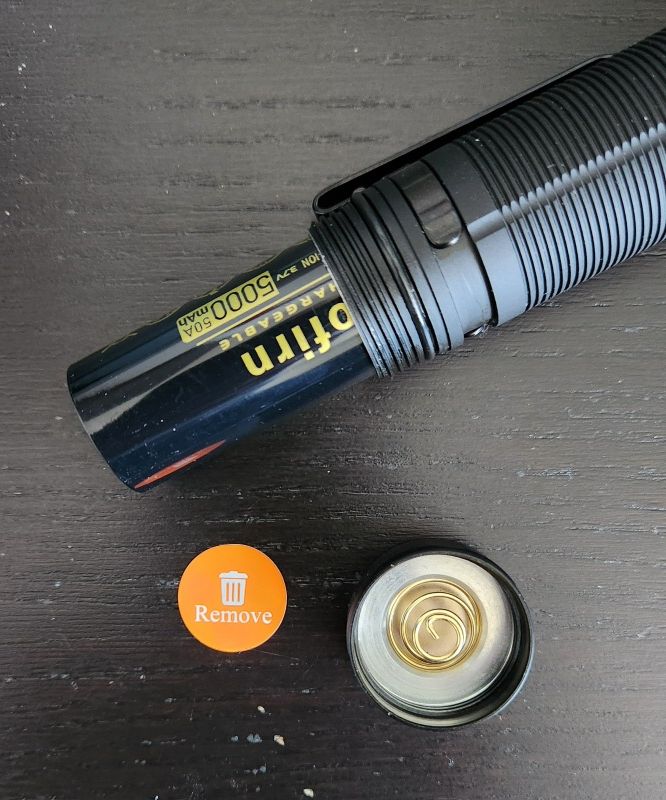
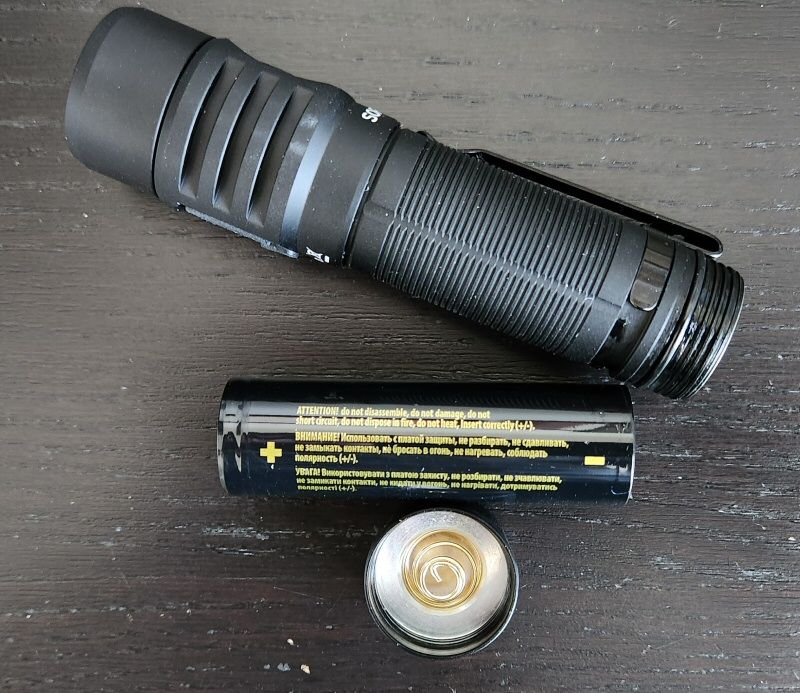
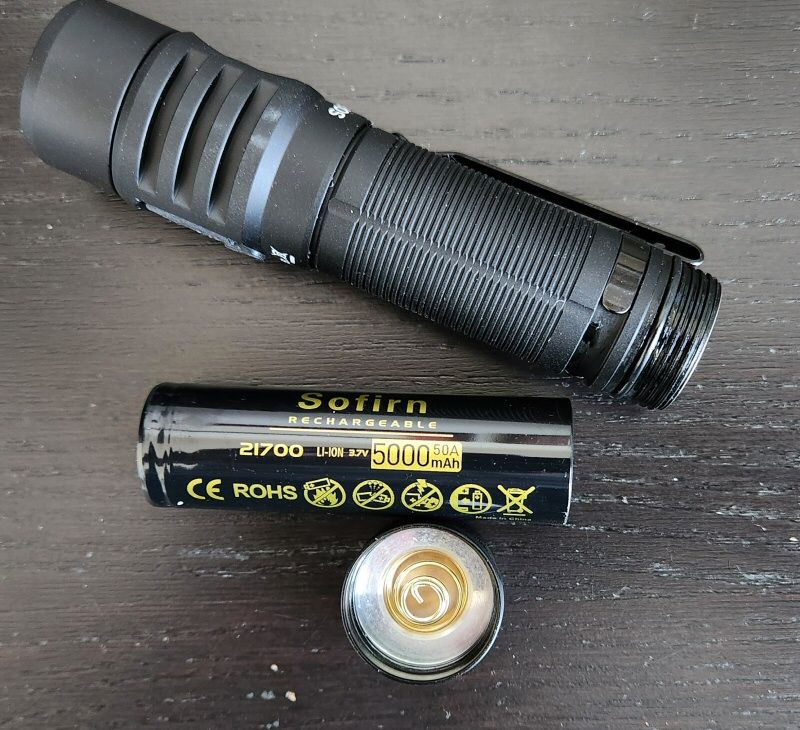
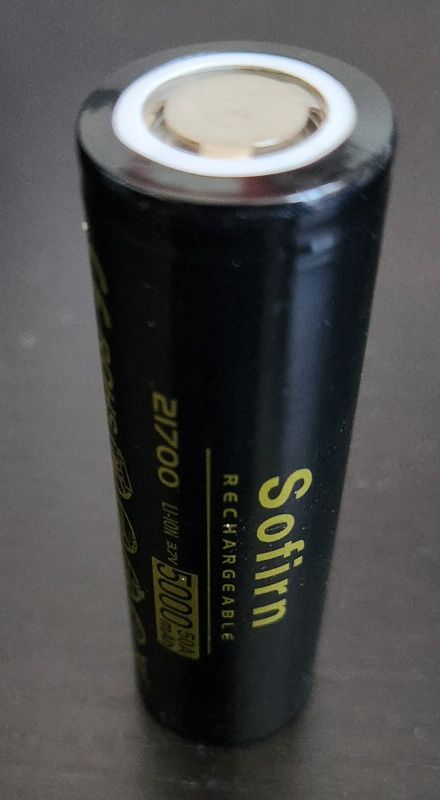
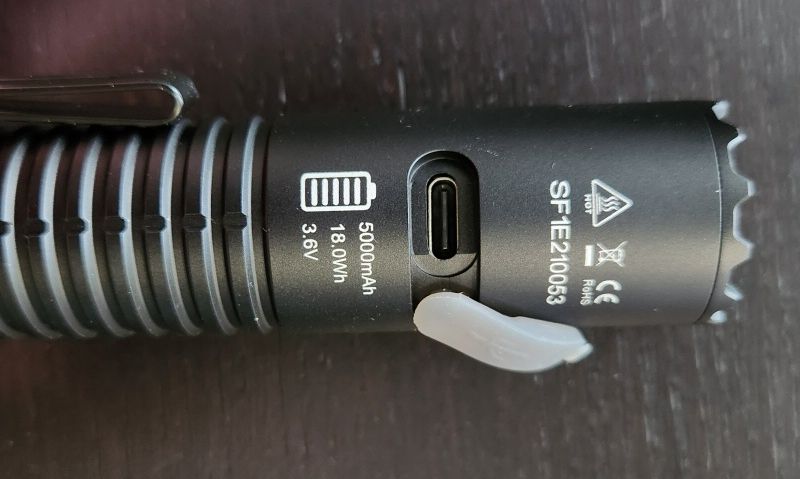
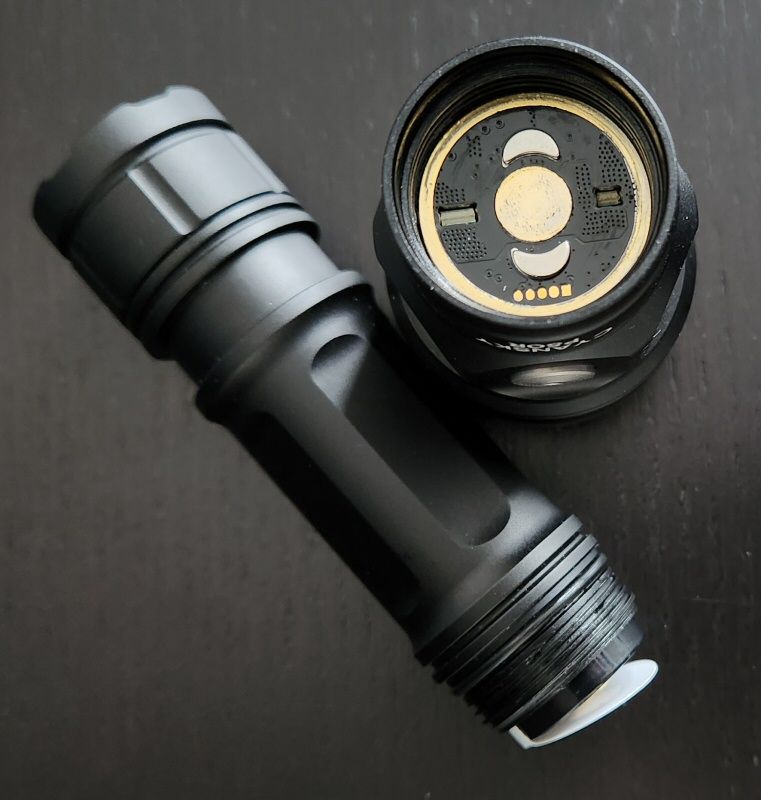
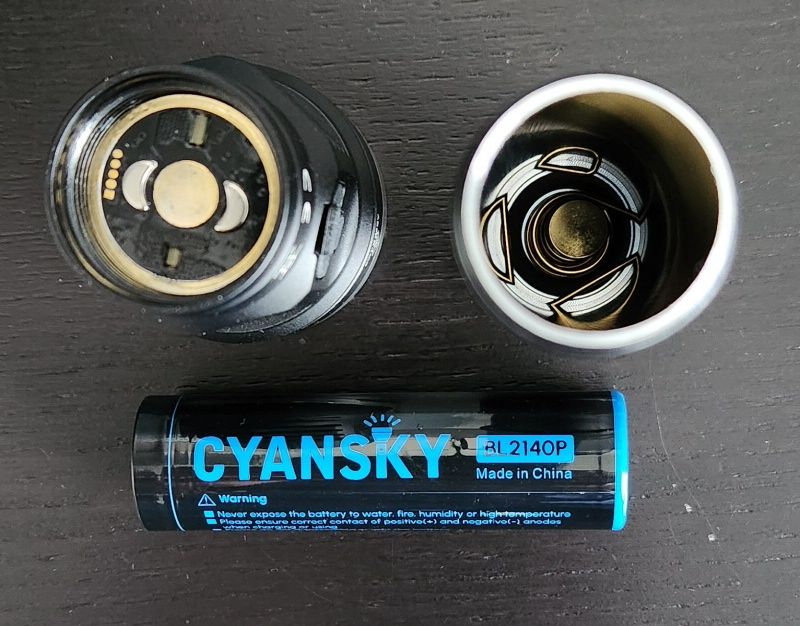
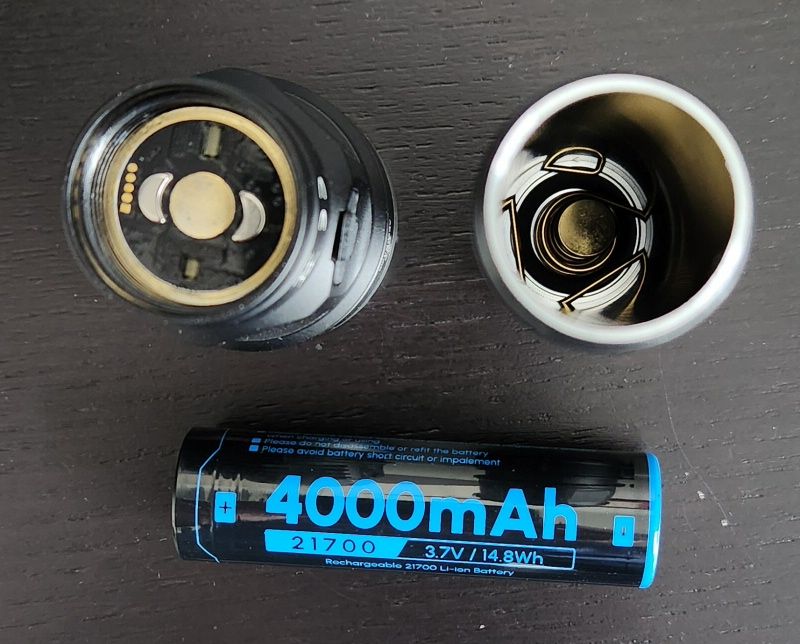
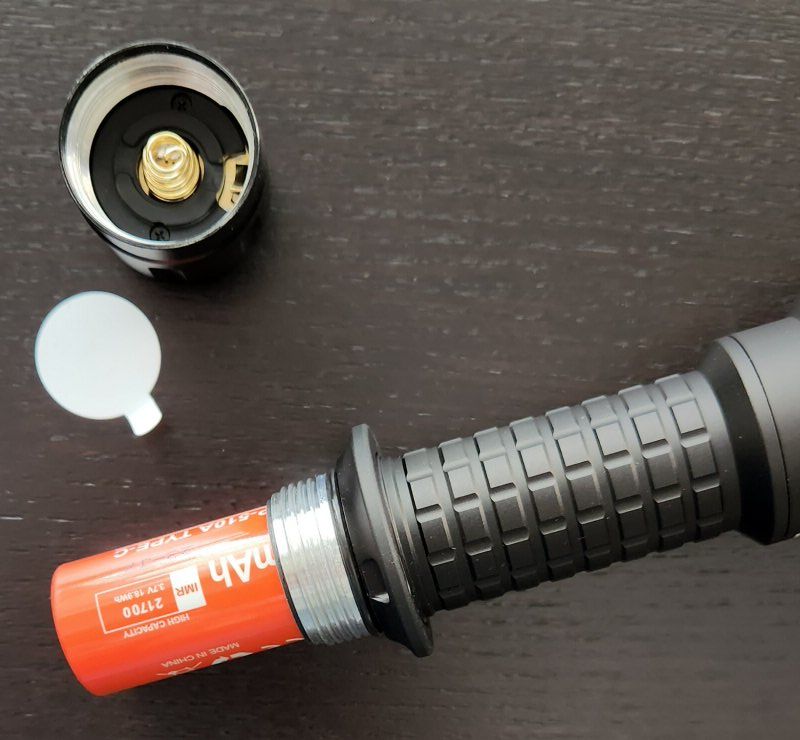
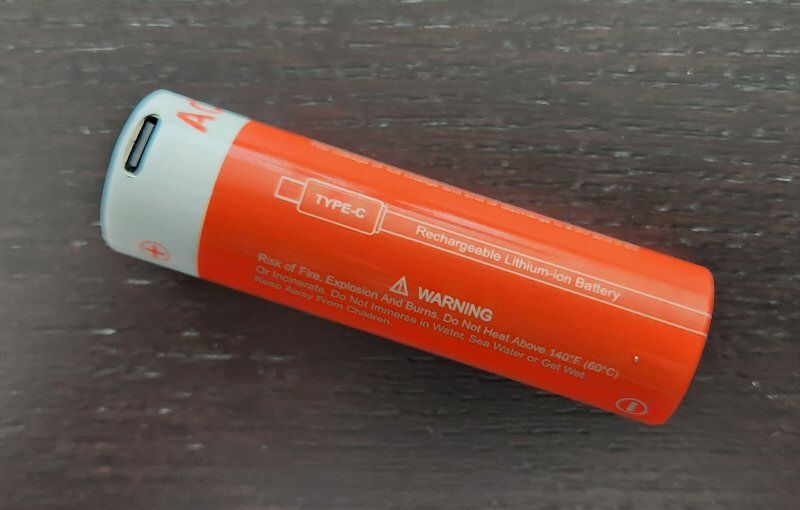
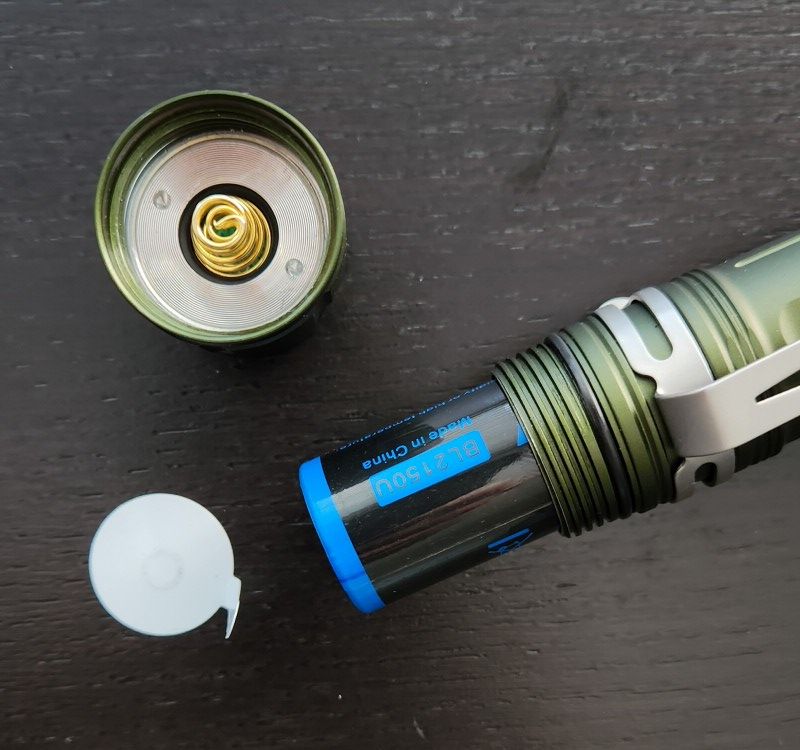
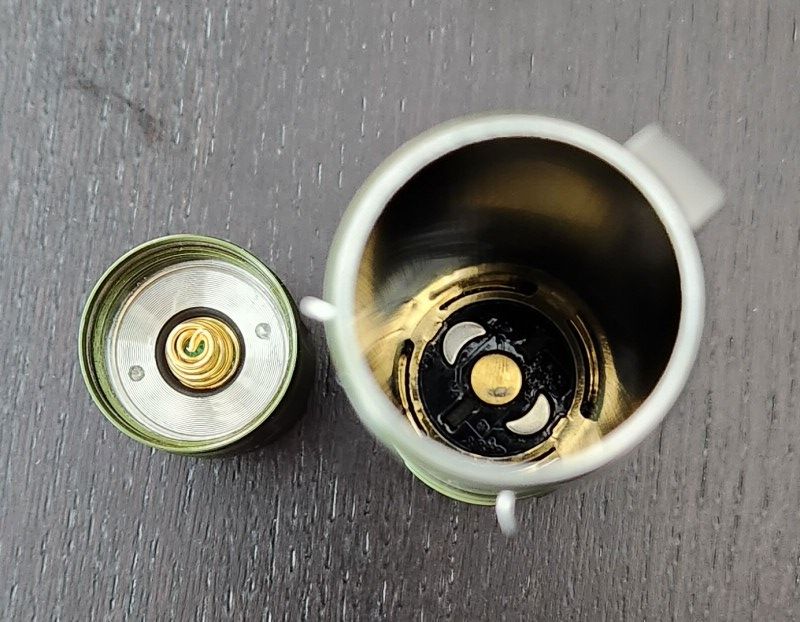
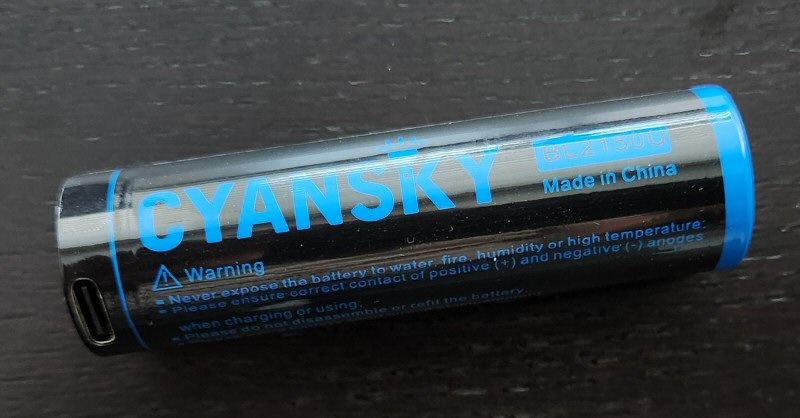
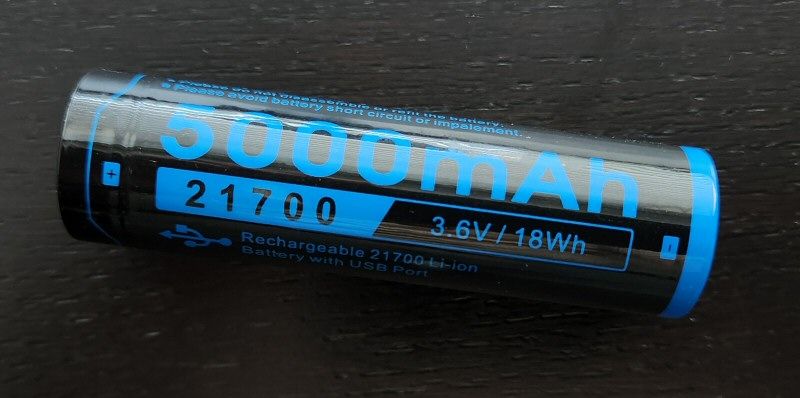
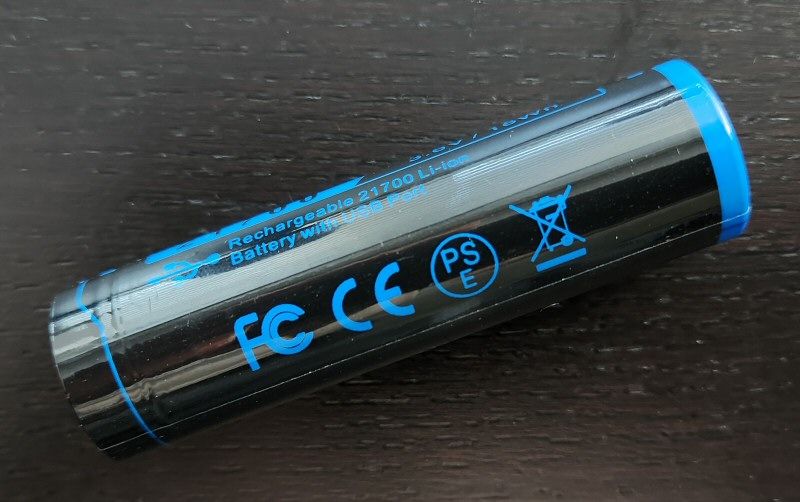
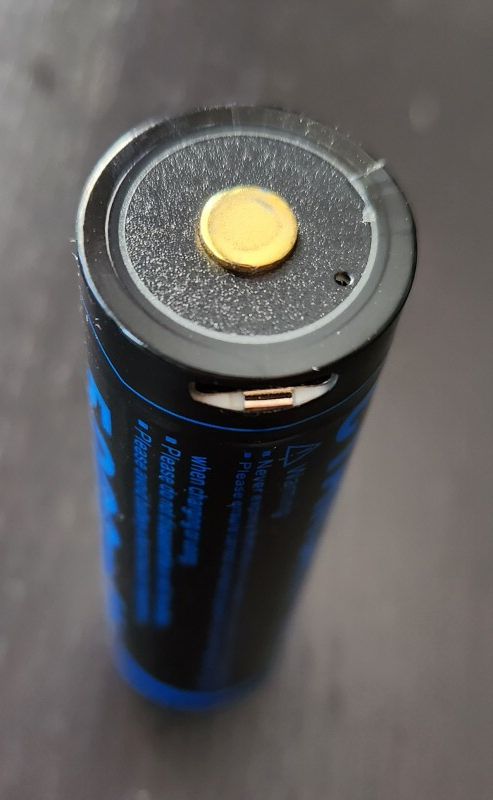
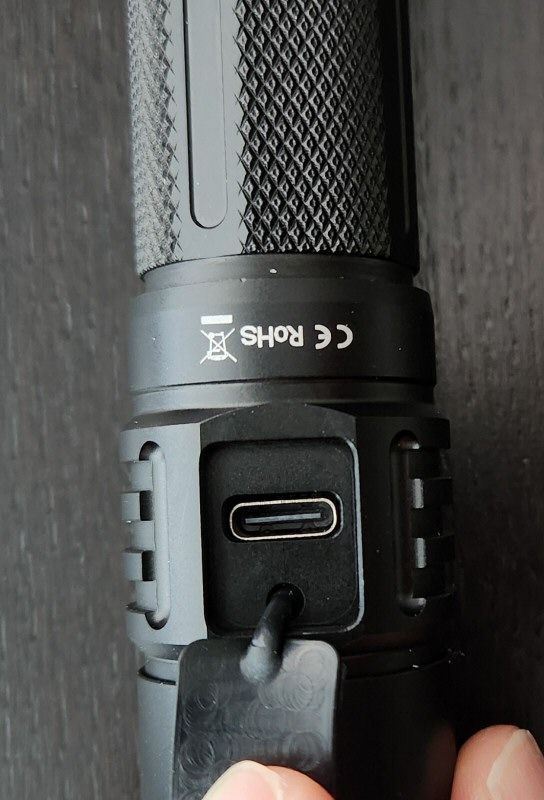
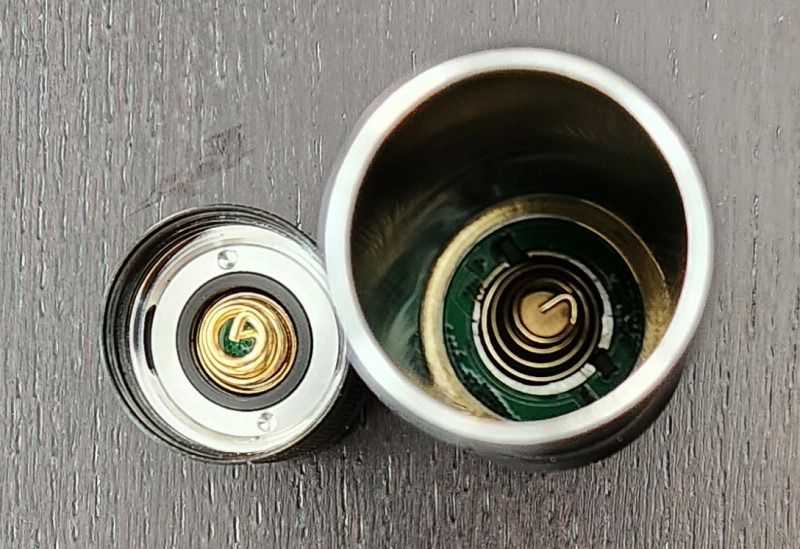
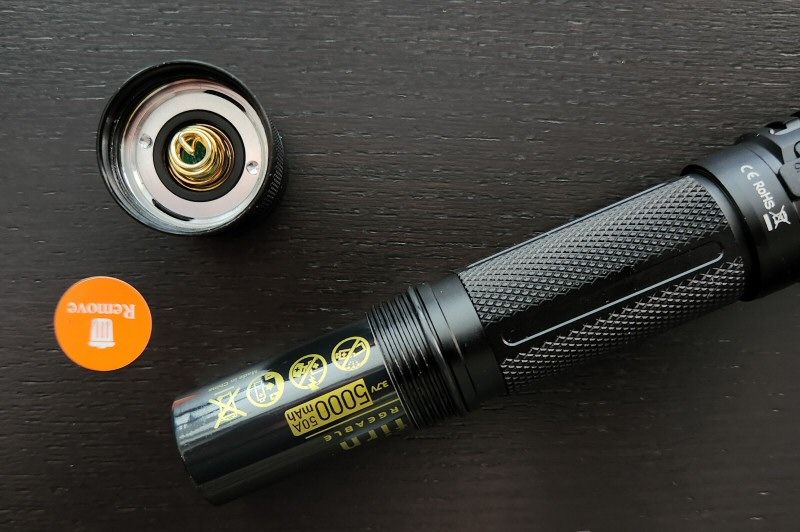
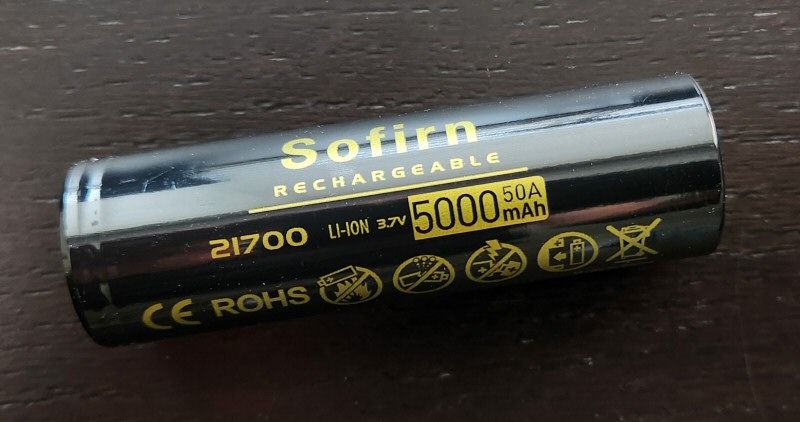
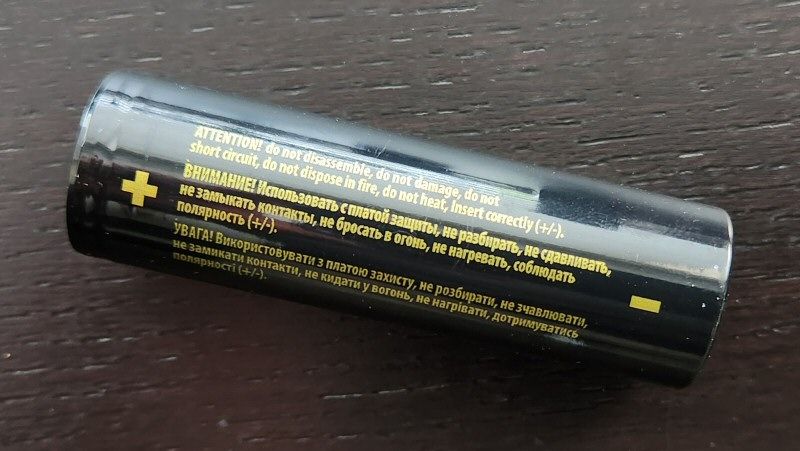
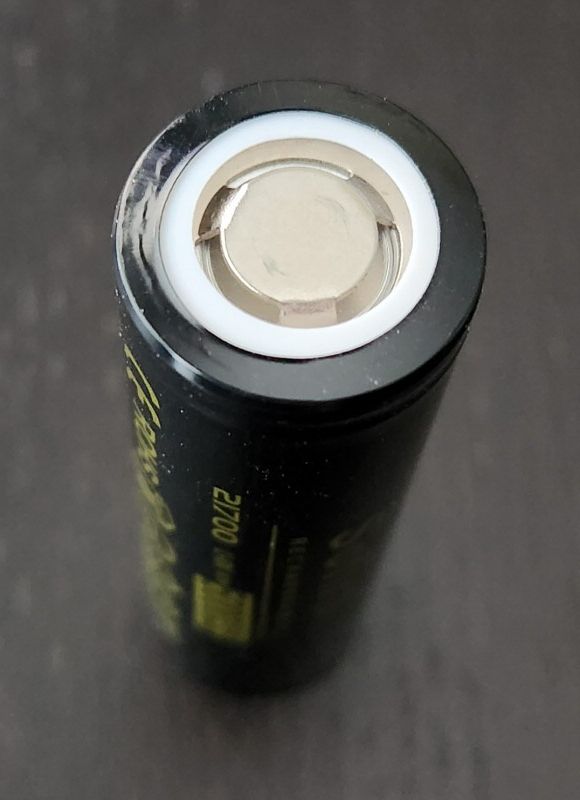
Inside, the light comes with a Cyansky-branded standard-sized 5000mAh 21700 battery, with integrated USB-C charger and slightly raised button-top, along with a charge status led. There is a flat contact in the head of the light, along with a reverse polarity detection feature.

This is a solid and well-made light, with decent grip and handfeel. It is longer than most in this class, which is something to keep in mind.


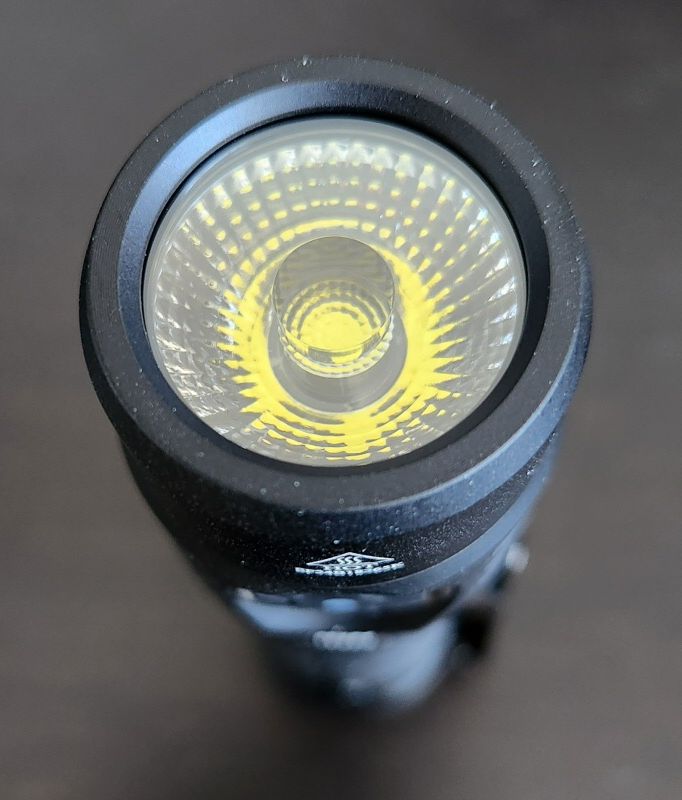
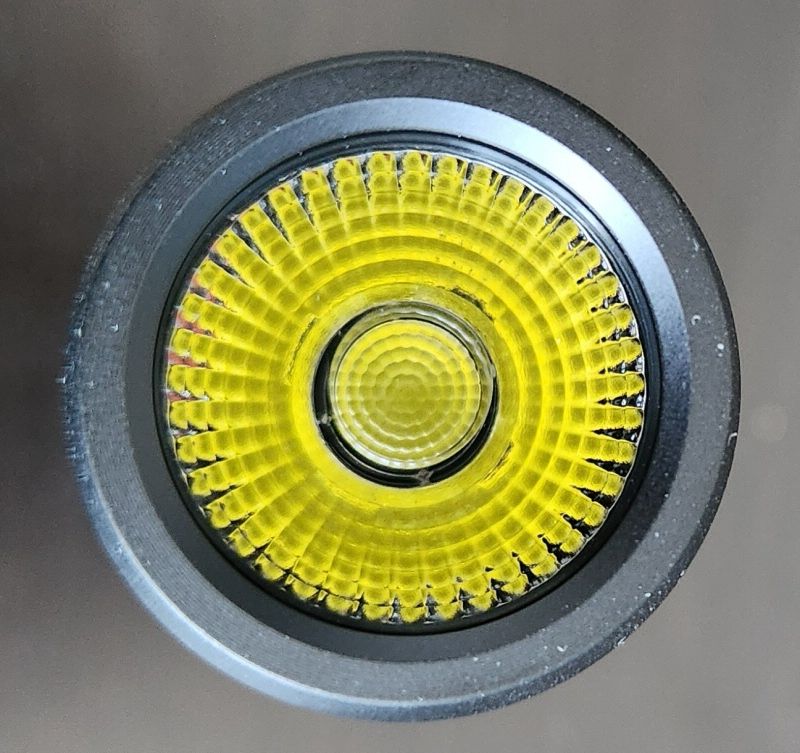
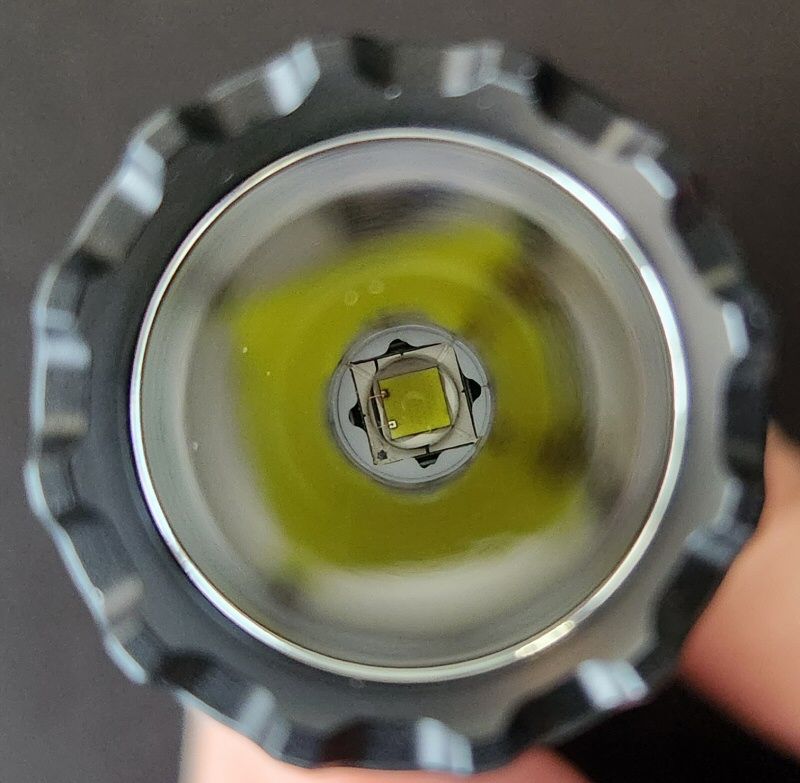
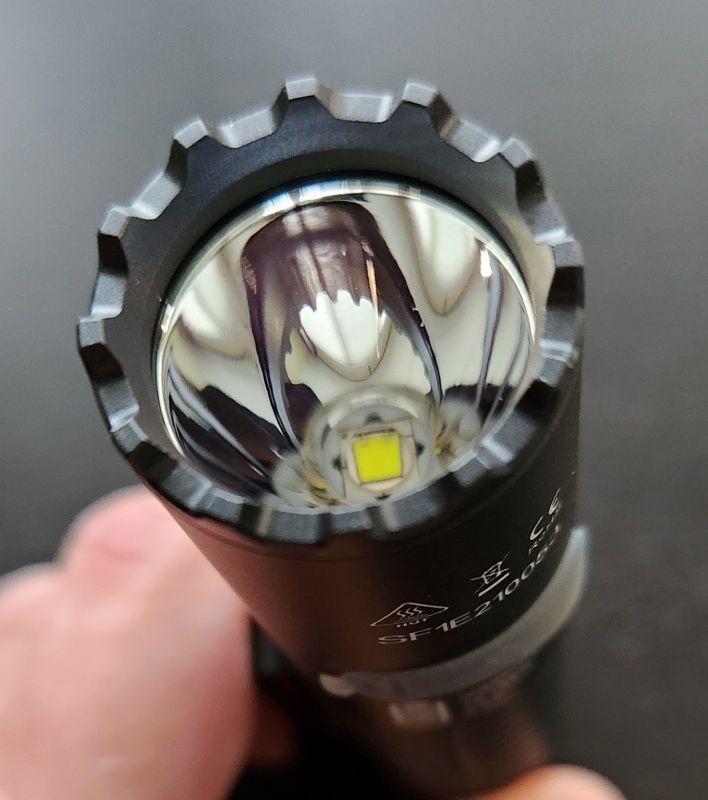
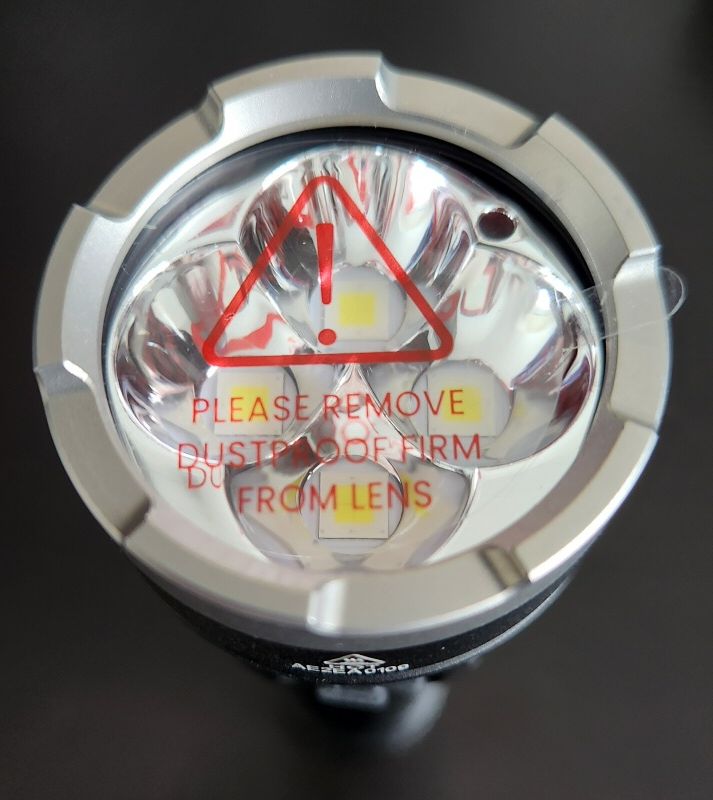
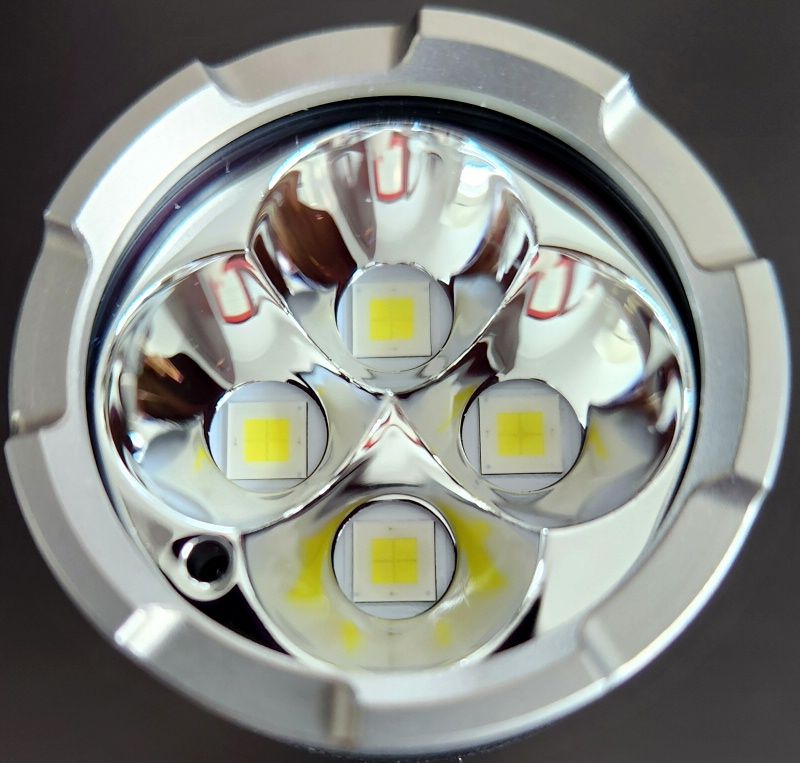
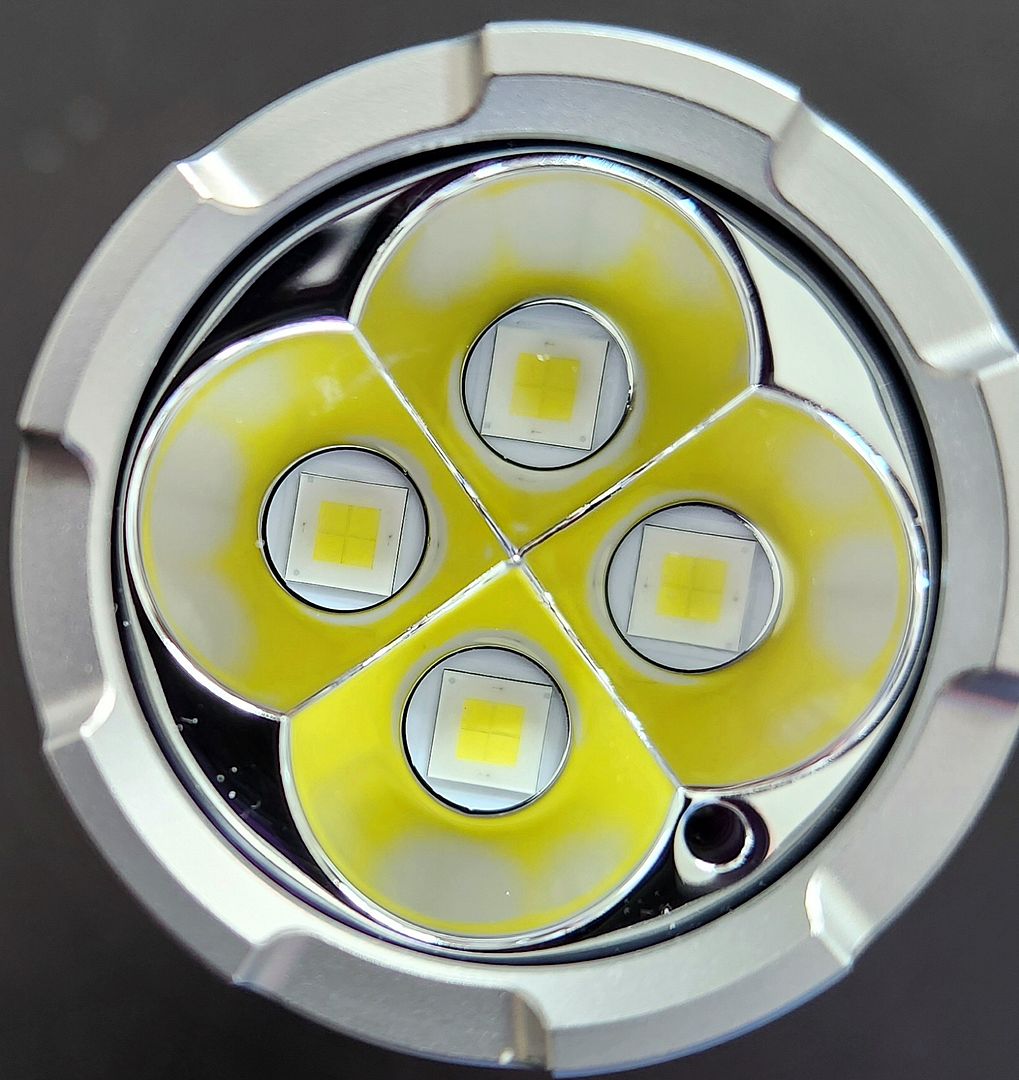
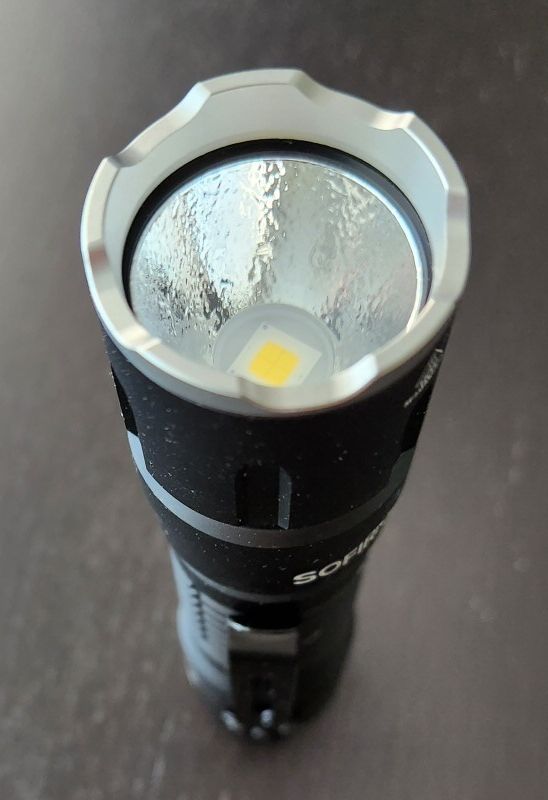
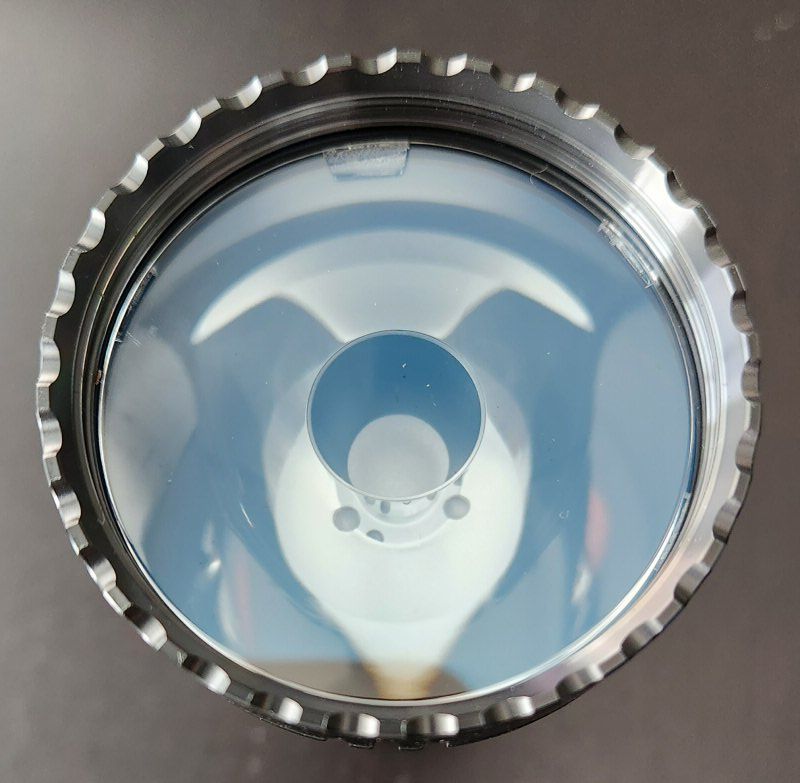
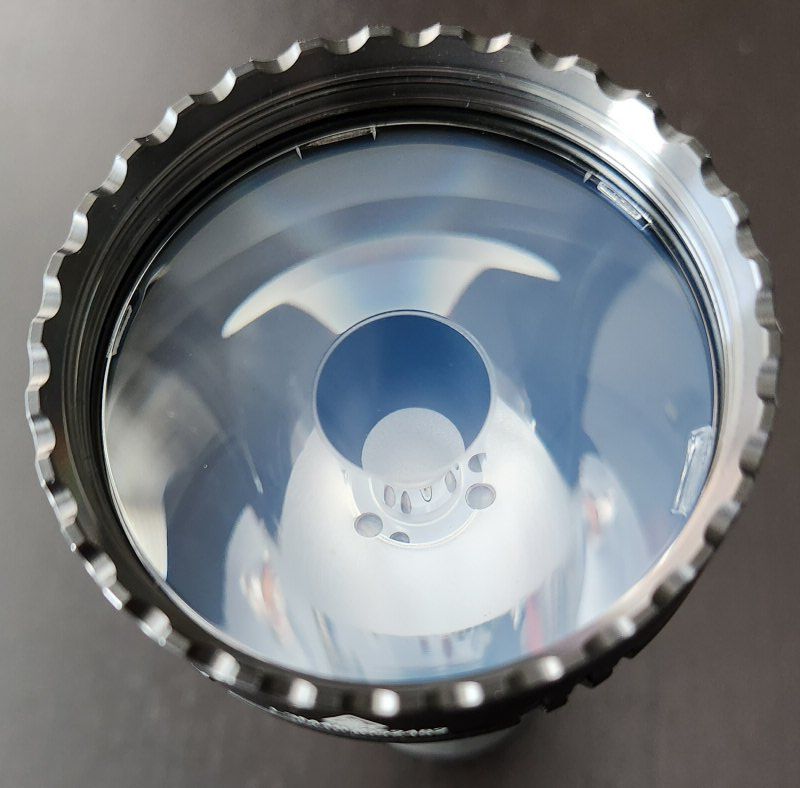
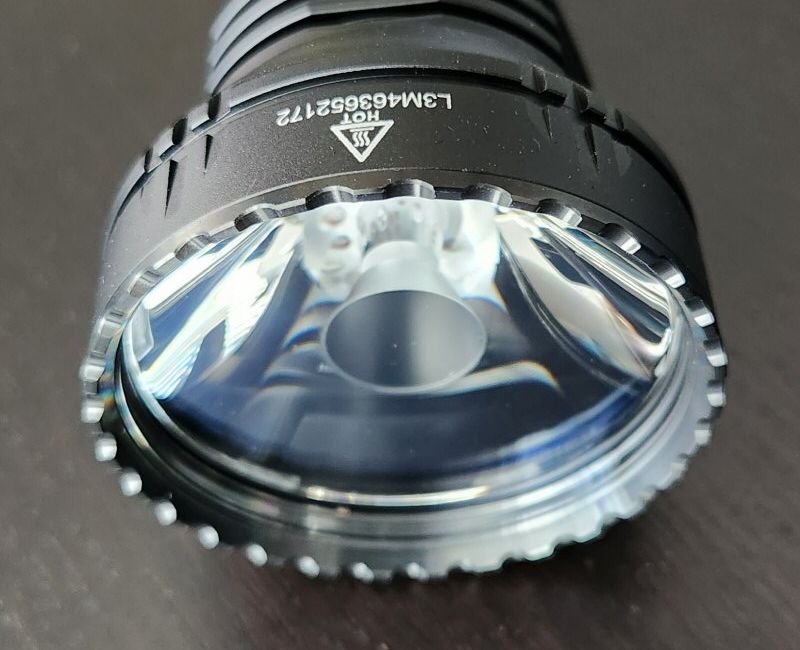
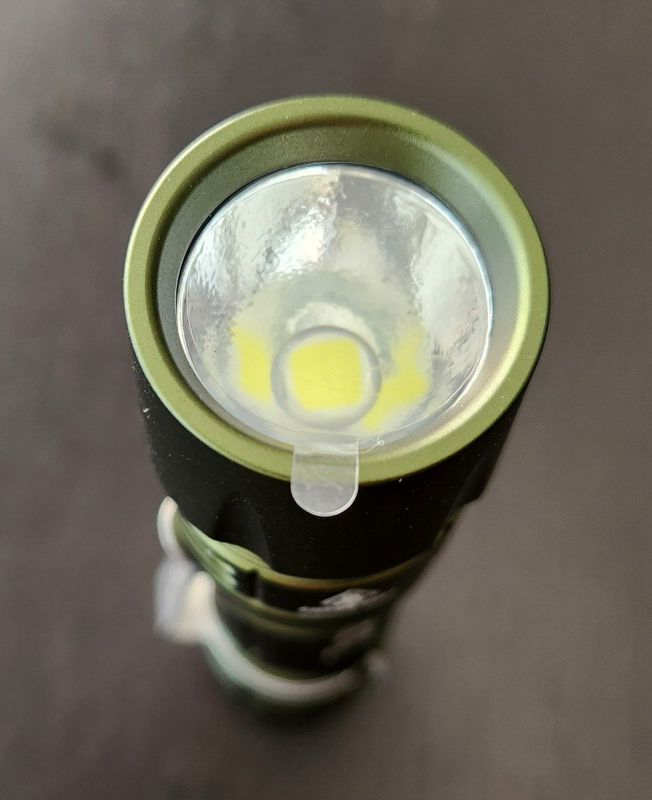
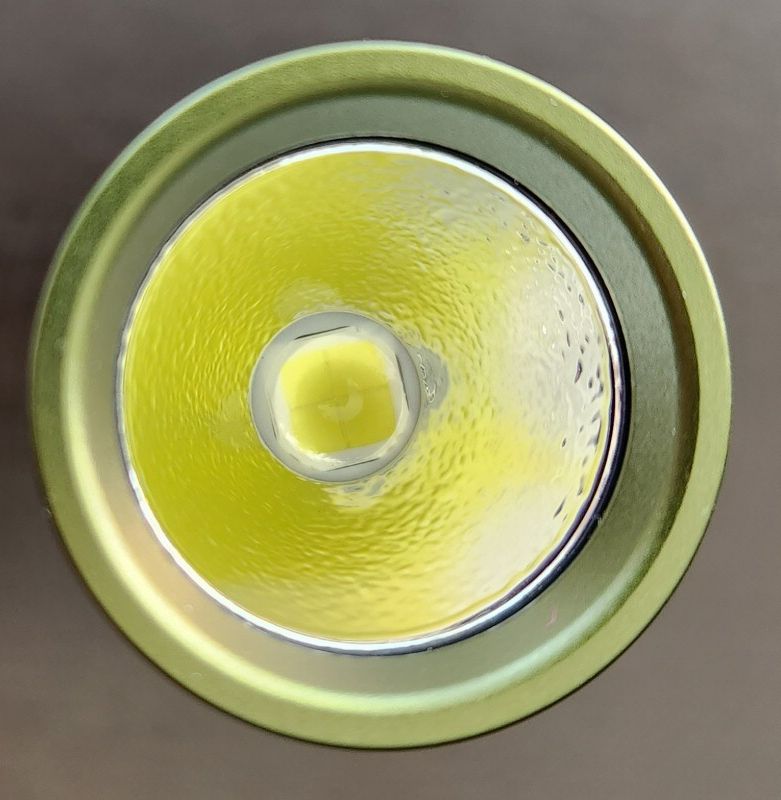
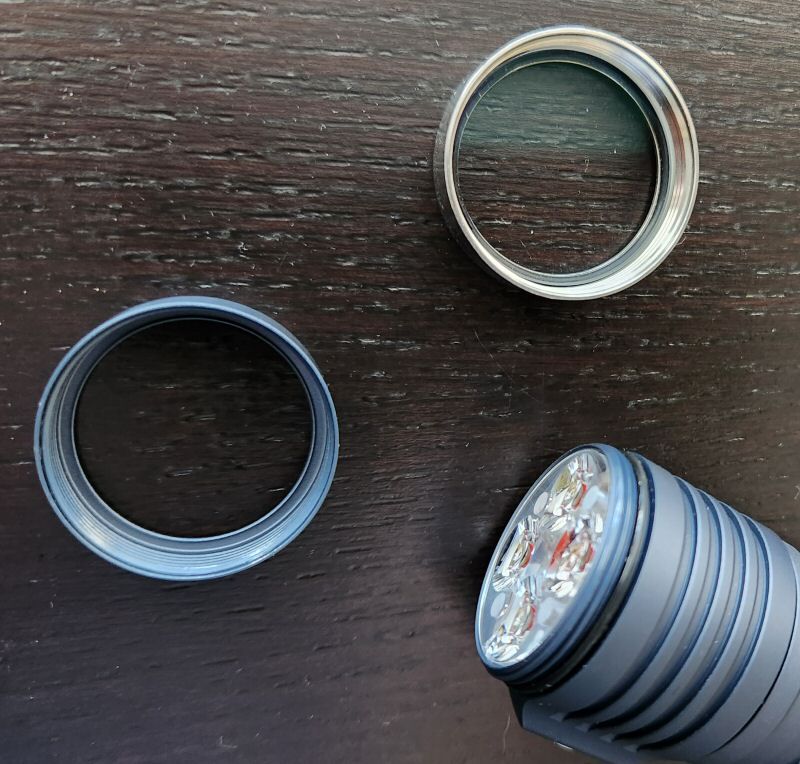
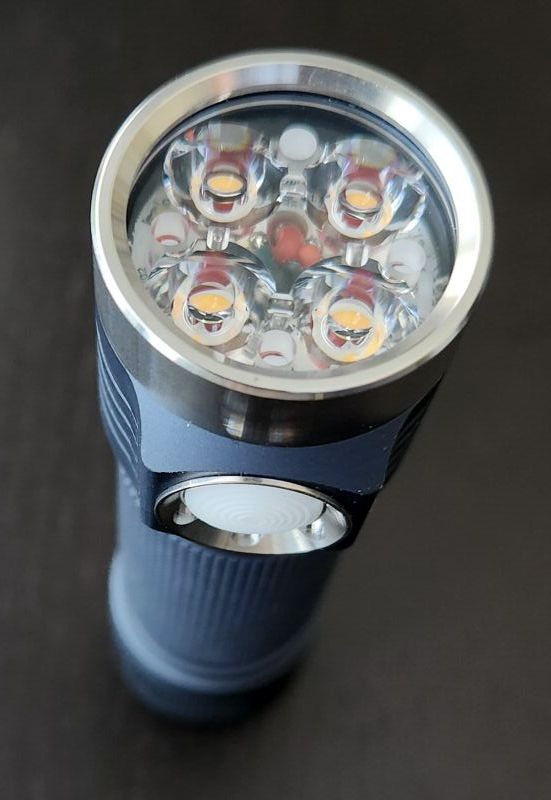
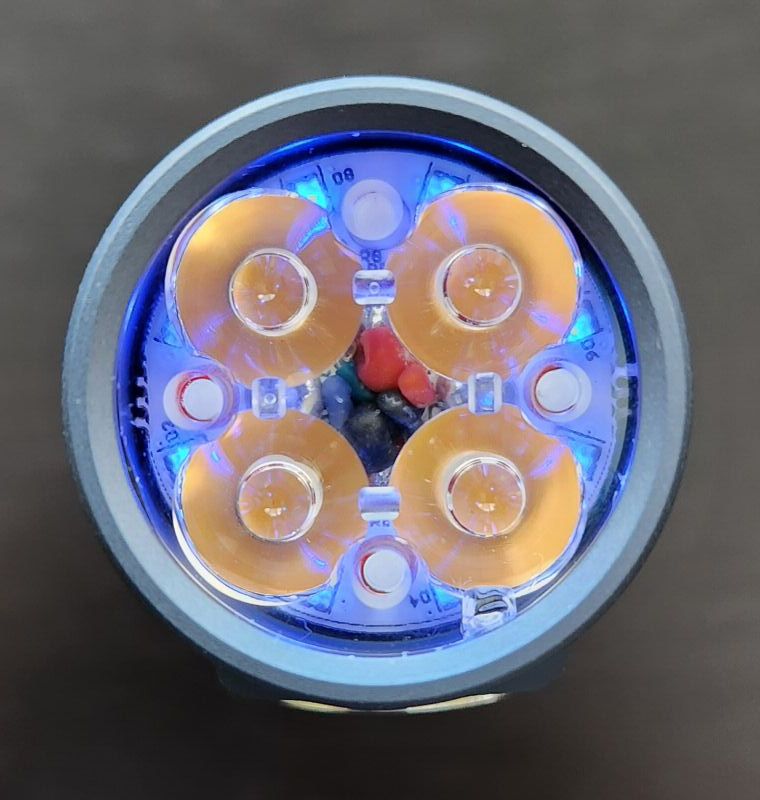
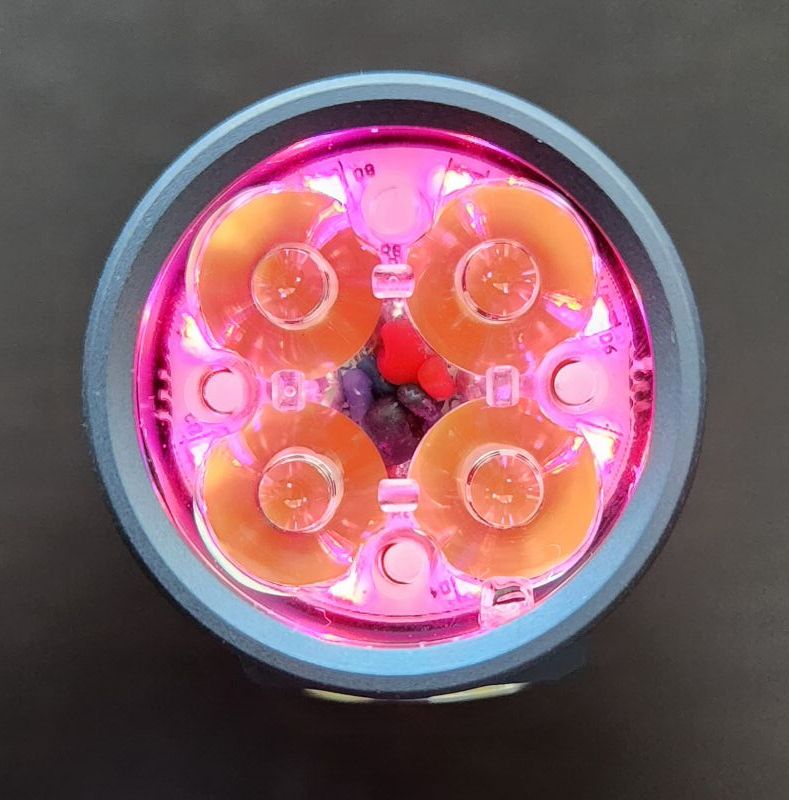
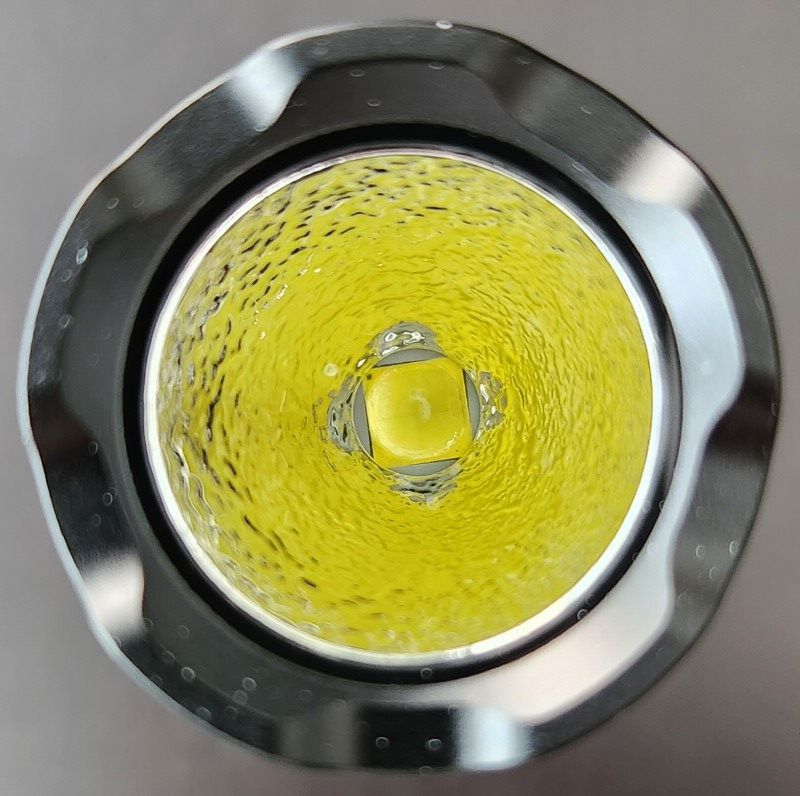
The P25 comes with a XHP70.3 HD emitter, in cool white. The reflector is deeper than most and moderately textured (moderate orange peel, MOP).

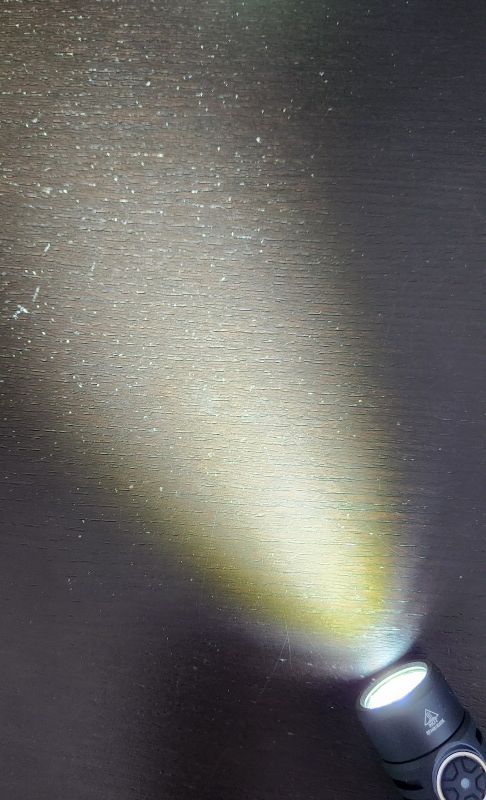
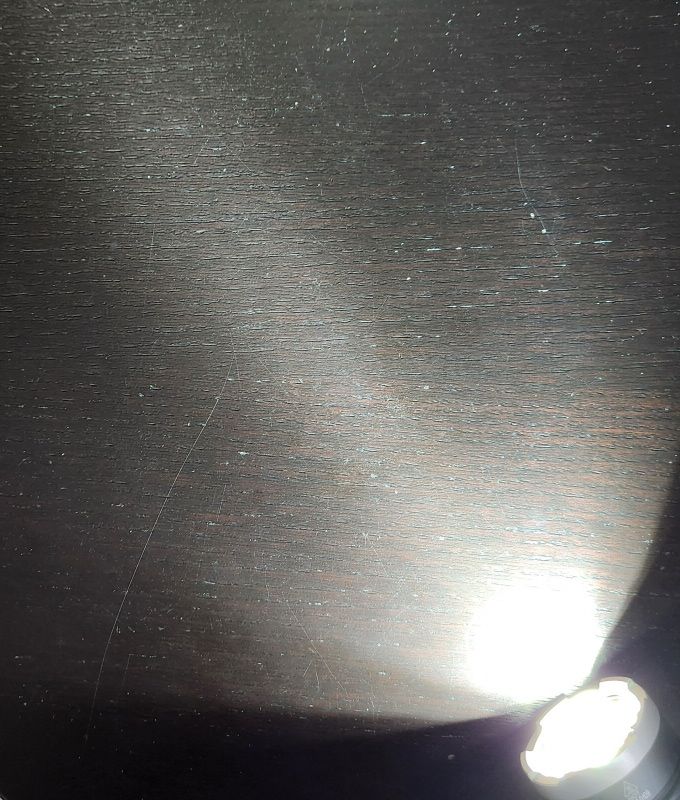
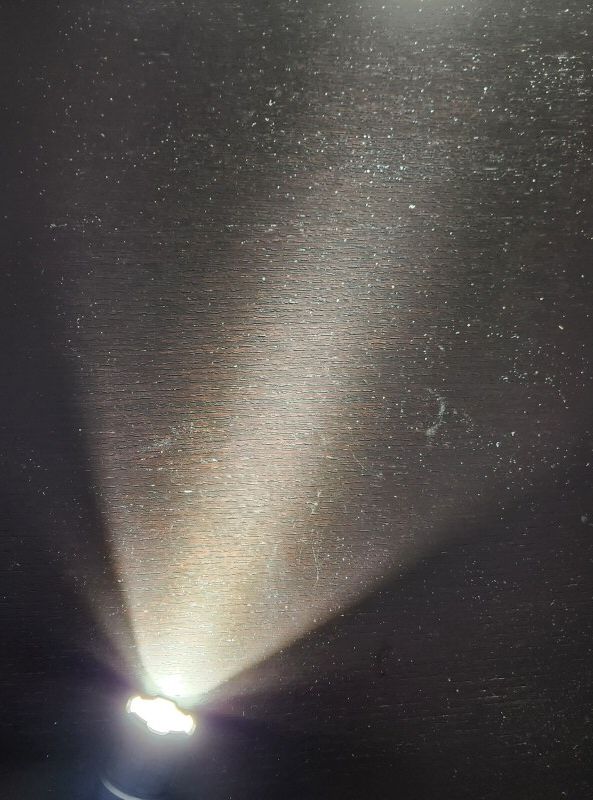
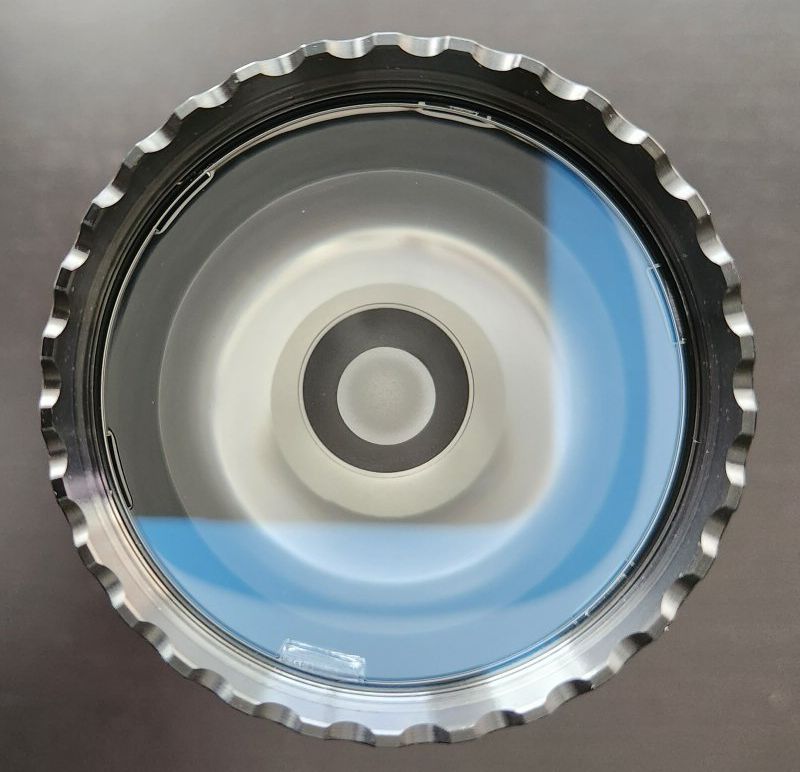
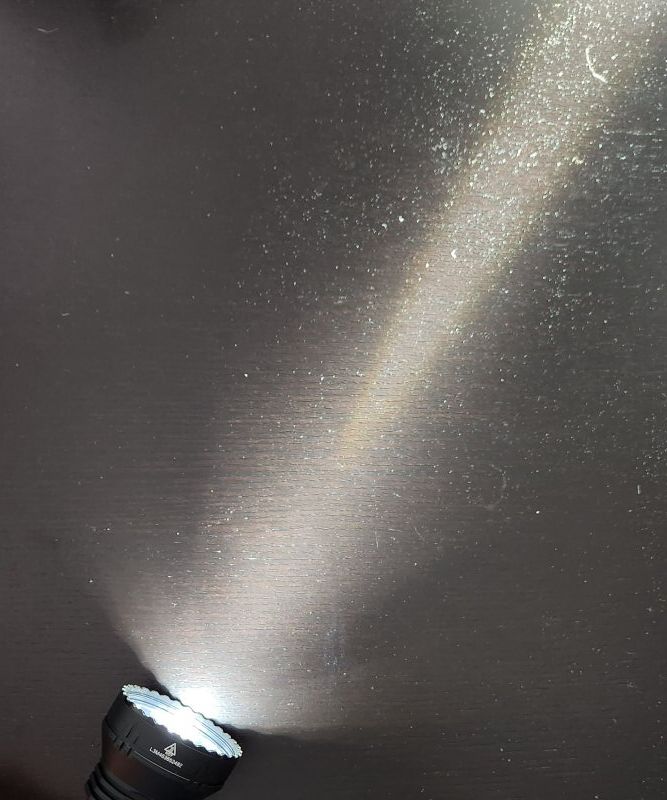
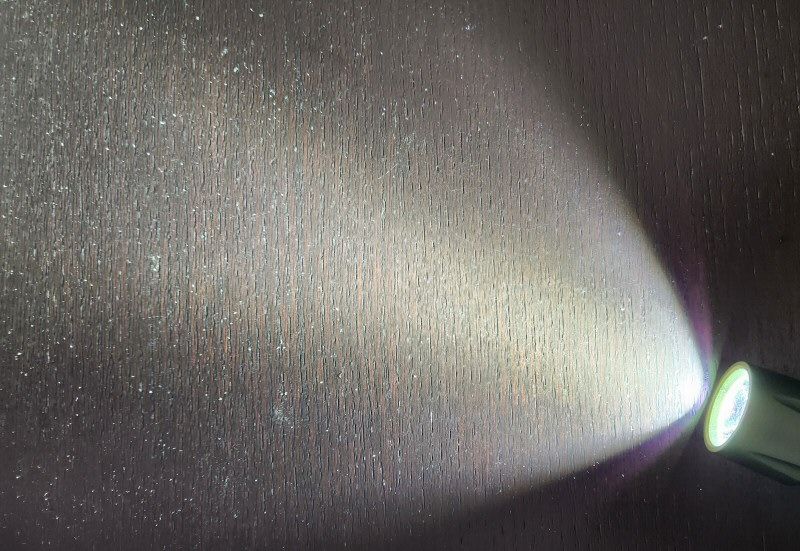
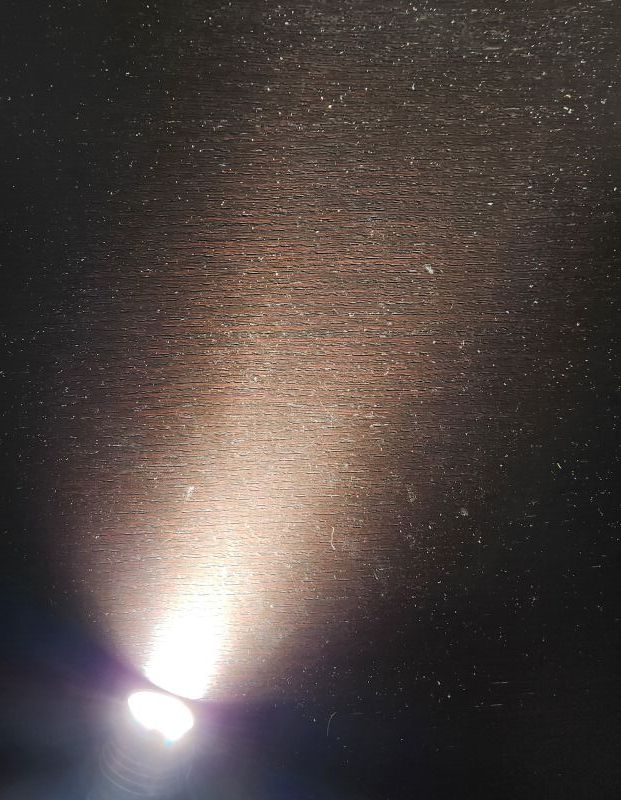
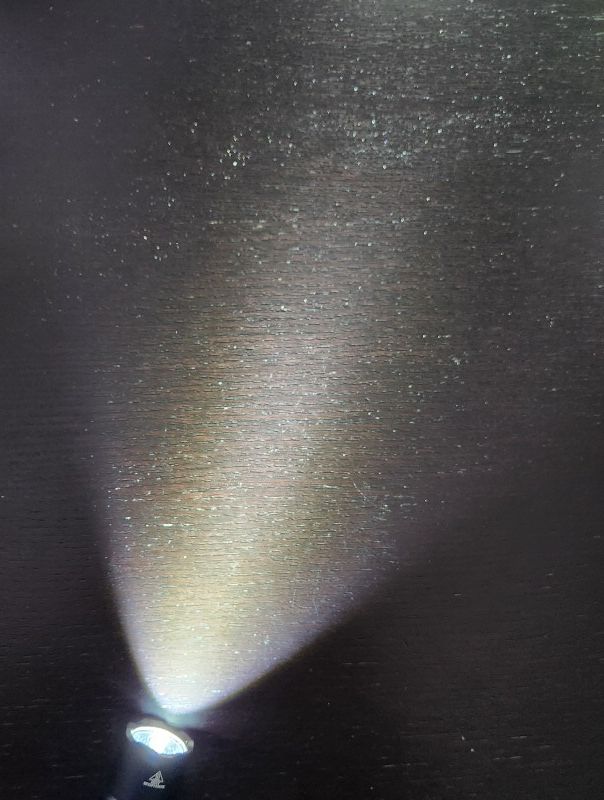
As expected, there is some tint/colour shifting across the periphery of the beam, with a cool white hotspot surrounded by a yellowish spill except for a purplish shift near the edge of the periphery. This is a well-known issue with HD emitters of the XHP family. The textured reflector seems to be help even it out it somewhat though. There is an purplish anti-reflective coating on the lens, which is contributing to the edge effect that you are seeing in the desk beamshot above (scroll down for outdoor beamshots).

The bezel is flat aluminum. There is no scalloping to speak of, and the light can headstand stably.

User Interface

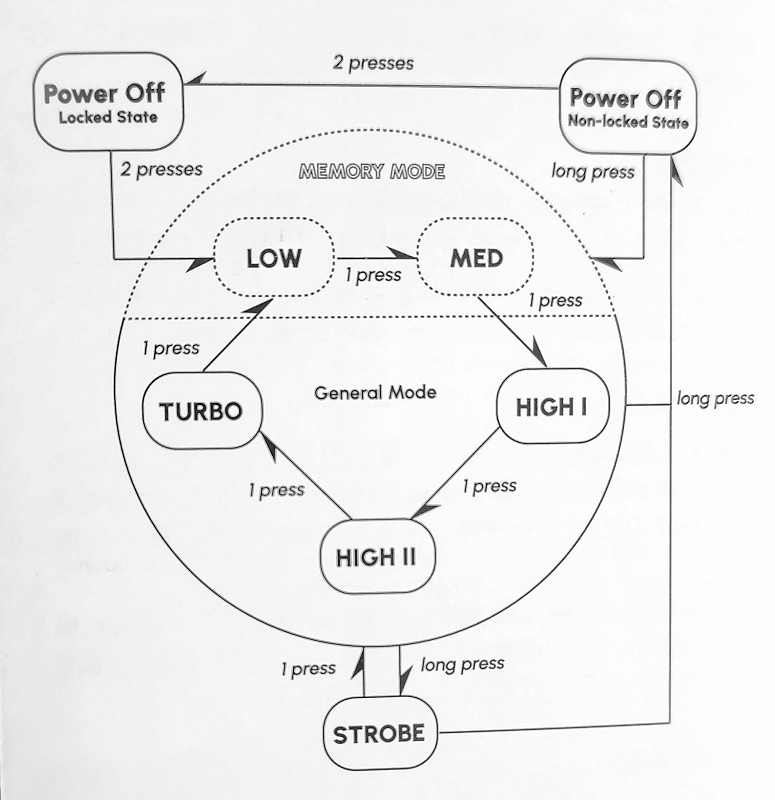
The P25 uses a fairly common general-purpose user interface, given the switch arrangement.

From OFF:

  • Tail switch, partial-press: Momentary On in last memorized mode.
  • Tail switch, single-click: Turns On in last memorized mode.
  • Side switch, press-and-hold: Nothing – but if you click the tail switch while holding down the side switch, the light will activate in Eco mode.
  • Side switch, single-click: Nothing.

From ON:

  • Tail switch, partial-press: Nothing.
  • Tail switch, single-click: Turns Off.
  • Side switch, press-and-hold (>1 sec): Switch to Strobe. Press-and-hold again to advance to SOS. Single-click at any time to return to constant-on modes.
  • Side switch, single-click: Steps up to the next constant-on output mode (in sequence, Lo > Med > High > Turbo).
  • Side switch, double-click: Nothing, simply advances two steps in output (i.e., this is not a short-cut to Turbo, as on some lights).

Mode memory:

Yes, for constant-on output modes, except Turbo. If turned off in Turbo, it will save as High.

Mode 1 Shortcuts:

  • Eco mode: Press-and-hold the side switch while turning on at the tail switch.
  • Strobe mode: Press-and-hold the side switch when already On.
  • There doesn’t seem to be a shortcut to Turbo that I have found

Battery indicator:

When first activating the light, the indicator on the side switch shows the relative battery voltage (lasts for ~3 secs):

  • Solid green: ~81-100% power remaining
  • Flashing green: ~51-80% power remaining
  • Solid red: ~21-50% power remaining
  • Flashing red: 0-20% power remaining

Low voltage warning:

Yes. When the battery is low, the power indicator flashes red 3 times per second, and the main LED light flashes 2 times every 3 minutes. When the battery voltage is lower than 3.0V, the flashlight will reduce the main LED to the Low mode.

Lock-out mode:

Yes, but physically – you lock-out the light by a twist of the tailcap.

Reviewer Comments:

This is a reasonable UI for a general-purpose light. It’s very similar the “general mode” of two-stage tactical lights, like the Sofirn SP35T. I would liked a shortcut to Turbo, though.

Circuit Measures

Pulse-Width Modulation (PWM):

Eco:
Eco

Low:
Lo

Med:
Med

High:
Hi

Turbo:
Turbo

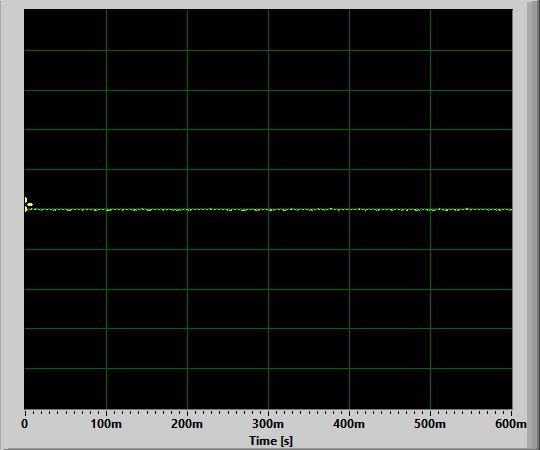
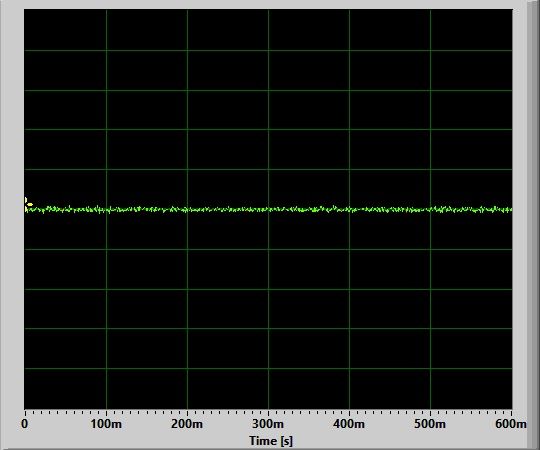
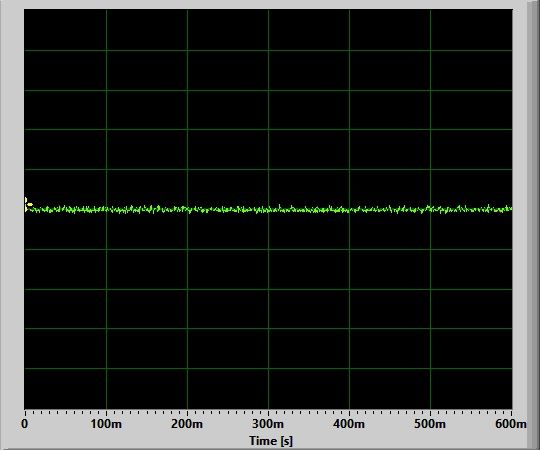
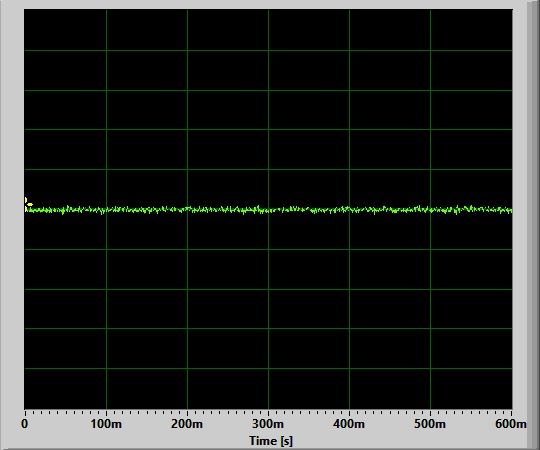
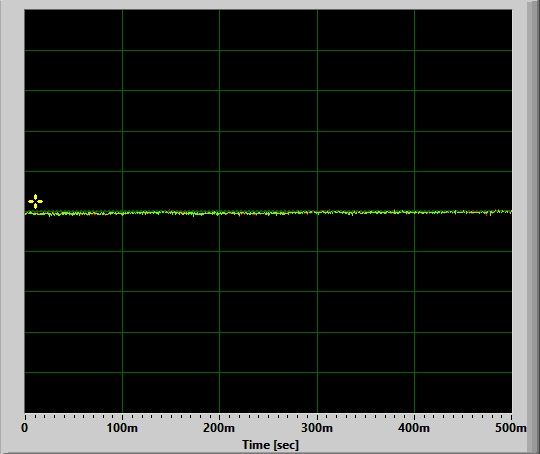
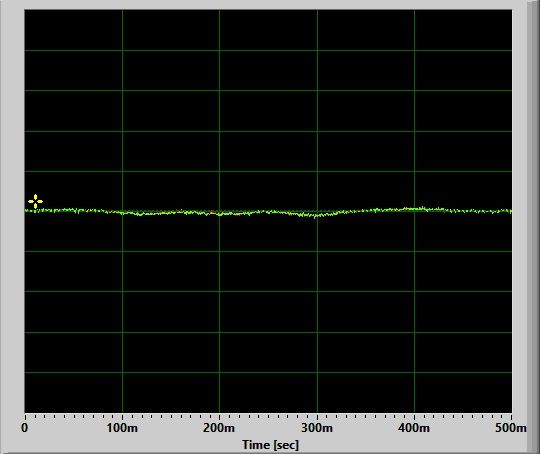
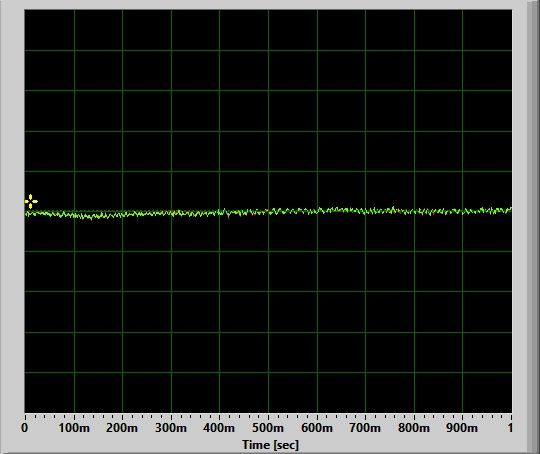
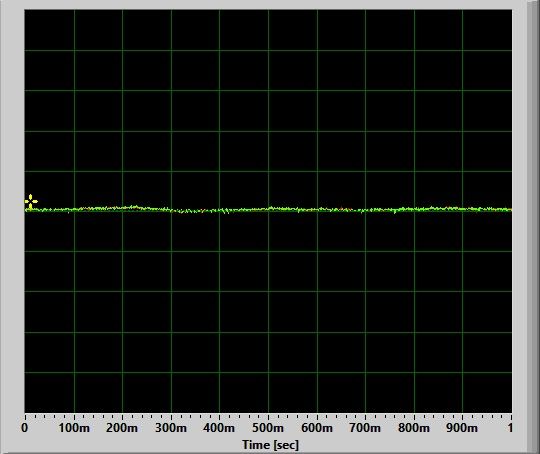
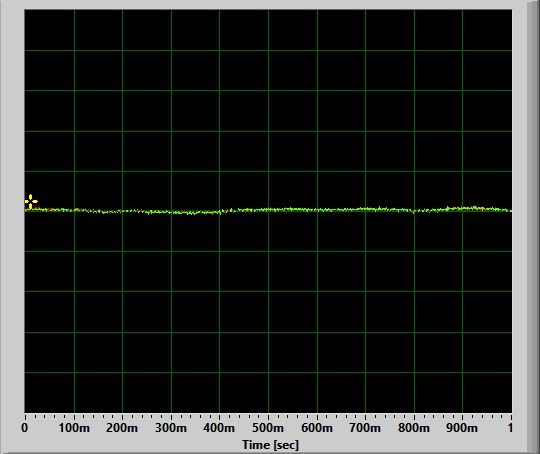
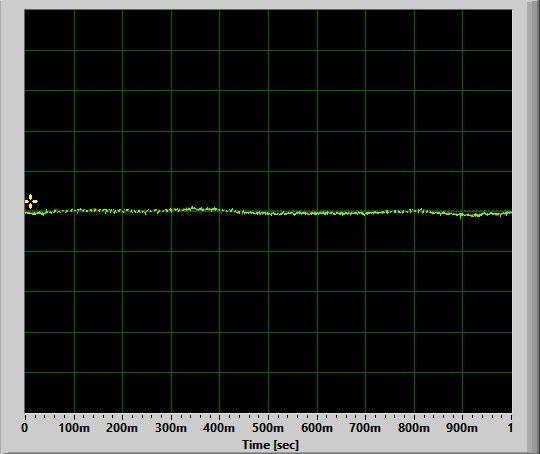
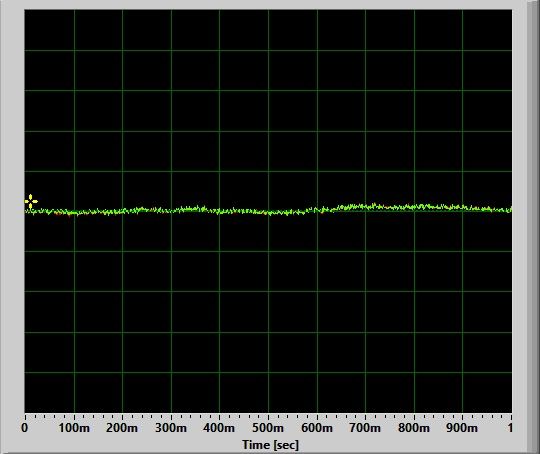
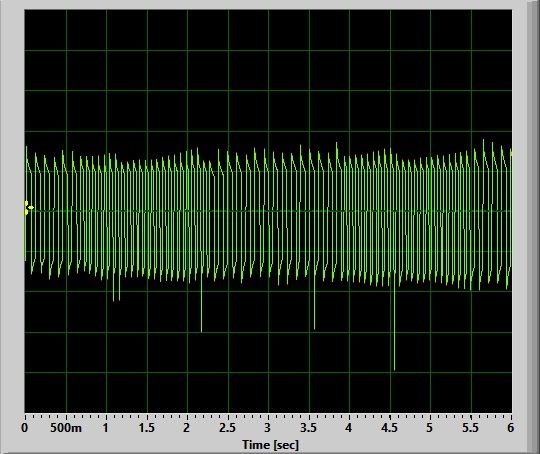
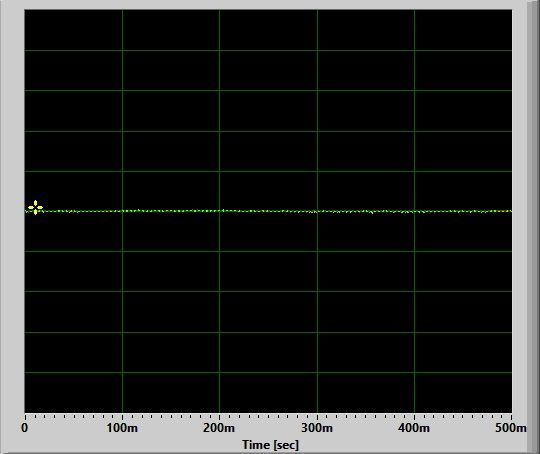
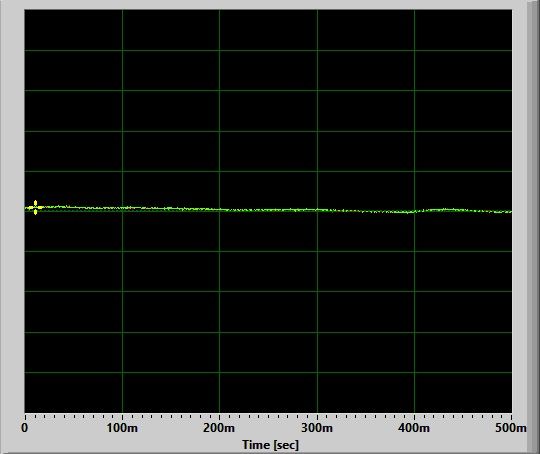
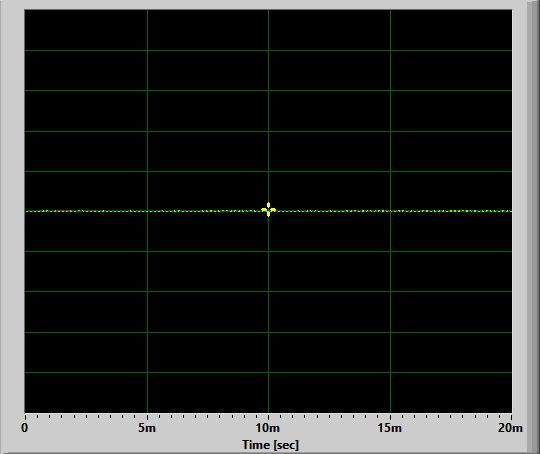
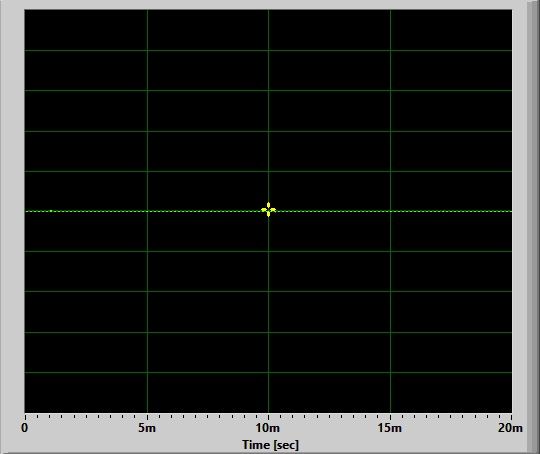
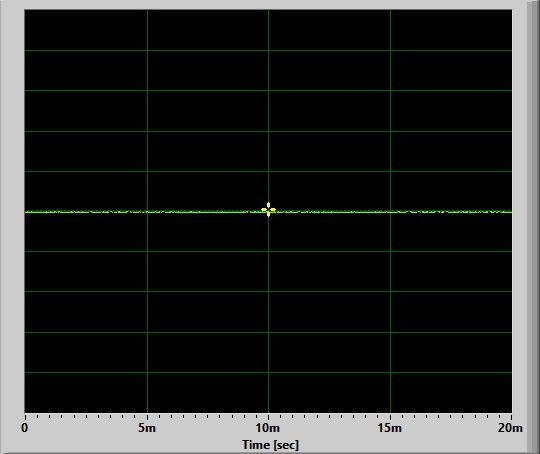
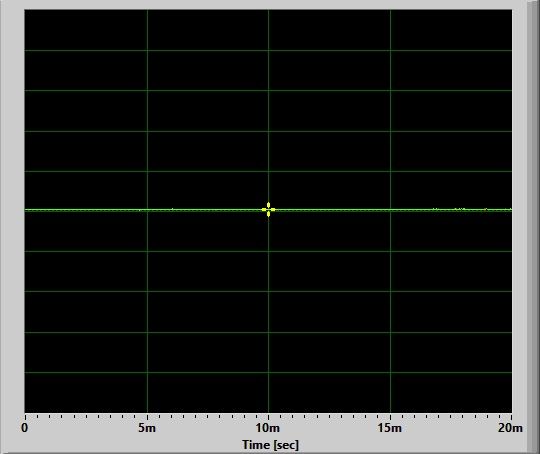
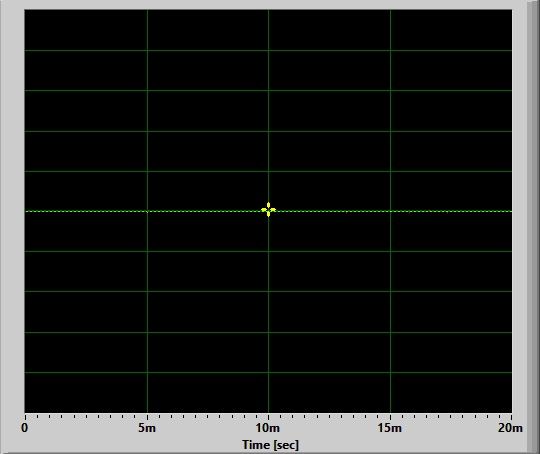
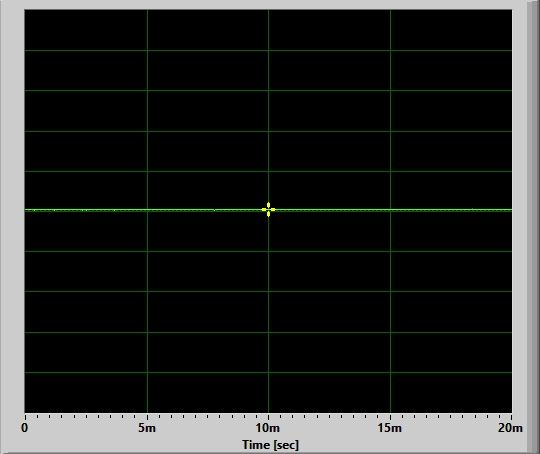
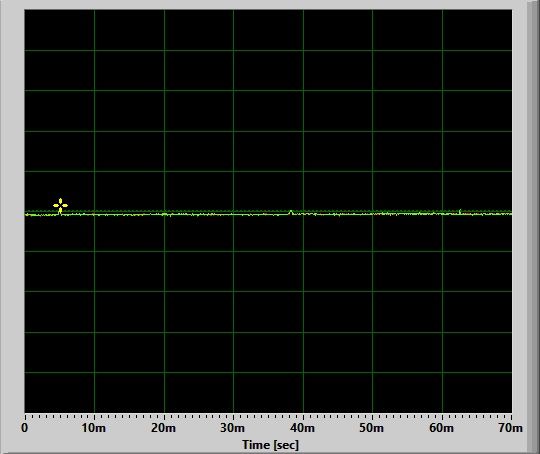
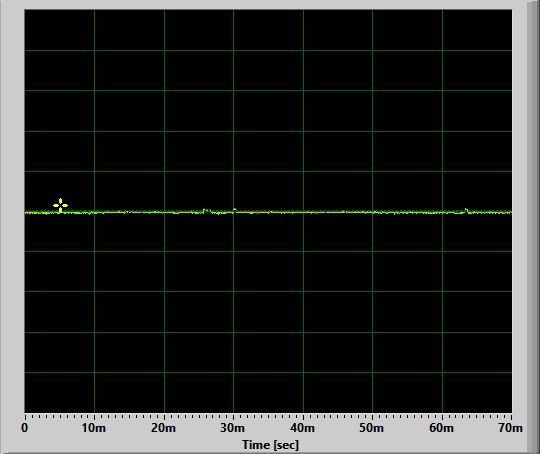
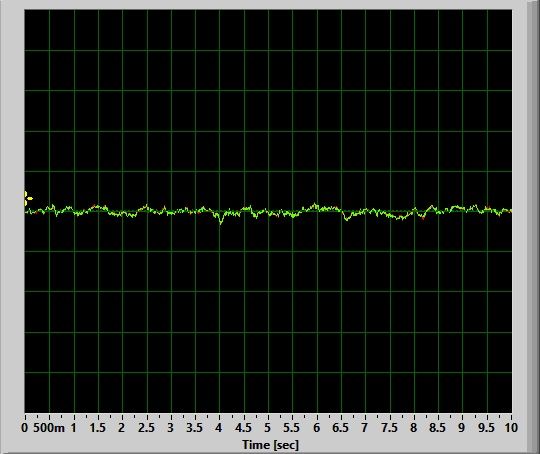
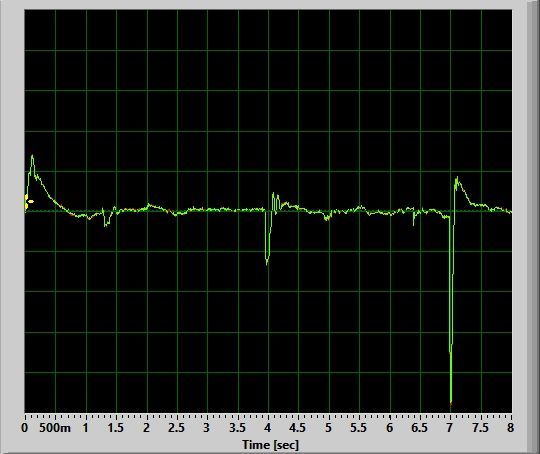
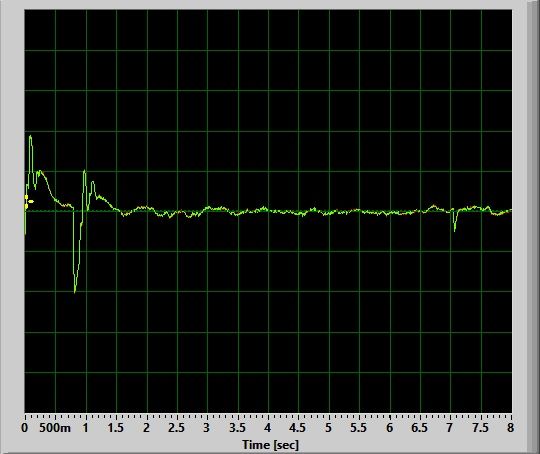
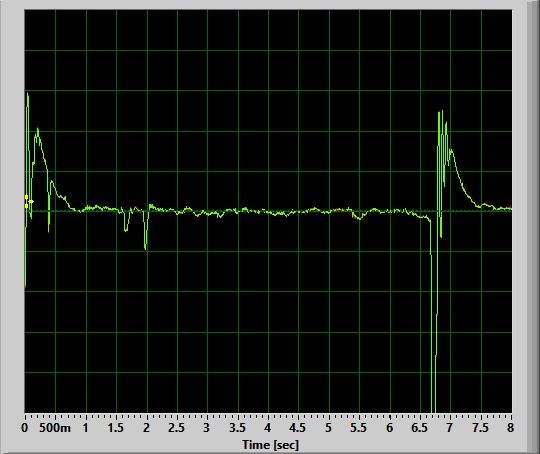
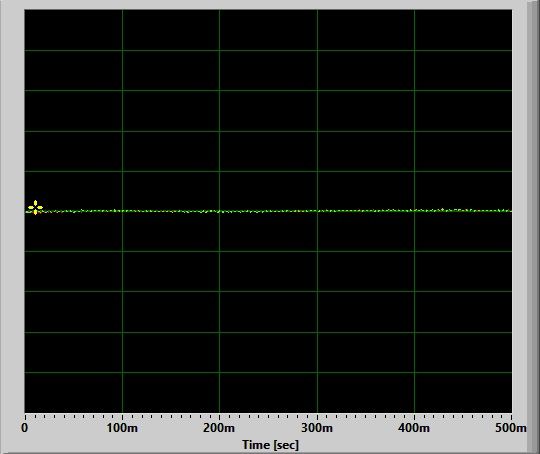
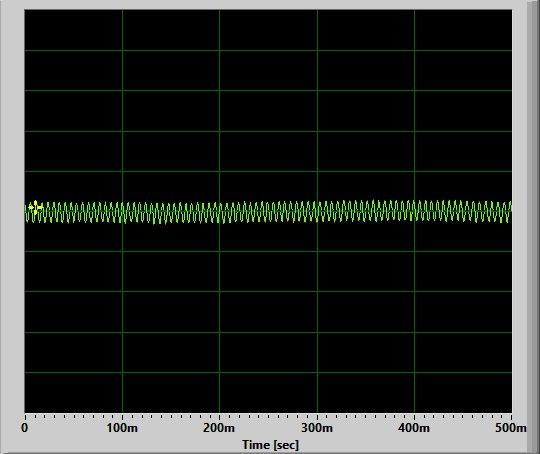
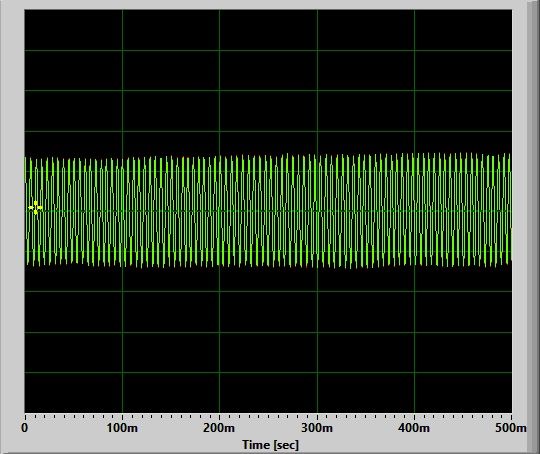
Well, this is great to see – not only is there no sign of PWM, but there is not even any circuit noise on any level. It’s rare nowadays to see a current-controlled light without at least some high frequency circuit noise on some levels – well done Cyansky.

Strobes:

Strobe:

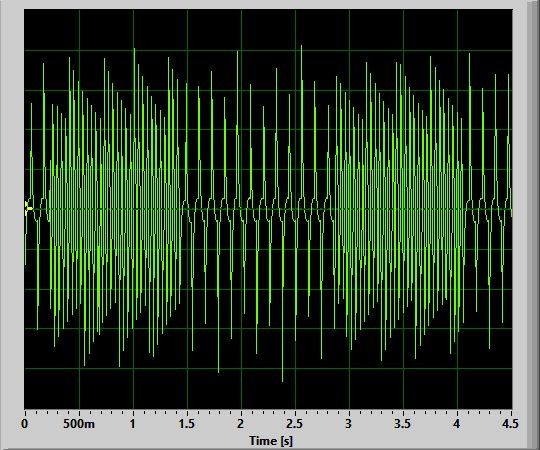
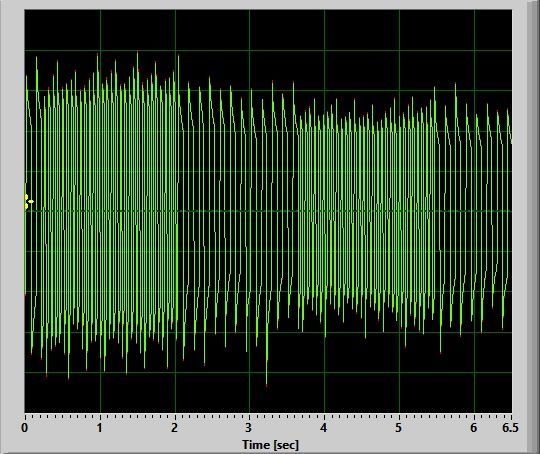
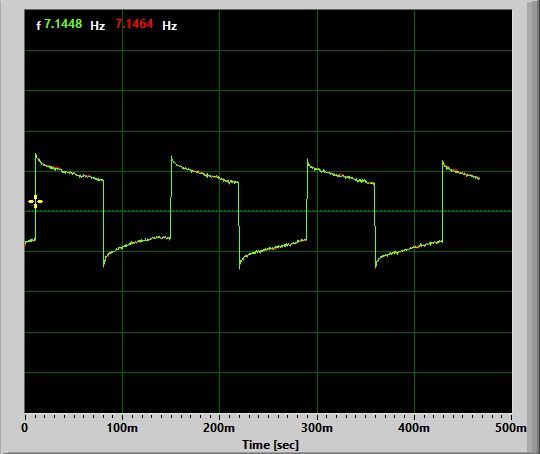
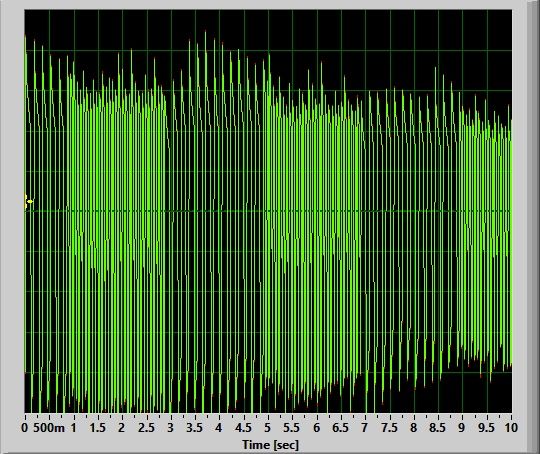
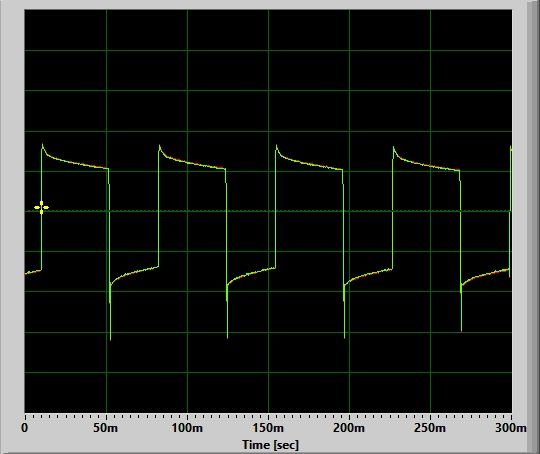
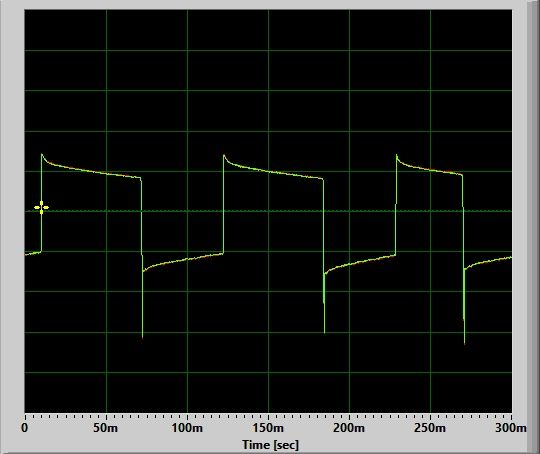
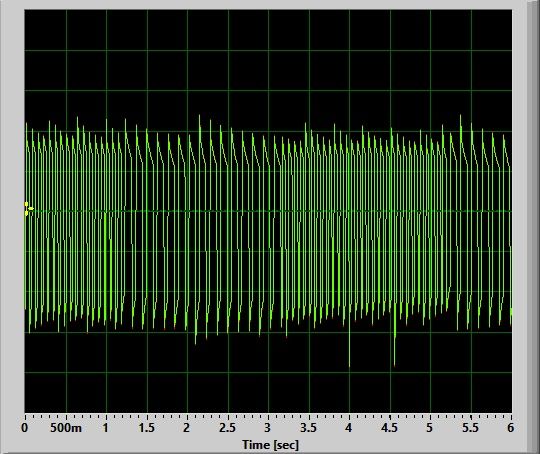
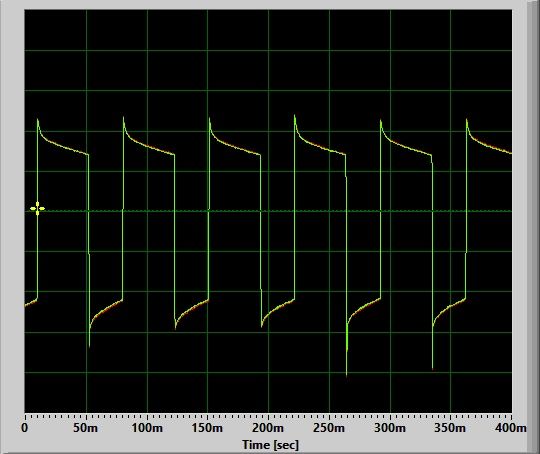
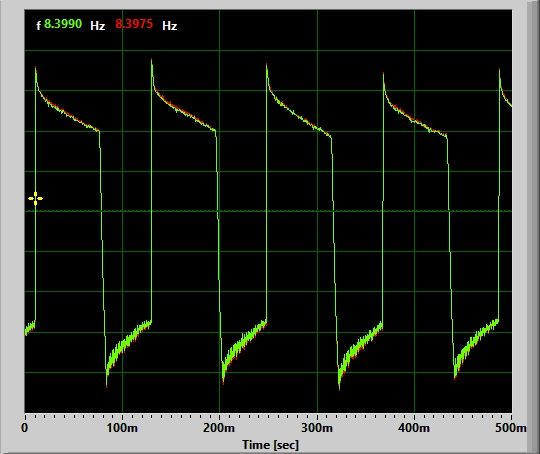
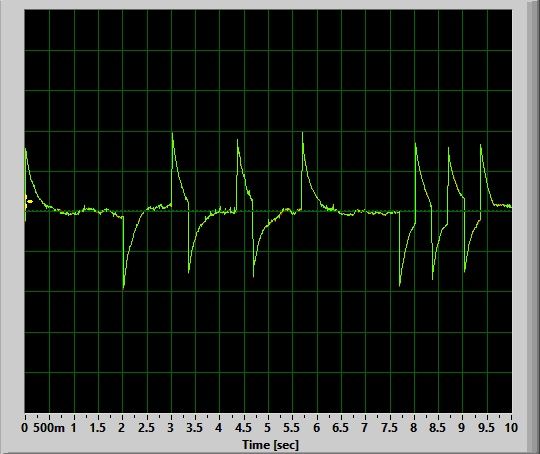
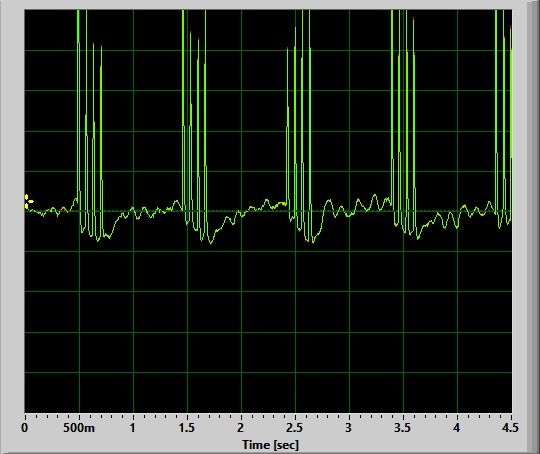
Strobe alternates between 6 Hz and 15 Hz every ~2 secs or so. Very distracting.

SOS:

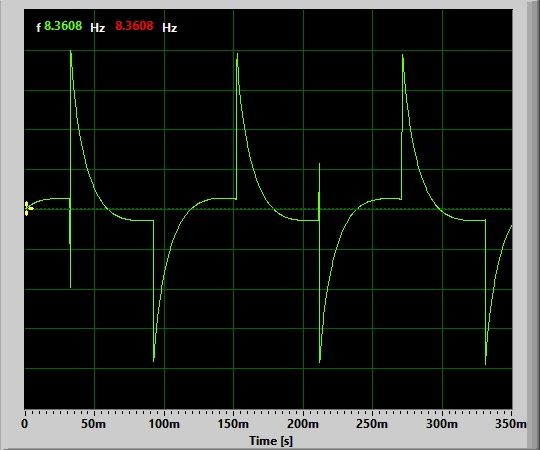
A standard SOS mode, relatively slow.

Beacon:

Sadly, no beacon mode on the P25.

Charging:

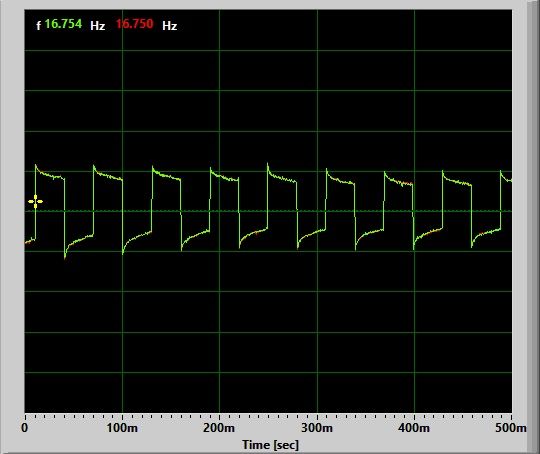
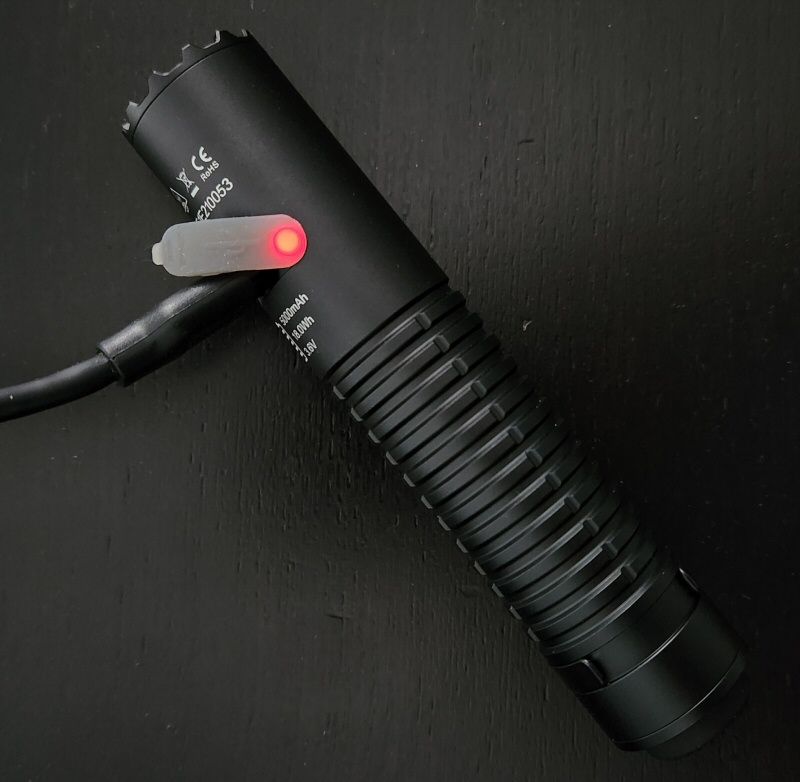
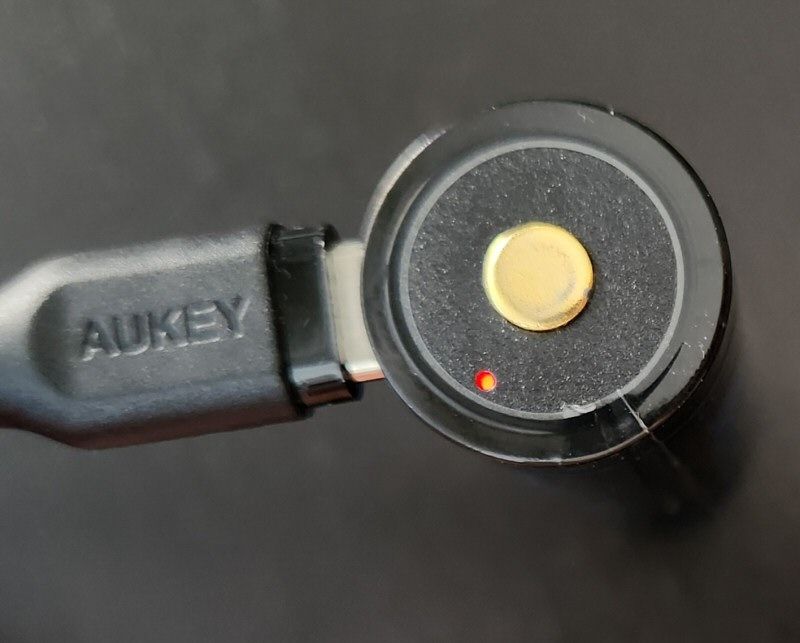
There is no integrated charger on the P25 light – it uses a 21700 cell with a built-in USB-C charger instead. There is an indicator LED on the battery that shows solid red when the light is charging. Changes to solid green when the charging is complete.

Resting voltage <3.0V
Resting voltage >3.0V
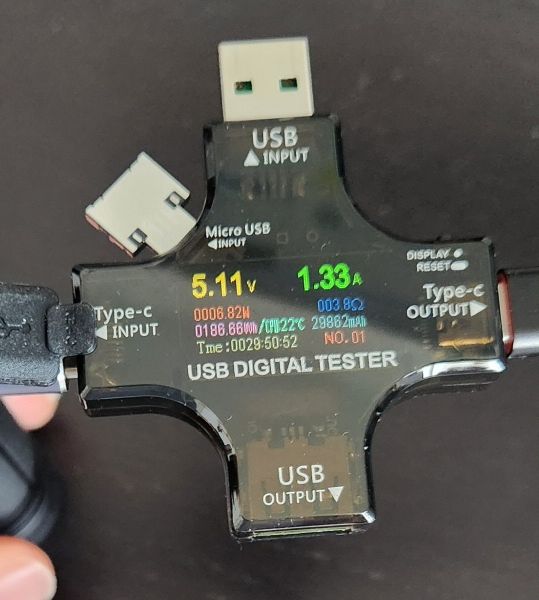
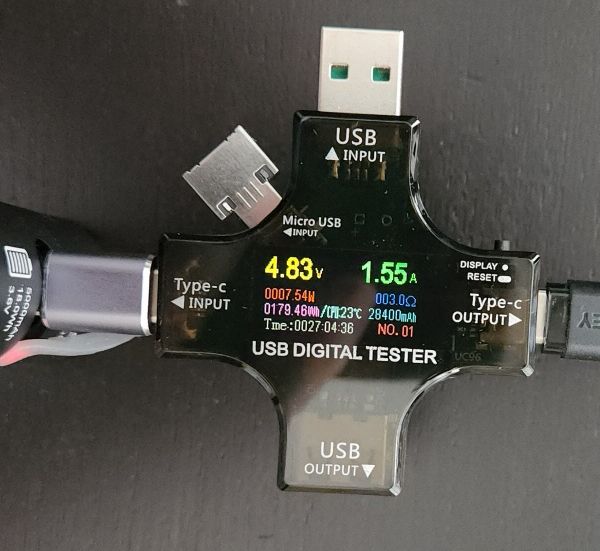
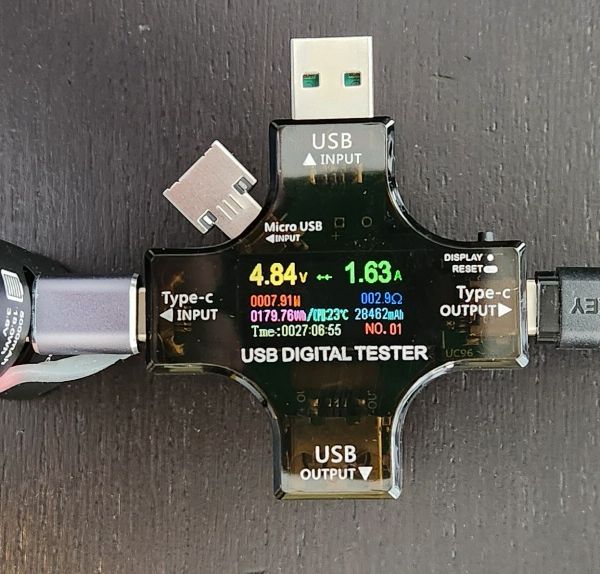
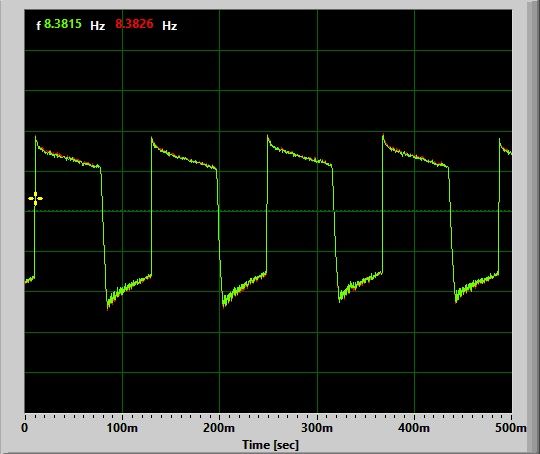
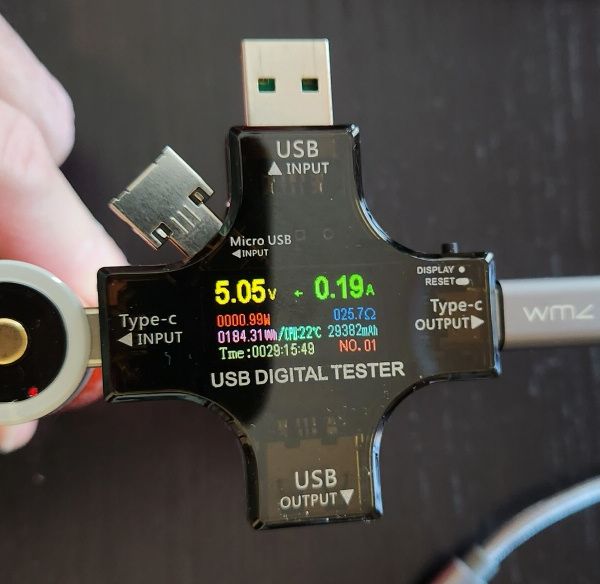
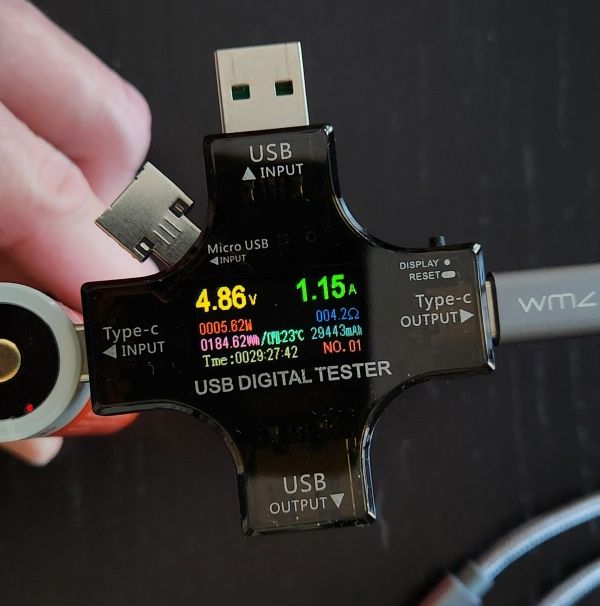
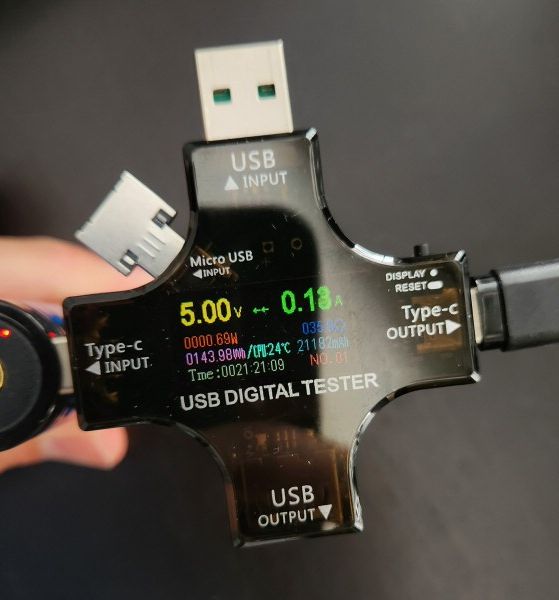
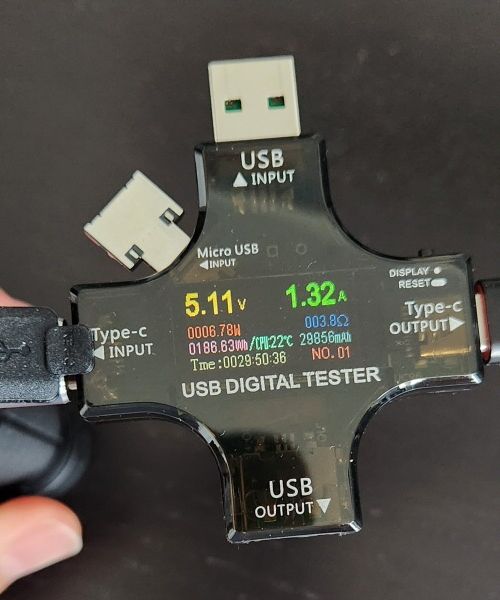
The Cyansky battery uses a two-stage charging feature, as seen on many (but not all) higher-end lights and batteries (i.e., where there is a lower initial charging rate when the cell is heavily discharged). The initial charging rate here is ~0.13A, which jumps to ~1.2A once the battery reaches 3.0V resting. I presume it continues to climb from there. This is a reasonable charging rate for the class, but not as high as some others.

Standby / Parasitic Drain:

None. That is one of the nice things about a physical clicky switch, no standby current. 🙂 And you can always lock-out the light by a twist of the tailcap, to prevent accidental activation.

Emitter Measures

In this section, I directly measure key emitter characteristics in terms of colour temperature, tint, and colour rendition. Please see my Emitter Measures page to learn more about what these terms mean, and how I am measuring them. As tint in particular can shift across levels, I typically stick with the highest stably regulated level for all my reported measures.

As explained on that page, since I am using an inexpensive uncalibrated device, you can only make relative comparisons across my reviews (i.e., don’t take these numbers as absolutely accurate values, but as relatively consistent across lights in my testing).

P25 on Hi:

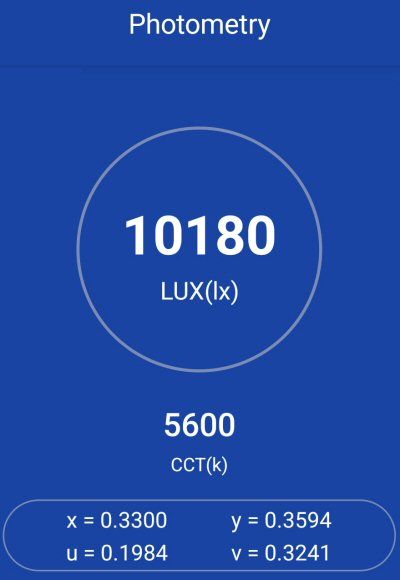
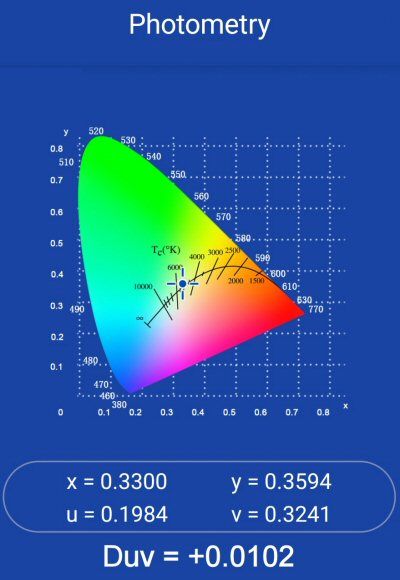
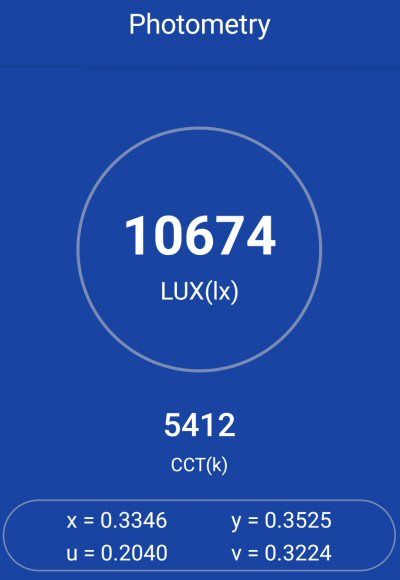
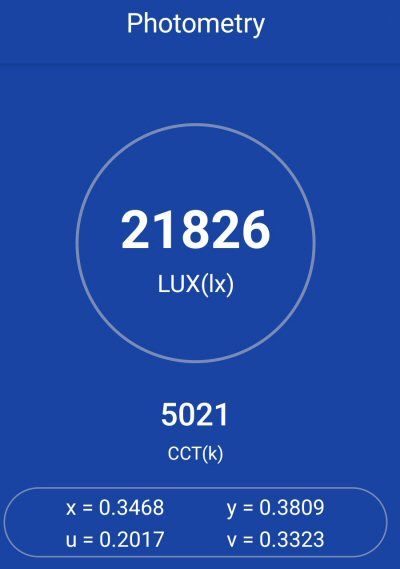
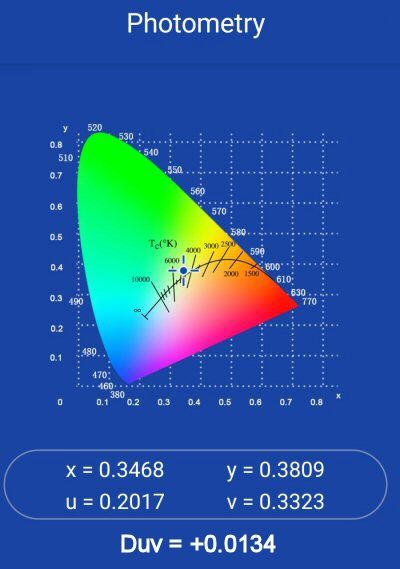
The key measures above are the colour temperature of ~5530K, and a positive tint shift (+0.0138 Duv) to slightly greenish-yellow at this temperature. For CRI (Ra), I measured a combined score of 69.

These values are consistent with the performance of a cool white XHP70.3 HD emitter, and match my visual experience of this light. Note that there is a tint shift to more yellowish spill, with a purplish spillbeam edge, as is common on XHP HD emitters.

Beamshots

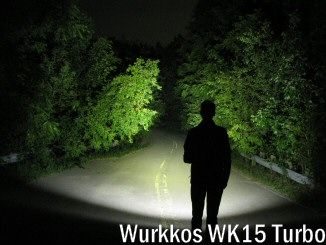
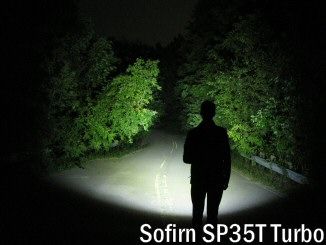
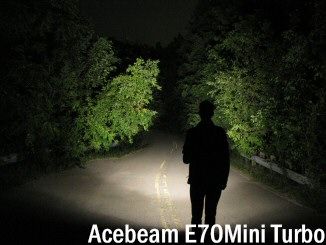
All outdoor beamshots are taken on my Canon PowerShot S5 IS at f/2.7, 0.5 secs exposure, ISO 400, daylight white balance. The bend in the road is approximately 40 meters (~45 yards) from the camera. Learn more about my outdoor beamshots here (scroll down for the floody light position used in this review).

Click on any thumbnail image below to open a full size image in a new window. You can then easily compare beams by switching between tabs.


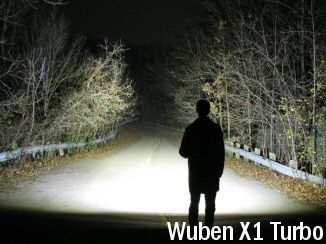
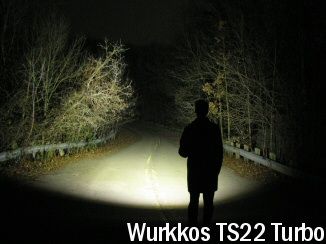
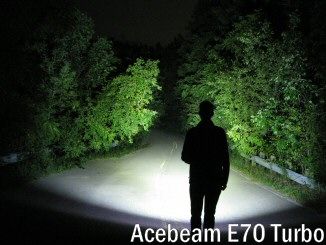
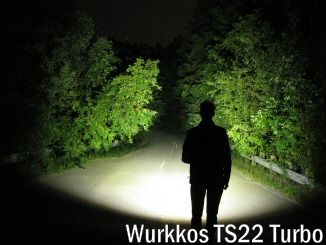
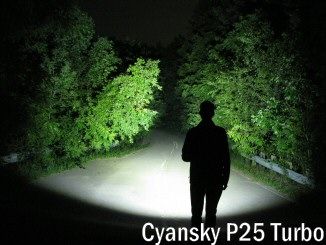
As you can see above, the P25 has a very clean beam profile, quite similar to my XHP70.2 HD-equipped Wurkkos TS22. Also, the minor tint-shift to purplish at the edge of the periphery is less noticeable than a number of other lights, like the Acebeam E70.

Testing Results

My summary tables are generally reported in a manner consistent with the ANSI FL-1 standard for flashlight testing. In addition to the links above, please see my output measures page for more background.

All my output numbers are based on my home-made lightbox setup. As explained on that methodology page, I have devised a method for converting my lightbox relative output values to estimated lumens. Note that my lightbox calibration seems to run higher than most hobbyists today, but I’ve kept it to remain consistent with my earlier reviews (when the calibration standard was first established).

My Peak Intensity/Beam Distance are directly measured with a NIST-certified Extech EA31 lightmeter.

P25 Testing Results

ModeSpec LumensEstimated Lumens @0secEstimated Lumens @30 secsBeam Intensity @0secBeam Intensity @30secsBeam Distance @30secsPWM/Strobe FreqNoise FreqCharging Current <3VCharging Current >3VParasitic DrainWeight w/o BatteryWeight with BatteryCCT (K)DuvCRI
Eco51010---NoNo0.13 A1.20 ANo99 g171 g---
Low506060---NoNo0.13 A1.20 ANo99 g171 g---
Med200255250---NoNo0.13 A1.20 ANo99 g171 g---
High800940940---NoNo0.13 A1.20 ANo99 g171 g5,5300.010369
Turbo3,6004,4504,30014,300 cd13,800 cd235 mNoNo0.13 A1.20 ANo99 g171 g---
Strobe1,600-----6-15 HzNo0.13 A1.20 ANo99 g171 g---
SOS200-----NoNo0.13 A1.20 ANo99 g171 g---

Well, this is nice to see – my P25 sample actually performs higher than the specs in my lightbox. Of course, I know my lightbox’s relative calibration is generously high for modern high-output lights. But my NIST-calibrated luxmeter (which is accurately calibrated to an absolute standard) also reports greater throw than the specs. This is a good result.

To view and download full testing results for all modern lights in my testing, check out my Database page.

Runtimes

As always, my runtimes are done under a small cooling fan, for safety and consistency. To learn more about how to interpret runtime graphs, see my runtimes methodology page.

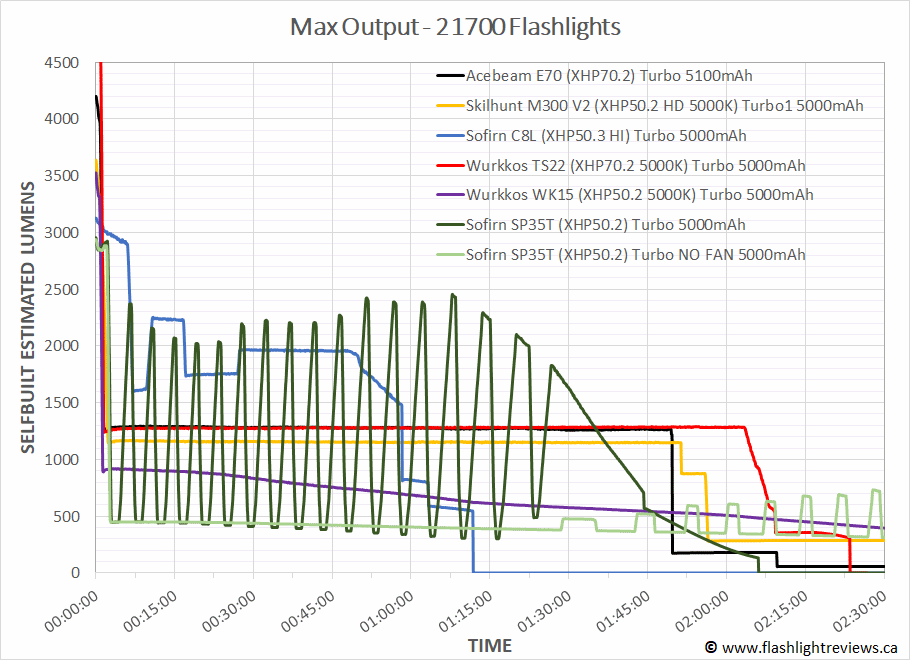
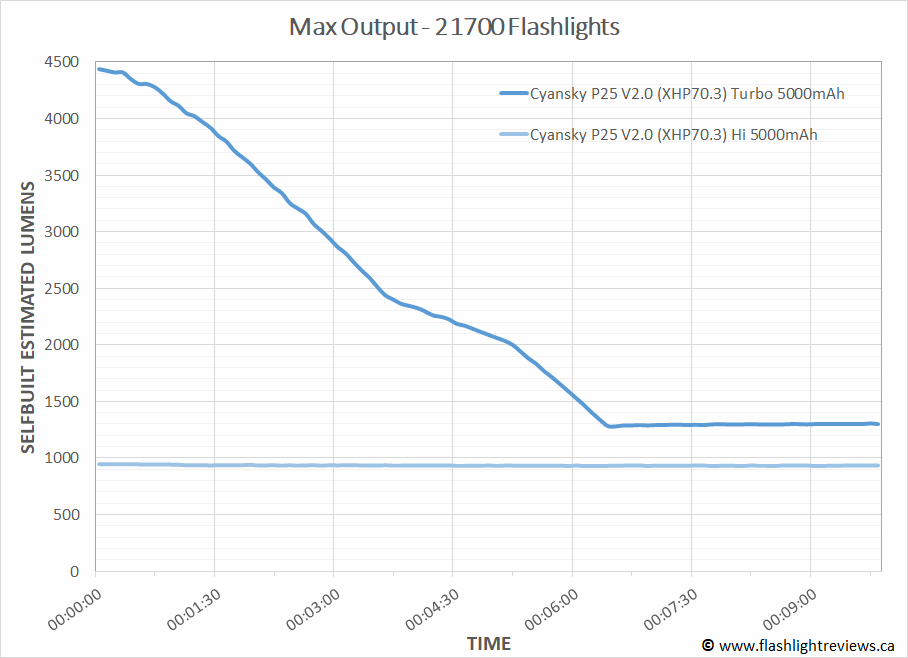
Max

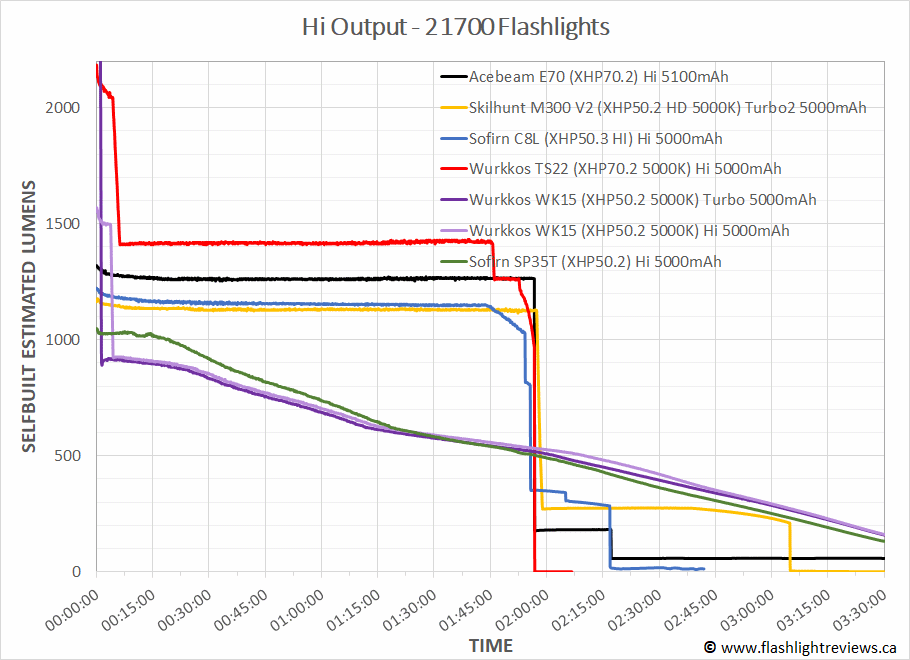
Hi

Med

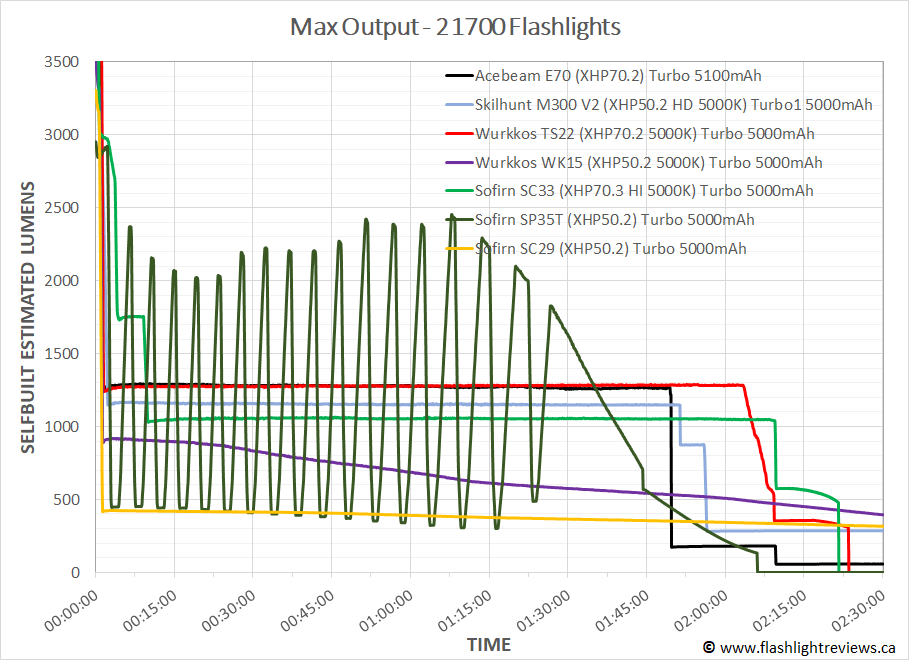
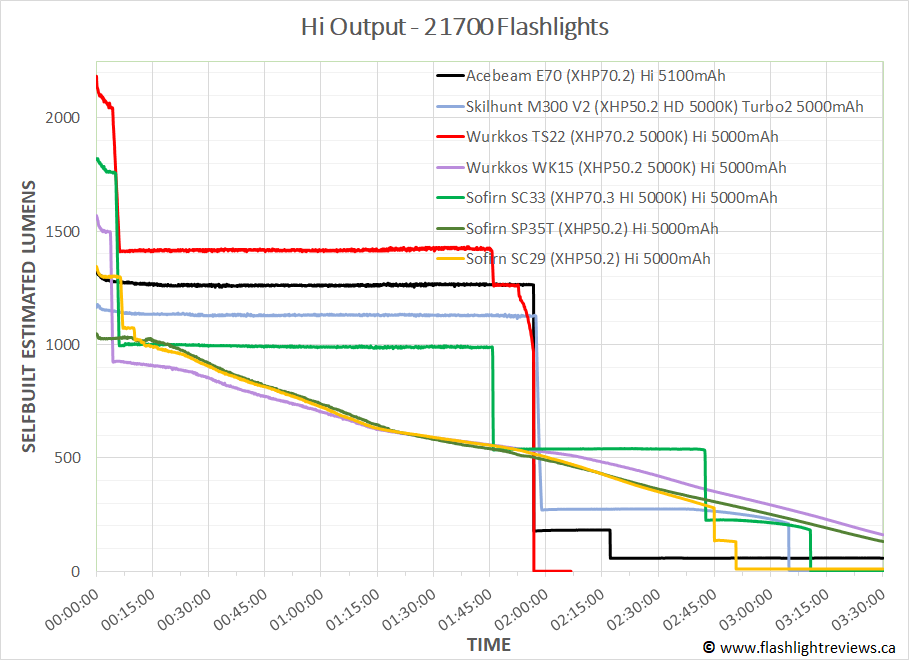
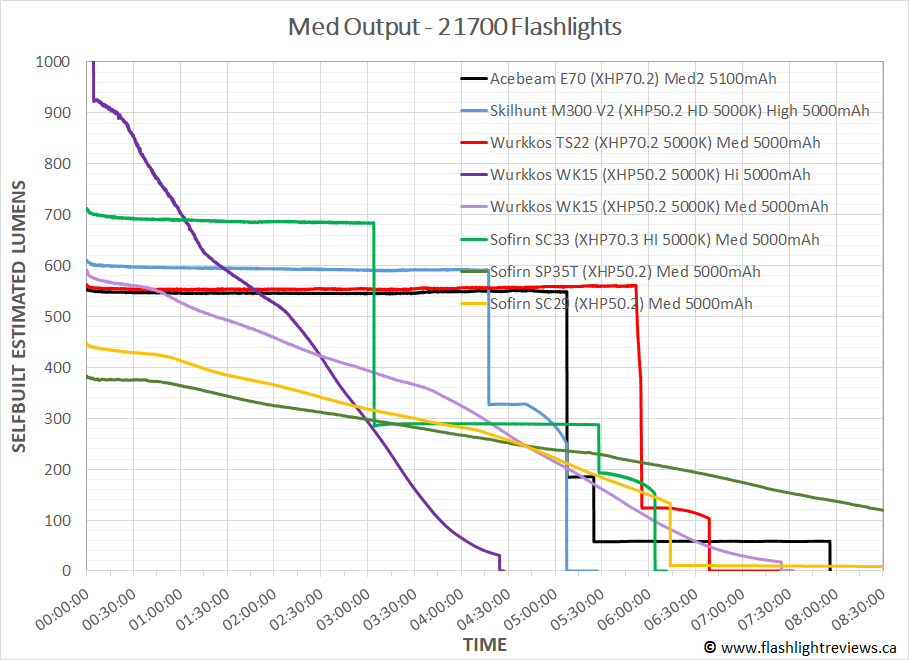
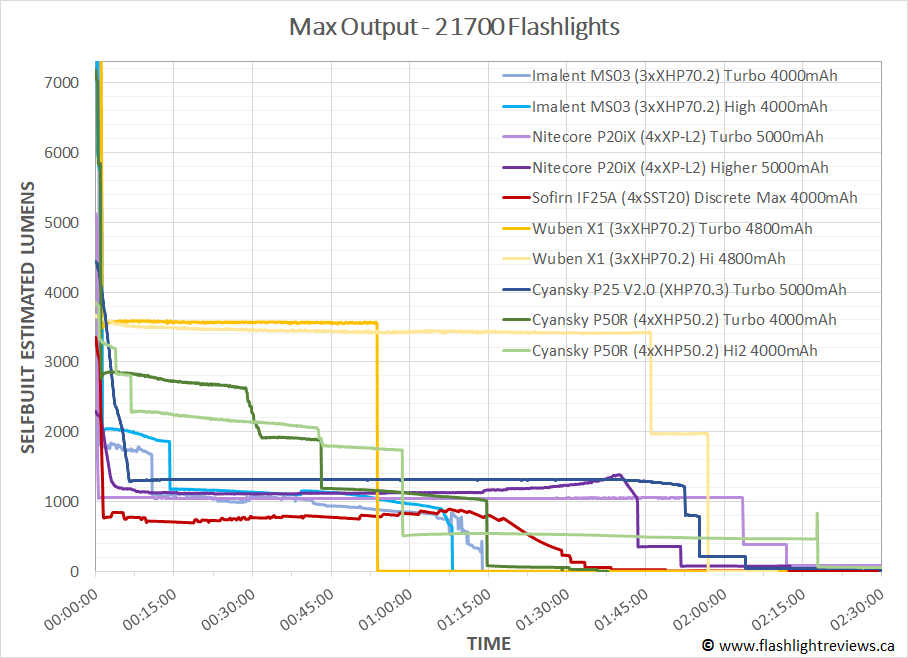
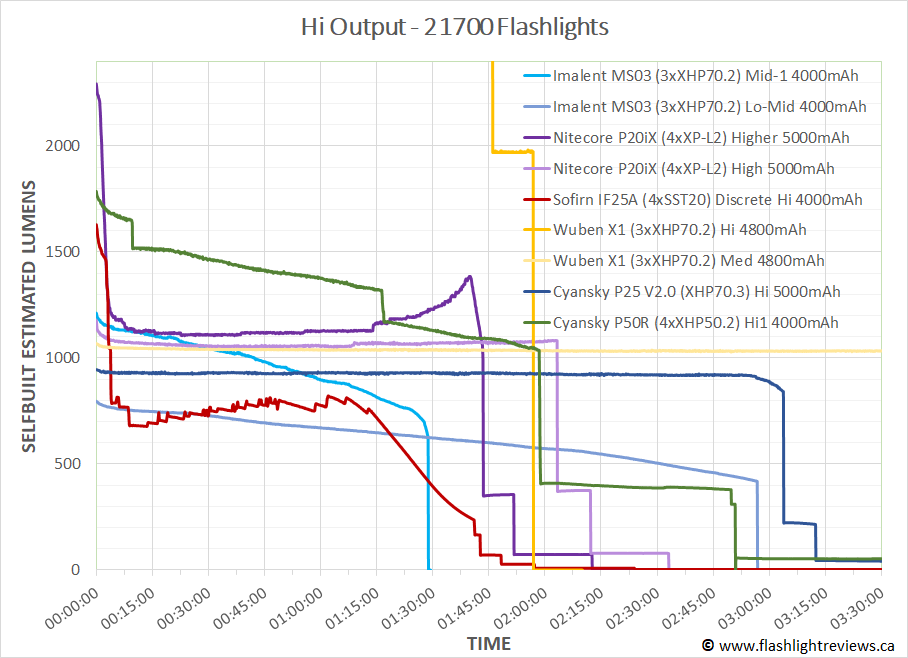
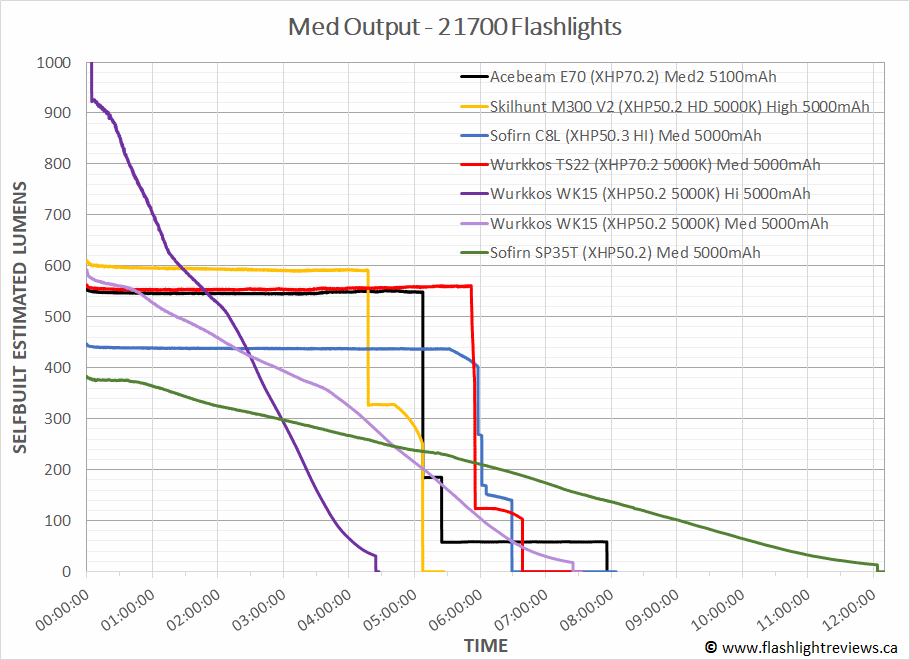
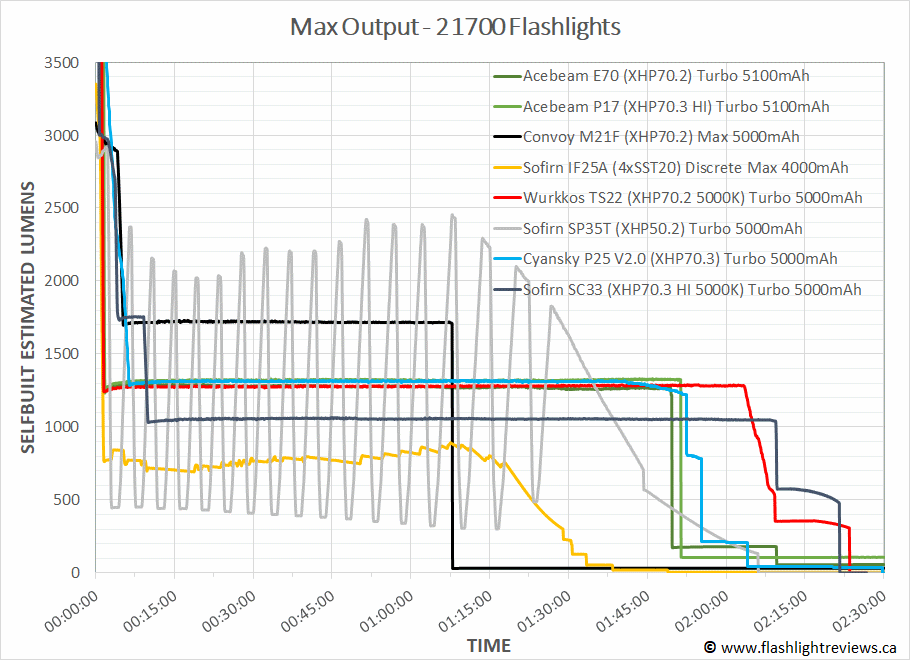
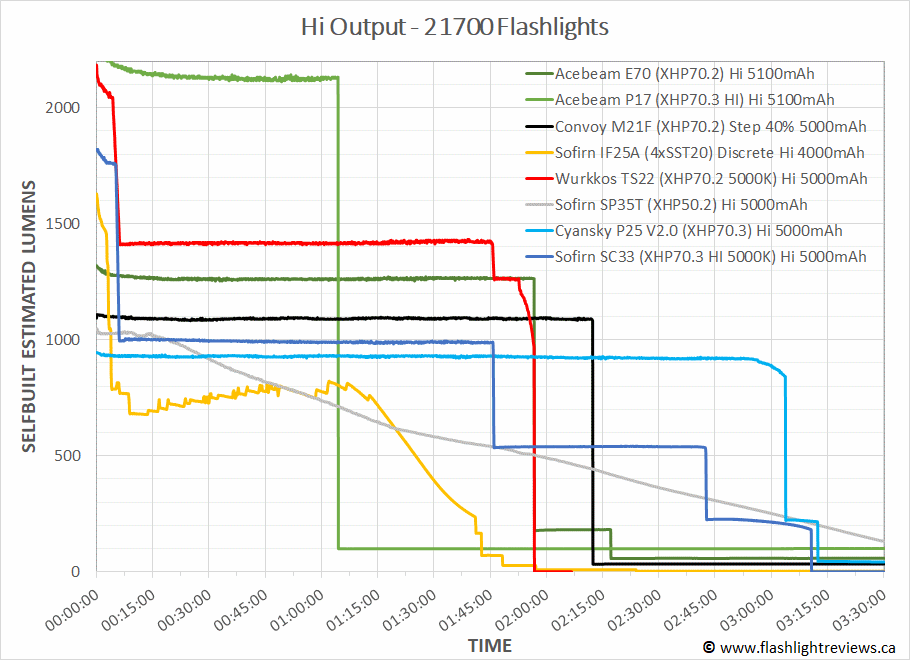
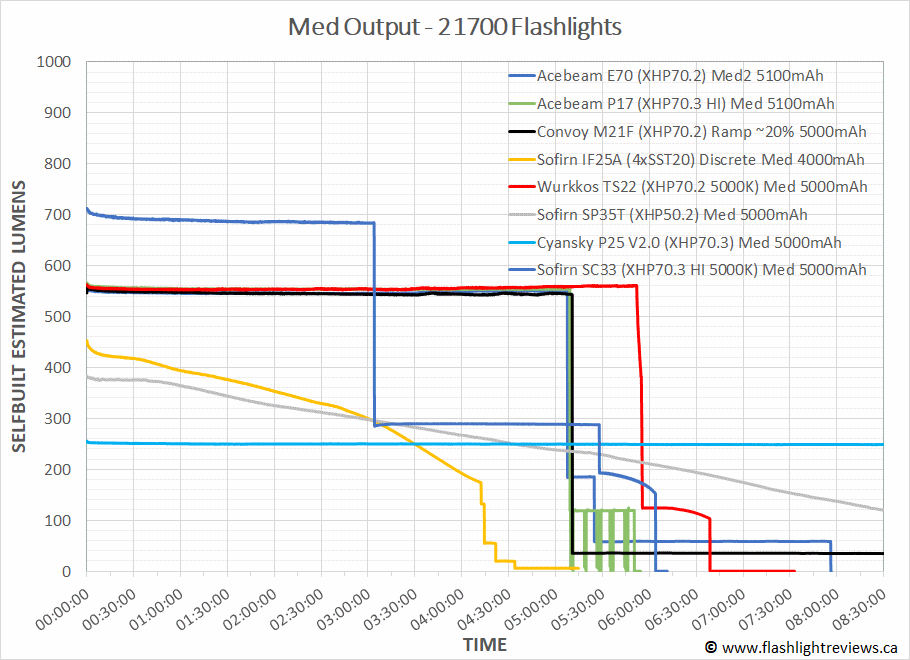
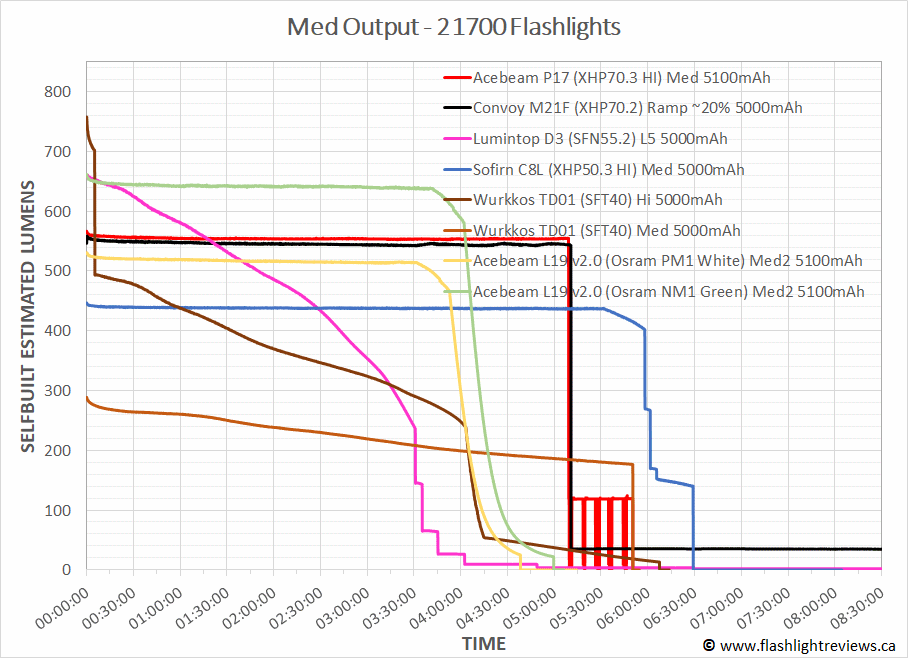
Another pleasant finding – fully flat-regulated output at all levels, with outstanding output/runtime efficiency. These results show a good boost circuit is being used, resulting in excellent performance across the board.

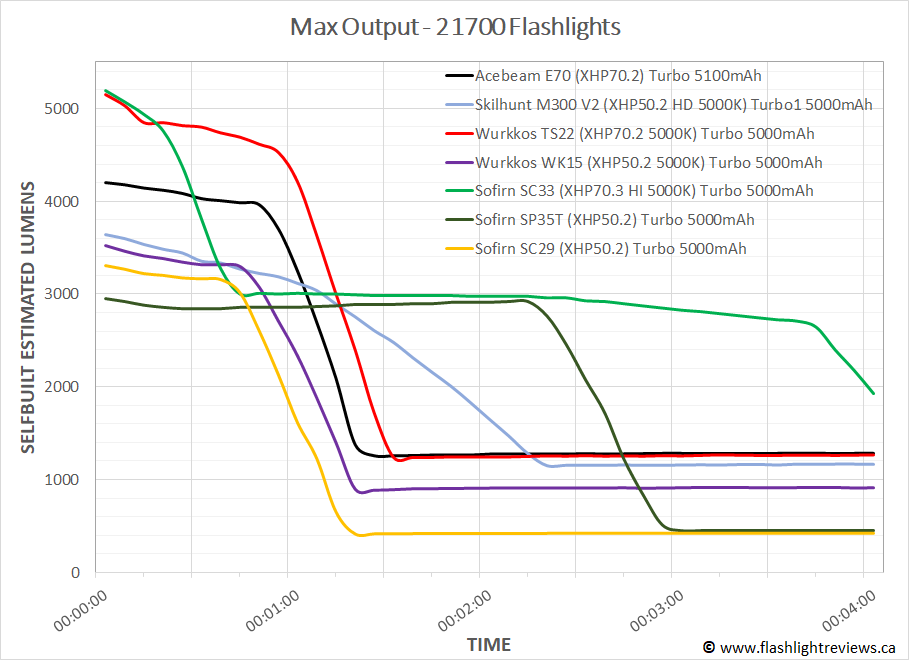
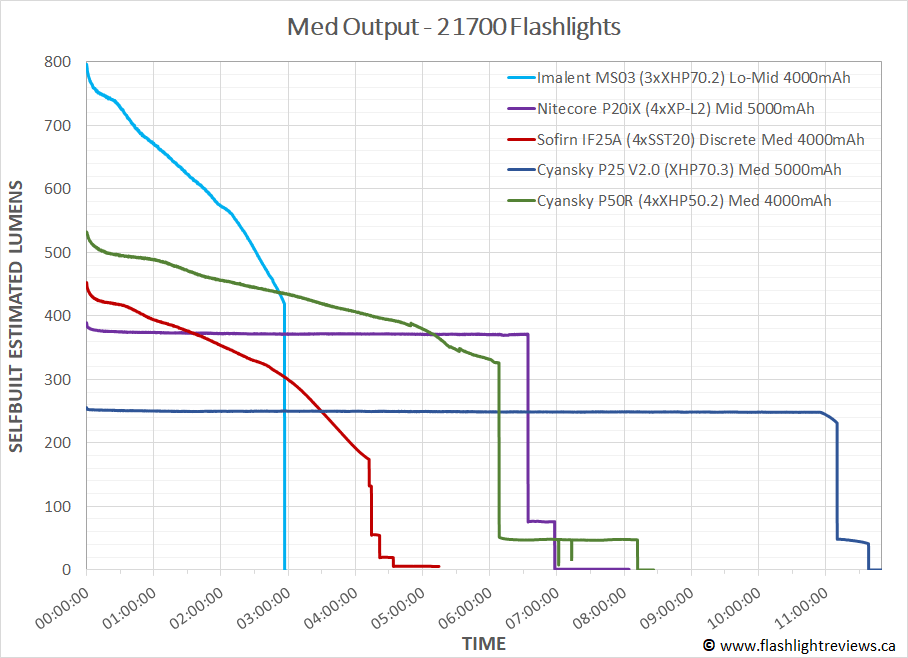
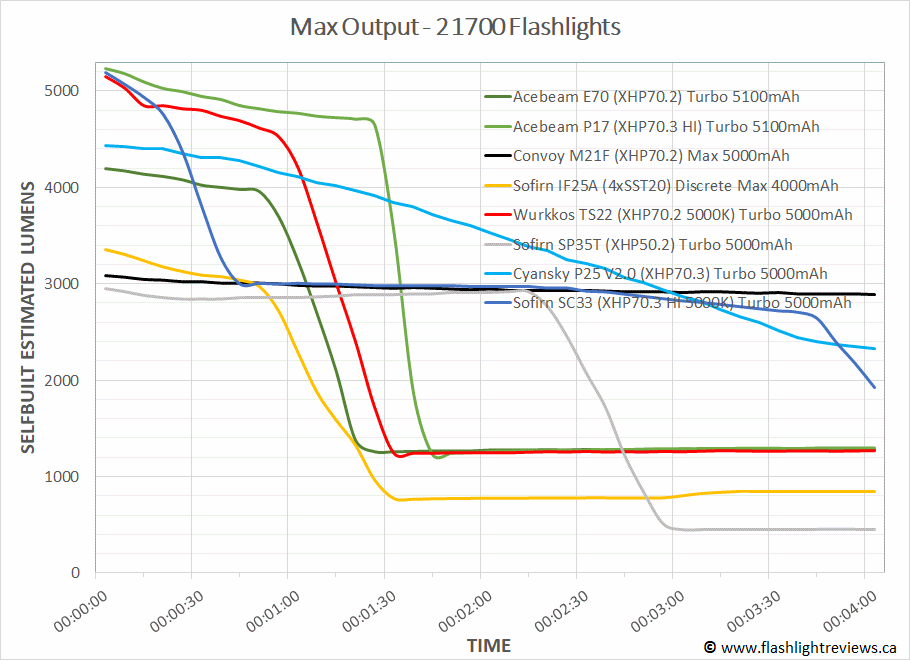
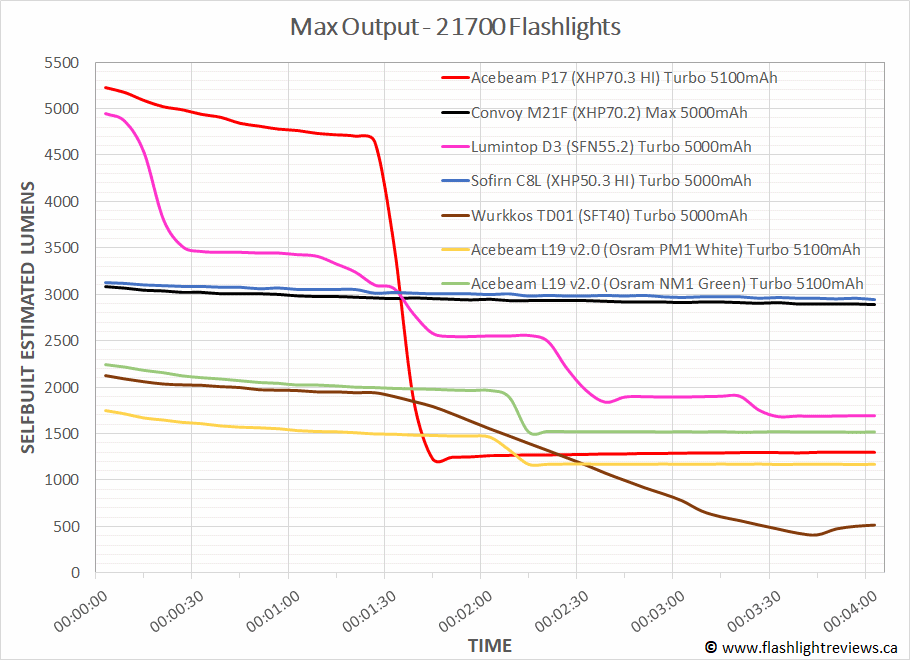
Another observation is that the Turbo mode (and step-down level) are very consistent with other top lights in this emitter class, like the Wurkkos TS22 and Acebeam E70. However, the Med mode (and to a lesser extent the Hi mode) is a little lower in output than most of the competition.

To better show you the step-down pattern on Turbo, here is an extended view of the first few minutes of the runtimes:

Interestingly, the P25 ramps down in output more slowly than most lights in this class – it takes over 6 minutes before you are down to the fully-regulated step-down level (which is a bit higher than the High level).

Pros and Cons

ProsCons
The light has a solid build, with a tactical forward clicky switch in the tail and a side electronic switch.Lacks a moonlight mode or a beacon/signalling mode.
Circuit is fully voltage-regulated, with excellent output/runtime efficiency.XHP70.3 HD cool white emitter produces high output, but no option for neutral/warm tint, high CRI, or greater throw.
The light has a serviceable user interface, comparable to other lights with this configuration.More expensive than competing lights.
Good range of output levels, actually exceeding rated specs.

Overall Rating

Preliminary Conclusions

The P25 from Cyansky is another example of a quality light from a new maker that has crossed my review desk.

Circuit performance is top-notch, with a highly efficient and well-regulated driver. This is something that I find to be quite variable among the new makers, but certainly speaks well here (and reflects that higher price point than most of the others). I’m also impressed to see this light exceed its reported specs – many makers over-promise and under-deliver, so it’s great to see the opposite here.

I like the implementation of the physical forward clicky switch – feel and function is good. The user interface is reasonable, and similar to other lights that have both a physical tailswitch and side electronic switch. That said, some competing lights feature a secondary “tactical” mode set as an option as well (and a shortcut to Turbo). As always, I would like to see an actual Moonlight mode as well (or at least something closer to it).

The physical build is quite solid and stable, if a touch long. There are some small aspects that detract a bit for me, such as the slippery finish with relative lack of knurling, flat aluminum bezel, and pretty basic clip. I would associate these with a more budget build typically. But the overall package is good, with the Cyansky-branded battery and holster.

It also comes with a modern high-output emitter, the XHP70.3 HD (cool white), which provides a lot of output and a smooth beam. That said, I would like to see some additional options, such as neutral white version (or high CRI model). For that matter, the HI edition of this emitter would produce more throw, and a cleaner beam with less chromatic aberrations.

At the end of the day, I found this to be a good light to handle and use. It’s really the combination of small touches to the build and UI that hold it back from top-of-the-line class for me. I hope the comparison results above will help you decide if it is right for you.

Acknowledgement

The P25 was supplied by Cyansky for review. As always, all opinions are my own and the light received the same rigourous and objective testing as all other lights that I have reviewed. At the time of review, this light retails for ~$100 USD (~$130 CDN).

Emisar D4K

The D4K is a multi-emitter Hank light built for general purpose use, and running on a single 21700 battery. It features a wide range of customizable options, and uses the sophisticated Anduril user interface.

  1. Introduction
  2. Manufacturer Specifications
  3. Package Details
  4. Build
  5. User Interface
  6. Circuit Measures
  7. Emitter Measures
  8. Beamshots
  9. Testing Results
  10. Runtimes
  11. Pros and Cons
  12. Overall Rating
  13. Preliminary Conclusions
  14. Acknowledgement

Introduction

Upon my return to reviewing this year, it became very clear that “Hank lights” have a huge following. The individual models are known commercially under the Emisar or Noctigon name, and can be purchased directly from Hank’s site at intl-outdoor.com.

The thing to understand about the individual models is that there really isn’t an off-the-shelf or “stock” version of a Hank light. Rather, any given model (and there many, in different form factors) is available with a wide range of options that you can select from – including emitters, circuits, button colours, optics, etc.. So all lights are effectively custom-built, within the range of the form factor.

Hank also uses the latest implementations of the open-source Anduril user interface. Taken together, this all points to the fact that these lights are primarily intended for flashaholics who understand what they are looking for. It is basically an opportunity to get a largely custom light assembled and shipped relatively quickly and cheaply.

Having reviewed a number of Anduril-equipped lights from more mainstream makers, I was curious to see how it would perform in a light specifically designed to take advantage of it. I’ll get into the details of my selected build below, but this is probably the best opportunity to take maximal advantage of the Anduril feature set. Indeed, the creator of Anduril, Selene (aka ToyKeeper) specifically recommended the D4K and D1 to me as good models to start with.

First up in this review is the quad-emitter, 1×21700 Emisar D4K. Scroll down for my specific configuration. I’m excited to see how it performs in my testing.

Manufacturer Specifications

Note: as always, these are simply what the manufacturer provides (although in this case, specific to my custom specs). Scroll down to see my actual runtimes.

FeatureSpecs
MakerEmisar
ModelD4K
Emitter4xNichia 519A dome on
Tint4500 K CRI>90
Max Output (Lumens)3,800 (FET)
Min Output (Lumens)-
Max Runtime-
Max Beam Intensity (cd)-
Max Beam Distance (m)-
Constant Levels150
Flashing6
Battery1x21700
Weight (w/o battery)-
Weight (with battery)58 g
Length103 mm
Head Diameter28 mm
Body Diameter26.5 mm
WaterproofIP67 1m

Again, you can select other options here if you wish.

Package Details


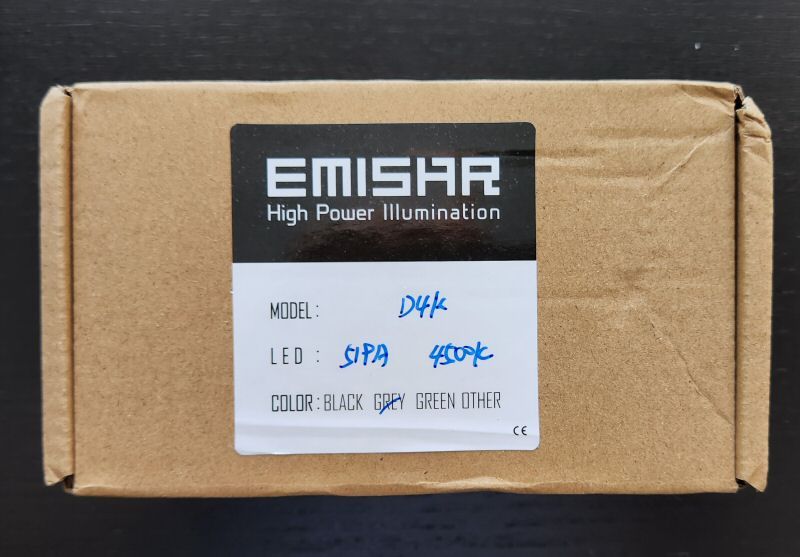
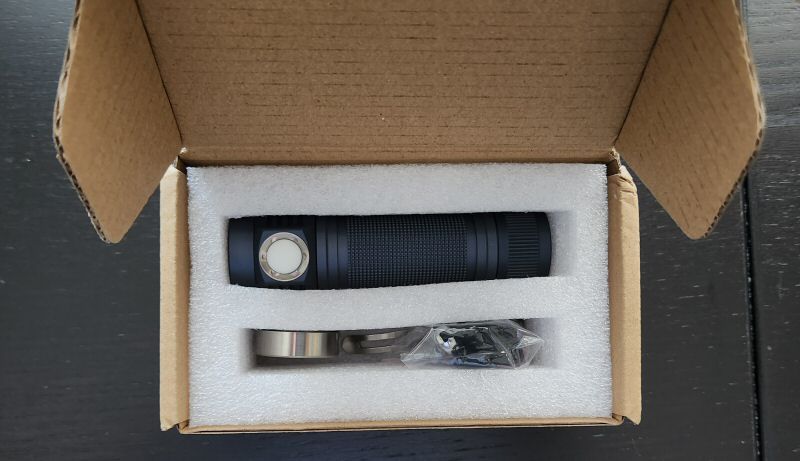
The packaging for Hank’s lights is fairly basic – a cardboard box with some hand-written description of the features selected. Inside is some cut-out foam holding the light and your extras. Here is what I selected, reflected in the package above:

  • D4K in Dark Grey
  • Flat threaded switch ring
  • Cool White switch backlight
  • LEDs: 519A 4500K with dome on
  • Standard optic
  • Optional boost driver
  • Optional steel bezel (comes with one spare large o-ring)
  • Optional pocket clip

All lights also come with:

  • Wrist lanyard
  • 2 Spare body tube o-rings

Hank provides a lot of emitter and switch options. I choose the 519A 4500K dome-on to better match some of the other lights I’ve tested (there are plenty of de-domed options to consider as well). The cool white switch backlight can be used as a fairly bright “moonlight” (there are plenty of other options available here as well).

The boost driver was a key selection for me. I’ve tested many budget lights running Anduril that lack a boost driver (i.e., just running a basic linear driver, like FET). That translates into a fairly quick drop-down to a relatively low output level – with a “noisy” regulation pattern followed by a slow unregulated drop-off. With a good boost driver, you should be able to sustain better regulated runtimes, and at higher thermally sustainable brightness levels. However, the trade-off is typically lower dynamic range (i.e., lower highs and higher lows). Given how quickly (and how low) FET-based Anduril lights drop-off, I think that’s a reasonable trade-off for higher regulated outputs with a good boost driver. And for once I don’t mind risking the loss of the lowest modes, as the switch light (which can be independently controlled with Anduril) can serve as an effective “Moonlight” mode in its own right.

To see the difference between the D4K with boost driver and other Anduril-based lights with simple linear drivers, check out my discussion in the Runtimes section of this review.

Build


From left to right: LiitoKala 21700 (5000mAh), Vapcell 21700 F56 (5600mAh), Emisar D4K, Imalent MS03, Convoy S21E, Skilhunt M300, Wurkkos WK15, Wurkkos TS22, Sofirn SP35T, Cyansky P25, Nitecore P20iX, Acebeam E70.


To start, I opted for the stainless steel bezel because I find the these enhance the  structural stability of the light. Aluminum is a great material to hold (or work with), but it is rather soft – to better protect the head from falls, etc., I prefer stainless steel.

The stainless steel pocket clip is another great option, as the body tube allows placement near the head or the tail of the light (for stable head-up or head-down carry). I didn’t opt for the tailcap magnet, but that’s a good option if you are considering using the light as a work light.

The light is controlled by an electronic side switch in the head, with a somewhat transparent rubberized cover. Feel and traverse of the electronic switch is good, with a firm click and typical traverse. There are a lot of options for the switch emitter LED, and I opted for cool white here (assuming it would produce max output). As you will see in my upcoming review of the D1, I opted for the multi-colour RGB LED option on that light.  Although set to off by default, you can configure the auxillary LEDs and the switch LEDs through Anduril to light up when a battery is connected (at two different intensities). See the user interface section below for more information.

I also went for the flat threaded switch ring, as I was worried the raised model might catch on clothing, etc. It is still easy to find the switch by feel, if you are leaving the standby indicator off.

The tailcap is perfectly flat, so the light is able to tailstand fairly stably. There is a small cut-out on the side for the simple wrist lanyard.

Tailcap threads are square-cut and anodized, with good feel – at both ends of the battery tube. Note there was no lubrication anywhere on the samples I received, so I recommend you add a good non-conducting lube for both the o-rings and the threads. I also always recommend you keep the light stored locked out when not in use. Thanks to the anodized tailcap threads, you can do this easily by a simple twist of the tailcap.

With the o-rings in place, I expect waterproofness to be good.

There is a stiff cylindrical spring in the head, along with a fairly thick conical tail spring. Resistance is high, so be careful about using longer cells in this light – you may dent the cell (or circuit board) if you use overly long cells. Note that Hank advises uprotected, flat top batteries only.

Unlike almost all the other lights I am reviewing these days, there is no built-in charger for batteries on the Emisar/Noctigon lights (or any bundled branded cells either). In keeping with the audience of flashlight enthusiasts, the assumption is that you have your own batteries and chargers on hand.

Knurling is not particularly aggressive – it is really more of a fine checkered or line pattern. It does feel a bit more grippy than most lights I’ve handled these days, which typically seem to be a bit smooth. Combined with the ridge detail, I would say overall grip is pretty good. Note that the light can roll, but the switch button cover helps limit this. Anodizing looks to be good quality (for presumed type II, give the colour range), with no damage on my sample. I would describe the finish as matte.


I opted for the standard optic, since I expect this should produce a decently floody beam with the quad-519A emitters (dome on). It doesn’t show up well in my desk shot above, but the beam is indeed very broad and floody. Scroll down for actual outdoor beamshots. There is a slight greenish-tint AR coating on the lens.

One interesting feature of the circuit board is that there are actually 8 additional secondary multi-colour RGB emitters built-in here. These can be turned on and controlled just like the auxillary switch LED in Anduril.

Here is what they look like on the high output AUX setting, in sequence:


You can configure the AUX LEDs to select an individual colour, or have it cycle through all colours, or reflect the battery voltage visually. You can turn these on at one of two intensities, or flash, or leave off. The AUX LEDs are linked to the side switch LEDs, so setting changes apply to both. But of course the RGB features are limited to the AUX emitters (unless you also get RGB under the switch too, in which case they would be synchronized).

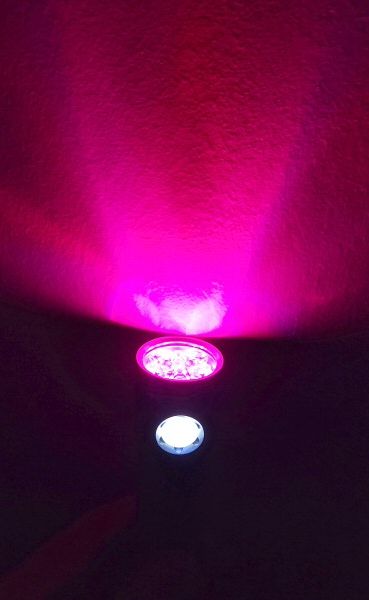
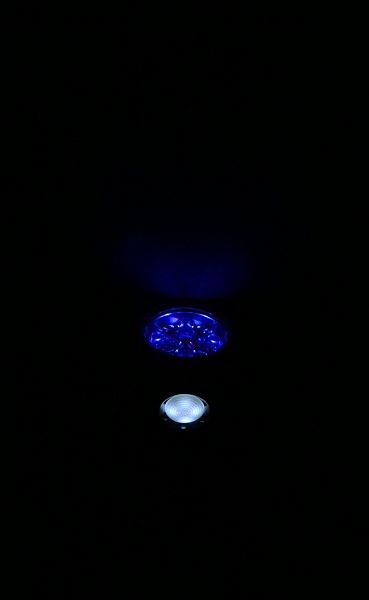
In my handling, I find the High level for the AUX/Switch LEDs is surprisingly bright – and the Low level is surprisingly low (scroll down for specific output measures). In fact, the white LEDs on the side switch on Low are virtually impossible to see except in complete darkness, and the AUX LEDs are very dim (so dim that they don’t register in my lightbox). Here are a couple of pictures showing both switches in ambient room light on an overcast day, first on High and then Low:

As you can tell, it doesn’t even look like the switches are on in the Low setting. But here are a couple of pictures in the dark, again on Hi and then Lo:

It’s not exactly a perfect comparison, as I’m using my cell phone camera’s auto-adjust, but this gives you a general idea of the significant difference between the modes. Scroll down for current draws and output measures, where possible.

User Interface

As mentioned above, the D4K uses the open-source Anduril 2 user interface (UI). Anduril has two distinct UIs mode sets: Simple and Advanced. The labels are a bit misleading, as both are fairly sophisticated – it is just that the Advanced UI has a lot of extra options not available on the scaled-down Simple UI. Both UIs have the option for a discrete Stepped level mode, in addition to the continuously-variable Smooth Ramping mode.

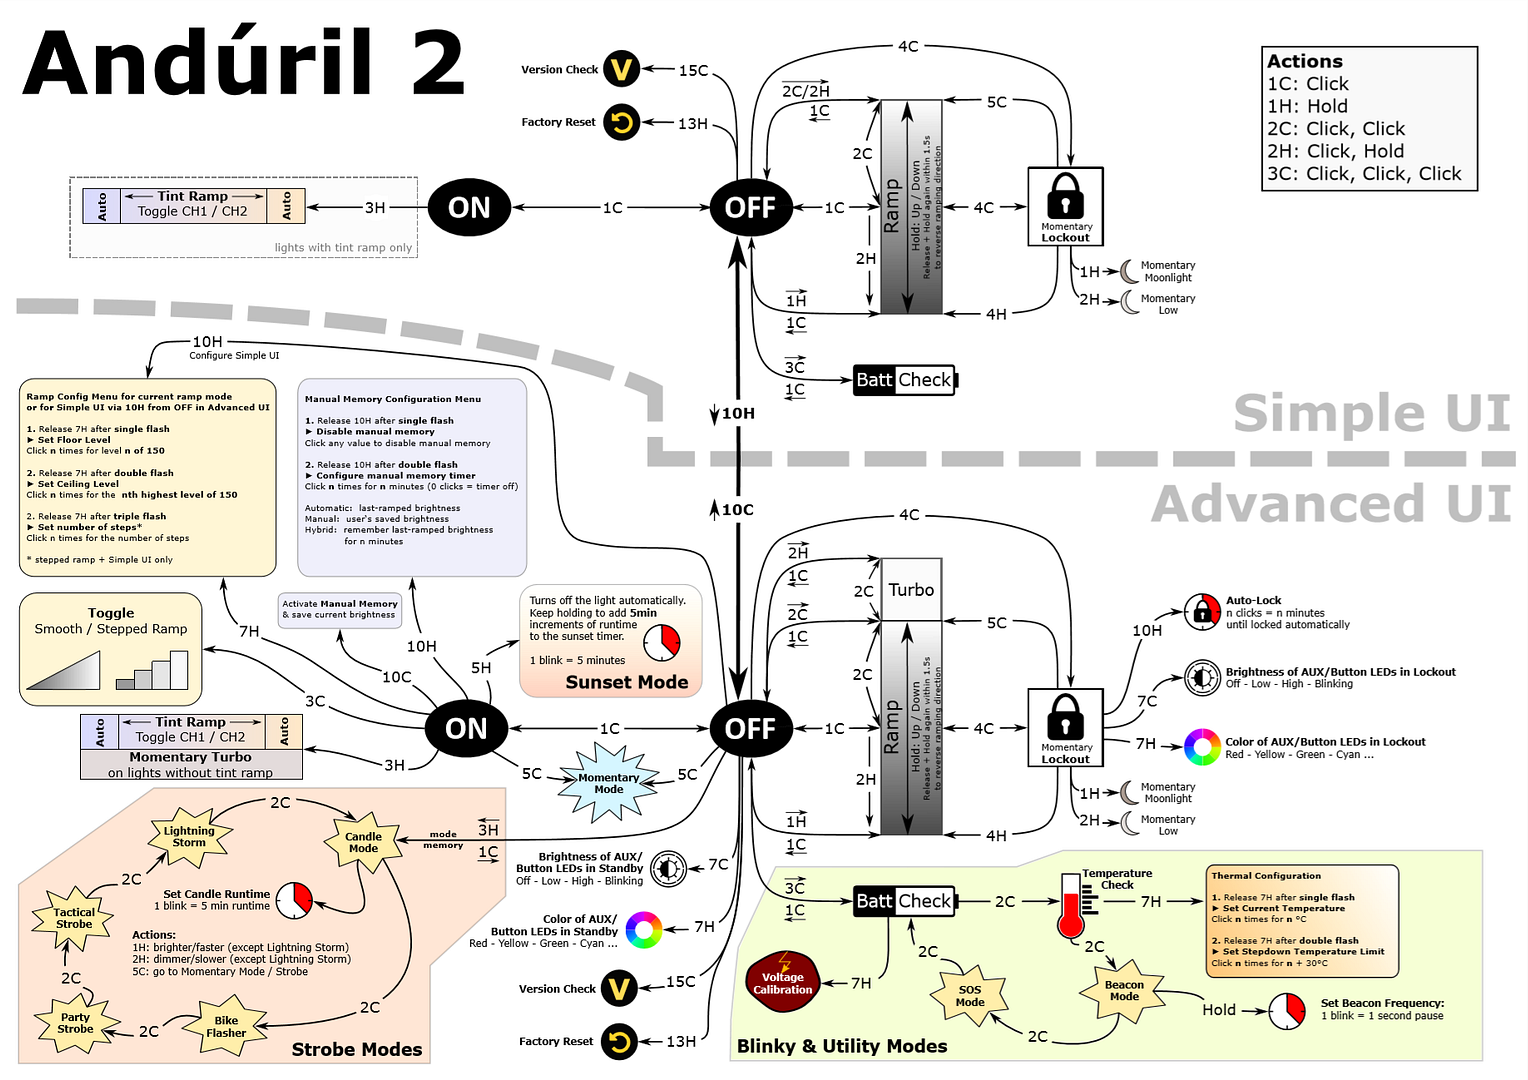
To switch from the default Simple UI to Advanced UI, you need to do 10 clicks from Off with a hold on the 10th click (10H), with 10 clicks (10C) to return to simple UI. Advanced UI has a lot more options available. It’s easier to show the UIs rather than explain them in words, so here is a helpful pic:

ui-diagram

You can also download a plain text-based manual from Anduril creator Toykeeper, or a more interactive one with version control here.

This implementation of Anduril 2 has eight discrete Stepped levels, which I’ve numbered in this review as L1 through L8 (with L1 being the lowest level, and L8 being Turbo).

According to the firmware Version Check, my D4K sample is model 0273. Full info is 2022-10-21-02-73 (version code is Year-Month-Day the firmware was compiled, followed by a 2-digit brand ID and 2-digit product ID).

Again, check the image and link above for more info, but here is a simplified description of the UI to get you started.

From OFF:

  • Press-and-hold (1H): Turns On in lowest output, in either Ramping mode or Stepped mode depending on which mode is enabled (and which UI you are in)
  • Single-click (1C): Turns on in last memorized mode used (Ramping or Stepped)
  • Double-click (2C): Turns on to Turbo (aka the Ramping max output)
  • Triple-click (3C): Battery check (voltage read out a single time) and basic flashing/strobe modes.
  • Triple-click-and-hold (3H): Special strobe modes, but only when in Advanced UI (remembers last strobe mode used)
  • 4 clicks (4C): Lockout mode. In lockout mode you have different options available:
    • Press-and-hold (1H): Momentary Moonlight
    • Double-click-and-hold (2H): Momentary Low
    • 4 clicks (4C): Turns On in memorized output level
    • 4 clicks and hold (4H): Turns On in the lowest level
    • 5 clicks (5C): Turns On in Turbo
    • 10 clicks and hold (10H): Configure the lock timeout threshold (in Advanced UI only), allowing you to pre-set the timeout time of the lock.
  • 7 clicks (7C): (Advanced UI only) Enters AUX/Button LED config for the next mode. There are four modes you can switch between; constant low, blinking low, off, constant hi. Click 7 times again to advance to the next option, in sequence. The light auto-memorizes the last option you select.
  • 7 clicks-and-hold (7H): (Advanced UI only) Enters AUX/Button LED config for the next colour. The colours follow the sequence: Red, Yellow (Red+Green), Green, Cyan (Green+Blue), Blue, Purple (Blue+Red), White (Red+Green+Blue), Disco (fast random colors), Rainbow (cycles through all colors in order more slowly), and Voltage read-out (uses colour to display battery charge). See the video in the section above for what Rainbow looks like.

From ON:

  • Press-and-hold (1H): Ramps up (or Steps up, depending on the mode). Ramps/steps down if you do it again.
  • Single-click (1C): Turns Off
  • Double-click (2C): Jumps to Turbo
  • Double-click-and-hold (2H): Ramps down (or Steps down)
  • Triple-click (3C): Switch between Ramping and Stepped modes
  • 4 clicks (4C): Lockout mode (see above for options)

Mode memory:

Yes, the circuit memorizes the last constant On output level in either Ramping or Stepped modes.

Strobe/Blinking modes:

Yes, quite a few actually. The strobe/blinking modes are accessible from Off with a triple-click (3C) or triple-click-and-hold (3H), but in Advanced UI only. You can switch between strobe/blinking modes with 2 clicks (2C), in the following sequence (see testing results below to see what these look like):

Triple-click (3C):

  • Battery check
  • Temperature check
  • Beacon mode
  • SOS mode

Triple-click-and hold (3H):

  • Candle mode
  • Bike flasher mode
  • Party strobe mode
  • Tactical strobe mode
  • Lightning mode

Low voltage warning:

Sort of. In operation, the light drops in brightness in steps, and runs for an extended time at a very low level. Apparently it shuts off when the cell is ~2.8V (although I haven’t run it that long to confirm).

Lock-out mode:

Yes. In either Simple UI or Advanced UI, lockout is accessed by 4 clicks (4C) from On or Off (repeat to unlock). The lockout mode is unusual with Anduril, as it actually enables momentary operation in the minimum modes. There are other lockout modes available, as explained above. As always though, I recommend you physically lock out at the light at the tailcap, if you want to guarantee no accidental activation.

Temperature check and thermal calibration mode:

This is a little complicated (and beyond the needs of most users), so I will just refer you to the diagram from the manual above. With default settings, I find this light steps down fairly quickly due to heat (unsurprising, given default Anduril settings are conservative). I have not tried to reconfigure my sample. Note that if you get into any trouble (or wish to reset any custom configurations), you can easily reset the light to the factory defaults by 13 clicks-and-hold (13H).

Reviewer Comments:

Anduril is a sophisticated setup – a choice of Simple or Advanced UI, Stepped and Ramping modes, AUX LEDs, etc. Of course, you will never please everyone, and many may prefer a simpler interface. But as this light is directed toward flashaholics, I think it is a very good choice.

Circuit Measures

Pulse-Width Modulation (PWM):

There is no sign of PWM on any level, the circuit appears to be fully current-controlled. There is no sign of high frequency noise at any level (unlike many of the budget Anduril lights with simple FET drivers).

L1:
L1

L2:
L2

L7:
L7

L8:
L8

Nice to see the lack of circuit noise on this model.

Strobe Modes:

Note that for most of the strobe / flashing modes below, the actual frequency and intensity are both configurable. What I am showing below is the default speed and/or brightness setting. By pressing and holding the switch (1H or 2H) you can select the frequency. And in some cases, brightness is set from the last-used ramp level.

Beacon:
Beacon

Beacon strobe is a single flash every ~1.8 secs (so, 0.55 Hz) by default.

SOS:
SOS

A fairly typical SOS mode.

Candle:
Candle

Candle strobe is a continuous flicker, of varying intensity (again, accurately simulating a candle).

Bike Strobe:
Bike

Bike strobe is a bit unusual. It is constant On at a lower level, with four brief flashes to max (over ~0.25 secs) every ~1 sec or so by default. It certainly is an attention grabber.

Party Strobe:
Party

Party strobe is a super-fast (and annoying) frequency of ~20 Hz by default.

Tactical Strobe:
Tactical

Tactical strobe is basically ~10 Hz, by default.

Lightning Strobe:
Lightning
Lightning
Lightning

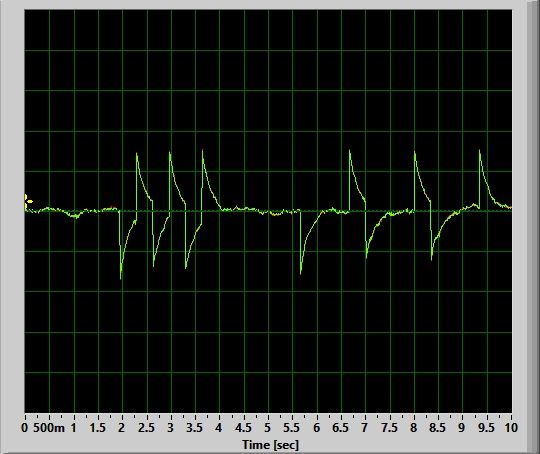
I’ve shown three 10-sec cycles above, so you can a feel for the frequency and intensity of light flashes. Lightning strobe is a fairly realistic lightning simulation, with variable intensity and time between flashes.

Charging:

The Emisar D4K does not come with built-in charging. You will have look into stand-alone battery chargers.

Standby / Parasitic Drain:

With the switch and AUX LEDs set to off, I measured the standby drain as fluctuating between 45 and 50 uA, but with a very brief jump to ~285uA every 3 secs or so. It’s hard to provide a good estimate, so I’ve just gone with ~50uA for now. For a 5000mAh cell, that would translate into over 11 years before the cell would be fully drained – which is extremely low, and not a concern. Regardless, I recommend you store the light locked out at the tailcap when not in use (which disables the standby drain).

Note that ToyKeeper tells me this current jump quirk is due to a bug in this firmware version. There is an updated firmware for this model that resolves the current jump, and lowers the overall standby drain by ~15 uA or so. You can kit to flash the firmware yourself, but I haven’t tried this yet.

With both the switch and AUX LEDs activated on the Low AUX output setting (i.e., barely visible, except in low light), I measured the combined drain as 105 uA with current firmware. For a 5000mAh cell, that would give you almost 5.5 years before the cell would be drained. This is similarly low enough to not be a concern, and could be useful as a signaling indicator, especially as a colourfull voltage readout (with the electronic lockout in place).

With both the switch and AUX LEDs activated on the High AUX output setting, I measured the combined drain as 3.58mA. For a 5000mAh cell, that would give you just under two months of continuous runtime on the higher AUX mode. While this is fine for the occasional use, it doesn’t make for a very effective or efficient Moonlight mode. Indeed, based on my experience, the low smooth Ramping minimum on the main emitters would likely have a slightly lower drain – but for much greater output with a better beam pattern.

Emitter Measures

In this section, I directly measure key emitter characteristics in terms of colour temperature, tint, and colour rendition. Please see my Emitter Measures page to learn more about what these terms mean, and how I am measuring them. As tint in particular can shift across levels, I typically stick with the highest stably regulated level for all my reported measures.

As explained on that page, since I am using an inexpensive uncalibrated device, you can only make relative comparisons across my reviews (i.e., don’t take these numbers as absolutely accurate values, but as relatively consistent across lights in my testing).

D4K on L6:

The key measures above are the colour temperature of ~3950K, and a noticeably negative tint shift (-0.0048 Duv) to pinkish-red at this temperature. For CRI (Ra), I measured a combined score of 95 (Hi CRI).

These results are very consistent with other neutral-warm Nichia 519A emitters I’ve tested.

Just out of curiosity, I thought I’d measure the AUX LEDs set to red.

AUX Red LEDs:

The simple Light Master lightmeter that I am using is not rated for monochromatic sources, but the reading above is very consistent with a dedicated red light – it is well off the blackbody radiation curve at the red end of the spectrum.

How about the cool white switch emitter?

Cool White side switch:

The cool white switch emitter is very bluish to my eyes, so the ~9350 CCT with slight negative tint shift is very consistent with my observation.

Beamshots

All outdoor beamshots are taken on my Canon PowerShot S5 IS at f/2.7, 0.5 secs exposure, ISO 400, daylight white balance. The bend in the road is approximately 40 meters (~45 yards) from the camera. Learn more about my outdoor beamshots here (scroll down for the floody light position used in this review).

Click on any thumbnail image below to open a full size image in a new window. You can then easily compare beams by switching between tabs.


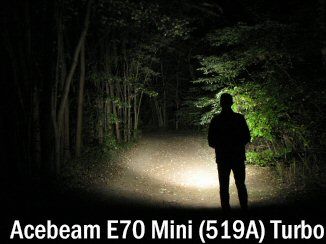
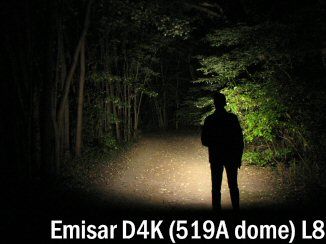
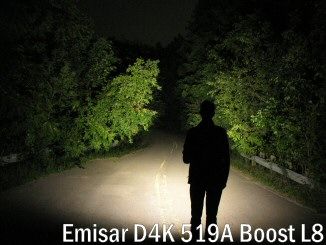
As you can see above, the D4K’s 4x Nichia 519A 4500K emitters perform similarly to the Acebeam E70 Mini’s 3x 519A 5000K emitters – but with a bit more output, and slightly warmer tint, as expected. Tint is pretty similar to my lower output Skillhunt M300’s 1x Nichia 144ART 4500K. In comparison, the the TS10’s 3xCSP 4000K emitters are considerably warmer in tint.

Testing Results

My summary tables are generally reported in a manner consistent with the ANSI FL-1 standard for flashlight testing. In addition to the links above, please see my output measures page for more background.

All my output numbers are based on my home-made lightbox setup. As explained on that methodology page, I have devised a method for converting my lightbox relative output values to estimated lumens. Note that my lightbox calibration seems to run higher than most hobbyists today, but I’ve kept it to remain consistent with my earlier reviews (when the base calibration standard was first established).

My Peak Intensity/Beam Distance are directly measured with a NIST-certified Extech EA31 lightmeter.

D4K Testing Results

ModeSpec LumensEstimated Lumens @0secEstimated Lumens @30 secsBeam Intensity @0secBeam Intensity @30secsBeam Distance @30secsPWM/Strobe FreqNoise FreqCharging Current <3VCharging Current >3VParasitic DrainWeight w/o BatteryWeight with BatteryCCT (K)DuvCRI
Cool White Switch LED + AUX Red LEDs (High)-0.060.06---NoNo--3.6 mA65 g----
Smooth Ramp Min-1.11.1---NoNo--~50 uA65 g----
L1-1.51.5---NoNo--~50 uA65 g----
L2-1717---NoNo--~50 uA65 g----
L3-7474---NoNo--~50 uA65 g----
L4-220220---NoNo--~50 uA65 g----
L5-490480---NoNo--~50 uA65 g----
L6-860850---NoNo--~50 uA65 g-3,960-0.004895
L7-2,0502,000---NoNo--~50 uA65 g----
L83,800 (FET)3,1502,6506,320 cd5,720 cd151 mNoNo--~50 uA65 g----
Candle------NoNo--~50 uA65 g----
Bike Strobe------1 HzNo--~50 uA65 g----
Party Strobe------23 HzNo--~50 uA65 g----
Tactical Strobe------10.4 HzNo--~50 uA65 g----
Lightning------NoNo--~50 uA65 g----
Beacon------0.48 HzNo--~50 uA65 g----
SOS------NoNo--~50 uA65 g----

The effect of the optional boost driver shows up in the higher Ramping minimum output, compared to other lights that use simple linear FET drivers (e.g., Sofirn IF25A, Wurkkos TS30S Pro). Still, I’m actually quite impressed at the dynamic range of the main emitters on the D4K here – I had expected a lower max output, and even higher min output. Scroll down to see how it compares in terms of runtime patterns.

To view and download full testing results for all modern lights in my testing, check out my Database page.

Runtimes

As always, my runtimes are done under a small cooling fan, for safety and consistency. To learn more about how to interpret runtime graphs, see my runtimes methodology page.

The D4K didn’t come with its own battery, but I had a brand new LiitoKala cell (5000 mAh) that I used for the main runtimes below.

Max

Hi

Med

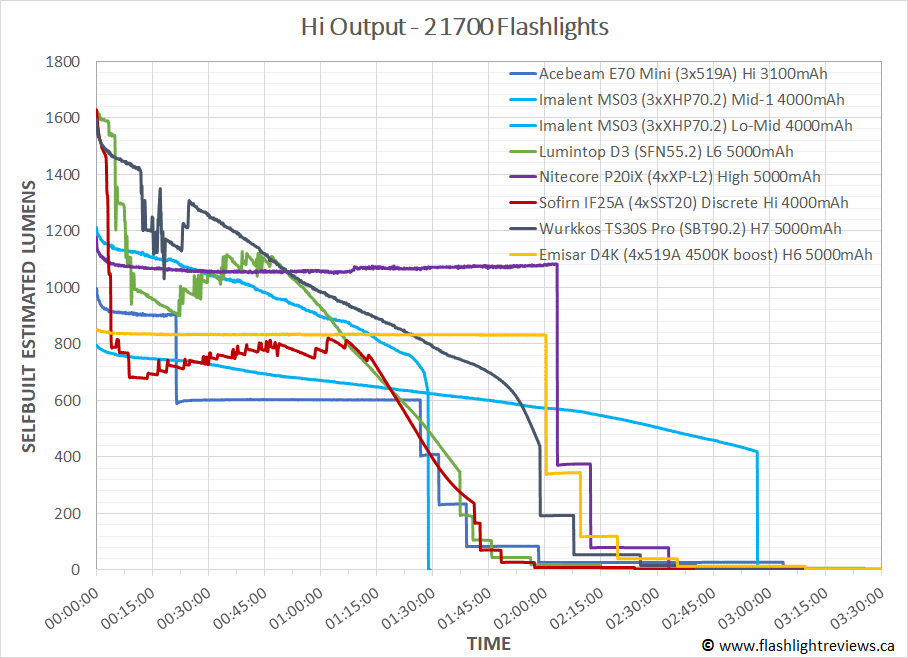
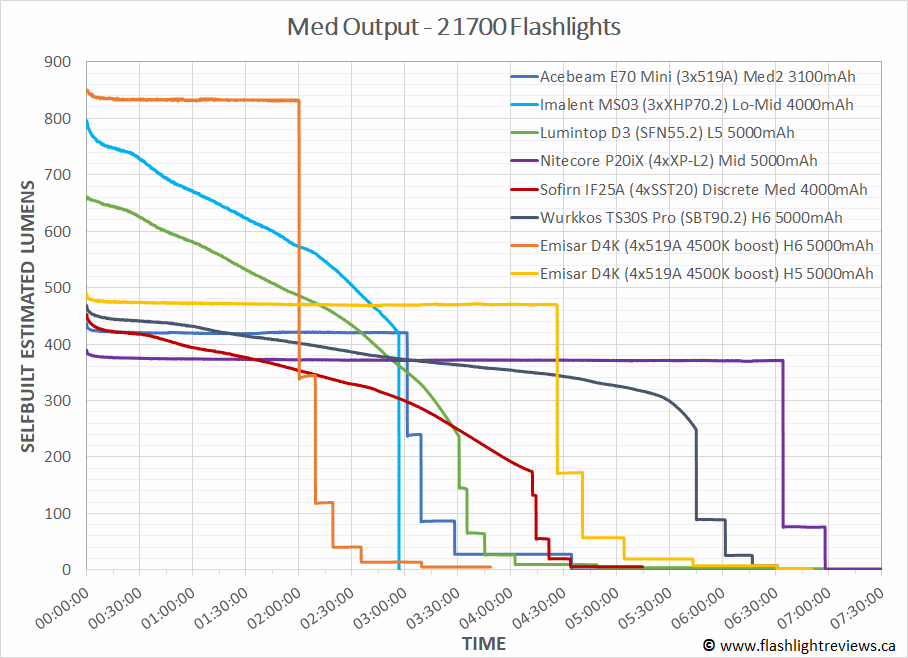
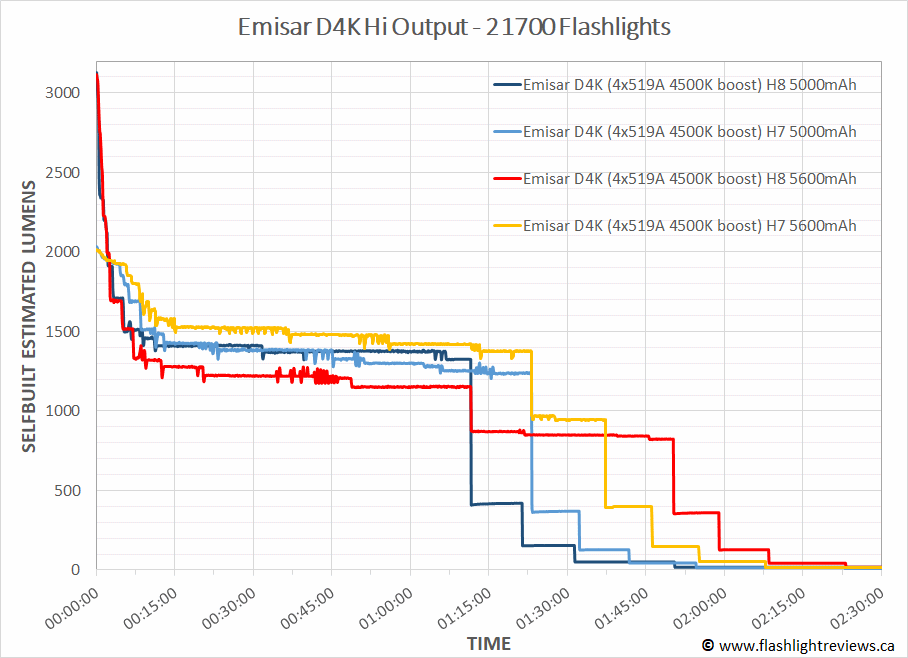
These results provide the opportunity to compare the optional boost driver on the D4K with a standard linear driver, as I alluded to in my build overview. Specifically, let’s take the example of the somewhat comparable multi-emitter Sofirn IF25A, which has a basic FET driver. The emitters are different, so you can’t directly compare overall output/runtime efficiency, but I think output levels and regulation patterns above are very revealing.

On Max, the IF25A starts out at a slighty higher initial output (~3400 lumens in my lightbox), but very quickly drops down to a “regulated” level of only ~700-800 lumens. It also shows a very “noisy” runtime pattern before dropping out of regulation. In contrast, the D4K with boost driver starts off at a slightly lower level (~3100 lumens in my lightbox) and drops off to a much higher regulated level of ~1300-1400 lumens. The regulated portion of the runtime also seems more stable on the D4K.

At the lower Hi levels, you can see the IF25A remains quite noisy at its regulated ~700-800 lumen level. But the D4K with boost driver is now perfectly flat-regulated at ~850 lumens.

At at the even lower Med levels, the IF25A shows a very typical direct-drive-like pattern of slow drop-off in output as the battery voltage drops (until some defined step-downs at the very end of the run). In contrast, the D4K with boost driver remains flat regulated at ~480 lumens until it steps down at the end of the run.

Again, you can’t exactly directly compare these two lights – you would really need to get the D4K without the boost driver to quantify the exact difference. But these results are exactly what I would have expected given their general similarities outside of the circuit/emitters. That is, you get about the twice the stably-regulated output level here, with only some loss of dynamic range. This speaks to the value of using a good boost driver. I wish other makers would offer this for their Anduril-based lights.

As always, the relatively low thermal mass here means that the light will step-down fairly quickly on the highest output levels. But I am impressed by how high the step-down level is, and how well regulated.

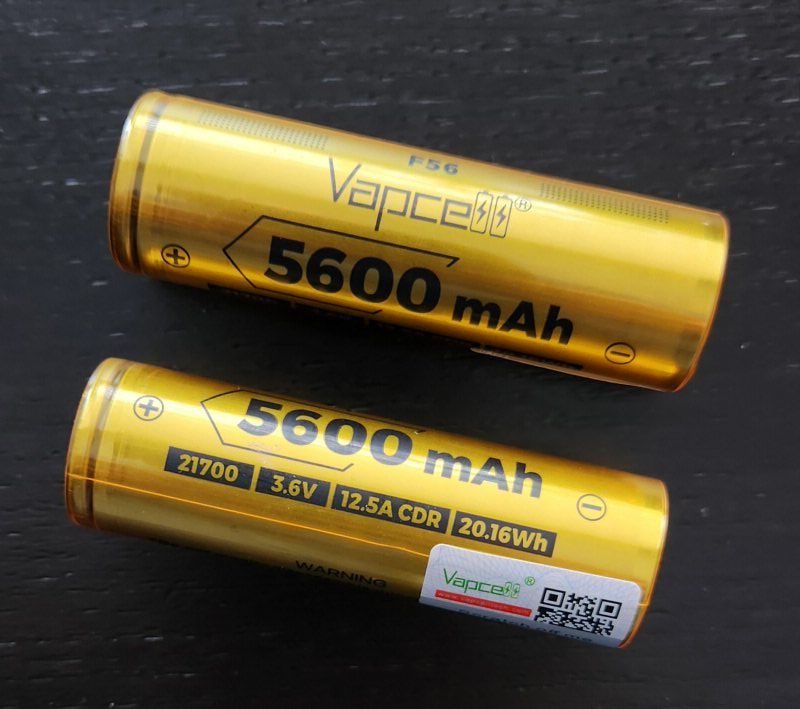
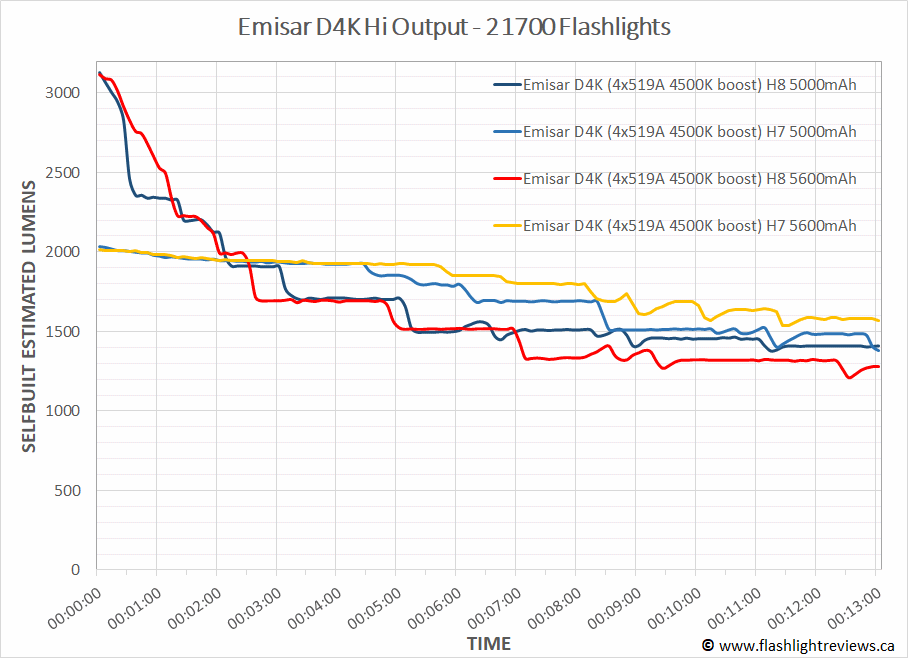
To better show this initial step-down pattern, I’ve done some addition runtimes with another new cell, a Vapcell F56 5600mAh 21700 battery.

The Liitokala and Vapcell batteries are differentiated below by their rated capacity – 5000mAh vs 5600mAh. Note as well that both are a good length (the Vapcell F56 in particular), so there is a risk of denting the cells when using in a compact light with dual springs like this.

Not surprisingly, there is not much difference between the cells over the first minutes. Effectively, the early runtimes above look equivalent for their initial step-down patterns.

Max-extended

This longer resolution is where you can see a difference. The 5600mAh Vapcell runtimes last longer, at a med-high level near the end of the runs. Harder to interpret is the slightly higher regulated output on the L7 run, and lower regulated output on the L8 max run, on the Vapcell. This may be just variation from one run to the next – but it could also be that the higher capacity Vapcell doesn’t respond as well to the initial high-drain on the max run.

I haven’t tried adjusting the thermal management settings (these are configurable with Anduril), but you should be able to slightly extend the initial output before step-down (at the expense of greater heat, of course).

Pros and Cons

ProsCons
Good physical build with a lot of possible customizations.No in-light charging feature.
With the optional boost driver, you get better regulated output and step-down levels than other Anduril lights running on simple linear FET drivers. Best implementation of Anduril I've seen yet.Due to small thermal mass, light will step-down quickly on Turbo - but maintains a higher brightness level here than other budget lights I've tested.
Even with the optional boost driver, there is a surprisingly wide dynamic range of output levels, but you do lose the <1 lumen moonlight levels.Only unprotected, flat top cells should be used in the light. Longer batteries are likely to get dented by the stiff springs in this small build.
Excellent beam profile and tint with my chosen dome-on Nichia 519A emitters.Body walls seem a bit thin, and threads come non-lubed.
RGB AUX LEDs are a nice feature, in addition to the switch options.Anduril interface can be intimidating.
Surprisingly affordable given it is basically a custom light (on a standardized form factor).

Overall Rating

Preliminary Conclusions

The D4K with optional boost driver did not disappoint. This is exactly the performance I was hoping for with a better driver – a higher step-down level on max, and flatter regulation across the board. I was prepared for some loss of dynamic range, but it wasn’t as much as I feared – except for the loss of <1 lumen Moonlight modes on the main emitter. But you do have the switch LEDs and AUX LEDs which can serve as impromptu Moonlight modes. While not as efficient or effective as a true Moonlight on the main emitter, it is enough for me to not knock down the star rating. I strongly recommend you opt for the boost driver upgrade on this model.

The other customizable features are really a question of personal preference. Now that I know the switch backlight and front circuit board AUX RGB emitters can’t be independently controlled, I would probably opt for the RGB switch – in order the match the AUX RGB colours. But this is just a question of personal preference.

Although I think this light is worth 5 stars for the performance, I do miss seeing an integrated charging port (a minor issue given the target audience though). The physical build is also a little on the thin and lighter side for my tastes, but still seems robust enough.

Beam pattern was excellent with the standard optic and dome-on Nichia 519A emitters. I know a lot of people like dedomed emitters, but keep in mind that dedoming also tends to reduce the colour temperature significantly (i.e., these “4500K” temp emitters would wind up being a lot warmer after dedoming). Of course, that may be to your tastes, but I would suggest going with 5700K emitters if you plan to dedome.

As always, I find it a pleasure to work with the Anduril user interface. I know this UI is not to everyone’s tastes, but there is something to be said for the consistency of knowing what to expect when a light arrives. By definition, there are a lot of arbitrary choices that have to be made when building in an advanced interface (by that I mean that multiple clicks-and-holds will be required, and one selection is not necessarily better or worse than another). So this is where consistency can be a more highly prized feature – especially when you own a lot of lights.

Certainly a very positive experience for my first Hank light!

Acknowledgement

The D4K was purchased from intl-outdoor.com for review. As always, all opinions are my own and the light received the same rigourous and objective testing as all other lights that I have reviewed. At the time of review, this light in this configuration (without battery) retails for ~$67 USD (~$92 CDN) shipped.

Sofirn SP35T

The SP35T is a tactical-style, general-purpose flashlight running on a single included 21700 battery. It features both tactical and general user interface options.

  1. Introduction
  2. Manufacturer Specifications
  3. Package Details
  4. Build
  5. User Interface
  6. Circuit Measures
  7. Emitter Measures
  8. Beamshots
  9. Testing Results
  10. Runtimes
  11. Pros and Cons
  12. Overall Rating
  13. Preliminary Conclusions
  14. Acknowledgement

Introduction

The SP35T is a popular mid-range model from Sofirn. Equipped with the XHP50.2 emitter, it is rated for relatively high output in the 1×21700 class – similar to many competing models that I’ve recently tested from other makers. What really caught my eye here though was the tactical tailcap switch. That’s not something you see very often any more, outside of the larger “tactical” lights from Wurkkos and Sofirn.

Given the very interconnected (and sometimes interchangeable) nature of parts across Wurkkos and Sofirn lights, I thought the SP35T might be an interesting one to test. Could this be a “Goldilocks” model that strikes just the right balance between output and performance?

Let’s see how it performs in my testing.

Manufacturer Specifications

Note: as always, these are simply what the manufacturer provides – scroll down to see my actual runtimes.

FeatureSpecs
MakerSofirn
ModelSP35T
EmitterXHP50.2
Tint
Max Output (Lumens)3,800
Min Output (Lumens)5
Max Runtime220 hours
Max Beam Intensity (cd)19,625 cd
Max Beam Distance (m)280 m
Constant Levels5
FlashingStrobe, SOS, Beacon
Battery1x21700
Weight (w/o battery)-
Weight (with battery)87 g
Length139.5 mm
Head Diameter28 mm
Body Diameter-
WaterproofIPX8 2m

Package Details


Unlike the modern “cellphone box” style packaging of the newer models from Sofirn and Wurkkos, my SP35T came in the same basic retail packaging as my old IF25A. Oh well, it’s what inside the box that counts I guess. There I found:

  • Sofirn SP35T flashlight
  • Sofirn-branded 5000mAh 21700 battery
  • Pocket clip
  • Wrist lanyard
  • USB-C charging cable
  • 2 Spare O-rings
  • Manual

It’s a decent package for a “budget” build, but I would like to see a holster included. FYI, Wurkkos sells an inexpensive holster (small size for ~$2 USD) that fits this light well.

Build


From left to right: LiitoKala 21700 (5000mAh), Vapcell 21700 F56 (5600mAh), Emisar D4K, Imalent MS03, Convoy S21E, Skilhunt M300, Wurkkos WK15, Wurkkos TS22, Sofirn SP35T, Cyansky P25, Nitecore P20iX, Acebeam E70.


At just under 140mm, the SP35T is one of the tallest general-purpose 1×21700 lights I’ve handled. This is the side effect of the tactical forward clicky switch (and dual spring design). This makes the light very suitable for tactical purposes, but it does mean you have to accept greater length. As someone with above-average sized hands with long fingers, I find the light comfortable to hold and use in either overhand or underhand grip – but some may find it a bit long.

The SP35T definitely shares a lot close design similarities to recent compact Wurkkos lights I’ve handled. This is not surprising, since these lights come off the same manufacturing production lines (i.e., Sofirn is the OEM manufacturer for Wurkkos).

The tailcap physical forward clicky switch does indeed look and feel identical to the Sofirn C8L that I recently reviewed. It has a pleasantly firm action, with a solid click and predictable firm traverse. It could just be sample variability, but I found the switch on my recent Wurkkos TD01 to be comparatively “soft and squishy” – I like the firmness of this SP35T sample. There are two raised tailcap guards that can serve as the lanyard attachment point. And just like my C8L, it is able to tailstand stably (my TD01 would not).

Tailcap threads are square-cut and anodized, with good feel. Thanks to the anodized tailcap threads, you can easily lock-out this light by a simple twist of the tailcap.

As an aside, the whole tailcap assembly here won’t fit on the TD01 – but it does fit and work on my Wurkkos TS22 perfectly.

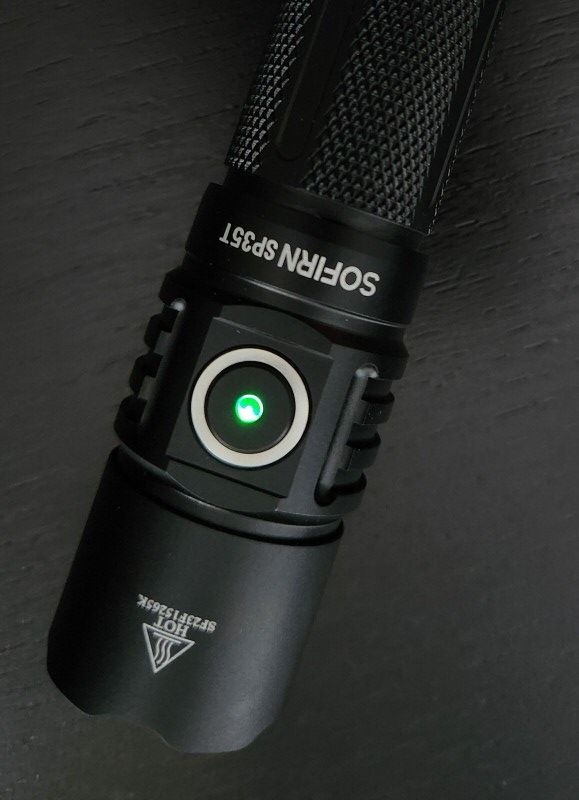
There is a raised side-mounted electronic switch on the side of the head, with red and green LEDs underneath to show charge status. Feel and traverse of the electronic switch is very similar to a lot of Wurkkos and Sofirn lights – it’s ok, but could be a bit tighter/firmer (i.e., hard switch covers always have some degree of play).

The side switch shines a bright red when charging the battery through the light’s USB-C charging port (green when fully charged). The port is located on the opposite side from the switch, under a rubber cover. The cover fits pretty well on the SP35T (just like the C8L) – not too too tight, not too loose. I expected waterproofness is reasonable.

There is a reasonable amount of knurling on the light – not super aggressive, but more than most, and certainly enough to help with grip. With the various other design elements and cut-outs, I would say grip is excellent. Thanks to included clip, the light will not roll on its side. Anodizing looks to be good quality for type II, with no damage on my sample. I would describe the finish as matte.

Inside, the light comes with a Sofirn-branded standard-sized 5000mAh 21700 battery, with a slightly raised flat-top. There is a good size spring in the head, ensuring good contact.

This is a solid and well-designed light, with good grip and handfeel. It is a bit longer than most in this class, which is something to keep in mind.


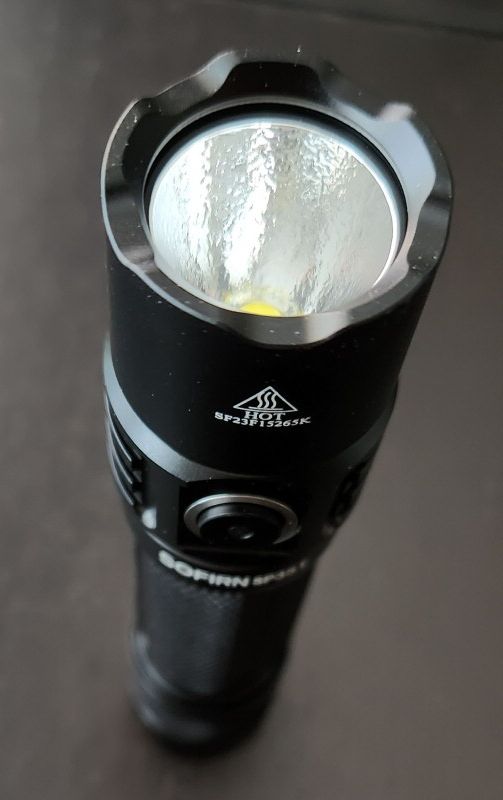
The SP35T comes with a XHP50.2 HD emitter, in cool white tint apparently (I didn’t see any options to select a specific tint). The reflector is fairly shallow and heavily textured (heavy orange peel, HOP). There doesn’t seem to be any kind of anti-reflective coating on the lens.

As expected, there is some tint/colour shifting across the periphery of the beam, with a cool white hotspot surrounded by a yellowish spill except for a purplish shift near the edge of the periphery. This is a well-known issue with HD emitters of the XHP family, especially apparent on the XHP50.2. The heavily textured reflector seems to be help even it out it somewhat – it’s not as pronounced as most that I’ve seen.

The bezel is crenelated black aluminum. Scalloping is not too aggressive, so you can headstand stably.

User Interface

The SP35T has a straightforward user interface, and one that is identical to the Sofirn C8L and Wurkkos TD01. Like many “tactical” lights, you have two sets of possible modes; Mode Group 1 for General use, and Mode Group 2 for Tactical use.

To switch between groups, press-and-hold the side switch for >3 secs when On.

Mode Group 1 (default) available levels: Eco, Low, Medium, High, Turbo, Strobe, SOS, and Beacon.

Mode Group 1, from OFF:

  • Tail switch, partial-press: Momentary On in last memorized mode.
  • Tail switch, single-click: Turns On in last memorized mode.
  • Tail switch, double-press: Turns On in last memorized mode and then jumps to Turbo (click to stay locked-on in Turbo). You have be very rapid on the double-press to jump to Turbo.
  • Side switch, press-and-hold: Nothing – but if you click the tail switch while holding down the side switch, the light will activate in Eco mode.
  • Side switch, single-click: Nothing.

Mode Group 1, from ON:

  • Tail switch, partial-press: Nothing.
  • Tail switch, single-click: Turns Off.
  • Side switch, press-and-hold (3 secs): Switch to Mode Group 2 (see below)
  • Side switch, single-click: Steps up to the next non-Turbo constant output mode (in sequence, Eco > Lo > Med > High).
  • Side switch, double-click: Turbo.
  • Side switch, triple-click: Strobe.
    • Side switch, double-click when in Strobe: Cycle through in sequence Strobe > SOS > Beacon (with no mode memory).

Mode 1, Mode memory:

Yes, for non-Turbo constant output modes.

Mode 1 Shortcuts:

  • Eco mode: Press and hold the side switch while turning on at the tail switch.
  • Turbo mode: Double-click the side switch from On, or double-press the tail switch from Off.

Mode 2 available levels: Medium, Turbo, and Strobe.

Mode 2 functions basically as a stripped-down “tactical” version of Mode 1. The main differences are:

  • Single-click of the side switch from On only selects between Medium and Turbo now.
  • Double-click of the the tail or side switch goes to Strobe instead of Turbo.
  • There is no level memory now.

Otherwise, the two modes function the same way.

Battery indicator:

When first activating the light, the indicator on the side switch shows the battery voltage  (lasts for ~5 secs):

  • Solid green: ~70-100%
  • Flashing green: ~40-70%
  • Solid red: ~10-40%
  • Flashing red: 0-10%

Mode memory:

Yes, in the Mode Group 1 for non-Turbo constant output modes. There is no memory in the Mode Group 2.

Shortcuts:

  • Mode Group 1: Yes, for Eco, Turbo and Strobe (see above).
  • Mode Group 2: Yes, for Eco and Strobe (see above).

Low voltage warning:

Yes, the main light will step down as the battery is running low. It will then turn Off at ~2.95V

Lock-out mode:

Yes, but physically – you lock-out the light by a twist of the tailcap.

Reviewer Comments:

As with the C8L and TD01, I think this is a reasonable dual-mode UI for a tactical light, with a general mode set and a tactical mode set.

The multiple-press functionality of the tactical tailcap switch is a cute feature, if you feel you need a direct shortcut to Turbo from Off. With the firm clicky switch, I found I was able to do this reliably well. But for non-tactical types, I find doing a double-click of the side switch from On even easier.

I prefer General Mode Group, for its general usefulness and versatility. But I suppose “tactical” people will like the lack of mode memory in Tactical Mode Group 2.

Circuit Measures

Pulse-Width Modulation (PWM):

Eco:
Eco

Low:
Lo

Med:
Med

High:
Hi

Turbo:
Turbo

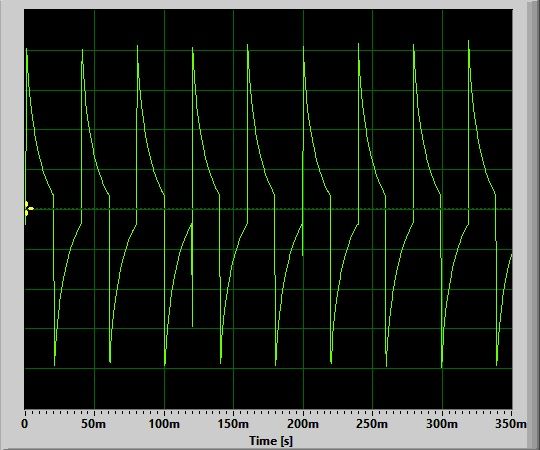
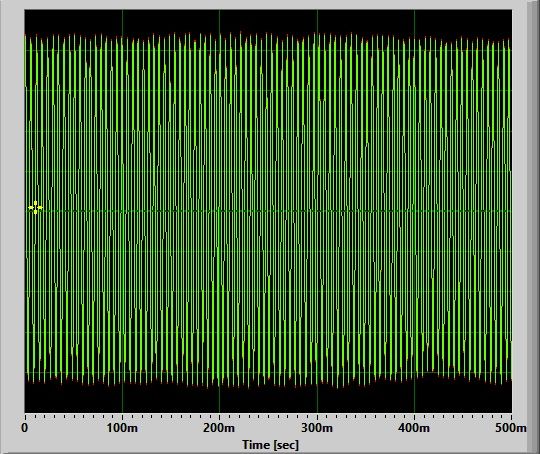
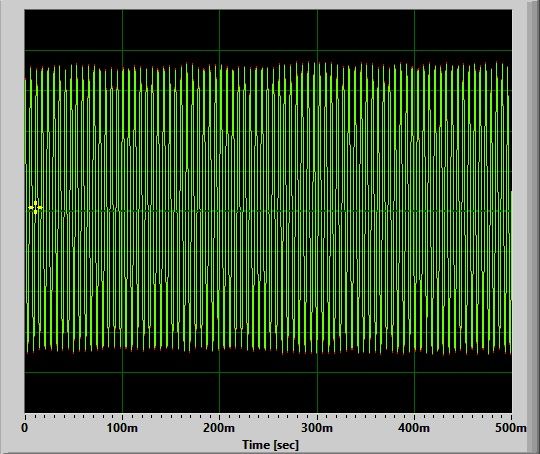
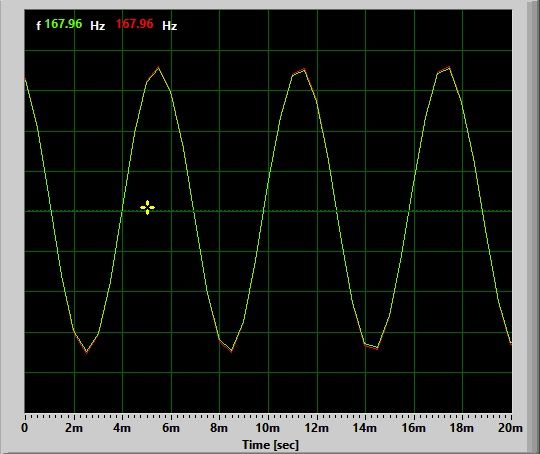
There is low frequency circuit noise on all levels, including Turbo, on the SP35T. It is definitely not PWM (note the simple sine wave below), but is at an an unusually low frequency of 167 Hz according to my soundcard oscilloscope. Shown below on a shorter timescale for the Hi mode.

Turbo

This is certainly different from the C8L, which was completely noise free. Even the TD01, which had circuit noise on all levels except Turbo, was at a more typical high frequency of ~5kHz.

Again, this is not a problem per se, as it was completely undetectable in practice (i.e., I couldn’t even see it when shinning on a fan or running water). But I do find it very unusual, and am not sure what to make of it. Typically, I find this doesn’t bode well for regulation or output/runtime efficiency.

Strobes:

Strobe:


Strobe alternates between 7 Hz and 11 Hz every ~1.5 secs or so. Very distracting.

SOS:

A standard SOS mode, relatively slow.

Beacon:

A single flash beacon once every 2 secs (0.5 Hz).

Charging:

The switch button shows solid red when the light is charging. Changes to solid green when the charging is complete.

Resting voltage <3.0V

Resting voltage >3.0V

The SP35T does not have a two-stage charging feature, as seen on many modern lights (i.e., where there is a lower initial charging rate when the cell is heavily discharged). Mind you, neither does the C8L. The initial charging rate here is ~1.75A, which slowly rose to ~1.85A after a few minutes. I presume it continued to climb from there. This is a pretty high charging rate for the class, and will charge a 21700 cell quickly.

Standby / Parasitic Drain:

None. That is one of the nice things about a physical clicky switch, no standby current. 🙂 And you can always lock-out the light by a twist of the tailcap, to prevent accidental activation.

Emitter Measures

In this section, I directly measure key emitter characteristics in terms of colour temperature, tint, and colour rendition. Please see my Emitter Measures page to learn more about what these terms mean, and how I am measuring them. As tint in particular can shift across levels, I typically stick with the highest stably regulated level for all my reported measures.

As explained on that page, since I am using an inexpensive uncalibrated device, you can only make relative comparisons across my reviews (i.e., don’t take these numbers as absolutely accurate values, but as relatively consistent across lights in my testing).

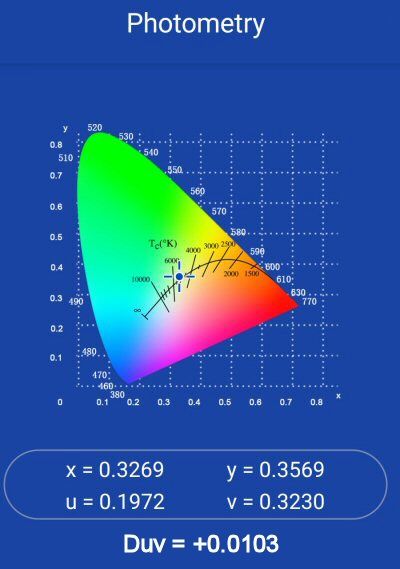
SP35T on Hi:

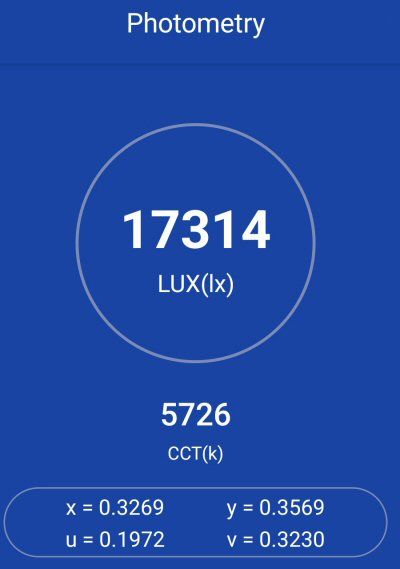
The key measures above are the colour temperature of ~5725K, and a negligible positive tint shift (+0.0103 Duv) to a very slight greenish-yellow at this temperature. For CRI (Ra), I measured a combined score of 58.

These values are consistent with the performance of a cool white XHP50.2 emitter, and match my visual experience of this light. Note that there is a tint shift to more yellowish spill, with purplish spillbeam edge, as is common on XHP50.2 HD emitters.

Beamshots

All outdoor beamshots are taken on my Canon PowerShot S5 IS at f/2.7, 0.5 secs exposure, ISO 400, daylight white balance. The bend in the road is approximately 40 meters (~45 yards) from the camera. Learn more about my outdoor beamshots here (scroll down for the floody light position used in this review).

Click on any thumbnail image below to open a full size image in a new window. You can then easily compare beams by switching between tabs.


As you can see above, the SP35T has a narrower spill than most lights in this class, and somewhat lower output (although to be fair, three of the lights above are XHP70.2 lights). It is a very clean beam though, with little evidence of chromatic/tint aberrations.

Testing Results

My summary tables are generally reported in a manner consistent with the ANSI FL-1 standard for flashlight testing. In addition to the links above, please see my output measures page for more background.

All my output numbers are based on my home-made lightbox setup. As explained on that methodology page, I have devised a method for converting my lightbox relative output values to estimated lumens. Note that my lightbox calibration seems to run higher than most hobbyists today, but I’ve kept it to remain consistent with my earlier reviews (when the calibration standard was first established).

My Peak Intensity/Beam Distance are directly measured with a NIST-certified Extech EA31 lightmeter.

SP35T Testing Results

ModeSpec LumensEstimated Lumens @0secEstimated Lumens @30 secsBeam Intensity @0secBeam Intensity @30secsBeam Distance @30secsPWM/Strobe FreqNoise FreqCharging Current <3VCharging Current >3VParasitic DrainWeight w/o BatteryWeight with BatteryCCT (K)DuvCRI
Eco52.12.1---No164 Hz1.75 A1.85 ANo84 g153 g---
Low1008080---No165 Hz1.75 A1.85 ANo84 g153 g---
Med500385380---No166 Hz1.75 A1.85 ANo84 g153 g---
High1,5001,0501,030---No167 Hz1.75 A1.85 ANo84 g153 g5,7250.010358
Turbo3,8002,9502,85011,200 cd10,400 cd204 mNo168 Hz1.75 A1.85 ANo84 g153 g---
Strobe3,800-----7.0-14.8 Hz168 Hz1.75 A1.85 ANo84 g153 g---
SOS500-----No168 Hz1.75 A1.85 ANo84 g153 g---
Beacon3,800-----2.25 Hz-1.75 A1.85 ANo84 g153 g---

The SP35T clearly has very inflated specs across all its output levels, as measured in my lightbox. It is probably even worse than the numbers above suggest, as I know my lightbox’s relative calibration is generously high for modern high-output lights. This finding is not entirely surprising, since the max output ratings in particular were not realistic for the XHP50.2 emitter.

My NIST-calibrated luxmeter is accurately calibrated to an absolute standard, and similarly reports much lower beam intensity on Turbo (~25-30% less than spec, which is comparable to what my lightbox reports for overall output measures).

To view and download full testing results for all modern lights in my testing, check out my Database page.

Runtimes

As always, my runtimes are done under a small cooling fan, for safety and consistency. To learn more about how to interpret runtime graphs, see my runtimes methodology page.

Med

Hi

Max

According to reports online, the SP35T is supposed to have a buck driver – but I don’t see any evidence of that. Looking at the Med and Hi mode runtimes, it looks like a basic FET driver – and one that performs remarkably similar to the XHP50.2-equipped Wurkkos WK15 that I currently have on hand for testing. I presume these two lights are in fact using the same basic driver. This is a bit disappointing compared to the excellent flat voltage-regulated Wurkkos TS22.

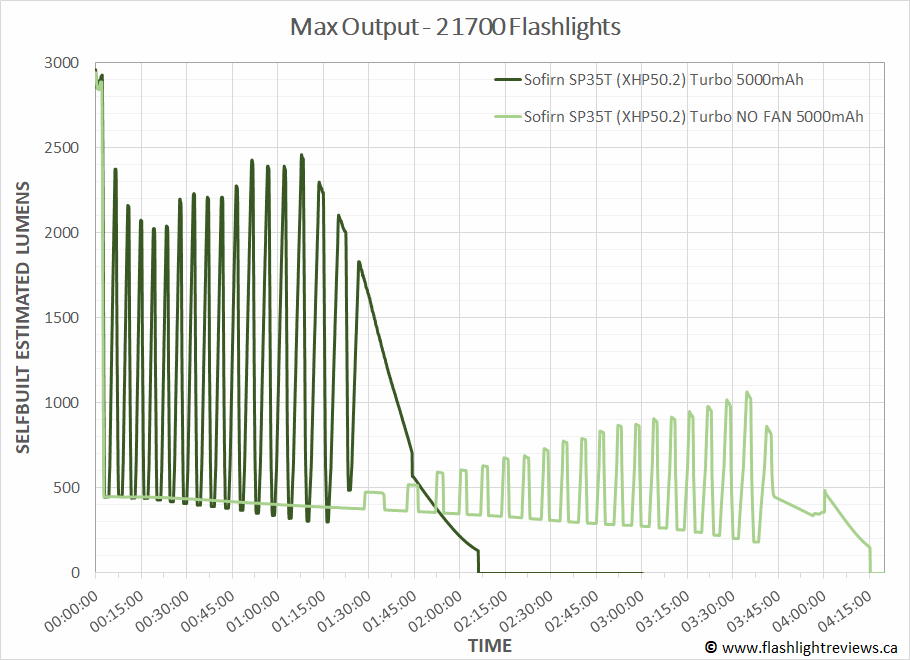
There is one thing that is very different on the SP35T though – the wide oscillations in output on Turbo mode. Presuming this was due to the thermal sensor reacting to my cooling fan, I did a separate test without cooling, as shown in the lighter green above. It is clear that the cooling fan is having a big difference, as the light runs fairly consistently at the much lower level once step-down occurs without cooling. But it is interesting that the oscillations do eventually re-appear later in the run.

To show this more clearly, here are the two Turbo runtimes – with and without cooling – on a longer timeframe:

Max-extended

This is pretty unique in my experience. The step-down from Turbo level is to quite a bit lower level than usual (down to ~450 lumens in my lightbox, just slightly above Med level). Eventually, as the light cools, it starts to step up in output, with widening swings.

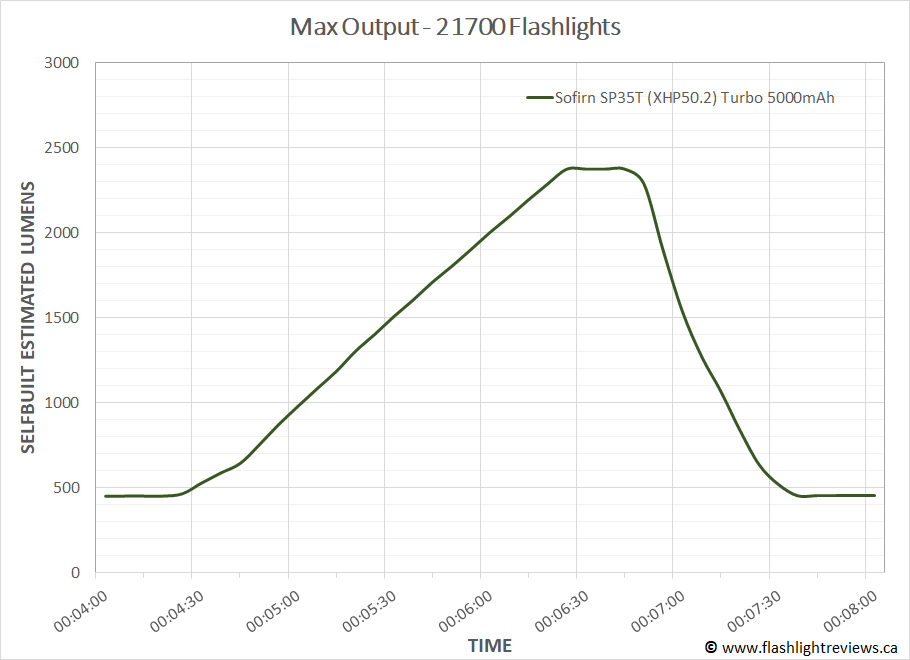
By the way, I know the swings under a cooling fan seem a lot more extreme above, but they are not so noticeable in real life. Below is an expanded runtime, to show you that a typical ramp up and back down under cooling actual takes about 7 mins. Here is how it looks in practice:

In the rising stage, you won’t notice the gradual shift over time, it is that slow. But on the ramp down, you are likely to notice the light is dimming fairly quickly.

All that to say, I think this light would benefit from a less sensitive thermal sensor – and a lower step-down level to start with (i.e., ~450 lumens is very low for a modern light).

Pros and Cons

ProsCons
The light has a solid build, with a tactical forward clicky switch in the tail and a side electronic switch.Circuit is not voltage-regulated, producing a slowly decreasing output instead of flat runtimes.
The light has a serviceable dual mode set user interface, identical to the Sofirn C8L and Wurkkos TD01.The circuit is also noticeably less efficient then other current-controlled lights with flat regulation.
Price is reasonably low.The turbo mode steps down to a much lower level than most lights, and oscillates considerably in output (likely due to a poorly calibrated thermal sensor).
XHP50.2 HD emitters produce well known tint shifts across the beam, with a yellowish spill and purplish spillbeam edge.
Output specifications are clearly very inflated.

Overall Rating

Preliminary Conclusions

The SP35T is certainly a solid light, with a very decent physical build and good user interface. The presence of a forward clicky tactical switch here is great, if you are a fan of that design. The user interface is certainly very serviceable, being identical to the C8L.

But as the pros and cons list above demonstrates, the circuit performance is disappointing here. Sure, it produces a reasonable amount of light for a reasonable amount of time – but its performance just doesn’t compare to the well-regulated and efficient C8L or Wurkkos TS22. But the SP35T doesn’t even compare well to other simple FET driver-based lights – due to the unusually low step-down level on Turbo, and the repeated oscillations back up to higher output as it cools.

Moreover, the rated output specs are way off on this light (as in, at least 25-30% below spec, if not more). Its rare nowadays to see such a large mismatch between published specs and actual performance. Since many make their purchasing decisions based on published specs, this is very disappointing.

The XHP50.2 HD emitter is known for a lot of tint/chromatic variation across its beam, and this example is no different. That said, I do find it a bit better than typical, likely due to the heavily textured reflector here. But to put it simply, I think this light would benefit from both an emitter and circuit upgrade.

At the end of the day, I like the physical build (and forward clicky tail switch). The user interface is also quite serviceable. But the circuit performance is sub-standard compared to Sofirn’s other offerings, and to other lights in this class – both in terms of overall output and output/runtime efficiency. And the odd behaviour on Turbo after step-down needs to be corrected. But it still is a reasonable amount of light for a reasonable amount of time, in absolute terms.

Acknowledgement

The SP35T was supplied by Sofirn for review. As always, all opinions are my own and the light received the same rigourous and objective testing as all other lights that I have reviewed. At the time of review, this light retails for ~$30 USD (~$40 CDN) on sale on the Sofirn website here.

Wurkkos TS30S Pro

The TS30S Pro is a high-output thrower light, running on an included single 21700 battery. It also features the sophisticated Anduril user interface.

  1. Introduction
  2. Manufacturer Specifications
  3. Package Details
  4. Build
  5. User Interface
  6. Circuit Measures
  7. Emitter Measures
  8. Beamshots
  9. Testing Results
  10. Runtimes
  11. Pros and Cons
  12. Overall Rating
  13. Preliminary Conclusions
  14. Acknowledgement

Introduction

The TS30S Pro is a larger light coming out of Wurkkos – a high-output thrower running on 1×21700. Significantly, it features the Luminus SBT90.2, which is a large but low profile emitter. This means you can generate super high output (i.e., >5000 lumens) while still maintaining great throw when coupled with a large, focused reflector. It also runs at 3V, meaning it can work with a basic FET driver – which is consistent with a lot of the budget lights coming from Wurkkos.

This setup means that Wurkkos was also able to easily implement Anduril, the powerful open-source user interface, giving you a lot of options to play with. Keep in mind though that super-high output is going to require a lot of current (and generate a lot of heat), so you should expect fairly rapid thermal step-down (especially with the default conservative temperature settings in Anduril, although these are user-adjustable).

I’ve had a number of requests to review this light, so let’s see how it does in my testing.

Manufacturer Specifications

Note: as always, these are simply what the manufacturer provides – scroll down to see my actual runtimes.

FeatureSpecs
MakerWurkkos
ModelTS30S Pro
EmitterSBT90.2
Tint5700 K
Max Output (Lumens)6,000
Min Output (Lumens)1
Max Runtime40 days
Max Beam Intensity (cd)295,000 cd
Max Beam Distance (m)1086 m
Constant Levels8
Flashing-
Battery1x21700
Weight (w/o battery)-
Weight (with battery)265 g
Length157.2 mm
Head Diameter61 mm
Body Diameter-
WaterproofIP68 <2m

Package Details


Another example of the nice new packaging for the higher-end lights from Wurkkos (and Sofirn, which share a common manufacturing plant). The hard-sided box comes with a lot of printed specs on the sleeve, and a clear separation of items and components inside thanks to the cut-out foam. Inside the box, I found:

  • Wurkkos TS30S Pro flashlight
  • Wurkkos-branded 5000mAh 21700 battery
  • Wrist lanyard
  • USB-C charging cable
  • 2 Spare O-rings
  • Manual

It’s a decent package for a “budget” build, but I would like to see a holster included. FYI, none of inexpensive holsters that Wurkkos sells fit this light – it’s too large for any of their current offerings.

Build


From left to right: LiitoKala 21700 (5000mAh), Acebeam 21700 USB-C (5100mAh), Lumintop D3, Convoy M21F, Sofirn C8L, Wurkkos TS30S Pro, Wurkkos TD01, Acebeam L19 V2.0, Acebeam P17.


The Wurkkos TS30S Pro is a substantial light for this class, with an exceptionally large head (thanks to a large deep reflector). It does make the light somewhat top-heavy, but not unreasonably so. It is definitely a higher-end “budget” light – keep in mind that over half the cost of the light comes from the emitter alone.

The light is controlled by an electronic side switch in the head, with a rubberized cover. Feel and traverse of the electronic switch is actually a bit better than most Wurkkos and Sofirn lights, which typically have a hard cover that has a bit too much play. There are multi-colour RGB LEDs under the switch. Although set to off by default, you can configure them to light up different colours when a battery is connected (which can make for a great coloured “moonlight” mode). See the user interface section below for more information. There is also a separate set of orange LEDs under the switch to show the charge status (scroll down to the Charging Section for more info).

There are two slightly raised tailcap guards that can serve as the lanyard attachment point. The light is able to tailstand fairly stably (although it is top-heavy).

Tailcap threads are square-cut and anodized, with good feel. I always recommend you keep a light stored locked out when not in use. Thanks to the anodized tailcap threads, you can do this easily on the TS30S Pro by a simple twist of the tailcap.

The side switch flashes orange when charging the battery through the light’s USB-C charging port (solid orange when fully charged). The port is located on the opposite side from the switch, under a rubber cover. The cover fits pretty well – not too too tight, not too loose – just like my recent TD01. I expected waterproofness is reasonable.

There is no actual knurling on the light, but large raised concentric rings around the body tube help with grip (pattern is similar to the TD01, but with greater thickness to the horizontal cutouts). When combined with the head and tailcap ridge detail, I would say overall grip is pretty good. Note that the light can roll fairly easily, although there are some mild cut-outs on the head to help reduce this. Anodizing looks to be good quality for type II, with no damage on my sample. I would describe the finish as satin.

Inside, the light comes with a Wurkkos-branded standard-sized 5000mAh 21700 battery, with a slightly raised flat-top. There is a a slightly raised contact point in the head, so flat-top cells should work just fine.


The TS30S Pro has a large and deep reflector, to help ensure excellent throw with the low-profile SBT90.2 emitter.

The bezel is stainless steel (dull finish) with mild crenelations – not too aggressive, so you can headstand stably. There is a mild purplish anti-reflective (AR) coating on the lens.

Here are a couple of white wall beamshots, to give you an idea of how focused it is:


It’s hard to see above, but there are quite a few “daisy flower-like” artifacts in the corona around the hospot. If you look closely you’ll notice the corona is a bit irregular (i.e., stretches out more to the left and top). This is clearly visible on a white wall, but they are not at all noticeable in real life (scroll down for outdoor beamshots).

As mentioned above, in addition to the amber charging indicator LED under the switch, there are also RGB LEDs. This is fully programmable with the Anduril user interface (described below), allowing you to control the presence, intensity and colour of the optional standby indicator under the switch. This is more than just a cute novelty feature – effectively, it gives you a coloured Moonlight mode if you turn it on (i.e., you can “activate” this Moonlight mode by using the tailcap as a twisty, making or breaking battery contact).

Here is a video of the “Rainbow” indicator switch mode, where it continuously cycles through all the possible switch colours slowly. You can similarly select any of the colours shown as your constant switch indicator (scroll down for a description of the UI controls).

User Interface

The TS30S Pro uses the open-source Anduril 2 user interface (UI). Anduril has two distinct UIs mode sets: Simple and Advanced. The labels are a bit misleading, as both are fairly sophisticated – it is just that the Advanced UI has a lot of extra options not available on the scaled-down Simple UI. Advanced UI also has an option for a discrete Stepped level mode, in addition to the continuously-variable smooth Ramping mode (which is the only mode present on the Simple UI).

To switch from the default Simple UI to Advanced UI, you need to do 10 clicks from Off with a hold on the 10th click (10H), with 10 clicks (10C) to return to Simple UI. Advanced UI has a lot more options available. It’s easier to show the UIs rather than explain them in words, so here is a helpful pic:

ui-diagram

You can also download a plain text-based manual from Anduril creator Toykeeper, or a more interactive one with version control here.

This implementation of Anduril 2 has eight discrete Stepped levels, which I’ve numbered in this review according to Wurkkos preference (H1 through H8, with H1 being the lowest level, and H8 being Turbo).

According to the firmware Version Check, my TS30S sample has model 0715. Full info is 2022-07-25-07-15 (version code is Year-Month-Day the firmware was compiled, followed by a 2-digit brand ID and 2-digit product ID). According to Selene (Toymaker), the TS30S Pro comes with either model 0715 (which was built for the TS25) or model 0716 (built for the FC13). Both of which work fine, but the model 0716 has improved RGB switch functionality, such as indicating battery voltage during use as well as when off.

Again, check the image and link above for more info, but here is a simplified description of the UI to get you started.

From OFF:

  • Press-and-hold (1H): Turns On in lowest output, in either Ramping mode or Stepped mode depending on which mode is enabled (and which UI you are in)
  • Single-click (1C): Turns on in last memorized mode used (Ramping or Stepped)
  • Double-click (2C): Turns on to Turbo (aka the Ramping max output)
  • Triple-click (3C): Battery check (voltage read out a single time) and basic flashing/strobe modes.
  • Triple-click-and-hold (3H): Special strobe modes, but only when in Advanced UI (remembers last strobe mode used)
  • 4 clicks (4C): Lockout mode. In lockout mode you have different options available:
    • Press-and-hold (1H): Momentary Moonlight
    • Double-click-and-hold (2H): Momentary Low
    • 4 clicks (4C): Turns On in memorized output level
    • 4 clicks and hold (4H): Turns On in the lowest level
    • 5 clicks (5C): Turns On in Turbo
    • 10 clicks and hold (10H): Configure the lock timeout threshold (in Advanced UI only), allowing you to pre-set the timeout time of the lock.
  • 7 clicks (7C): (Advanced UI only) Enters AUX/Button LED config for the next mode. There are four modes you can switch between; constant low, blinking low, off, constant hi. Click 7 times again to advance to the next option, in sequence. The light auto-memorizes the last option you select.
  • 7 clicks-and-hold (7H): (Advanced UI only) Enters AUX/Button LED config for the next colour. The colours follow the sequence: Red, Yellow (Red+Green), Green, Cyan (Green+Blue), Blue, Purple (Blue+Red), White (Red+Green+Blue), Disco (fast random colors), Rainbow (cycles through all colors in order more slowly). See the video in the section above for what Rainbow looks like.

From ON:

  • Press-and-hold (1H): Ramps up (or Steps up, depending on the mode). Ramps/steps down if you do it again.
  • Single-click (1C): Turns Off
  • Double-click (2C): Jumps to Turbo
  • Double-click-and-hold (2H): Ramps down (or Steps down)
  • Triple-click (3C): Switch between Ramping and Stepped modes
  • 4 clicks (4C): Lockout mode (see above for options)

Mode memory:

Yes, the circuit memorizes the last constant On output level in either Ramping or Stepped modes.

Strobe/Blinking modes:

Yes, quite a few actually. The strobe/blinking modes are accessible from Off with a triple-click (3C) or triple-click-and-hold (3H), but in Advanced UI only. You can switch between strobe/blinking modes with 2 clicks (2C), in the following sequence (see testing results below to see what these look like):

Triple-click (3C):

  • Battery check
  • Temperature check
  • Beacon mode
  • SOS mode

Triple-click-and hold (3H):

  • Candle mode
  • Bike flasher mode
  • Party strobe mode
  • Tactical strobe mode
  • Lightning mode

Low voltage warning:

Sort of. In operation, the light drops in brightness in steps, and runs for an extended time at a very low level. Apparently it shuts off when the cell is ~2.8V (although I haven’t run it that long to confirm).

Lock-out mode:

Yes. In either Simple UI or Advanced UI, lockout is accessed by 4 clicks (4C) from On or Off (repeat to unlock). The lockout mode is unusual with Anduril, as it actually enables momentary operation in the minimum modes. There are other lockout modes available, as explained above. As always though, I recommend you physically lock out at the light at the tailcap, if you want to guarantee no accidental activation.

Temperature check and thermal calibration mode:

This is a little complicated (and beyond the needs of most users), so I will just refer you to the diagram from the manual above. With default settings, I find this light steps down fairly quickly due to heat (unsurprising, given default Anduril settings are conservative). I have not tried to reconfigure my sample. Note that if you get into any trouble (or wish to reset any custom configurations), you can easily reset the light to the factory defaults by 13 clicks-and-hold (13H).

Powerbank Feature:

The TS30S Pro can serve as a power bank, allowing you to charge other devices (like a cell phone) directly from the light. Simply plug a device into the USB-C port. As you can see above, it can easily charge my phone at ~1.6A, which is a fast charging rate.

Reviewer Comments:

Anduril is a sophisticated setup – a choice of Simple or Advanced UI, Stepped and Ramping modes, etc. Of course, you will never please everyone, and many may prefer a simpler interface (e.g., the Wurkkos TS22 or TD01). Like many flashaholics, I enjoy many of the extra customization items Anduril provides (especially with the switch RGB LED). Some of the features are really novelties though (e.g., candle mode and lightning storm are particularly well done, but when would you practically ever use them other than as a party trick?).

Circuit Measures

Pulse-Width Modulation (PWM):

There is no sign of PWM on any level, the circuit appears to be fully current-controlled.

That being said, my oscilloscope was able to detect high frequency noise at all levels except max and min outputs, as depicted below.

H1:
L1

H2:
L2

H3:
L3L3

H4:
L4

H5:
L5

H6:
L6

H7:
L7

H8:
L8

Like on other lights running off simple FET drivers (e.g., Sofirn IF25A) there is high-frequency noise of ~5 kHz on non-Turbo levels. This is sufficiently high as to be completely undetectable visually, and is not a concern – the light remains flicker free in actual use.

Strobe Modes:

Note that for most of the strobe / flashing modes below, the actual frequency and intensity are both configurable. What I am showing below is the default speed and/or brightness setting. By pressing and holding the switch (1H or 2H) you can select the frequency – and in some cases, brightness is set from the last-used ramp level.

Beacon:
Beacon

Beacon strobe is a single flash every ~2.25 secs (so, 0.45 Hz) by default.

SOS:
SOS

A fairly typical SOS mode.

Candle:
Candle

Candle strobe is a continuous flicker, of varying intensity (again, accurately simulating a candle).

Bike Strobe:
Bike

Bike strobe is a bit unusual. It is constant On at a lower level, with four brief flashes to max (over ~0.25 secs) every ~1.1 secs or so by default. It certainly is an attention grabber.

Party Strobe:
Party

Party strobe is a super-fast (and annoying) frequency of ~20 Hz by default.
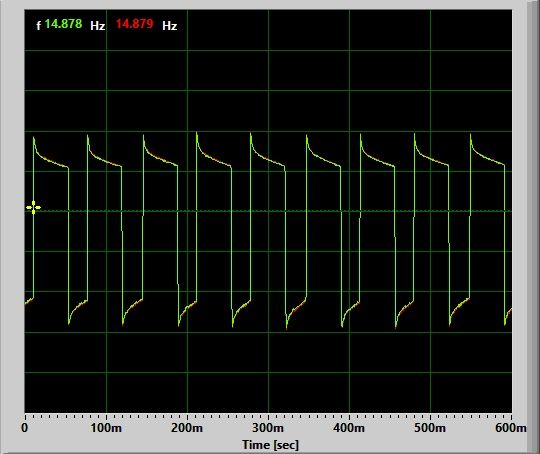
Tactical Strobe:
Tactical
Tactical
Tactical strobe is basically ~9 Hz. Interestingly, it doesn’t stay completely stable on my TS30S Pro, but fluctuates from ~8.5 Hz to ~9 Hz over time. Either way, it is configurable.

Lightning Strobe:
Lightning
Lightning
Lightning
Lightning

I’ve shown four consecutive 10-sec cycles above, so you can a feel for the frequency and intensity of light flashes. Lightning strobe is a fairly realistic lightning simulation, with variable intensity and time between flashes.

Charging:

The switch button flashes orange the light is charging. Changes to solid orange when the charging is complete. Note the orange LEDs are separate from the user-selectable “AUX” RGB emitters under the switch.

Resting voltage <3.0V

Resting voltage >3.0V

The TS30S Pro has a two-stage charging feature, as seen on many modern lights where there is a lower initial charging rate when the cell is heavily discharged. The initial charging rate is 0.17A, which jumps to 2.0A once the cell exceeds 3.0 resting volts. These rates are good for a 21700 cell.

Note that you need to have a good charging adapter and cables to reliably supply the 2A current. I found that if anything else was connected to same USB-AC power adapter concurrently, the TS30S Pro’s switch LED would eventually start to flash rapidly (as some sort of error signal, it seems) – with the current repeatedly dropping to zero. The same would happen sometimes when using multi-pronged charging cables (i.e., those USB cables with multiple heads). Removing any the other devices and using a single dedicated cable resolved the problem.

Charging terminated at ~4.20V on my sample.

Standby / Parasitic Drain:

With the switch LED set to off, I measured the standby drain for the electronic switch as fluctuating evenly between 102uA and 148uA (so, ~125uA on average). For a 5000mAh cell, that would translate into over 4.5 years before the cell would be fully drained – which is quite low. Regardless, I recommend you store the light locked out at the tailcap when not in use (which disables the standby drain).

Emitter Measures

In this section, I directly measure key emitter characteristics in terms of colour temperature, tint, and colour rendition. Please see my Emitter Measures page to learn more about what these terms mean, and how I am measuring them. As tint in particular can shift across levels, I typically stick with the highest stably regulated level for all my reported measures.

As explained on that page, since I am using an inexpensive uncalibrated device, you can only make relative comparisons across my reviews (i.e., don’t take these numbers as absolutely accurate values, but as relatively consistent across lights in my testing).

TS30S Pro on L6:

The key measures above are the colour temperature of ~5060K, and a noticeably positive tint shift (+0.0149 Duv) to greenish-yellow at this temperature. For CRI (Ra), I measured a combined score of 64.

This is my first SBT90.2 emitter, but these values are not inconsistent with other rated 5700K XHP-class emitters I’ve tested.

Beamshots

All long-distance outdoor beamshots are taken on my Canon PowerShot S5 IS at f/2.7, 1 sec exposure, ISO 400, daylight white balance. The tree at the centre of the hotspot is approximately 90 meters (~100 yards) from the camera. Note the road dips down and turns away in the distance, out of the camera’s sight line. Learn more about my outdoor beamshot locations here.

Click on any thumbnail image below to open a full size image in a new window. You can then easily compare the overall beams by switching between tabs.


To help illustrate the hotspots better, I’ve also cropped the raw pictures around the centre of the frame. As before, click on any thumbnail below to open a full size image in a new window.


As you can see above, the TS30S Pro puts out a ton of light, while still having excellent throw (i.e., hotspot intensity is roughly on par with the TD01).

Testing Results

My summary tables are generally reported in a manner consistent with the ANSI FL-1 standard for flashlight testing. In addition to the links above, please see my output measures page for more background.

All my output numbers are based on my home-made lightbox setup. As explained on that methodology page, I have devised a method for converting my lightbox relative output values to estimated lumens. Note that my lightbox calibration seems to run higher than most hobbyists today, but I’ve kept it to remain consistent with my earlier reviews (when the base calibration standard was first established).

My Peak Intensity/Beam Distance are directly measured with a NIST-certified Extech EA31 lightmeter.

TS30S Pro Testing Results

ModeSpec LumensEstimated Lumens @0secEstimated Lumens @30 secsBeam Intensity @0secBeam Intensity @30secsBeam Distance @30secsPWM/Strobe FreqNoise FreqCharging Current <3VCharging Current >3VParasitic DrainWeight w/o BatteryWeight with BatteryCCT (K)DuvCRI
Smooth Ramp Min-0.0050.005----5,010 Hz0.17 A2.0 A125 uA260 g328 g---
H110.220.22----5,010 Hz0.17 A2.0 A125 uA260 g328 g---
H253.33.3----5,010 Hz0.17 A2.0 A125 uA260 g328 g---
H3151818----5,010 Hz0.17 A2.0 A125 uA260 g328 g---
H4455252----5,010 Hz0.17 A2.0 A125 uA260 g328 g---
H5110150150----5,010 Hz0.17 A2.0 A125 uA260 g328 g---
H6480470460----4,992 Hz0.17 A2.0 A125 uA260 g328 g5,0600.014962
H71,7001,6001,550----4,979 Hz0.17 A2.0 A125 uA260 g328 g---
H86,0005,5505,200253,000 cd233,000 cd965 m-No0.17 A2.0 A125 uA260 g328 g---
Candle--------0.17 A2.0 A125 uA260 g328 g---
Bike Strobe------0.9 Hz-0.17 A2.0 A125 uA260 g328 g---
Party Strobe------20 Hz-0.17 A2.0 A125 uA260 g328 g---
Tactical Strobe------9 Hz-0.17 A2.0 A125 uA260 g328 g---
Lightning--------0.17 A2.0 A125 uA260 g328 g---
Beacon------2.63 Hz-0.17 A2.0 A125 uA260 g328 g---
SOS-------5,010 Hz0.17 A2.0 A125 uA260 g328 g---

Like the TD01 that I recently reviewed, this light seems to have somewhat inflated specs on its highest levels. It is probably even worse than the numbers above suggest, as I know my lightbox’s relative calibration is generously high for modern high-output lights.

My NIST-calibrated luxmeter similarly shows ~10% lower throw than the specs. But this is still an incredibly bright and far-throwing flashlight.

As an aside, I’ve very impressed with how low the light can go in the Smooth Ramping output level set. This is one of the lowest levels I’ve seen yet for a modern light. Note that this likely reflects the presence of a simple linear FET driver, as a boost driver would have reduced dynamic range (and a higher minimum). Scroll down to output/runtimes for confirmation.

To view and download full testing results for all modern lights in my testing, check out my Database page.

Runtimes

As always, my runtimes are done under a small cooling fan, for safety and consistency. To learn more about how to interpret runtime graphs, see my runtimes methodology page.

Max

Hi

Med

For all its larger build and higher-end emitter, it is clear Wurkos is still using a basic FET driver on this light (i.e., something similar to the Anduril-equipped Sofirn IF25A and Lumintop D3 lights). This means you also won’t see any flat voltage-regulated output patterns on the TS30S Pro. It also means the step-down level from max is relatively low (i.e., drops to ~600 lumens and slowly recovers up to ~1300 lumens over the next hour).

At least the output/runtime efficiency of the SBT90.2 is a little higher than the D3’s SFN55.2 and IF25A’s 4xSST20 emitters. That said, overall output/runtime efficiency is definitelty lower than the fully flat-regulated TS22 and Convoy M21F, in comparison.

Although the higher thermal mass here means it won’t step-down quite as quickly on the highest output level (H8), you can also see that the TS30S Pro step-down is pretty steep once it begins. To better show this initial step-down pattern, below is an expanded view of first few minutes of those runtimes.

Max-extended

I’ve thrown in an additional run above for the max of the Ramping mode, showing that this is identical the max of the Stepped modes.

And here is comparison of the all the levels I’ve tested, and a clearer time-scale resolution:Max-extended

I haven’t tried adjusting the thermal management settings (these are configurable with Anduril), but you should be able to extend the runtime before step-down slightly (at the expense of greater heat, of course).

Pros and Cons

ProsCons
Super high output and throw, thanks to the SBT90 emitter and large reflectorr.Light doesn't meet the stated max specifications.
Good implementation of the sophisticated Anduril 2.0 user interface.Lacks flat voltage-regulation, and shows instead a somewhat "noisy" gradual direct-drive-like runtime appearance.
Solid build quality, with good fit and finish. Switch performance is particularly good for the budget class.Light steps down rapidly on highest level to a relatively low output.
Rapid USB-C charging and powerbank function.Some beam artifacts, especially in the corona.
Very affordable option for a high-output thrower light.Anduril interface can be intimidating.
Lacks a holster or other carry option.

Overall Rating

Preliminary Conclusions

I’m actually reasonably impressed with this model – it delivers an extraordinary amount of output and throw, with a good implementation of the Anduril user interface. Physically, the light feels very solid with good ergonomics (if understandably a bit top-heavy). And I like the feel of the rubberized switch cover, which I find superior to the typical Wurkkos hard button cover. I also like the RGB LED under the switch (in addition to the amber charging LED), as this gives you plenty of configuration options – and an impromptu “coloured Moonlight” mode option to boot. I don’t factor price into my rating system, but it is amazing to me that your can get a SBT90 emitter with all the features of this light for only ~$75 USD (i.e., the emitter alone is more than half that total cost).

That said, there are some missed opportunities here to make this a truly outstanding light. The most significant is the circuit – this light has the same basic FET driver that you see on many inexpensive Anduril lights, with a somewhat noisy and non-voltage-regulated runtime pattern. Overall output/runtime efficiency is somewhat better with the SBT90 than with lower-output emitters I’ve tested with this circuit, but it doesn’t compare to the fully regulated circuits that I’ve seen on the TS22 (and many other lights). This simple circuit is fundamentally why this light tops out at 4 stars in my view.

Physically, this light is pretty impressive for the price, but it would benefit from some refinements. One example is the reflector – while it throws remarkably well, there are a number of “daisy flower” like artifacts in the corona surrounding the hotspot (but that’s only noticeable on a white wall). Another area is thermal management. Like with many Anduril lights, the light steps down quickly from its highest modes due to heat. With a better heatsink in such a substantial build, you should have been able to extend that higher output runtime.

But thanks to the sophistication of Anduril, there is a lot you can do to customize the experience of this light. The rapid USB-C fast charging and powerbank functionality are also nice to see. I think its fair to give this light 4 stars given all that you do get here.

Acknowledgement

The TS30S Pro was supplied by Wurkkos for review. As always, all opinions are my own and the light received the same rigourous and objective testing as all other lights that I have reviewed. At the time of review, this light retails for ~$75 USD (~$100 CDN) with typical discounts on their website here.

Wurkkos TD01

The TD01 is a budget tactical flashlight featuring a TIR lens for maximum throw with minimal spill. Powered by a single included 21700 battery, with both tactical and general user interface options.

  1. Introduction
  2. Manufacturer Specifications
  3. Package Details
  4. Build
  5. User Interface
  6. Circuit Measures
  7. Emitter Measures
  8. Beamshots
  9. Testing Results
  10. Runtimes
  11. Pros and Cons
  12. Overall Rating
  13. Preliminary Conclusions
  14. Acknowledgement

Introduction

The TD01 is a new tactical/hunting-style flashlight from Wurrkos. Featuring the low-profile Luminus SFT40 coupled with a large focused TIR, this 1×21700 flashlight is clearly designed to be a dedicated thrower. I was certainly impressed with the compact TS22 from Wurkkos, so am happy review this larger thower model.

Physically, the light is still fairly compact for having such a large head. There is also a tailcap forward clicky switch, coupled with an electronic side switch in the head. This design is very reminiscent of the reflectored Sofirn C8L – a comparison which, as we will see, runs more than skin deep.

Let’s see how it compares in my testing.

Manufacturer Specifications

Note: as always, these are simply what the manufacturer provides – scroll down to see my actual runtimes.

FeatureSpecs
MakerWurkkos
ModelTD01
EmitterSFT40
Tint6000 - 6500 K
Max Output (Lumens)2,200
Min Output (Lumens)30
Max Runtime70 hours
Max Beam Intensity (cd)270,000 cd
Max Beam Distance (m)1039 m
Constant Levels5
FlashingStrobe, SOS, Beacon
Battery1x21700
Weight (w/o battery)
Weight (with battery)200 g
Length152 mm
Head Diameter59 mm
Body Diameter-
WaterproofIPX-8

Package Details


I really like the packaging of the higher-end lights from Wurkkos (and Sofirn, which share a common manufacturing plant). The hard-sided box comes with a lot of printed specs on the sleeve, and a clear separation of items and components inside thanks to the cut-out foam. Inside the box, I found:

  • Wurkkos TD01 flashlight
  • Wurkkos-branded 5000mAh 21700 battery
  • Wrist lanyard
  • USB-C charging cable
  • 2 Spare O-rings
  • Manual

It’s a decent package for a “budget” build, but I would really like to see a holster included. These form factor lights tend not to fit well into after-market holsters.

Build


From left to right: LiitoKala 21700 (5000mAh), Acebeam 21700 USB-C (5100mAh), Lumintop D3, Convoy M21F, Sofirn C8L, Wurkkos TS30S Pro, Wurkkos TD01, Acebeam L19 V2.0, Acebeam P17.


The Wurkkos TD01 immediately reminds me a lot of the Sofirn C8L in its overall build and feel. This is not surprising, since these lights come off the same manufacturing production line. I will get into the specifics below, but it is a solid build overall, with good handfeel. I would rate it as above average quality for a budget light, but lacking some of the nicer touches of a true top-of-the-line light. And while substantial in overall dimensions and weight, it is still pocket-able to some degree (i.e., with the head protruding out).

Like the C8L, there is a physical forward clicky switch in the tailcap, used for the turning the light on/off. However, switch feel is not as good on this particular sample – I find it too “soft and squishy” (i.e., you need to press more than expected to activate in momentary mode, and it’s too easy to then accidentally click). This makes momentary or a double-press (required to jump to Turbo from Off) tricky to do consistently. See the user interface section below for more information.

There are two raised tailcap guards that can serve as the lanyard attachment point. However, unlike the C8L (which had exact same arrangement), my TD01 is not able to tailstand at all – the tactical switch protrudes too far, beyond the switch guard rails. This is a missed opportunity on this model (or at least, this sample).

Tailcap threads are square-cut and anodized, with good feel. I always recommend you keep a light stored locked out when not in use. Thanks to the anodized tailcap threads, you can do this easily on the TD01 by a simple twist of the tailcap.

There is a raised side-mounted electronic switch on the side of the head, with red and green LEDs underneath to show charge status. Feel and traverse of the electronic switch is very similar to a lot of Wurkkos and Sofirn lights – it’s ok, but could be a bit tighter/firmer (i.e., hard switch covers always have some degree of play).

The side switch shines a bright red when charging the battery through the light’s USB-C charging port (green when fully charged). The port is located on the opposite side from the switch, under a rubber cover. The cover fits pretty well on the TD01 (just like the C8L) – not too too tight, not too loose. I expected waterproofness is reasonable.

There is no actual knurling on the light, but large raised concentric rings around the body tube help with grip (pattern is virtually identical to the Wurkkos TS22). When combined with the head and tailcap ridge detail, I would say overall grip is pretty good. Note that the light can roll away completely unfettered when on its side – the head has a completely smooth round edge, and lacks any cut-outs of any kind (even the C8L had some gentle ones, to help reduce roll a little). I recommend you stand it upright on its head when not in use. Anodizing looks to be good quality for type II, with no damage on my sample. I would describe the finish as satin.

Inside, the light comes with a Wurkkos-branded standard-sized 5000mAh 21700 battery, with a slightly raised flat-top. There is a good size spring in the head, ensuring good contact (always a good idea for a “tactical” light).

As with all things, it comes down to your expectations. The TD01’s build is a very good approximation of a quality tactical light, but it does have a number of small issues and inconsistencies that add up (and reflect its budget status).


The TD01 uses a very distinctive large TIR optic looks a lot like the Acebeam L19, except with a thicker centre “column.” I’ve taken pics from a lot of angles above, so you can see how it generally obscures the emitter (except in the second shot above). The low-profile SFT40 is ideal for producing a very focused beam, which the TD01 does very well.

The bezel is crenelated black aluminum – not too aggressive, so you can headstand stably. Note that some of the promotional material seems to suggest the light has a stainless steel strike bezel – it doesn’t, just this low profile aluminum bezel (again, in keeping with its budget nature). There doesn’t seem to be any kind of anti-reflective coating on the lens.

Here are a couple of white wall beamshots, to give you an idea of how focused it is:


I’ve included the white wall beamshots above to highlight a single bright ring that is visible in the mid-distance around the hotspot. Note that in real life the hotpot is much smaller than it appears above (the camera settings are over-saturating the hotspot intensity). But I’ve chosen these settings to better show you the ring. Rest assured, the ring is not that distracting in real life, but it is present (scroll down for outdoor beamshots).

User Interface

The TD01 has a user interface that is identical to the Sofirn C8L, again reflecting their shared heritage. Like many “tactical” lights, you have two sets of possible modes; Mode Group 1 for General use, and Mode Group 2 for Tactical use.

To switch between groups, press-and-hold the side switch for >3 secs when On.

Mode Group 1 (default) available levels: Eco, Low, Medium, High, Turbo, Strobe, SOS, and Beacon.

Mode Group 1, from OFF:

  • Tail switch, partial-press: Momentary On in last memorized mode.
  • Tail switch, single-click: Turns On in last memorized mode.
  • Tail switch, double-press: Turns On in last memorized mode and then jumps to Turbo (click to stay locked-on in Turbo). You have be very rapid on the double-press to jump to Turbo.
  • Side switch, press-and-hold: Nothing – but if you click the tail switch while holding down the side switch, the light will activate in Eco mode.
  • Side switch, single-click: Nothing.

Mode Group 1, from ON:

  • Tail switch, partial-press: Nothing.
  • Tail switch, single-click: Turns Off.
  • Side switch, press-and-hold (3 secs): Switch to Mode Group 2 (see below)
  • Side switch, single-click: Steps up to the next non-Turbo constant output mode (in sequence, Eco > Lo > Med > High).
  • Side switch, double-click: Turbo.
  • Side switch, triple-click: Strobe.
    • Side switch, double-click when in Strobe: Cycle through in sequence Strobe > SOS > Beacon (with no mode memory).

Mode 1, Mode memory:

Yes, for non-Turbo constant output modes.

Mode 1 Shortcuts:

  • Eco mode: Press and hold the side switch while turning on at the tail switch.
  • Turbo mode: Double-click the side switch from On, or double-press the tail switch from Off.

Mode 2 available levels: Medium, Turbo, and Strobe.

Mode 2 functions basically as a stripped-down “tactical” version of Mode 1. The main differences are:

  • Single-click of the side switch from On only selects between Medium and Turbo now.
  • Double-click of the the tail or side switch goes to Strobe instead of Turbo.
  • There is no level memory now.

Otherwise, the two modes function the same way.

Battery indicator:

When first activating the light, the indicator on the side switch shows the battery voltage  (lasts for ~5 secs):

  • Solid green: ~70-100%
  • Flashing green: ~40-70%
  • Solid red: ~10-40%
  • Flashing red: 0-10%

Mode memory:

Yes, in the Mode Group 1 for non-Turbo constant output modes. There is no memory in the Mode Group 2.

Shortcuts:

  • Mode Group 1: Yes, for Eco, Turbo and Strobe (see above).
  • Mode Group 2: Yes, for Eco and Strobe (see above).

Low voltage warning:

Yes, the main light will step down as the battery is running low. It will then turn Off at ~2.95V

Lock-out mode:

Yes, but physically – you lock-out the light by a twist of the tailcap.

Reviewer Comments:

As with the build, I think this is a reasonable dual-mode UI for a tactical light, with a general mode set and a tactical mode set.

One thing I’m not crazy about is the multiple-press functionality of the tactical tailcap switch. I didn’t really find this as much of an issue on the C8L, but my TD01’s switch is noticeably softer. This made it harder to consistently double-click the tailcap (i.e., soft-press, then press-and-click rapidly). But in any case, this level switching feature at the tailcap is completely unnecessary on the C8L/TD01 anyway, as you always have the electronic side switch in the head to control output levels (including accessing Turbo).

On the whole, I personally prefer General Mode Group 1, for its versatility. I suppose “tactical” people will like the lack of mode memory in Tactical Mode Group 2.

Circuit Measures

Pulse-Width Modulation (PWM):

Eco:
Eco

Low:
Lo

Mid:
Mid

High:
Hi

Turbo:
Turbo

There is high frequency circuit noise on all levels except Turbo on the TD01, at a visually undetectable constant frequency of 19.9 kHz. This is different from the C8L, which was completely noise free. As is often the case, this constant circuit noise increases in amplitude with output level. It is definitely not PWM, although it has a bimodal distribution (i.e., there is a secondary harmonic of rising/cresting waves at ~5 kHz), as shown in the expanded view of the High mode below

Turbo

Again, this is not a problem per se, as you won’t be able to see any of the above in use. But from long experience, I find this doesn’t bode well when it comes to overall circuit regulation and efficiency (scroll down for runtimes).

Strobes:

Strobe:


Strobe alternates between 8 Hz and 14 Hz every 2 secs or so. Very distracting.

SOS:

A standard SOS mode, relatively slow.

Beacon:

A single flash beacon once every 2 secs (0.5 Hz).

Charging:

The switch button shows solid red when the light is charging. Changes to solid green when the charging is complete.

Resting voltage <3.0V

Resting voltage >3.0V

The TD01 has a two-stage charging feature, as seen on many modern lights (although oddly, not its sister light the C8L) where there is a lower initial charging rate when the cell is heavily discharged. The initial charging rate is ~0.25A, which jumps to ~1.55A once the cell exceeds 3.0V resting. These rates are good for a 21700 cell. Charging terminated at ~4.19V on my sample. This is probably the first example where the TD01 has a slight advantage over the C8L.

Standby / Parasitic Drain:

None. That is one of the nice things about a physical clicky switch, no standby current. 🙂 And you can always lock-out the light by a twist of the tailcap, to prevent accidental activation.

Emitter Measures

In this section, I directly measure key emitter characteristics in terms of colour temperature, tint, and colour rendition. Please see my Emitter Measures page to learn more about what these terms mean, and how I am measuring them. As tint in particular can shift across levels, I typically stick with the highest stably regulated level for all my reported measures.

As explained on that page, since I am using an inexpensive uncalibrated device, you can only make relative comparisons across my reviews (i.e., don’t take these numbers as absolutely accurate values, but as relatively consistent across lights in my testing).

TD01 on Med:

The key measures above are the colour temperature of ~6045K, and a noticeably positive tint shift (+0.0138 Duv) to greenish-yellow at this temperature. For CRI (Ra), I measured a combined score of 64.

These values are very consistent with the rated specs for the cool white SFT40 emitter on my sample, and match my visual experience of this light.

Beamshots

All long-distance outdoor beamshots are taken on my Canon PowerShot S5 IS at f/2.7, 1 sec exposure, ISO 400, daylight white balance. The tree at the centre of the hotspot is approximately 90 meters (~100 yards) from the camera. Note the road dips down and turns away in the distance, out of the camera’s sight line. Learn more about my outdoor beamshot locations here.

Click on any thumbnail image below to open a full size image in a new window. You can then easily compare the overall beams by switching between tabs.


To help illustrate the hotspots better, I’ve also cropped the raw pictures around the centre of the frame. As before, click on any thumbnail below to open a full size image in a new window.


As you can see above, the TD01 is a very focused thrower. It does put out a little more light into the periphery than the L19, and with a slightly larger hotspot. But this is an incredible thrower.

Testing Results

My summary tables are generally reported in a manner consistent with the ANSI FL-1 standard for flashlight testing. In addition to the links above, please see my output measures page for more background.

All my output numbers are based on my home-made lightbox setup. As explained on that methodology page, I have devised a method for converting my lightbox relative output values to estimated lumens. Note that my lightbox calibration seems to run higher than most hobbyists today, but I’ve kept it to remain consistent with my earlier reviews (when the calibration standard was first established).

My Peak Intensity/Beam Distance are directly measured with a NIST-certified Extech EA31 lightmeter.

TD01 Testing Results

ModeSpec LumensEstimated Lumens @0secEstimated Lumens @30 secsBeam Intensity @0secBeam Intensity @30secsBeam Distance @30secsPWM/Strobe FreqNoise FreqCharging Current <3VCharging Current >3VParasitic DrainWeight w/o BatteryWeight with BatteryCCT (K)DuvCRI
Eco302928---No19.858 Hz0.25 A1.55 ANo193 g261 g---
Low150155150---No19.858 Hz0.25 A1.55 ANo193 g261 g---
Med350290285---No19.864 Hz0.25 A1.55 ANo193 g261 g6,0450.013864
High900760740---No19.878 Hz0.25 A1.55 ANo193 g261 g---
Turbo2,2002,1002,000255,000 cd235,000 cd970 mNo-0.25 A1.55 ANo193 g261 g---
Strobe2,200-----8-14 Hz-0.25 A1.55 ANo193 g261 g---
SOS350------19.858 Hz0.25 A1.55 ANo193 g261 g---
Beacon2,200-----0.5 Hz-0.25 A1.55 ANo193 g261 g---

Unlike my TS22 and C8L samples, the TD01 has inflated specs on its higher levels, compared to what I measure in my lightbox. Oddly, it’s worse on the Med and Hi levels, with Turbo only being inflated by ~10% in my lightbox. Although it is probably even worse than the numbers above suggest, as I know my lightbox’s relative calibration is generously high for modern high-output lights.

My NIST-calibrated luxmeter is accurately calibrated to an absolute standard, and reports slightly lower beam intensity on Turbo (comparable to my lightbox for overall output measures). But this is still an impressive showing.

To view and download full testing results for all modern lights in my testing, check out my Database page.

Runtimes

As always, my runtimes are done under a small cooling fan, for safety and consistency. To learn more about how to interpret runtime graphs, see my runtimes methodology page.

Max

Hi

Med

One thing these results make very clear: Wurkkos is definitely not using a buck driver on the TD01. There had been some apparent miscommunication on this point when the light was first announced. It appears to be using a standard FET driver, producing the non-voltage-regulated runtimes you see above.

In and of itself, this is not necessarily a problem – such lights can still be relatively efficient. But that doesn’t really seem to be the case here. It is not as efficient as the Convoy S21E that I tested with this same SFT40 emitter – that light had perfectly flat regulated output (which lowers overall efficiency, since it spends a lot more time at higher output, plus has circuit overhead to consider). So performance here is disappointing, especially in comparison to the outstanding efficiency and regulation that you can see on the TS22 and the Sofirn C8L.

You can also see that the TD01 steps down very quickly on Turbo and Hi. To better show this initial step-down pattern, here is a expanded view of first few minutes of those runtimes:

Max-extended

Pros and Cons

ProsCons
As advertised, the light is a very dedicated thrower, thanks to its large focused TIR optic.Circuit is not voltage-regulated, producing a slowly decreasing output instead of flat runtimes. It also appears to be less efficient then other current-controlled lights with flat regulation.
The light has a solid build with good handfeel, although there are some small issues (see Cons).Tactical forward clicky switch has a softer feel than typical, making signalling or double-clicking difficult. It also protrudes too far, preventing tailstanding.
Price is incredibly low, making this arguably the best throwing light of the 1x21700 class at this price point.Light can roll very easily, with no preventive measures to impeed.
Output specs seem to be somewhat inflated.
Would really benefit from an included holster.

Overall Rating

Preliminary Conclusions

Many of my build observations of the Sofirn C8L are true here as well – in many ways, this is a sister light to that model, but one that is heavily focused for throw. The lights are very similar in overall build quality and packaging, reflecting the common factory they are produced at (despite being different companies). The dual physical tailcap clicky and side electronic switch design – along with an identical user interface – further cements their close relationship.

But the switches are where I find the comparison starts to break, and not in the TD01’s favour. The switch feel is softer on my TD01 sample than the C8L, limiting its value for momentary signalling. And because it protrudes further than my C8L sample, the TD01 doesn’t tailstand at all, which is disappointing. Not a huge deal of course, but it is a minor annoyance that could easily have been avoided.

Overall output/runtime efficiency is fine for a SFT40 emitter, but overall output is lower than rated for the specs on this model. And unfortunately regulation is disappointing here too – especially against the outstanding TS22 and Sofirn C8L. It looks like Wurkkos simply reused an older driver/circuit for the SFT40 emitter, and updated it with the C8L’s user interface. I would have preferred to see a fully voltage-regulated pattern here.

Beam pattern is very throwy as advertised, and I find the TIR optic does a really good job of focusing almost exclusively for throw. There is just one noticeable beam ring – but that’s more an issue on a white wall than in actual use outdoors. It really is quite the spotlight!

Despite the close similarities to the C8L – and the impressive TIR optic here – I can’t give this light higher than 3.5 stars in its current form. The physical quirks with the switch, and the more significant circuit issues (i.e., off from the specs, lower sustained output, lack of voltage regulation, reduced efficiency, circuit noise, etc.) knock this light down a full star from the C8L in my view.

It is still an incredible value for the price, and I appreciate all that it does bring to the table. If the issues above don’t matter to you, this is a great way to experience massive TIR throw at a budget price (it really is unbelievably cheap!). As the beamshots show, that is an incredible beam. With a little more fine-tuning, this could become a top pick in the dedicated TIR thrower class.

Acknowledgement

The TD01 was supplied by Wurkkos for review. As always, all opinions are my own and the light received the same rigourous and objective testing as all other lights that I have reviewed. At the time of review, this light retails for ~$45 USD (~$60 CDN) with typical discounts on their website here.

Acebeam Defender P17

The P17 is a high quality tactical flashlight featuring fairly high output and very good throw, running on a single included 21700 battery. Also features both tactical and general user interface options.

  1. Introduction
  2. Manufacturer Specifications
  3. Package Details
  4. Build
  5. User Interface
  6. Circuit Measures
  7. Emitter Measures
  8. Beamshots
  9. Testing Results
  10. Runtimes
  11. Pros and Cons
  12. Overall Rating
  13. Preliminary Conclusions
  14. Acknowledgement

Introduction

Following on my Acebeam E70 review, I thought it would be worth examining their larger tactical 1×21700 light, the Defender P17.

Featuring the Cree XHP70.3 HI emitter in cool white, the P17 has a reported maximum output of 4900 lumens, and beam distance of 445 meters thanks to the larger head. It also features a dual tactical tail switch similar to the Nitecore P20iX that I recently reviewed. This allows easy one-handed access to instant Turbo and/or Strobe.

Although billed for tactical use (e.g., law enforcement, security, search and rescue, hunting, etc.), this design is frankly very generally useful for all outdoor activities where a rugged build is desired.

Let’s see how it compares in my testing.

Manufacturer Specifications

Note: as always, these are simply what the manufacturer provides – scroll down to see my actual testing results.

FeatureSpecs
MakerAcebeam
ModelP17
EmitterXHP70.3 HI
Tint6500 K
Max Output (Lumens)4,900
Min Output (Lumens)3
Max Runtime20 days
Max Beam Intensity (cd)49,506 cd
Max Beam Distance (m)445 m
Constant Levels5
FlashingStrobe/SOS
Battery1x21700
Weight (w/o battery)154 g
Weight (with battery)227 g
Length147 mm
Head Diameter41 mm
Body Diameter26 mm
Waterproof-

Package Details


The light comes in a good quality hard-sided box, with magnetic closing flap. There are printed specs all along the box. Inside, you have cut-out foam for the light and accessories.

Inside the box, I found:

  • Acebeam Defender P17 flashlight with pocket clip attached
  • Acebeam 5100mAh 21700 battery with USB-C charging port
  • Wrist lanyard
  • USB-C charging cable
  • 2 Spare O-rings
  • Manual and warranty card

It’s a decent package, consistent with other lights of this class. As always, I would have liked to have seen a holster, but at least they included a good quality bi-directional pocket clip.

Build


From left to right: Armytek 18650 (3500mAh), Sofirn 21700 (5000mAh), Acebeam 21700 USB-C (5100mAh), Acebeam E70, Acebeam P17, Armytek Doberman Pro, Convoy M21F, Lumintop D3, Nitecore MH12SE, Nitecore P20iX,  Sofirn C8L.


The P17 is larger than most flashlights in this class, due to the larger head, dual-wall body, and dual switch tailcap. But I find it very well balanced, and quite comfortable to hold in the hand – although I do have large hands.

As I mentioned in my Nitecore P20iX review, I’ve always liked this dual tailcap switch arrangement – a number of makers have used it over the years. You have a standard protruding forward physical clicky switch as your main switch for on/off operation and signaling (the “Tactical Switch” in Acebeam’s terminology), with a recessed secondary electronic switch to cycles modes (the “Function Switch”). This is a very “tactical” style arrangement, but I find it just generally very functional. With the wide use of single electronic switches in most lights now, it is great to go back to a primary physical clicky while also keeping the functionality of the electronic switch.

Feel and traverse of the main Tactical clicky switch is good, for both momentary (half-press) and clicked-on. The secondary Function switch is electronic, and I found it easy enough to access given its slightly protruding nature. It too has good feel and resistance.

Since the primary Tactical switch protrudes, tailstanding is not possible, and accidental activation is easy. So as always, I strongly recommend you keep the light stored locked out at the tailcap when not in use. A simple twist of the tailcap will do the job, thanks to breaking of the contact with the inner tube. There are cut-outs on the side of the tail for using the wrist lanyard. The attached bi-direction pocket/belt clip fits on securely, and is designed for either bezel-up or bezel-down carry.

The body has good grip, with all the reeling and cut-outs along the length and on the head. The light can roll, even with the flat cut-outs in the head, but the clip really helps prevent it (I recommend you leave the clip on).

Anodizing is a dark gray, and looks to be excellent quality. It feels relatively thick, and is actually somewhat grippy, with a matte finish. It is advertised as type III (Hard Anodized), and I fully believe that – it feels very high quality. I didn’t notice any flaws on my sample.

As you can see above, there are springs in both the tail and the head, ensuring the cell is held securely in place.

Like the P20iX, the dual switch arrangement in the tailcap requires a double-walled tube connecting the tailcap to the head (i.e., one to the carry the current, one to allow signalling). Unlike the P20iX though, no proprietary cell is needed – because the charging circuit is built into the battery, instead of the flashlight. Like the Acebeam E70, simply remove the 5100mAh cell and charge it through the USB-C port directly on its positive terminal. And special bonus, no need to worry about the waterproofness of a built-in charging dock on this light.


The P17 comes the low-profile XHP70.3 HI emitter, which I prefer over the domed 70.2 HD emitters as it shows far less chromatic aberration (and has slightly better throw). As you can see above, there seems to be a small speck on the flat emitter dome in my sample, but it is not affecting the beam. The reflector is moderate orange peel (OP), to help minimize chromatic variation. I don’t notice any significant colour temperature/tint shifting across the beam – which is rather throwy thanks to the large head (scroll down for emitter measures and beamshots). There is a mild greenish anti-reflective (AR) coating on the lens (which I prefer).

The stainless steel bezel has relatively mild crenelations, but with an unusual feature – 3 integrated round beads of high-strength silicon nitride ceramic on the protruding ends. This allows it to be used as a strike bezel, for example to break glass. At the same time, these beads are rounded, so it won’t rip a hole in your clothing (much appreciated), and still allows the light to headstand. Thanks to the crenelations and beads, you can tell if the light is on when headstanding.

User Interface

The P17 has three available mode sets, referred to as Daily Mode, Tactical Mode, and Special Mode. Unfortunately, some of the mode and level instructions in the manual are not clear, so I will describe everything in detail below. But first, I will explain how you switch between them.

Mode Switching (between Daily, Tactical and Special modes)

  • From Off, press-and-hold down the Function switch for at least 3 secs
  • Without releasing the Function switch, click the Tactical switch.
  • Release the Function switch. Light enters “breathing mode” while it waits for you to select the Mode set (the main LED has a slow fade-in and fade-out repeatedly, which looks like “breathing” – to be honest, I find it rather relaxing).
  • Click the Function switch to advance through the three mode settings, which are identified as follows:
    • Strobe – Tactical mode (also called “Tactical Mode 1” in the manual)
    • High level – Special mode (also called “Tactical Mode 2”)
    • SOS – Daily mode
  • Click the Tactical switch to turn off and accept the mode setting.

And now, here is what you get with each of the three mode sets:

Daily Mode (available levels: Ultra-Low, Low, Med, High, Turbo, SOS)

Daily Mode, from OFF:

  • Partial depress Tactical switch: Momentary On (i.e., turns Off when released).
  • Single-click Tactical switch: Turns On in last memorized mode used.
  • Press-and-hold Function switch: Momentary Ultra-Low. If you keep holding the switch down for >3 secs, it will stay locked On when you release the switch.
  • Single-click Function switch: Nothing but a single flash of Ultra-Low (i.e., there is no single-click option – the Function switch acts as a momentary press-and-hold only, see above).

Daily Mode, from ON:

  • Single-click Tactical switch: Turns Off
  • Press-and-hold Function switch >1 sec: Turns on SOS.
  • Single-click Function switch: Advances through modes in sequence from Low > Med > High > Turbo.

Tactical Mode (available levels: Low, Med, Hi, Turbo, Strobe)

Tactical Mode, from OFF:

  • Partial depress Tactical switch: Momentary On in last memorized constant output mode.
  • Single-click Tactical switch: Turns On in last memorized constant output mode.
  • Press-and-hold Function switch: Momentary Strobe. If you keep holding the switch down for >3 secs, it will stay locked On when you release the switch.
  • Single-click Function switch: Nothing but a single flash of Strobe (i.e., there is no single-click option – the Function switch acts as a momentary press-and-hold only, see above).

Tactical Mode, from ON:

  • Single-click Tactical switch: Turns Off.
  • Press-and-hold Function switch >1 sec: Turns On Strobe.
  • Single-click Function switch: Advances through modes in sequence from  Low > Med > High > Turbo.

Special Mode (available levels: Ultra-Low, Low, High)

Special Mode, from OFF:

  • Partial depress Tactical switch: Momentary On at High level.
  • Single-click Tactical switch: Turns On at High level.
  • Press-and-hold Function switch: Momentary On at High level. If you keep holding the switch down for >3 secs, it will stay On when you release the switch.
  • Single-click Function switch: Nothing but a single flash of High (i.e., there is no single-click option – the Function switch acts as a momentary press-and-hold only, see above).

Special Mode, from ON:

  • Single-click Tactical switch: Turns Off.
  • Press-and-hold Function switch: Nothing, except when you release the switch it  advances you through modes as explained below (i.e., there is no press-and-hold option in this mode, just a click option).
  • Single-click Function switch: Advances though modes as follows: High > Low > Ultra-Low.

Short-cuts:

  • To Ultra-Low: In Daily mode, press-and-hold or click the Function switch from Off.
  • To Hi: In Special mode, press-and-hold Function switch from Off, or click the tactical switch from Off.
  • To Strobe: In Tactical mode, press-and-hold Function switch from Off.
  • To SOS: In Daily mode, press-and-hold Function switch from Off.

Mode memory:

Yes, but only in Daily Mode and Tactical Model, for constant output levels (i.e., Strobe and SOS are accessed by the Function switch). There is no memory for the Special Mode, which always activates in High.

Strobe/Blinking modes:

Yes, for Strobe and SOS – but they are located on separate Mode sets.

Low voltage warning:

Yes. As the battery drains, the light steps down in levels. Once the light reaches the Low level, the main LED starts to flash 3 times every 30 secs.

Lock-out mode:

Yes, but only by physically locking out the light at the tailcap.

Reviewer Comments:

There are a few surprising quirks with this triple-mode interface.

First off, it seems odd that a “tactical” light has no dedicated mode option (or even a short-cut) to jump to Turbo (just the High level, in the Special mode set). But this might become somewhat clearer when you check out the runtimes below. In any case, you can access Turbo by cycling through the main sequence in Daily mode or Tactical Mode – and have the light memorize this choice.

Personally, I plan to use this light in Daily Mode exclusively, as this is that the mode set with access to widest range of levels (i.e., everything except Strobe).

That said, I’m not crazy that the Function switch works differently depending on whether the light is On or Off. Furthermore, it’s odd that the various Modes sets are inconsistent in this regard – that is, when the Function switch acts as a clicky (typically only when On), or when it acts as press-and-hold (always when Off, sometimes when On). Specifically, the Daily and Tactical Mode sets assign a special function to a press-and-hold when On (SOS or Strobe, respectively), but Special Mode doesn’t (i.e., just acts like a long click). They might as well have put a Beacon option in Special mode, just for the sake of consistency if nothing else.  Indeed, I would have preferred a Beacon option in Daily mode, as I’ve always found SOS a bit silly (but it does a similar enough job).

I certainly like that the Daily mode gives an option to activate from Off into Ultra-Low – I always look for a way to jump to that mode from Off. And quirks aside, I do like having a physical forward clicky back as the main switch – call me old-school.

Circuit Measures

Pulse-Width Modulation (PWM):

Ultra-low:
Ultra-Lo

Low:
Lo

Medium:
Med

Hi:
Hi

Turbo:
Turbo

There is no sign of PWM on any level – the circuit appears to be fully current-controlled. This is also no sign of high-frequency noise at any level. This is refreshing – although PWM is very rare nowadays, it is not uncommon to see some (visually-undetectable) circuit noise.

Strobes:

Strobe:


Strobe alternates between 5 Hz and 10 Hz strobes every 2.5 secs.

SOS:

A fairly typical SOS mode.

Charging:

The P17 comes with Acebeam’s 21700 battery with a built-in charging port. There is a small LED on the positive terminal of the battery, which shows red when the cell is charging, and green when it is fully charged. In my testing, resting voltage of the cell was ~4.19V at termination.

Resting voltage <3.0V

Resting voltage >3.0V

The Acebeam 21700 5100mAh battery shows an initial low USB-C charging current of ~0.20A when the cell is heavily depleted (<3.0V resting), which jumps up to ~1.2A once the cell is >3.0V resting. This two-current charging is a good design, and indicates a safe integrated charging circuit. The max charging rate is a bit lower than most lights/batteries in this class, but much better than the original version of this battery when I tested on the E70.

Standby / Parasitic Drain:

I measured the standby current as 0.19 mA. This is a reasonably low standby drain, and it would take just over 3 years to fully drain the cell. Regardless, I always recommend you physically lockout the light at the tailcap to prevent accidental activation when not in use.

Emitter Measures

In this section, I directly measure key emitter characteristics of my sample in terms of colour temperature, tint, and colour rendition. Please see my Emitter Measures page to learn more about what these terms mean, and how I am measuring them. As tint in particular can shift across levels, I typically stick with the highest stably regulated level for all my reported measures.

As explained on that page, since I am using an inexpensive uncalibrated device, you can only make relative comparisons across my reviews (i.e., don’t take these numbers as absolutely accurate values, but as relatively consistent across lights in my testing).

P17 on High:

The key measures above are the colour temperature of ~5565K, and a slight positive tint shift (+0.0115 Duv) toward greenish-yellow at this temperature. For CRI (Ra), I measured a combined score of 66.

These values are very consistent with the rated specs for the cool white white XHP70.3 HI emitter on my sample, and match my visual experience of this light. As mentioned previously, I see no obvious chromatic variation in the beam of my sample.

Beamshots

All outdoor beamshots are taken on my Canon PowerShot S5 IS at f/2.7, 0.5 secs exposure, ISO 400, daylight white balance. The bend in the road is approximately 40 meters (~45 yards) from the camera. Learn more about my outdoor beamshots here (scroll down for the floody light position used in this review).

Click on any thumbnail image below to open a full size image in a new window. You can then easily compare beams by switching between tabs.


As you can see above, the P17 has a throwy beam, with an impressive amount of overall output. This gives you the best of both worlds. It is a super nice beam profile, without artifacts or noticeable chromatic variations.

Testing Results

My summary tables are generally reported in a manner consistent with the ANSI FL-1 standard for flashlight testing. In addition to the links above, please see my output measures page for more background.

All my output numbers are based on my home-made lightbox setup. As explained on that methodology page, I have devised a method for converting my lightbox relative output values to estimated lumens. My Peak Intensity/Beam Distance are directly measured with a NIST-certified Extech EA31 lightmeter.

P17 Testing Results

ModeSpec LumensEstimated Lumens @0secEstimated Lumens @30 secsBeam Intensity @0secBeam Intensity @30secsBeam Distance @30secsPWM/Strobe FreqNoise FreqCharging Current <3VCharging Current >3VParasitic DrainWeight w/o BatteryWeight with BatteryCCT (K)DuvCRI
Ultra-Low33.13.1---NoNo0.21 A1.2 A0.19 mA153 g233 g---
Low90115115---NoNo0.21 A1.2 A0.19 mA153 g233 g---
Med580570565---NoNo0.21 A1.2 A0.19 mA153 g233 g---
High2,2002,3002,250---NoNo0.21 A1.2 A0.19 mA153 g233 g5,5650.011866
Turbo4,9005,2504,95048,700 cd44,100 cd420 mNoNo0.21 A1.2 A0.19 mA153 g233 g---
Strobe2,000-----5-10 HzNo0.21 A1.2 A0.19 mA153 g233 g---
SOS2,000-----NoNo0.21 A1.2 A0.19 mA153 g233 g---

At all levels, there is a remarkably good concordance between published specs and what my lightbox reports.

My NIST-calibrated luxmeter reports slightly lower beam distance measures, but that is not uncommon in my testing. It’s still an impressive amount of throw.

I don’t really expect to see a Moonlight mode in a light like this, but the ~3 lumen Ultra-Low mode is quite reasonable.

To view and download full testing results for all modern lights in my testing, check out my Database page.

Runtimes

As always, my runtimes are done under a small cooling fan, for safety and consistency. To learn more about how to interpret runtime graphs, see my runtimes methodology page.

Max

Hi


Med

The runtime results show you the benefit of having a good thermal mass – The P17 shows very impressive stable regulation on the High level without step-down. No other light in my testing to date has managed the feat of sustained flat output of >2200 lumens for over an hour.

Further, the Turbo mode is quite reasonable too: ~5000 lumens output to start, dropping down within minutes to a stable flat ~1300 lumens for nearly 2 hours.

Taken together, this may help to explain why the Special Mode (aka “Tactical mode 2”) goes automatically to High and not Turbo. High is the fully sustained high output level.

In any case, the P17 shows impressive output/runtime efficiency and regulation on all levels, consistent with an excellent current-controlled driver. I never get tired of seeing those perfectly flat output runtimes. Performance of the XHP70.3 HI emitter in this light is very consistent with other good quality lights running XHP70.2 HD lights in my testing (although I greatly prefer the XHP70.3 HI for its improved beam profile).

You can see the low-voltage warning coming on during the final Low level step-down (~115 lumens). At this point, the LED flashes three times every 30 secs – which is picked up by the sampling frequency of my DMM light meter as those irregular drops to zero at the end of the Med runtime above.

Pros and Cons

ProsCons
Light has excellent output/runtime efficiency, at all levels, with the High mode as a particular stand-out.Turbo step-down level is lower than the defined High level.
Circuit shows very good flat regulation, with thermally-mediated step-down on Turbo only.There is no mode set when Turbo comes on by default (either has mode memory, or High mode on activation).
Uses a dual tail switch design, with the option of three Mode setsLacks a true Moonlight mode, but has a very good low level.
Exceptionally good build quality and hand feel.
Great beam profile, with good balance between throw and flood, without chromatic aberrations.

Overall Rating

Preliminary Conclusions

There are some lights that you just pick up for the first time and go, “Oh, yeah.” By which I mean, there is an ineffable quality that just immediately tells you they got this light right. The P17 is one of those lights.

If I were to break down what that means to me, it starts with the handfeel – which is itself a complex term that includes overall heft, weight balance across the light as it fits in your hand (for both overhand and underhand carry), switch placement and feel, and the tactile feel of the surface of the light itself (i.e., just the right gripiness). That later point is not just the type or degree of knurling (although that is important) or other grip items like cut-outs and clips – good quality thick anodizing can often have a more “grippy” texture (e.g., Armytek is a good example of this). This light gets all of those features just right in my view.

Next is the beam pattern when you turn it on. To be sure, sometimes you want a very focused beam, and sometimes you may want full flood. But often you are looking for a good balance between relative throw and spill – the later involving both how wide and how bright the spill beam is. And then finally how “pretty” the beam is (i.e., lack of aberrations across the range of the beam, including a lack of chromatic variations). Again, as the beamshots above show, this light just really seems to really find that sweet spot – with fantastic output levels to boot.

As I started to handle the light though, I found some of the user interface choices a bit odd. For example, I’m used to having multiple mode sets on “tactical” dual switch lights, and the Daily mode here is generally well suited to my needs. But typically there is a dedicated “tactical” mode where the light always comes on at the maximum output level, with the option for a high-frequency strobe depending on which switch is used. But this light doesn’t do that – the Tactical mode has mode memory (so the light comes on in the last memorized output level), without so much as even a shortcut to Turbo. There is a secondary tactical mode – called the Special mode here – that ditches the level memory, but comes on at the lower High level (and has no strobe option).

I still think this arrangement is odd, but after my runtime tests I can understand why they choose the High level (instead of Turbo) for the non-memorized Special mode set: The P17 is an outstanding performer at the High level. It is in fact the only light I’ve tested so far that can stably produce >2200 lumens in a fully flat-regulated level for over an hour. If you opted for ~5000 initial lumens on Turbo, you would have to put up with the fact that the light quickly steps down to a (very common) lower ~1300 lumen level for its extended run.

This unusual UI is really why I’ve knocked half a star off – everything else about the light, including output/runtime efficiency and regulation, make this light a top performer in the high-output class of 1×21700 lights. Another great showing from Acebeam, and a real pleasure to handle and use!

Acknowledgement

The P17 was supplied by Acebeam for review. As always, all opinions are my own and the light received the same rigourous and objective testing as all other lights that I have reviewed. At the time of review, this light retails for ~$120 USD (~$160 CDN).

Skilhunt H300

The H300 is a compact headlamp flashlight with a floody beam with excellent colour rendition, running on a single included 18650 battery.

  1. Introduction
  2. Manufacturer Specifications
  3. Package Details
  4. Build
  5. User Interface
  6. Circuit Measures
  7. Emitter Measures
  8. Beamshots
  9. Testing Results
  10. Runtimes
  11. Pros and Cons
  12. Overall Rating
  13. Preliminary Conclusions
  14. Acknowledgement

Introduction

Following on my review of the Skilhunt M300, I also have their 18650-based headlamp version on hand, the H300. This light uses the same magnetic charging dock as its larger sibling.

Also like that other light, you can select your own emitter from a good range of options. For the H300, you can select between CREE XHP50.2 Cool White 6500K, CREE XHP50.2 Neutral White 5000K, CREE XHP50.3 HI 6500K, CREE High CRI J2 90 CRI 5000K, and Nichia 144ART R9050 sm453 4500K.

Wow, that’s a lot of options. Although I was most interested in the Cree Hi CRI J2 90, I opted instead to go for the Nichia 144ART, to facilitate comparison to the Armytek Wizard C2 Pro Nichia that I previously reviewed. As always, when it comes to headlamps especially, I recommend people consider high CRI options whenever possible. But the advantage here is that you can select the emitter option that best suits your needs.

Let’s see how it compares in my testing.

Manufacturer Specifications

Note: as always, these are simply what the manufacturer provides – scroll down to see my actual testing results.

FeatureSpecs
MakerSkilhunt
ModelH300
EmitterNichia 144ART R9050
Tint4500 K 90 CRI
Max Output (Lumens)1,500
Min Output (Lumens)0.5
Max Runtime150+ hrs
Max Beam Intensity (cd)4,500 cd
Max Beam Distance (m)134 m
Constant Levels7
FlashingStrobe 1/2
Battery1x18650
Weight (w/o battery)54 g
Weight (with battery)-
Length104.7 mm
Head Diameter25.2 mm
Body Diameter-
WaterproofIPX-8 1m

Package Details


The light comes in a fairly standard shelf-presentation style box, with a description of the features and characteristics printed on it. Inside is a professional looking package, with the cover tab under the the plastic tray holder. My sample came with an extra light carrying pouch in a small plastic bag.

Inside the box, I found:

  • Skilhunt H300 flashlight
  • Skilhunt BL-135 3500mAh 18650 battery (optional)
  • Headband & mounting bracket
  • Wrist lanyard
  • Pocket clip
  • USB magnetic charging dock
  • 2 Spare O-rings
  • Spare switch cover
  • Manual

It’s a decent package, consistent with other lights of this class. It’s good that they included the pocket clip for carry (although it is the simple press-fit variety). This is a good set of extras.

Build


From left to right: Skilhunt 18650 (3500mAh), Wurkkos 21700 (5000mAh), Acebeam 21700 USB-C (5100mAh), Acebeam E70 Mini, Armytek Wizard C2 Pro Nichia, Acebeam E70, Armytek Wizard C2 Pro Max, Convoy S21E, Fenix E35 v3, Imalent MS03, Skilhunt H300, Skilhunt M300 V2, Wurkkos TS22.


The H300 is a very compact build, with lots of design elements to help with grip (although the concentric rings on the body and tailcap are not as sharp as the M300). The headband bracket seems to hold the light reasonably well. I like the inclusion of the pocket clip, in case you want to carry it as an angle-light clipped to you, bezel-up. I would say the overall size is pretty compact for a 18650 headlamp – definitely on the smaller size of ones I’ve handled.

There is a raised rubberized switch cover over the electronic switch (replaceable, thanks to the retaining ring). Underneath are a pair of red and blue LEDs, to signal various states of the light/battery. Switch feel is good, with a standard traverse/tactile feedback for an electronic switch.

There is a magnetic charging dock on the top of the head of the light (same charging cable as the M300). One nice thing about magnetic charging docks is that waterproofness is not a concern – the light looks quite spashable/dunkable (although note that I do not test for this in my reviews).

Tailstanding is very stable, thanks to the flat tailcap (there is a side cut-out to allow you thread the basic wrist lanyard through, if you wanted to carry it that way). Tailcap threads are square-cut and anodized, with good feel. I always recommend you keep a light stored locked out when not in use. Thanks to the anodized tailcap threads, you can do this easily by a simple twist of the tailcap.

There is a magnet in the tailcap, so you attached the light stably to any metal surface. A useful feature in worklight/headlamp model.

There are tailsprings in both the tailcap and head, so flat-top cells will also work just find (and the battery should be held in place fairly securely).

Anodizing is a flat black in matte finish, and looks to be good quality on my sample with no damage or issues. Skilhunt reports it is type III (hard anodized), and I see no reason to doubt that.

Inside, my sample came with the optional Skilhunt-branded button-top 3500mAh 18650 battery.

The common M300/H300 USB charging dock also comes with blue and red LEDs, to signal charging status. The magnet has a reasonably strong pull (not as heavy as some), and locks into place easily.


My H300 came with the Nichia 144ART emitter, and features a heavily textured optic. This produces a nice and even flood light, with a brighter centre. Scroll down to my Emitter Measures section to see how my sample performs.

The bezel is like the switch retaining ring, allowing you access to the optic and emitter.

Note that despite the charging dock on the top of the head, you can still headstand stably.

User Interface

The H300 uses the latest version of the Skilhunt user interface (UI), just the M300, and has a reasonably good number of modes and features. You get two Low modes, three Regular modes (two Med modes, one High mode), two Turbo modes, and three Strobe modes – organized into those four mode sets.

One comment to make up front – the mode level labels are different from most lights in that the lower number for a given level is actually the higher output (so, for example, T1 is brighter than T2). That means the constant output modes, in sequence, are: L2 > L1, M2 > M1 > H, and T2 > T1.

The manual doesn’t describe the three strobe modes, but for sake of this review I will refer to them as S3 = Strobe, S2 = SOS, and S1 = Beacon.

Let me break down the full interface for you:

From OFF:

  • Press-and-hold: Turns On in memorized Low mode (L2 or L1).
  • Single-click: Turns On in memorized Regular mode (M2, M1, or H).
  • Double-click: Turns On in memorized Turbo mode (T2 or T1).
  • Triple-click: Turns on in memorized strobe mode (S3, S2, or S1).
  • 4 clicks: Activates the electronic Lockout mode.
    • Press-and-hold for momentary Moonlight (i.e., lowest Low, L2)
    • While in lockout, the switch indicator light will flash red every second, but that can be toggled off/on with a double-click.

From ON:

  • Press-and-hold: Cycle to the next level within the current mode level set (constant output modes only, doesn’t work for Strobe).
  • Single-click: Turns Off.
  • Double-click: Jumps to the memorized Turbo level (from Regular modes only), or back to Regular modes if already in Turbo (note this doesn’t work from Low modes or Strobe modes)
  • Triple-click: Jumps to the memorized Strobe mode (from Regular or Turbo), or back to most recent Regular or Turbo if already in Strobe mode.

Strobe modes:

  • Triple-click: Turns On in memorized Strobe mode.
  • Double-click: Cycles through the Strobe modes in sequence:
    • S3 – Strobe
    • S2 – SOS
    • S1 – Beacon

Mode memory:

Yes, each mode set retains its own memory for the last level selected in that mode set.

Shortcuts:

  • To Low (L2 or L1): Press-and-hold from Off.
  • To Turbo (T2 or T1): Double-click from Off or when On in Regular mode.
  • To Strobe (S1, S2, or S3): Triple-click from Off or when On in Regular or Turbo mode.

Low voltage warning:

When the battery is running very low (<3.0V according to the manual), the switch indicator light will flash red, and the main emitter will flash every couple of seconds. the light will shut off at 2.7V according to the manual.

Lock-out mode: 

  • 4 clicks from Off: Activates the electronic Lockout mode.
  • Physical lockout is also possible by simply unscrewing the tailcap.

Battery indicator:

Yes. The LED under the switch indicates the battery status for the first ~5 secs after turning on:

  • Solid Blue: >80% Battery power remaining.
  • Flashing Blue: 50-80% Battery power remaining.
  • Solid Red: 20-50% Battery power remaining
  • Flashing Red: <20% Battery power remaining.

These are identical to the M300, and seem reasonable to me.

Video Overview:

Please see the video below, which walks you through the common UI and build features of this light and its M300 V2 sibling:

Reviewer Comments:

Like many of the recent lights I’ve reviewed, I find this UI to be very reasonable, and relatively versatile. Of course, you are never going to please everyone with any given UI (e.g., I would like to see double-click reliably jumping to Turbo, and have the Low modes as part of a regular sequence without having to go through off first). But these are really quibbles, the light does reasonably well.

One small thing I would like is the ability to independently turn on the the blue switch indicator, to serve as an additional “moonlight mode”. This is something the Anduril-based lights allow (if implemented, like on the Sofirn IF25A), and some other new UIs (like the Wurkkos TS22).

Allowing momentary L2 when in the electronic lockout is a nice touch. But as always, I recommend locking out the light at the tailcap when not in use.

Circuit Measures

Pulse-Width Modulation (PWM):

L2:
Lo

M2:
Mid

H:
Hi

T2:
Turbo

T1:
Turbo

There is no sign of PWM on any level – the circuit appears to be fully current-controlled. This is also no sign of high-frequency noise at any level. This is refreshing – although PWM is very rare nowadays, it is not uncommon to see some (visually-undetectable) circuit noise.

Strobes:

S3 – Strobe:


S3 Strobe alternates between 6 Hz and 14 Hz strobes (1 sec for 6Hz, 3 secs for 14 Hz).

S2 – SOS:

S2 is a SOS mode.

S1 – Beacon:

S3 is a 1hz slow signalling strobe.

Charging:

The magnetic charging dock switches from blue (when power is supplied) to solid red when connected and charging the H300. Switches back to solid blue when the charging is complete.

In my testing, resting voltage of the cell was ~4.12V at termination. This is lower than typical, but is easier on the cell. Note that the charging dock won’t initiate a charge cycle if the cell is above 4.0V resting, just like the Armytek charging dock.

Resting voltage <3.0V

Resting voltage >3.0V

The M300 doesn’t really have a two-stage charging feature, but it does start off at a lower charge rate when the cell is heavily depleted <3V (1.58A shown above, rises to 1.64A within a minute or so).

Standby / Parasitic Drain:

I measured the standby current as 29 uA. This is an extremely low standby drain, and will not appreciably affect the light (i.e., it would take just under 14 years to fully drain the included cell). Regardless, I always recommend you lockout the light when not in use – either by electronic lockout, or better yet physically by twisting the tailcap.

Emitter Measures

In this section, I directly measure key emitter characteristics of my sample in terms of colour temperature, tint, and colour rendition. Please see my Emitter Measures page to learn more about what these terms mean, and how I am measuring them. As tint in particular can shift across levels, I typically stick with the highest stably regulated level for all my reported measures.

As explained on that page, since I am using an inexpensive uncalibrated device, you can only make relative comparisons across my reviews (i.e., don’t take these numbers as absolutely accurate values, but as relatively consistent across lights in my testing).

H300 on H (Hi):

The key measures above are the colour temperature of ~4350K, and a very slight negative tint shift (-0.0022 Duv) to orange at this temperature. For CRI (Ra), I measured a combined score of 93 – very respectable for Hi CRI.

These values are very consistent with the rated specs for the Nichia 144ART emitter on my sample, and match my visual experience of this light. Like many enthusiasts, I prefer a negative tint shift on a neutral white emitter.

Beamshots

All outdoor beamshots are taken on my Canon PowerShot S5 IS at f/2.7, 0.5 secs exposure, ISO 400, daylight white balance. The bend in the road is approximately 40 meters (~45 yards) from the camera. Learn more about my outdoor beamshots here (scroll down for the floody light position used in this review).

Click on any thumbnail image below to open a full size image in a new window. You can then easily compare beams by switching between tabs.


As expected, the beam pattern is very similar to the Armytek Wizard C2 Pro Nichia, although the H300’s optic is perhaps a touch less floody overall.

Testing Results

My summary tables are generally reported in a manner consistent with the ANSI FL-1 standard for flashlight testing. In addition to the links above, please see my output measures page for more background.

All my output numbers are based on my home-made lightbox setup. As explained on that methodology page, I have devised a method for converting my lightbox relative output values to estimated lumens. My Peak Intensity/Beam Distance are directly measured with a NIST-certified Extech EA31 lightmeter.

H300 Testing Results

ModeSpec LumensEstimated Lumens @0secEstimated Lumens @30 secsBeam Intensity @0secBeam Intensity @30secsBeam Distance @30secsPWM/Strobe FreqNoise FreqCharging Current <3VCharging Current >3VParasitic DrainWeight w/o BatteryWeight with BatteryCCT (K)DuvCRI
L210.350.35---NoNo1.55 A1.65 A29 uA55 g106 g---
L142.72.7---NoNo1.55 A1.65 A29 uA55 g106 g---
M2252121---NoNo1.55 A1.65 A29 uA55 g106 g---
M1115135135---NoNo1.55 A1.65 A29 uA55 g106 g---
H330365360---NoNo1.55 A1.65 A29 uA55 g106 g4,355-0.002293
T2860990970---NoNo1.55 A1.65 A29 uA55 g106 g---
T11,5001,8501,7505,250 cd4,940 cd141 mNoNo1.55 A1.65 A29 uA55 g106 g---
S3------1 HzNo1.55 A1.65 A29 uA55 g106 g---
S2------SOSNo1.55 A1.65 A29 uA55 g106 g---
S1------6-14 HzNo1.55 A1.65 A29 uA55 g106 g---

Like with the M300, I am finding generally good concordance of published specs with what my lightbox reports – although I’m measuring somewhat higher output on the high through Turbo modes on my sample.

And once again, my NIST-calibrated luxmeter also reports slightly higher beam distance measures as well, showing these results are consistent. An impressive showing!

I’m also impressed to see a true “moonlight” low mode (L2) here, which clocked in around 0.35 lumens in my testing. Yay!

To view and download full testing results for all modern lights in my testing, check out my Database page.

Runtimes

As always, my runtimes are done under a small cooling fan, for safety and consistency. To learn more about how to interpret runtime graphs, see my runtimes methodology page.

Max

Hi

Med

Skilhunt shows both excellent output/runtime efficiency and regulation, consistent with a top-quality current-controlled driver.

As you can see above, the Nichia 144ART-equipped H300 performs very comparably to the Nichia 144AR-equipped Armytek Wizard C2 Pro Nichia. The initial output and step-down levels are very comparable, as are the runtimes. If you do an area-under-the-curve analysis, the Armytek model seems to have a very slight edge in terms of overall output/runtime efficiency, but it is pretty inconsequential (and could simply be due to variation in emitter output bins). For all intents and purposes, I would find these models equivalent. It really comes down to which build/UI you prefer. For example, I note the Armytek is slightly heavier and longer (by ~8g and ~7mm). But again, there is not a big functional difference between them.

To better show the Turbo step-down pattern on T1/T2, here is a blow-up view of those first few mins:

Max-extended

Pros and Cons

ProsCons
The light shows excellent current-controlled efficiency across all levels.User interface is fairly sophisticated, and reasonable for the class, but it does have some small quirks and limitations.
Circuit shows excellent regulation, with stable runtimes and reasonable step-down levels and duration.Magnetic charging dock performance is good but won't initiate a charge >4.0V resting, and terminates @~4.12V resting.
Great overall range of output levels, with a true Moonlight mode.
Textured optic provides an extremely floody beam, with no real hotspot.
Very compact build with good quality and decent feel.
Includes a bidirectional pocket clip, in addition to headband

Overall Rating

Preliminary Conclusions

The H300 is another great performer from Skilhunt. As with the M300, it has a high quality feel, good design and some nice stylistic touches. Switch feel is good, and the user interface is very reasonable for the class. The charging dock worked well in my testing, consistent with others who use this magnetic design (e.g., Armytek). The headband works well, and I find this to be to a particularly comfortable 1×18650 headlamp (i.e., it is a bit lighter than some others).

The H300’s circuit shows a great range of levels, and features excellent output/runtime efficiency and regulation. In these regards, it is virtually identical to the Armytek Wizard C2 Pro Nichia (which I also awarded 5-stars). I suppose that isn’t too surprising, since I opted for basically the same emitter here. But one of the great advantages of Skilhunt is that you can select from a quite a number of emitters – it is good to have so many options.

The overall build of the two lights is comparable, although the H300 is a bit smaller and lighter. That makes it more comfortable as a headlamp, but also means it steps down a bit faster on its Turbo mode (due to the lower thermal mass). Beam patterns are fairly comparable too – very even and floody, with a great tint and high CRI (with the Nichia 144ART). And as always, it’s great to see the <1 lumen Moonlight mode here.

There is really not much to critique here, it really is a great all-around headlamp/worklight. Another very strong option to consider – highly recommended!

Acknowledgement

The H300 was supplied by Skilhunt for review. As always, all opinions are my own and the light received the same rigourous and objective testing as all other lights that I have reviewed. At the time of review, this light retails for ~$95 USD with discounts (~$125 CDN).

Sofirn C8L

The C8L is a budget tactical flashlight featuring fairly high output and very good throw, running on a single included 21700 battery. Also features both tactical and general user interface options.

  1. Introduction
  2. Manufacturer Specifications
  3. Package Details
  4. Build
  5. User Interface
  6. Circuit Measures
  7. Emitter Measures
  8. Beamshots
  9. Testing Results
  10. Runtimes
  11. Pros and Cons
  12. Overall Rating
  13. Preliminary Conclusions
  14. Acknowledgement

Introduction

My first Sofirn review was of their fairly basic 1×21700 IF25A model, which has been around for a couple of years now. While certainly solid and serviceable, it did have a fairly generic build and presentation. In contrast, the newer C8L has been recommended to me as more representative of what Sofirn is producing now.

The C8L is in the style of a “tactical” light, with a larger head (for better throw, and likely higher sustained output due to great thermal mass) and an actual forward clicky tailcap switch. The C8L comes with the XHP50.3 HI emitter, which should provide for excellent throw and decent output.

I thought this would be a good opportunity to expand beyond my initial focus on compact, EDC-style 1×21700 lights. Let’s see how the C8L performs in my testing.

Manufacturer Specifications

Note: as always, these are simply what the manufacturer provides – scroll down to see my actual testing results.

FeatureSpecs
MakerSofirn
ModelC8L
EmitterXHP50.3 HI
Tint6000 K
Max Output (Lumens)3,100
Min Output (Lumens)8
Max Runtime220 hrs
Max Beam Intensity (cd)70,500 cd
Max Beam Distance (m)531 m
Constant Levels5
FlashingStrobe, SOS, Beacon
Battery-
Weight (w/o battery)-
Weight (with battery)151 g
Length156 mm
Head Diameter46.5 mm
Body Diameter-
WaterproofIPX-8 2m

Package Details


The C8L comes in a modern-looking hard cardboard box with printed specs cover and cut-out foam interior. This design offers good protection for the light (e.g., although the outside corner of the box got dinged in the mail, everything inside as unaffected). Inside, I found:

  • Sofirn C8L flashlight
  • Sofirn-branded 5000mAh 21700 battery
  • Spacer to allow the use of 18650 batteries
  • Basic wrist lanyard
  • USB-C Charging cable
  • 2 Spare O-rings
  • Manual

It’s a decent package, consistent with other lights of this class. I would have liked to have seen a holster, since that is my preferred way to carry a light like this, but that is not typically included with budget lights.

Build


From left to right: Armytek 18650 (3500mAh), Sofirn 21700 (5000mAh), Acebeam 21700 USB-C (5100mAh), Acebeam E70, Acebeam P17, Armytek Doberman Pro, Convoy M21F, Lumintop D3, Nitecore MH12SE, Nitecore P20iX,  Sofirn C8L.


The C8L is a nice and solid build, with very good handfeel. It’s about what I would expect for a tactical-style light in overall dimensions and weight – substantial enough, but still pocket-able.

There is a physical forward clicky switch in the tailcap used for the turning the light on/off. I must say, it’s been awhile since I tested a light with an actual physical clicky switch – it is nice to see them again. Switch feel is good, and you can easily flash/momentary signal with the forward clicky.

There are two raised tailcap guards that allow the light to tailstand, and serve as the wrist lanyard attachment point. I note that some earlier reviews reported the light couldn’t tailstand stably, but my sample does fine. Tailcap threads are square-cut and anodized, with good feel. I always recommend you keep a light stored locked out when not in use. Thanks to the anodized tailcap threads, you can do this easily on the C8L by a simple twist of the tailcap.

There is a raised side-mounted electronic switch on the side of the head, with red and green LEDs underneath to show charge status. Feel and traverse of the electronic switch is decent, but could be a bit tighter/firmer (i.e., the cover has a bit too much play). The switch shines a bright red when charging the battery through the light’s USB-C charging port (green when fully charged). The port is located on the opposite side from the switch, with a thick rubber cover. Like the IF25A, I found the cover to fit rather tightly, making it hard to full depress. But I suppose that should help with waterproofness if you can press it down enough.

There is no actual knurling on the light, but concentric ring reeling around the body tube and a good number of deep cut-outs on the head and tailcap that provide good grip. The head fins have flat areas to help minimize rolling (but it can still roll with enough force). Anodizing looks to be good quality, with no damage on my sample. I would describe the finish as satin. Its a nice package, comfortable and well-balanced in the hand with decent grip – but nothing too sharp to rip through clothing or anything.

Inside, the light comes with a Sofirn-branded standard-sized 5000mAh 21700 battery, with a slightly raised flat-top. A battery sleeve is also included, in case you want to use older 18650 cells. There is a good size spring in the head, ensuring good contact.


The C8L uses the XHP50.3 HI, which is basically a low-profile emitter known for its excellent throw while still maintaining decent high output. Reflector has a light orange peel texture. Together, this should provide for decent throw while minimizing any chromatic aberrations.

The bezel is crenelated black aluminum – not too aggressive, so you can headstand stably. There doesn’t seem to be any kind of anti-reflective coating on the lens (which is surprising nowadays). You can see the reflections of my cell phone camera in the macro shots, for example. Still, at least its not contributing to any chromatic aberrations – the beam is pretty consistently cool white across its full range.

User Interface

Gone is the Anduril user interface – instead, we have a more common dual physical/electronic switch interface.

Personally, I find it great to see the classic forward clicky switch interface again: partially press for momentary on, clicked for locked-on. Easy-peasy. You change output levels by the secondary electronic switch in the head.

But there is some hidden sophistication here, as there are actually two different mode groups you can switch between. A press-and-hold of the electronic switch for 3 secs when the light is on will switch between the two modes. Let me describe them here in detail.

Mode 1 (default) available levels: Eco, Low, Medium, High, Turbo, Strobe, SOS, and Beacon

Mode 1, from OFF:

  • Tail switch, partial-press: Momentary On in last memorized mode
  • Tail switch, single-click: Turns On in last memorized mode
  • Tail switch, double-press: Turns On in last memorized mode and then jumps to Turbo (click to stay locked-on in Turbo). You have be pretty rapid on the double-press to jump to Turbo.
  • Side switch, press-and-hold: Nothing – but if you click the tail switch while holding down the side switch, the light will activate in Eco mode.
  • Side switch, single-click: Nothing

Mode 1, from ON:

  • Tail switch, partial-press: Nothing
  • Tail switch, single-click: Turns Off
  • Side switch, press-and-hold (3 secs): Switch to Mode 2 (see below)
  • Side switch, single-click: Steps up to the next non-Turbo constant output mode (in sequence, Eco > Lo > Med > High)
  • Side switch, double-click: Turbo
  • Side switch, triple-click: Strobe
    • Side switch, double-click when in Strobe: Cycle through in sequence Strobe > SOS > Beacon (with no mode memory)

Mode 1, Mode memory:

Yes, for non-Turbo constant output modes.

Mode 1 Shortcuts:

  • Eco mode: Press and hold the side switch while turning on at the tail switch.
  • Turbo mode: Double-click the side switch from On, or double-press the tail switch from Off.

Mode 2 available levels: Medium, Turbo, and Strobe.

Mode 2 functions basically as a stripped-down version of Mode 1. The main differences are:

  • Single-click of the side switch only selects between Medium and Turbo now.
  • Double-click of the the tail or side switch goes to Strobe instead of Turbo.

Otherwise, the two modes function the same way.

Low voltage warning:

Yes, the main light will step down as the battery is running low. It will then turn Off at ~2.95V

Lock-out mode:

Yes, but physically – you lock-out the light by a twist of the tailcap.

Battery indicator:

When first activating the light, the indicator on the side switch shows the battery voltage  (lasts for ~5 secs):

  • Solid green: ~70-100%
  • Flashing green: ~40-70%
  • Solid red: ~10-40%
  • Flashing red: 0-10%

Reviewer Comments:

The default Mode 1 set is very serviceable, and functions largely as you would expect. I particularly like the shortcut to jump to Eco mode, by holding down the side switch when activating at the tailcap. And shortcuts to Turbo are always appreciated. I also like the very intuitive battery read-out when activating the light.

I have to say though, I really don’t get the point of Mode 2. I could maybe see the value of a scaled down output set that excluded the blinky modes. Or, alternatively, a simple “tactical” interface of just Turbo and Strobe. But I don’t know how many people would want this half-way in-between option.

Circuit Measures

Pulse-Width Modulation (PWM):

Eco:
Eco

Low:
Lo

Turbo:
Turbo

There is no sign of PWM or noise on any level, the circuit appears to be fully current-controlled.

Strobes:

Strobe:


Strobe alternates between 7 Hz and 16 Hz every ~1.75 secs or so. Very distracting.

SOS:
SOS

Beacon:
Beacon

Beacon strobe is a slow 0.5 Hz (i.e., one full power flash every 2 seconds).

Charging:

The switch button shines solid red when the light is charging (switches to solid green when the charging is complete).

Resting voltage <3.0V

Resting voltage >3.0V

The C8L lacks the multi-stage charging feature seen on many lights (i.e., with a lower charging rate for when cells are heavily discharged). Charging rate is reasonably fast for a 21700 cell. Charging terminated at ~4.19V on my sample.

One oddity when charging – if you click the side switch while charging, the light will activate in Eco. I must say I was a bit surprised when I discovered that by accident. But I suppose it could be useful if you need an emergency light/night light while charging.

Standby / Parasitic Drain:

None. That is one of the nice things about a physical clicky switch, no standby current. 🙂 And you can always lock-out the light by a twist of the tailcap, to prevent accidental activation.

 Emitter Measures

This section is a new feature of my reviews, where I directly measure key emitter characteristics in terms of colour temperature, tint, and colour rendition. Please see my Emitter Measures page to learn more about what these terms mean, and how I am measuring them.

As explained on that page, since I am using an inexpensive uncalibrated device, you can only make relative comparisons across my reviews (i.e., don’t take these numbers as absolutely accurate values, but as relatively consistent across lights in my testing).

The key measures above are the colour temperature of ~5970K, and the slight positive tint shift (+0.0101 Duv) to yellow-green at this temperature.

For CRI (Ra), I measured a combined score of 71.

These values are very consistent with the XHP50.3 emitter, and match my visual experience of this light.

Beamshots

All outdoor beamshots are taken on my Canon PowerShot S5 IS at f/2.7, 0.5 secs exposure, ISO 400, daylight white balance. The bend in the road is approximately 40 meters (~45 yards) from the camera. Learn more about my outdoor beamshots here (scroll down for the floody light position used in this review).

Click on any thumbnail image below to open a full size image in a new window. You can then easily compare beams by switching between tabs.


As you can see above, the beam pattern for C8L is very much on the throwy side, with a nice and bright hotspot (as expected for this emitter).

Testing Results

My summary tables are generally reported in a manner consistent with the ANSI FL-1 standard for flashlight testing. In addition to the links above, please see my output measures page for more background.

All my output numbers are based on my home-made lightbox setup. As explained on that methodology page, I have devised a method for converting my lightbox relative output values to estimated lumens. My Peak Intensity/Beam Distance are directly measured with a NIST-certified Extech EA31 lightmeter.

C8L Testing Results

ModeSpec LumensEstimated Lumens @0secEstimated Lumens @30 secsBeam Intensity @0secBeam Intensity @30secsBeam Distance @30secsPWM/Strobe FreqNoise FreqCharging Current <3VCharging Current >3VParasitic DrainWeight w/o BatteryWeight with BatteryCCT (K)DuvCRI
Eco82727---NoNo1.7 A1.8 ANo173 g242 g---
Low100125125---NoNo1.7 A1.8 ANo173 g242 g---
Med500450450---NoNo1.7 A1.8 ANo173 g242 g---
High1,3001,2001,200---NoNo1.7 A1.8 ANo173 g242 g5,9700.010171
Turbo3,1003,1503,10063,600 cd63,200 cd503 mNoNo1.7 A1.8 ANo173 g242 g---
Strobe------7-16 HzNo1.7 A1.8 ANo173 g242 g---
SOS------NoNo1.7 A1.8 ANo173 g242 g---
Beacon------0.5 HzNo1.7 A1.8 ANo173 g242 g---

The Eco mode is not as low in my testing as the specs report (i.e., more of a typical low). The higher outputs in my lightbox seem to correlate pretty well with the specs.

My beam distance measures are slightly lower than the specs, but are within a reasonable range to them (i.e., it is quite a strong thrower).

To see full testing results for all modern lights in my testing, check out my Database page.

Runtimes

As always, my runtimes are done under a small cooling fan, for safety and consistency. To learn more about how to interpret runtime graphs, see my runtimes methodology page.

Max

Hi

Med

The C8L seems to be very efficient, with overall output/runtime performance for the XHP50.3 coming in a little below the XHP70.2/SST-70 lights, but above the SST-40 lights, as you would expect. But max output rivals the higher output emitters, which is very impressive.

The regulation is very stable and flat on the Hi and Med levels, but showed an interesting step pattern on the Turbo run. I assumed this was due to thermal management and the effect of my standard cooling fan, so I did an additional Turbo run without the fan (red trace above). Based on earlier reviews, I expected the C8L to step down to the Hi level and stay there. Instead, without the fan, the C8L stepped down to a lower level than Hi, but still stepped back up to an intermediate level in an apparently thermally-regulated pattern.

I haven’t seen quite this pattern before, so I thought it would be good to compare the runs at a shorter timeframe (by default, all runs are under a cooling fan unless stated otherwise):

Max-extended

Interestingly, the light doesn’t actually step-down, but rather gradually ramps down to lower levels. After some variable period of time (presumably as the light cools), it then ramps back up to a higher level. But doesn’t level off at the defined Hi or Turbo levels, rather at a series of intermediate outputs. This is a fairly distinctive thermal management feature.

In any case, the light is certainly well regulated at every level, with very good efficiency for a XHP50.3 HI emitter.

Pros and Cons

ProsCons
Light has excellent output/runtime efficiency, at all levelsTurbo ramps down to a reduced Hi level eventually, due to heat. However, light ramps back up to intermediate output levels as it cools.
Circuit shows very good regulation overall, with thermally-mediated ramp down/up on Turbo, and step-downs as the battery is almost drained.Lacks a true Moonlight/ultra-low level, but that is not surprising for a thrower.
Uses a dual switch design, with physical tailcap clicky for on/off.Electronic button feel could be improved.
Good build quality and hand feel.

Overall Rating

Preliminary Conclusions

The C8L is a very impressive light. The build quality and hand feel are top notch, on par with with more expensive lights (although I do find the electronic switch cover a bit loose in feel). I would also appreciate a few more package extras (like a belt holster), but this is a very good package for the price.

The beam pattern is what you would expect for the size reflector and emitter – a lot of throw, with decent spill. And there are no obvious chromatic abberations – a consistent (and accurately labelled) 6000K cool white beam.

I like the implementation of the dual switch user interface, with easy shortcuts to min or max output. The UI is very serviceable, although it could use a few tweaks (like a revised second mode set). Output levels are reasonable (note there is no Moonlight mode, but that is not surprising in a larger throw light like this).

Overall output/runtime efficiency seems very good for the emitter type. Regulation pattern is also very flat and stable, but with an interesting thermally-mediated ramp down (and ramp back up) on the Turbo level. It all seems very well thought out.

No surprises, this light works exactly as advertised – and is a great bargain to boot. After testing this model, I am definitely interested in reviewing additional Sofirn lights in the future.

Acknowledgement

The C8L was supplied by Sofirn for review. As always, all opinions are my own and the light received the same rigourous and objective testing as all other lights that I have reviewed. At the time of review, this light retails for ~$40 USD (~$55 CDN).

Sofirn IF25A

The IF25A is a popular compact every-day-carry light, running on an included single 21700 battery. It also features the sophisticated Anduril user interface.

  1. Introduction
  2. Manufacturer Specifications
  3. Package Details
  4. Build
  5. User Interface
  6. Circuit Measures
  7. Emitter Measures
  8. Beamshots
  9. Testing Results
  10. Runtimes
  11. Pros and Cons
  12. Overall Rating
  13. Preliminary Conclusions
  14. Acknowledgement

Introduction

In my absence from reviewing, another popular premium “budget” maker that has come on the scene is Sofirn. Making a series of affordable but powerful lights, I was curious to give them a try. So I purchased their popular compact 1×21700 model, the IF25A.

Note that this light has been around for a while now, so its performance may not be quite as high as some of their newer offerings. And my sample was purchased last fall – it took me awhile to get around to it, given all my requested reviews.

The IF25A is quite a tiny little tank of a light, and features 4x Luminus SST20 emitters. The light comes with a choice of either warm (4000K) or a cool (6500K) white LEDs. This review is of the cool white IF25A, in order to compare with other lights configured for maximum output.

Note this will be the second light I’ve tested that uses the open-source Anduril user interface (although I know it uses an early implementation of Anduril 2). Let’s see how the light performs in my testing.

Manufacturer Specifications

Note: as always, these are simply what the manufacturer provides – scroll down to see my actual testing results.

FeatureSpecs
MakerSofirn
ModelIF25A
Emitter4xSST20
Tint6500K
Max Output (Lumens)4,000
Min Output (Lumens)-
Max Runtime-
Max Beam Intensity (cd)-
Max Beam Distance (m)420 m
Mode Levels5 + Ramp
FlashingStrobe
Battery1x21700
Weight (w/o battery)99 g
Weight (with battery)-
Length106.4 mm
Head Diameter35 mm
Body Diameter35 mm
WaterproofIPX-8

Package Details


The IF25A comes in typical cardboard box, with fairly simply background illustrations and basic light details (I know some of the newer Sofirn models come in fancier packaging). Inside, I found:

  • Sofirn IF25A flashlight
  • Sofirn-branded 4000mAh 21700 battery (note some distributors may include a higher-rated cell)
  • A 18650 battery sleeve
  • Wrist lanyard
  • USB-C Charging cable
  • 2 Spare O-rings
  • Manual

It’s a decent package for a budget build. I would have liked a pocket clip and a higher capacity cell though, to match the competition (again, newer versions may come with a higher capacity cell). I do appreciate the USB-C charging cable – I have plenty of these lying around, but it always nice to see one included in a budget package.

Build


From left to right: LiitoKala 21700 (5000mAh), Fenix ARB-L21-5000U 21700 (5000mAh), Sofirm IF25A, Fenix E35 v3, Convoy S21E, Imalent MS03, Armytek Wizard C2 Pro Max, Acebeam E70, Nitecore P20iX, Nitecore MH12SE, Lumintop D3, Convoy M21F.


The IF25A is shorter than most lights in this class, despite the multi-emitter head. Despite that, it actually feels very robust, with a nice thick body. A surprisingly tiny but substantial build at the same time.

There is a side-mounted electronic switch on the side of the light near the head, with a grippy rubber cover that still allows the red and green LEDs underneath to shine through. Feel and traverse of the electronic switch is good. Note that by default the switch shines a constant low output dual-green when the battery is connected but not in use or charging (brighter green in those conditions). I initially found this constant “locator” feature is a bit annoying – but you can turn it off, or switch it to a brighter green (which actually has an important potential use – scroll down to User Interface for a discussion).

The button also shines a bright red when charging the battery through the light’s integrated USB-C charging port. The port is located on the opposite side from the switch, with a thick rubber cover. I found the cover to fit rather tightly, making it hard to full depress. But I suppose that should help with waterproofness if you can press it down enough.

I always recommend you keep a light stored locked out when not in use. Thanks to the anodized tailcap threads, you can do this easily on the IF25A by a simple twist of the tailcap. Threads are square-cut, and well lubricated. The light can tailstand stably, thanks to the side cut-outs for the wrist lanyard.

There is no actual knurling on the light, just a series of cut-outs at various points. Combined with somewhat glossy anodizing, this makes the light fairly slippery in use – I would have preferred some knurling elements. Note the light can also roll fairly easily, although the slightly flared tailcap helps a little bit with this (as does the rubber port cover). The anodizing seems in good shape on my sample, but I suspect it is only the thinner type II, given the price point.

Note that no pocket clip is included, and it would be a challenge to carry the light that way given the wider head and flared tailcap. Personally, I would have preferred a narrower tailcap and a clip option, since I don’t think thin wrist lanyards are of much use. Not a bad physical build by any means, but it does feel and look somewhat budget. I also find it a bit too short, but I have larger than average hands.

My sample came with a Sofirn-branded standard-sized 4000mAh 21700 battery (higher capacity may be sold by some vendors), with a slightly raised flat-top (also called a wide button by some).

A battery sleeve is also included, in case you want to use older 18650 cells (again, a nice touch in a budget light). I suspect a button-top would also work fine in the light, but it would need to be compact given the small size here (and certainly, none of those 21700 cells with built-in charging ports would fit). Note there is no spring in the head, just a flat contact disc (which helps explain the more compact length).


The IF25A uses 4 non-frosted TIR optics instead of individual reflectors, allowing the head be quite a bit shorter than most. I actually recommend the use of TIR optics for multi-emitters, as it tends to minimize beam artifacts. It also shines a generally “smoother” beam, with less differentiation between hotpot and spill. The beam looks reasonably clean on my sample, with just a few artifacts.

Note that I did observe some tint shifting on the lower levels (i.e., the lowest output has a definite greenish hue). This is not uncommon on current-controlled lights (e.g., Fenix), but is particularly noticeable here.

The bezel is flat black aluminum, with no crenelations – so, it can headstand stably, but you may not be able to tell if the light is on. I don’t see any form of AR coating on the lens.

There is a very interesting option with this light, using the switch indicator (green LEDs) when the battery and tailcap are connected. As I will explain below, you can increase the output of the default setting, giving yourself in essence an extra “moonlight” mode. Here is what it looks like, close-up on a white wall in the dark (not really this bright, using my cellphone’s auto-adjust mode):

Locator

The green is very even and surprisingly bright with dark-adapted eyes. Scroll down for more details on how to configure.

User Interface

The IF25A uses the open-source Anduril user interface (UI). Although the site I bought it from describes (and displays) the original interface of the inaugural Anduril release, I can confirm that my sample actually uses Anduril 2 (just like the Lumintop D3 I previously reviewed). I understand from ToyKeeper that it is actually an early implementation of it.

Anduril has two distinct UIs mode sets: Simple and Advanced. The labels are a bit misleading, as both are fairly sophisticated – it is just that the Advanced UI has a lot of extra options not available on the scaled-down Simple UI. Advanced UI also has an option for a discrete Stepped level mode, in addition to the continuously-variable smooth Ramping mode (which is the only mode present on the Simple UI).

To switch from the default Simple UI to Advanced UI, you need to do 10 clicks from Off, with a hold on the 10th click.

It’s easier to show the UIs rather than explain them in words, so here is a common pic:

ui-diagram

You can also download a fully described text manual here.

Like the Lumintop D3, my IF25A only has 5 discrete Stepped modes in the Simple UI (all 7 show up under Advanced UI though). Since most people are likely to leave it in the Simple UI, I’ve gone with 5 discrete levels my tables, and labelled L1-L5 as Moonlight, Lo, Med, Hi and Max/Turbo.

Again, check the image and link above for more info, but here is a simplified description of the UI to get you started.

From OFF:

    • Press-and-hold: Turns On in lowest output, in either Ramping mode or Stepped mode depending on which mode is enabled (and which UI you are in)
    • Single-click: Turns on in last memorized mode used (Ramping or Stepped)
    • Double-click: Turns on to Turbo (aka the Ramping max output)
    • Triple-click: Battery check (voltage read out a single time)
    • Triple-click-and-hold: Special strobe modes, but only when in Advanced UI (remembers last strobe mode used)
    • 4 clicks: Lockout mode. In lockout mode you have different options available:
      • Press-and-hold: Momentary Moonlight
      • Double-click-and-hold: Momentary Low
      • 4 clicks: Turns On in memorized output level
      • 4 clicks and hold: Turns On in the lowest level
      • 5 clicks: Turns On in Turbo
      • 10 clicks and hold: Configure the lock timeout threshold (in Advanced UI only), allowing you to pre-set the timeout time of the lock.
    • 7 clicks: (Advanced UI only) Enters auto light config for the button switch (“AUX/Button LEDs”). There are four modes you can switch between; constant low, blinking low, off, constant hi. Click 7 times again to advance to the next option, in sequence. The light auto-memorizes the last option you select. This allows you to use the switch LEDs as an impromptu “green moonlight” mode, as explained below.

From ON:

  • Press-and-hold: Ramps up (or Steps up, depending on the mode). Ramps/steps down if you do it again.
  • Single-click: Turns Off
  • Double-click: Jumps to Turbo
  • Double-click-and-hold: Ramps down (or Steps down)
  • Triple-click: Switch between Ramping and Stepped modes (in Advanced UI only)
  • 4 clicks: Lockout mode (see above for options)

Mode memory:

Yes, the circuit memorizes the last constant On output level in either Ramping or Stepped modes.

Strobe/Blinking modes:

Yes, quite a few actually. The strobe/blinking modes are accessible from Off with a triple-click-and-hold, but in Advanced UI only. You can switch between strobe/blinking modes with 2 clicks, in the following sequence (see testing results below to see what these look like):

  • Candle mode
  • Bike flasher
  • Party strobe
  • Tactical strobe
  • Lightning

Low voltage warning:

Sort of. In operation, the light drops in brightness in steps, and runs for an extended time at a very low level. Apparently it shuts off when the cell is ~2.8V (although I haven’t run it that long to confirm). I haven’t noticed any change in the switch LEDs to indicate low battery voltage (which seems like a missed opportunity, given they have red and green LEDs under there).

Lock-out mode:

Yes. In either Simple UI or Advanced UI, lockout is accessed by 4 clicks from On or Off (repeat to unlock). The lockout mode is unusual with Anduril, as it actually enables momentary operation in the Moonlight/Lo modes. There are other lockout modes available, as explained above. As always though, I recommend you physically lock out at the light at the tailcap, if you want to guarantee no accidental activation.

Temperature check and thermal calibration mode:

This is a little complicated (and beyond the needs of most users), so I will just refer you to the diagram from the manual above. With default settings, I find it steps down fairly quickly due to heat (unsurprising, give low thermal mass in the head). I have not tried to reconfigure my sample.

Reviewer Comments:

Anduril is a fairly sophisticated setup – a choice of Simple or Advanced UI, generally well thought out. Of course, you will never please everyone, and many may prefer a slightly simpler interface (e.g., the Convoy S21E), or even very basic one (e.g., Acebeam E70). While I can see flashaholics enjoying some of the extra items, some of them are really novelties (e.g. candle mode and lightning storm are particularly well done, but when would you practically ever use them other than as a party trick?). At the end of the day, I expect Simple UI is fine for most users. That said, the Stepped mode and bike strobe are something that many could use, so it’s nice to have them as options in the Advanced UI.

One of the main advantages of Anduril in a build like this is the ability to independently control the green LED emitters under the switch cover. By keeping the constant-on default setting (or increasing to brighter green), you can basically turn this into an additional “green moonlight” mode on the light. Simply use the light as a twisty: tighten the tailcap for moonlight and access to all the main modes, loosen the tailcap for a physical lock out. 🙂

Circuit Measures

Pulse-Width Modulation (PWM):

There is no sign of PWM on any level, the circuit appears to be fully current-controlled.

That being said, my oscilloscope was able to detect high frequency noise at all levels except max output, as depicted below. Note that these are not actually a concern, as they are not visible to naked the eye – the light remains flicker free in actual use. But I’ve noticed upon my return to reviewing that a lot of “budget” circuits are showing detectable signs of circuit noise. Using the Simple UI’s 5 discrete Stepped levels:

Level 1 (Moonlight):
L1

Level 3 (Med):
L3

Level 4 (Hi):
L4

Level 5 (Max):
L5

As you can see, noise begins with L1, at ~9.2 kHz. For L2 through L4, noise frequency remains constant at ~15.4 kHz, but increases in amplitude as output levels rise (which is fairly common, as more light is being emitted) – except for L5, which is noise free, oddly. Noise at these super high frequencies is impossible to detect visually, and so again not a concern. I am just including for completeness, as I like to present all my findings.

Strobes:

Tactical Strobe:
Tactical

Tactical strobe is a fairly typical 10.1 Hz, although the light spends more time in the On phase than the Off phase on each cycle.

Party Strobe:
Party

Party strobe is a super-fast (and annoying) short pulse at 25 Hz. I don’t know what kind of rave parties the Anduril folks like to hold, but I won’t be attending any. 😉
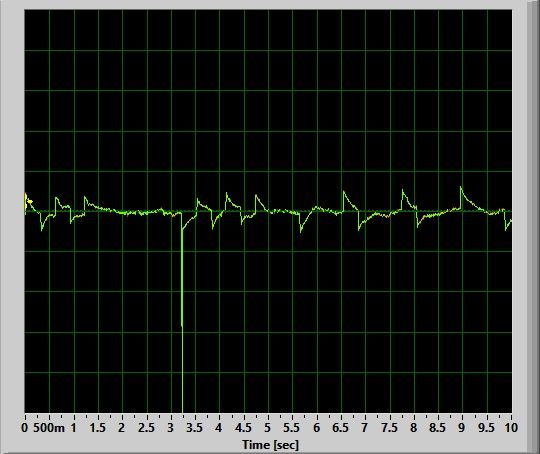
Lightning Strobe:
LightningD
Lightning
LightningA
LightningB
LightningC

I’ve shown five consecutive 10-sec cycles above, so you can a feel for the frequency and intensity of light flashes. Lightning strobe is a fairly realistic lightning simulation, with variable intensity and time between flashes.

Bike Strobe:
Bike

Bike strobe is a nice, slow 1 Hz signalling strobe – but with with 4 rapid flashes on every signal (shown in more detail below).

D3-BikeB

Beacon:
Beacon

Beacon strobe is a slow 0.5 Hz.

Candle:
Candle

Candle strobe is a continuous flicker, of varying intensity (again, accurately simulating a candle).

Charging:

The switch button shines a bright red when the light is charging (switches to bright green when the charging is complete).

Resting voltage <3.0V

Resting voltage >3.0V

The IF25A has a two-stage charging feature (i.e., with a lower charging rate for when cells are heavily discharged). With a heavily depleted cell (<3.0V), the initial charging voltage is a relatively low 0.32A. Once the resting voltage of the cell >3.0V, the charging current jumps to ~1.6V. Over the next few mins, it will continue to slowly rise a bit higher.

Note that the light drops to a very low level when the battery is nearly depleted, but there is no specific low voltage warning that I’ve noticed (e.g., there is no warning flash, and the button LED remains green throughout when the light is on unless you disable that feature). It will apparently shut-off at ~2.8V, but I never ran it that far to find out.

Standby / Parasitic Drain:

I measured the standby current (with default low green switch LEDs active) as 78 uA, which is negligible and not a concern (i.e., it would take many years to fully drain the cell). Regardless, I always recommend you lock the light out when not in use to prevent accidental activation (and cut any standby drain). A single twist of the tailcap will lock out this light, thanks to the anodized screw threads. And special bonus, this means you can use the tailcap twisty as a de facto “green moonlight” mode with the switch LEDs.
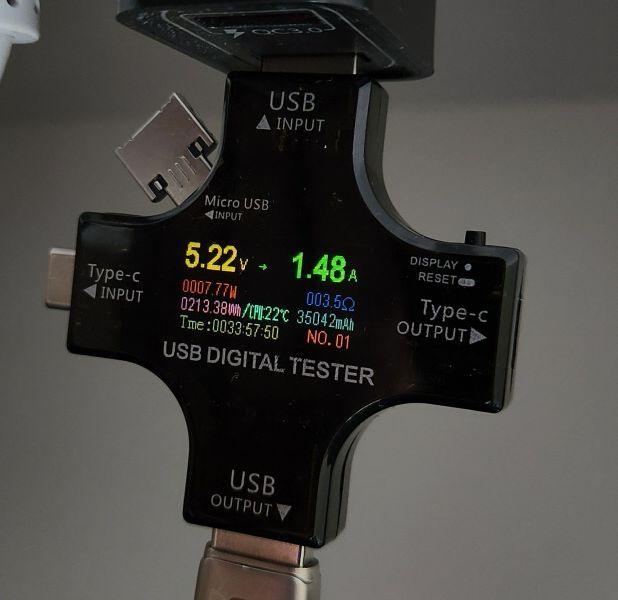
Emitter Measures

This section is a new feature of my reviews, where I directly measure key emitter characteristics in terms of colour temperature, tint, and colour rendition. Please see my Emitter Measures page to learn more about what these terms mean, and how I am measuring them.

As explained on that page, since I am using an inexpensive uncalibrated device, you can only make relative comparisons across my reviews (i.e., don’t take these numbers as absolutely accurate values, but as relatively consistent across lights in my testing).

As with all my reviews, the reported CCT and Duv measures above are for the first stable output mode without stepdown – which, in this case, is L3 (Med) on the Stepped Simple UI. The key measures above are the colour temperature of ~5265K, and the very noticeably positive tint shift (+0.0174 Duv) to green-yellow at this temperature.
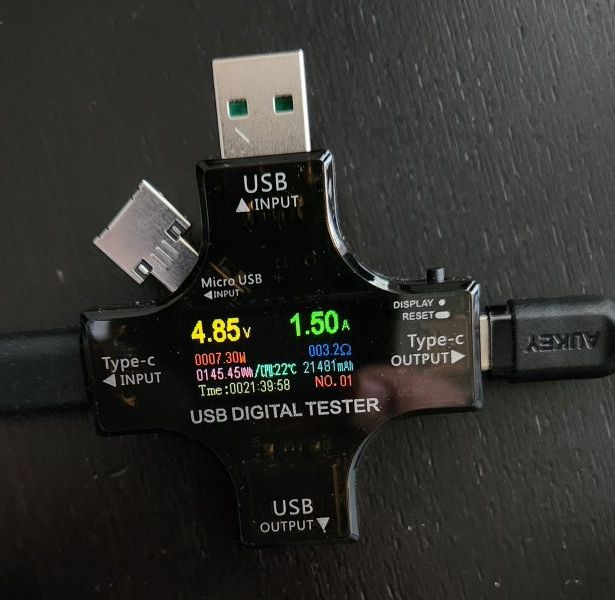
For CRI (Ra), I measured a combined score of 59 on this level.

These values are very consistent with Luminus SST emitters, and match my visual experience of this light.

Given the subjectively stronger green tint-shift I noticed on the lower outputs, I decided to actually measure the Duv tint shift of each discrete Stepped level on the Advanced UI, as shown below.

L7: ~5225K, Duv +0.0169
L6: ~5240K, Duv +0.0178
L5: ~5165K, Duv +0.0192
L4: ~5000K, Duv +0.0223
L3: ~5000K, Duv +0.0222
L2: ~5030K, Duv +0.0218
L1: ~5095K, Duv +0.0211

As you can see, the CCT doesn’t change much (i.e., typically stays within ~5000-5250K), but the positive (green) tint shift is greater at the lower levels (L1-L4) compared to the higher levels (L5-L7).
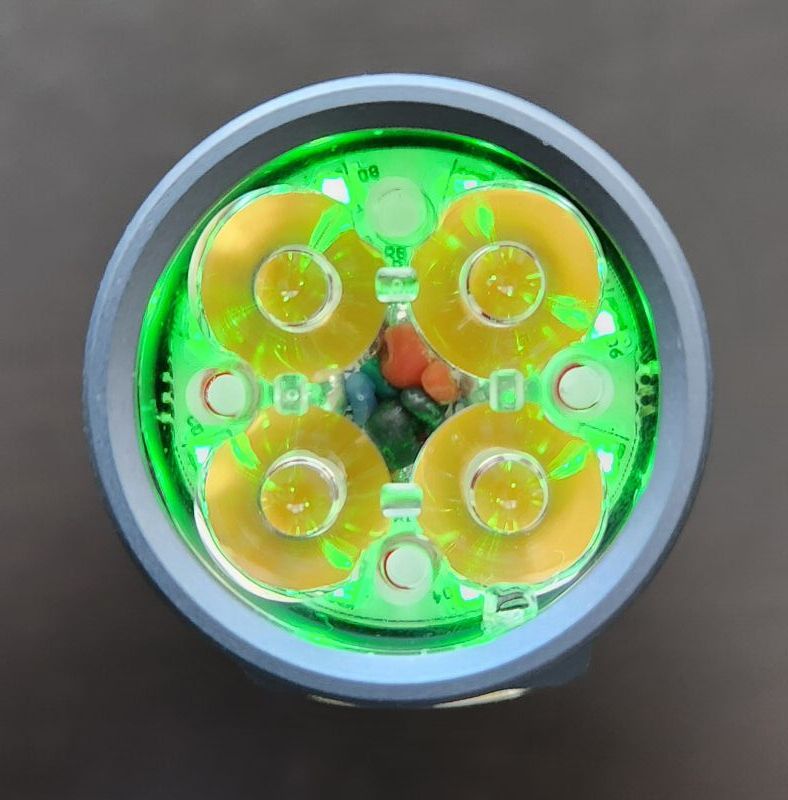
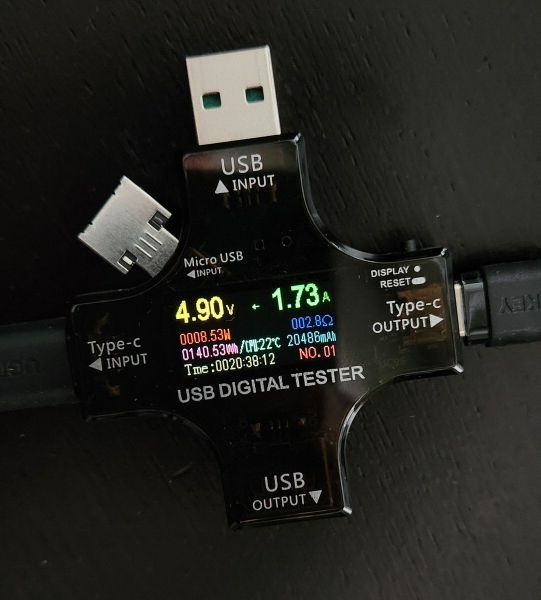
Beamshots

All outdoor beamshots are taken on my Canon PowerShot S5 IS at f/2.7, 0.5 secs exposure, ISO 400, daylight white balance. The bend in the road is approximately 40 meters (~45 yards) from the camera. Learn more about my outdoor beamshots here (scroll down for the floody light position used in this review).

Click on any thumbnail image below to open a full size image in a new window. You can then easily compare beams by switching between tabs.


I did a second set of beamshots at this location more recently, showing two more relevant lights:

As you can see above, the beam pattern for IF25A is more on the floody side, as expected give the multi-emitters and shallow TIR optics.

Testing Results

My summary tables are generally reported in a manner consistent with the ANSI FL-1 standard for flashlight testing. In addition to the links above, please see my output measures page for more background.

All my output numbers are based on my home-made lightbox setup. As explained on that methodology page, I have devised a method for converting my lightbox relative output values to estimated lumens. My Peak Intensity/Beam Distance are directly measured with a NIST-certified Extech EA31 lightmeter.

IF25A Testing Results

ModeSpec LumensEstimated Lumens @0secEstimated Lumens @30 secsBeam Intensity @0secBeam Intensity @30secsBeam Distance @30secsPWM/Strobe FreqNoise FreqCharging Current <3VCharging Current >3VParasitic DrainWeight w/o BatteryWeight with BatteryCCT (K)DuvCRI
L1 Moonlight-1.41.4---No9.2 KHz0.32 A1.6 A78 uA98 g163 g---
L2 Lo-7474---No15.4 kHz0.32 A1.6 A78 uA98 g163 g---
L3 Med-450440---No15.4 kHz0.32 A1.6 A78 uA98 g163 g5,2650.0174-
L4 Hi-1,6501,550---No15.4 kHz0.32 A1.6 A78 uA98 g163 g5,2800.016959
L5 Max4,0003,4003,05030,500 cd24,800 cd315 mNoNo0.32 A1.6 A78 uA98 g163 g---
Candle-------No0.32 A1.6 A78 uA98 g163 g---
Bike Strobe------1.0 HzNo0.32 A1.6 A78 uA98 g163 g---
Party Strobe------24 HzNo0.32 A1.6 A78 uA98 g163 g---
Tactical Strobe------10.1 HzNo0.32 A1.6 A78 uA98 g163 g---
Lightning-------No0.32 A1.6 A78 uA98 g163 g---
Beacon------0.50 HzNo0.32 A1.6 A78 uA98 g163 g---

My measured max output is considerably below the rated spec, as are my beam distance measures. The rated specs definitely seem inflated on this sample. That said, I do like the inclusion of the relatively low min output mode here (i.e., ~1.4 lumens). Not quite as low as I would like for Moonlight, but I’ll take what I can get given how rare actual Moonlight modes seem to be nowadays.

To see full testing results for all modern lights in my testing, check out my Database page.

Runtimes

As always, my runtimes are done under a small cooling fan, for safety and consistency. To learn more about how to interpret runtime graphs, see my runtimes methodology page.

Max

Hi

Med

For thermal reasons, both the (L5) Max and (L4) Hi runtimes quickly stepped down from their initial values to ~750 lumens or so, and stayed within a ~100 lumen range of that point for most of their extended runs (scroll down to see this with better resolution). You may be able to adjust this somewhat through the Anduril settings, but ultimately I suspect the low thermal mass of the light is the culprit here.

At the (L3) Med level, you get a semi-regulated runtime pattern (i.e., much closer to direct-drive over most of its run).

Something else you’ll notice in the full runtimes above is that the IF25A regulation pattern is quite “noisy”, demonstrating significant fluctuations in output over time (even at the “regulated” lower level). In practice, these fluctuations are not noticeable (i.e., they are actually fairly minor and slow over human perceptual timescales, and thus unnoticeable).

Here is a blow-up of the (L5) Max output runs, for both Ramping and Discrete Stepped, on a shorter time scale, to show you both the step-down and relative stability:

Max-extended

As you can see, there is no real difference between the discrete Stepped mode set and the Ramping (unlike some earlier reviews out there). It seems like Sofirn fixed that earlier issue.

To better show the effect of the “noisy” pattern above, here is a blow-up in even more detail, over a 2-min portion of the run when the changes in output were the most extreme (on the discrete Max output run):

IF25A-Max-extended

Again, these are not a concern as you will not be able to notice these kinds of subtle outputs changes in real life. Nevertheless, I would prefer to see more stable and consistent regulation across all modes, as the pattern above is a sign of a very basic budget circuit.

Which brings me around to the key point – overall efficiency of the IF25A appears lower than others in this class. Keep in mind my sample IF25A came with a 4000mAh battery, which is 20% lower capacity than most of the competition above. Still, the runtimes are  disappointing compared to lights with fully-regulated current-controlled circuits (e.g., the more expensive Nitecore P20iX, but even the budget Convoy M21F).

Part of this could be due to the relative efficiency of the multiple SST20 emitters (especially in a small head where heat management is an issue). But I doubt that is the main issue, as they are not being driven very hard at these lower “regulated” levels. It seems far more likely that the issue is with the driver. Which is a real shame, since Sofirn opted for the sophisticated Anduril UI – it would have been nice to have seen it paired with an efficient current-controlled circuit here.

I realize this IF25A model is getting a little long in the tooth now, but I still recommend Sofirn look into the improving both the regulation and the efficiency of the circuit on this model while it is still available.

Pros and Cons

ProsCons
Comes with the sophisticated Anduril UI, which has both simple and advanced options.Light steps down quickly on Max/Hi levels to a relatively low ~750 lumens for the remainder of the runtime (for thermal reasons)
Small and sturdy physical build.Driver output efficiency is below average for the class, consistent with entry-level budget lights.
Relatively floody beam, without too many artifacts from the multiple emitters.Regulation pattern is not impressive, both in terms of its relative spiky "noise" pattern, and semi-regulated appearance.
Thanks to the configurable UI, you can use the green LED switch indicator as an effective Moonlight mode.Rated specs for max output and beam distance are over-inflated in my testing.

Overall Rating

Preliminary Conclusions

The Sofirn IF25A is a serviceable build, with a decent (and sophisticated) user interface with a floody beam profile. It is a particularly compact yet sturdy light, which should appeal to many. That said, I would like to have seen a bit more refinement in the physical build (e.g., actual knurling, less-flared tailcap with pocket clip, etc.).

I realize this is an older model that has been around for a while, so it may not be entirely fair to compare it the newer competition. But the overall impression I have is one where they consistently skimped a bit on many aspects of the light. While each one may not seem like a big deal, the overall effect adds up over time. The most significant one is the circuit – both regulation and efficiency were sub-par, consistent with the most basic budget builds (yet many do better, as shown above). I find increasingly that this is something that differentiates the most entry-level budget lights from the intermediate or premium ones. At the end of the day, I find circuit performance really matters to me.

This is also an example where the rated max output and beam distance specs are clearly inflated. Since my return to reviewing, I’ve generally been pleasantly surprised to see much better concordance of my testing results to the rated specs (compared to the Wild West of my early days of reviewing). So when I see a clear mismatch now, as in the case of this light, it leaves a poor impression.

All scoring is relative, and bound to be a bit idiosyncratic, but I initially gave this light 3 stars overall. I’ve since upgraded that to 3.5 stars, as I find the green switch LEDs (especially set to high) to act as a very serviceable “green moonlight” mode. This is one of the plusses of having the sophisticated Anduril 2 UI, combined with a reasonable initial minimum and max output levels on the main emitter. But again, Max/Hi levels step down quickly to ~750 lumens for thermal reasons – which is a bit lower than the competition. And the main beam tint on all levels below Max/Hi is decidedly green on my sample.

The build quality seems relatively decent for a budget brand, and with a few noticeable refinements, this light could easily move into a higher tier. The quality and features inspire enough hope that I am looking forward to reviewing additional Sofirn lights.

Acknowledgement

The IF25A was purchased through an online vendor from China (aliexpress). As always, all opinions are my own and the light received the same rigourous and objective testing as all other lights that I have reviewed. At the time of review, this light retails for ~$35 USD (~$45 CDN).

Nitecore MH12SE

The MH12SE is the sixth iteration of the general-purpose MH12 line of flashlights. Features an integrated battery charging feature and single included 21700 battery.

  1. Introduction
  2. Manufacturer Specifications
  3. Package Details
  4. Build
  5. User Interface
  6. Circuit Measures
  7. Emitter Measures
  8. Beamshots
  9. Testing Results
  10. Runtimes
  11. Pros and Cons
  12. Overall Rating
  13. Preliminary Conclusions
  14. Acknowledgement

Introduction

Following on my P20iX review, this is the latest iteration of the MH12 series from Nitecore – now up to the MH12SE, which is apparently its sixth iteration. Featuring a 1×21700 battery and dual physical tail clicky/electronic side switches, the “multi-task hybrid” series has clearly come a long way.

This light features the Luminus SFT-40-W emitter, which is a low-profile “flat window” emitter (i.e., no dome). This translates into better throw, typically at the expense of some output. Let’s see how it does in my testing.

Manufacturer Specifications

Note: as always, these are simply what the manufacturer provides – scroll down to see my actual testing results.

FeatureSpecs
MakerNitecore
ModelMH12SE
EmitterSFT40-W
Tint-
Max Output (Lumens)1,800
Min Output (Lumens)1
Max Runtime1,500 hrs
Max Beam Intensity (cd)41,000 cd
Max Beam Distance (m)405 m
Mode Levels5
FlashingStrobe, Beacon, SOS
Battery1x21700
Weight (w/o battery)80 g
Weight (with battery)-
Length141 mm
Head Diameter25.4 mm
Body Diameter25.4 mm
WaterproofIP68 2m

Package Details


The MH12SE package is very comparable to the “premium” P20iX in terms of extras, except it comes a standard thin cardboard box, colourfully printed with information on the light. Inside you will find the following:

  • Nitecore MH12SE flashlight
  • Nitecore-branded 5000mAh 21700 battery (NL2150)
  • 1×18650/2xCR123A battery holder
  • Tactical belt holster (NTH10)
  • Wrist lanyard
  • Pocket clip
  • USB-C charging cable
  • Spare O-ring
  • Manual

That’s a nice package, including everything you would need for the light. I particularly like seeing the belt holster, as that is always my preferred mode of carry (and very rare to see nowadays). This hard plastic model seems to hold the light securely, and allows for quick grab, pull and release.

Build


From left to right: LiitoKala 21700 (5000mAh), Fenix ARB-L21-5000U 21700 (5000mAh), Sofirm IF25A, Fenix E35 v3, Convoy S21E, Imalent MS03, Armytek Wizard C2 Pro Max, Acebeam E70, Nitecore P20iX, Nitecore MH12SE, Lumintop D3, Convoy M21F.


The MH12SE is a bit longer than most flashlights in this class, likely due to the use of an actual forward clicky switch. It has narrow head, and fits well into the bundled holster.  I find it fits and works comfortably in the hand – I don’t find it too long (although I do have large hands).

It’s great to see a forward tail clicky switch again – I’ve always had a fondness for this format. You use this clicky switch as your main switch for on/off operation and signaling, with a secondary electronic switch to cycles modes. Feel and traverse of the main switch is good, for both momentary (half-press) and clicked-on. The secondary switch is electronic, with a fairly typical feel.

Note that since the primary switch protrudes, tailstanding is not possible, and accidental activation is easy. So as always, I strongly recommend you keep the light stored locked out at the tailcap when not in use. A simple twist of the tailcap will do the job, thanks to the anodized screw threads. There is a side cut-out in the tailcap for the wrist lanyard, if you want to use it. The belt clip fits on securely, and comes off without leaving a mark. I believe the clip is intended primary for bezel down carry, but  the light could be carried the other way in a pinch.

The body is fairly smooth overall, but has a good number of rings and cutouts to help with grip. Knurling is not very aggressive – it could be enhanced, but its not unreasonable for a general purpose light. The light can roll fairly easily, but the flat cut-outs in the head help  a little bit with this (the clip would considerably, if you used it).

Anodizing looks to be very good quality, relatively matte in finish. It is advertised as type III (Hard Anodized), and I see no cause to doubt that. I didn’t notice any flaws on my sample.

As you can see above, there is a standard tailspring in the tailcap, and Nitecore uses a standard button-top 21700 cell in this light. This is an advantage over the P20iX, where the dual-switch tailcap design necessitates a custom cell. You can swap in another battery easily enough, and can charge the cell outside the light if you want. Of course, by default, you are expected to charge the battery right inside the light. There is a rubber plug in the head, across from electronic mode switch, that covers the integrated USB-C charging port (cover fits securely, but without too much resistance). I expect waterproofness to be reasonable, but wouldn’t recommend dunking the light in water.

As always, I find the physical build of the MH-series lights from Nitecore to be very good for general purpose use. I really like the bundled MOLLE-compatible holster here, that is a pretty rare accessory.


The SFT-40 emitter is ideal for producing a very throwy beam, thanks to its low profile and lack of dome – even when coupled with a small reflector like this. The glass lens has a mild AR coating, which I rather prefer. The aluminum bezel has some very minor crenelations, so you can tell if the light is on when headstanding.

There is a LED under the electronic switch in the head, which lights up when the light is in use (or charging).

User Interface

The MH12SE features Nitecore’s standard dual user interface (UI) design, referred to as  as Daily Mode and Tactical Mode.

Switching between them is easy (but not something you are likely to do by accident). Press and hold the electronic switch while the light is off, and then press the tail switch while still holding the electronic switch for another ~ 5 secs or so. At that point, the light will flash rapidly (one flash for Daily Mode, two flashes for Tactical Mode).

Simply defined, Daily Mode has 5 constant output levels (Ultralow, Low, Mid, High and Turbo, in sequence) plus three strobe modes (Strove, SOS, and Beacon). The light has mode memory (except for SOS and Beacon). Tactical Mode cycles in the reverse direction from highest to lowest for the 5 constant output modes and Strobe, and does not use memory – the light always comes back on in Turbo.

Let’s start with Daily Mode, then Tactical Mode.

Daily Mode, from OFF:

  • Partial depress Main switch: Momentary On in last memorized mode used
  • Single-click Main switch: Turns On in last memorized mode used (this includes strobe modes, if set)

Daily Mode, from ON:

  • Single-click Main switch: Turns Off
  • Press-and-hold Side switch: Activate strobe modes (Strobe > Beacon > SOS). Release the Side switch to choose the desired strobe. Click the Side switch again to return to the last mode used.
  • Single-click Side switch: Move up to the next constant output level (Ultralow > Low > Mid > High > Turbo).

Tactical Mode, from OFF:

  • Partial depress Main switch: Momentary On in Turbo (no memory)
  • Single-click Main switch: Turbo (no memory)

Tactical Mode, from ON:

  • Single-click Main switch: Turns Off
  • Press-and-hold Side switch: Strobe (only, no other blinky modes). Press the side switch again to return to the last mode used.
  • Single-click Side switch: Move down to the next lower constant output level (Turbo > High > Mid > Low > Ultralow).

Switch to/from Daily or Tactical Modes, from Off:

  • Hold down Side switch and single-click Main switch while continuing to hold down Side switch for ~ 5 secs (flashes once for Daily Mode, twice for Tactical Mode, and then turns on at start of constant output ramp for that mode).

Shortcuts:

None.

Mode memory:

Yes, but only in Daily Mode, and for all output levels (i.e., constant output modes and strobe modes).

Strobe/Blinking modes:

Yes; Strobe, Beacon and SOS.

Low Voltage warning:

Yes. There is a power LED indicator under the side switch in the head that remains lit while the flashlight is in use – and will flash every two seconds once the battery is more than 50% drained.

Lock-out mode:

Yes, but only by physically locking out the light at the tailcap.

Temperature regulation control:

Yes. This light features Nitecore’s proprietary “Advanced Temperature Regulation” (ATR) control. It should keep the temperature within a reasonable range.

Reviewer Comments:

This is reasonable dual physical/electronic switch interface, with a good number of options. Personally, I like Daily Mode with its memory feature – although I don’t like having to cycle through Strobe to get to Beacon, and would have liked to be able to jump to Ultralow or Turbo by a shortcut.

Circuit Measures

Pulse-Width Modulation (PWM):

There is no sign of PWM on any level, the circuit appears to be fully current-controlled.

It’s actually refreshing to see no high-frequency circuit noise – it isn’t visible to the eye, but it is something that I’m seeing more commonly on modern lights. Glad to see its absence here.

Ultra Lo:
Ultra Lo

Lo:
Lo

Med:
Med

High:
Hi

Turbo:

Looking good!

Strobe:
Strobe
Strobe
Strobe

Strobe mode oscillates between a 15 Hz and 16 Hz strobe, with two different pulse durations (switching every two seconds or so). Note that both strobes are unusual, as they spends more time in the on-state than the off-state on each cycle. It is certainly very disorienting.

SOS:
SOS

Beacon:
Beacon

Beacon mode flashes approximately once every 2 seconds or so.

Charging:

Like the P20iX, the MH12SE uses a single-current charging feature, with a very fast-charging 2.0A rate. I normally like to see a two-stage charging implementation. But it is hard to over-discharge the cell given that the light steps down and eventually shuts off as the cell drains.

Standby / Parasitic Drain:

There is no standby drain on this light, thanks to the physical clicky switch.

That said, I always recommend you lock the light out when not in use to prevent accidental activation. A single twist of the tailcap will lock out this light, thanks to the anodized screw threads.

Emitter Measures

This section is a new feature of my reviews, where I directly measure key emitter characteristics in terms of colour temperature, tint, and colour rendition. Please see my Emitter Measures page to learn more about what these terms mean, and how I am measuring them.

As explained on that page, since I am using an inexpensive uncalibrated device, you can only make relative comparisons across my reviews (i.e., don’t take these numbers as absolutely accurate values, but as relatively consistent across lights in my testing).

The key measures above are the colour temperature of ~5650K, and the significant positive tint shift (+0.0139 Duv) to green-yellow at this temperature.

For CRI (Ra), I measured a combined score of 67.

These values are well within the range for SFT-40-W emitters, and match my visual experience of this light.

Beamshots

All outdoor beamshots are taken on my Canon PowerShot S5 IS at f/2.7, 0.5 secs exposure, ISO 400, daylight white balance. The bend in the road is approximately 40 meters (~45 yards) from the camera. Learn more about my outdoor beamshots here (scroll down for the floody light position used in this review).

Click on any thumbnail image below to open a full size image in a new window. You can then easily compare beams by switching between tabs.


As you can see above, the beam pattern for the MH12SE is very throwy, as expected for a SFT-40 emitter. Indeed, compared to the SFT-40-equipped Convoy S21E, the MS12SE is even more focused for throw (and with less intense spill).

Testing Results

My summary tables are generally reported in a manner consistent with the ANSI FL-1 standard for flashlight testing. In addition to the links above, please see my output measures page for more background.

All my output numbers are based on my home-made lightbox setup. As explained on that methodology page, I have devised a method for converting my lightbox relative output values to estimated lumens. My Peak Intensity/Beam Distance are directly measured with a NIST-certified Extech EA31 lightmeter.

MH12SE Testing Results

ModeSpec LumensEstimated Lumens @0secEstimated Lumens @30 secsBeam Intensity @0secBeam Intensity @30secsBeam Distance @30secsPWM/Strobe FreqNoise FreqCharging Current <3VCharging Current >3VParasitic DrainWeight w/o BatteryWeight with Battery
Ultralow10.80.8---NoNo2.0 A2.0 ANo80 g151 g---
Low455454---NoNo2.0 A2.0 ANo80 g151 g---
Mid260320310---NoNo2.0 A2.0 ANo80 g151 g---
High1,0501,0001,000---NoNo2.0 A2.0 ANo80 g151 g5,6510.0139-
Turbo1,8002,1001,50048,600 cd35,400 cd376 mNoNo2.0 A2.0 ANo80 g151 g---
Strobe1,800-----16-20 HzNo2.0 A2.0 ANo80 g151 g---
Beacon1,800-----0.5z HzNo2.0 A2.0 ANo80 g151 g---
SOS1,800------No2.0 A2.0 ANo80 g151 g---

I know my lightbox tends to produce higher results than some, but there seems to be a pretty good concordance to the published specs. I like seeing ~0.8 lumen Ultralow mode – close enough to be considered Moonlight.

Beam distance measurement is very good, demonstrating significant throw (but not quite up to the level of the reported specs).

To see full testing results for all modern lights in my testing, check out my Database page.

Runtimes

As always, my runtimes are done under a small cooling fan, for safety and consistency. To learn more about how to interpret runtime graphs, see my runtimes methodology page.

Max

Hi

Med

Not surprisingly, given the small mass in the head, both Turbo and High ramp down to a lower ~800 lumen level fairly quickly. This is consistent with other compact lights that also can’t sustain super-high outputs for long.

The Convoy S21E with a SFT-40 is obviously the closest comparable to this light – and as you can see, the MH12SE has a noticeable output advantage over the S21E for equivalent runtime. This is an excellent result, showing excellent output/runtime efficiency.

The regulation pattern not as stable as I would like, with a “noisy” appearance at the highest two levels. But that is not as much of of an issue as it appears, since it not noticeable at physiological timescales. To demonstrate, here is a blow up of a period the Hi mode runtime during a period of maximal fluctuations:

Hi

While not perfectly flat, it is no more than a ~5% change in output over time, with a gradual transition (i.e., this change isn’t fast or significant enough to be noticeable by eye).

In any case, the MH12SE shows a good regulation pattern overall, with a series of step-downs to lower levels once the battery is almost drained.

Pros and Cons

ProsCons
Light has excellent output/runtime efficiency, at all levelsTurbo and Higher modes both ramp down to a reduced Hi level fairly quickly, due to heat.
Circuit shows good regulation overall, with thermally-mediated ramp down on Turbo/High, and step-downs as the battery is almost drained.The reduced Hi level shows a variable change in output (i.e., not completely stable).
Uses a dual switch design, with physical tailcap clicky for on/off.Has an very good "Ultra-low" level that could serve as a moonlight mode.
Good build quality and hand feel.

Overall Rating

Preliminary Conclusions

This MH12SE has performed very well in my testing. You get excellent overall output/runtime efficiency, with a reasonable set of output levels (including a <1 lumen level). The dual user interface – with a fairly standard set of levels and mode memory, and a “tactical” set – is well implemented with the dual physical clicky switch and electronic side switch. Build quality is solid, with decent hand feel. And it offers a surprisingly throwy beam in such a small light, thanks the SFT-40 emitter.

There are a few things to keep in mind however. Max output quickly settles down to ~800 lumens on both Hi and Turbo, due to low thermal mass of the light (so there are not as many discrete levels as first appears). The regulation is not as flat as I would like at this point either, but the fluctuations are not something you can see by eye (and efficiency is still excellent).

Like in my P20iX review, I like the dual user interface setup, especially coupled with the forward physical clicky switch. That is of course more of a personal preference – but it is helpful in a “tactical” light. And one advantage here is that a standard 21700 battery is used, which means you can swap in/out other cells, and charge outside the light if you prefer (although the in-light charging worked well, with a good charging rate).

At the end of the day, this is an excellent performer, with good ergonomics and build quality. I’m giving a half-star advantage over the P20iX – mainly for the standard battery – but either light is a strong contender for the class, it all just depends if you want throw (MH12SE) or flood (P20iX).

Acknowledgement

The MH12SE was provided for review by Nitecore. All opinions are my own however, and the light received the same rigourous and objective testing as all other lights that I have reviewed. At the time of review, this light retails for ~$100 USD (~$140 CDN).

1 2