Wuben X1 Falcon

The X1 is a very high-output flashlight featuring three XHP70.2 emitters running on two included 21700 rechargeable batteries. It features a distinctive build, with a built-in fan to maintain excellent thermal performance during max output.
- Introduction
- Manufacturer Specifications
- Package Details
- Build
- User Interface
- Circuit Measures
- Emitter Measures
- Beamshots
- Testing Results
- Runtimes
- Pros and Cons
- Overall Rating
- Preliminary Conclusions
- Acknowledgement
Introduction
I’m still working on clearing my backlog – the X1 sample was received in early November 2023.
Wuben came on the scene around the time that I was taking a break from flashlight reviewing. So I never had the opportunity to test one of their models until now. First up is their super-high-output X1, featuring 3x Cree XHP70.2 emitters.
The X1 has a distinctive build, with a flat side-by-side battery arrangement (2×21700). Coupled with a built-in fan for keeping the light cool during max-output operation, you have the potential for well-regulated sustained output. Does the X1 live up to its potential? Let’s find out.
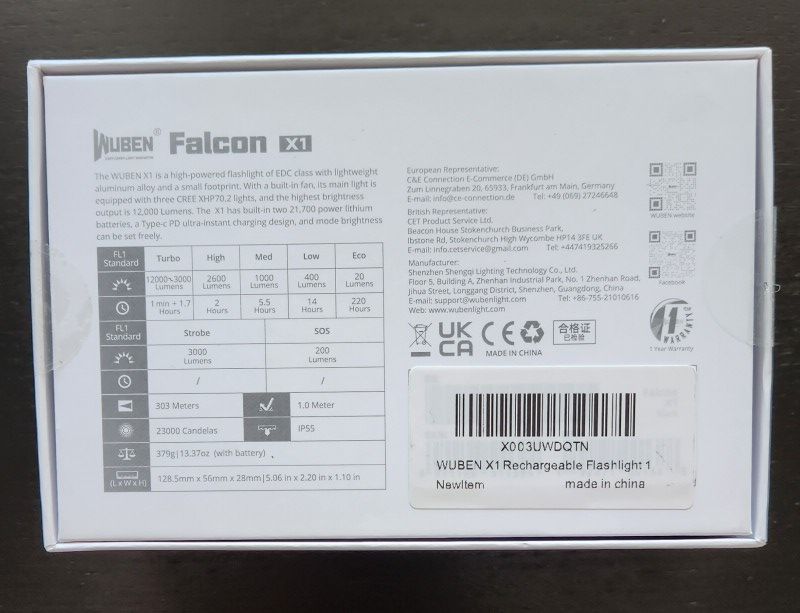
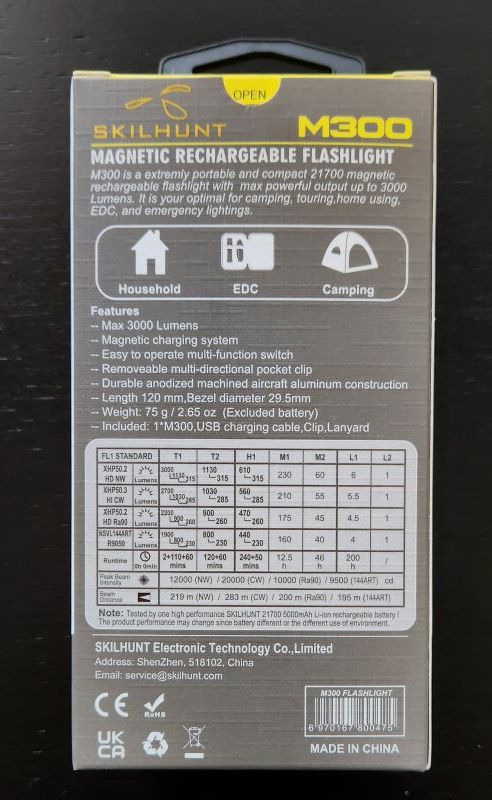
Manufacturer Specifications
Note: As always, these are simply what the manufacturer provides – scroll down to see my actual runtimes.
| Feature | Specs |
|---|---|
| Maker | Wuben |
| Model | X1 |
| Emitter | 3xXHP70.2 |
| Tint | 6000 K |
| Max Output (Lumens) | 12,000 |
| Min Output (Lumens) | 20 |
| Max Runtime | 220 hours |
| Max Beam Intensity (cd) | 23,000 cd |
| Max Beam Distance (m) | 303 m |
| Constant Levels | 5 |
| Flashing | Strobe, SOS |
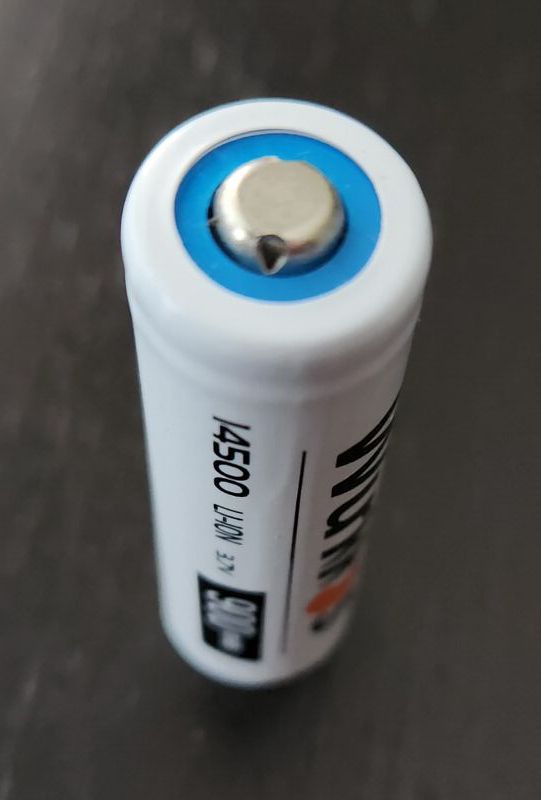
| Battery | 2x21700 |
| Weight (w/o battery) | - |
| Weight (with battery) | 379 g |
| Length | 128.5 mm |
| Head Diameter | 56 mm |
| Body Diameter | 28 mm |
| Waterproof | IP55 |
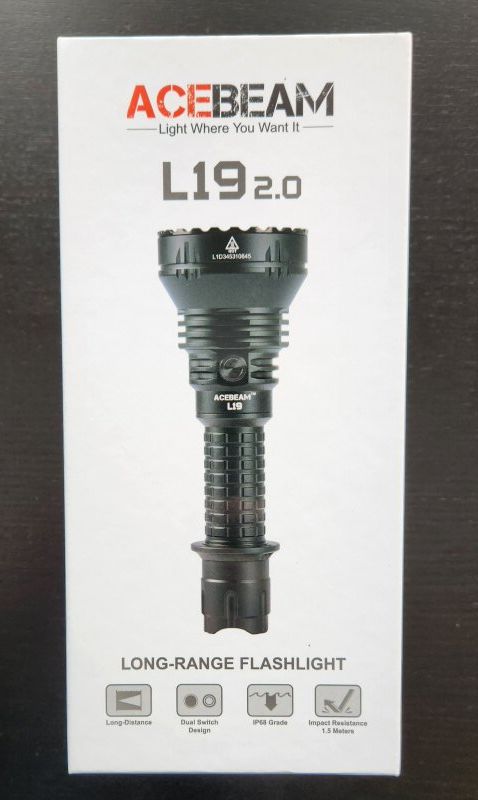
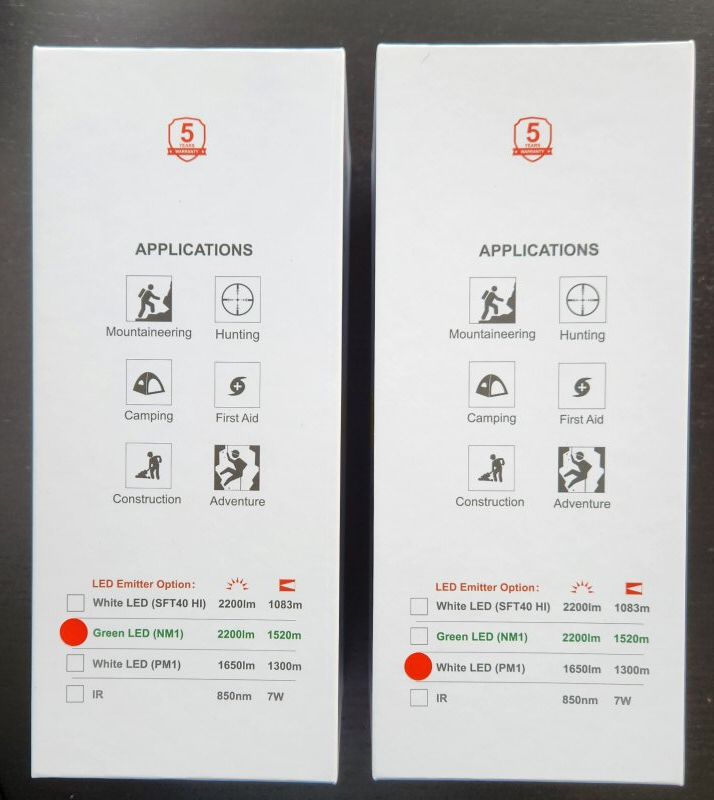
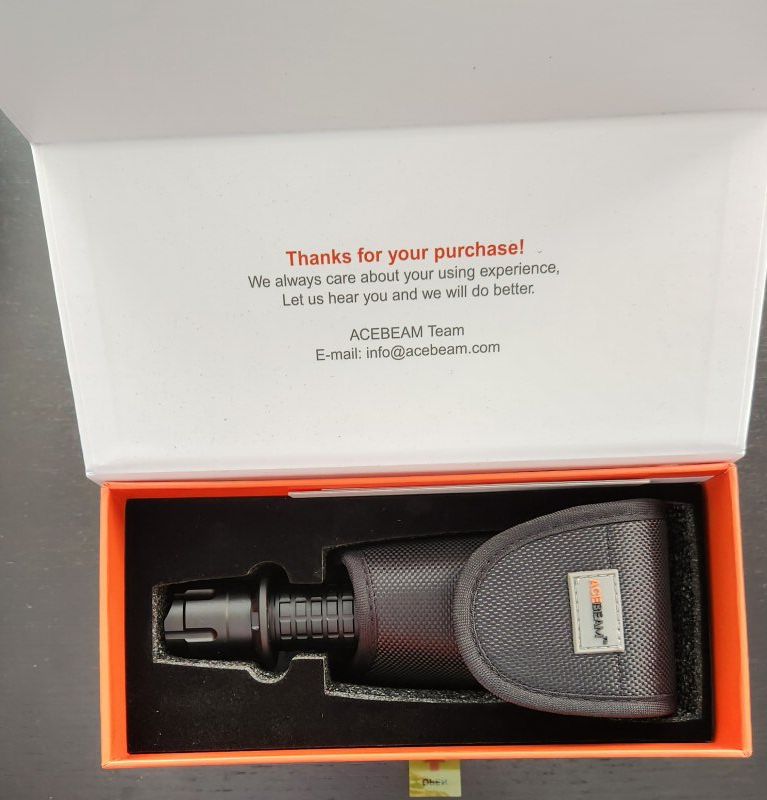
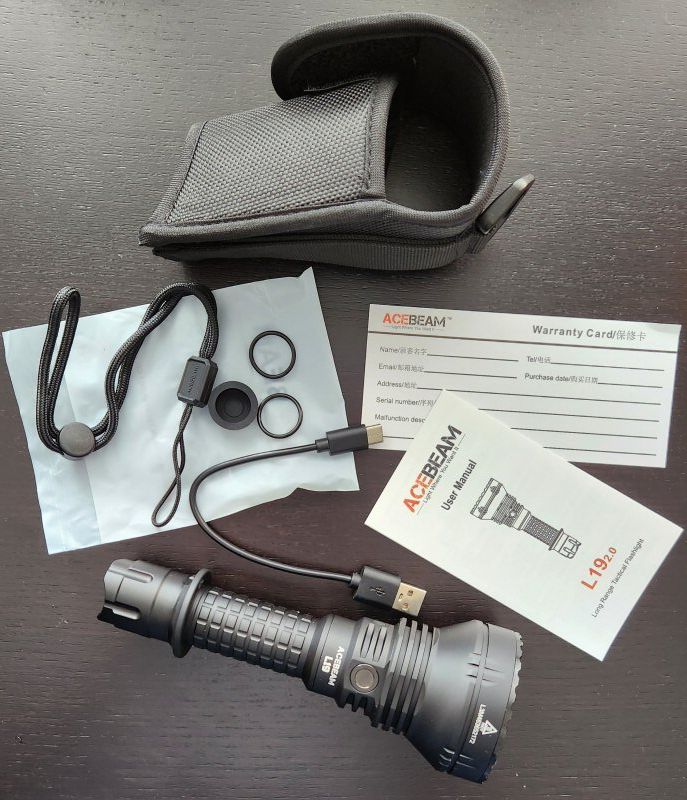
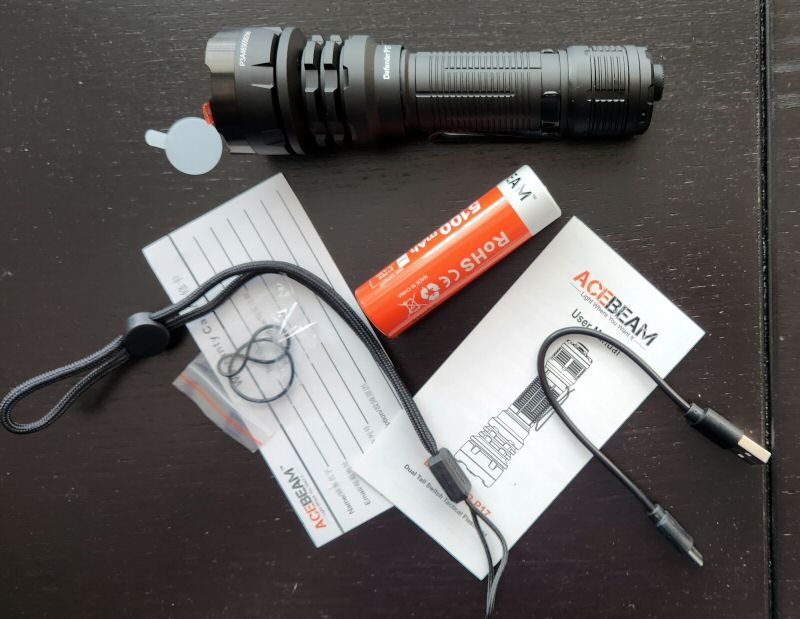
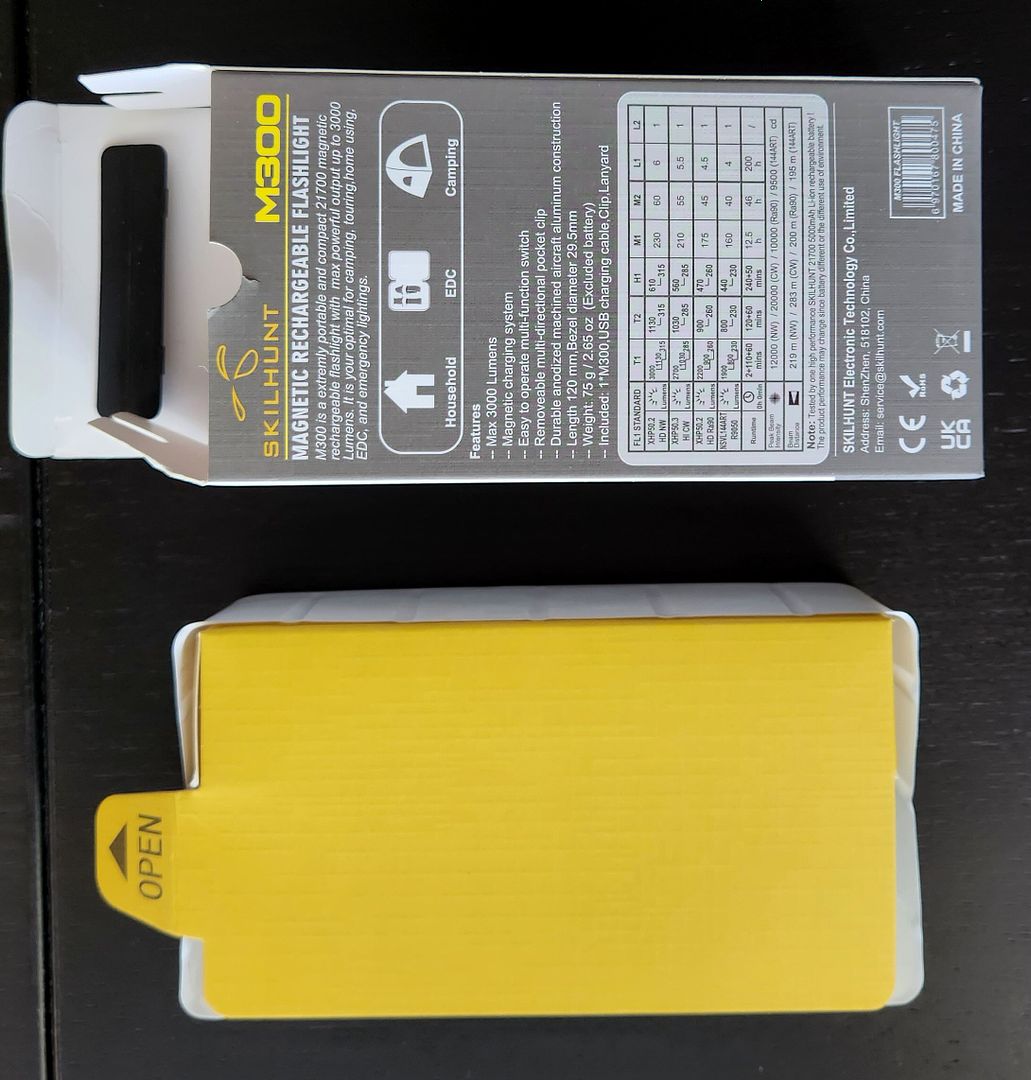
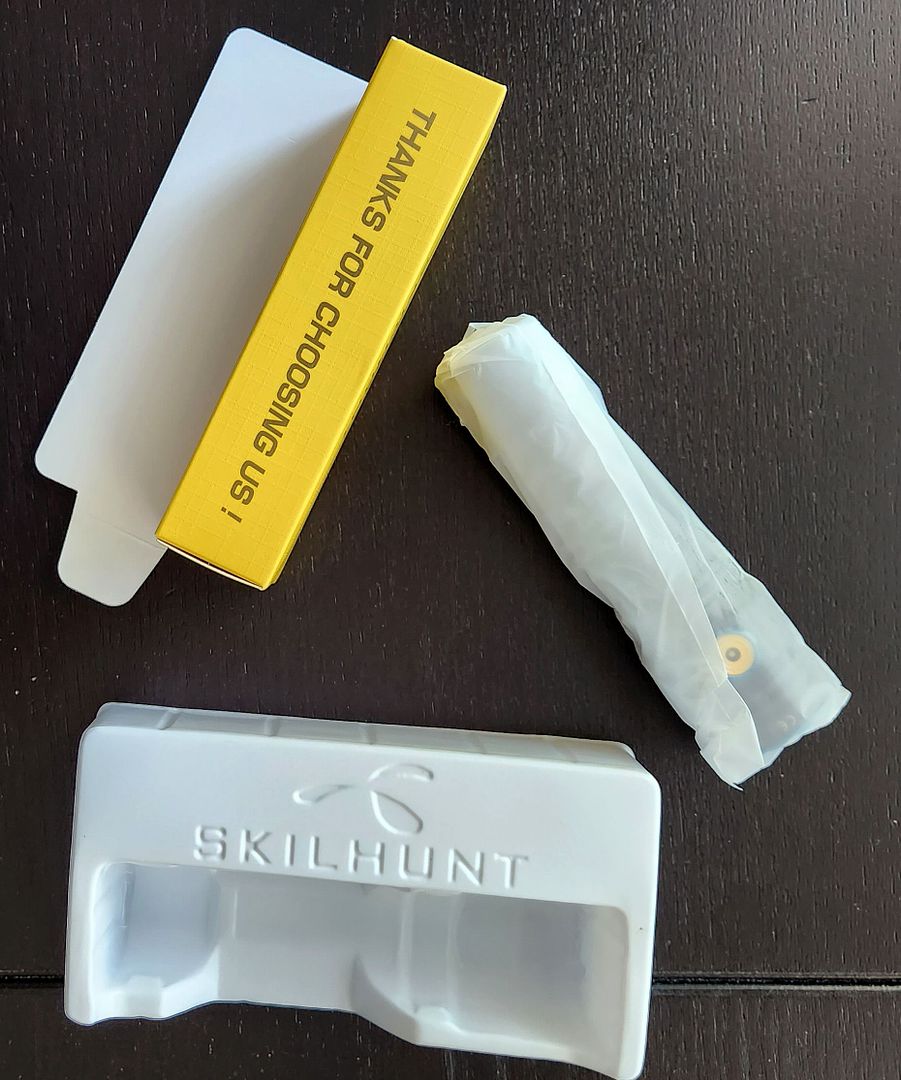
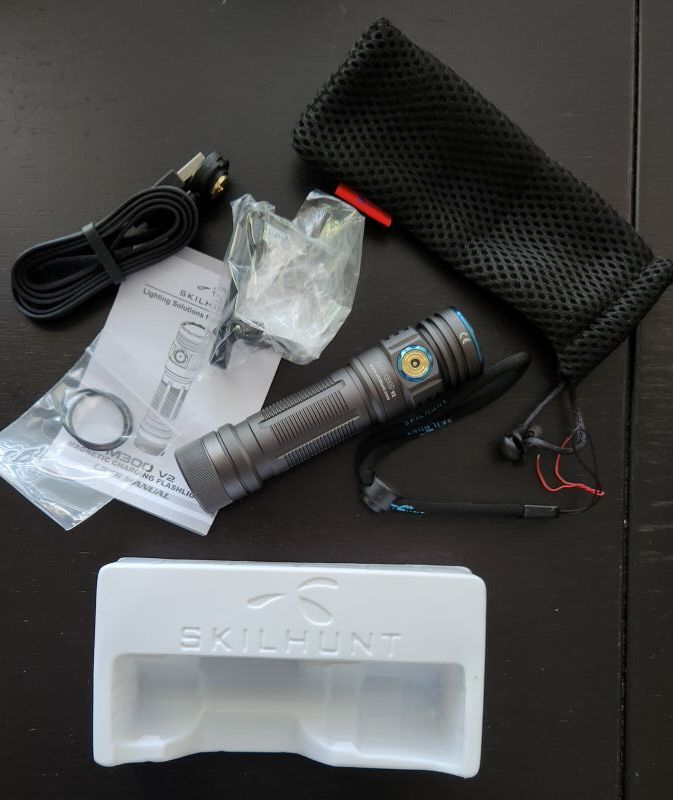
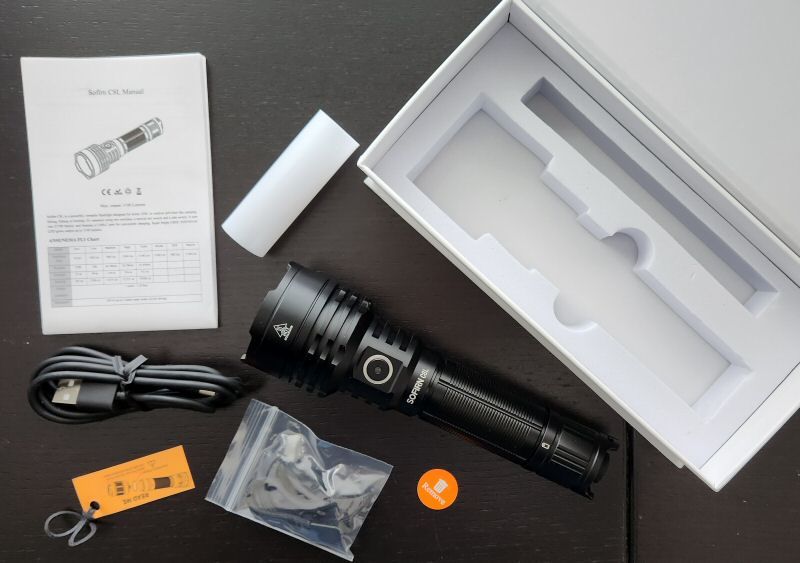
Package Details
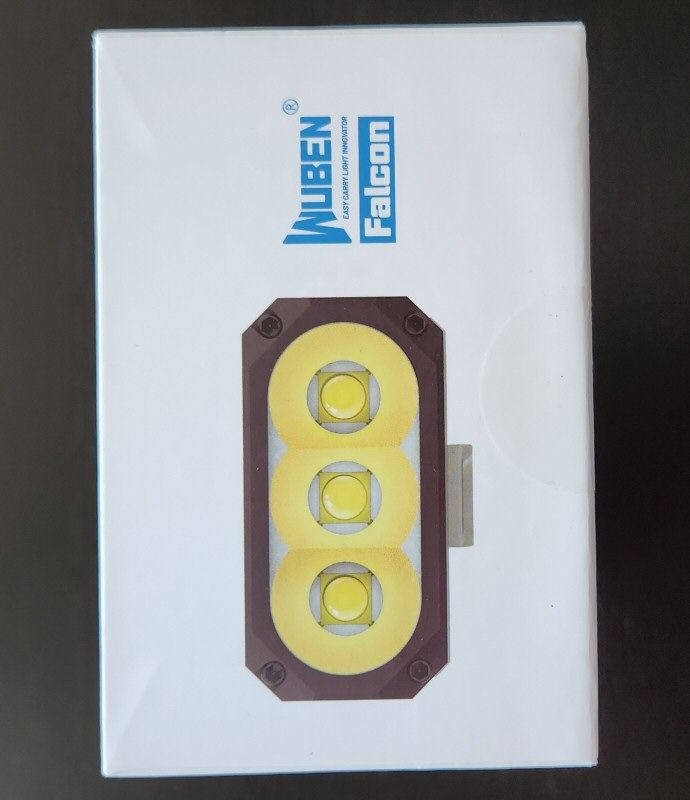
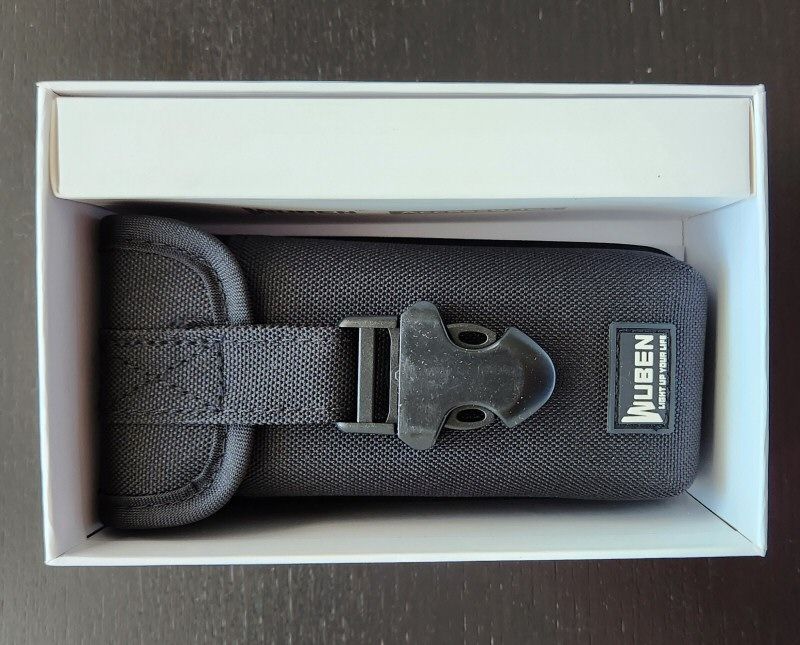
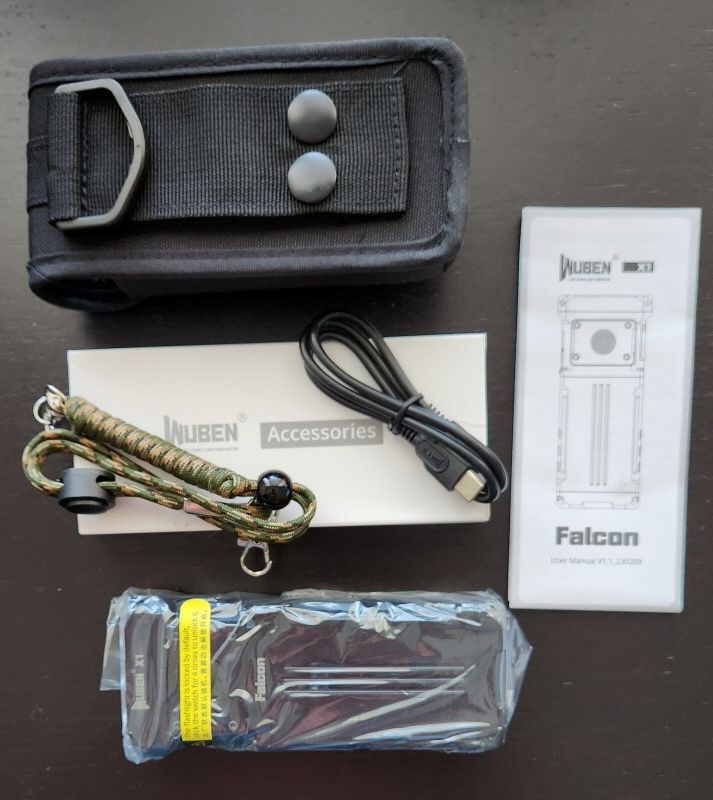
The X1 comes in the modern “cellphone box” style packaging common for higher-end lights today. Included:
- Wuben X1 flashlight
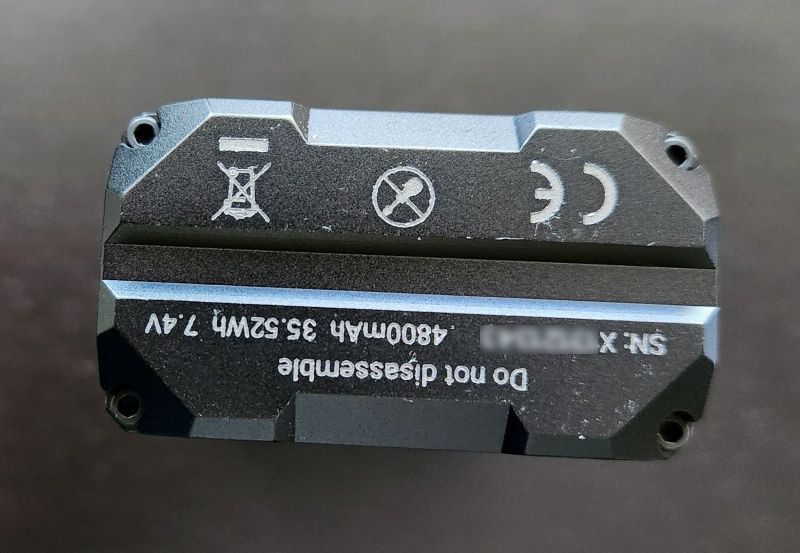
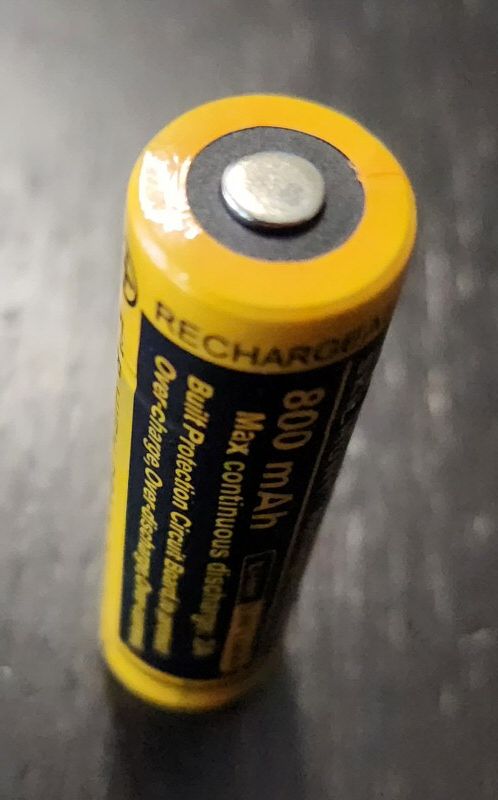
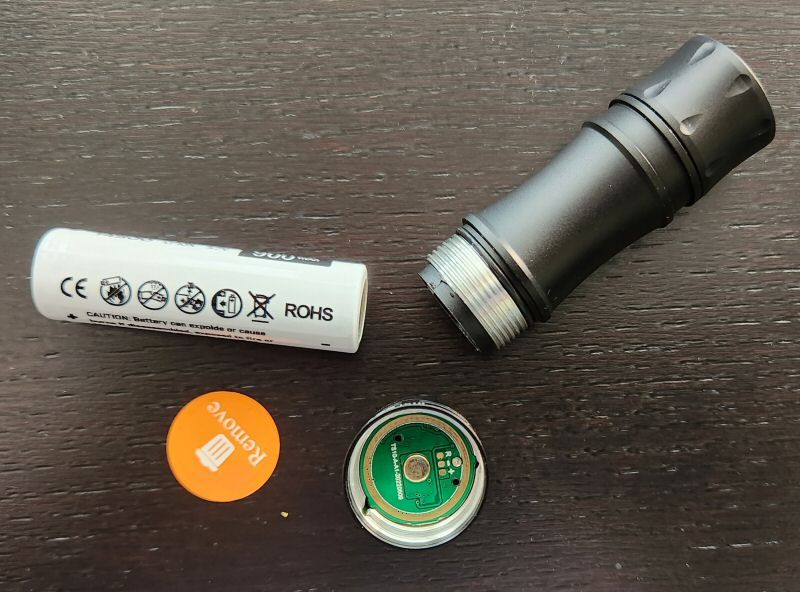
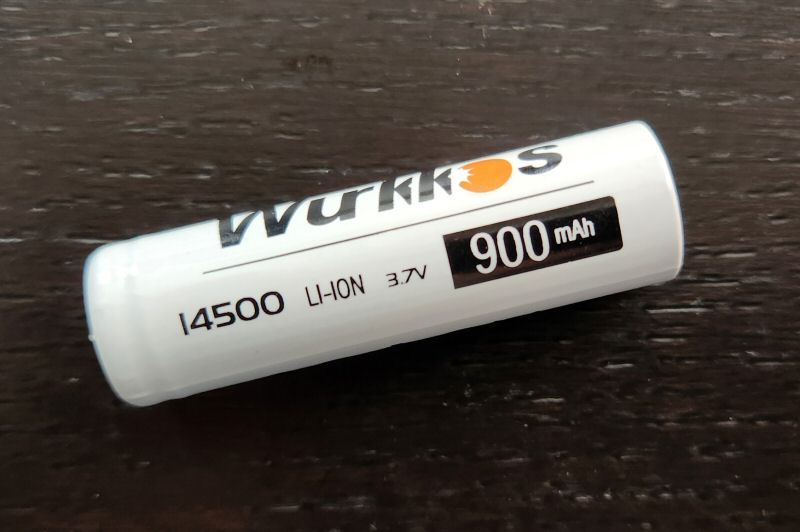
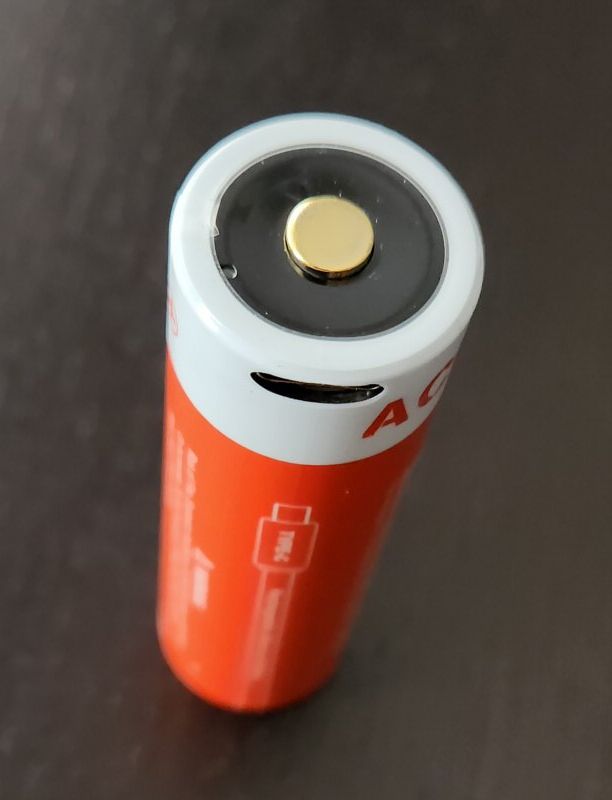
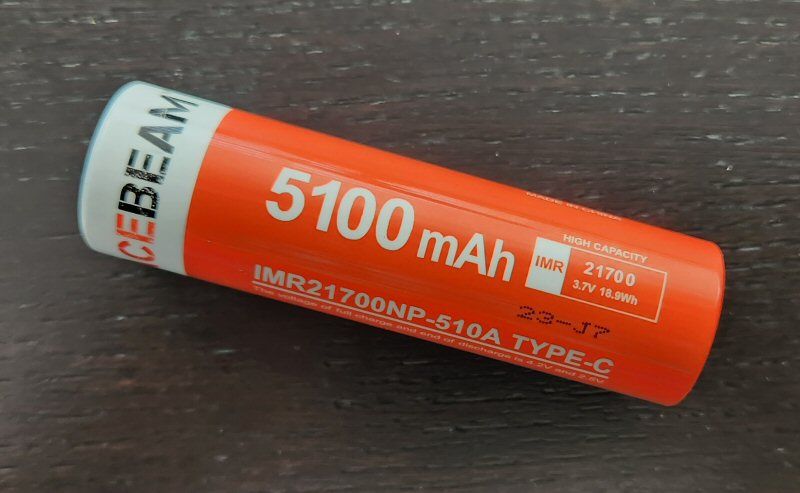
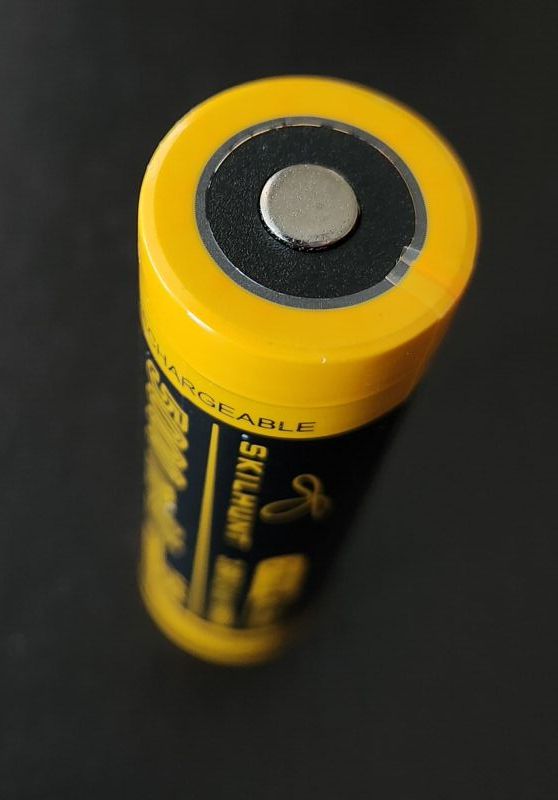
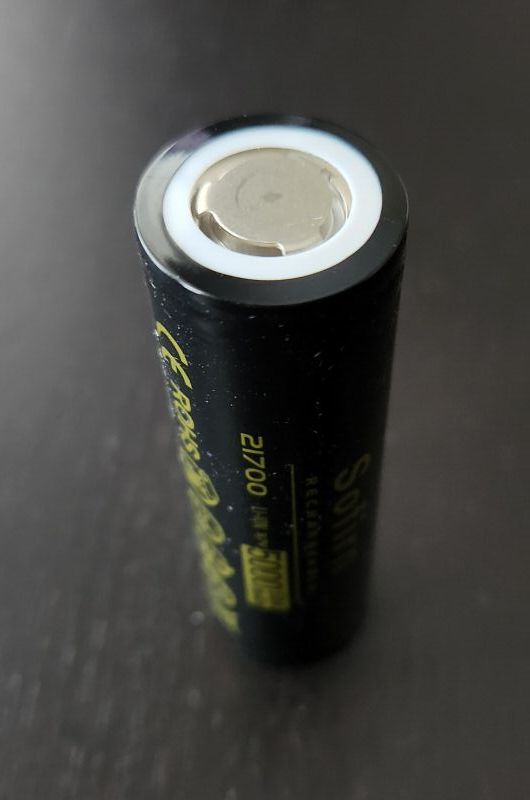
- Integrated 2×21700 4800mAh battery pack
- Paracord-style wrist lanyard
- USB-C charging cable
- Belt holster
- Manual
It’s a decent package, and I particularly like the enclosed belt holster for the light.
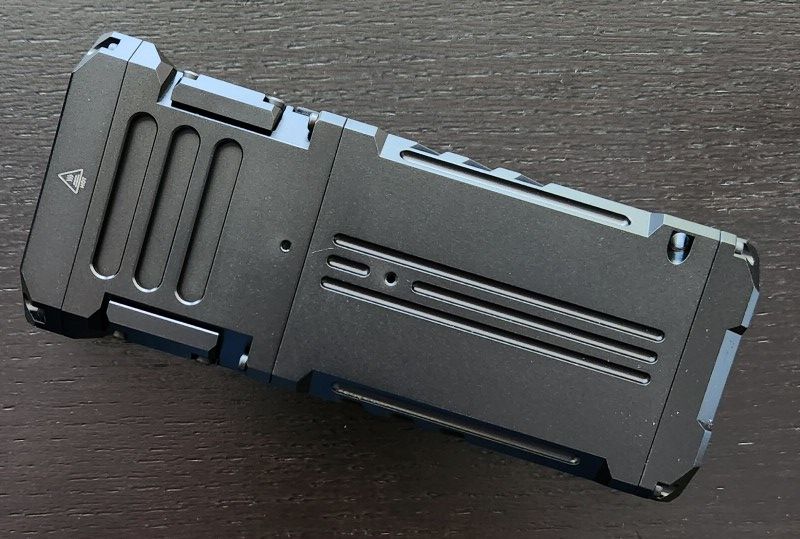
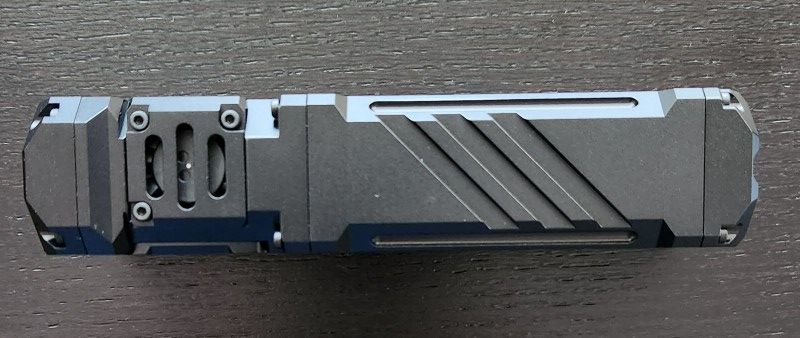
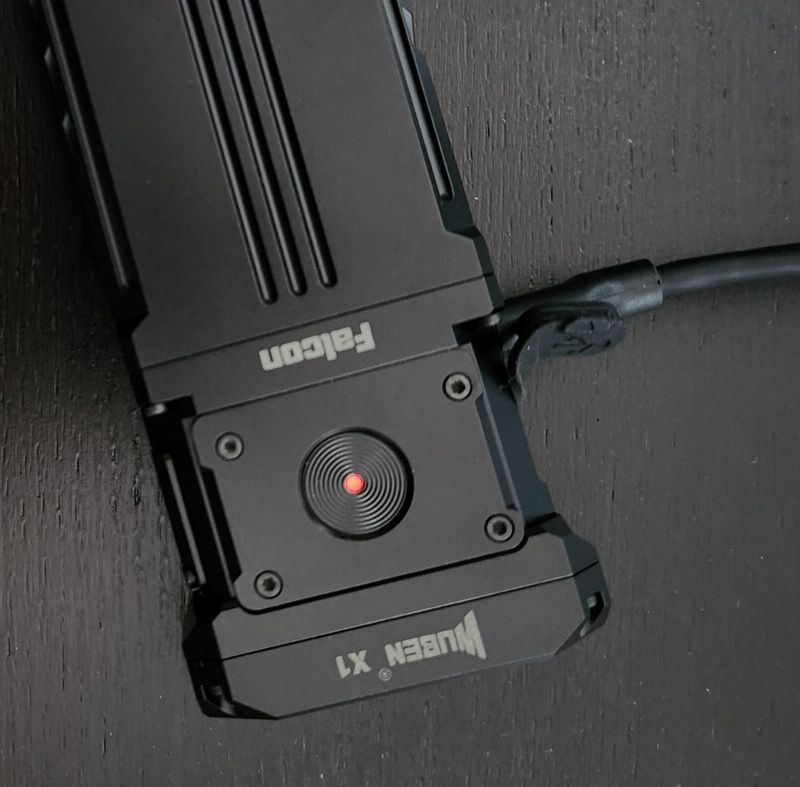
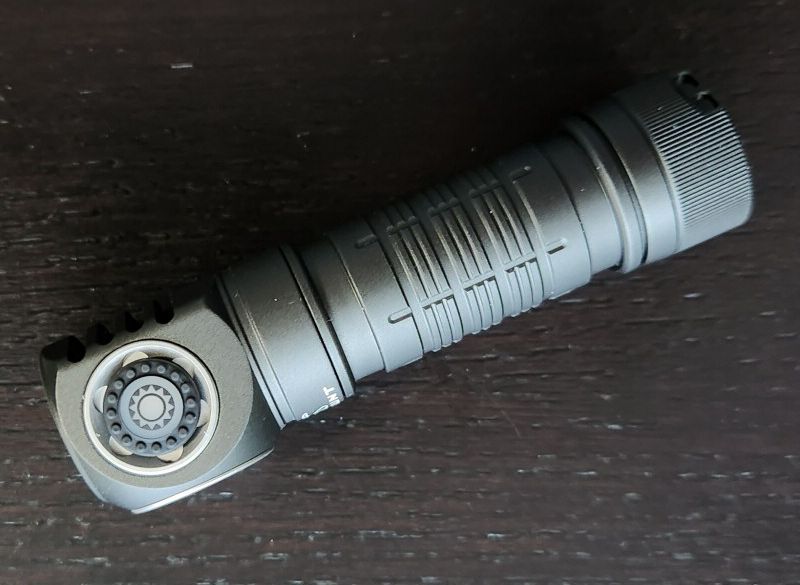
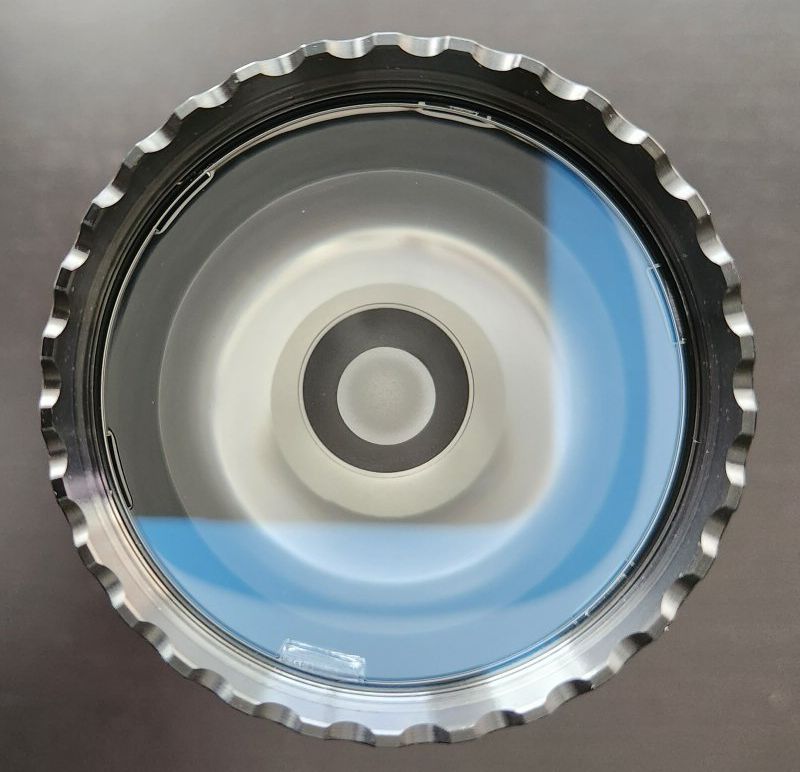
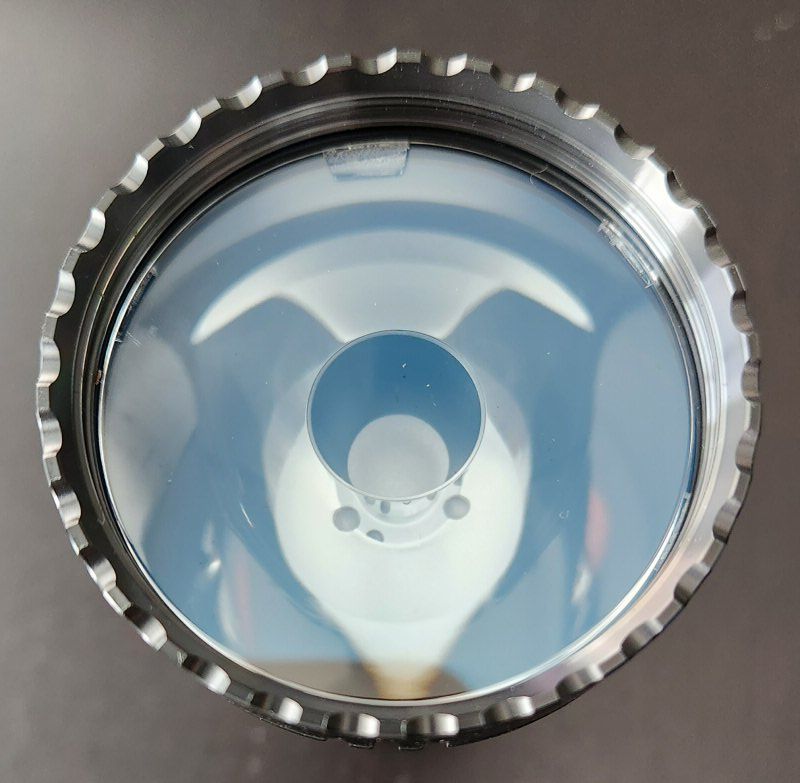
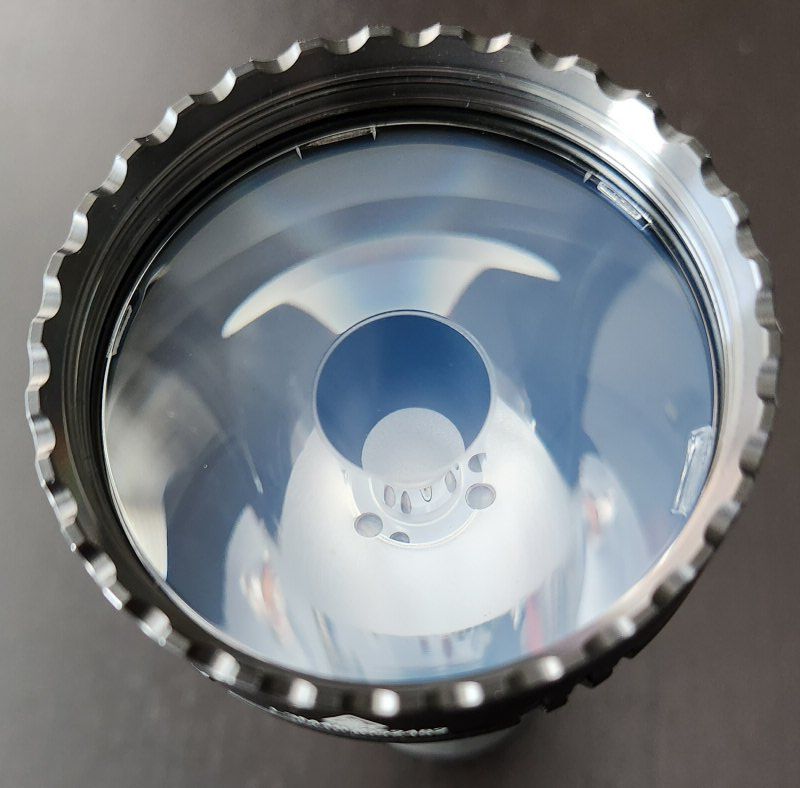
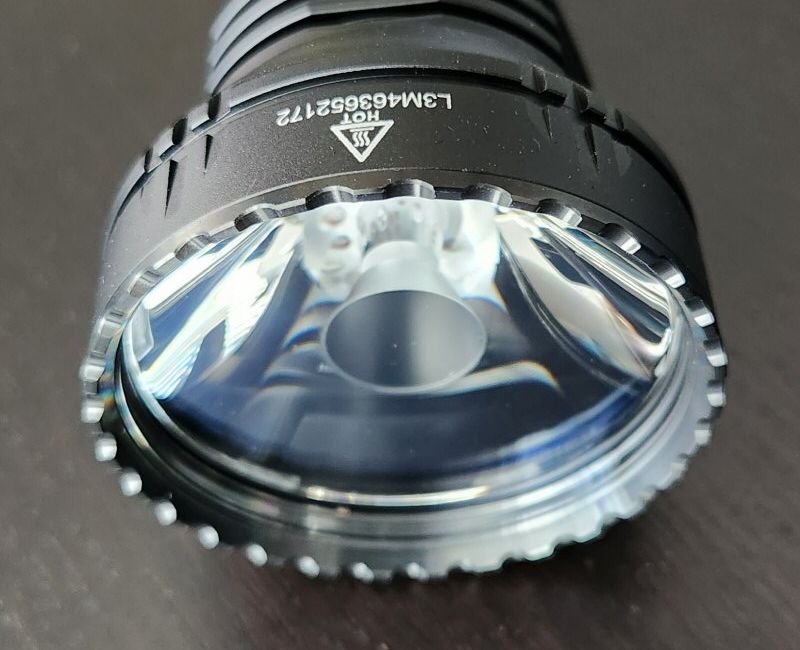
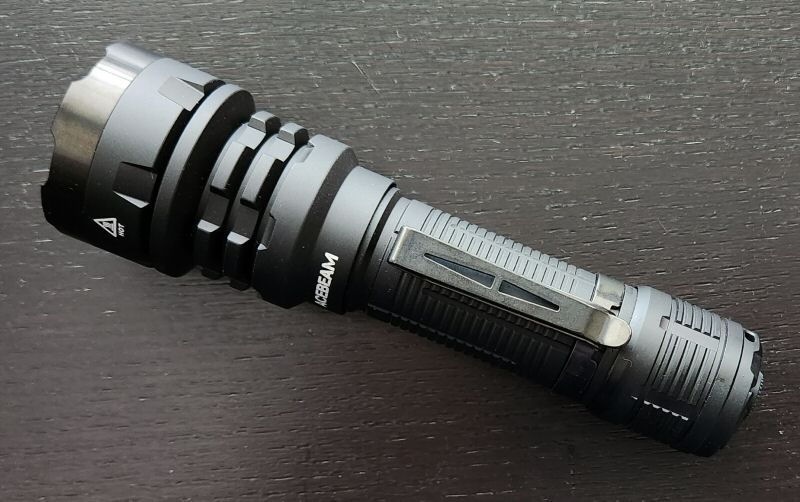
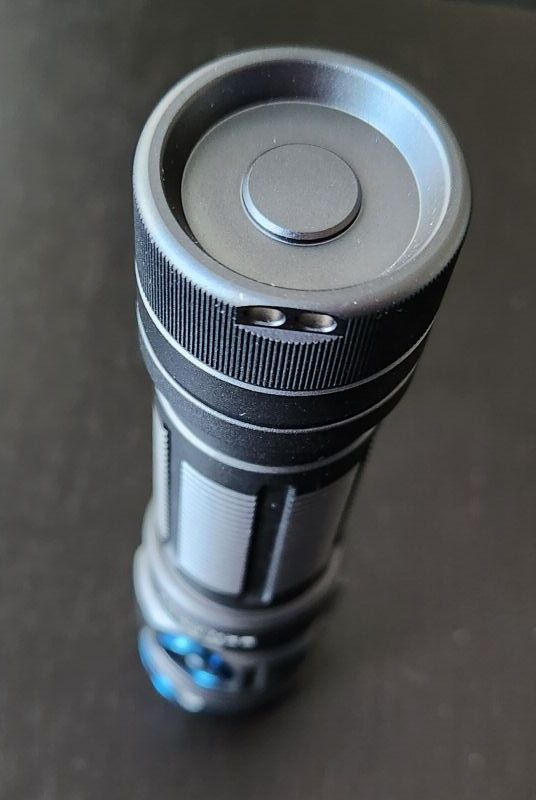
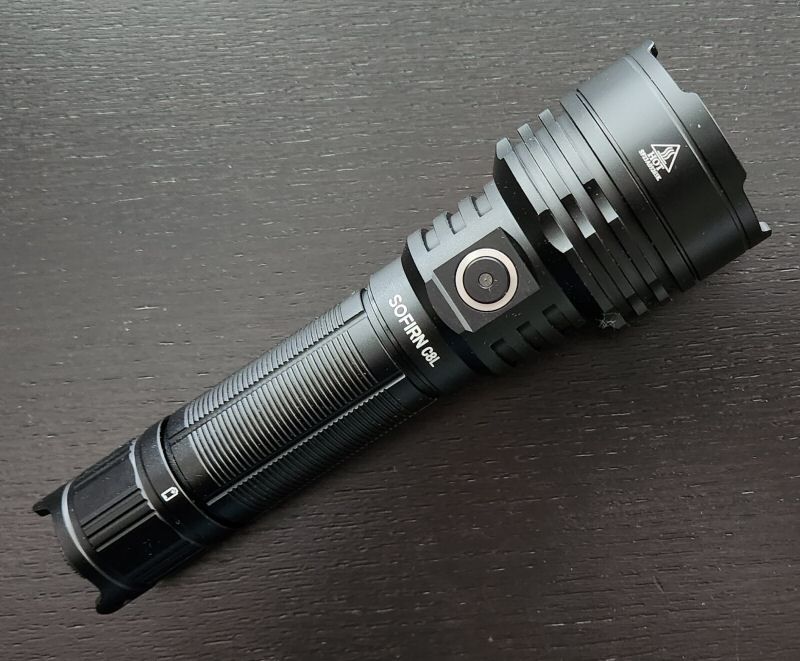
Build

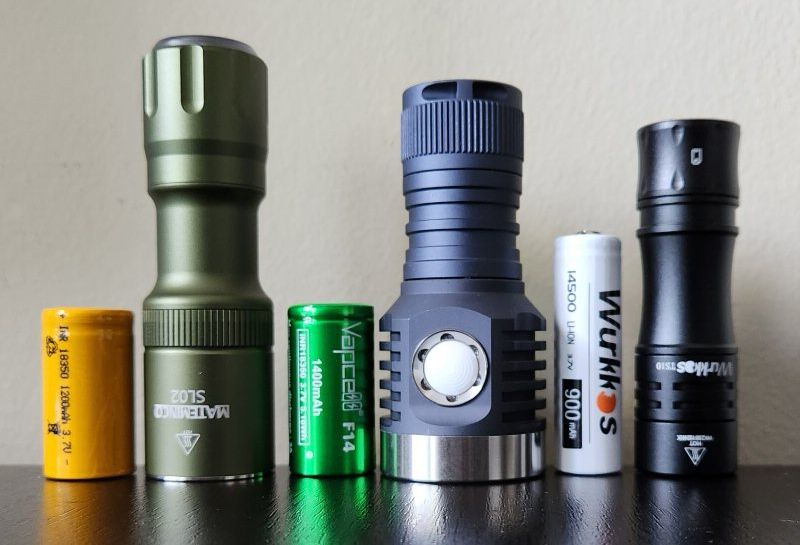
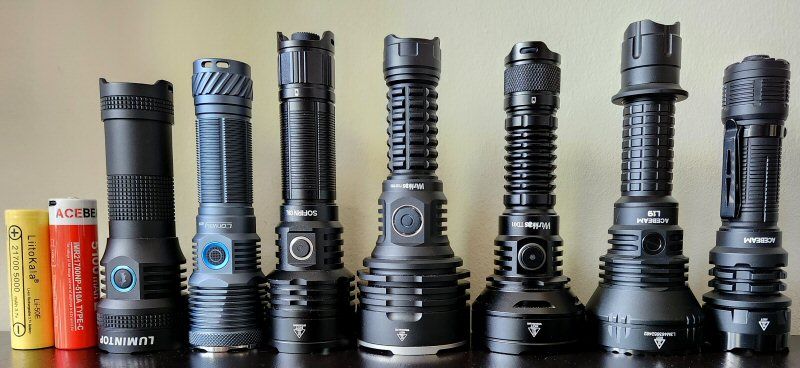
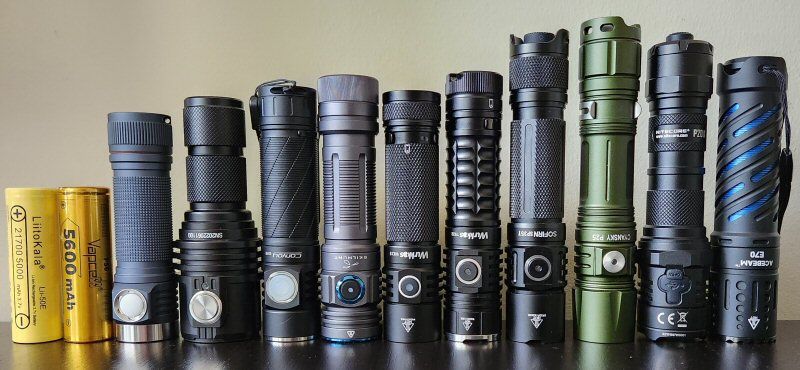
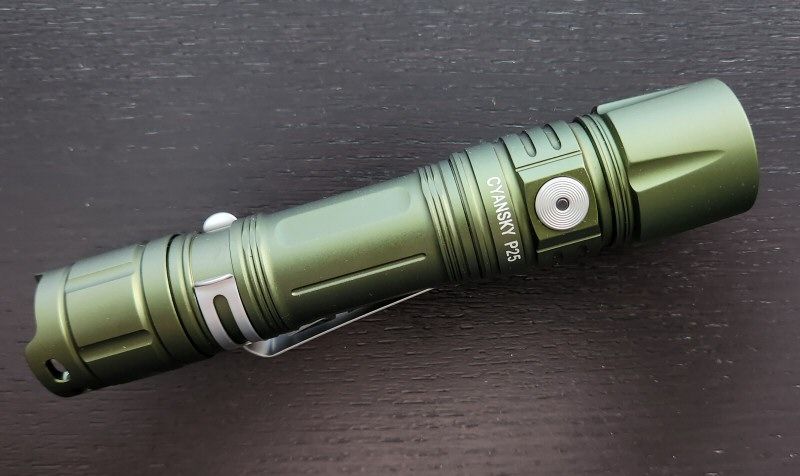
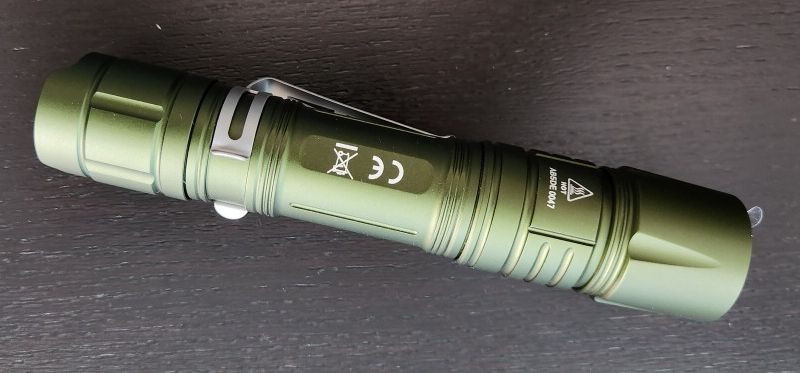
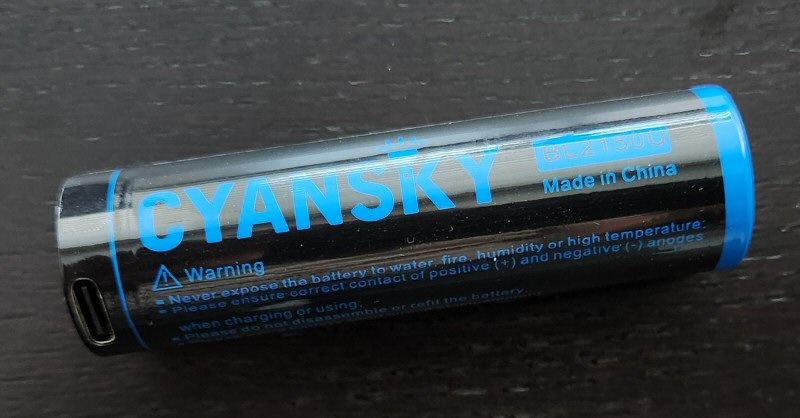
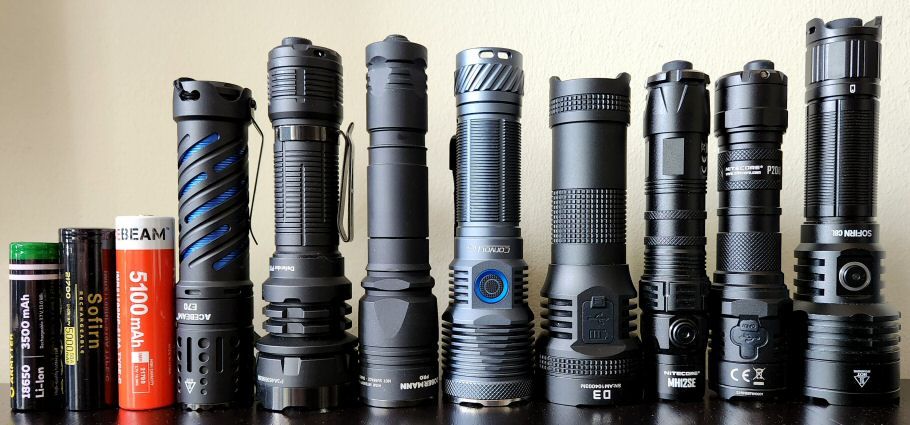
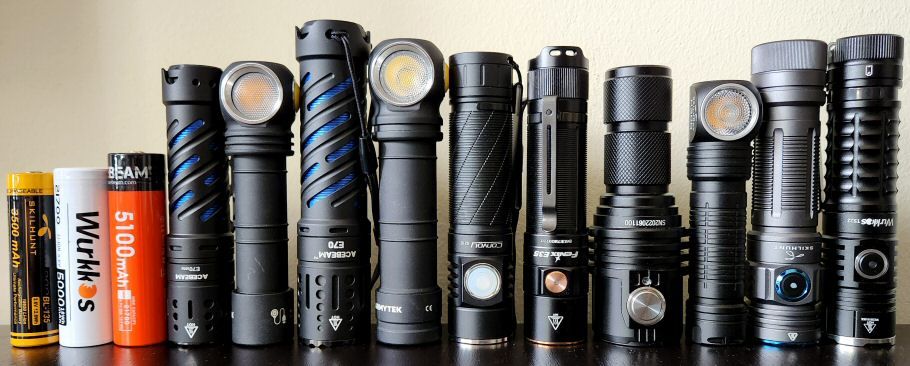
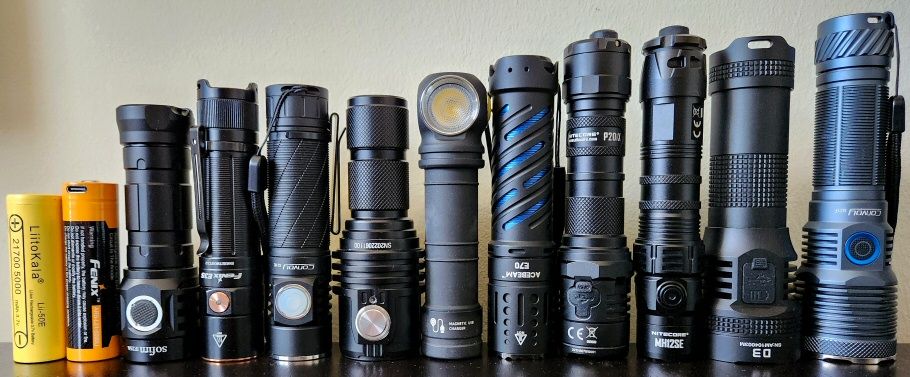
From left to right: Wurkkos 21700 (5000mAh), Vapcell 21700 F56 (5600mAh), Emisar D4K, Wurkkos WK15, Armytek Wizard C2 Max, Wurkkos TS22, Sofrin SC29, Speras E21, Wuben X1 Falcon, Sofirn SC33, Sofirn SP35T, Cyansky P50R, Cyansky P25.
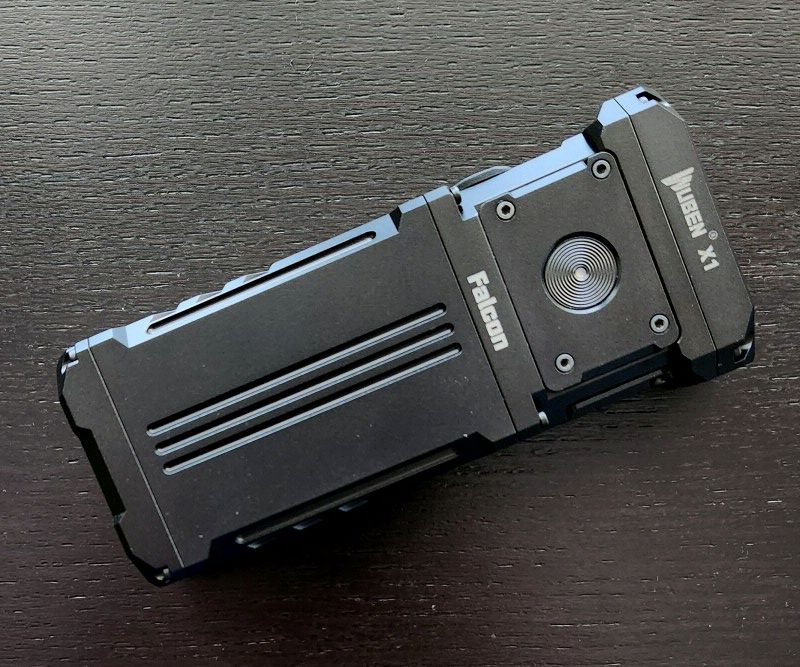
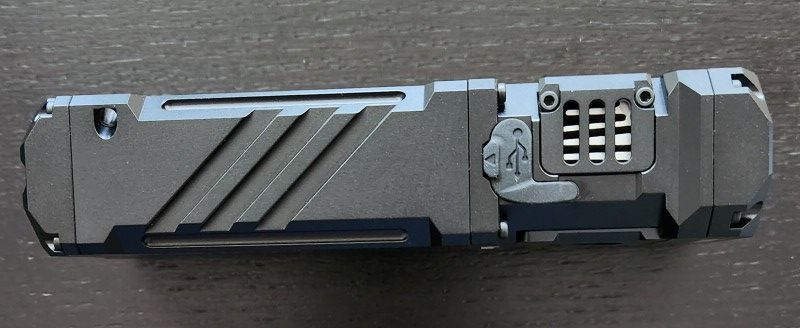
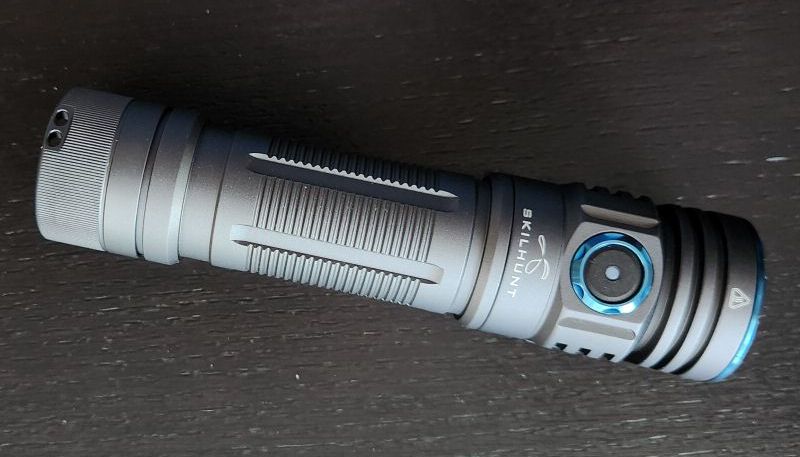
The X1 is a substantial light – hefty, but with good handfeel and ergonomics for the size. It is slightly heavier than I would have expected, which I suspect is due to a significant heatsink in the head. The switch is easy to access, and I find the user interface reasonably intuitive (scroll down for details).
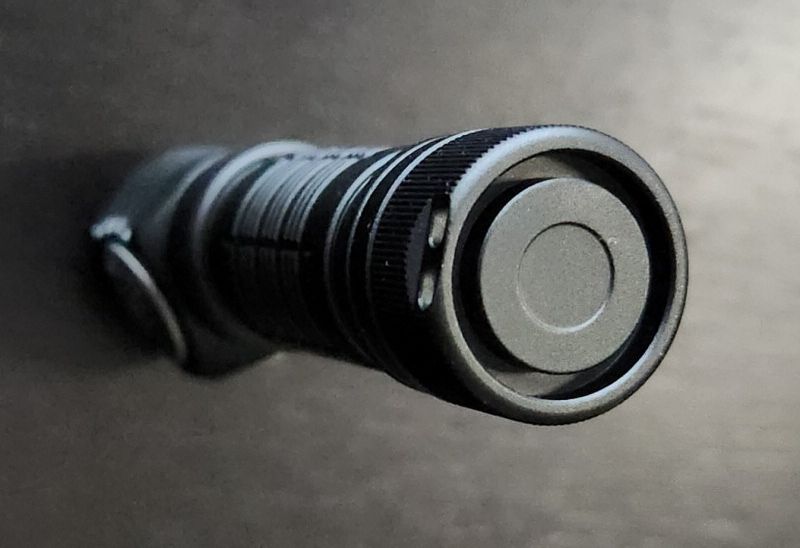
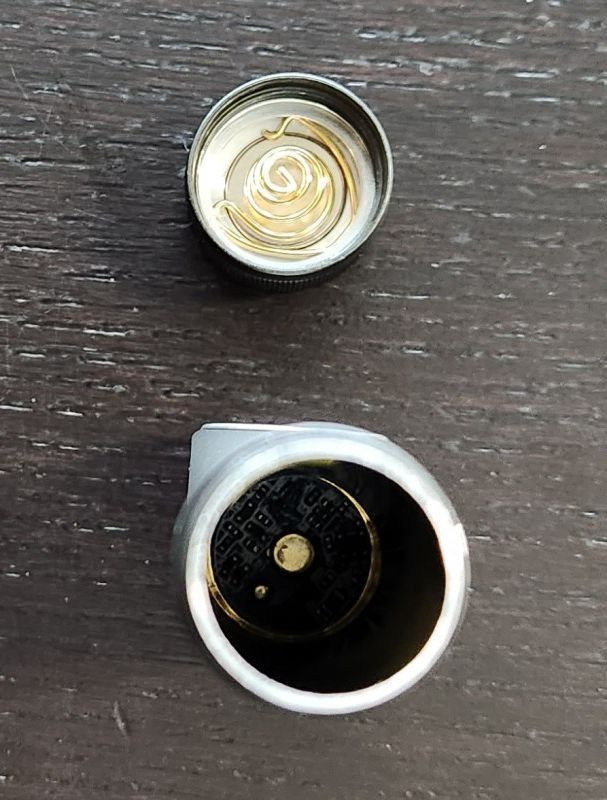
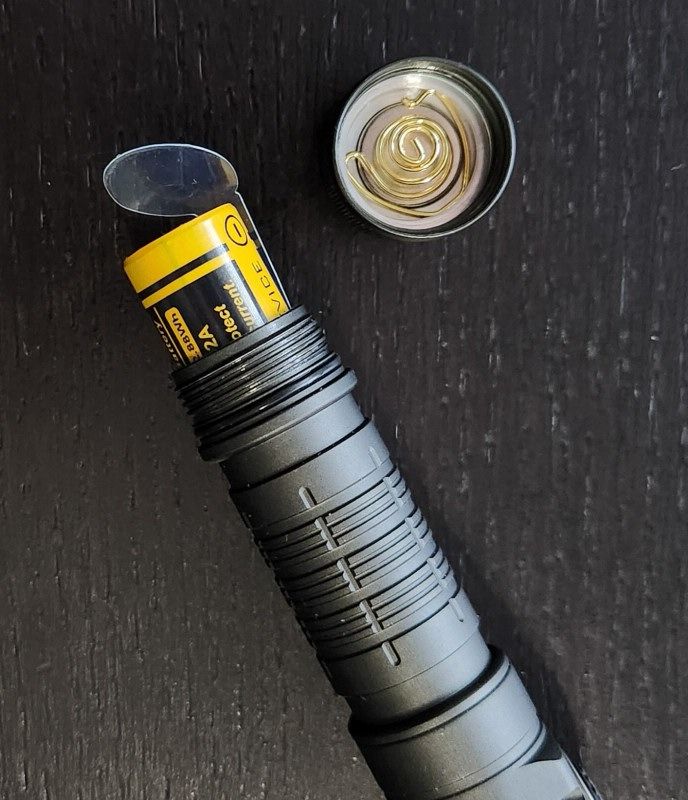
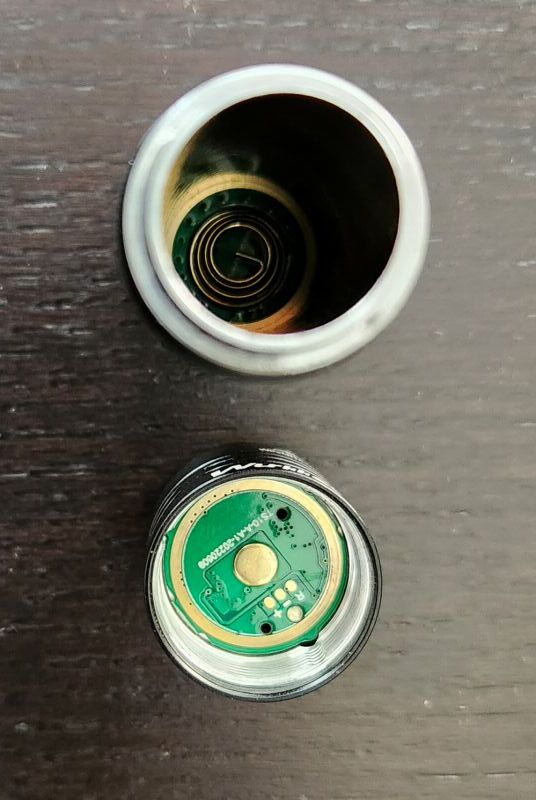
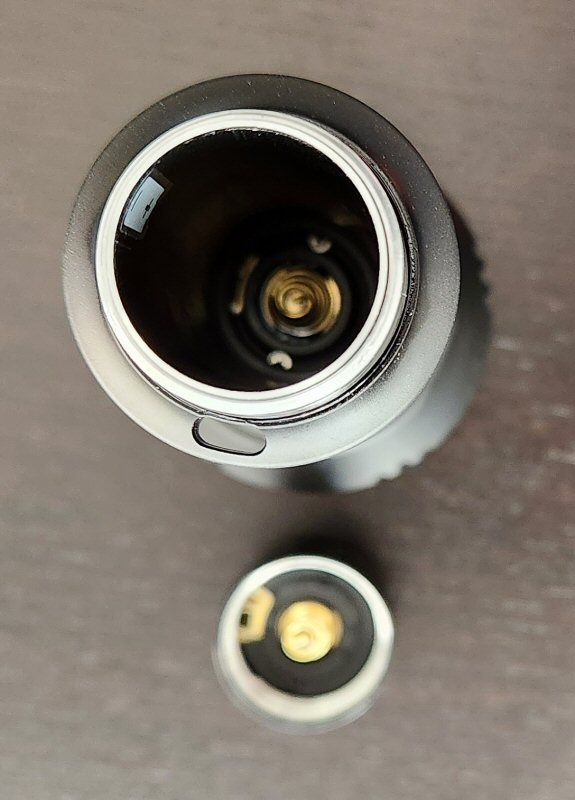
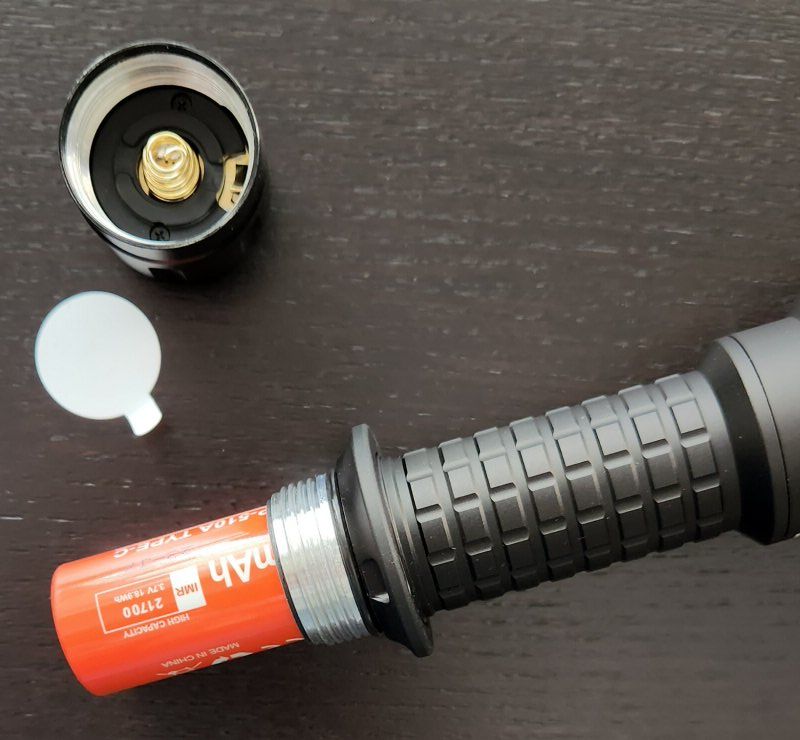
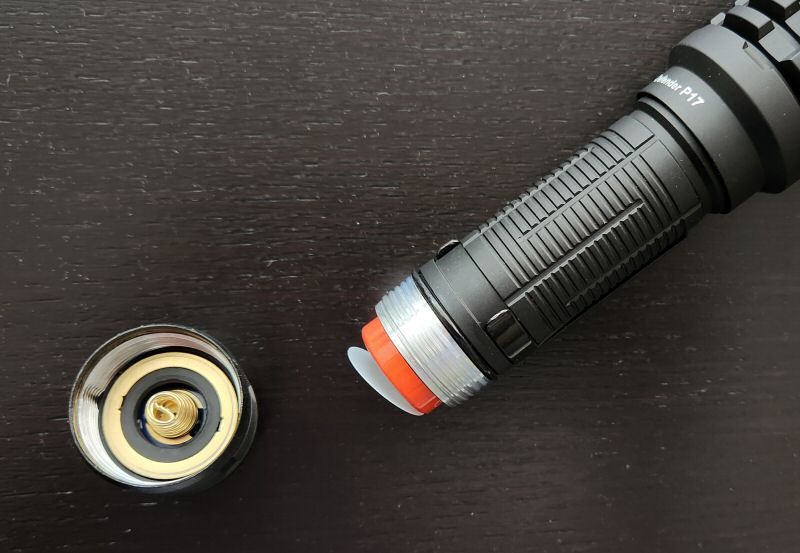
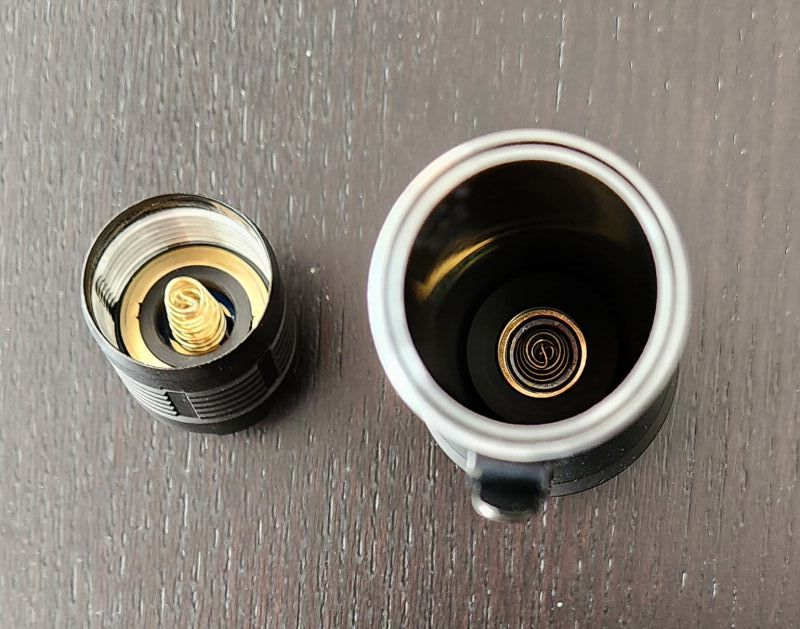
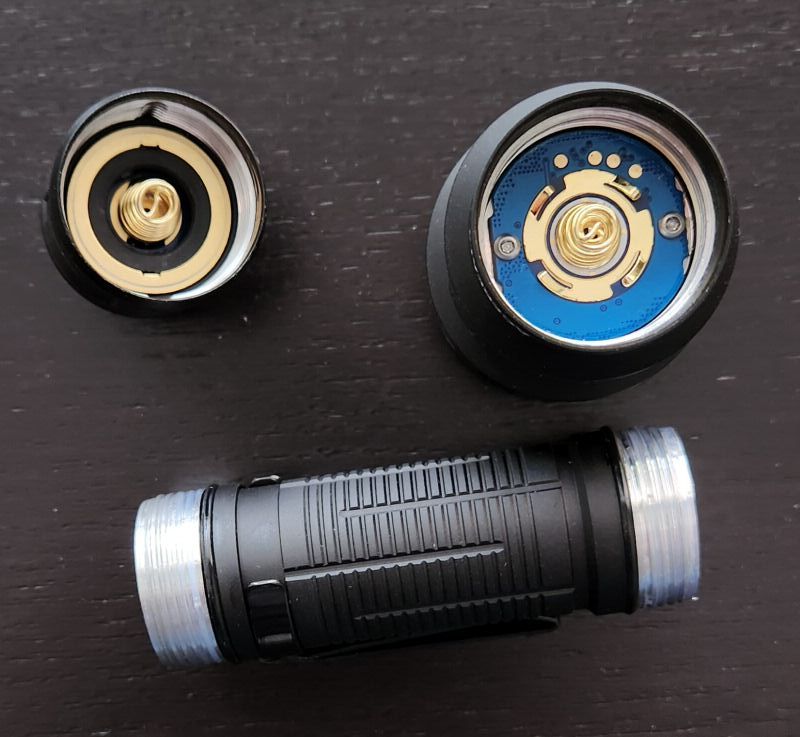
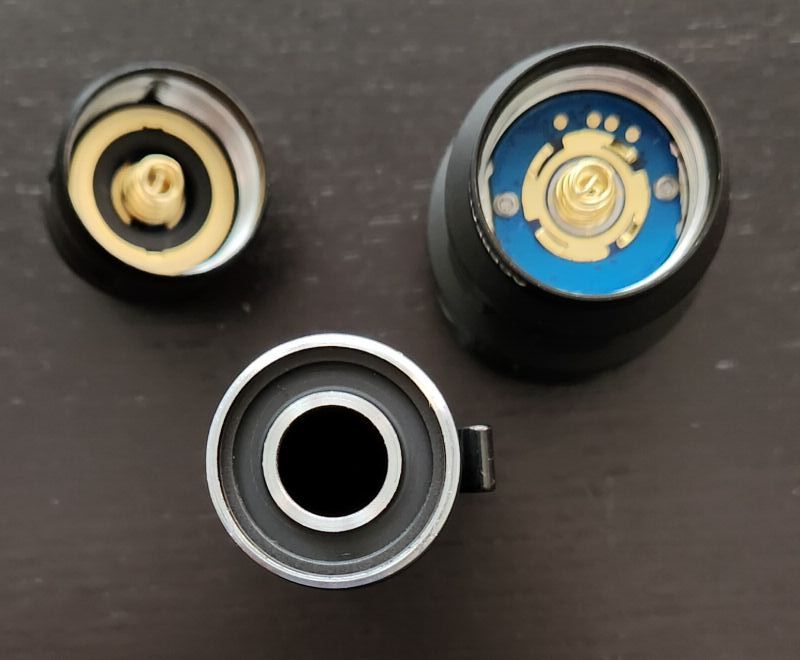
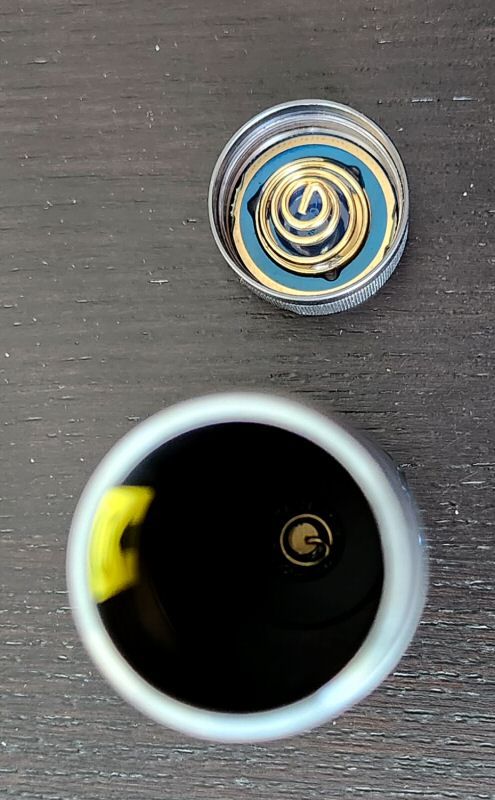
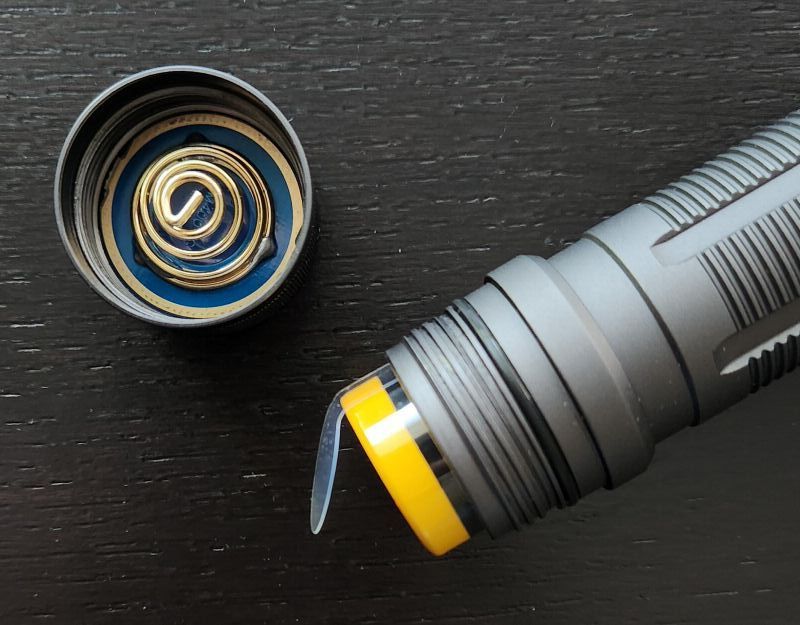
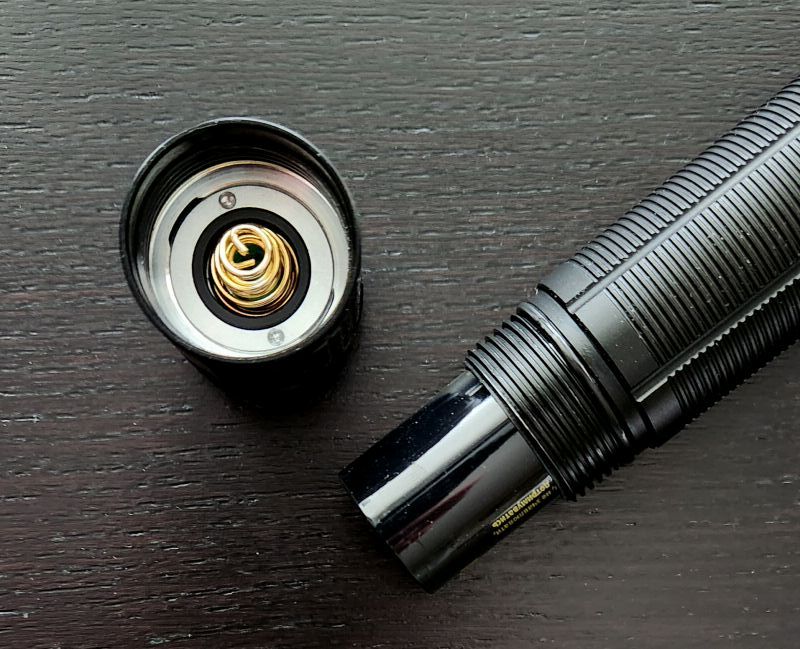
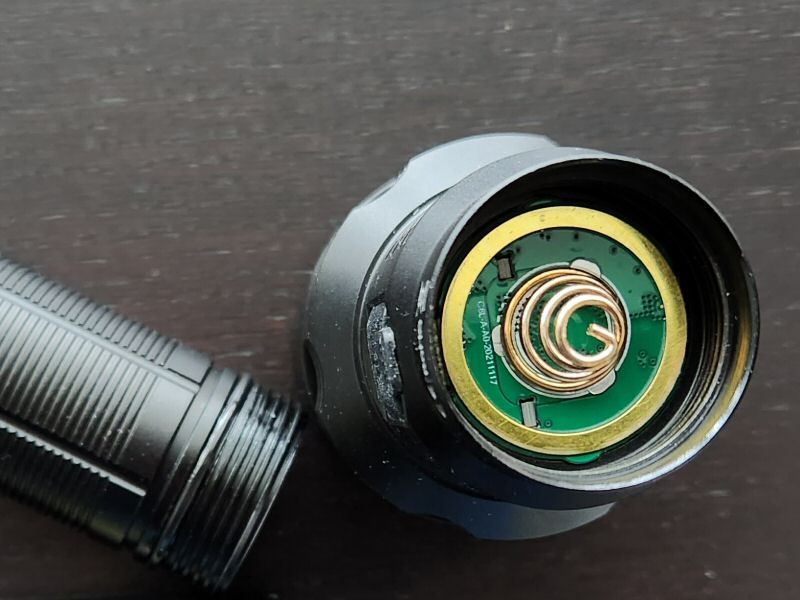
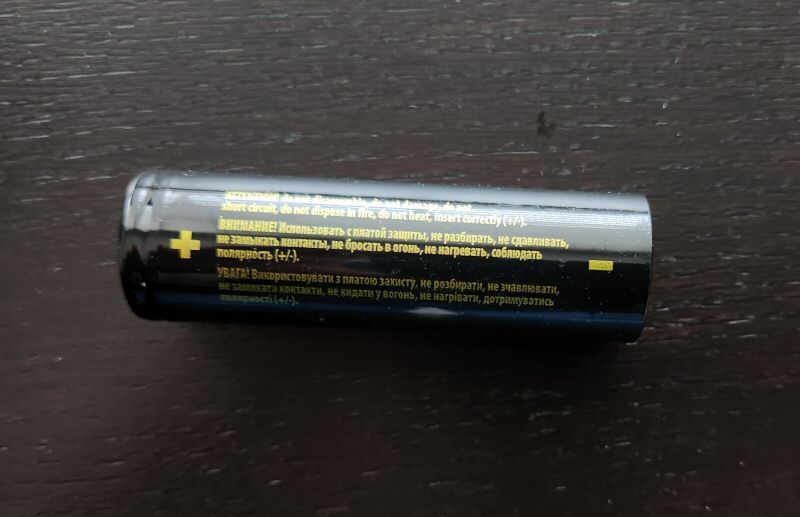
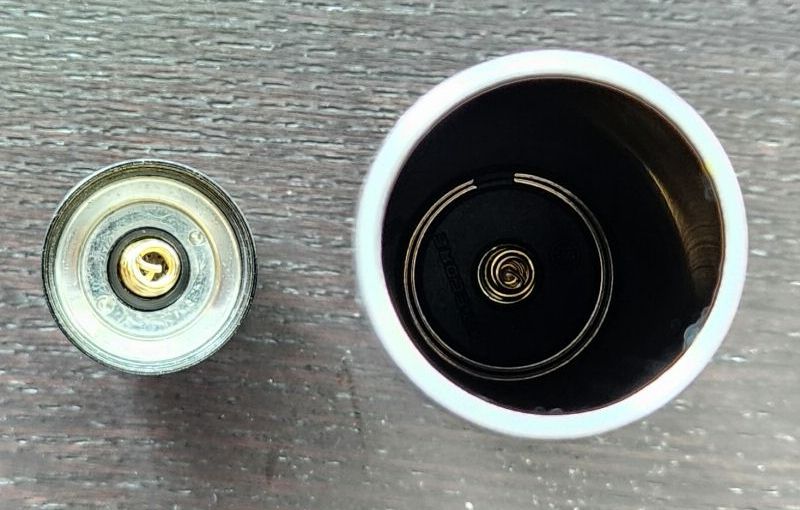
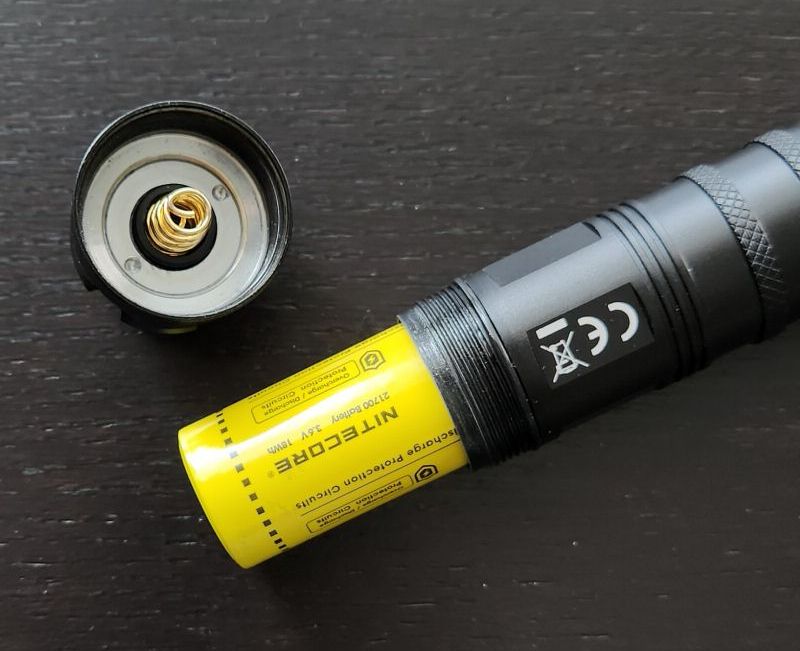
The light features a relatively closed body design, and you are not meant to open it up or change the cells (i.e., note the do-not-disassemble notice on the base). Attempting to open it will likely void the warranty.
That said, there are small torx screws located on the plates holding the switch, the side fan and side heatsink, as well as the handle to the head and the tail to the handle. So if you are determined to open it, you should be able to easily enough with the right torx bit. This is handy in case of battery failure, since I know most would be concerned in buying a permanently sealed light at this price point. I think this is a reasonable compromise, as I find most side-by-side designs that are meant to have the cells readily changed can often have flimsy tailcaps that break easily. So at least you don’t have to deal with that here – you can open it if you need to, but you shouldn’t need to.
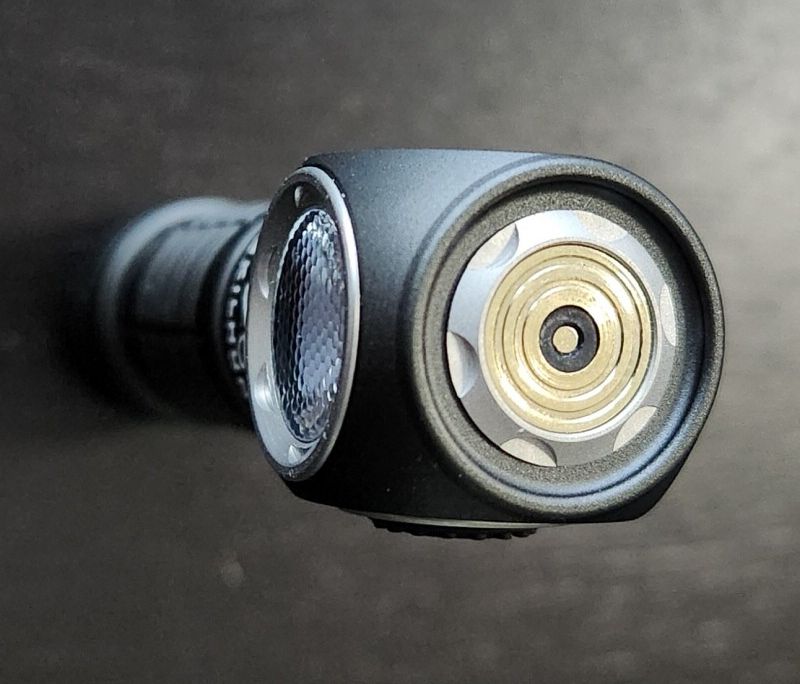
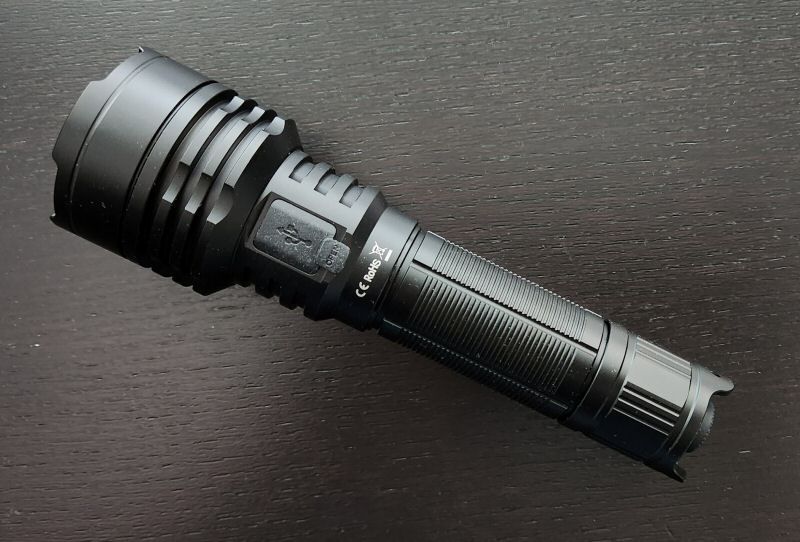
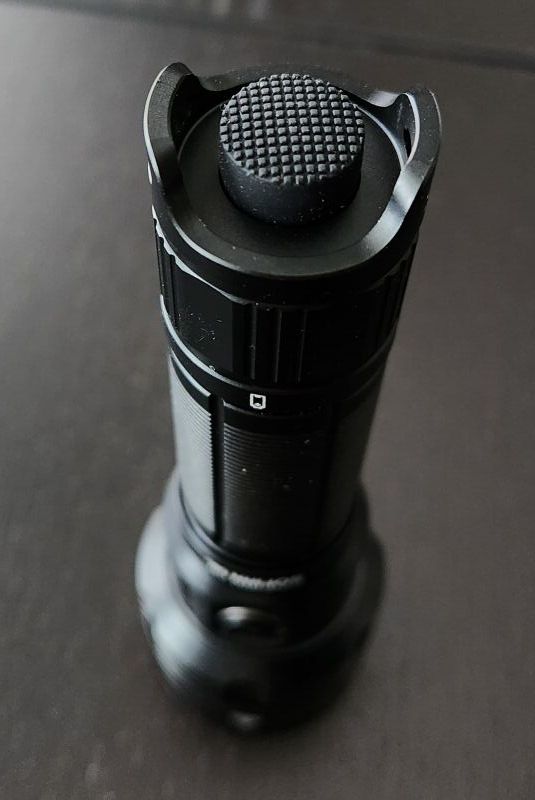
One of the notable build features is the built-in fan, that activates when running the light on Turbo. The fan cannot be controlled separately (it’s thermally-regulated), and I don’t find it too loud even on sustained Turbo runs (but it is noticeable).
You can see the heatsink and fan through the side slats on either side of the light. This is a thoughtful design feature to keep the light able to provide sustained max output. Of course, the fan is one more part that can fail (or get clogged with dust, debris, etc.). But typically, these sorts of fans are rated for a good amount of time.
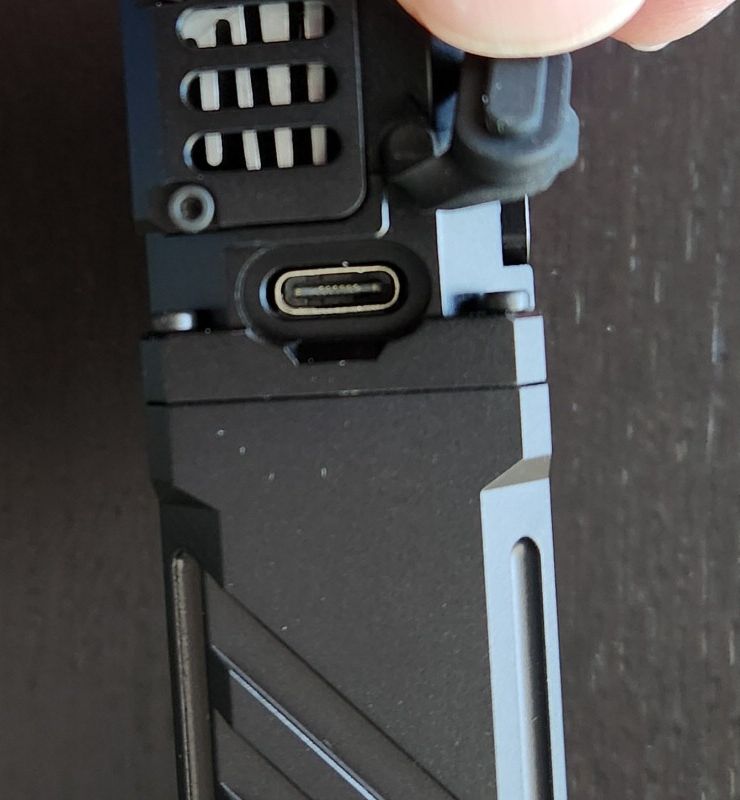
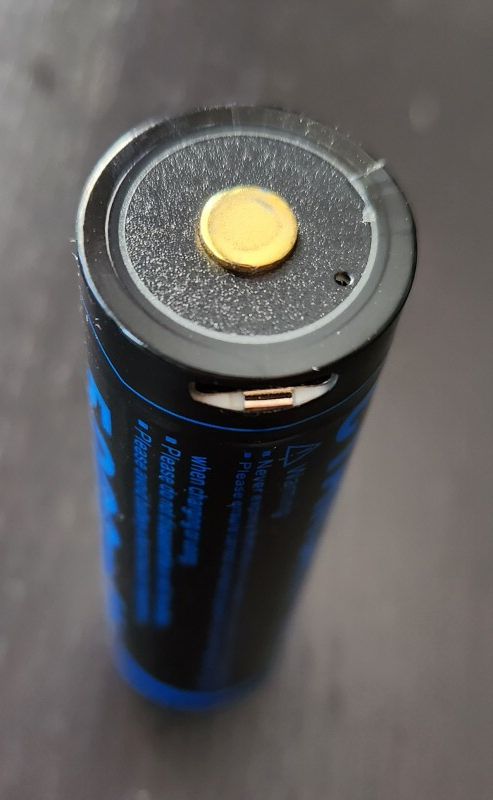
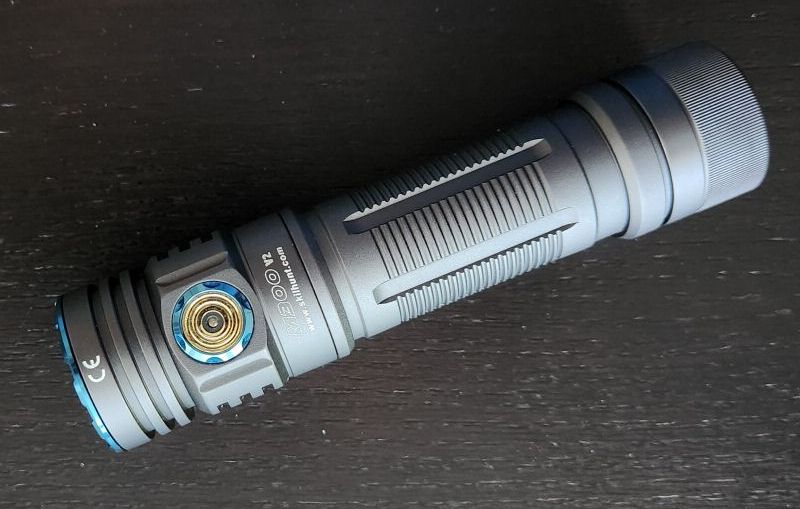
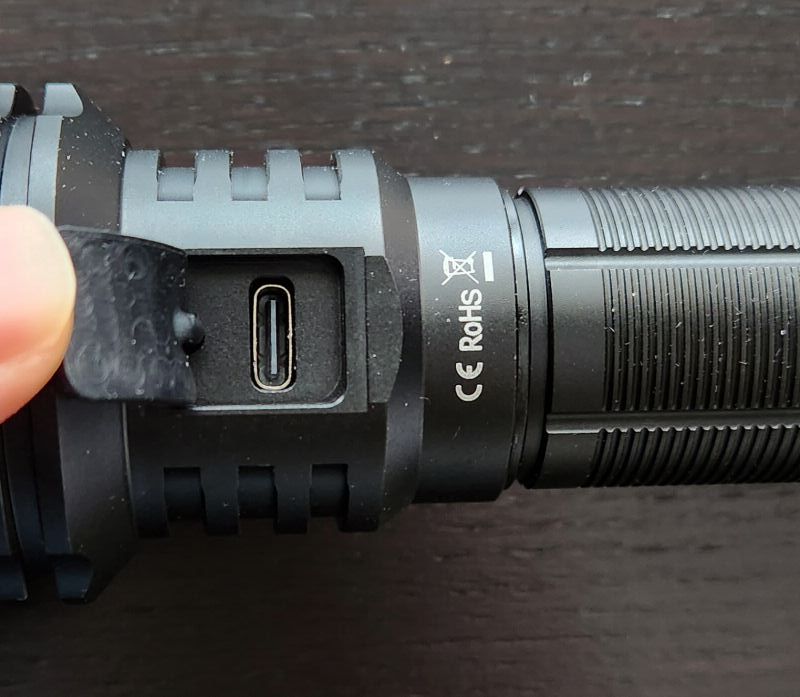
There is a USB-C charging port for charging the batteries, located on the side under a dust cover. The cover fits well and is snug. This should provide very decent splash or rain resistance, but as always I don’t recommend dunking the light in water if you can help it.
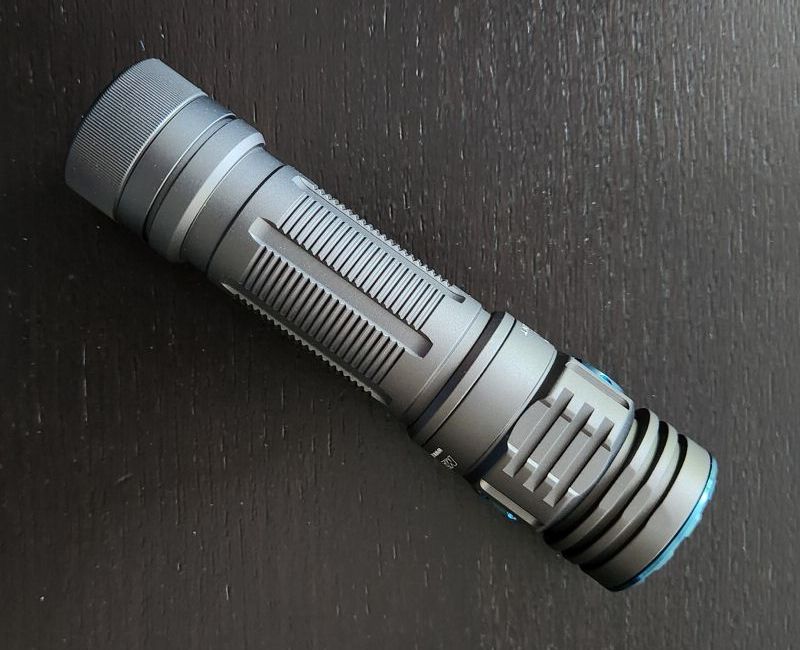
The light doesn’t have a huge amount of ridge detail, but what it does have is fairly deep. That combined with its rectangular shape gives it pretty good grip (rolling is certainly not going to be a problem!). The light can headstand, tailstand, or sidestand stably (i.e., on all surfaces). Note there are a couple of small holes on the back for attaching optional accessories, like a clip or bike attachment.
Anodizing appears to be excellent on my sample, no obvious chips or damage. My sample came in all black, but I gather other colours are available for the body. I would describe it as a matte finish. Lettering is minimal, and not overly bright (but sharp and clear).
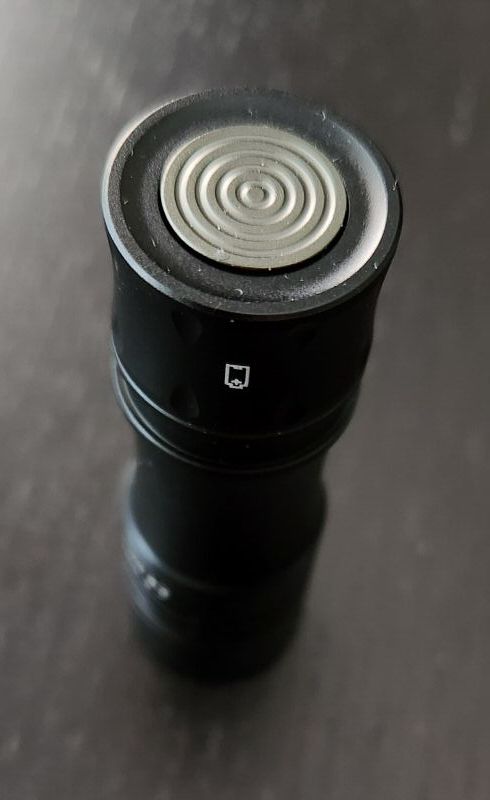
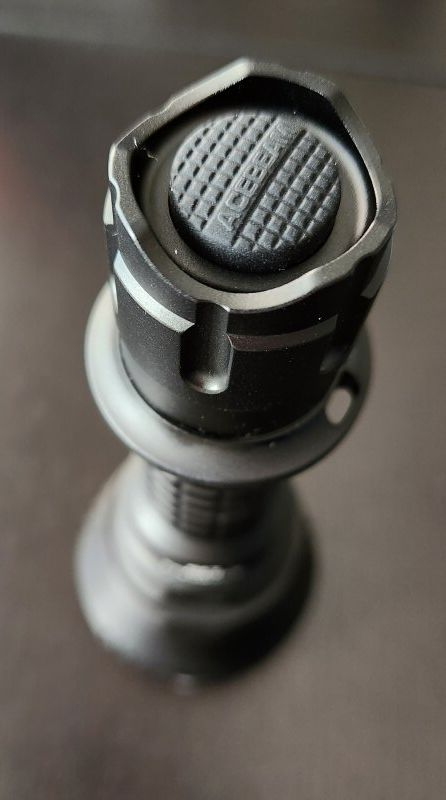
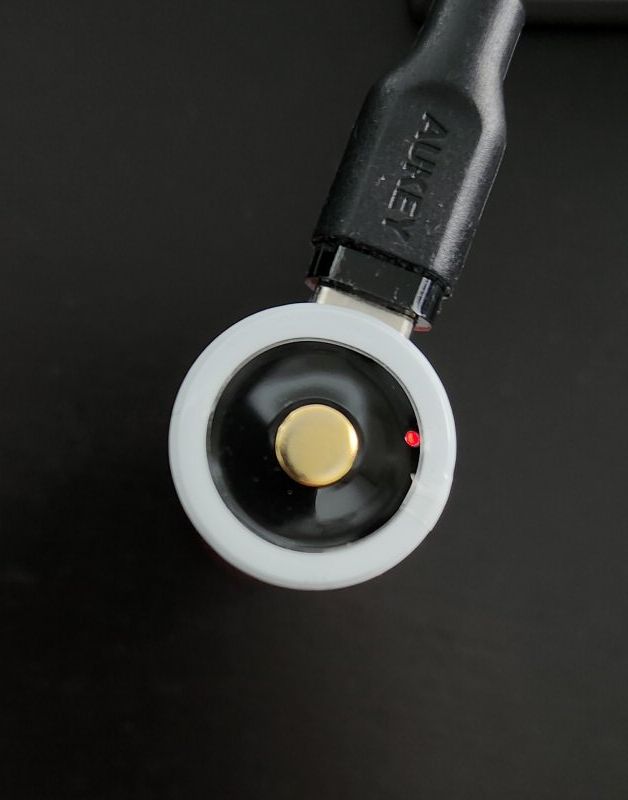
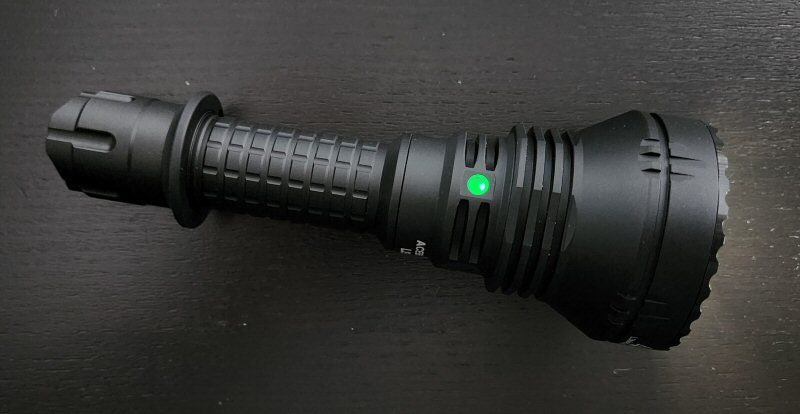
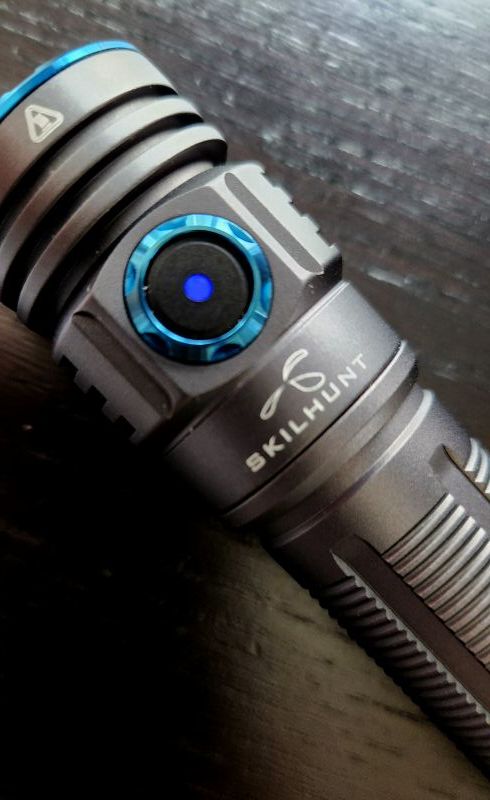
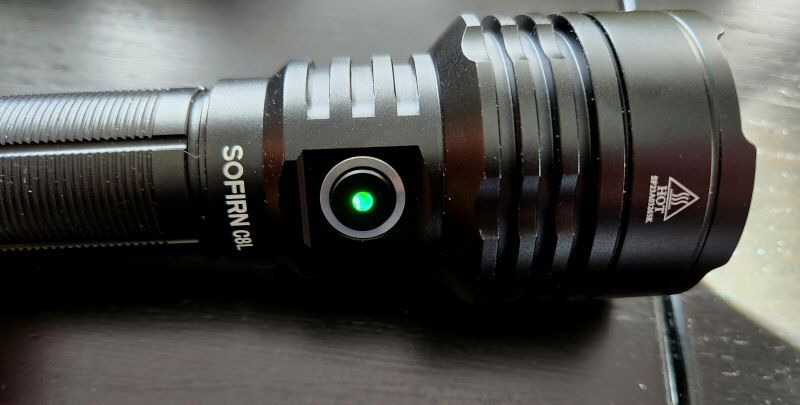
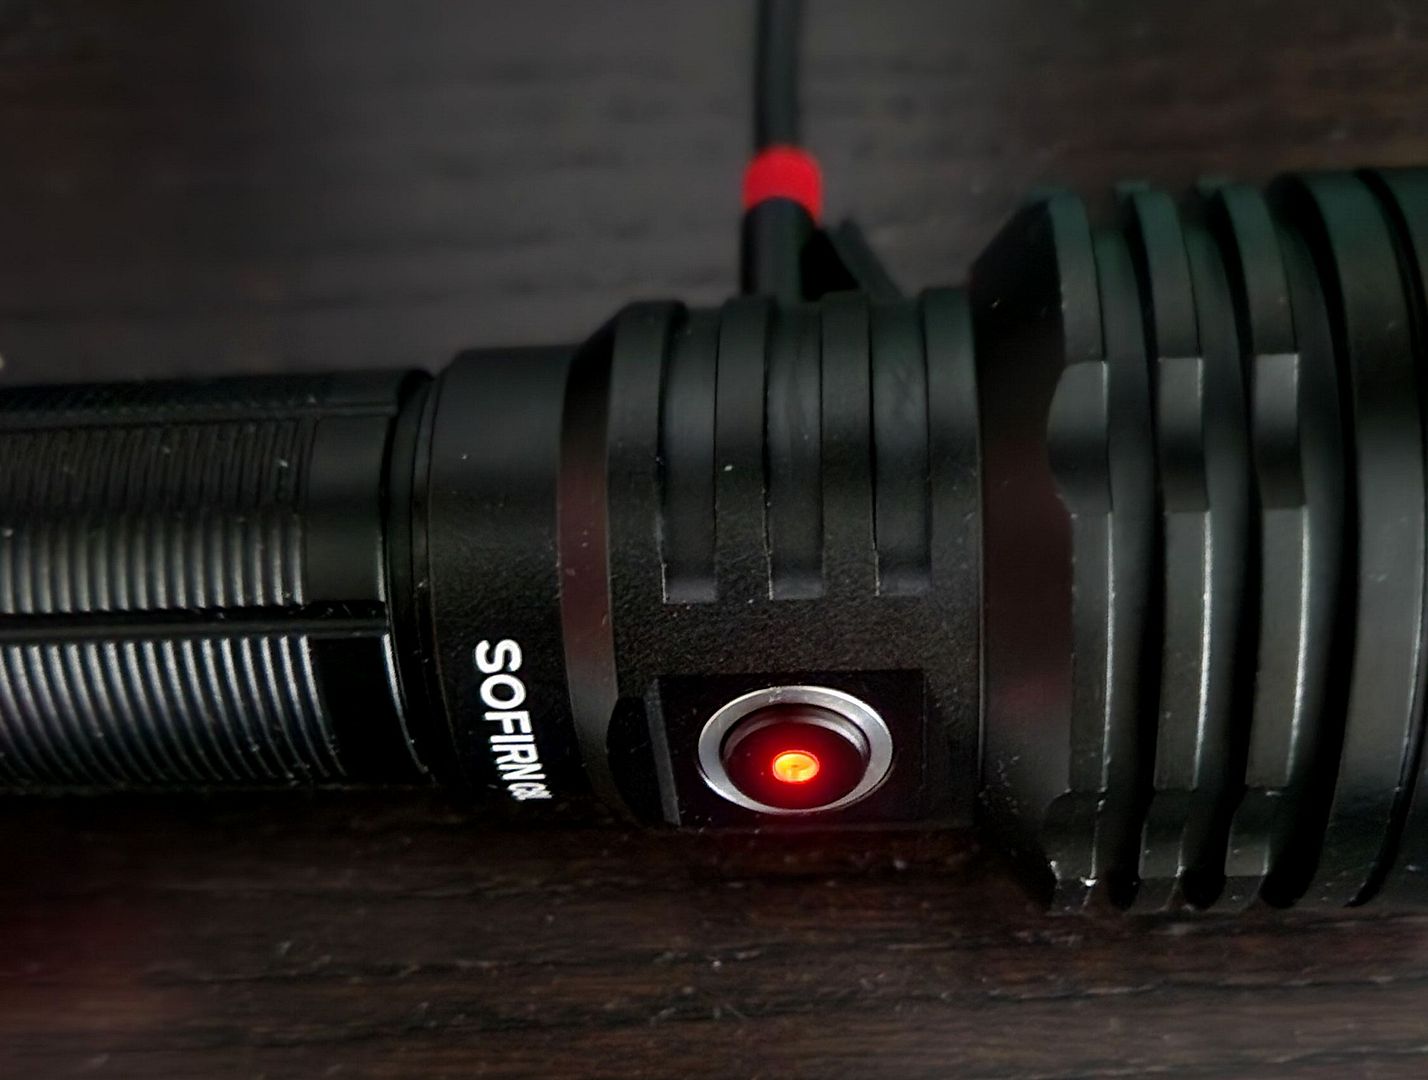
There is a small LED at the center of the switch, showing you charging or charge-remaining status.
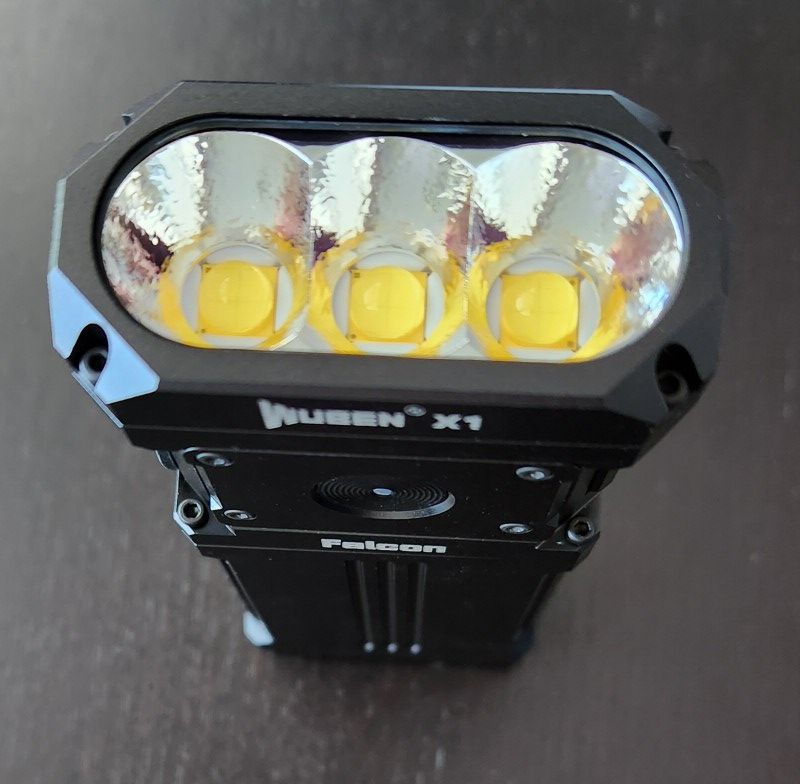
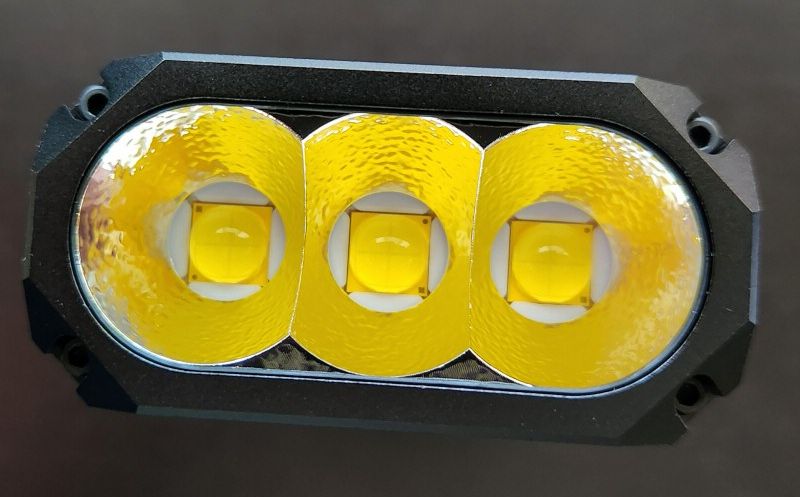
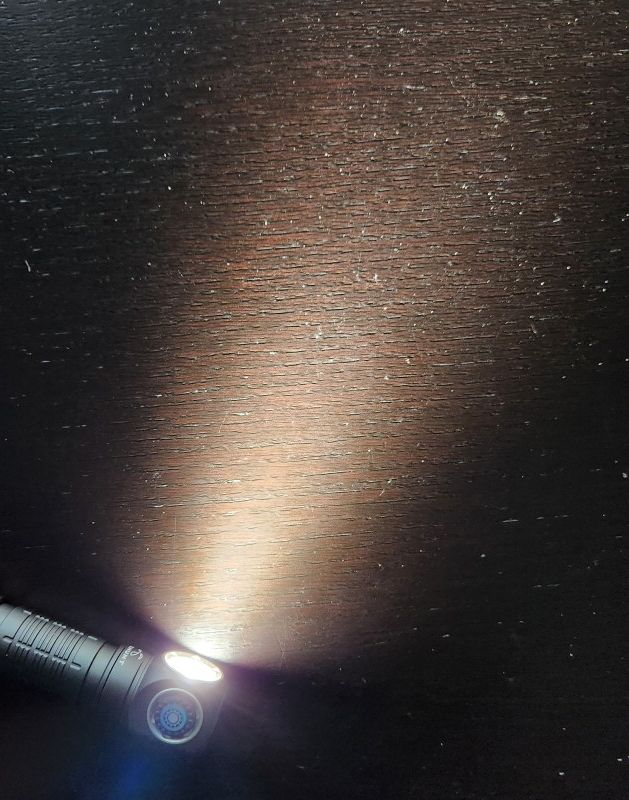
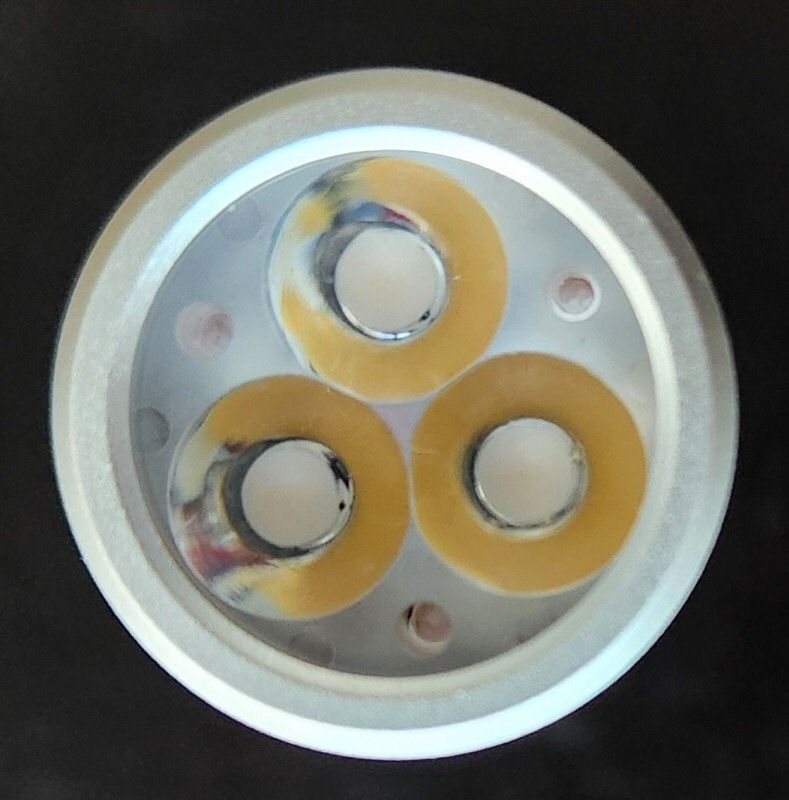
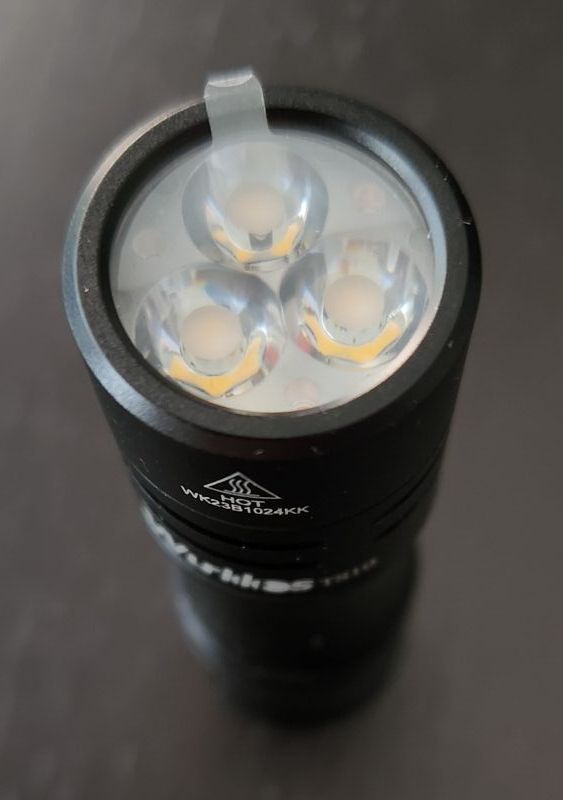
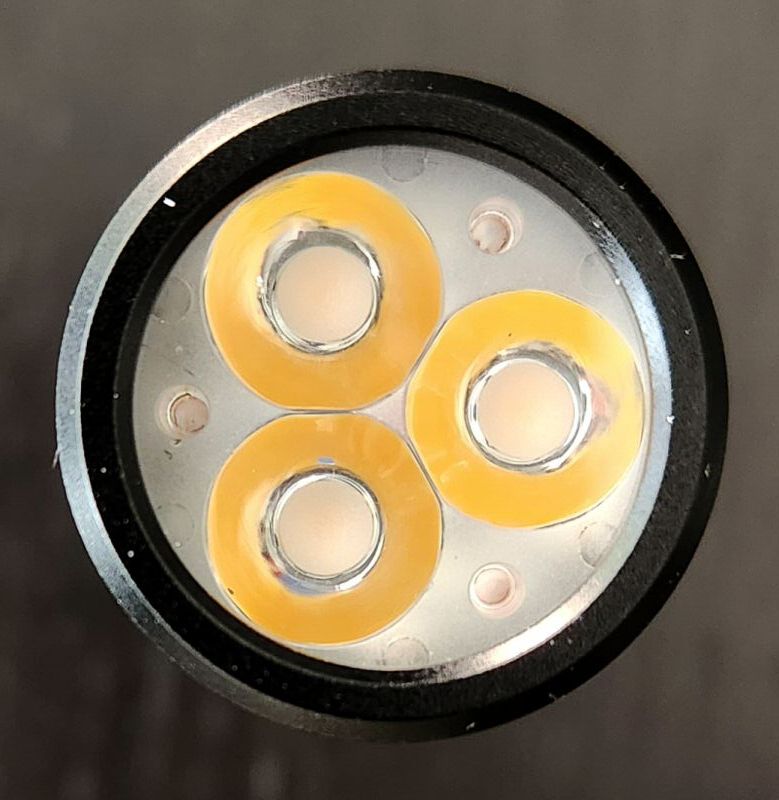
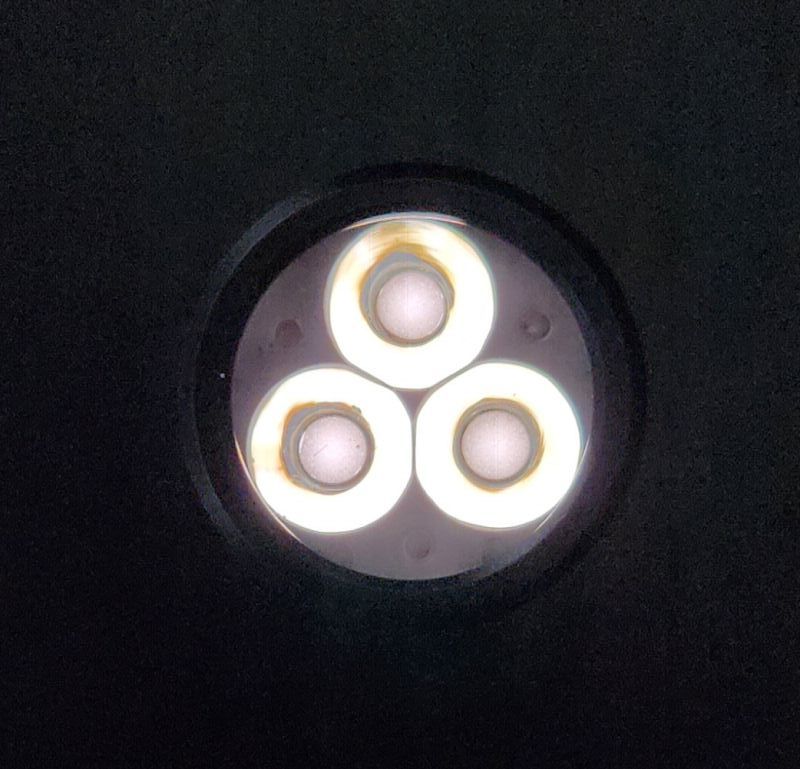
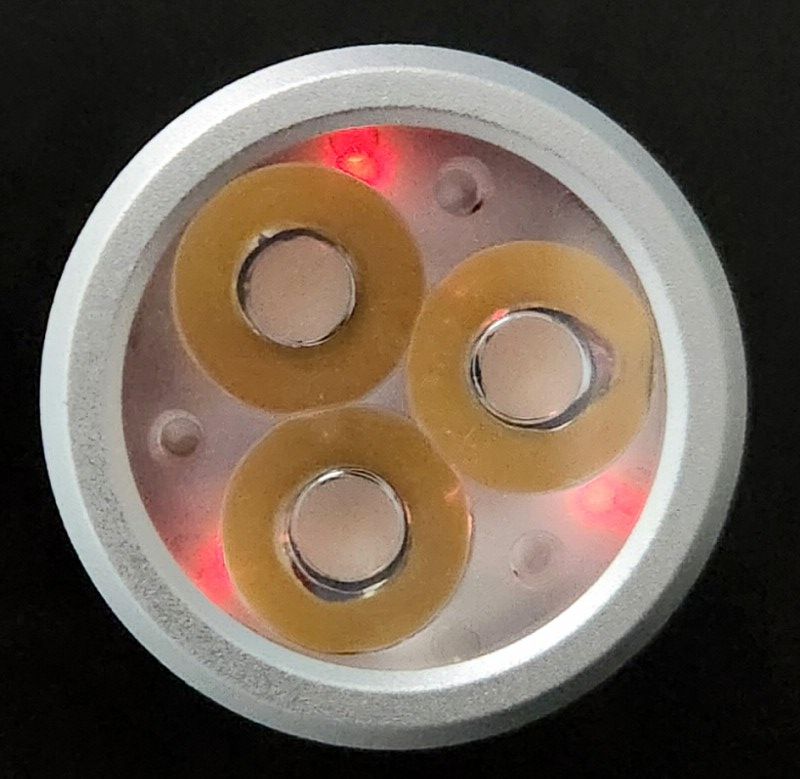
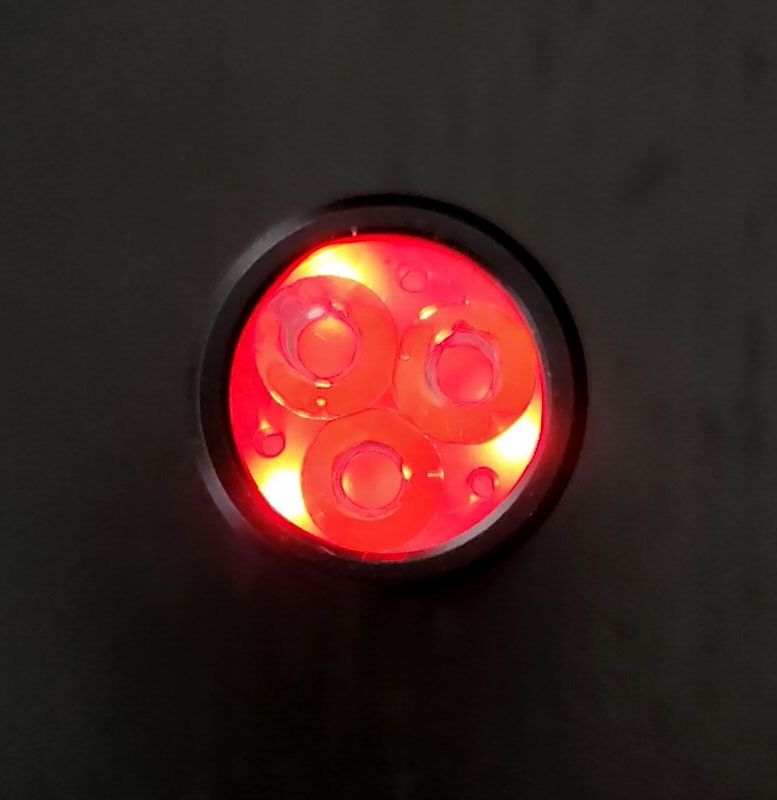
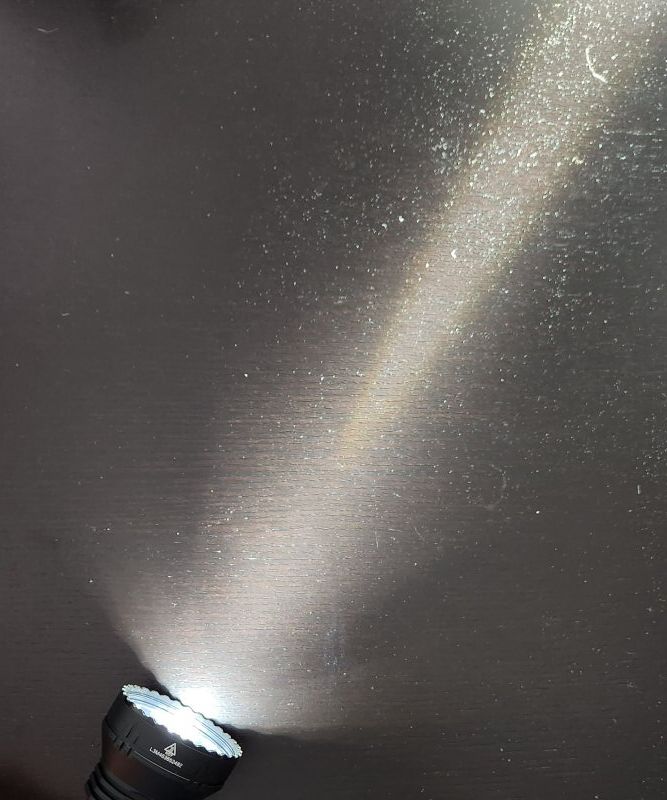
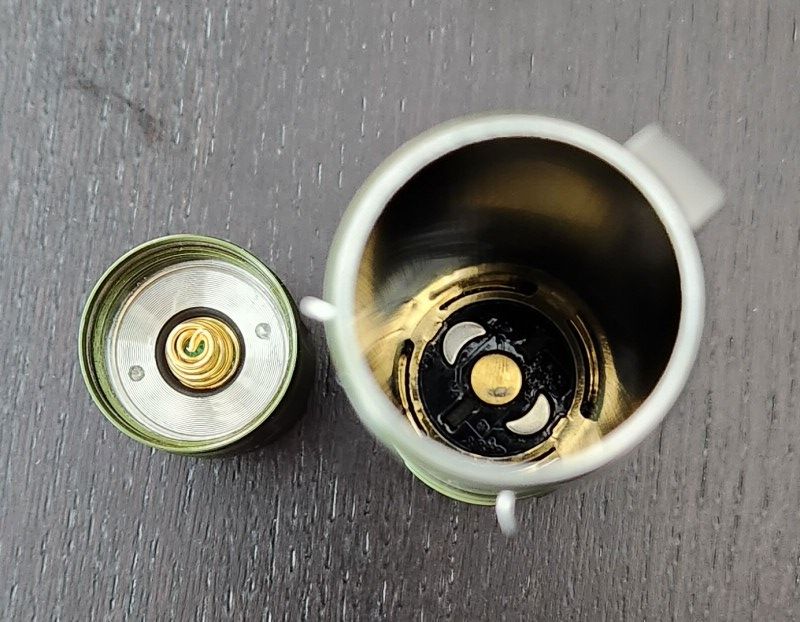
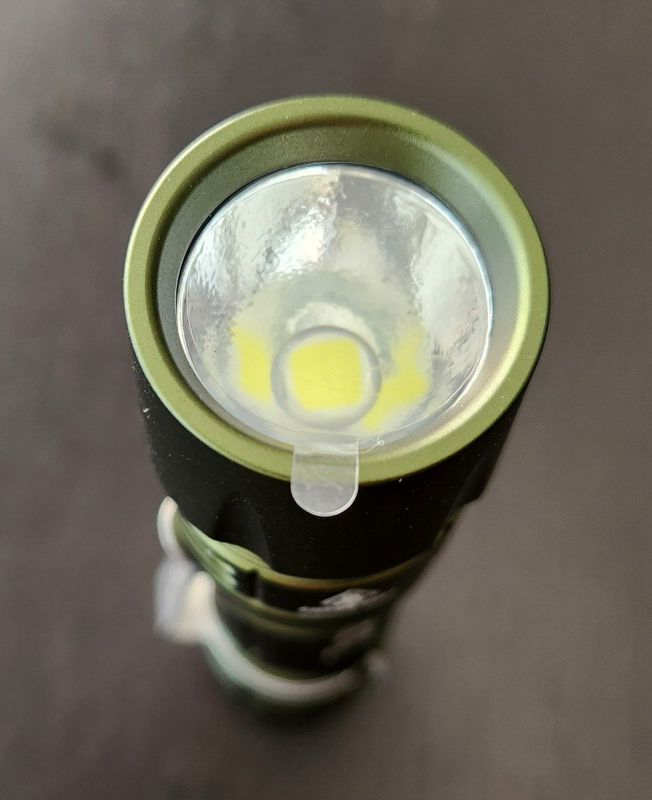
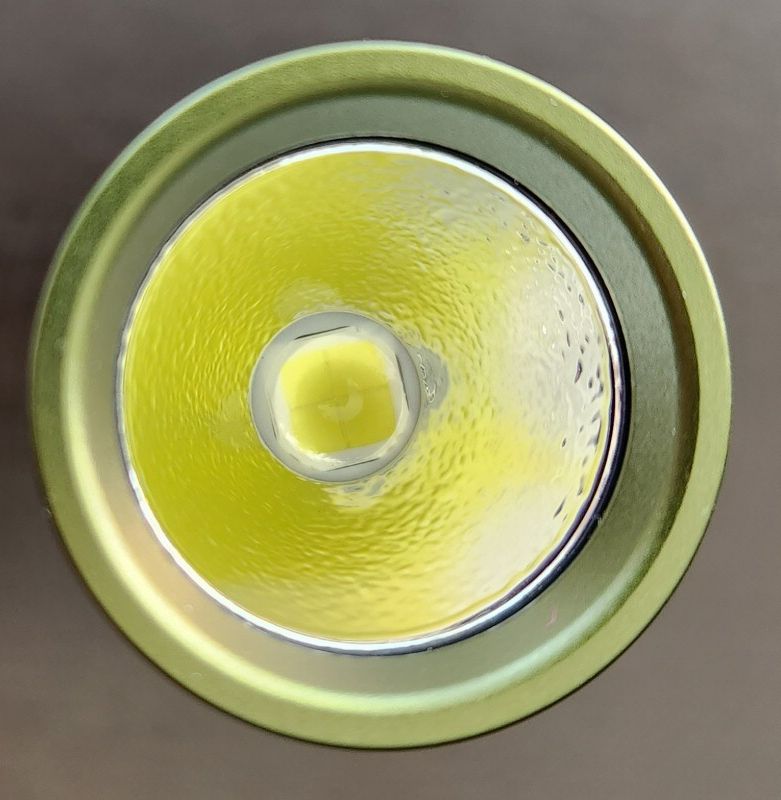
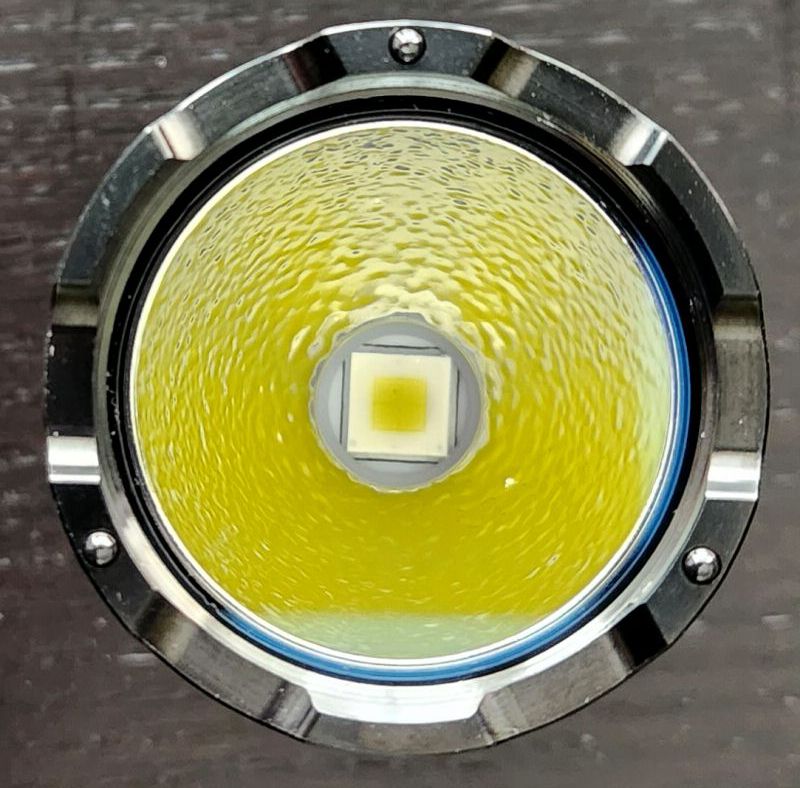
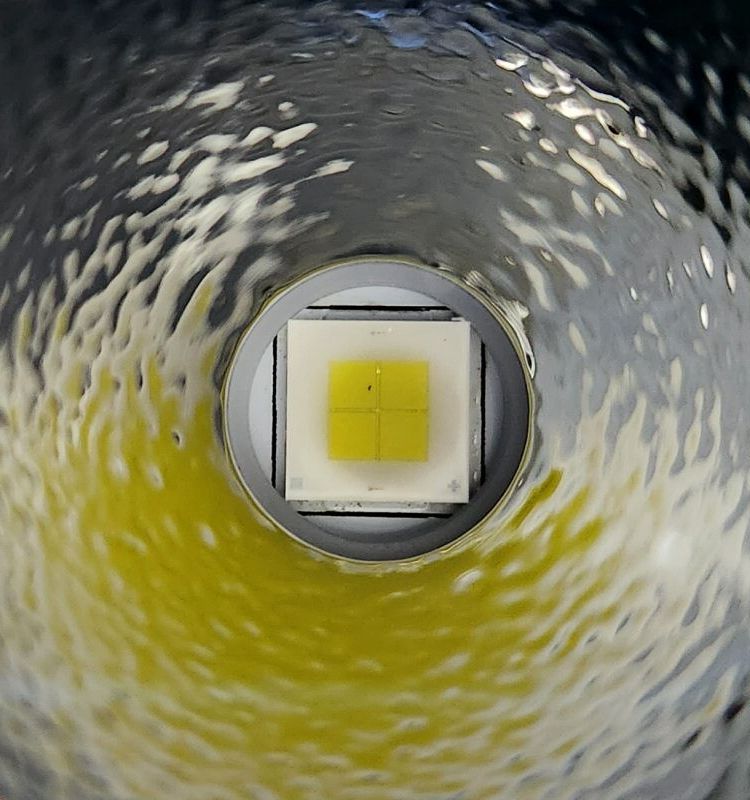
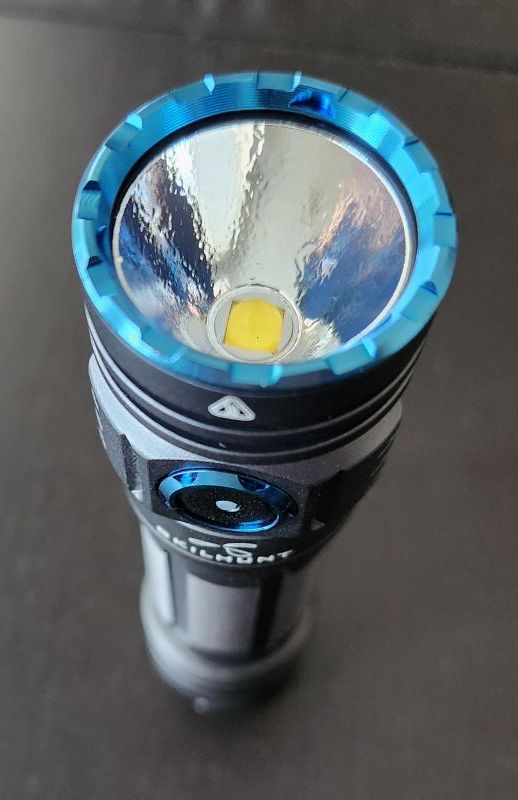
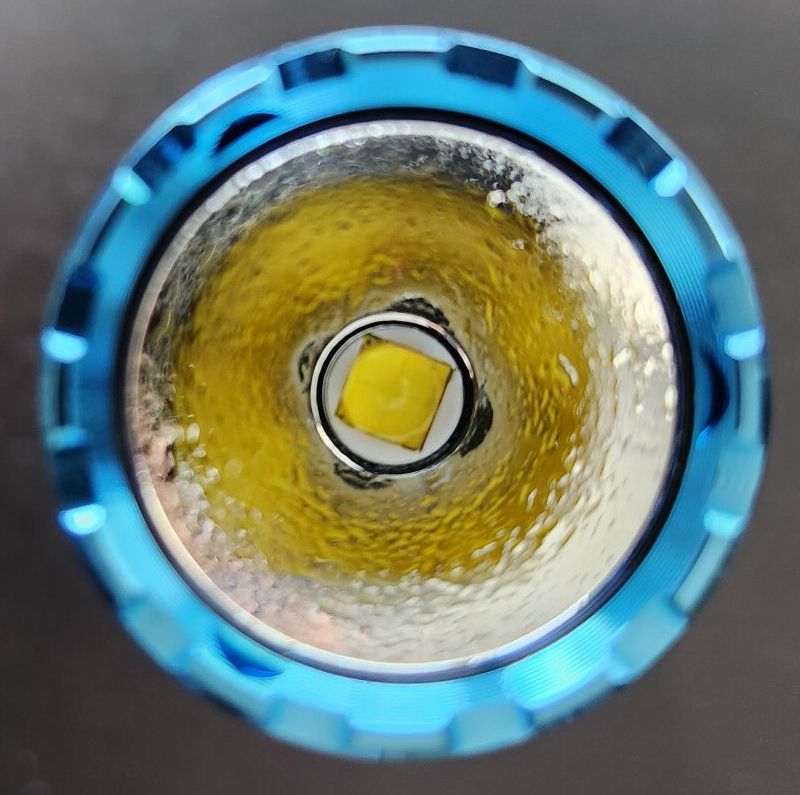
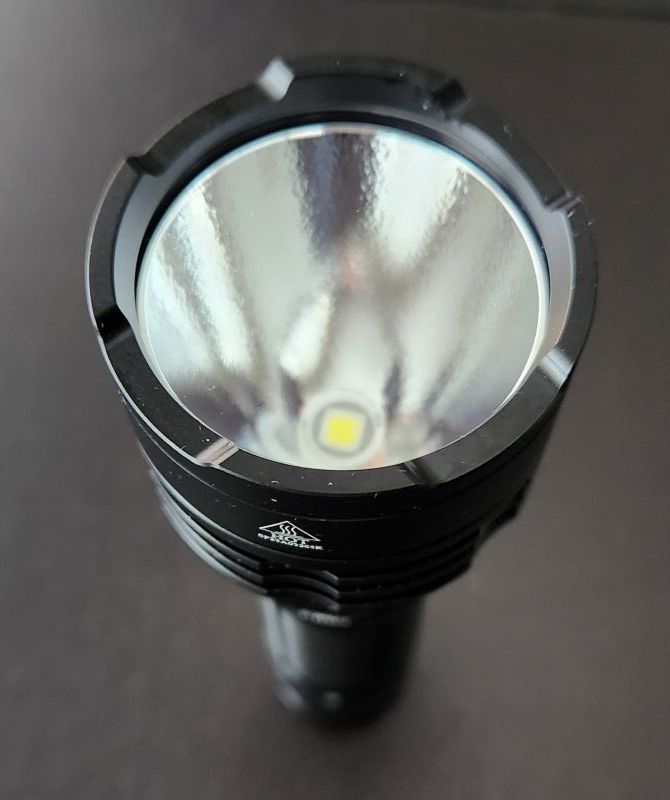
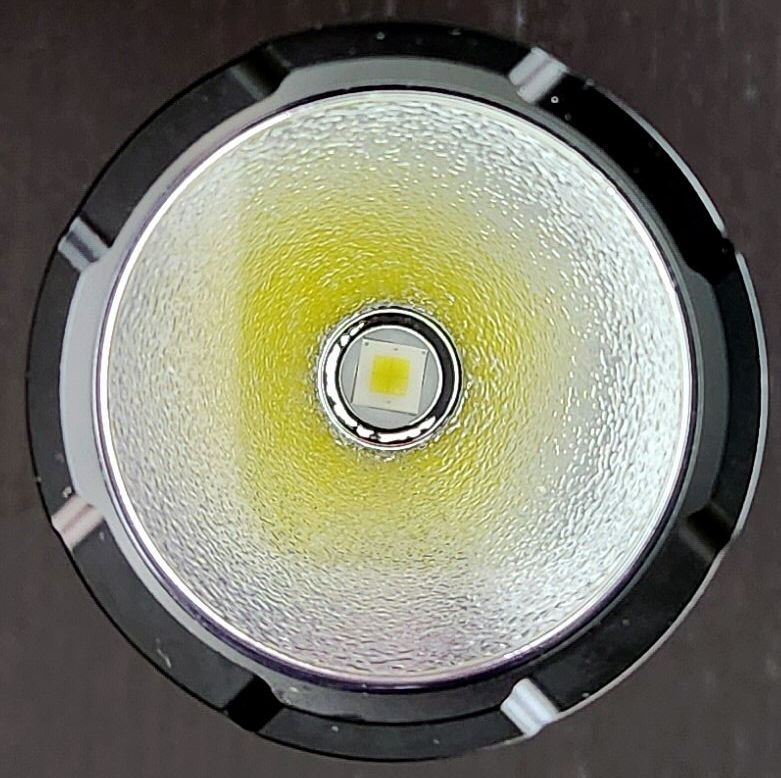
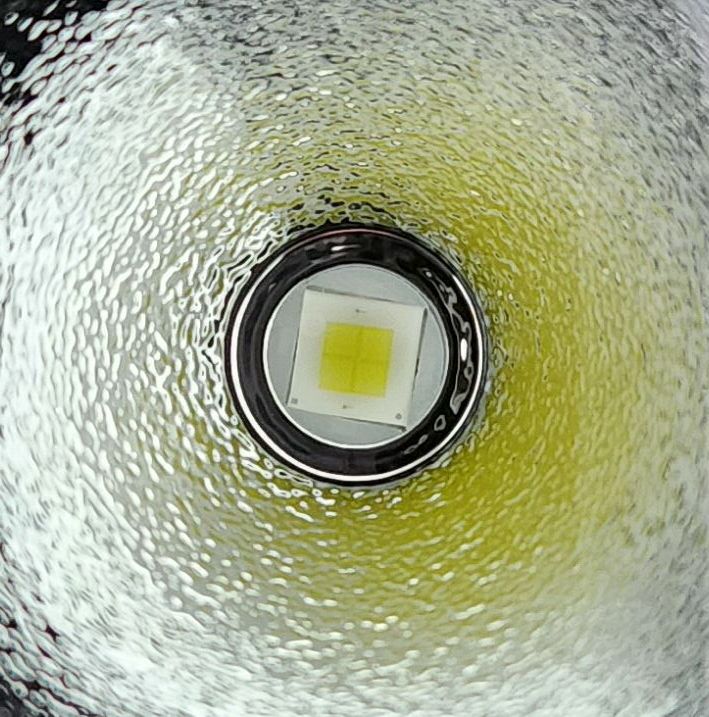
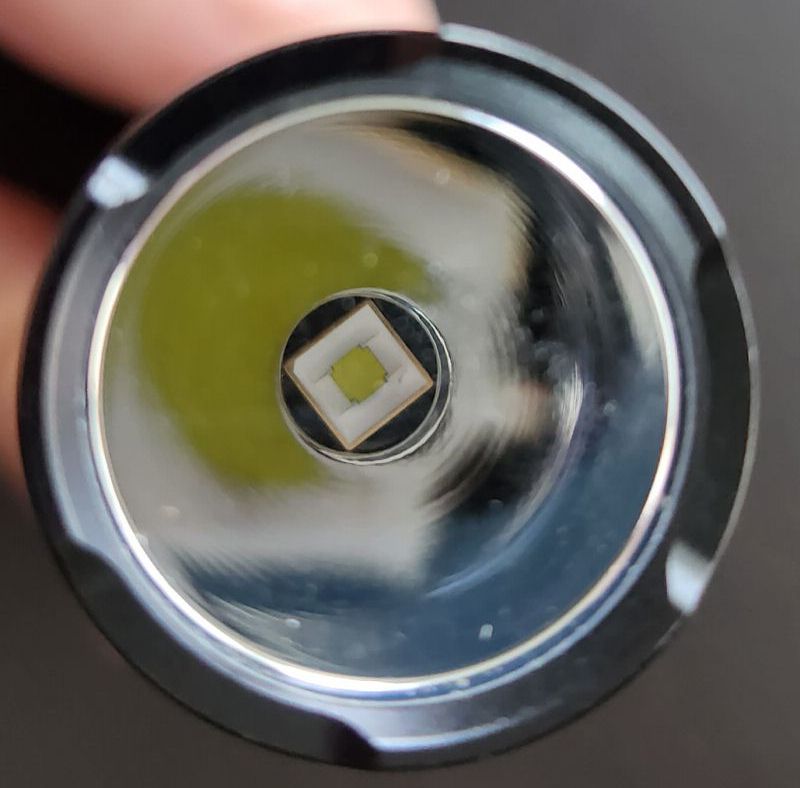
The X1 comes with three Cree XHP70.2 emitters, located side-by-side in a common reflector with individual wells. The light is of course more of a flooder than a thrower, but it produce a decent center beam, with a wide but narrow spill, given this shape (scroll down for beamshots).
The center beam pattern is lovely, somewhat creamy yellow (i.e., a bit warmer than I expected for the 6000K, scroll down for tint measures). Even the periphery is remarkably even and free of artifacts – they have done a very good job on the reflector.
Impressively, I haven’t noticed any significant tint shifting across the main hotspot or corona (something that is common with single XHP70.2 emitters). That said, there is a bit of a tint shift to purple in the spill and periphery (but I suspect that is due more to the purplish anti-reflective coating on the lens).
The bezel is flat black aluminum.
User Interface
The X1 uses a straightforward user interface, and one that is very similar to many other lights.
To start, you need to realize the light is shipped in Lockout mode. Since you cannot easily remove the tailcap, this is unavoidable. To unlock the light, simply do 4 fast clicks of the switch.
Mode levels: Eco, Low, Med, High, Turbo, Strobe, and SOS.
From OFF:
- Press-and-hold: Turns on in Eco mode.
- Single-click: Turns On in last memorized mode (except for Turbo or flashing modes).
- Double-click: Turns On in Turbo.
- Triple-click: Turns On in Strobe.
- 4 clicks: Deactivates Lockout mode.
From ON:
- Press-and-hold: Advances through main output modes (again, except for Turbo or flashing modes).
- Single-click: Turns Off.
- Double-click: Jumps to Turbo. Press-and-hold to return to last memorized mode (Single-click turns Off).
- Triple-click: Jumps to Strobe. Triple-click again to jump to SOS. Single-click to return to last memorized mode.
From Lockout:
- 4 clicks: Disable Lockout.
Mode memory:
Yes, for constant output modes, except Turbo.
Shortcuts:
- Lowest mode: Press and hold the switch from Off.
- Turbo mode: Double-click the switch from On or Off.
- Strobe: Triple-click the switch from On or Off.
Battery indicator:
When first activating the light, the indicator on the switch shows the battery capacity remaining (lasts for ~5 secs upon activation):
- Solid blue: >90%
- Flashing blue: ~40-90%
- Solid red: ~15-40%
- Flashing red: <15%
Low voltage warning:
Not that I’ve noticed – as you will see from the runtimes below, the shut-off is pretty abrupt.
Lockout mode:
Yes – turned on by default when shipped. You can toggled it off/on by 4-clicks from Off.
Reviewer Comments:
I find this interface very intuitive, similar to a lot of other lights (e.g. many of the Sofirn/Wurkkos lights with an electronic switch). The only inconsistency I’ve noticed is how you exit from the shortcuts to Turbo and Strobe/SOS (i.e., the first requires a press-hold, the other a click). Aside from that though, this is all very consistent and relatable.
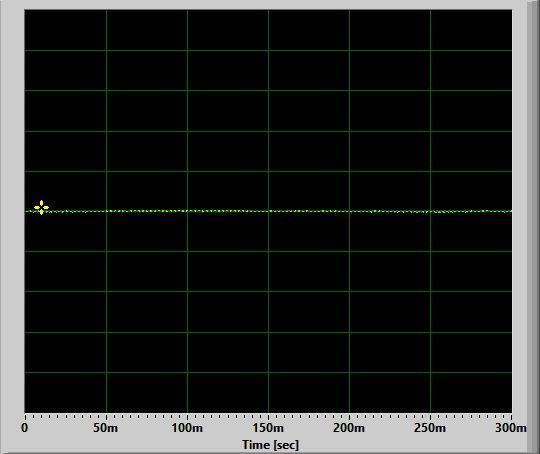
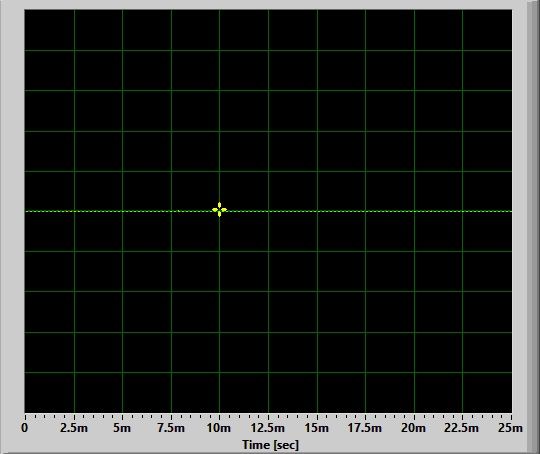
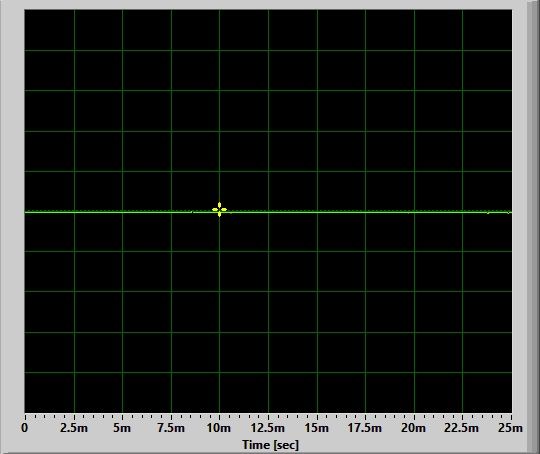
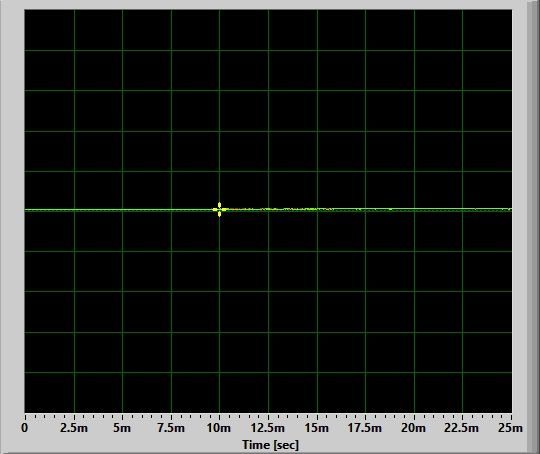
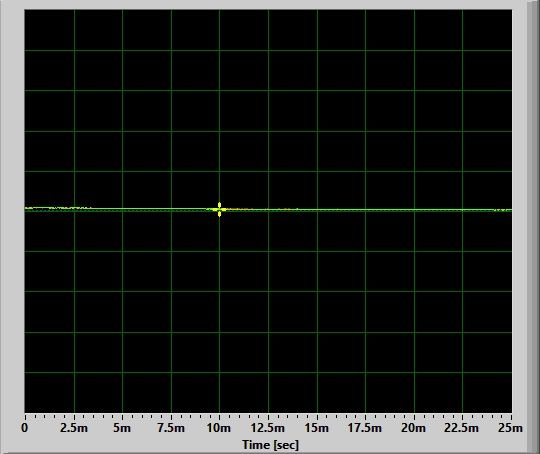
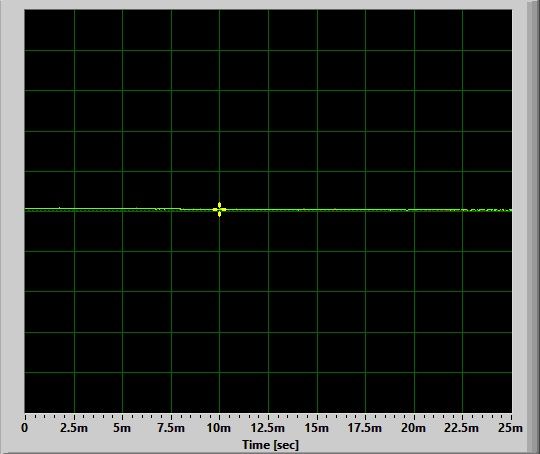
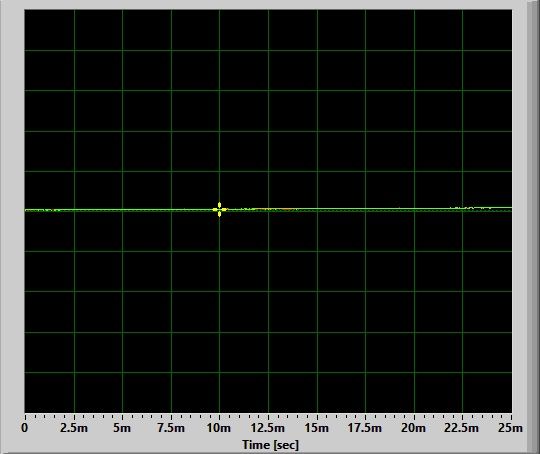
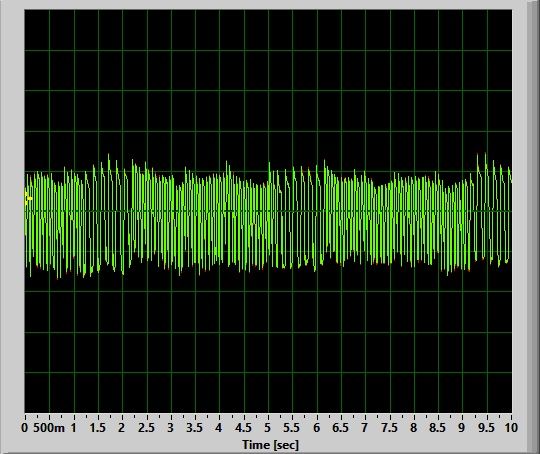
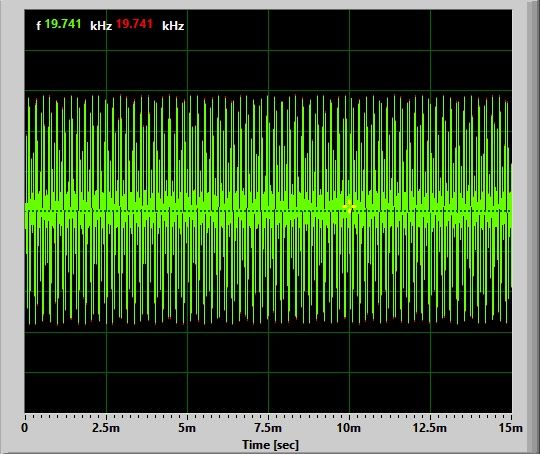
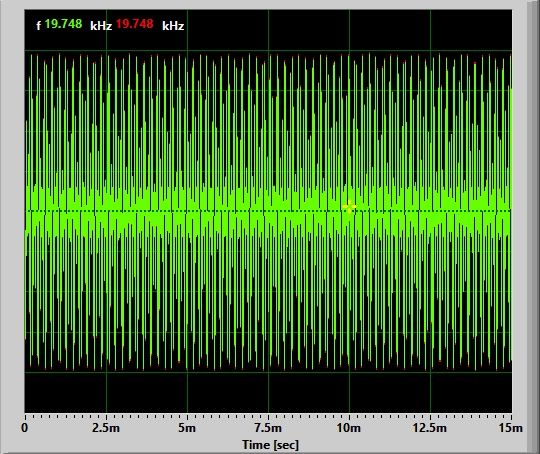
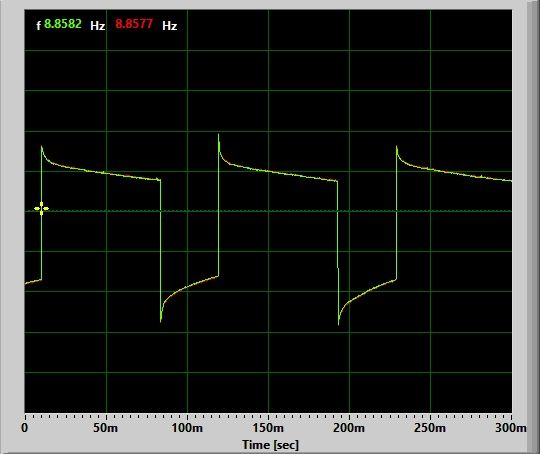
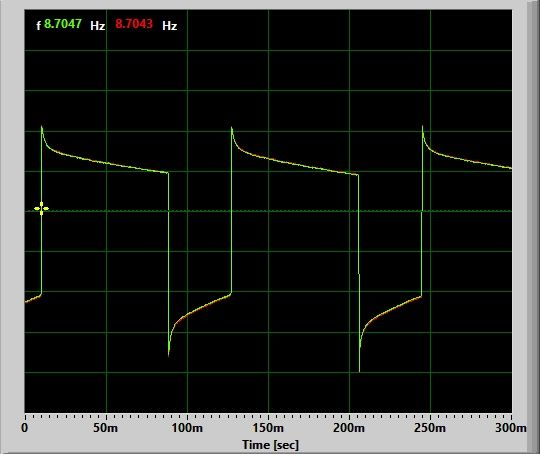
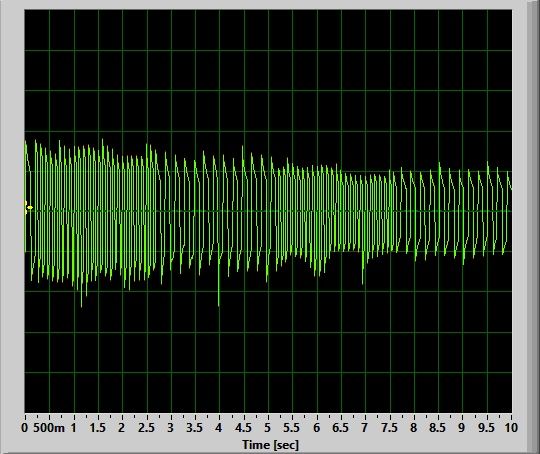
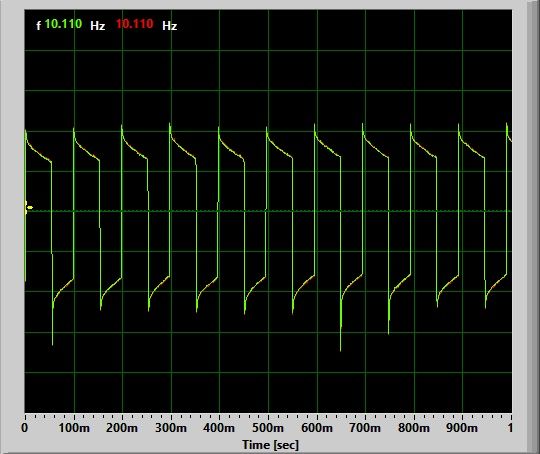
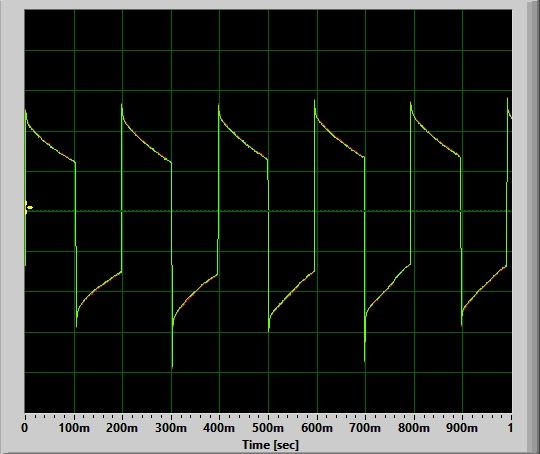
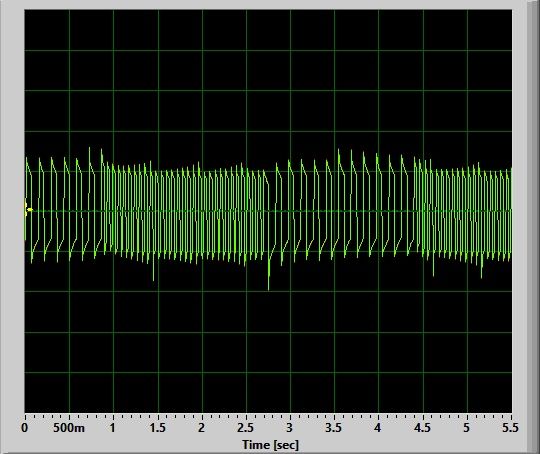
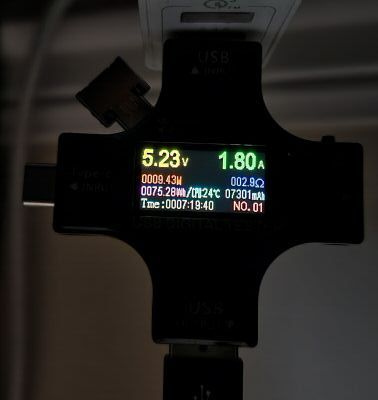
Circuit Measures
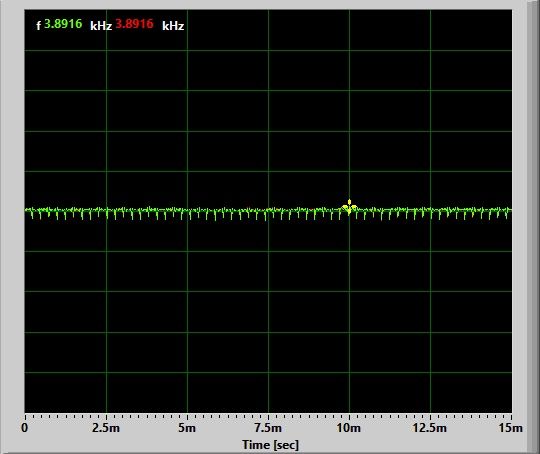
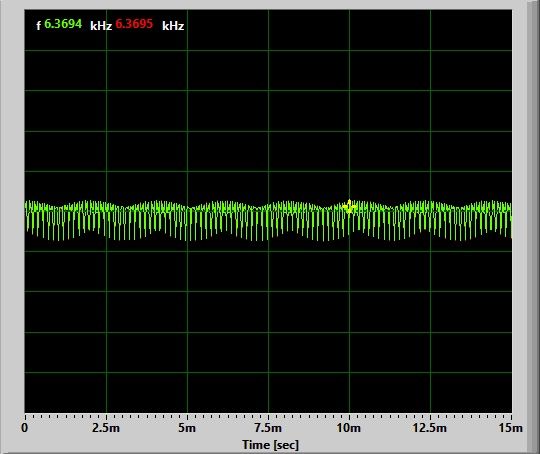
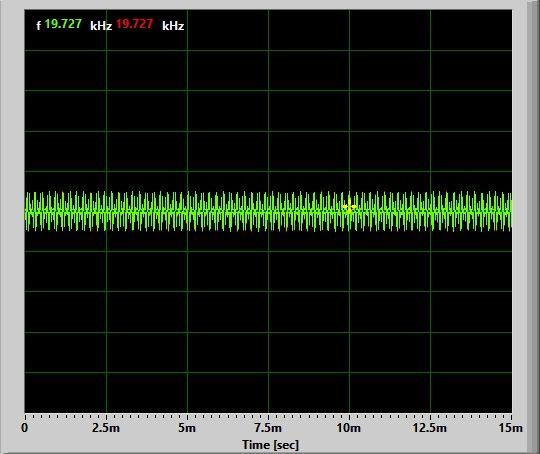
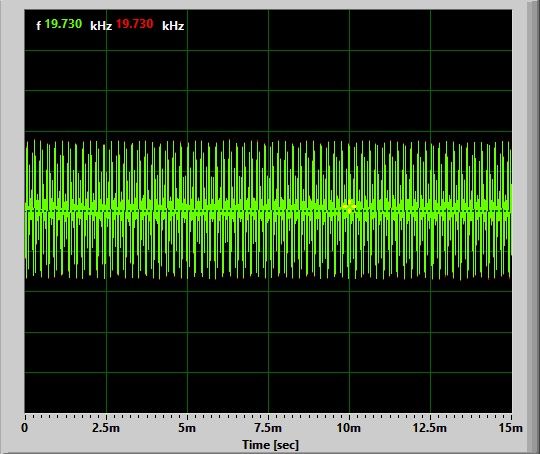
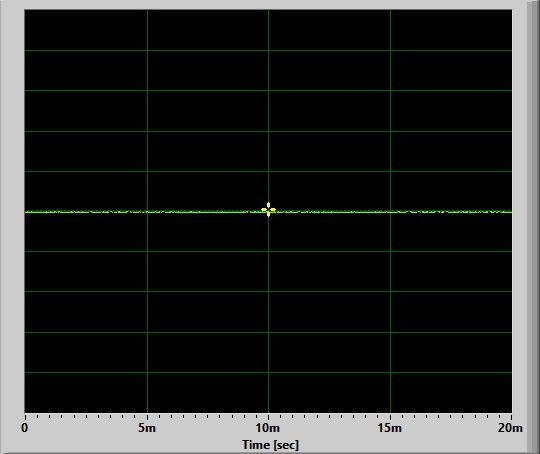
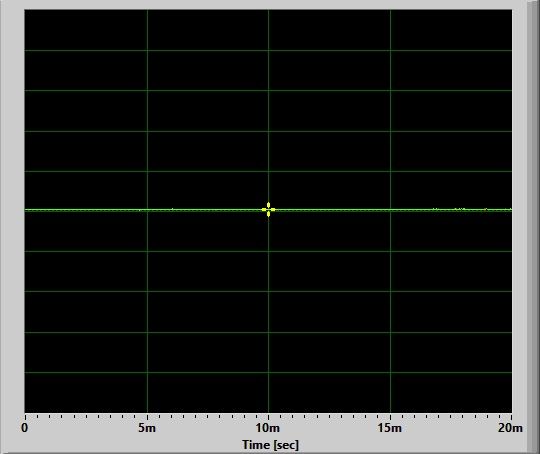
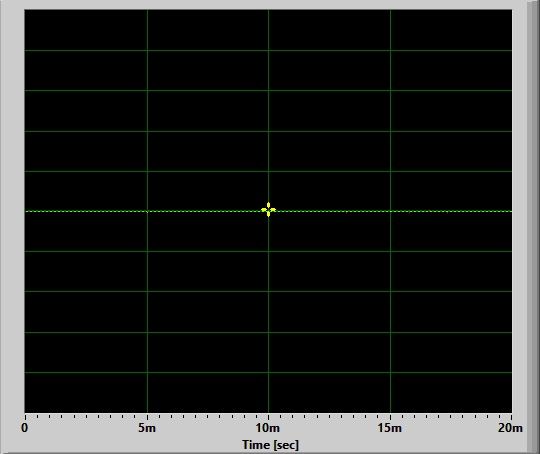
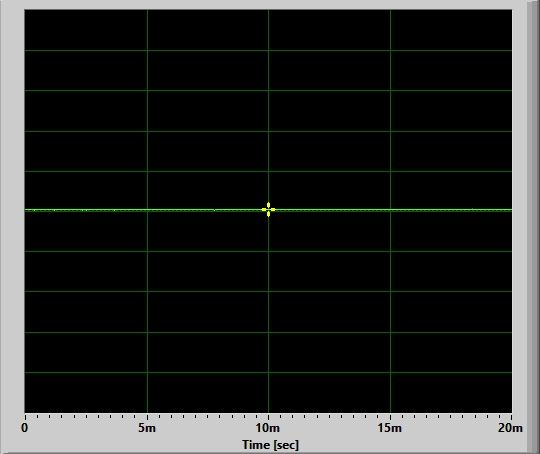
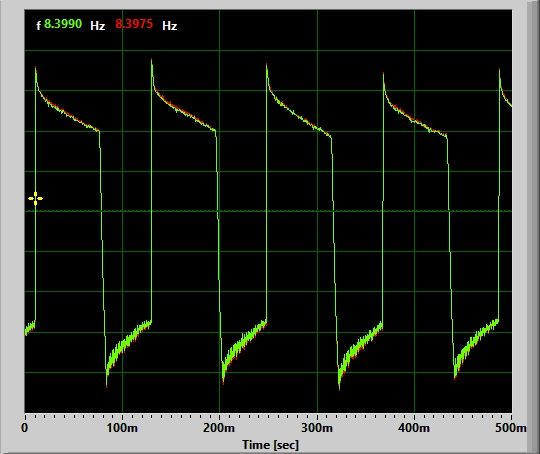
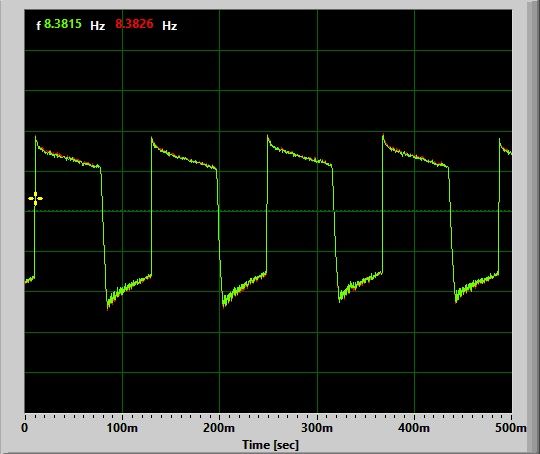
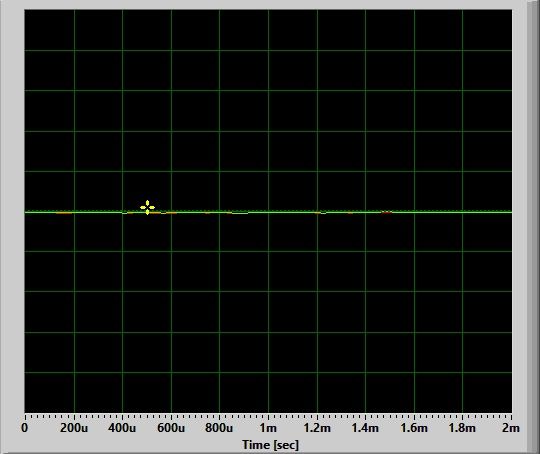
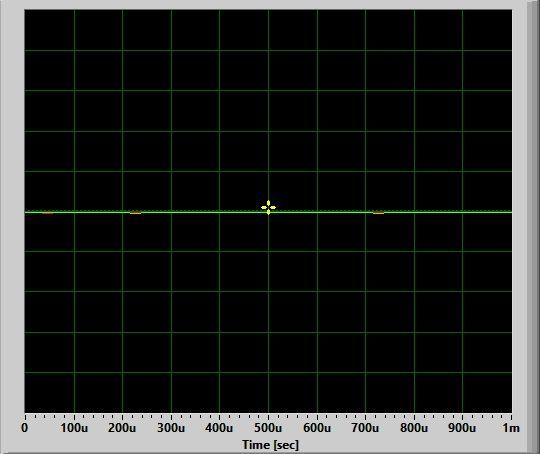
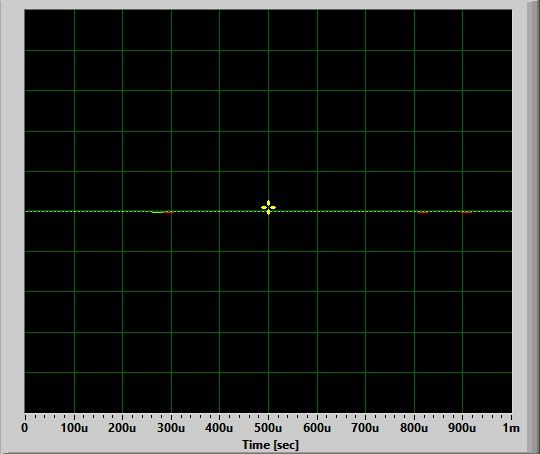
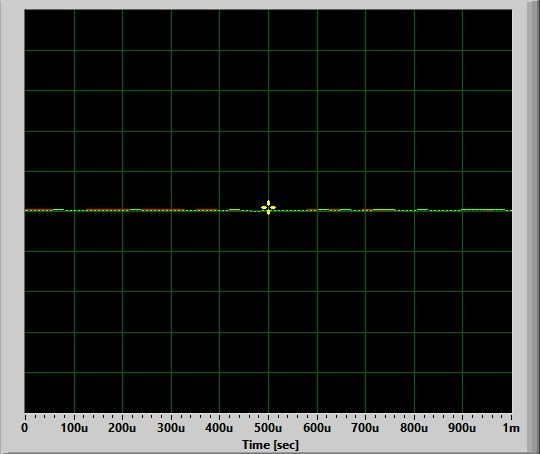
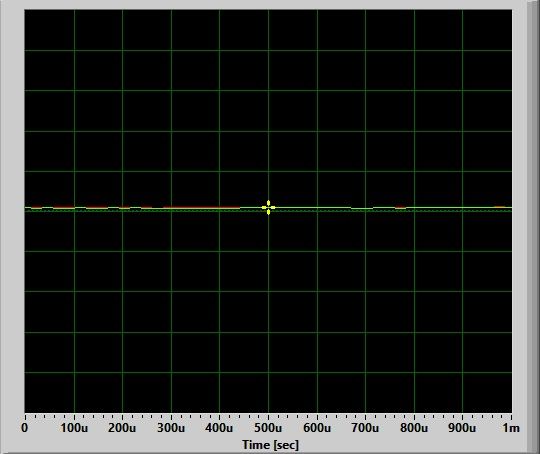
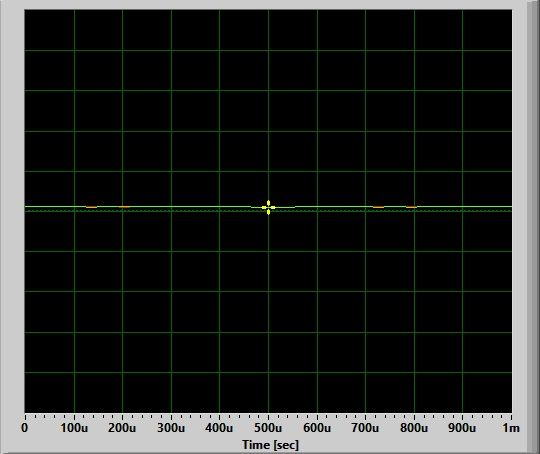
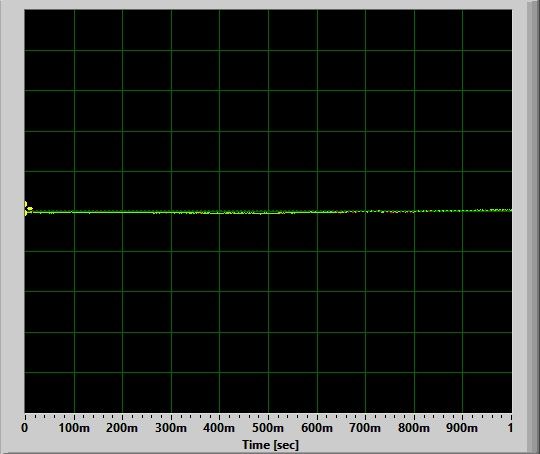
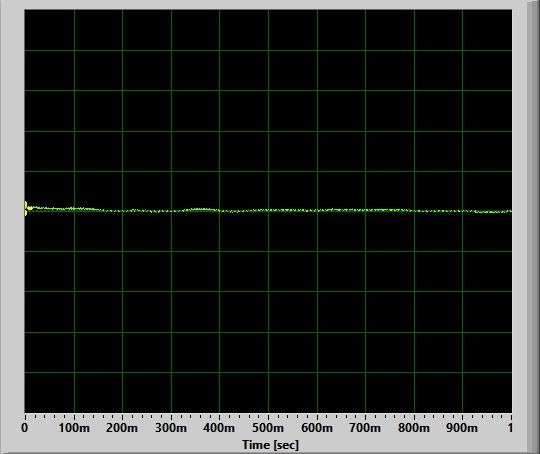
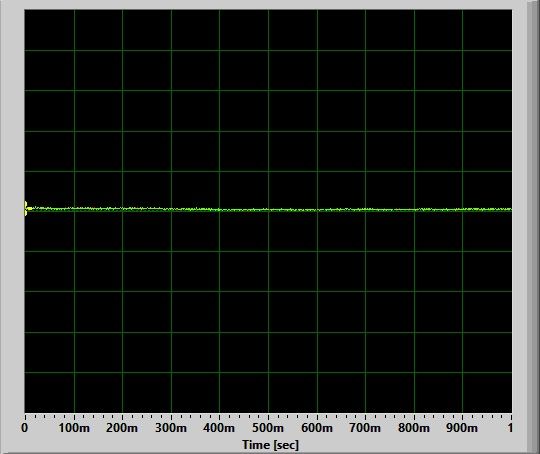
No Pulse-Width Modulation (PWM):
Eco:
Lo:
Med:
High:
Turbo:
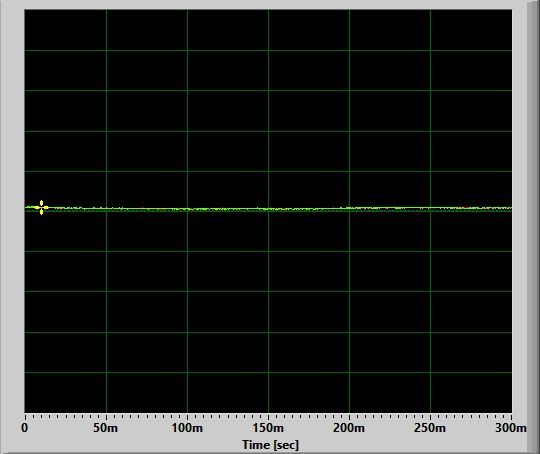
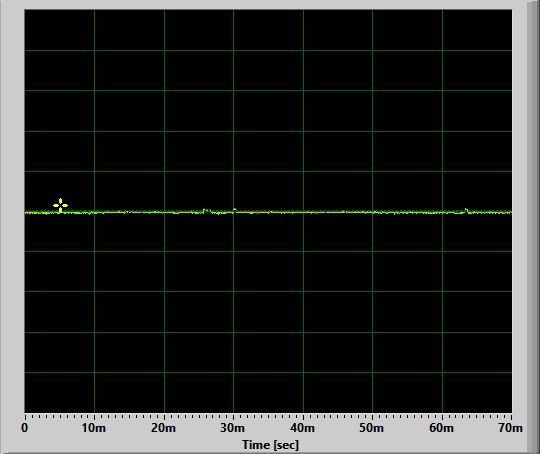
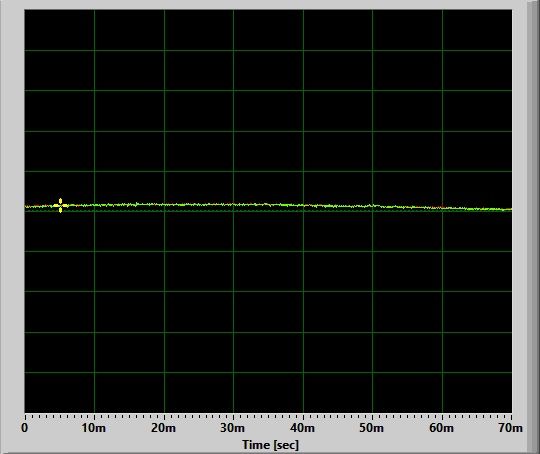
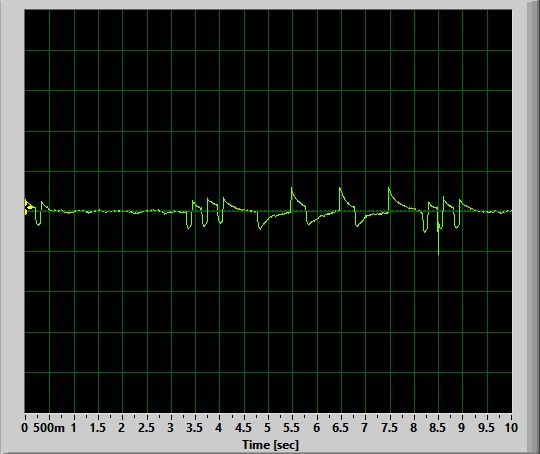
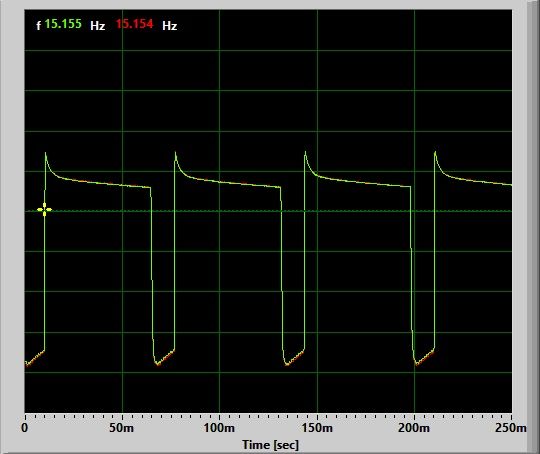
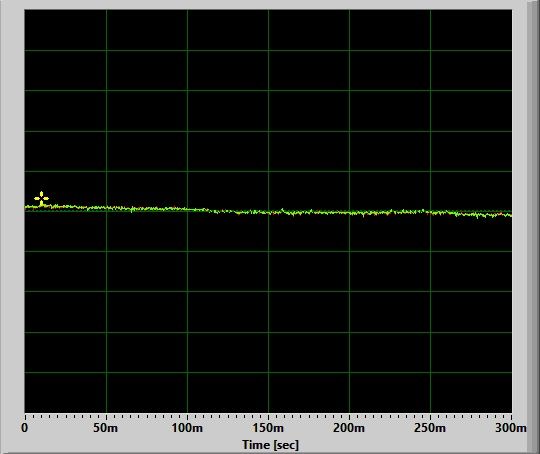
There is no sign of PWM, the circuit appears to be fully current-controlled. There is also no circuit noise on any level, which is always great to see. Note that circuit noise is not a problem per se, but I find that its absence (as in this case) bodes very well in terms of regulation and output/runtime efficiency. Scroll down to see actual results.
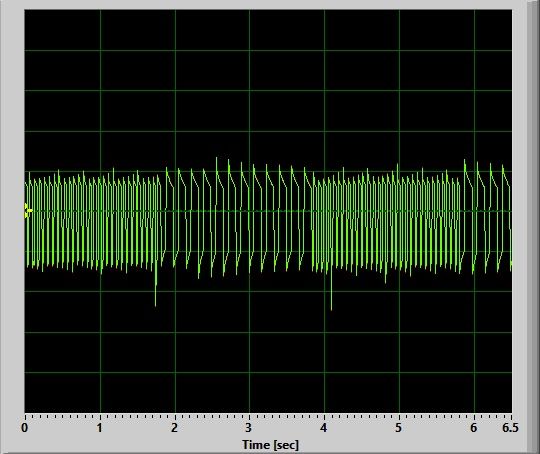
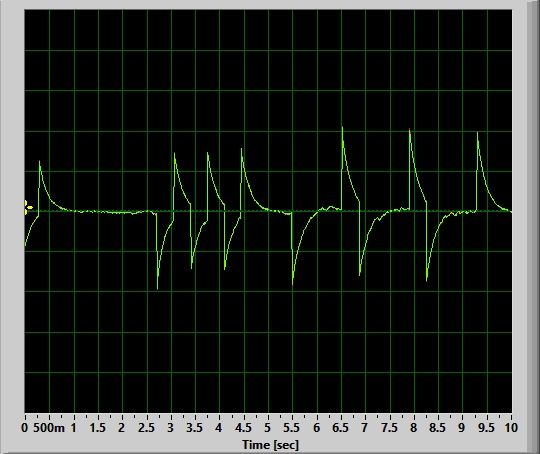
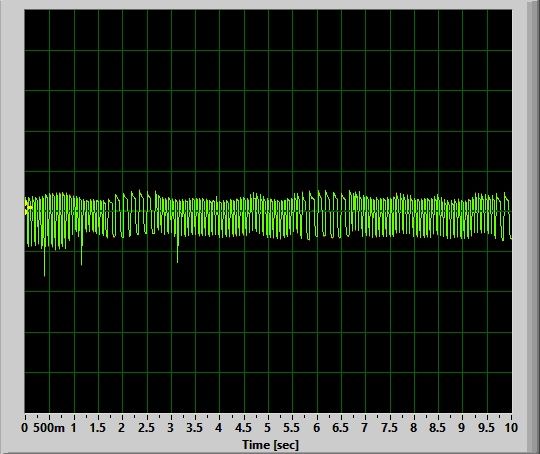
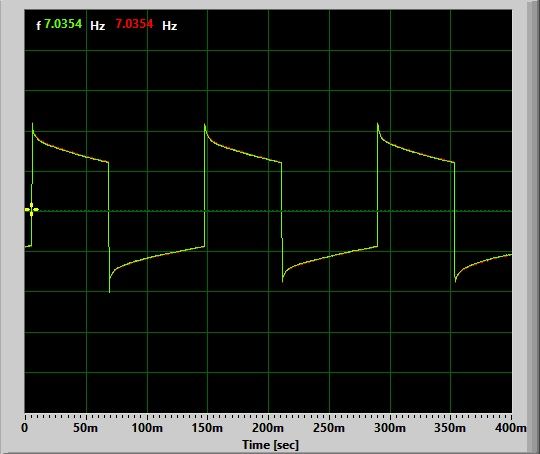
Strobes:
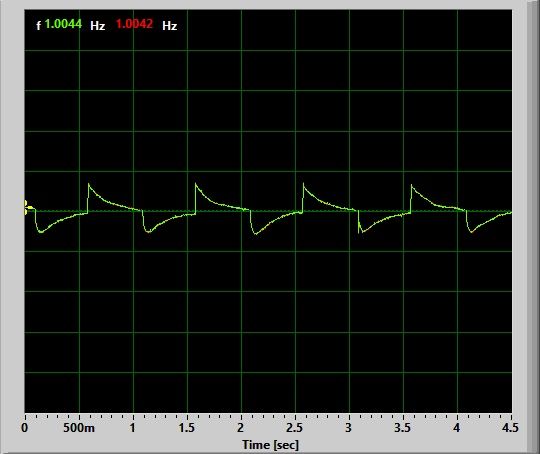
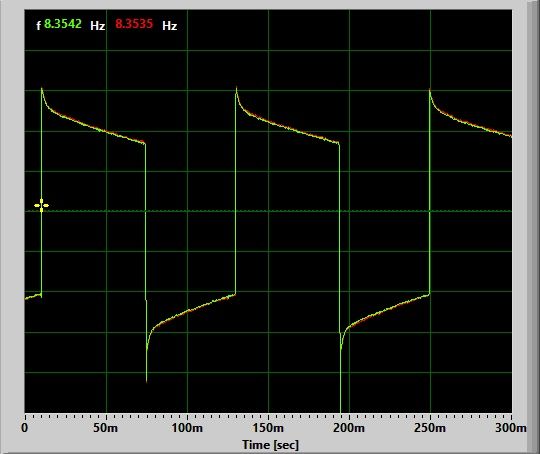
Strobe:
Strobe alternates between 9 Hz and 13 Hz every ~1.5 secs or so. Very disorienting and distracting.
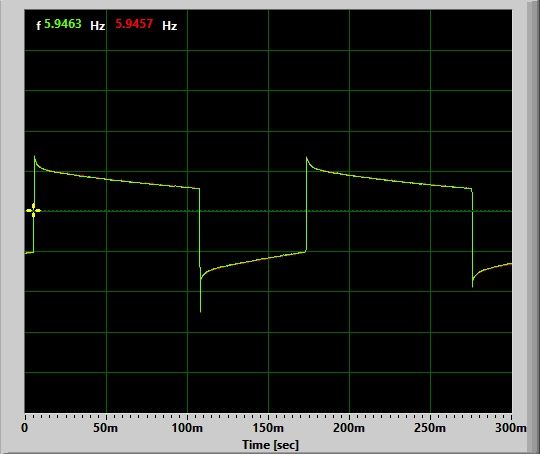
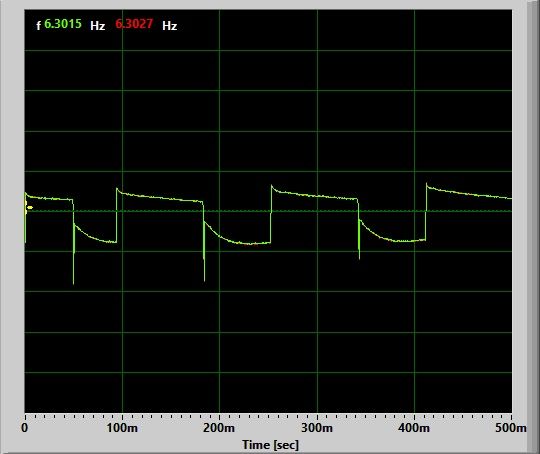
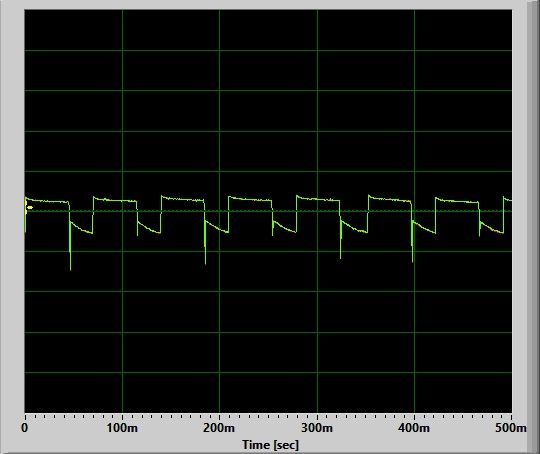
SOS:
A standard SOS mode, relatively slow.
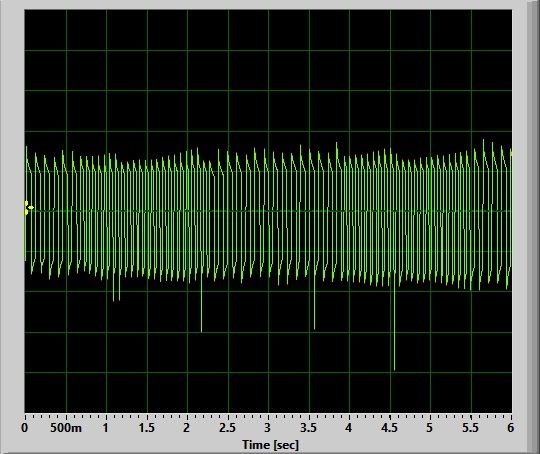
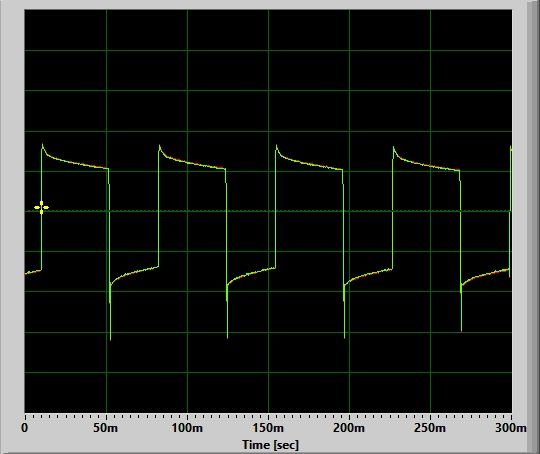
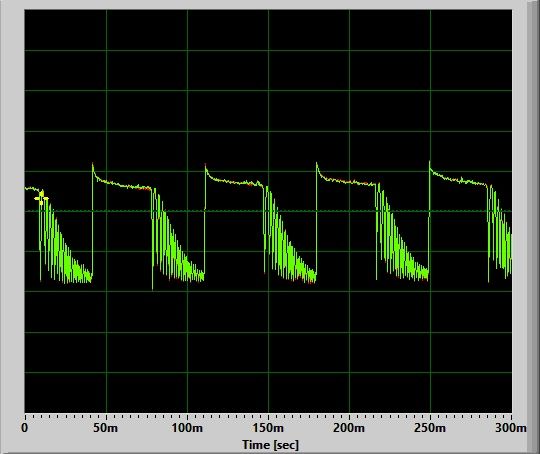
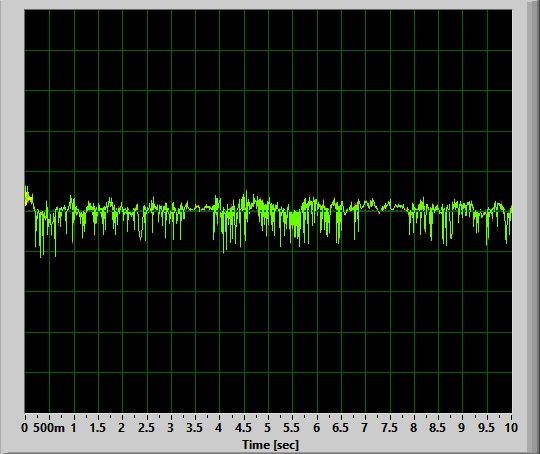
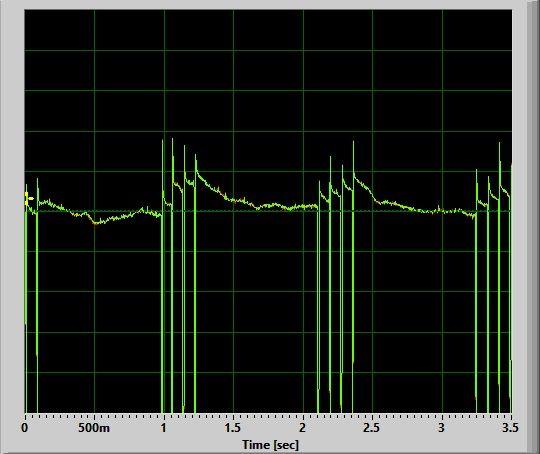
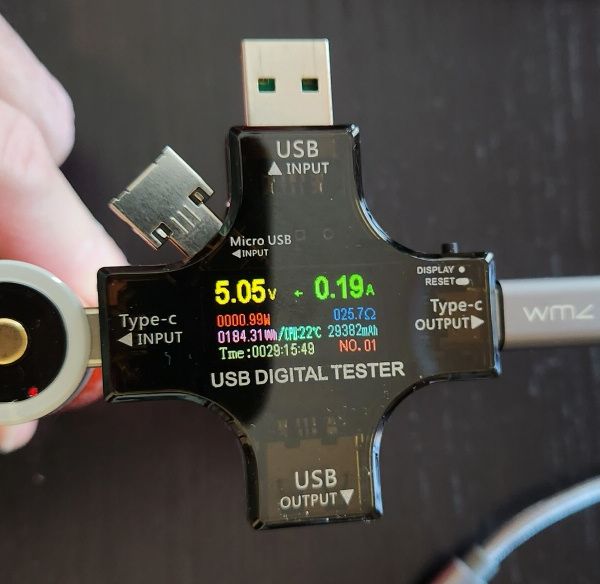
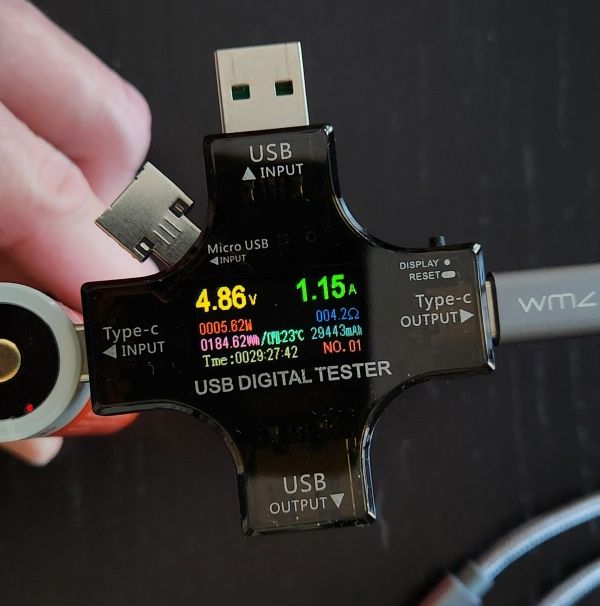
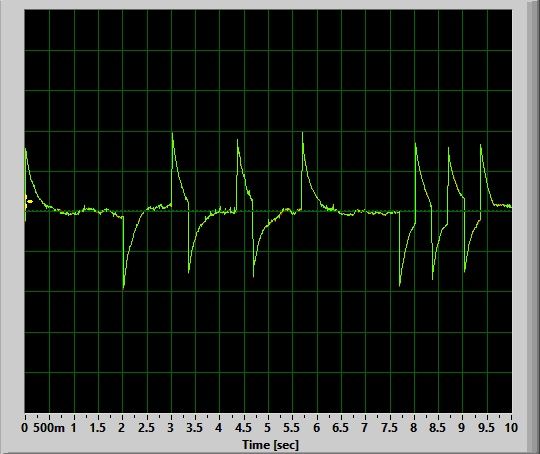
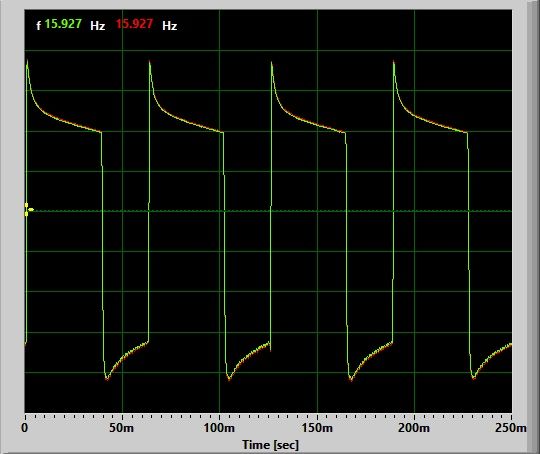
Charging:
The LED on the switch shows solid red when the light is charging. Changes to solid blue when the charging is complete.
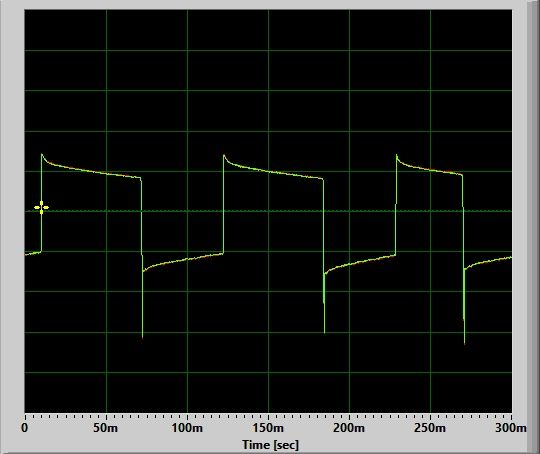
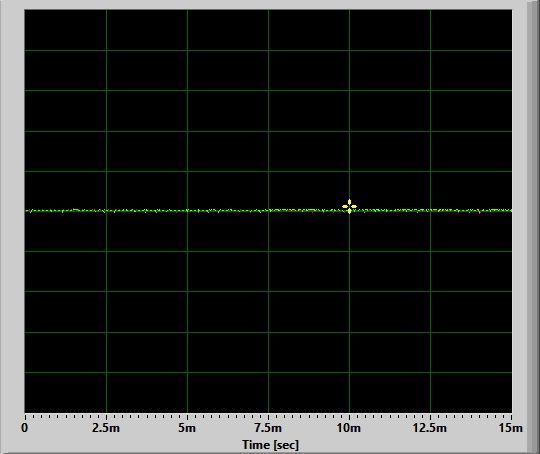
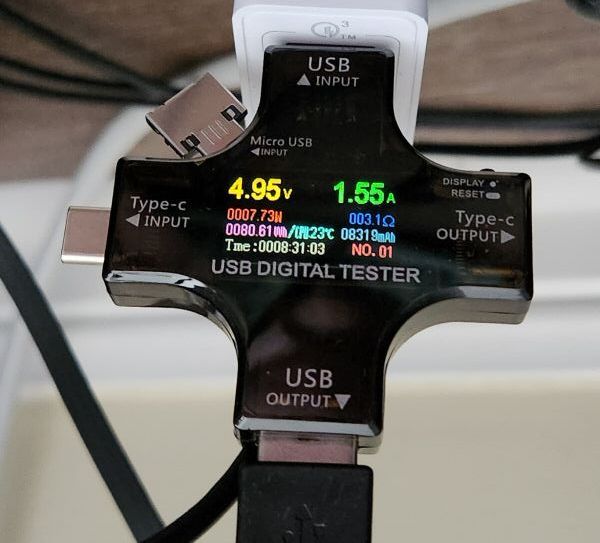
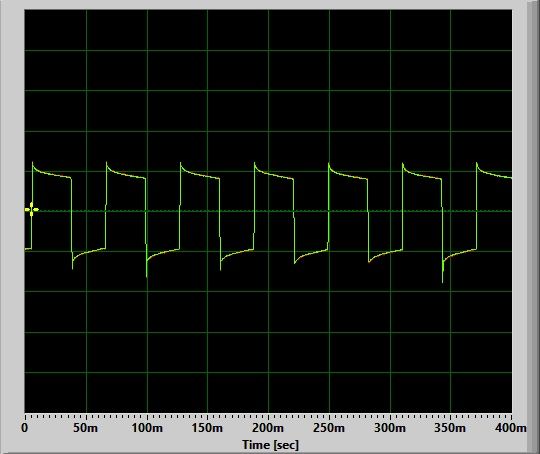
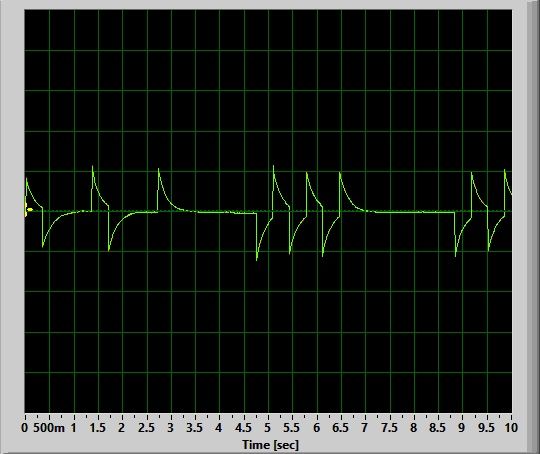
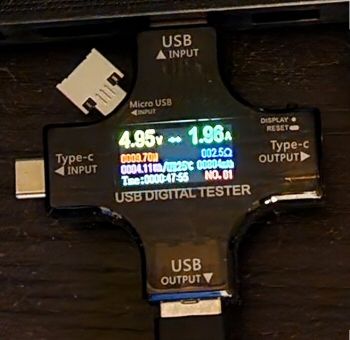
The X1 has an interesting built-in charging circuit, as shown in the video below:
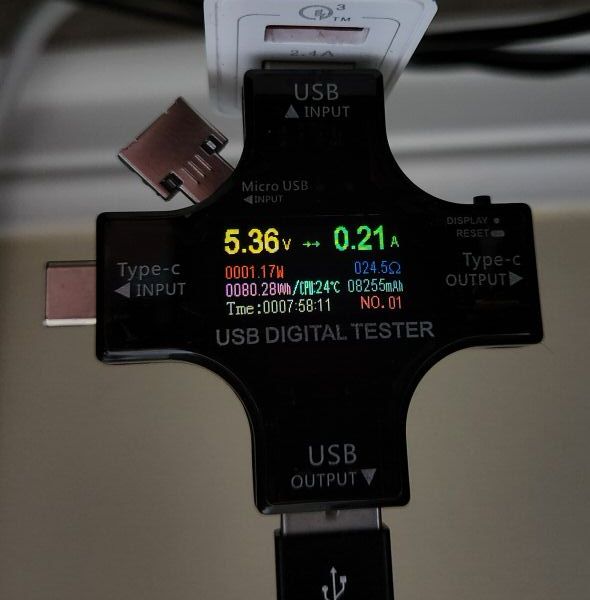
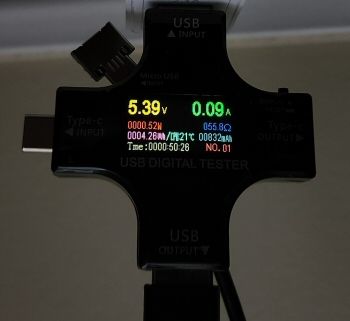
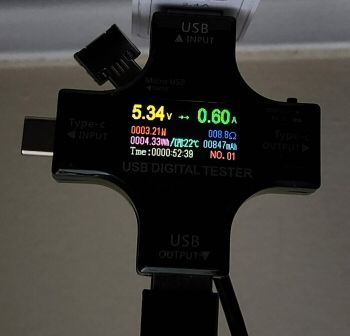
The X1 starts charging at a very low current (<0.05A) for a couple of seconds before ramping up to its full charging rate of just under 2.0A over the next 2-3 seconds. This slow ramp is a good safety feature, while the the circuit interrogates the state of the cells. Given its serial battery orientation, this is a reasonable charging rate by modern standards. The light charges at 9V.
Standby / Parasitic Drain:
Due to electronic switch, there is bound to be a parasitic standby drain when the light is not in use. But because of its fully enclosed physical build, I cannot measure it.
Emitter Measures
In this section, I directly measure key emitter characteristics in terms of colour temperature, tint, and colour rendition. Please see my Emitter Measures page to learn more about what these terms mean, and how I am measuring them. As tint in particular can shift across levels, I typically stick with the highest stably regulated level for all my reported measures.
As explained on that page, since I am using an inexpensive uncalibrated device, you can only make relative comparisons across my reviews (i.e., don’t take these numbers as absolutely accurate values, but as relatively consistent across lights in my testing).
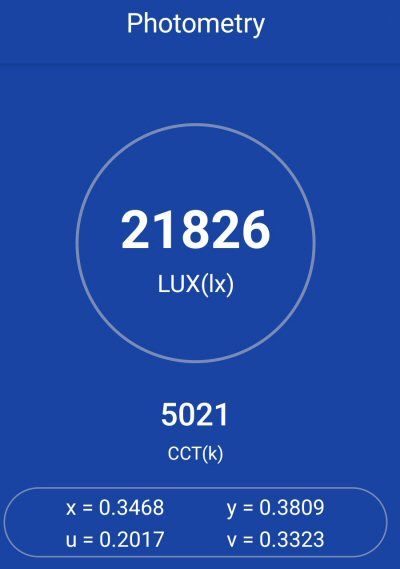
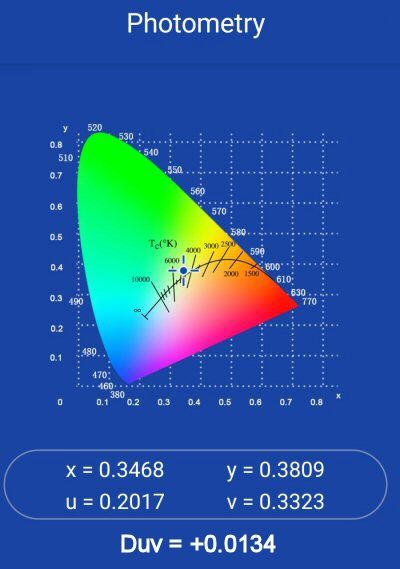
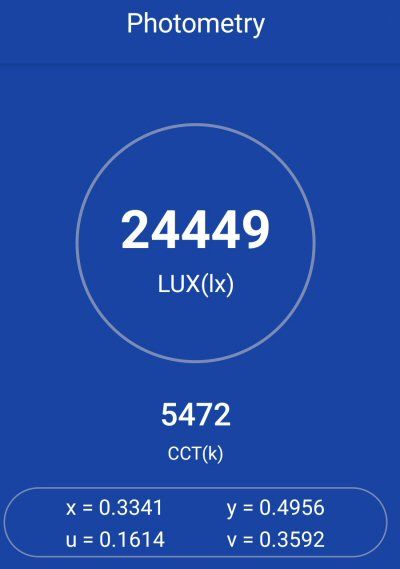
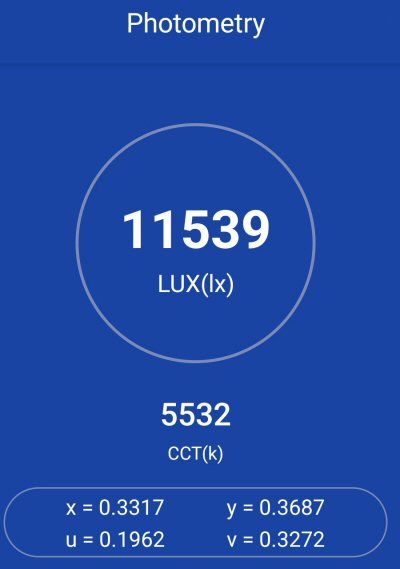
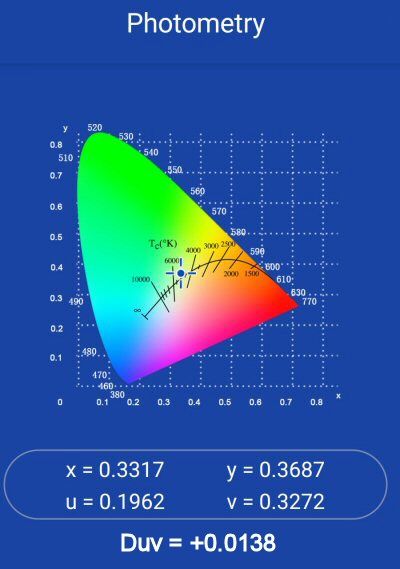
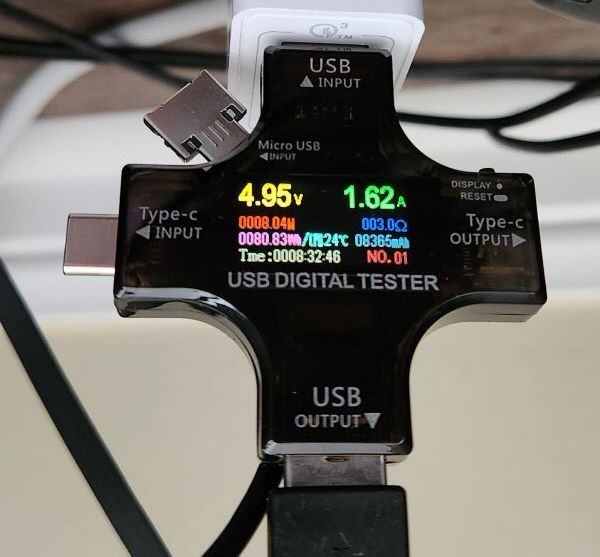
X1 on Hi:

The key measures above are the colour temperature of ~5400K, and a negligible positive tint shift (+0.0047 Duv) toward slightly greenish-yellow at this temperature. For CRI (Ra), I measured a combined score of 82.
These values are slightly warmer than most cool white XHP70.2 emitters in my testing, bordering on neutral white. That is also a slightly better CRI than typical for the XHP70.2, although it is within the range of my testing. Unlike some other reviews of this light, I didn’t notice any significant chromatic aberrations across the beam profile (other then a slight shift to purplish in the periphery, likely due to the AR coating on the lens).
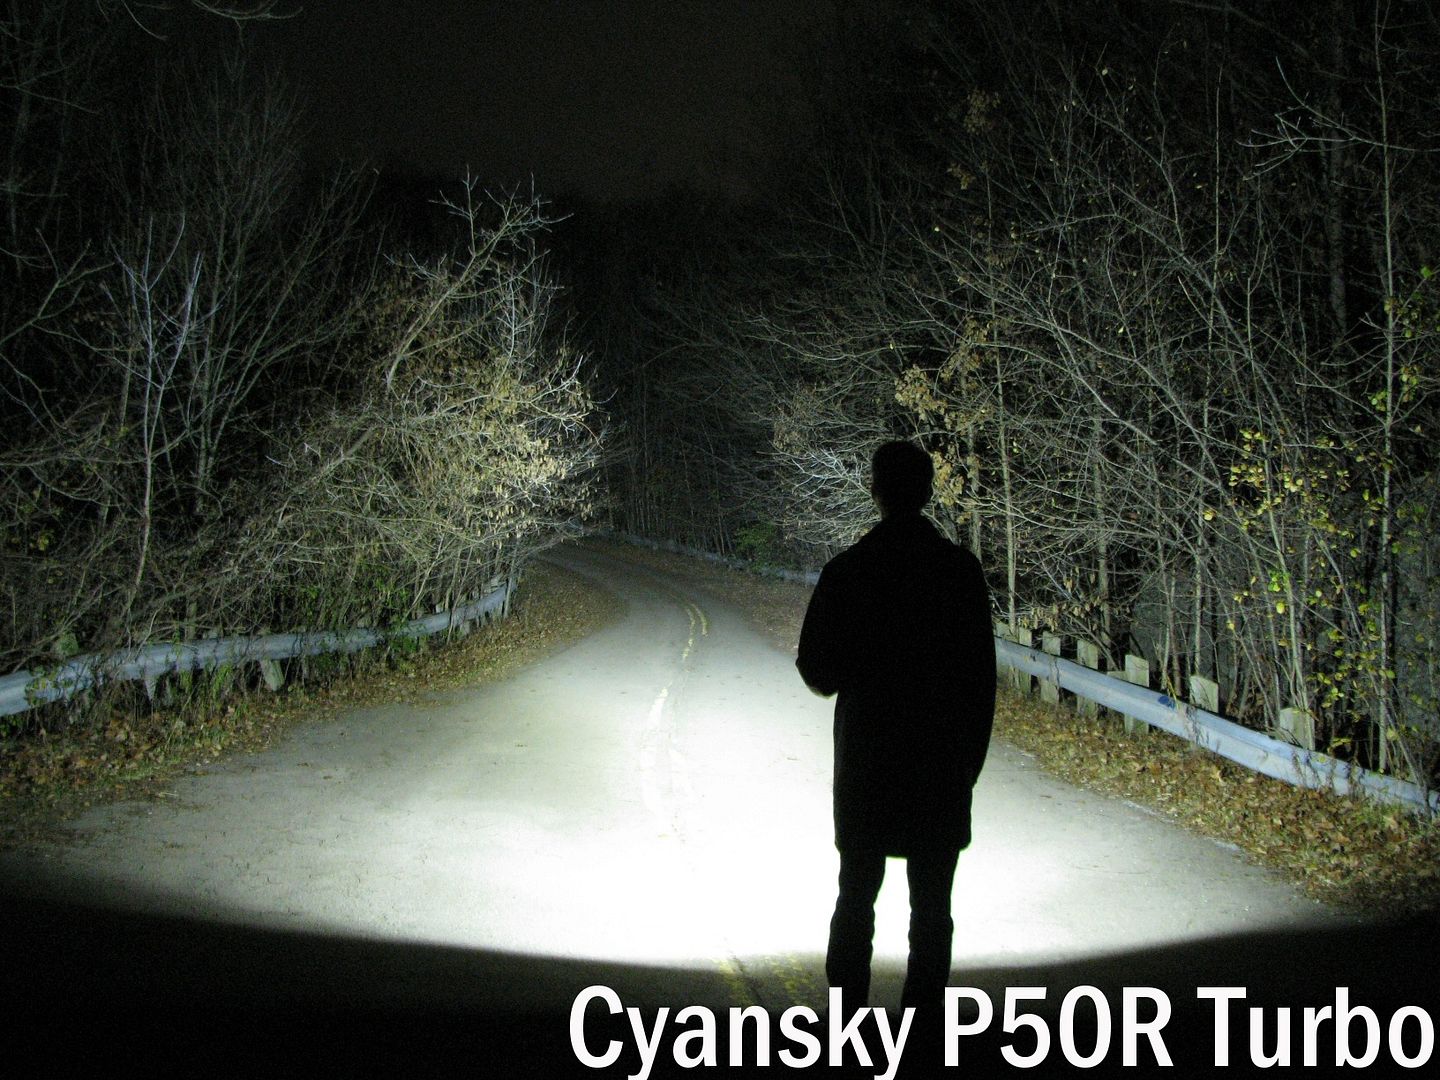
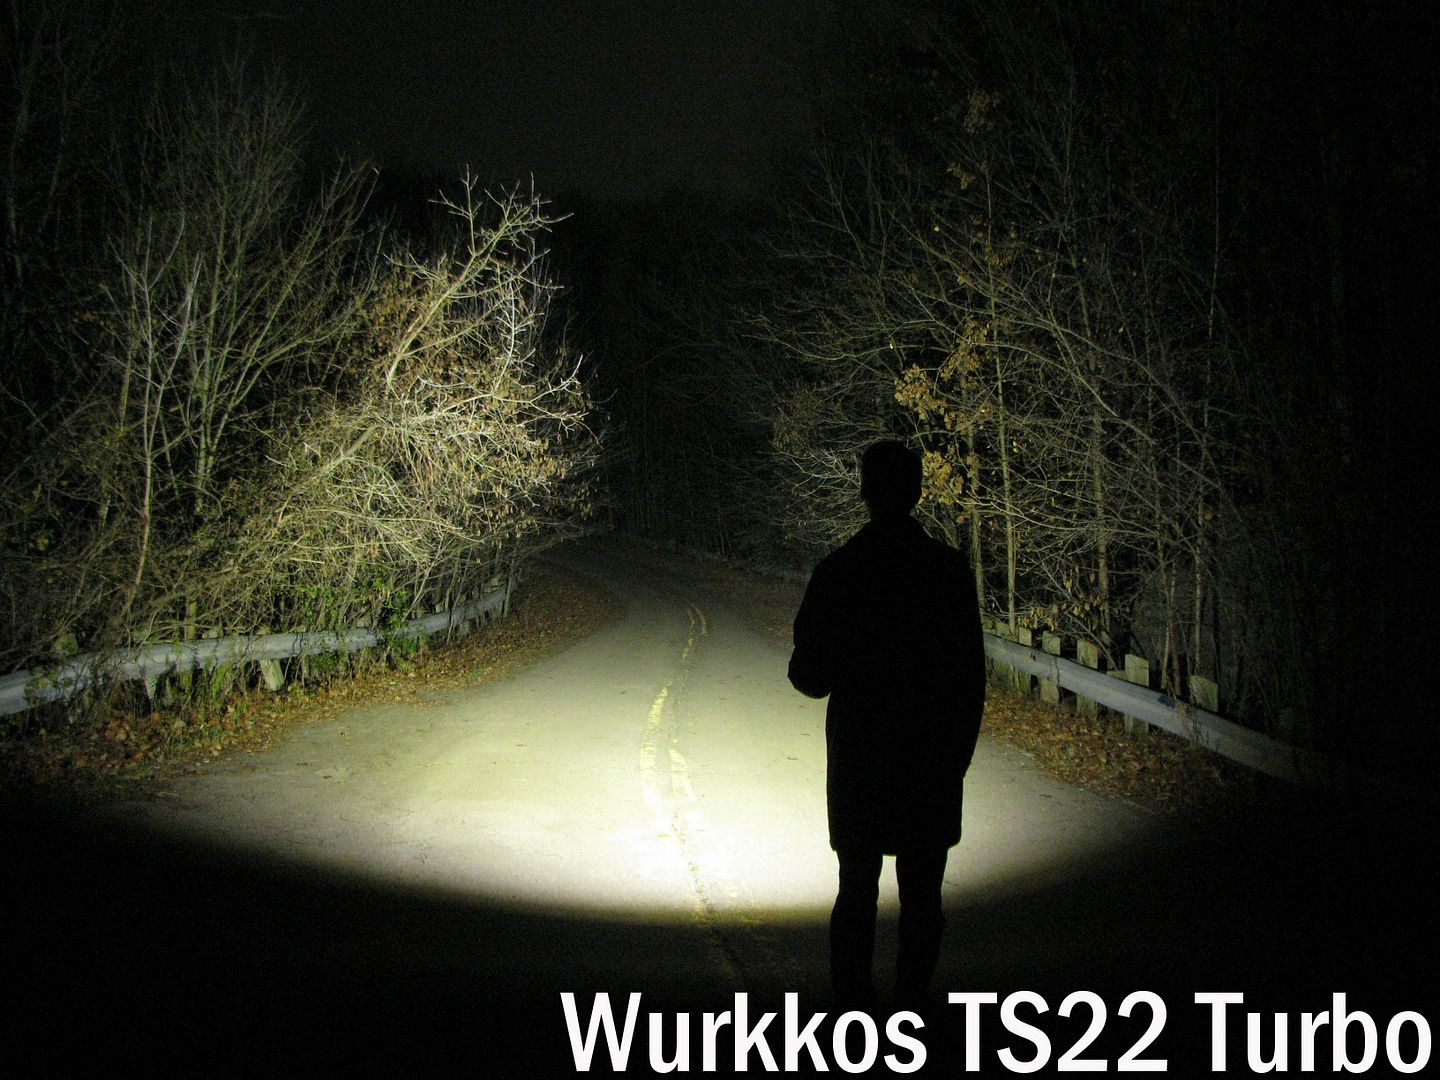
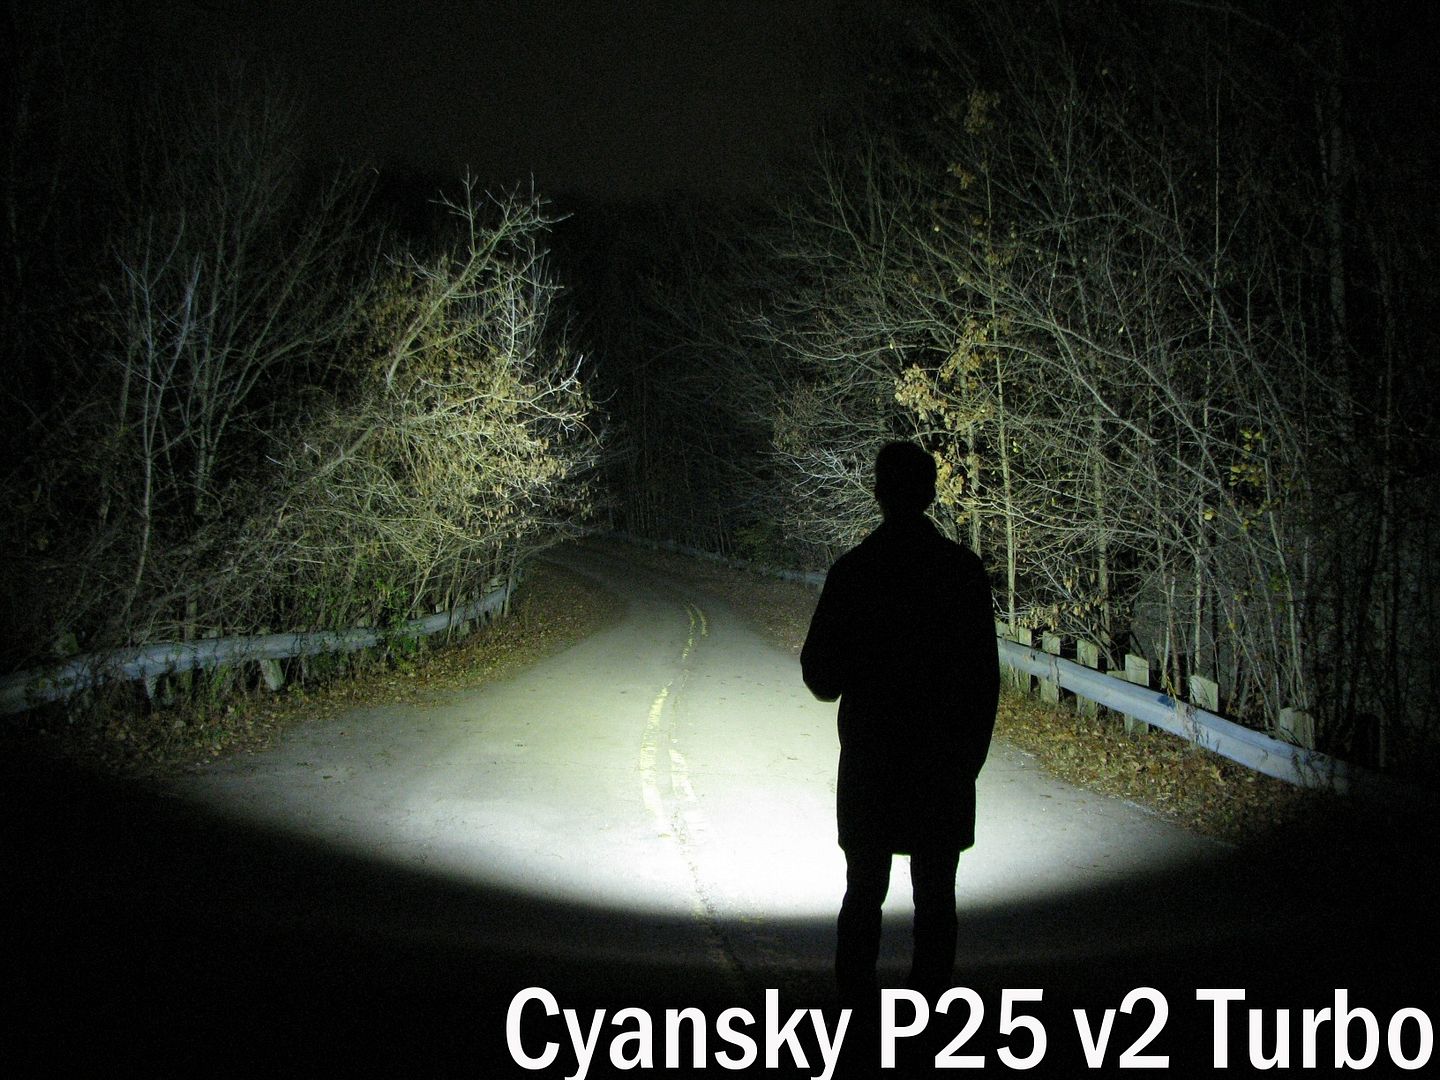
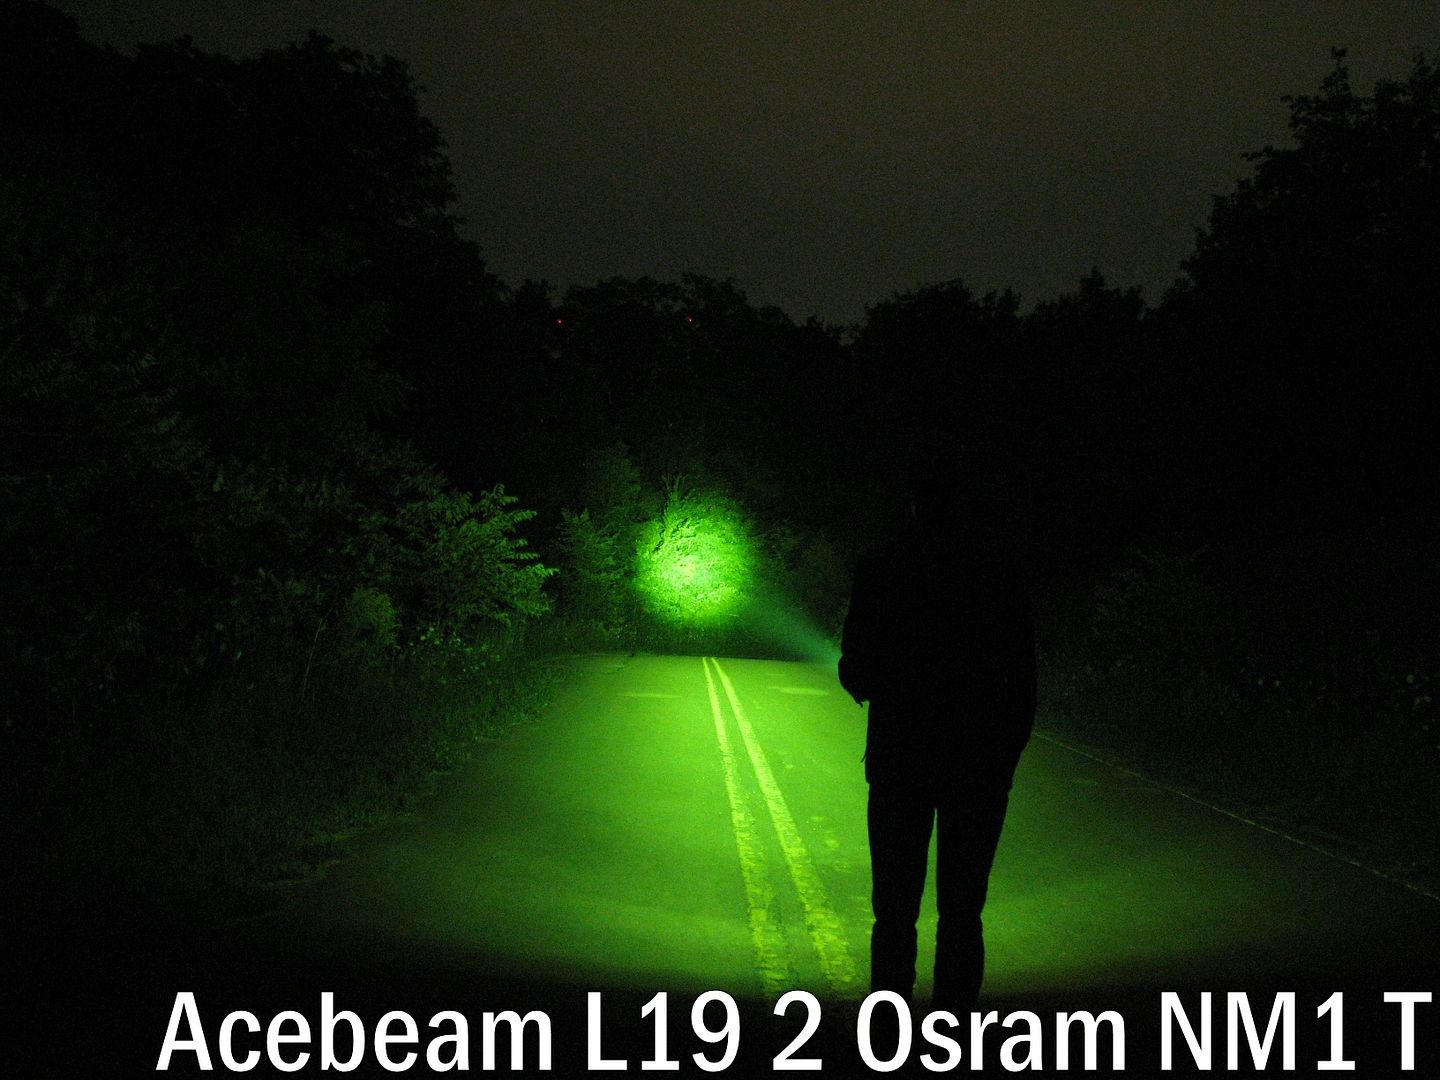
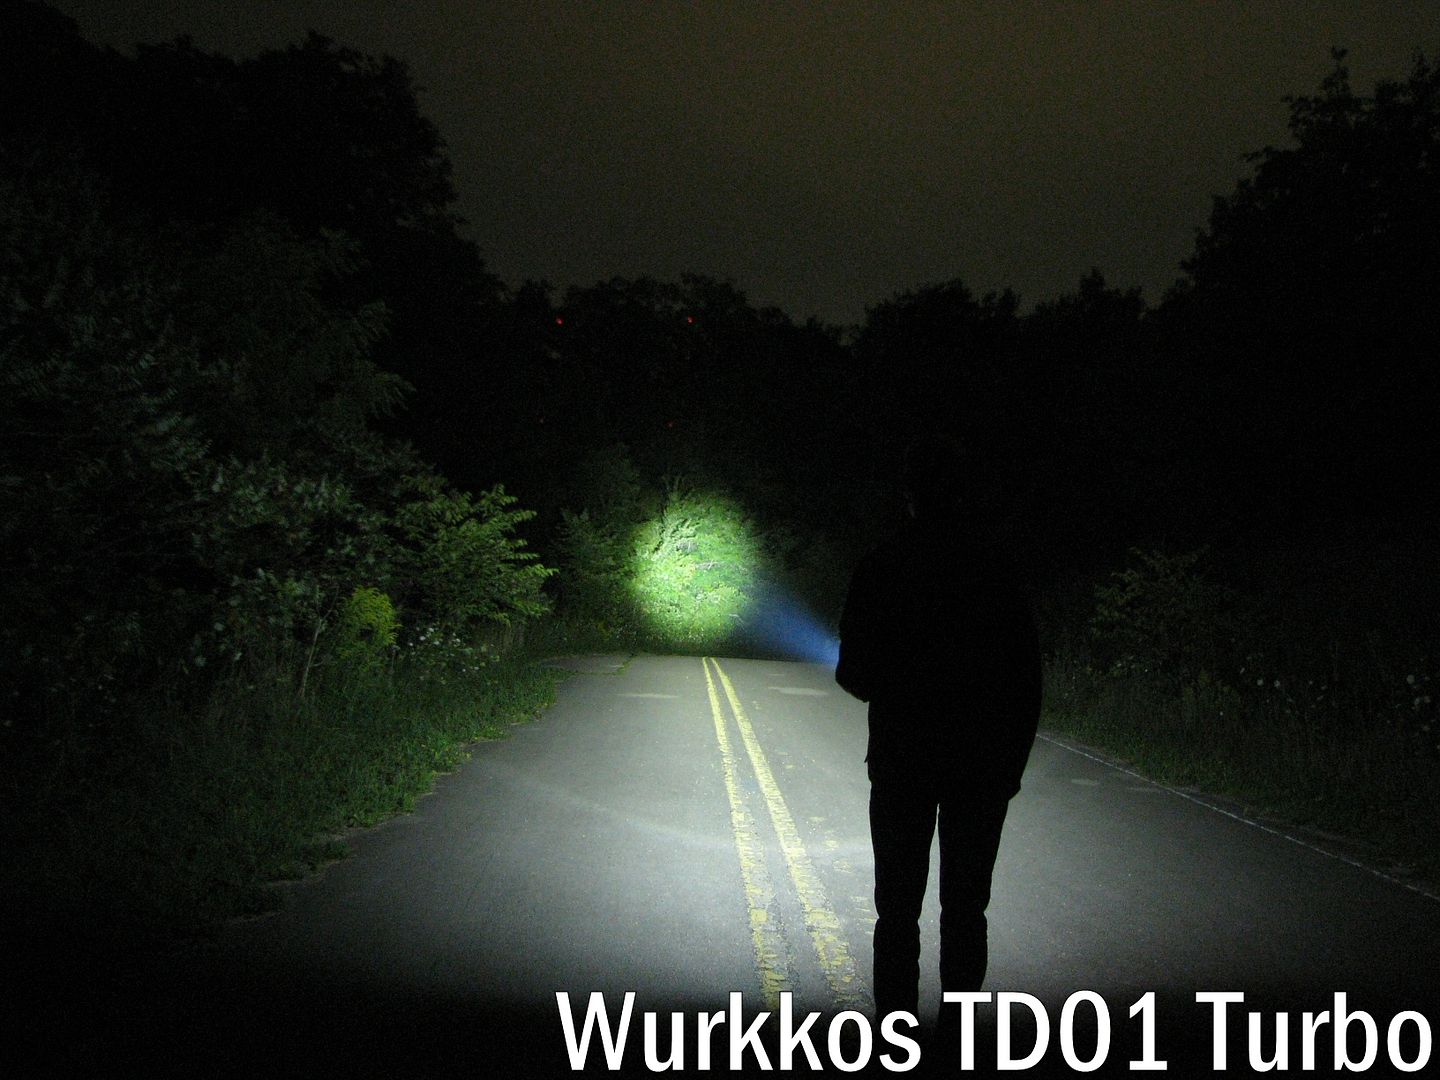
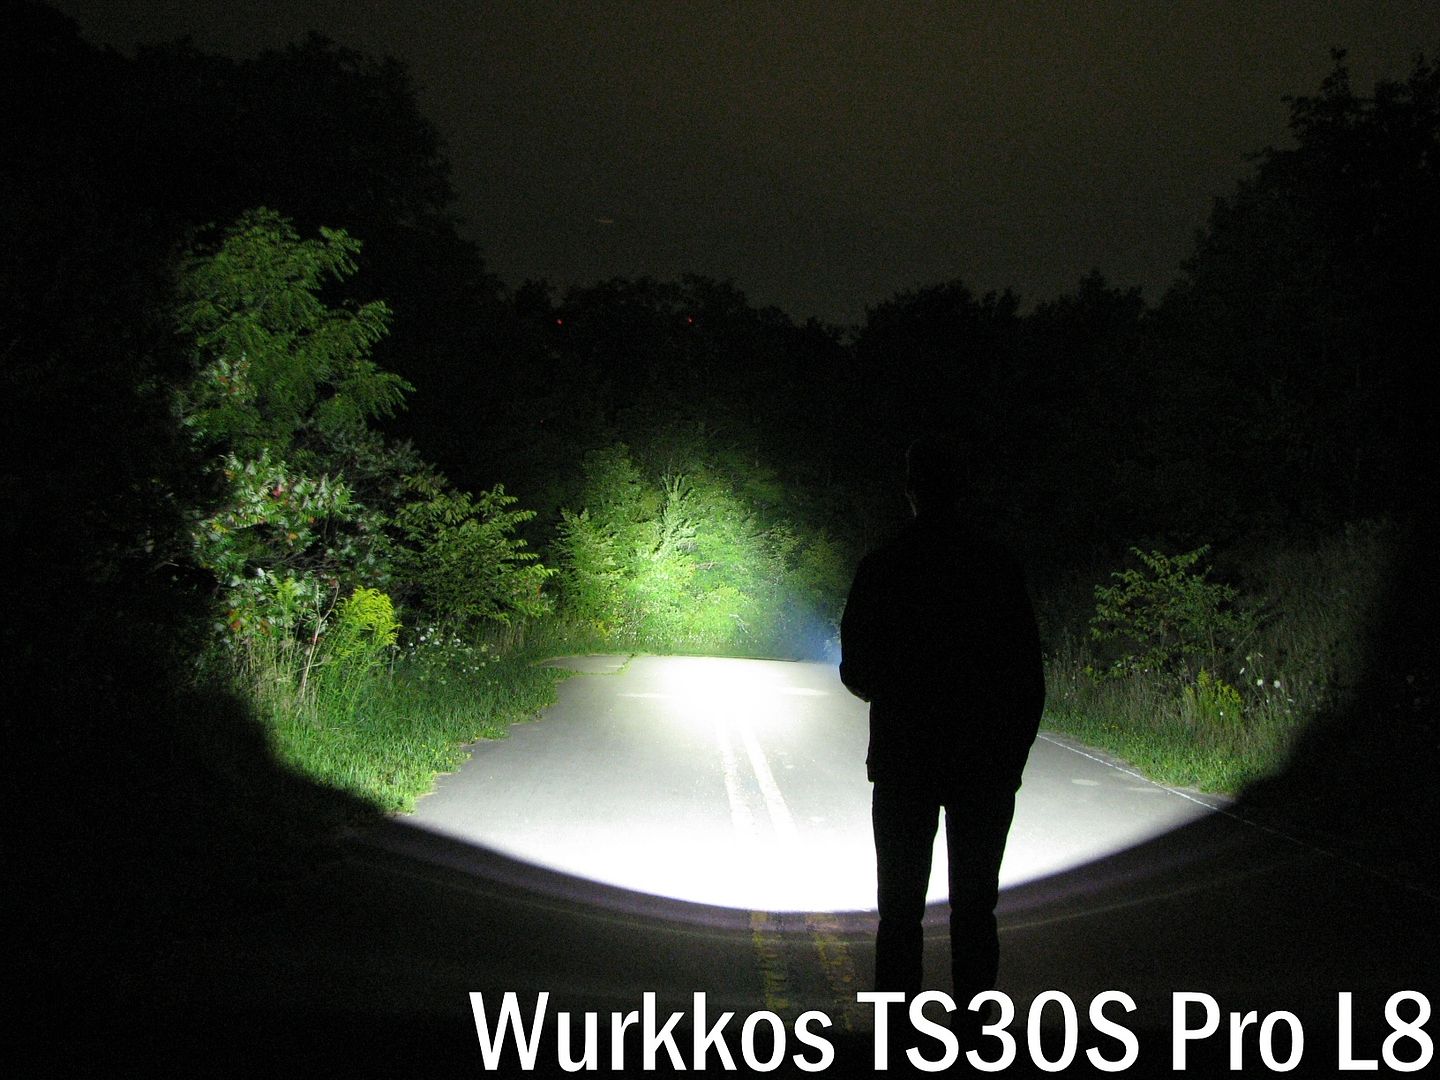
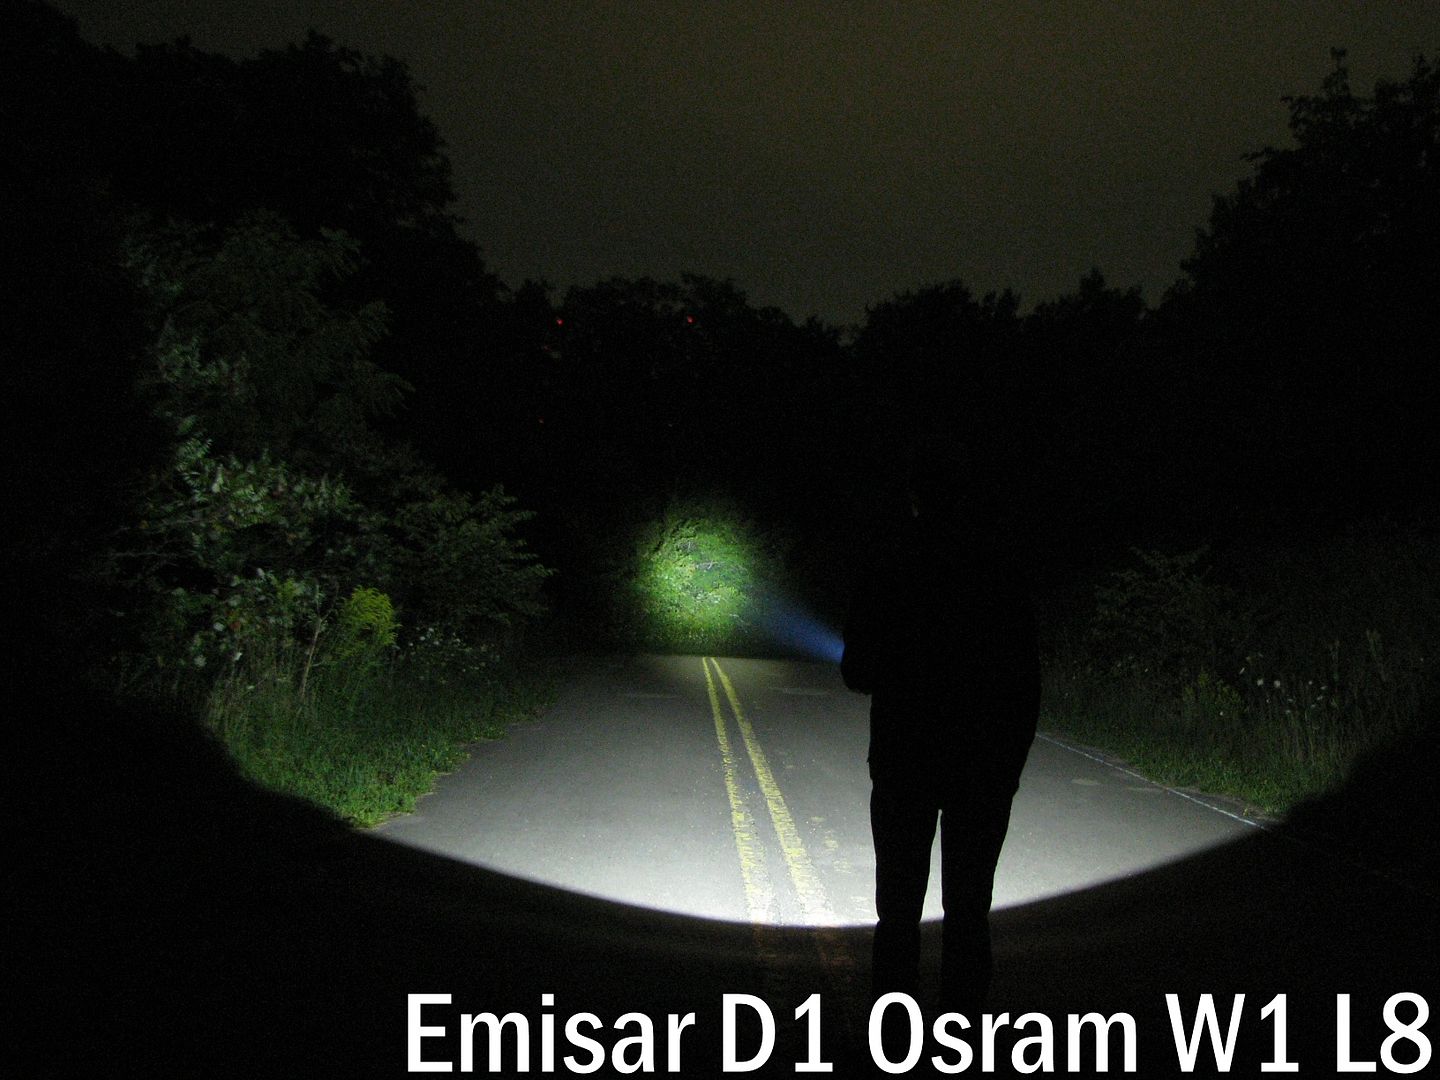
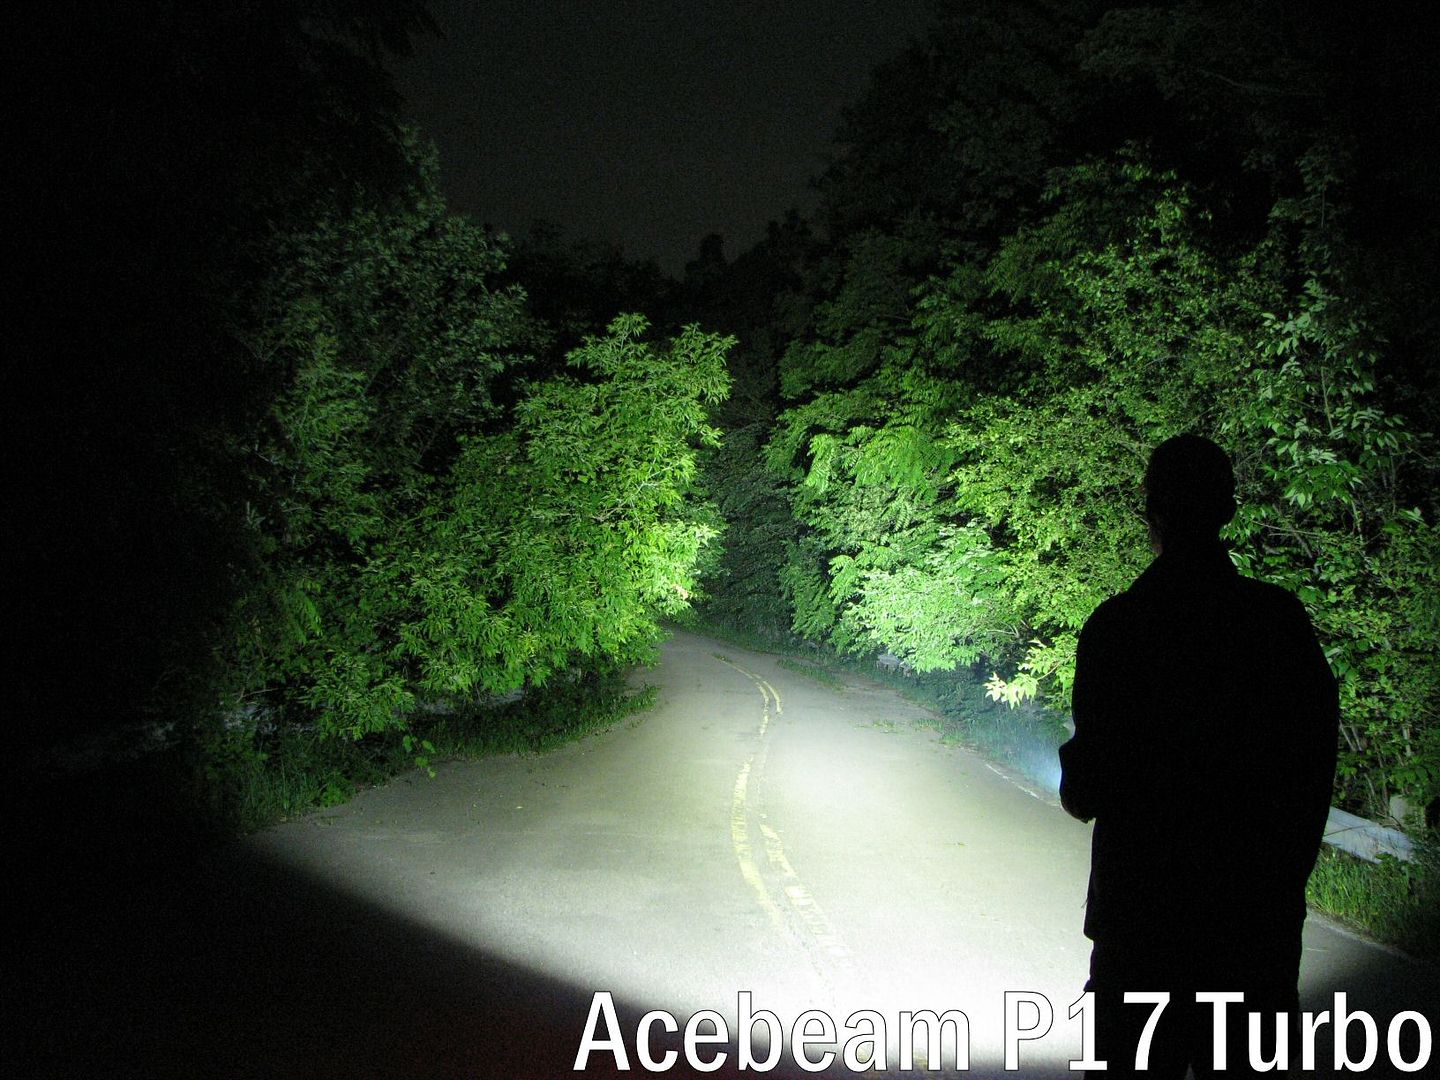
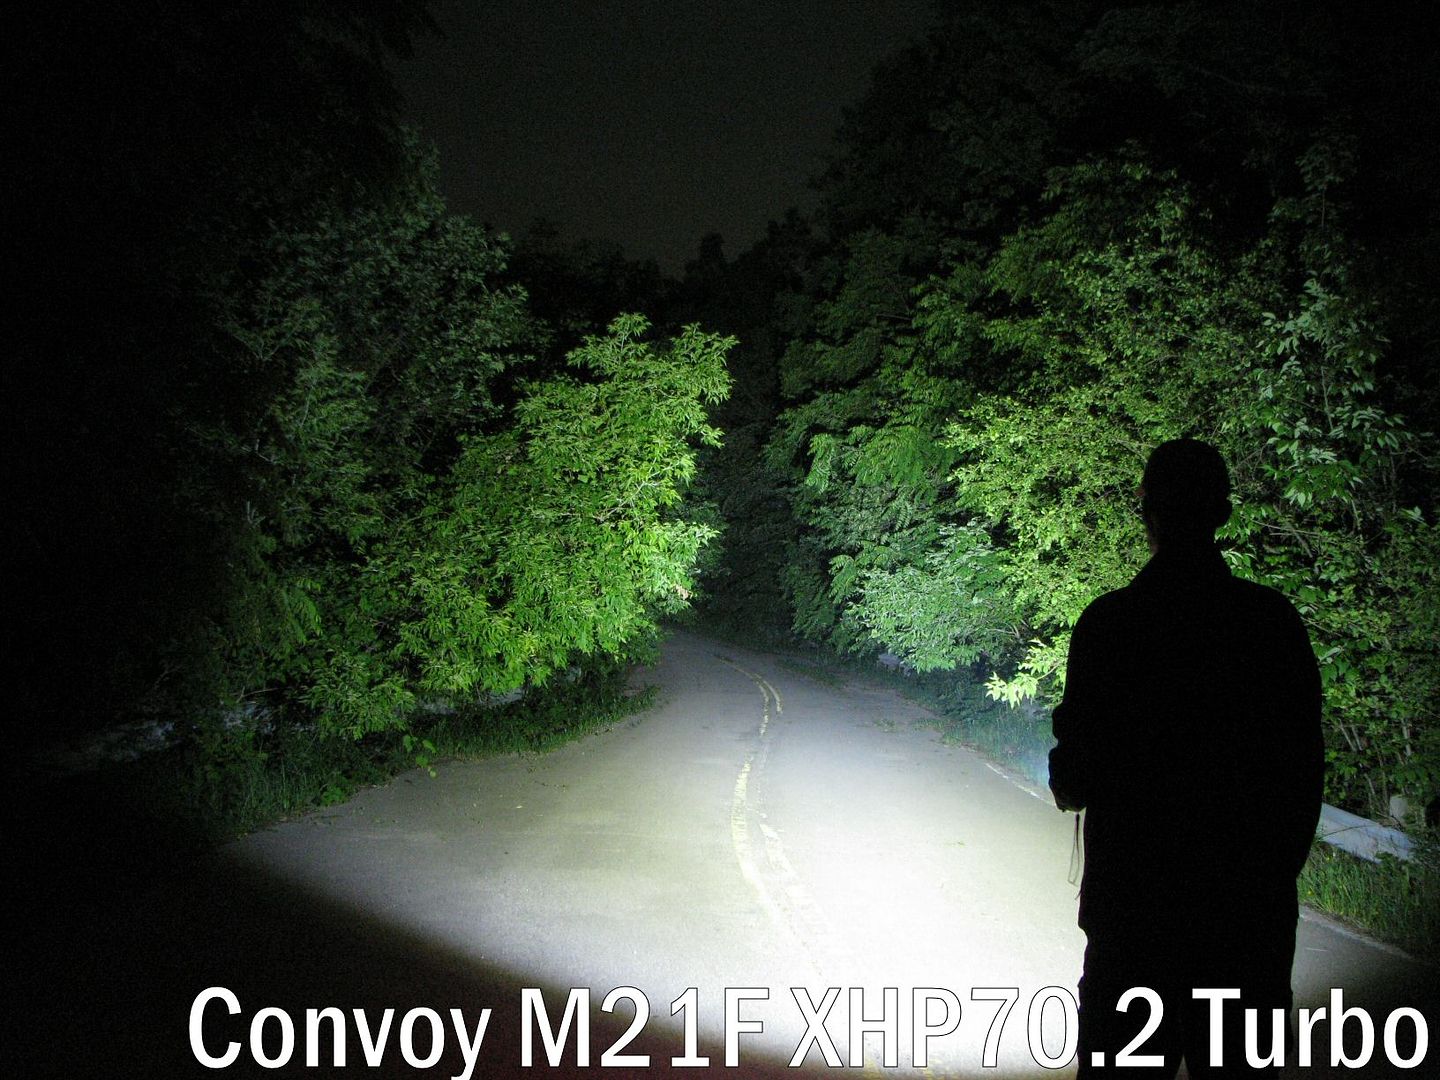
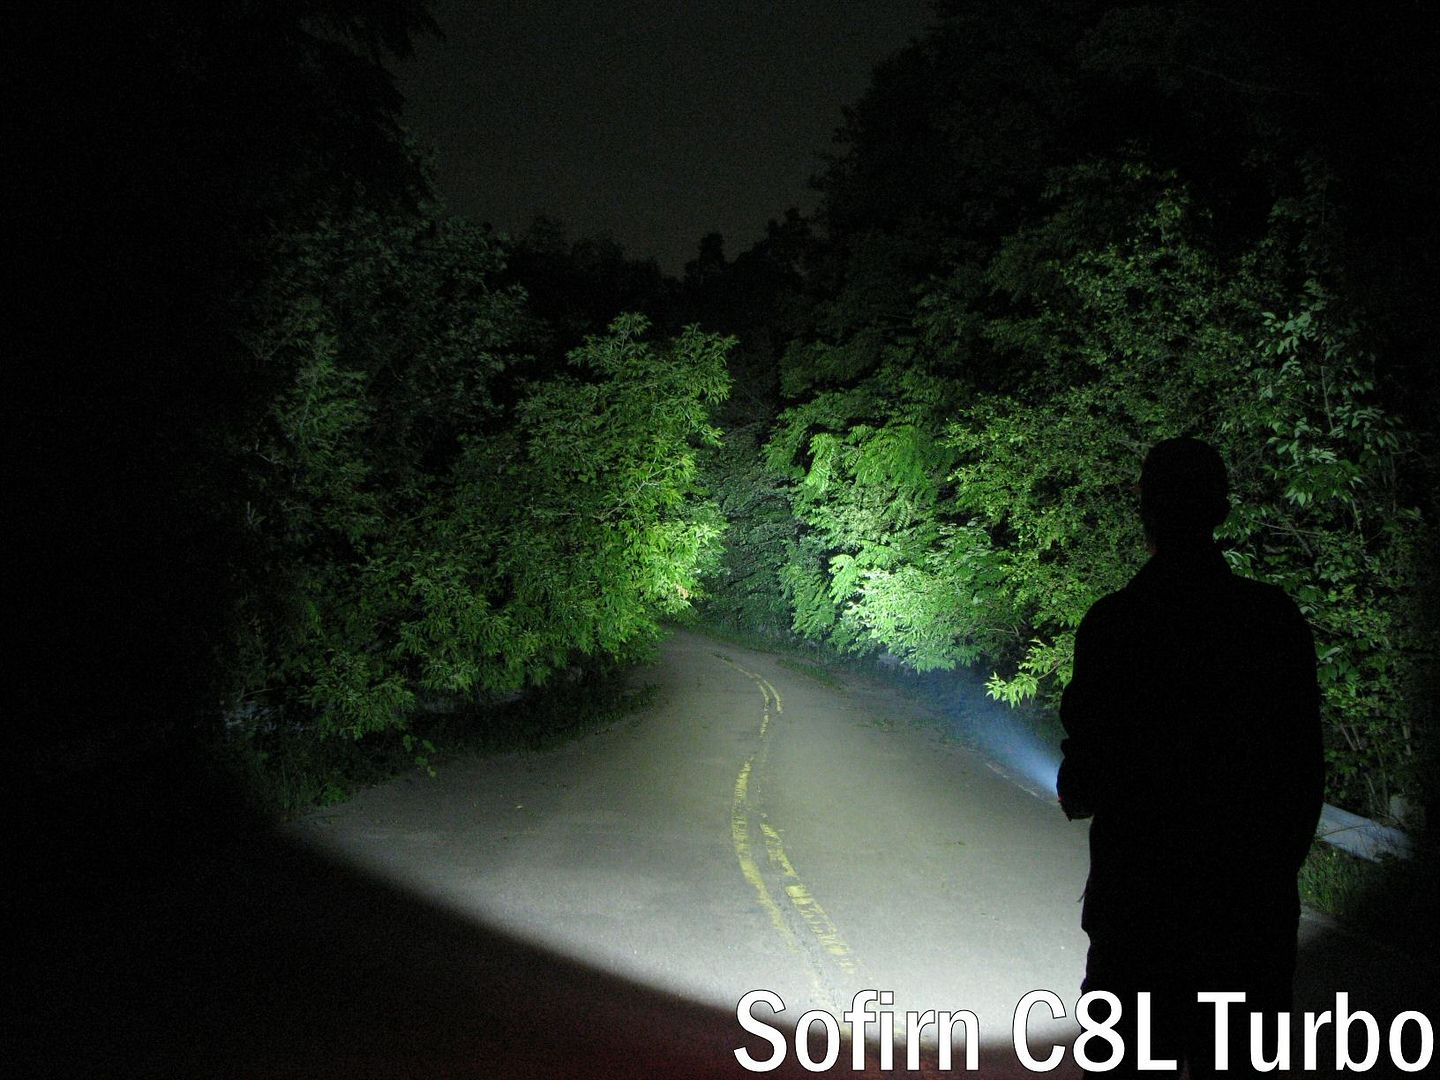
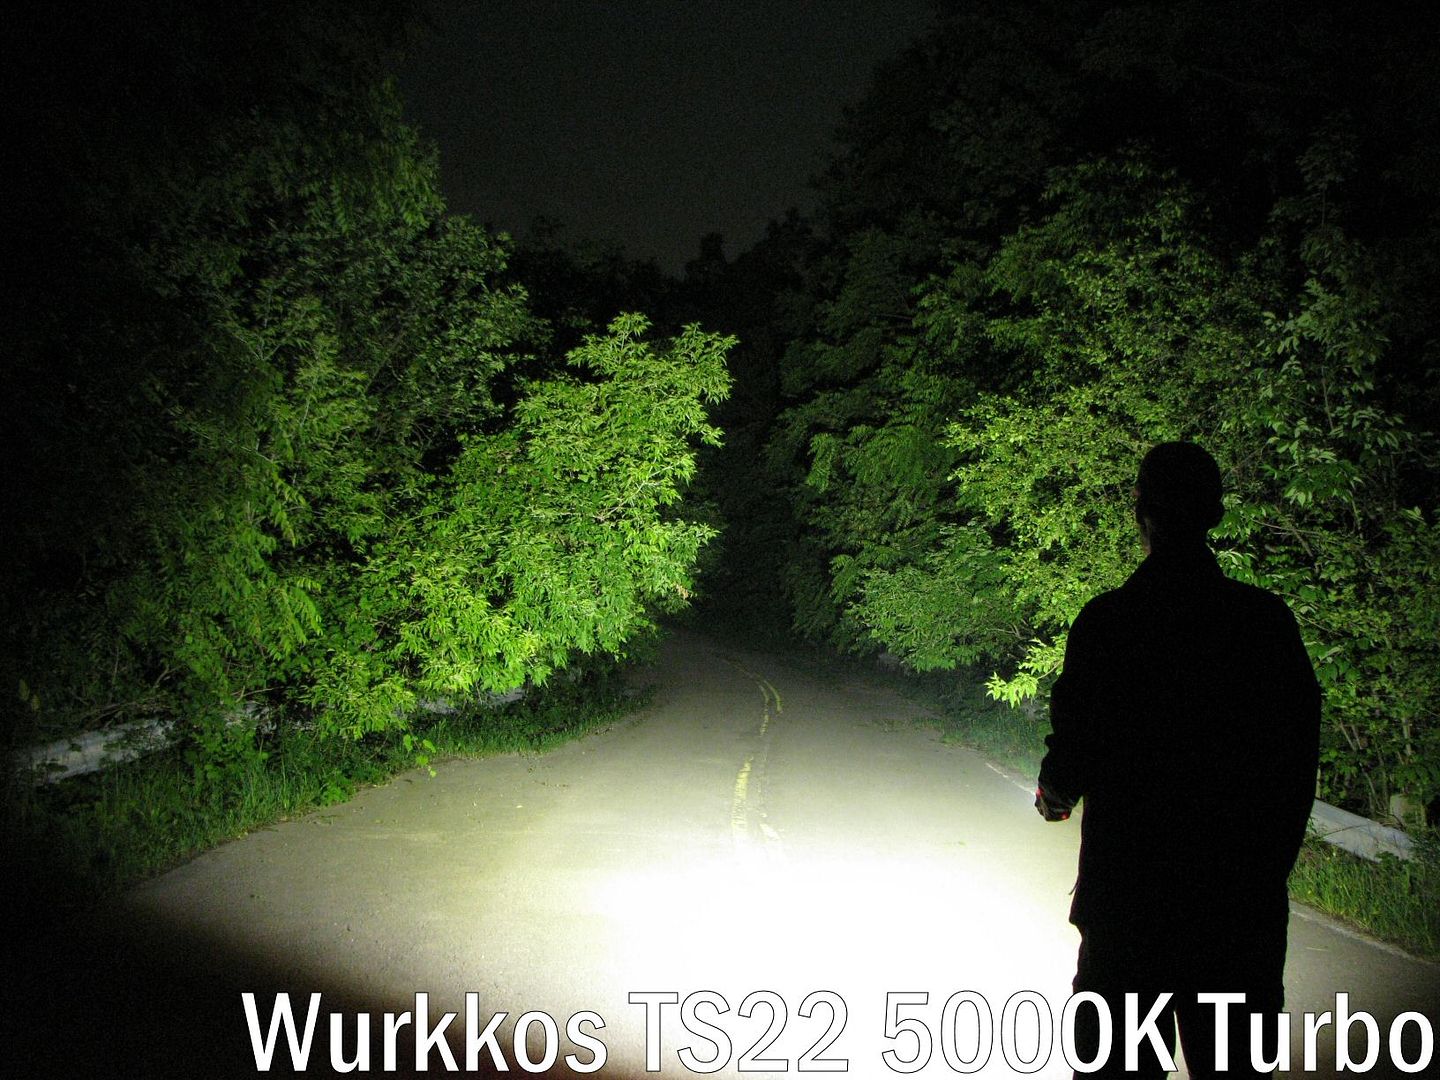
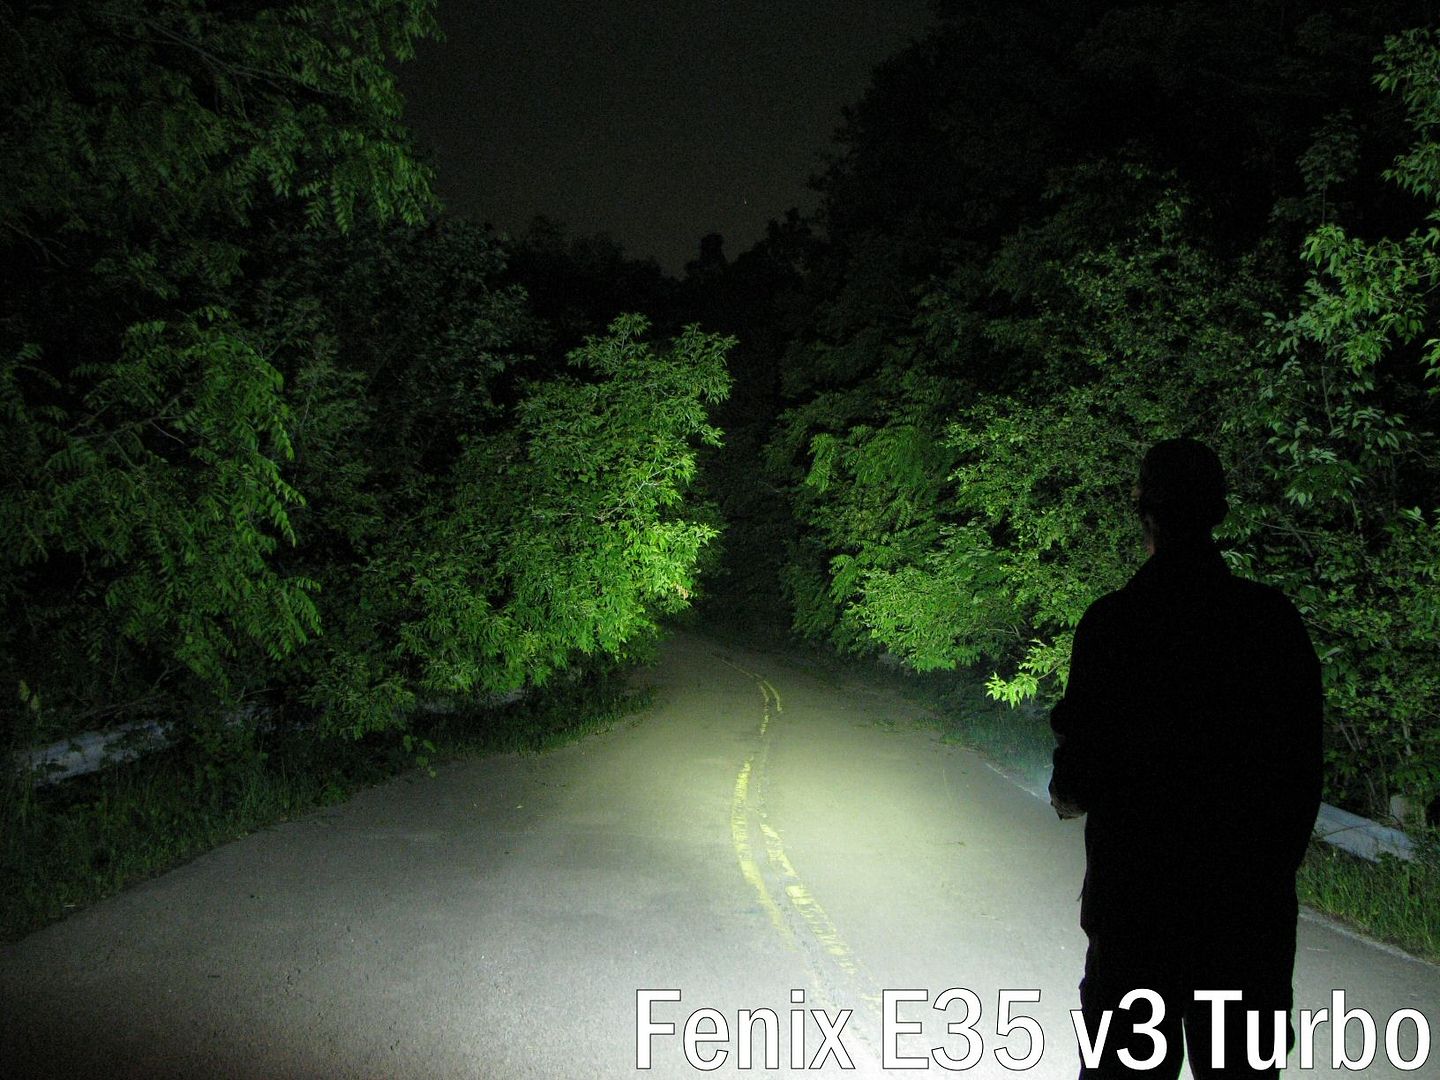
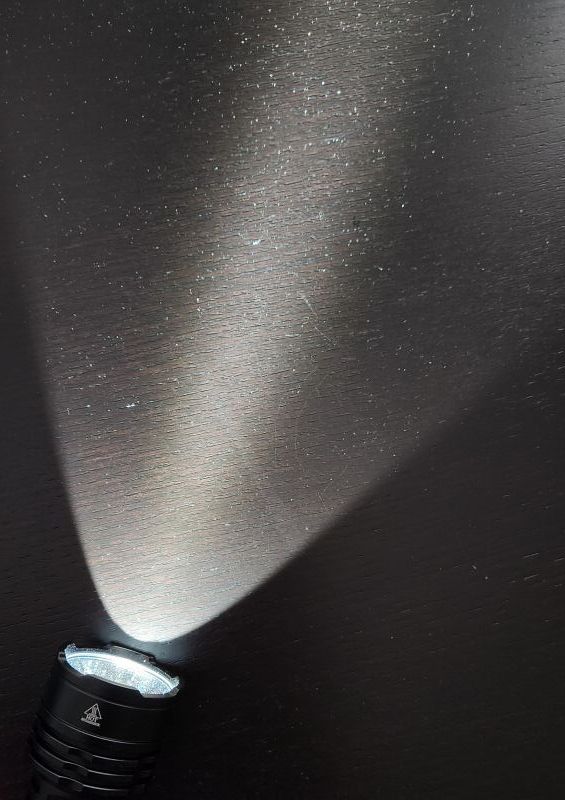
Beamshots
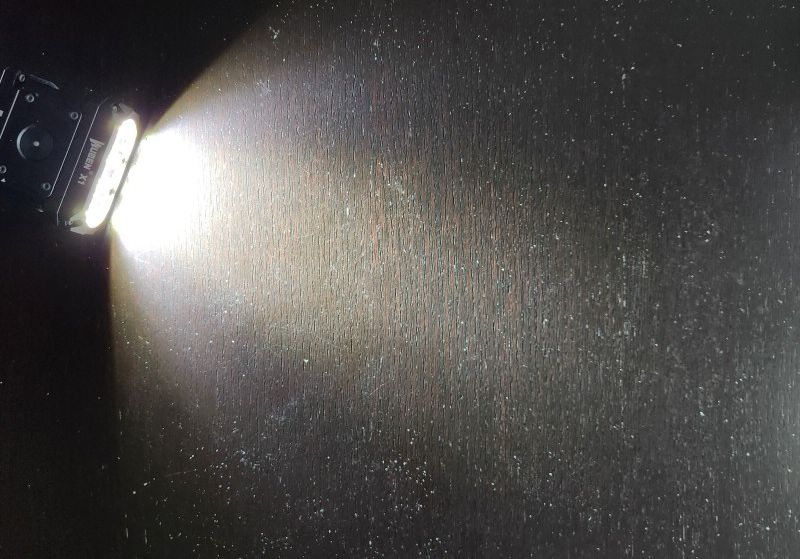
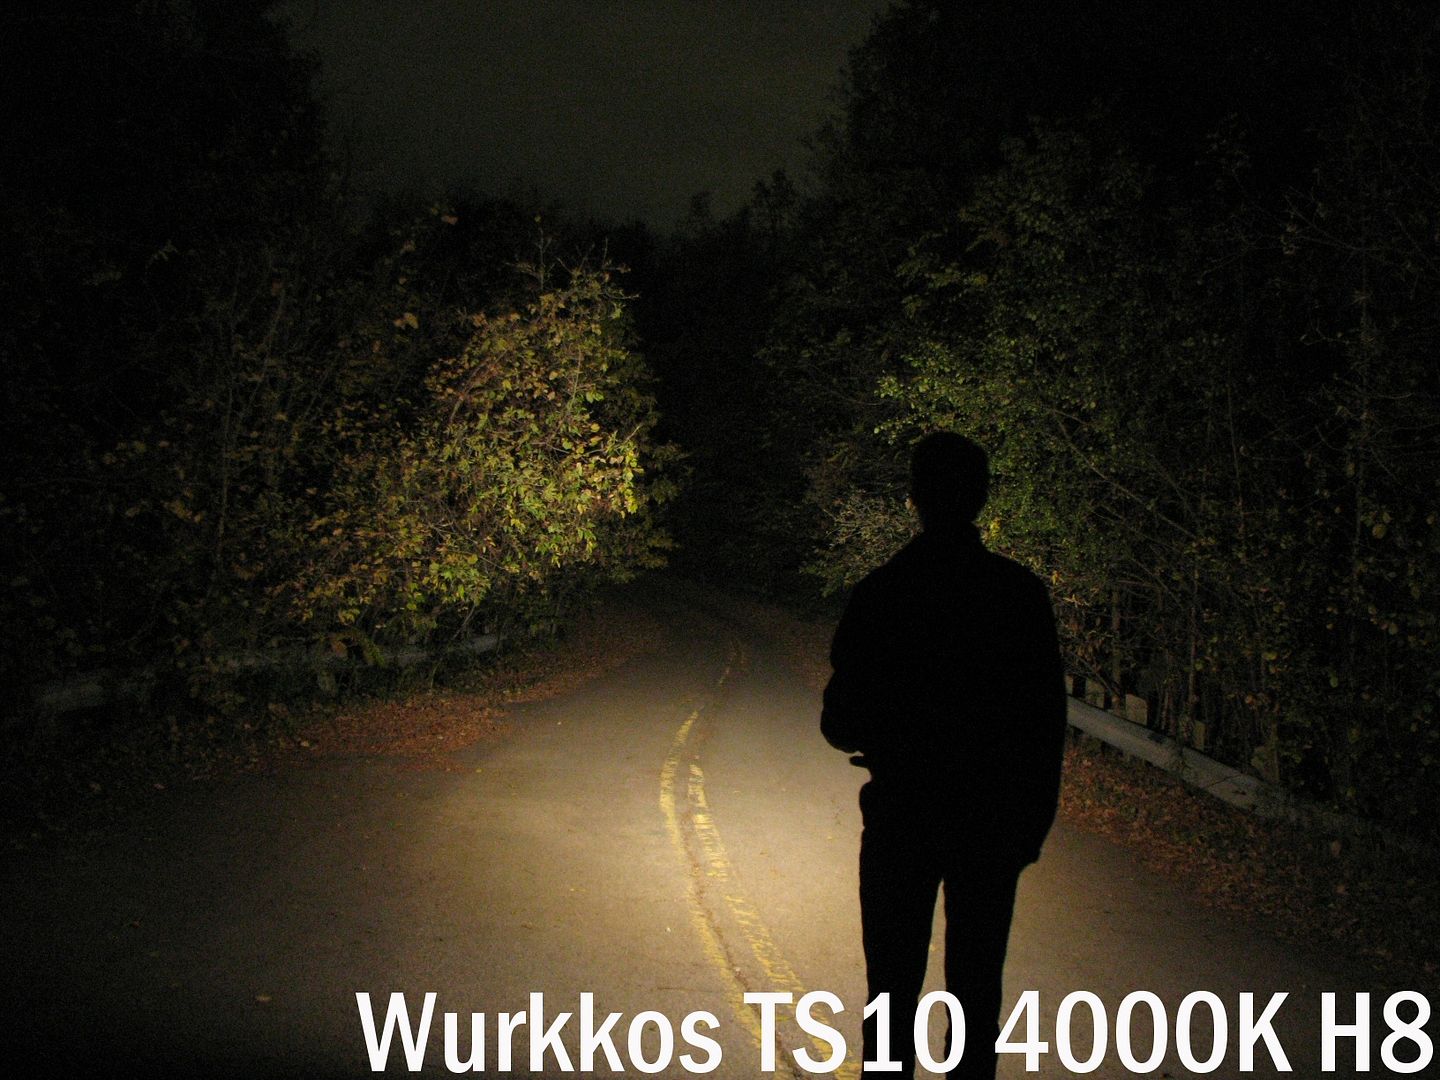
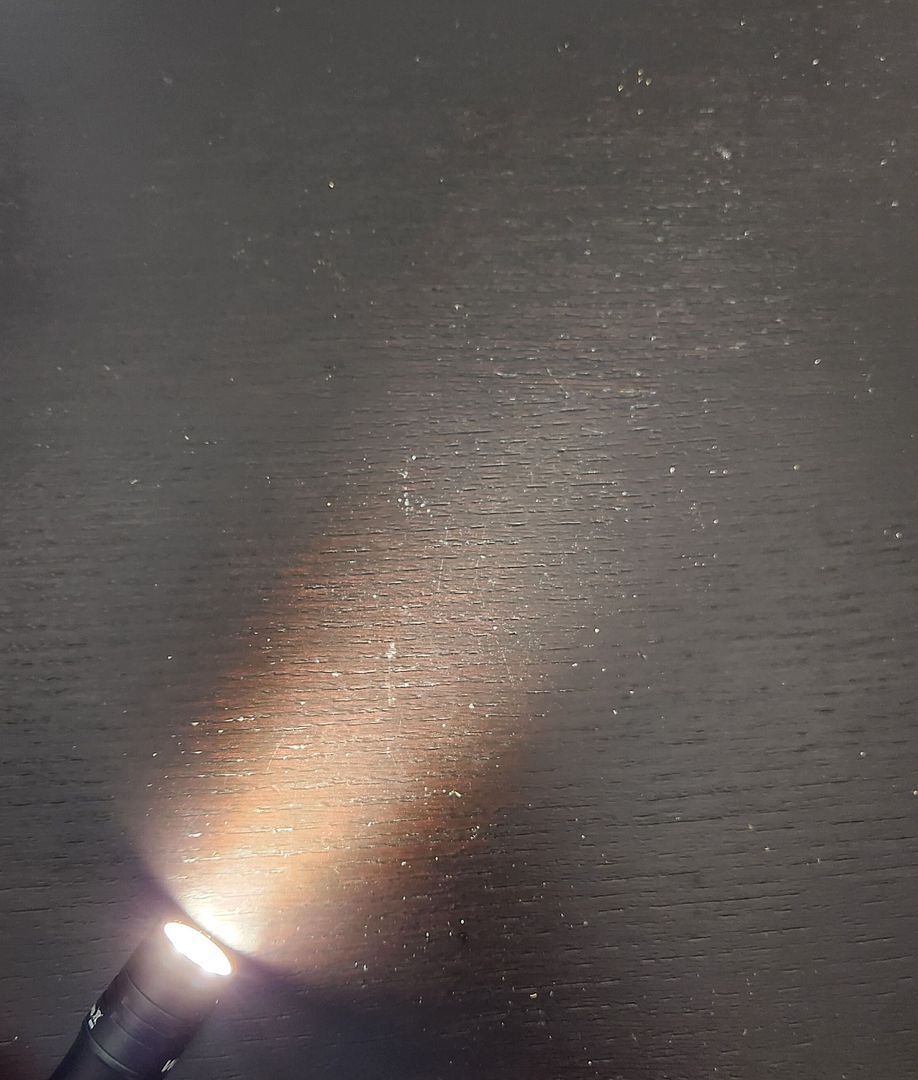
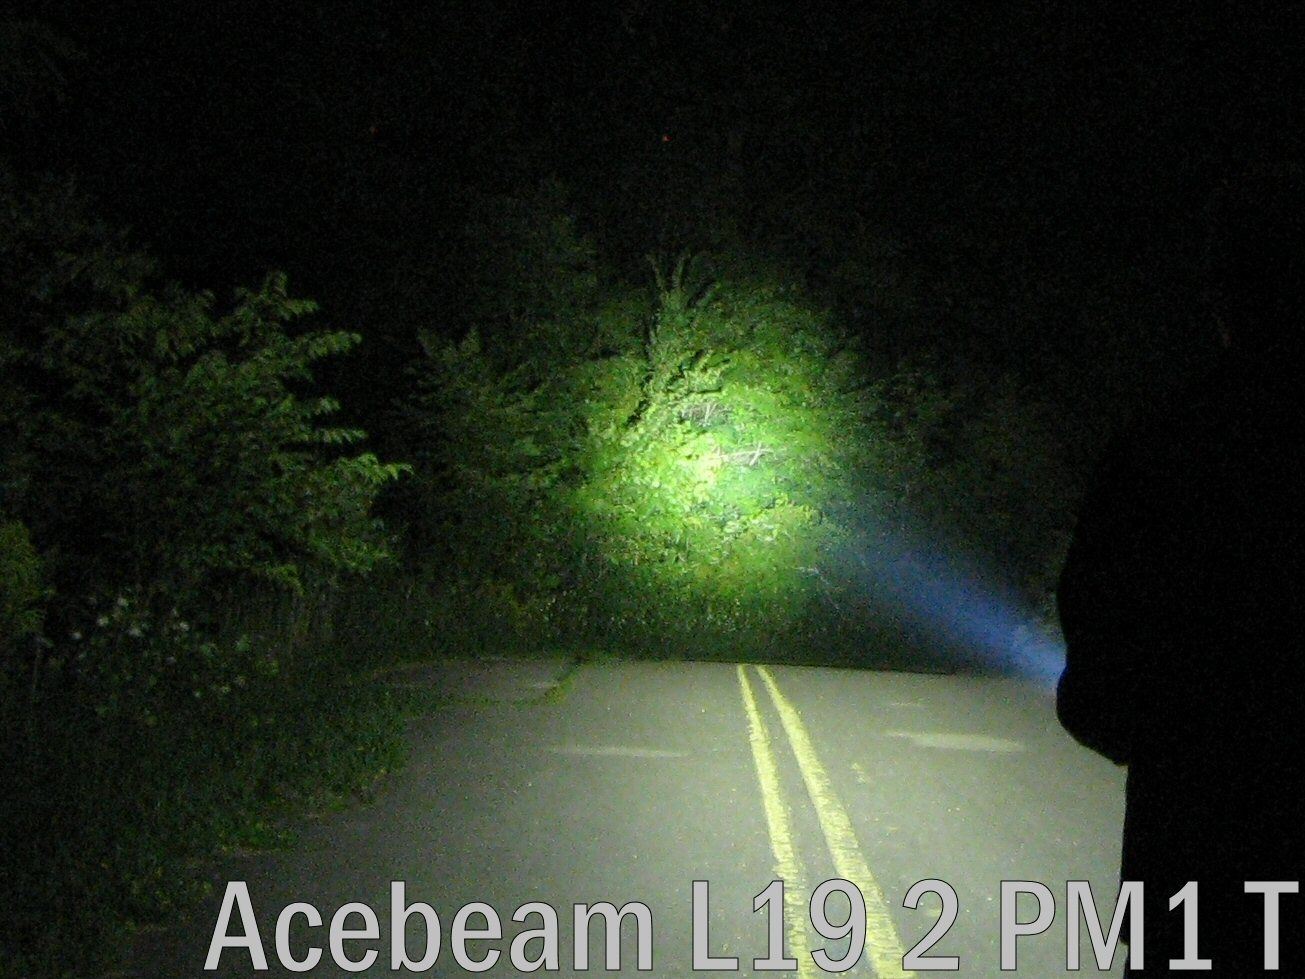
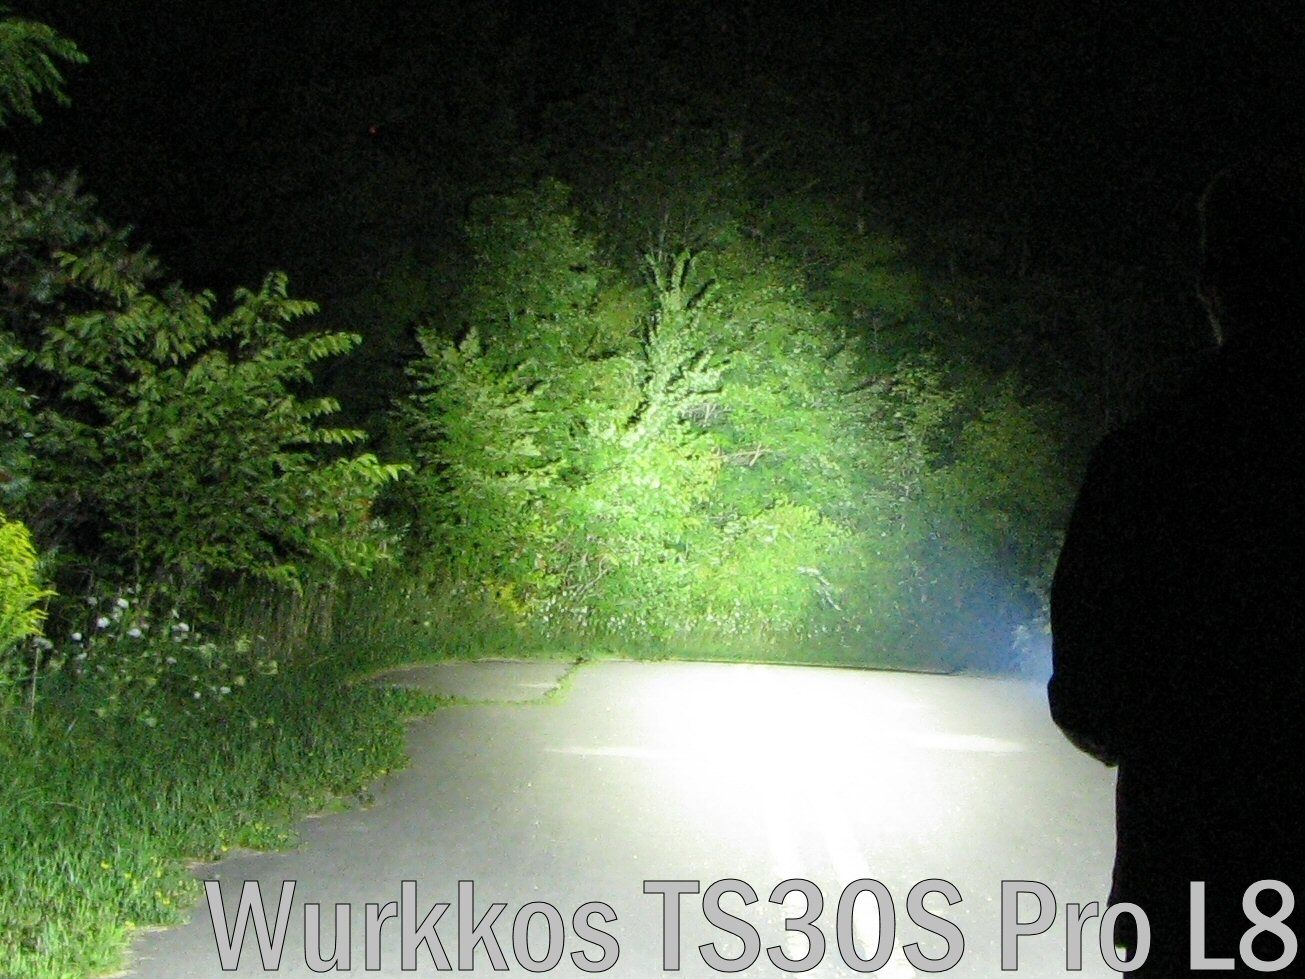
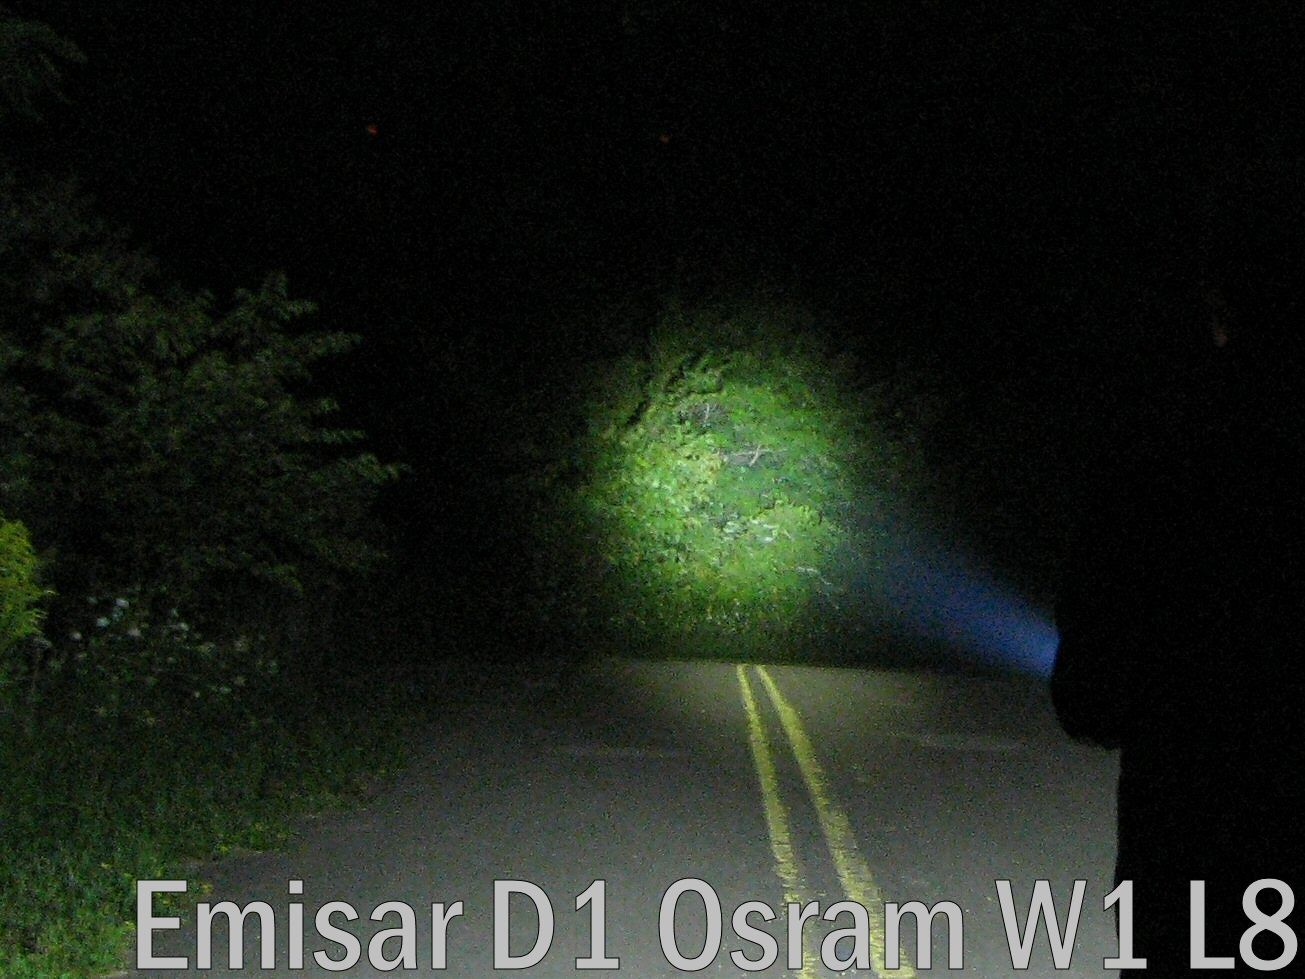
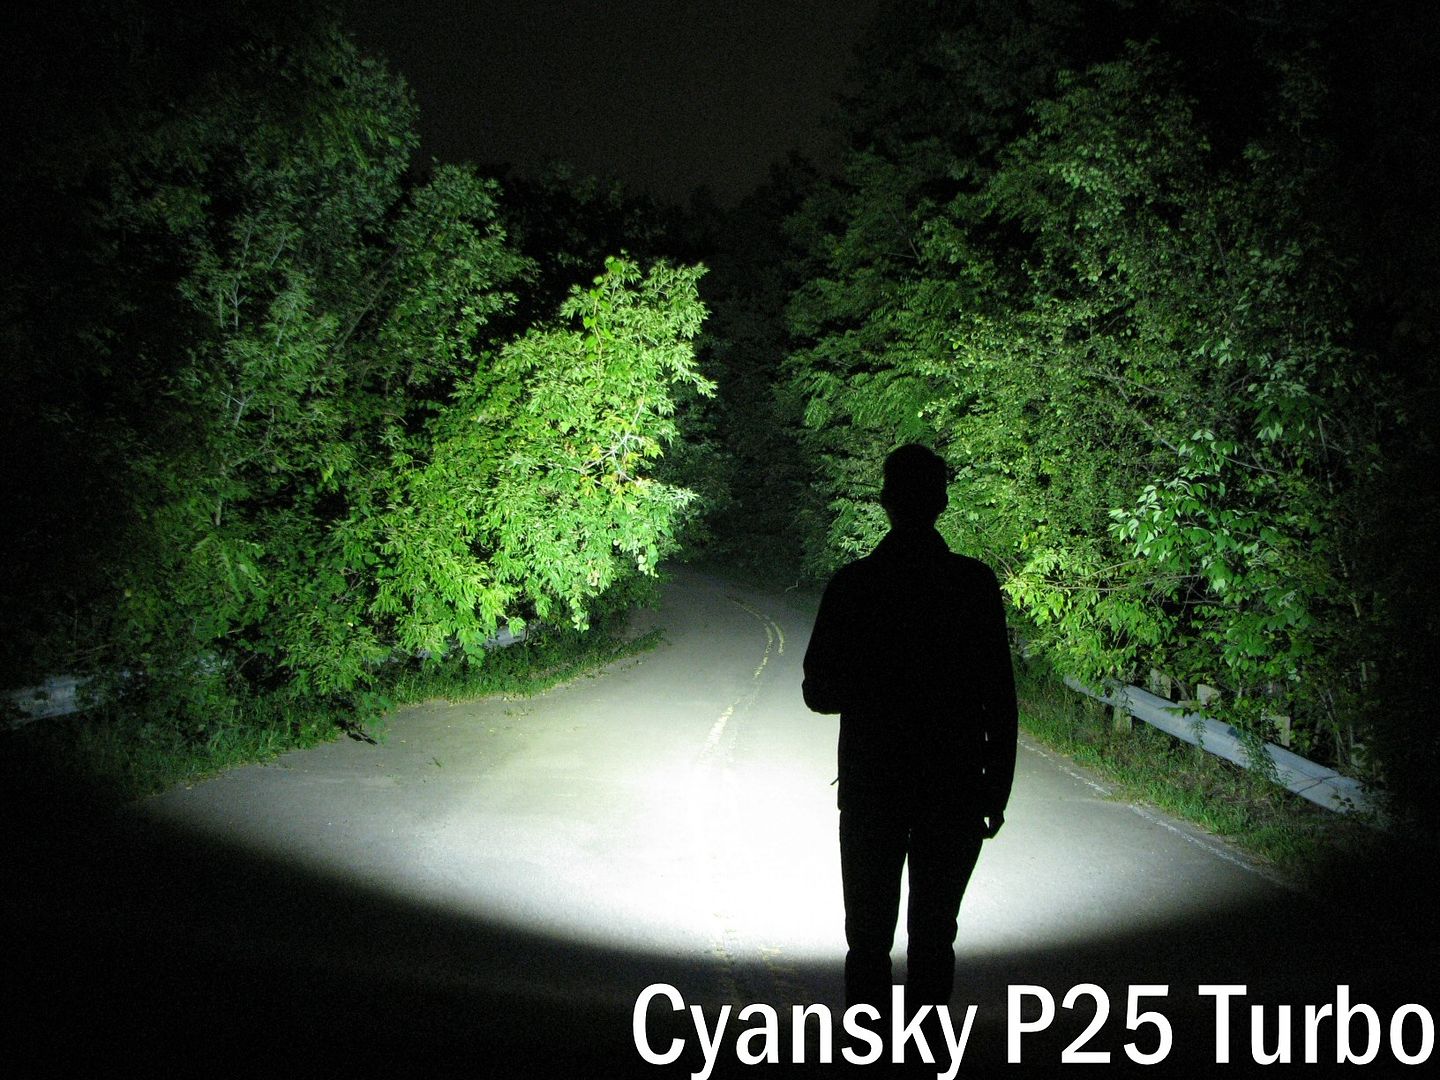
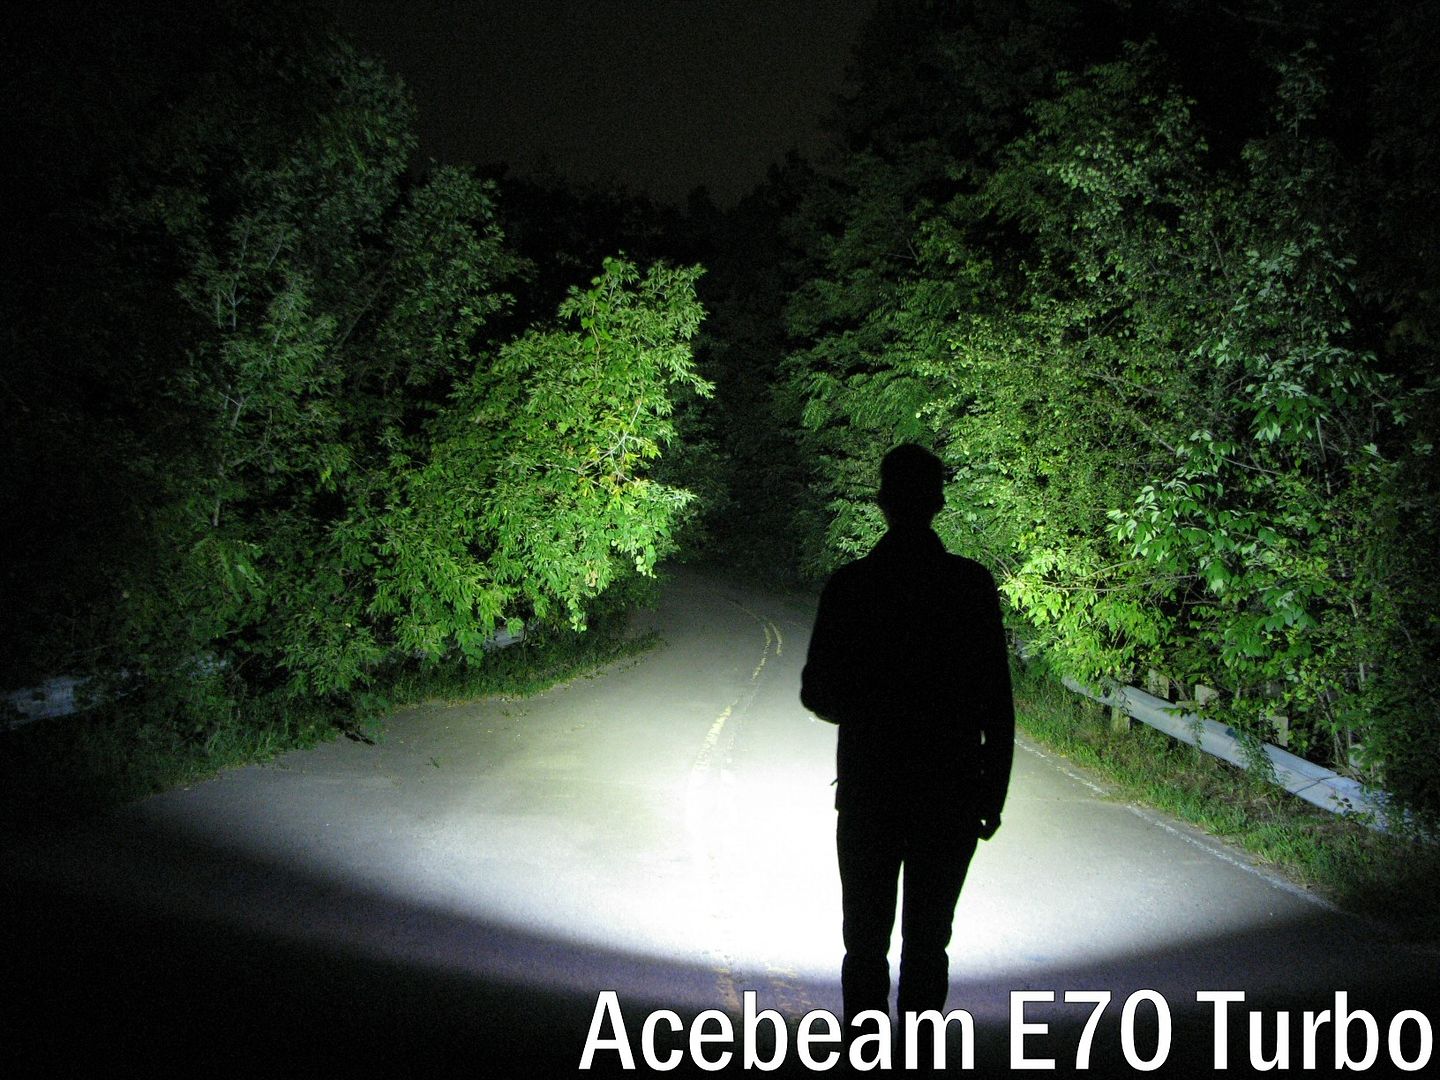
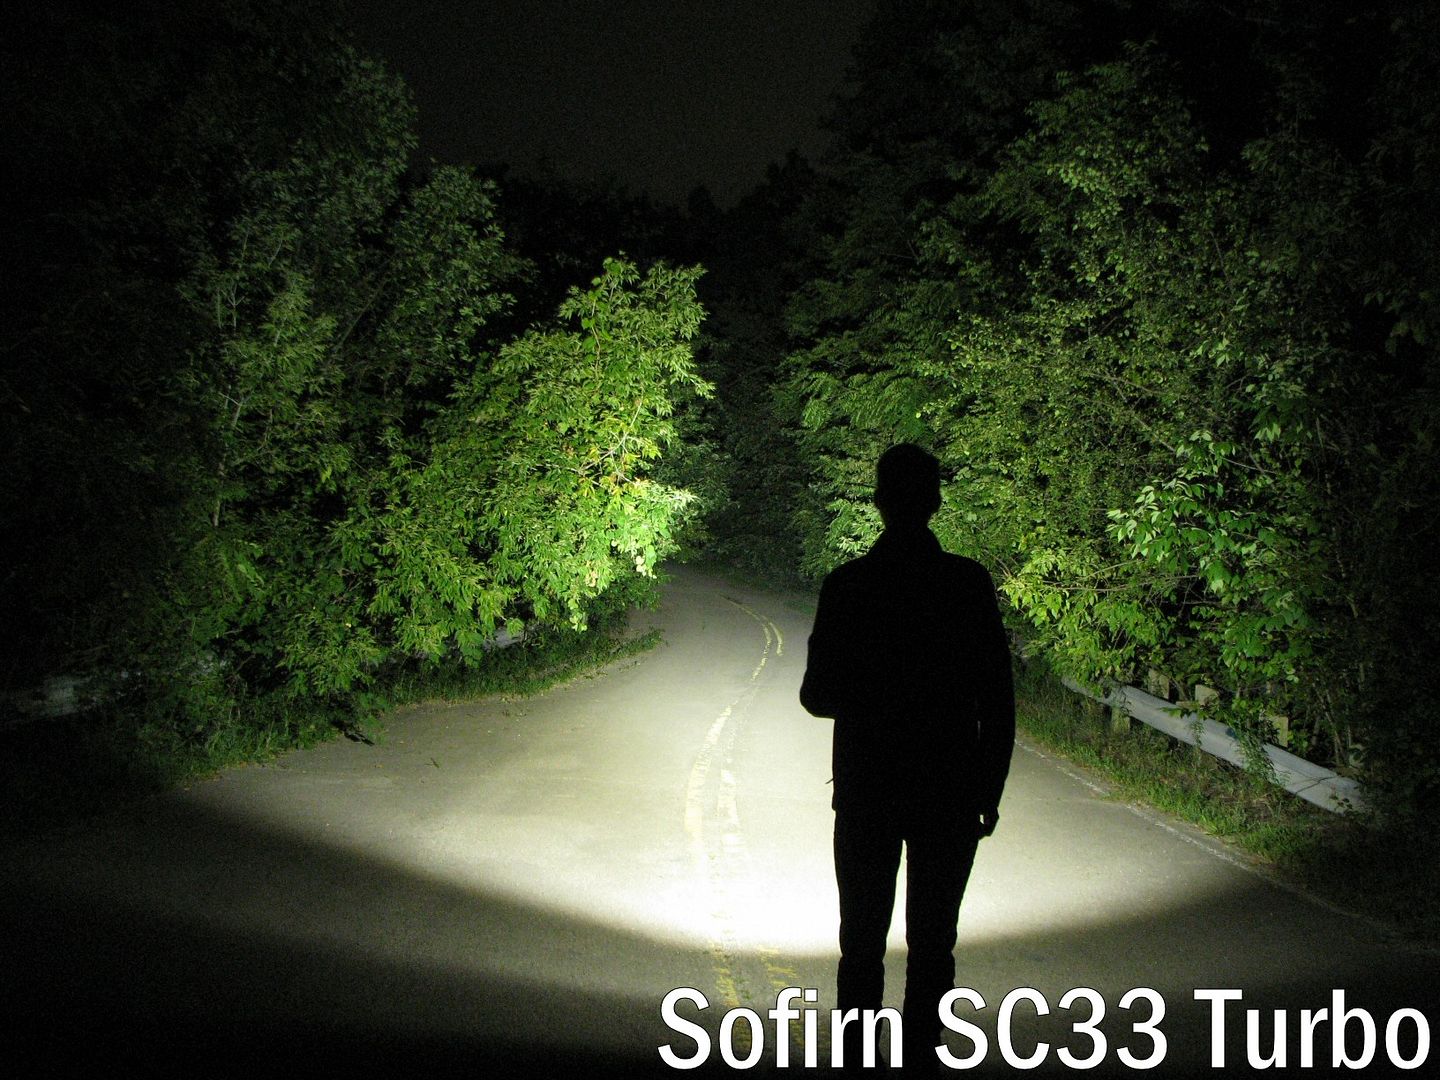
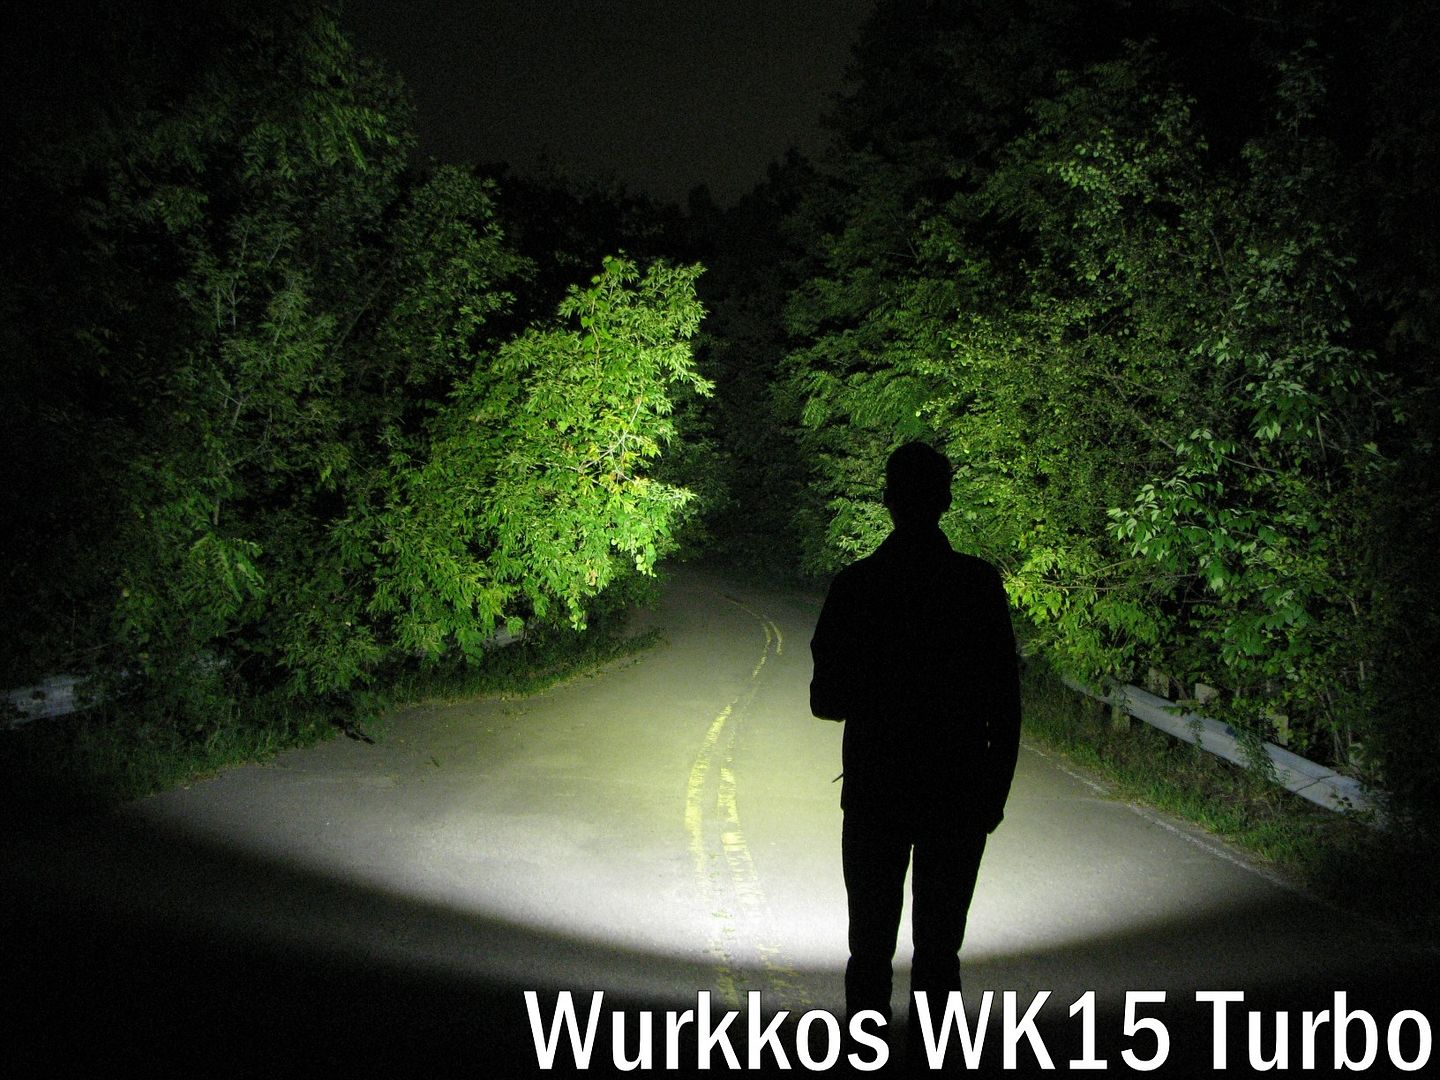
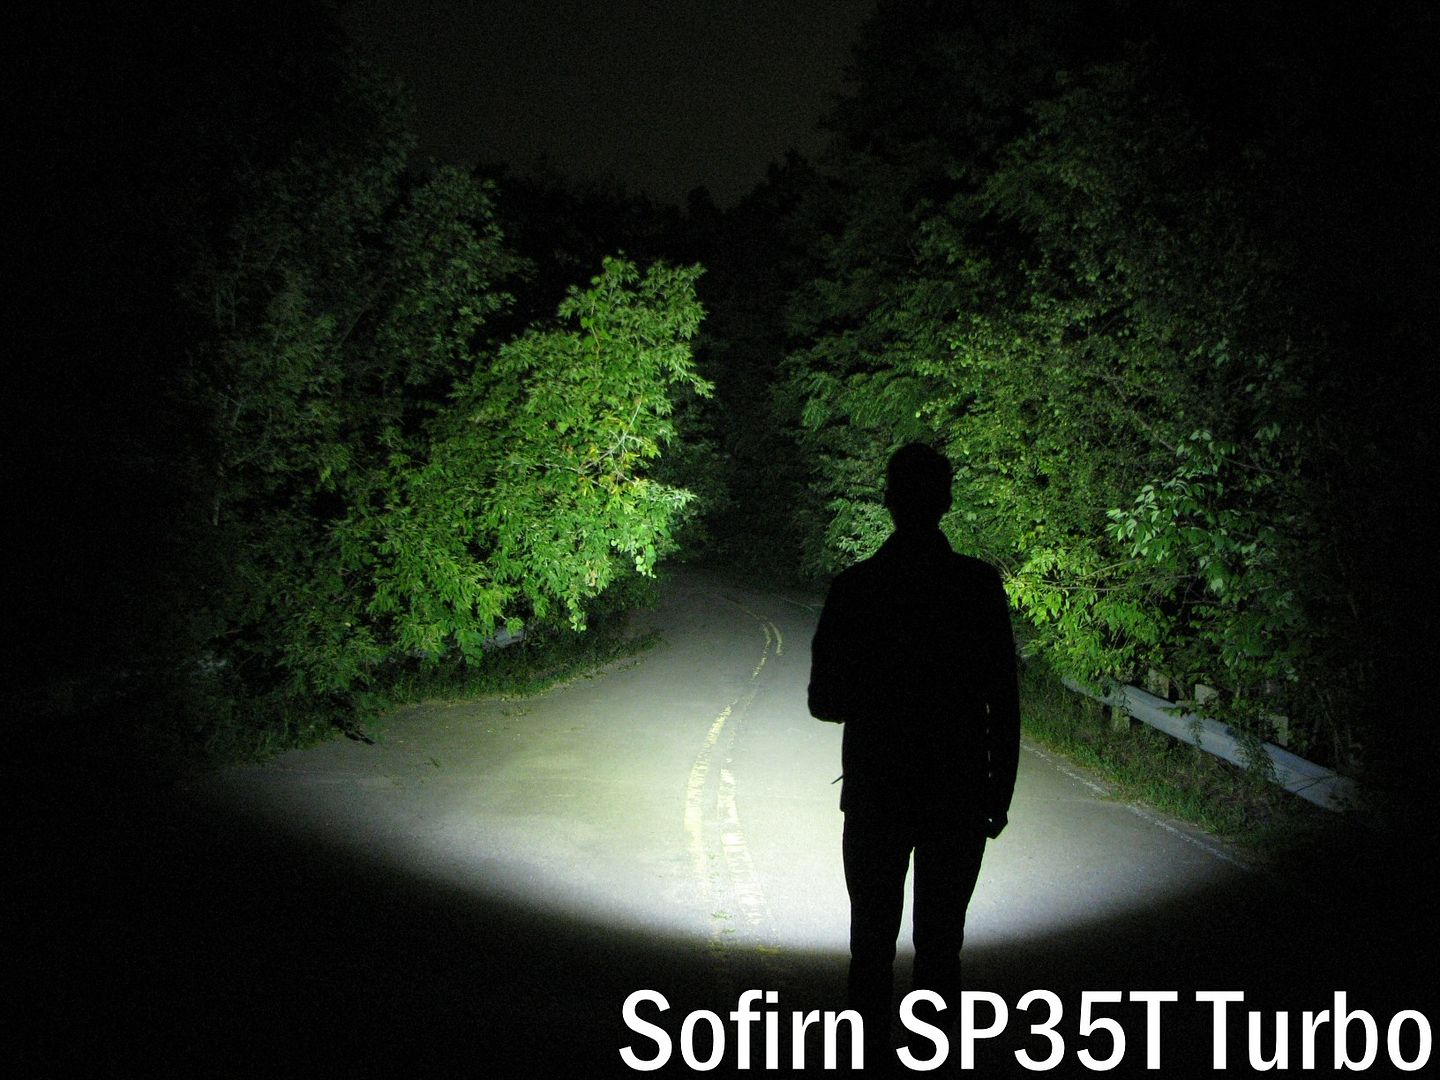
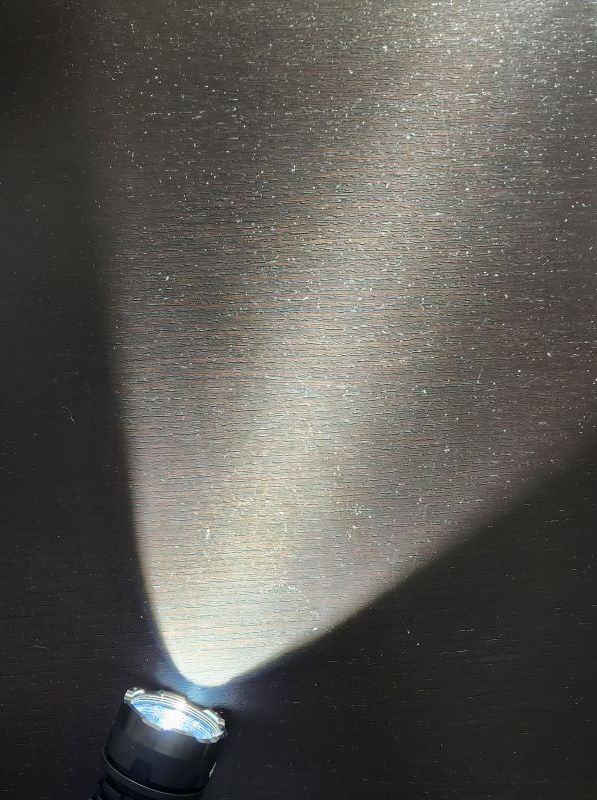
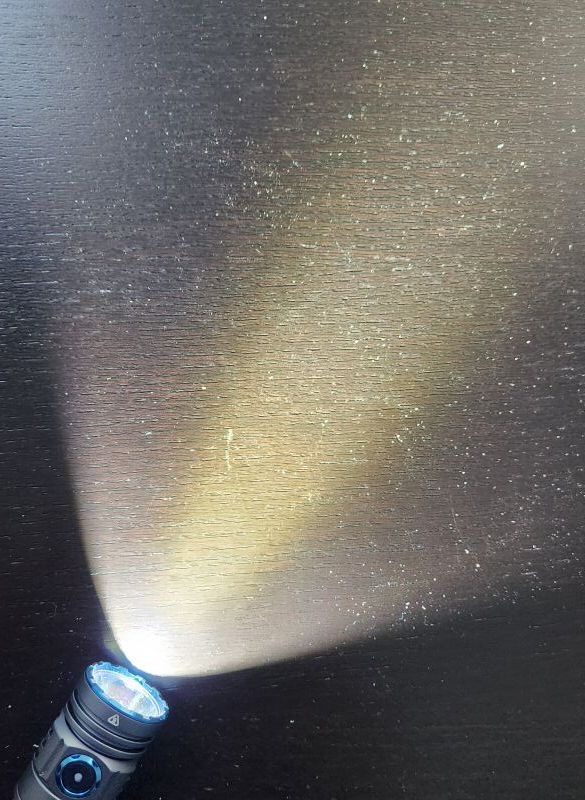
All outdoor beamshots are taken on my Canon PowerShot S5 IS at f/2.7, 0.5 secs exposure, ISO 400, daylight white balance. The bend in the road is approximately 40 meters (~45 yards) from the camera. Learn more about my outdoor beamshots here (scroll down for the floody light position used in this review).
Click on any thumbnail image below to open a full size image in a new window. You can then easily compare beams by switching between tabs.
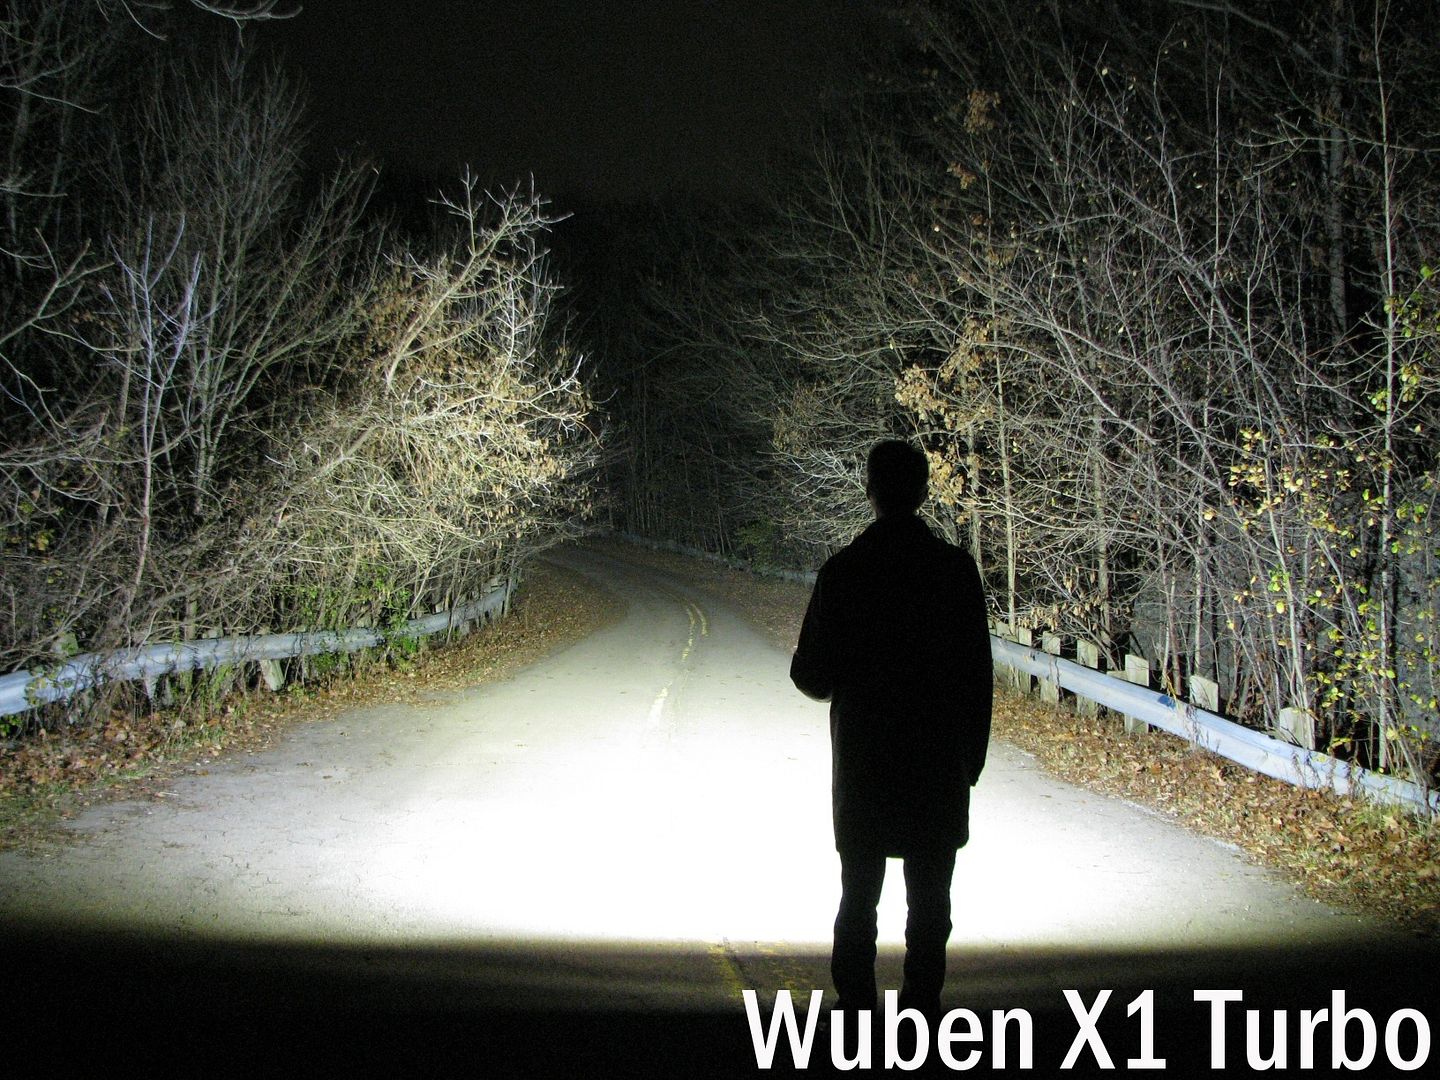
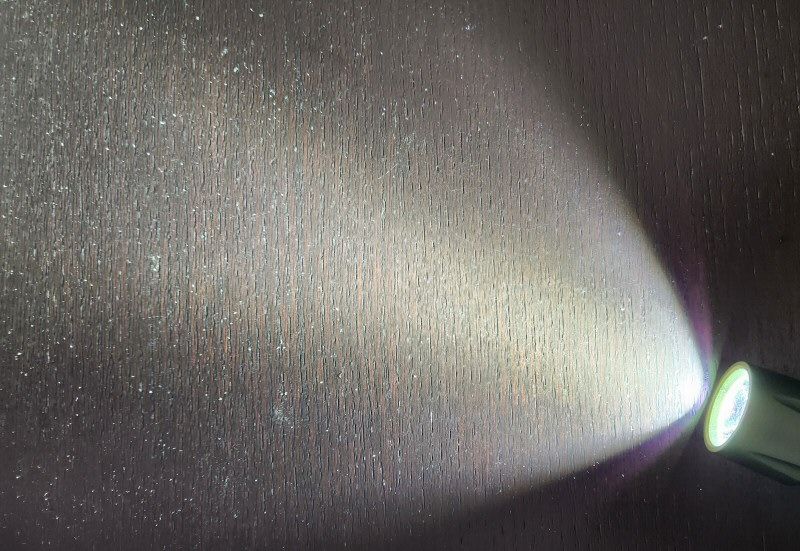
As you can see above, the X1 puts out a huge amount of light, with a very wide beam profile (note that I am holding with the light with the widest aspect parallel to the ground). It’s a great flood light in this orientation, with a super-wide beam.
Testing Results
My summary tables are generally reported in a manner consistent with the ANSI FL-1 standard for flashlight testing. In addition to the links above, please see my output measures page for more background.
All my output numbers are based on my home-made lightbox setup. As explained on that methodology page, I have devised a method for converting my lightbox relative output values to estimated lumens. Note that my lightbox calibration runs higher than most hobbyists today, but I’ve kept it to remain consistent with my earlier reviews (when the base calibration standard was first established). On average though, I find my lumen estimates are ~20% higher than most other modern reviewers.
My Peak Intensity/Beam Distance are directly measured with a NIST-certified Extech EA31 lightmeter.
X1 Testing Results
| Mode | Spec Lumens | Estimated Lumens @0sec | Estimated Lumens @30 secs | Beam Intensity @0sec | Beam Intensity @30secs | Beam Distance @30secs | PWM/Strobe Freq | Noise Freq | Charging Current <3V | Charging Current >3V | Parasitic Drain | Weight w/o Battery | Weight with Battery | CCT (K) | Duv | CRI | ||||||||||||||
|---|---|---|---|---|---|---|---|---|---|---|---|---|---|---|---|---|---|---|---|---|---|---|---|---|---|---|---|---|---|---|
| Eco | 20 | 27 | 27 | - | - | - | No | No | 2.0 A | 2.0 A | Yes (not measured) | - | 380 g | - | - | - | - | - | - | - | - | - | - | - | - | - | - | - | - | - |
| Low | 400 | 500 | 500 | - | - | - | No | No | 2.0 A | 2.0 A | Yes (not measured) | - | 380 g | - | - | - | - | - | - | - | - | - | - | - | - | - | - | - | - | - |
| Med | 1,000 | 1,200 | 1,100 | - | - | - | No | No | 2.0 A | 2.0 A | Yes (not measured) | - | 380 g | - | - | - | - | - | - | - | - | - | - | - | - | - | - | - | - | - |
| High | 2,600 | 3,700 | 3,650 | - | - | - | No | No | 2.0 A | 2.0 A | Yes (not measured) | - | 380 g | 5,410 | 0.0047 | 82 | - | - | - | - | - | - | - | - | - | - | - | - | - | - |
| Turbo | 12,000 | 12,000 | 11,000 | 19,500 cd | 17,800 cd | 267 m | No | No | 2.0 A | 2.0 A | Yes (not measured) | - | 380 g | - | - | - | 12,000 | 20 | 220 hours | 23,000 cd | 303 m | 5 | Strobe, SOS | 2x21700 | - | 379 g | 128.5 mm | 56 mm | 28 mm | IP55 |
| Strobe | 3,000 | - | - | - | - | - | 9-14 Hz | No | 2.0 A | 2.0 A | Yes (not measured) | - | 380 g | - | - | - | - | - | - | - | - | - | - | - | - | - | - | - | - | - |
| SOS | 200 | - | - | - | - | - | - | - | 2.0 A | 2.0 A | Yes (not measured) | - | 380 g | - | - | - | - | - | - | - | - | - | - | - | - | - | - | - | - | - |
The X1 seems to match fairly closely to the specs on most levels (although keep in mind that my lightbox’s relative calibration is generously high). The Turbo spec seems slightly over-stated relative to my testing however.
My NIST-calibrated luxmeter is accurately calibrated to an absolute standard, and similarly reports lower beam intensity on Turbo compared to the specs. But I find these throw measures very reasonable for these kinds of emitters and output levels.
To view and download full testing results for all modern lights in my testing, check out my Database page.
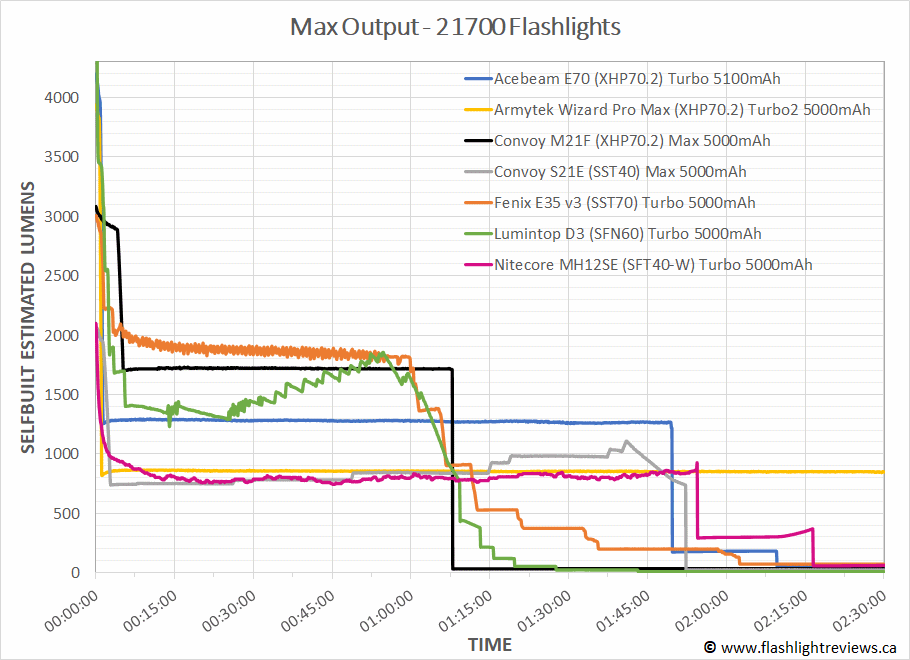
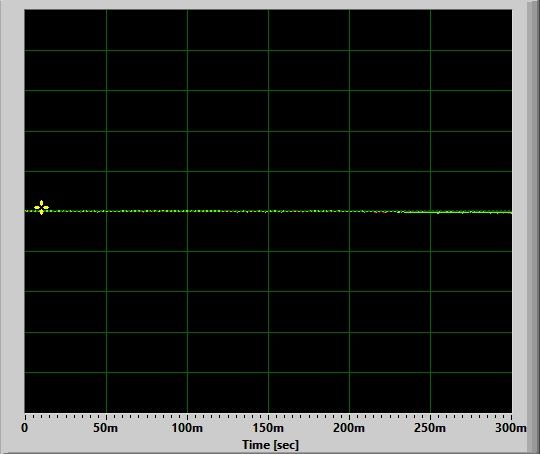
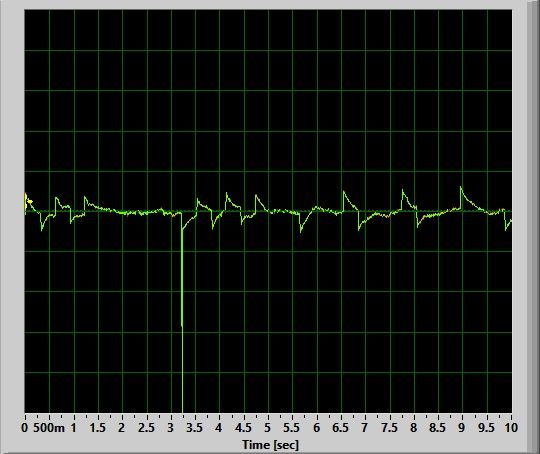
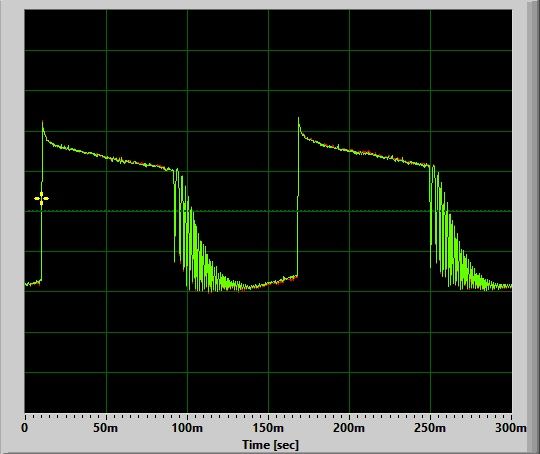
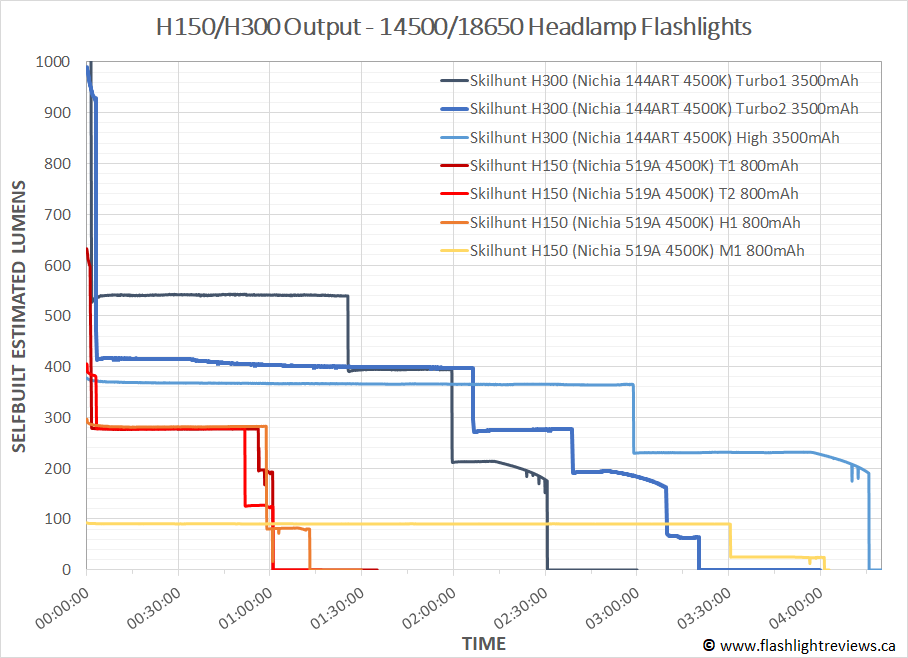
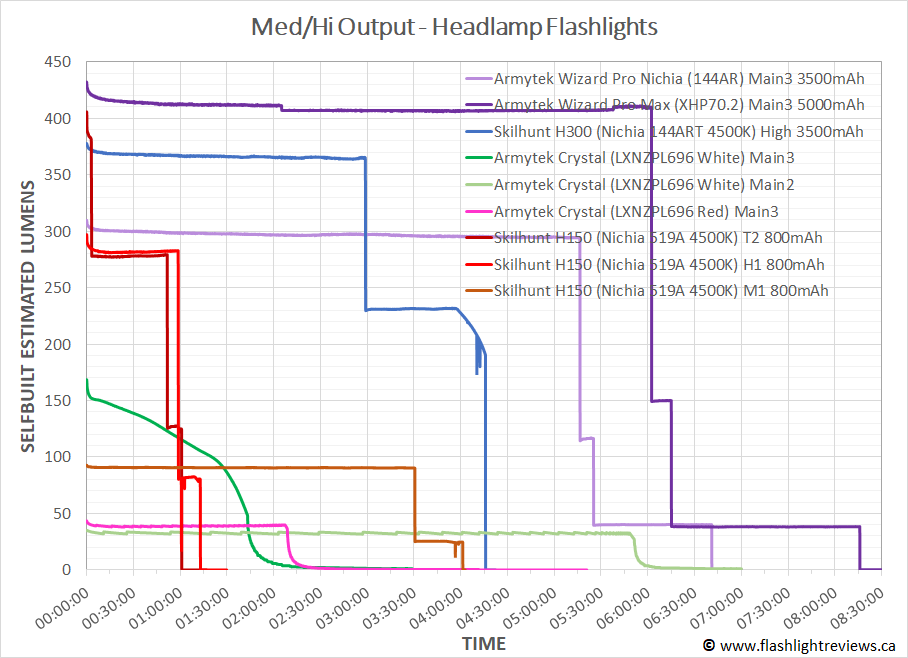
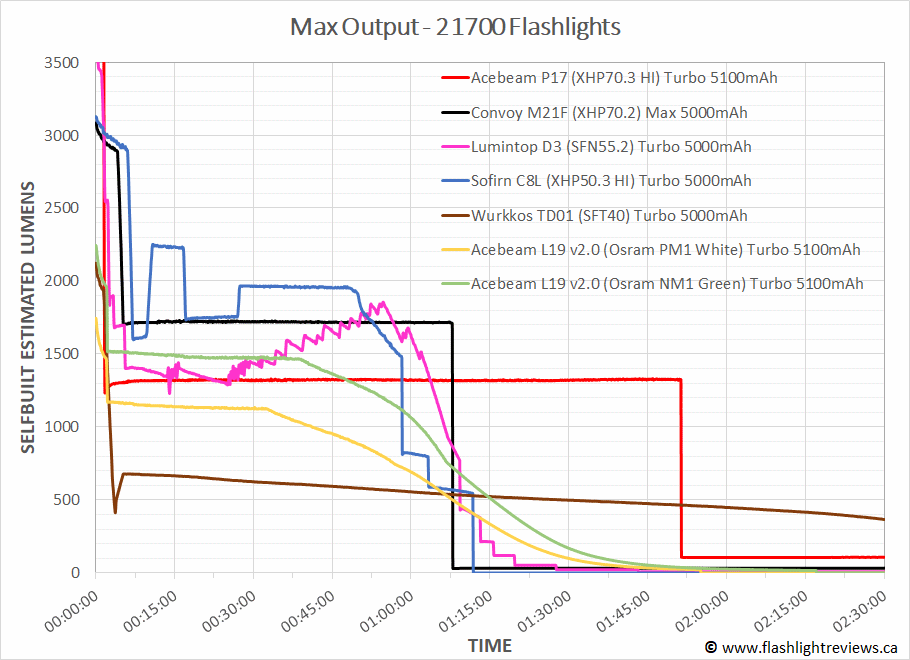
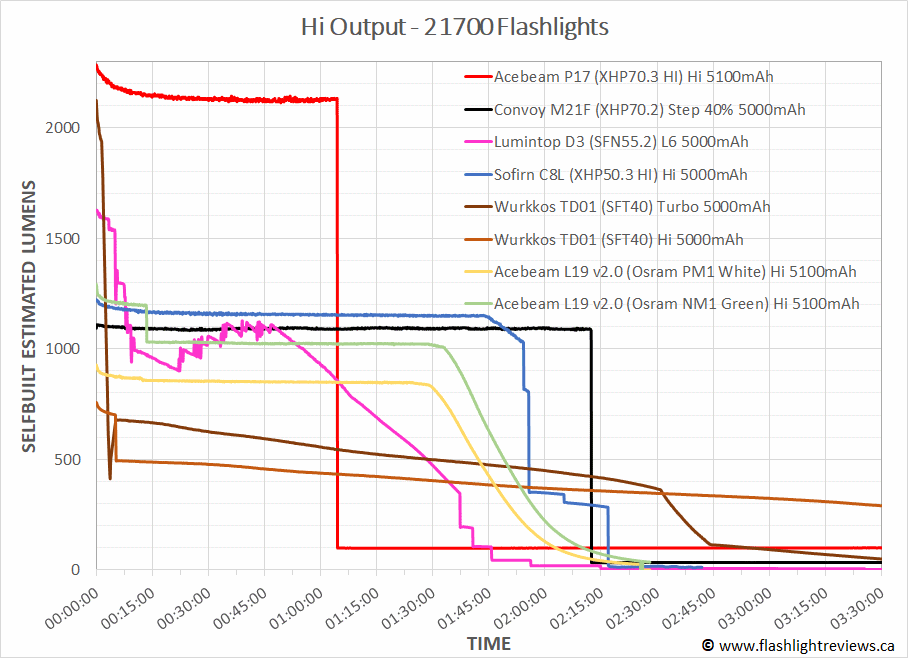
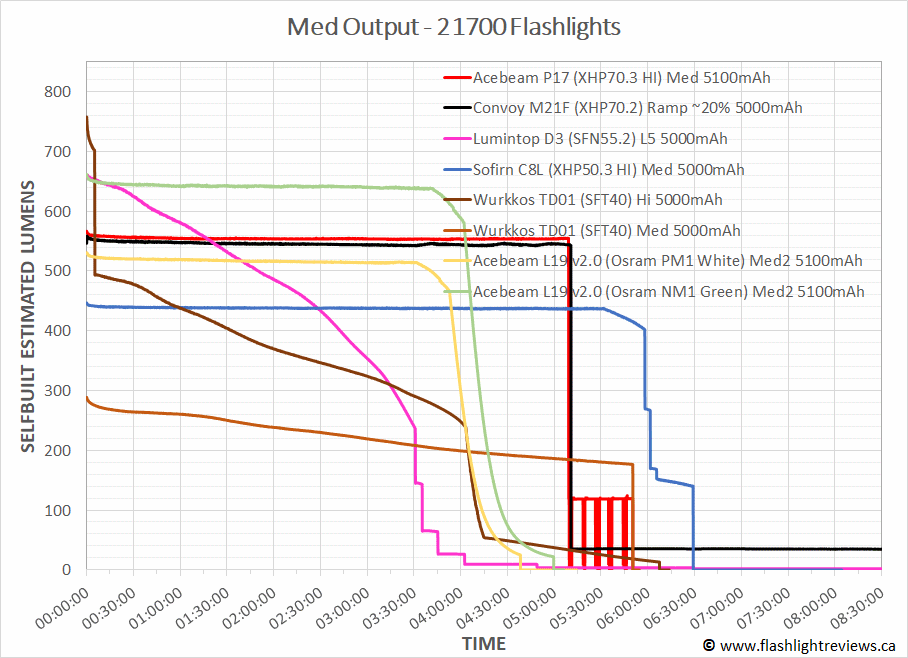
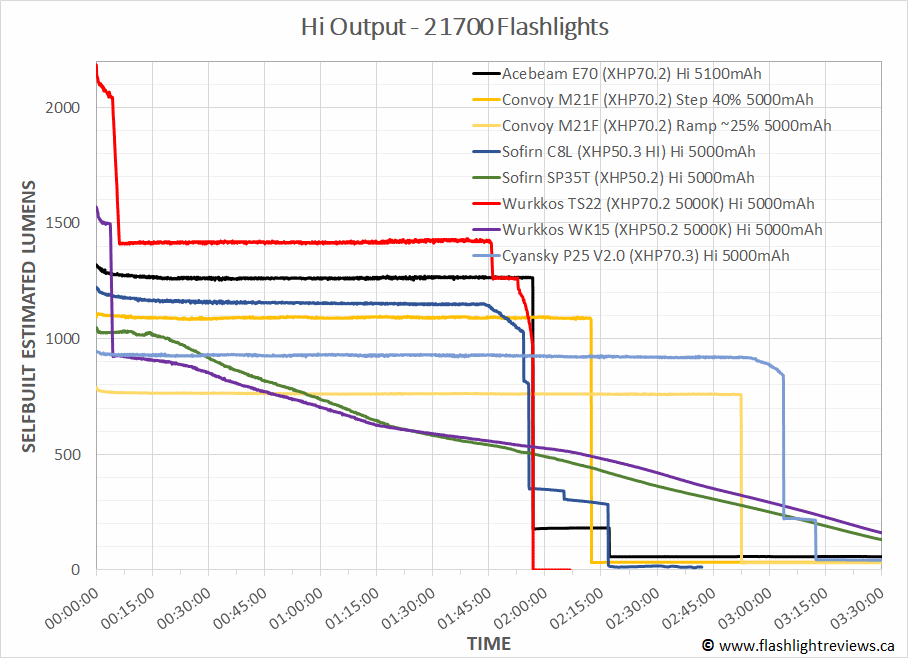
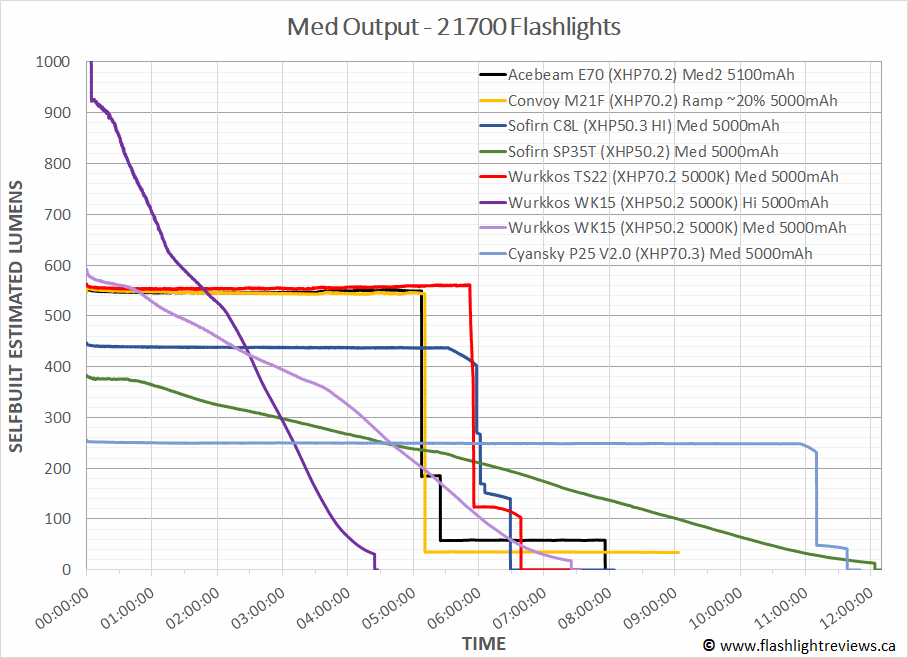
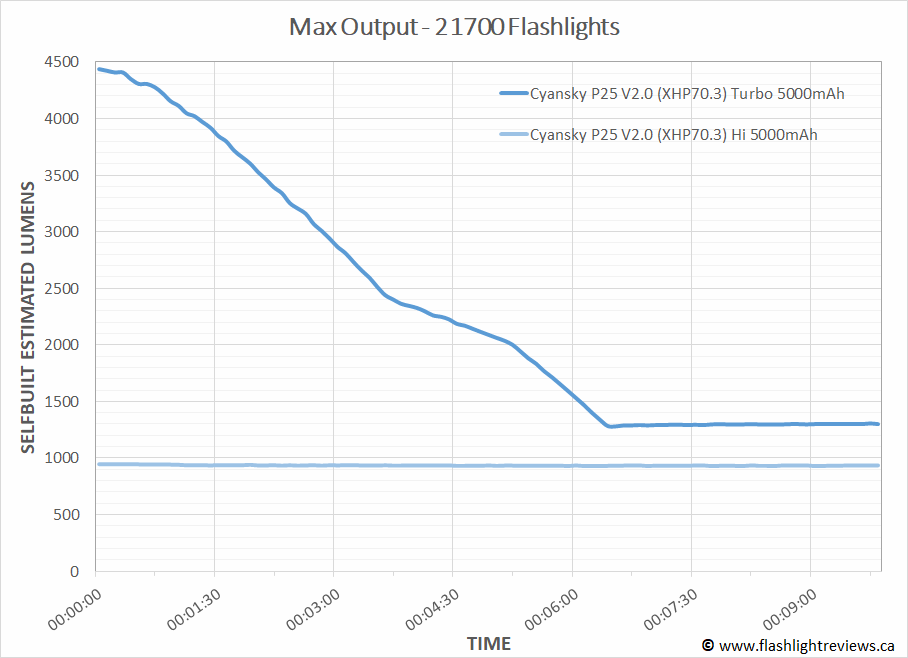
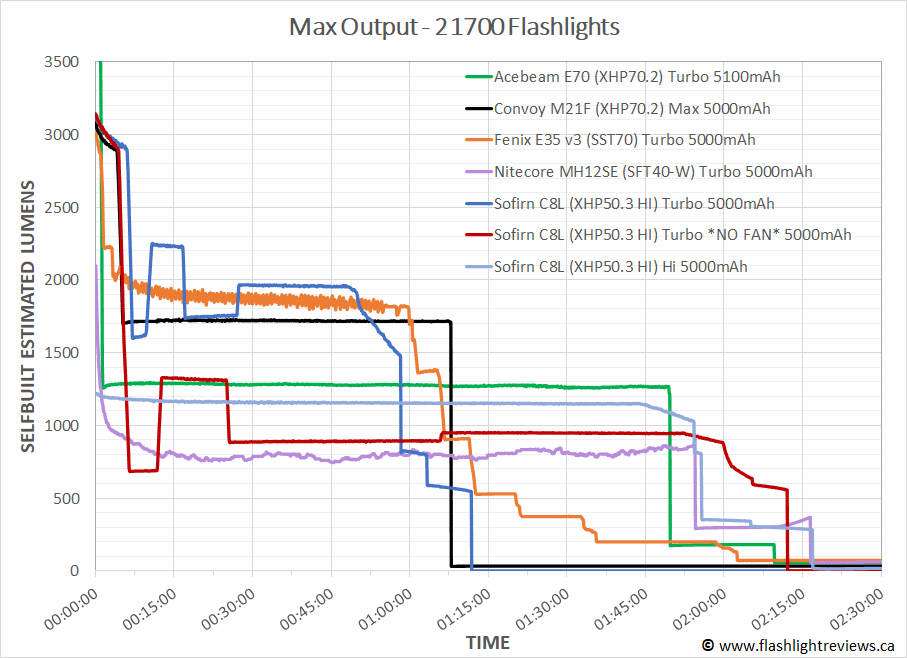
Runtimes
As always, my runtimes are done under a small cooling fan, for safety and consistency. To learn more about how to interpret runtime graphs, see my runtimes methodology page. Note that on average, my lightbox’s calibration seems to be ~20% higher than most modern reviewers.
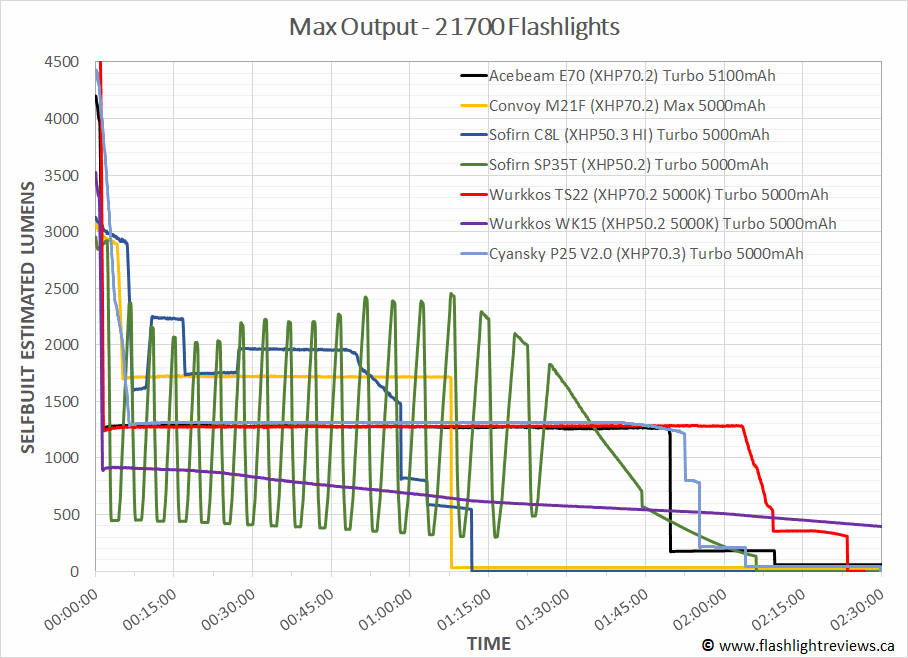
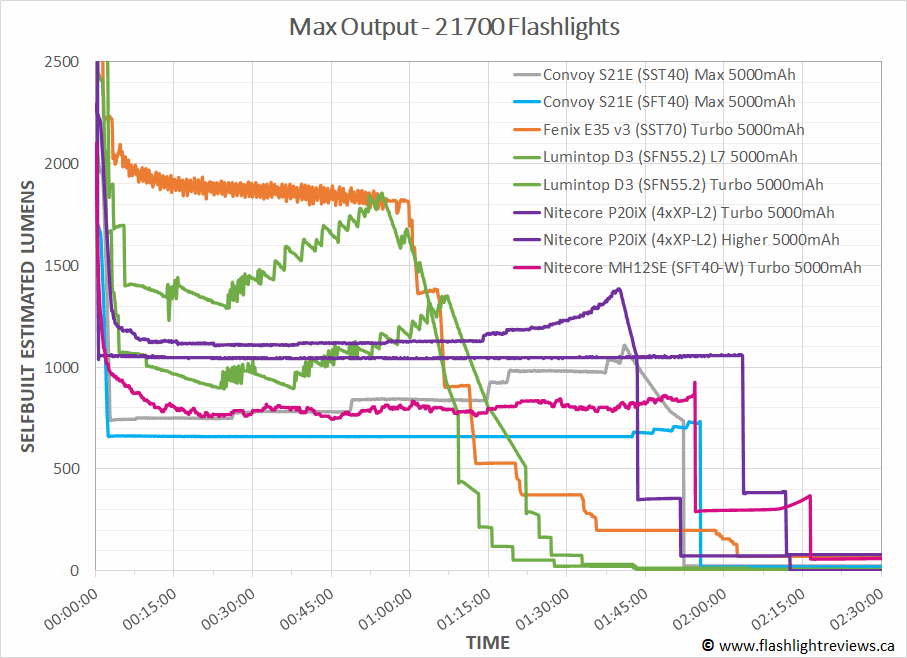
Given the dual-cell and triple-emitter design, it can be a little hard to compare to most lights. I’ve thrown in the fan-cooled super-large Acebeam X75 for comparison at the extreme output end.
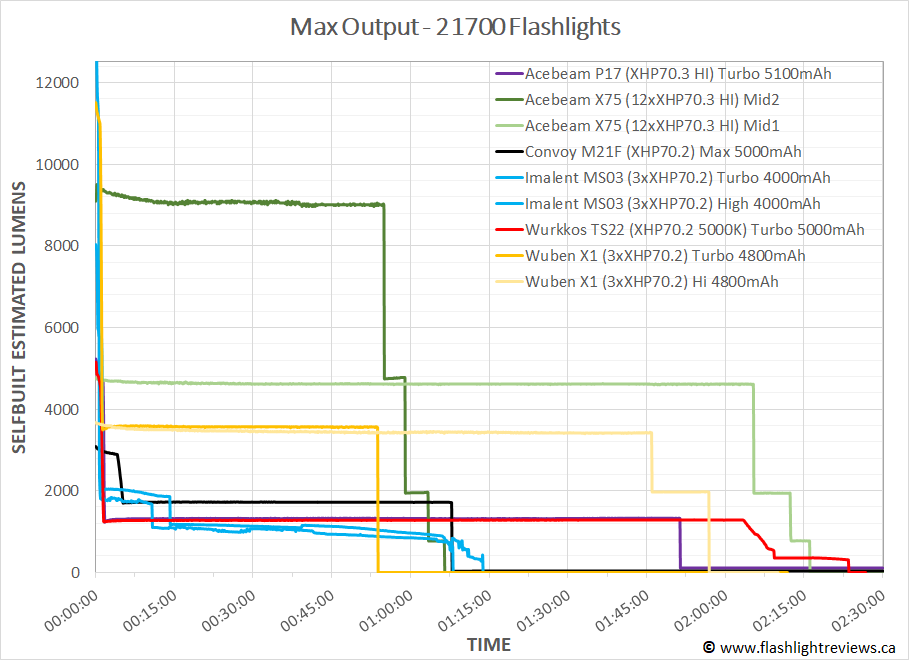
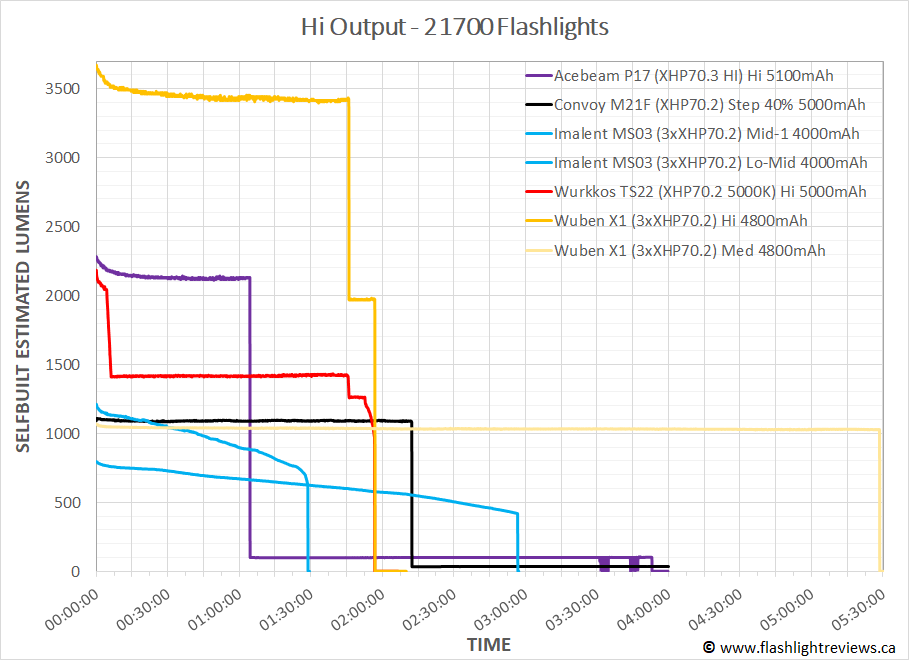
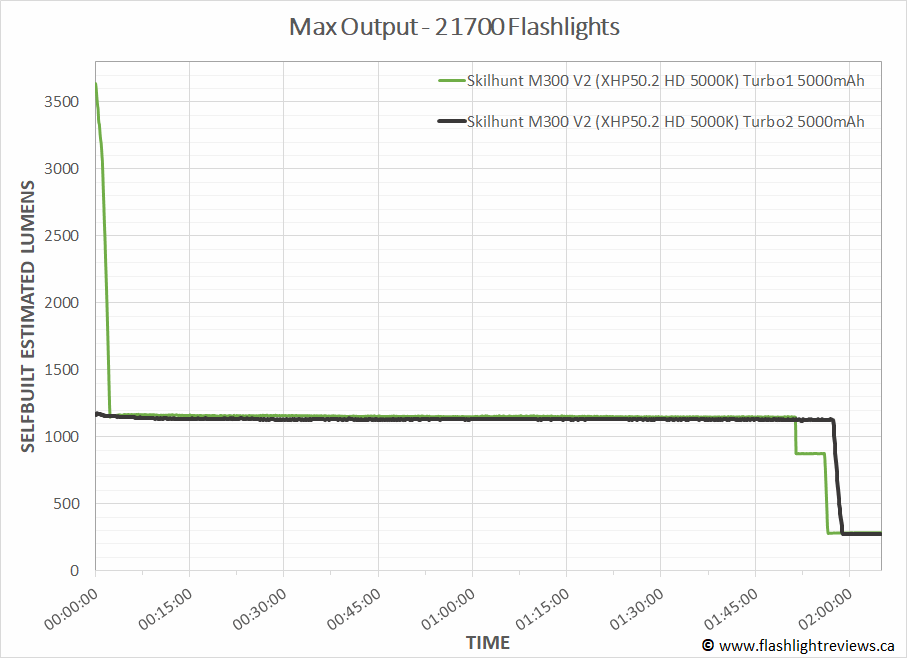
What you can see above is that regulation is excellent, as is output/runtime efficiency (i.e., more that twice the output or runtime compared to single cell/emitter lights). This is what you can expect from a good multi-emitter light on dual cells with good heatsinking – more stable and longer-lasting performance.
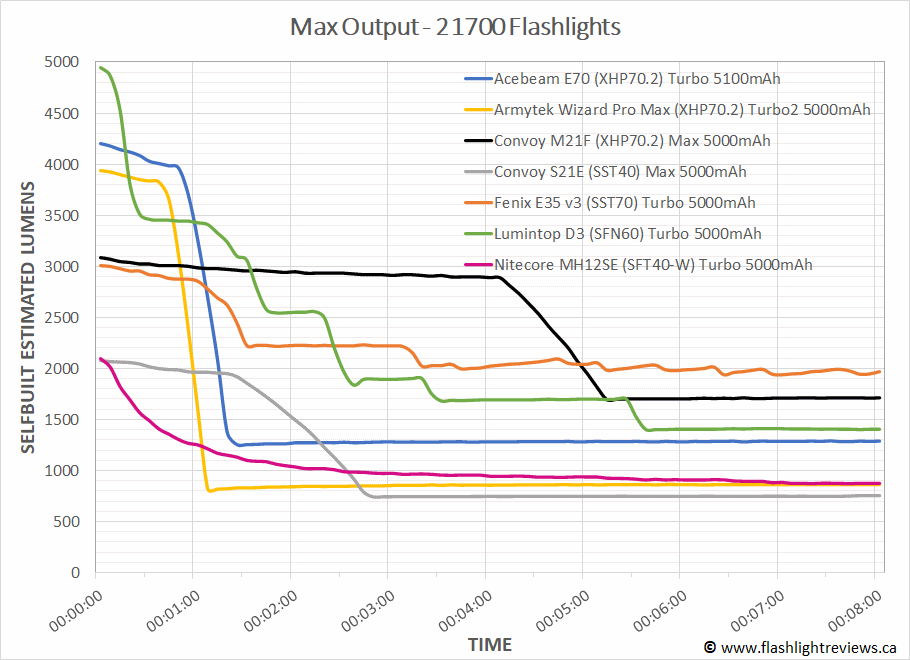
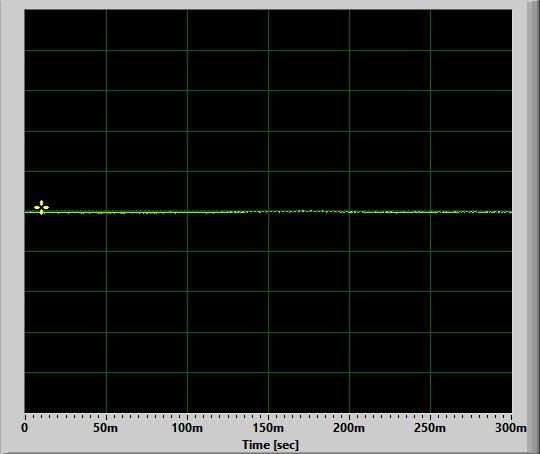
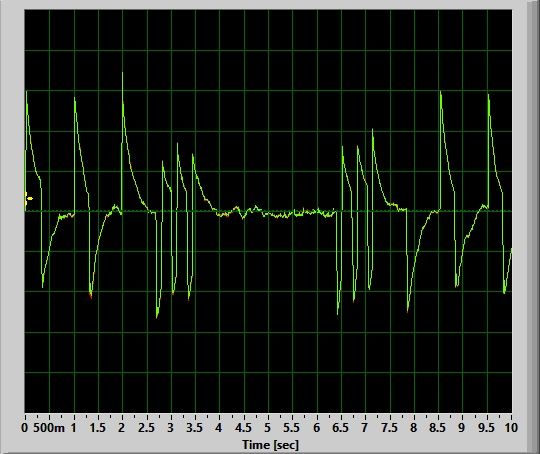
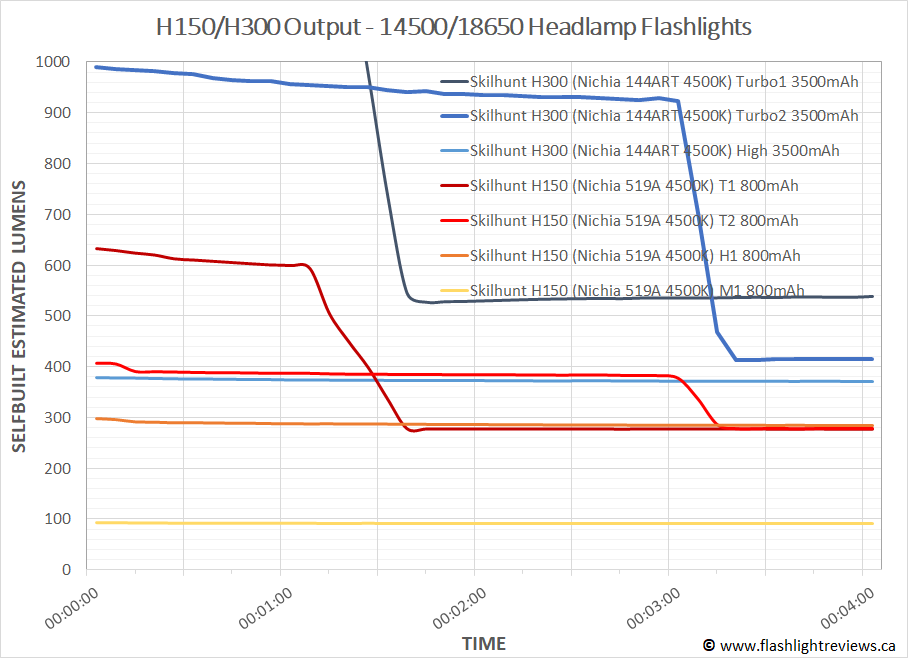
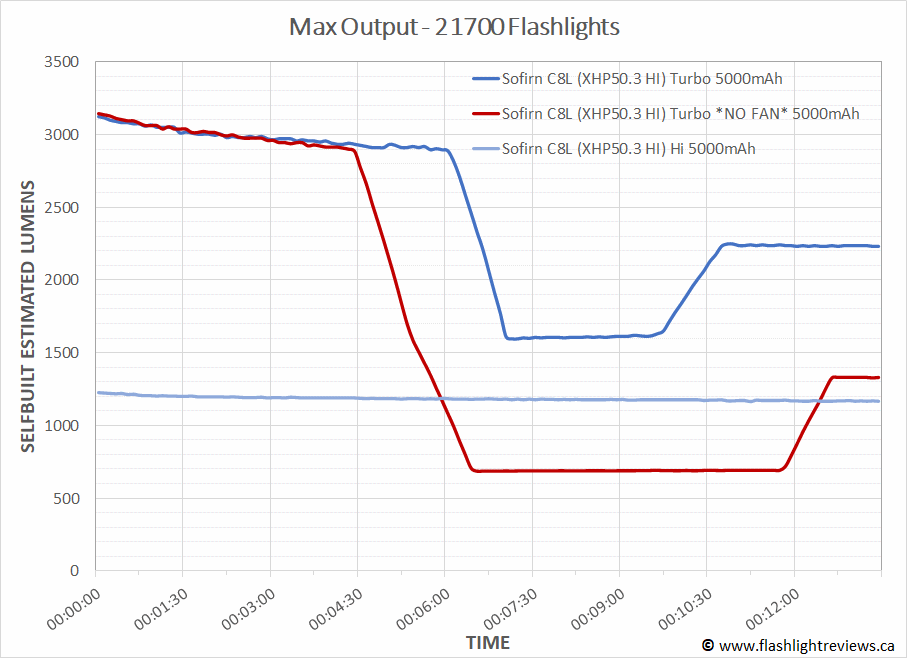
Since I expect many are interested in how the initial Turbo modes compare (i.e., how quickly and how far the lights step-down), here is a blow-up of the first few mins of runtime on max output:
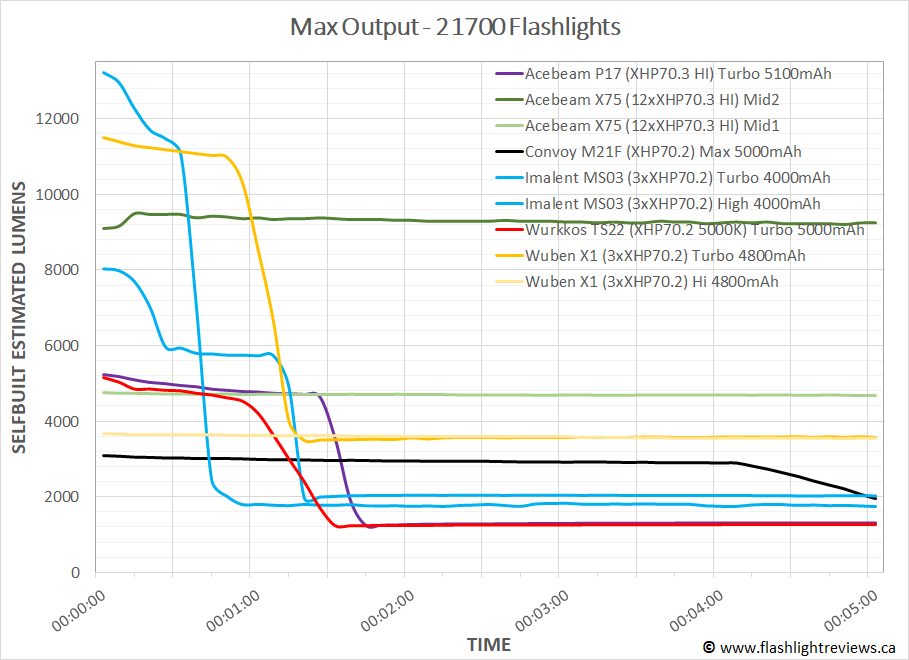
The X1 steps down around the one minute mark, similar to many other lights (although to be fair, most lights aren’t driven as hard as the X1 on Turbo).
Pros and Cons
| Pros | Cons |
|---|---|
| Light has outstanding output/runtime efficiency. | Max output is slightly lower than the specs indicate, although the rest of the output levels seem fairly accurate. |
| Circuit shows excellent flat-stabilized regulation, with thermally-mediated stepdowns (aided by built-in cooling fan). | Light lacks a moonlight mode. |
| Solid and sturdy build, although heavier than I expected. | Light is larger and heavier than most in this class. |
| User interface is very intuitive and similar to other modern lights. | Due to the build, physical lockout is not possible, only electronic lockout. |
| Lockout mode (on by default when shipped) can be easily disabled/re-enabled. | |
| Beam profile is remarkably clean and free of artifacts or tint shifting on my sample. |
Overall Rating

Preliminary Conclusions
The X1 is one of my new favourite high-output, multi-emitter lights. Thanks to the built-in cooling fan (and hefty heatskink) it can sustain Turbo output for a reasonable amount of time without getting too hot to hold. But it can also maintain an incredibly bright Hi mode for an extended runtime. As such, this light helps fill a bit of Goldilocks “just-right” intermediate between a single-cell high-out light and my massive Acebeam X75. To be honest, I can’t think of many occasions when I would need more light (or runtime) than what the X1 can provide.
I find the light comfortable to hold and use (although it is a bit heavy), with a very intuitive user interface common to many lights. The inability to easily open up the light is actually probably more of a selling feature here, as I don’t have to worry about compromising waterproofness. And if one of the cells does eventually fail, I know I can access the tailcap reasonably easily.
Due to this design, physical lockout is not possible – and I have no idea what the standby drain is. I’m not too worried though, as I have not seen any drop in capacity from the initial battery read-out even when storing for several months. The electronic lockout is quite reasonable here.
While the extra bulk and weight many be an issue, the side-by-side design at least makes this still relatively easy to pocket.
Performance of the light is excellent across all modes, with flat-stabilized output and outstanding runtime. I do wish the light would give some kind of advance warning when the batteries are near shutdown – but you can always reactivate at the lower level to if you need to squeeze some extra light before recharging (and turning off/on periodically will allow you to check the charge remaining).
In summary, overall excellent build quality and performance in my handling. I’m impressed for my first Wuben light.
Acknowledgement
The X1 Falcon was supplied by Wuben for review. As always, all opinions are my own and the light received the same rigourous and objective testing as all other lights that I have reviewed. At the time of review, this light retails for ~$180 USD (~$240 CDN) o the Wuben website here.


_20230729_100058.png)

_20230729_100423.png)
.jpg)


_20230924_092640.png)
_20230924_092651.png)
_20230924_093047.png)
_20230924_093141.png)


.jpg)
.jpg)
.jpg)
.jpg)


_20230810_165913.png)
_20230810_165033.png)


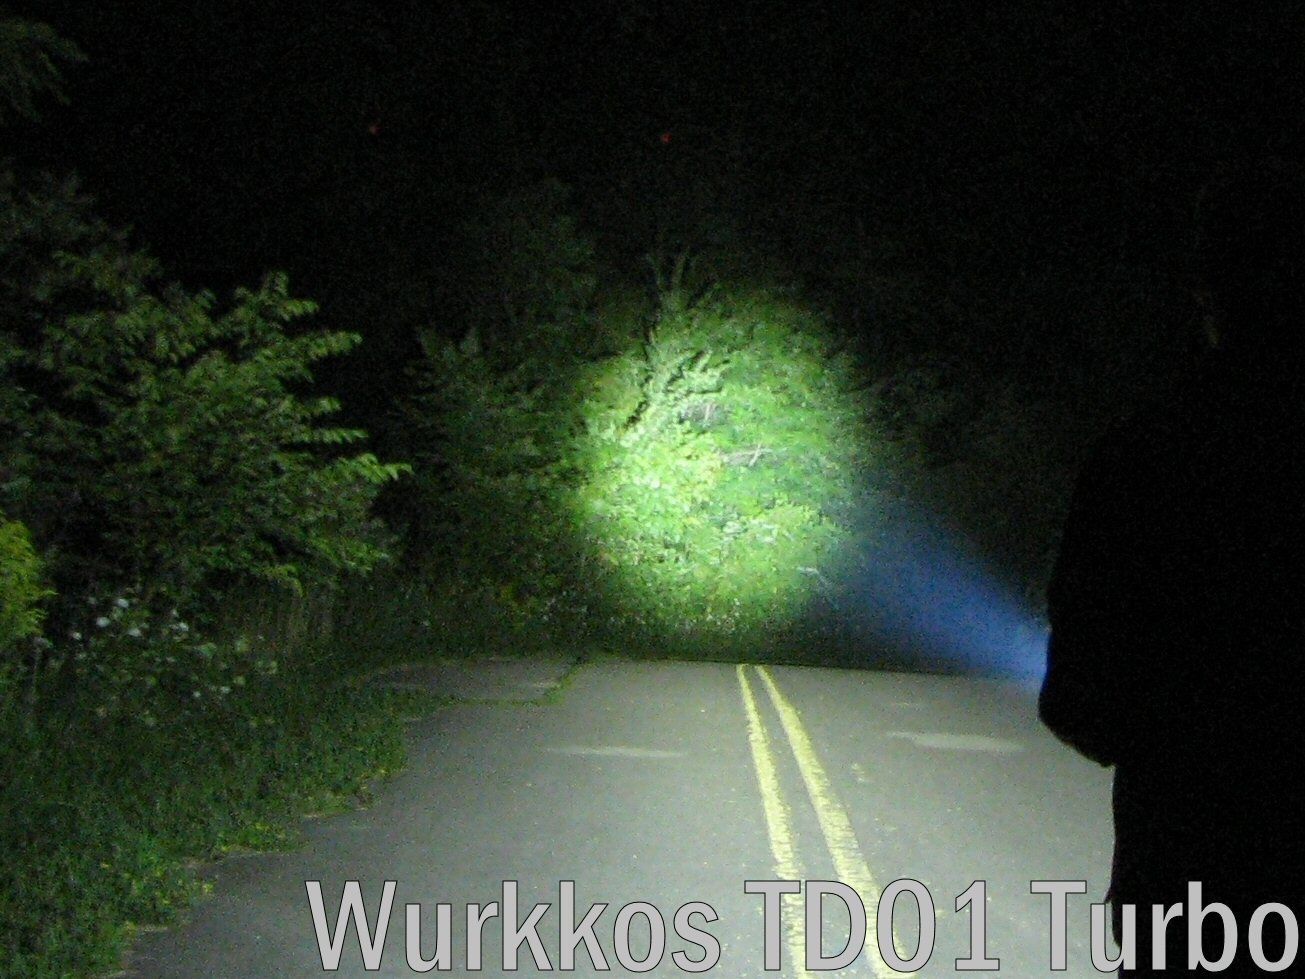

 These results show the improved driver performance on L19 compared to the TD01.
.jpg)


.jpg)
.jpg)


.jpg)
.jpg)


_gqcpyHhAQFEUfdCdkfN1WV.jpg)
_dwN9eNAEDNm458XnsQY3a2.jpg)
_05.JPG)
_05_sT82YVKHUit9Y5nmYpDhrZ.JPG)
_05_6xufWKrQKnW4MEhtSH4zdz.JPG)
_05.JPG)
_05_3qpnSz17JCXCDo3FBwuk5N.JPG)
_05_konN9xoDtcwHtsox8aAfSt.JPG)


_20230319_140329.png)
_20230319_140317.png)
_20230319_140309.png)
_20230319_140322.png)
_20230319_140422.png)
_20230319_140443.png)

_20230319_140538.png)
_20230319_140551.png)
_20230319_140709.png)
_20230319_140718.png)
_20230319_140804.png)
_20230319_140907.png)


_uC3SHbWjRQg1edDgcJsnAj.jpg)
_5CormVqaoM1FaVaTwLp9AD.jpg)


_20221013_124116.png?width=1920&height=1080&fit=bounds)


_cuq28cebf5wJePJWb1Ufjh.jpg)
_f9RZydKZPsk5x8EhA5RjZ3.jpg)
.JPG)
.JPG)
.JPG)
.JPG)
.JPG)
.JPG)