Tag Archives: Armytek

Armytek Crystal Pro

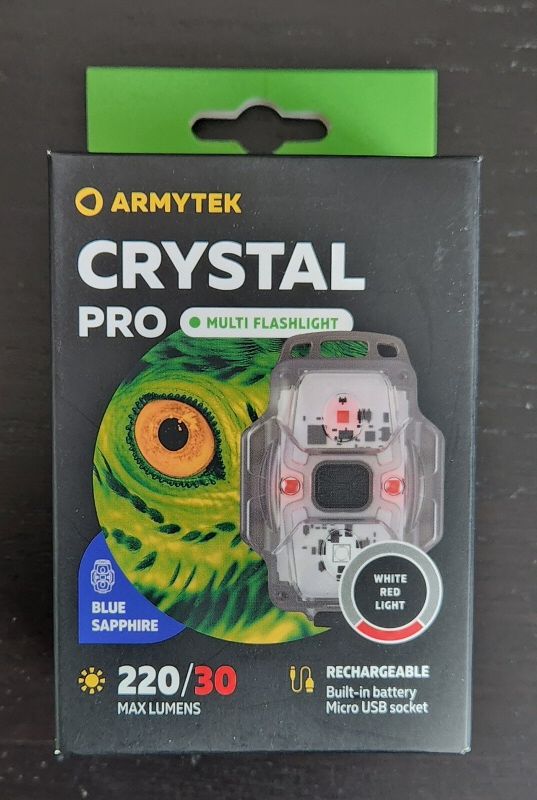
The Crystal Pro is a compact headlamp/keychain/bike flashlight with a full-flood white beam and red beam. It runs on an integrated Li-Po battery.

  1. Introduction
  2. Manufacturer Specifications
  3. Package Details
  4. Build
  5. User Interface
  6. Circuit Measures
  7. Emitter Measures
  8. Beamshots
  9. Testing Results
  10. Runtimes
  11. Pros and Cons
  12. Overall Rating
  13. Preliminary Conclusions
  14. Acknowledgement

Introduction

Last year Armytek updated its Crystal headlamp/keychain light to a new Pro version, adding some additional functionality.

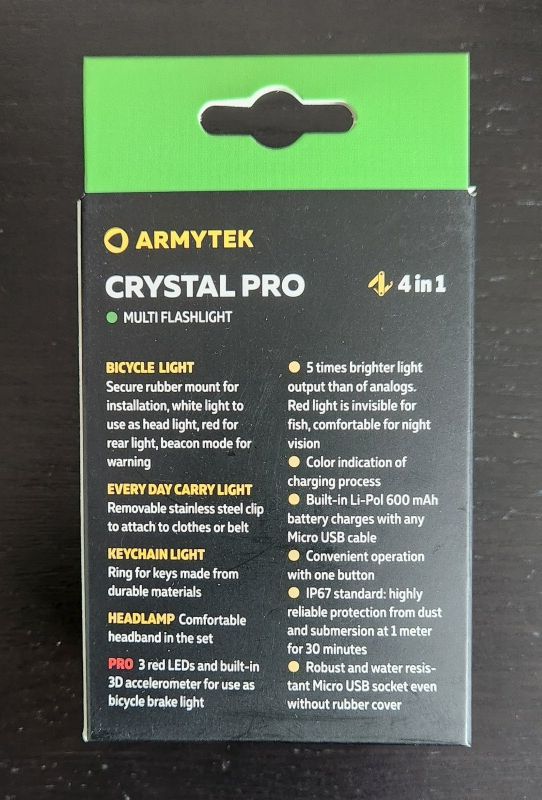
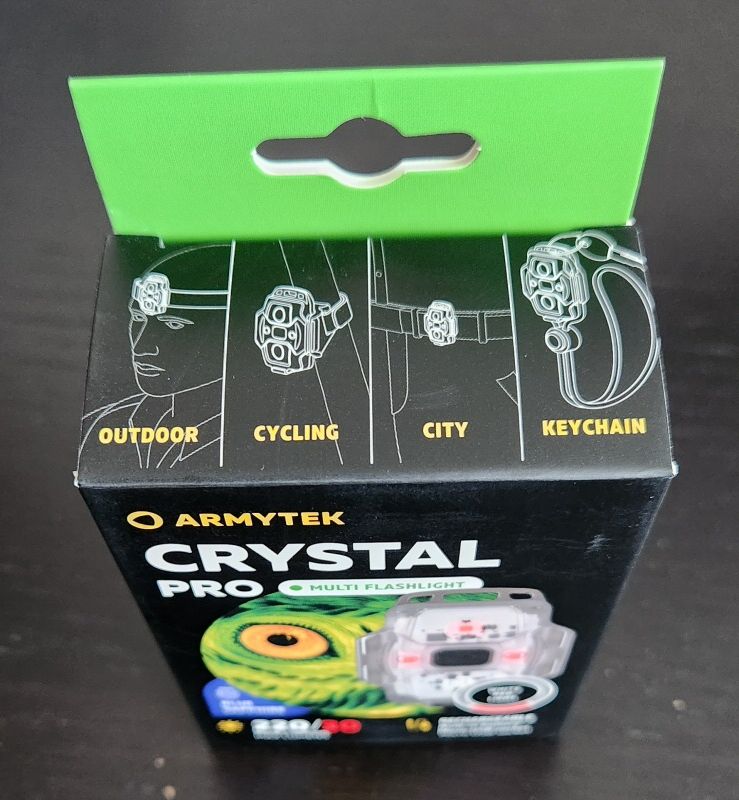
At first glance, this model doesn’t look all that different from the original pocket-sized headlamp/keychain rechargeable light that I reviewed last year. But it does offer a number of upgrades, include increased output and a novel accelerometer feature, as I will describe below. Featuring both cool white and red LEDs, this distinctive Armytek design lets you strap it to your head with the accompanying band, clip on to a jacket/bag with the built-in pocket clip, strap it to bike frame, or use as a keychain fob.

Let’s see how it performs in my testing.

Manufacturer Specifications

Note: as always, these are simply what the manufacturer provides – scroll down to see my actual testing results.

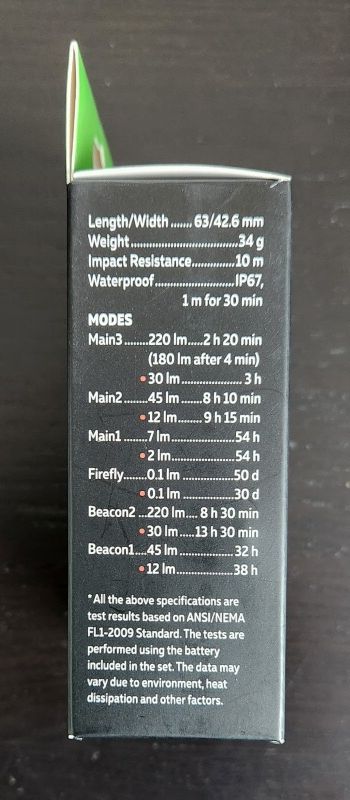
FeatureSpecsSpecs
MakerArmytekArmytek
ModelCrystal ProCrystal Pro
EmitterLXNZPL696 (White)LXNZPL696 (Red)
TintWhiteRed
Max Output (Lumens)22030
Min Output (Lumens)0.10.1
Max Runtime50 days30 days
Max Beam Intensity (cd)--
Max Beam Distance (m)14 m-
Constant Levels55
FlashingBeacon1, Beacon2Beacon1, Beacon2, Braking
BatteryLi-Pol 600 mAhLi-Pol 600 mAh
Weight (w/o battery)
Weight (with battery)34 g34 g
Length63 mm63 mm
Head Diameter42.6 mm42.6 mm
Body Diameter15 mm15 mm
WaterproofIP67 1mIP67 1m

Package Details


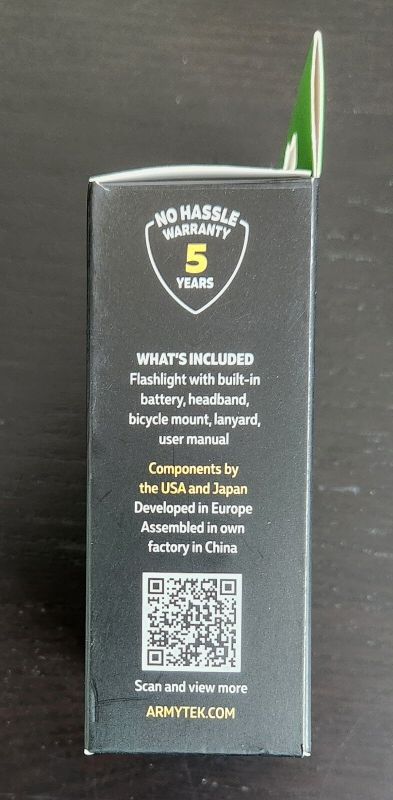
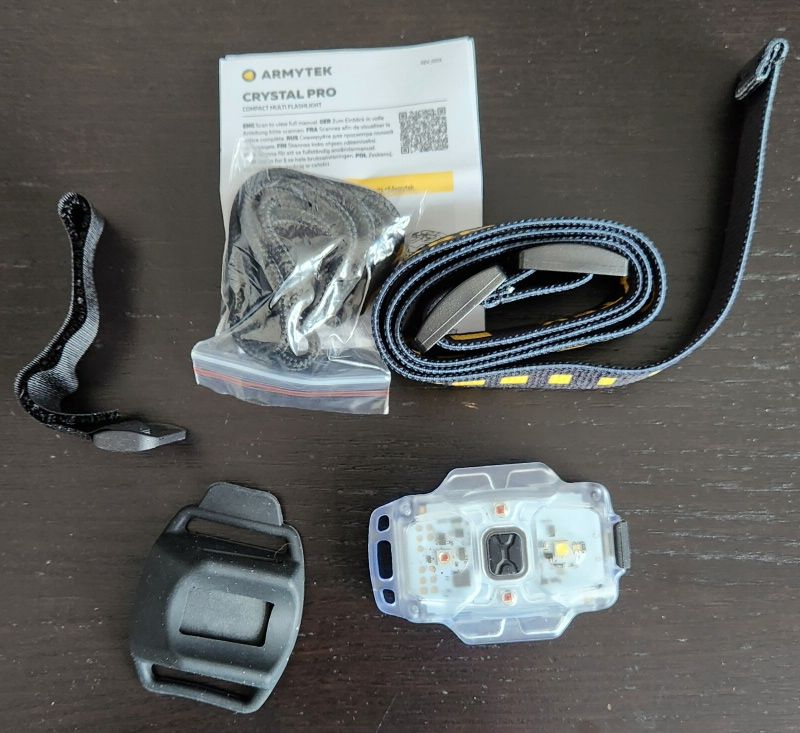
As before, the light ships in a colourful cardboard box, with plenty of labels and product details. Inside, you will find the following:

  • Crystal headlamp/keychain light, with built-in pocket clip
  • Headband
  • Bike mounting bracket and strap
  • Wrist lanyard
  • Simple manual

The package has been upgraded, with some additional ways to carry or afix the light securely. I particularly like the new bike light accessory, making it easy to mount. No charging cable was included, and you will still need one with a micro-USB port connector. It’s too bad they weren’t able to upgrade to USB-C.

Build
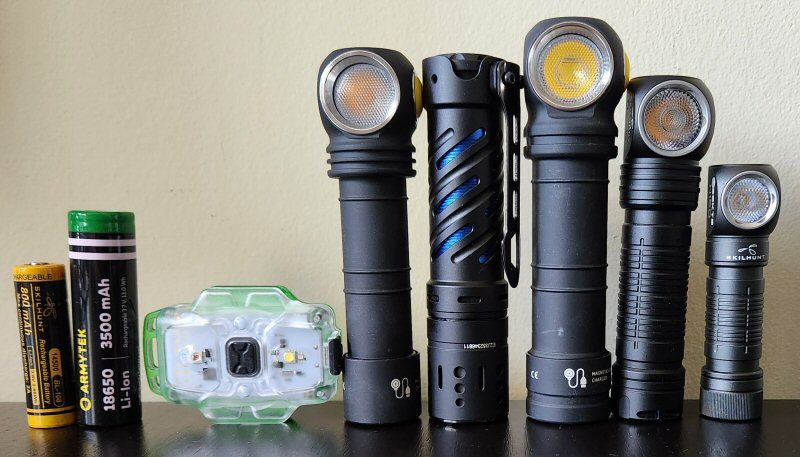

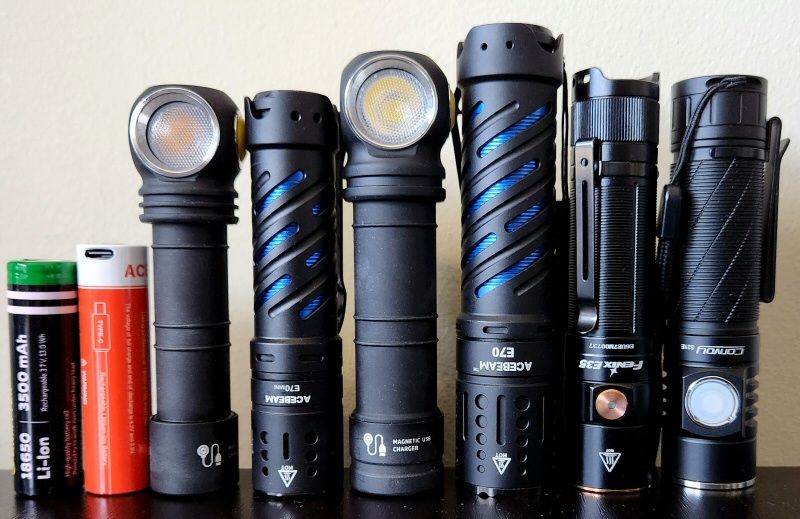
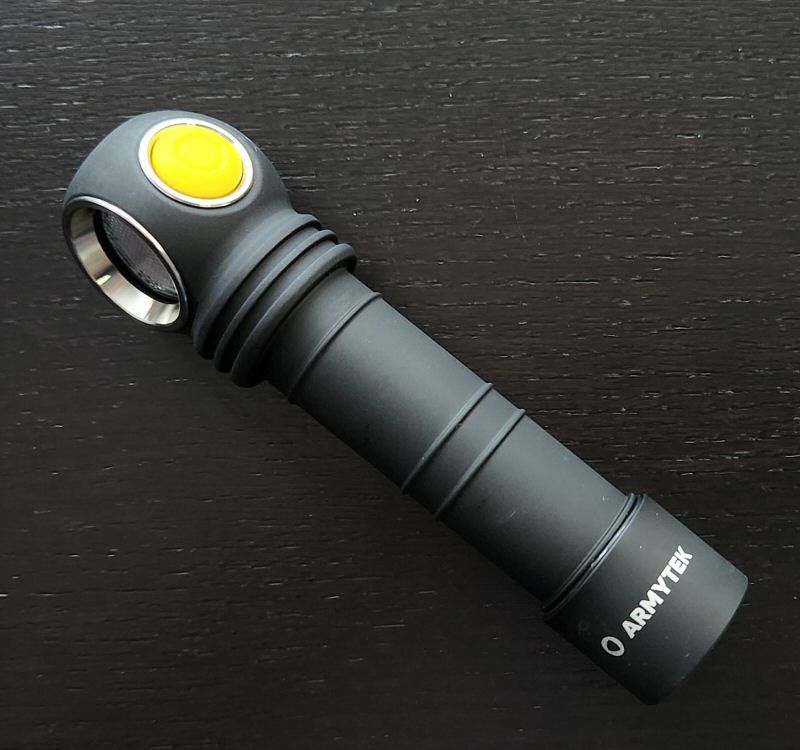
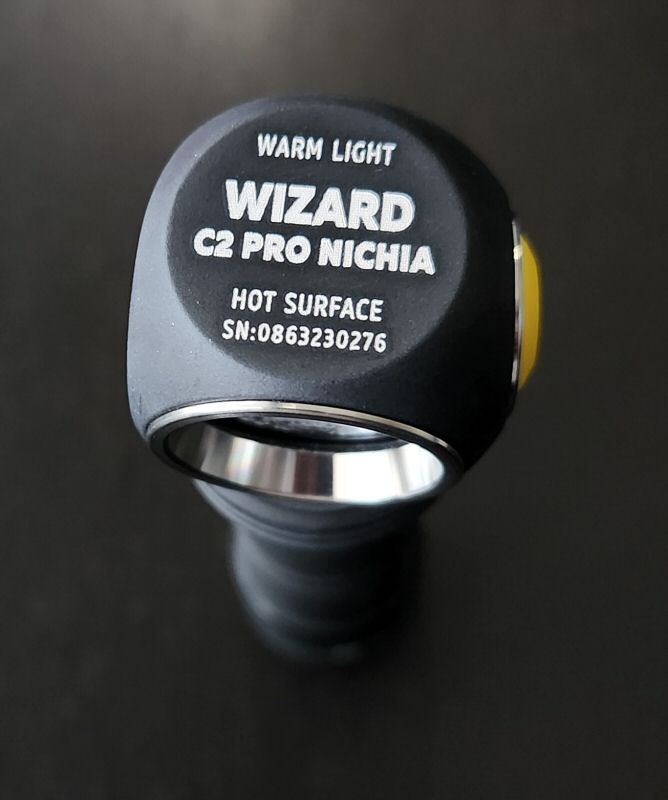
From left to right: Skilhunt 14500 (800mAh), Armytek 18650 (3500mAh), Armytek Crystal, Armytek Wizard C2 Pro Nichia, Acebeam E70 Mini, Armytek Wizard C2 Pro Max, Skilhunt H300, Skilhunt (ESKTE) H150. Note that the Crystal Pro is the same size and dimensions as the original Crystal shown above.
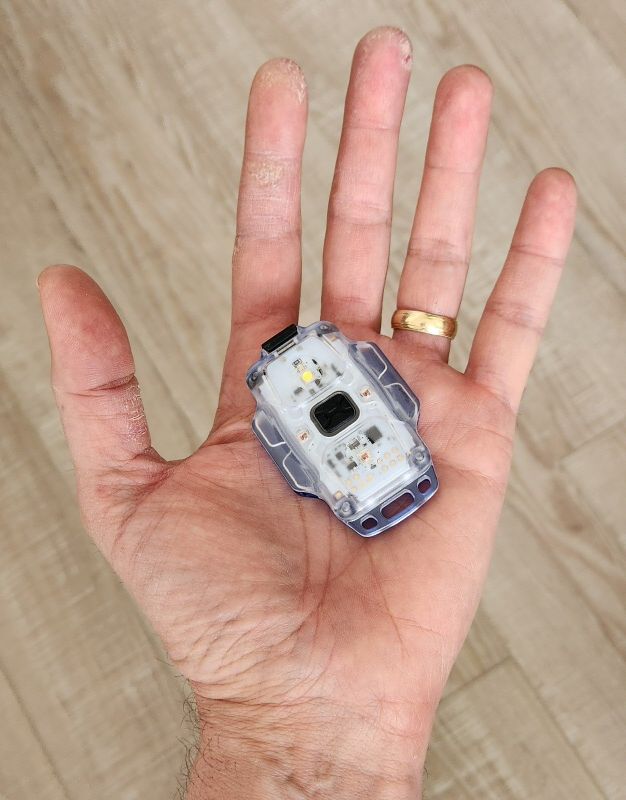
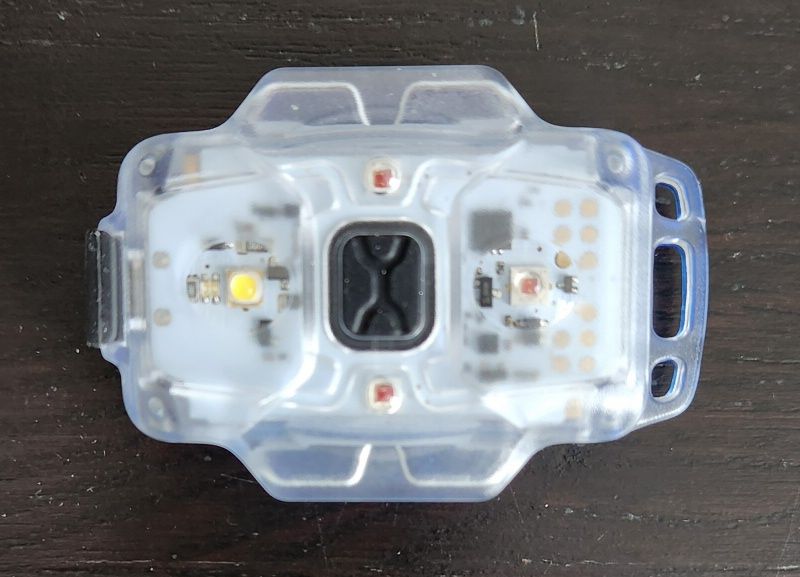
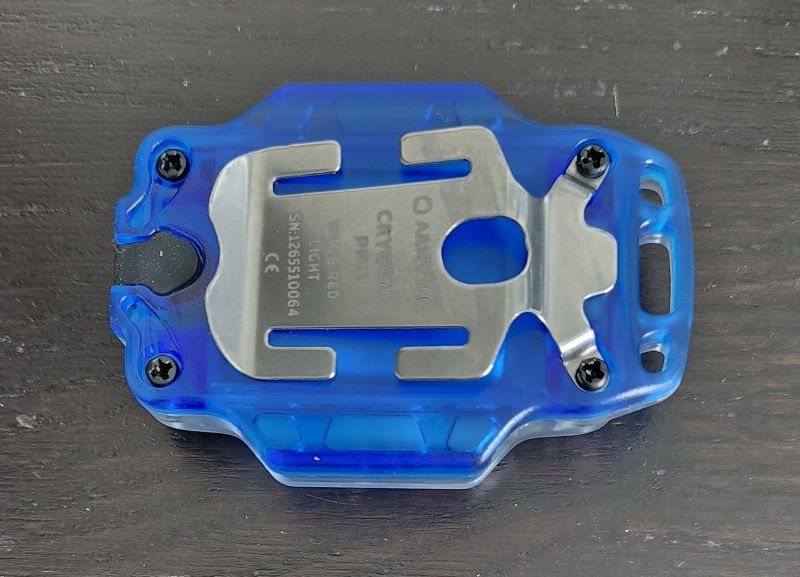
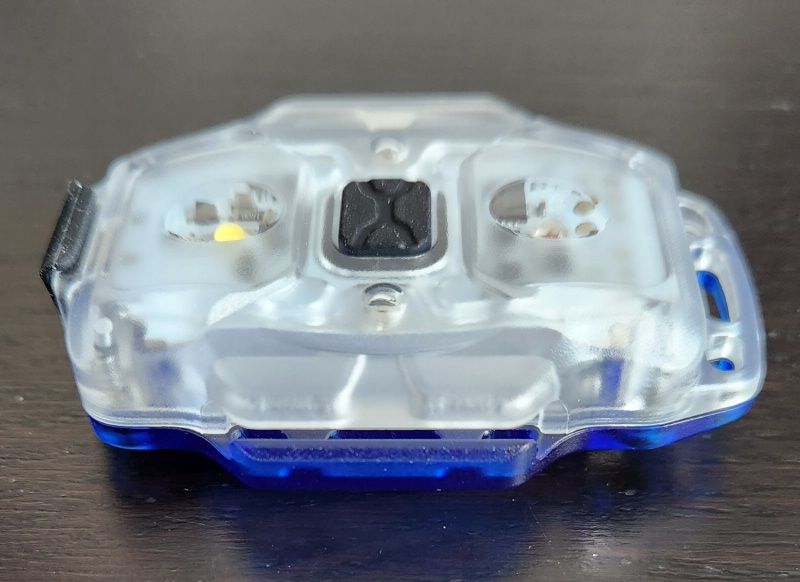
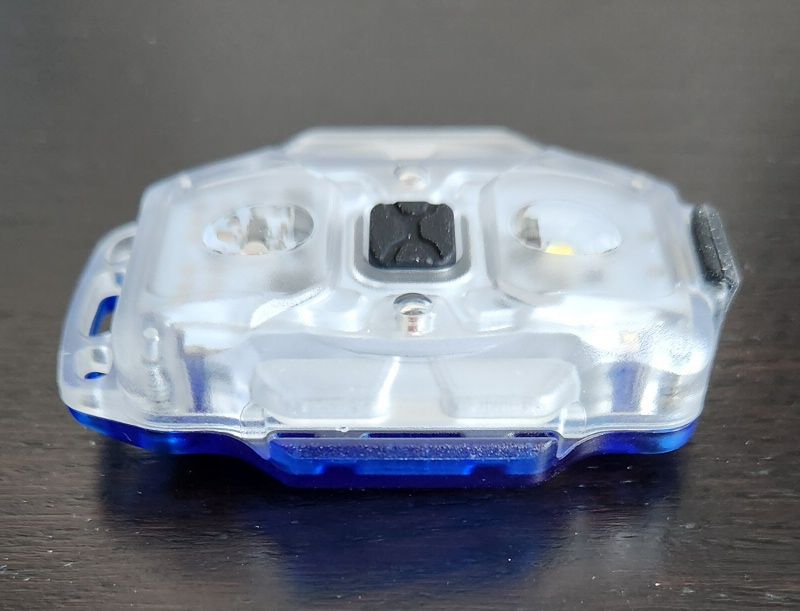
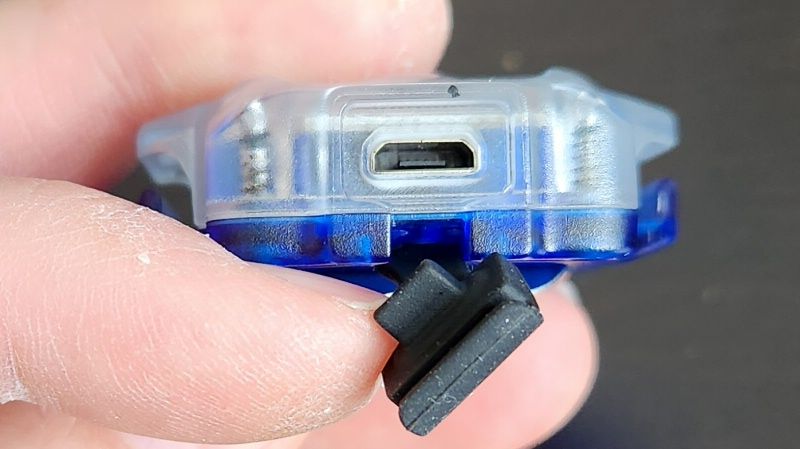
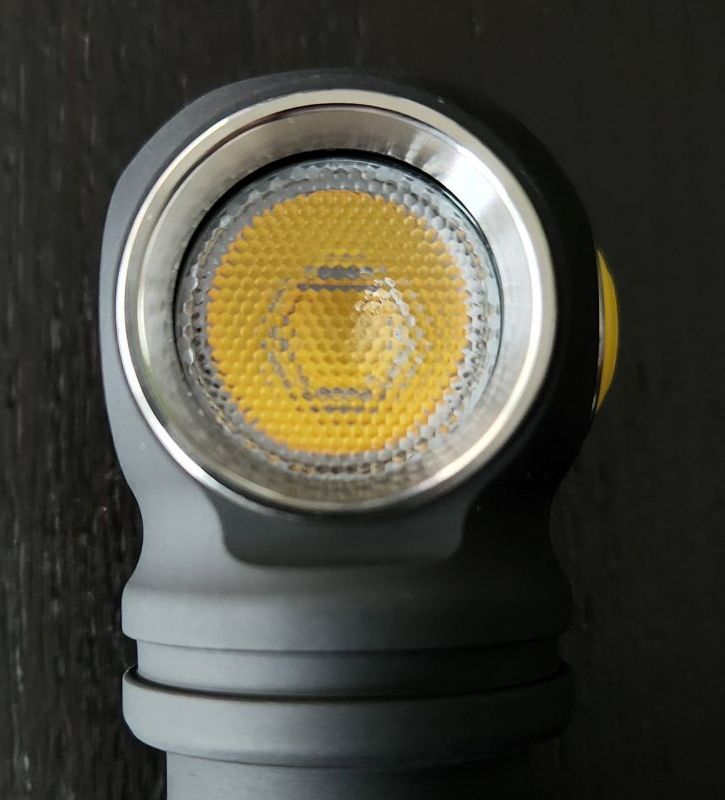
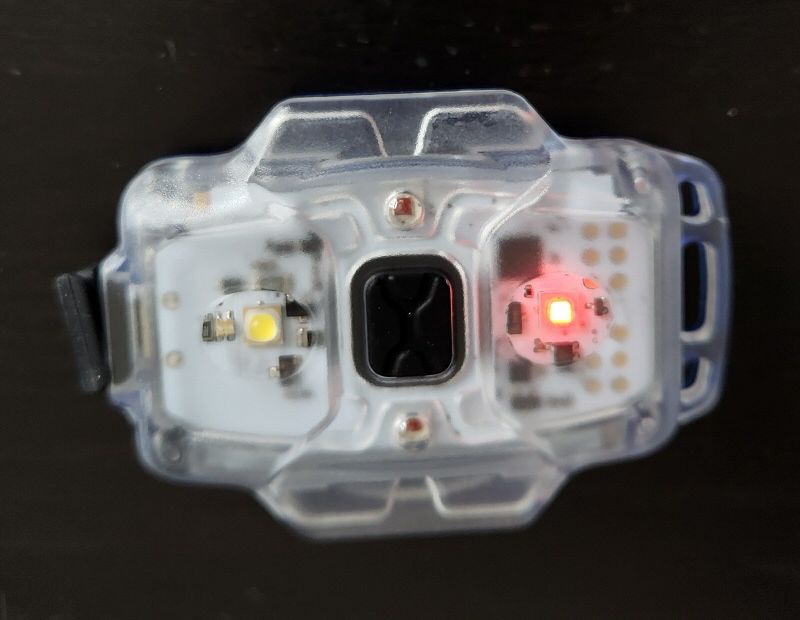
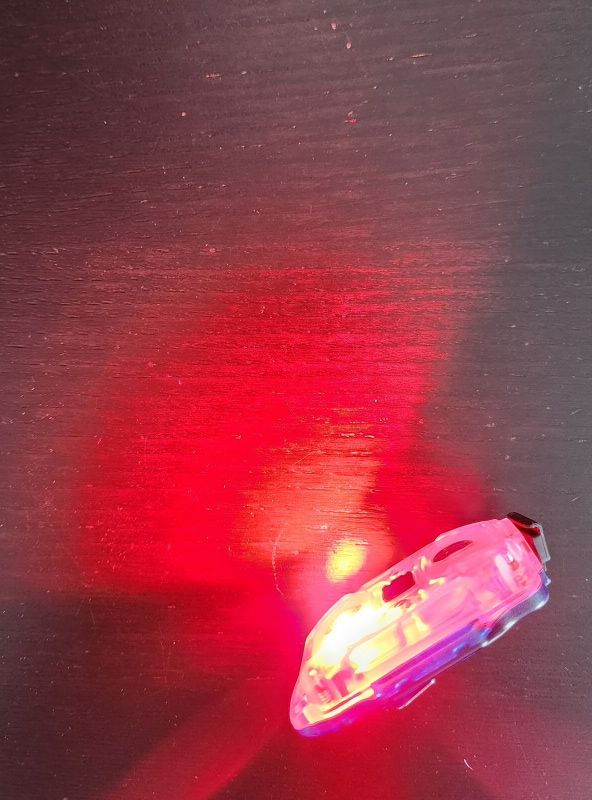
At first glance, the Crystal Pro looks very much the same as the original Crystal – at least in terms of external physical build. But on closer view, you can see there are a lot more circuit elements under the clear cover – as well as two additional red LEDs on the side.

Like before, you can buy the Crystal Pro with various coloured plastic backings. It is currently available in green, blue, red, yellow, or gray.

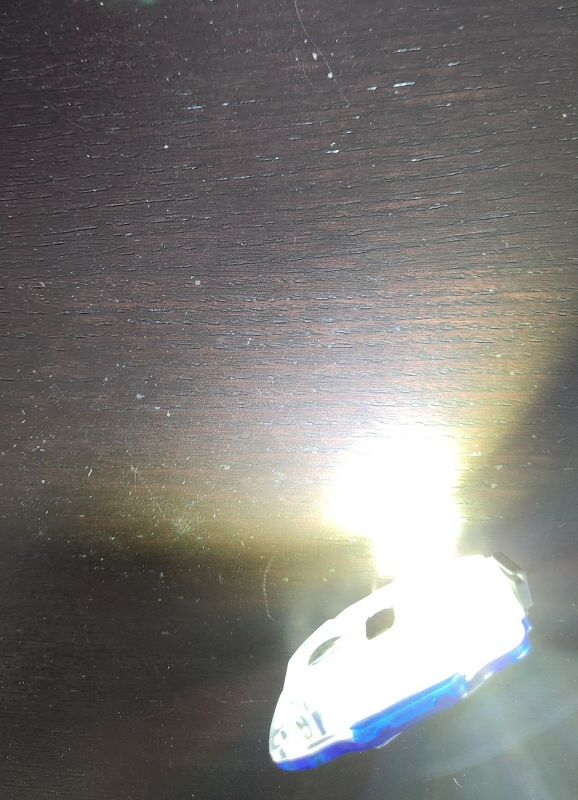
Build features a fullly transparent front cover, which allows you to see the bare emitters and the basic circuitry elements of the light. I’m guessing this is to prevent any significant colour distortions in the beam. That said, my original Crystal (on white) seemed to project a somewhat greenish-tint out the edges and sides of the light, whereas this Crystal Pro has a cooler white profile (which may in part reflect the green vs blue coloured bases).

You can clearly see the main white and red emitters above, on either side of the switch, as well as the two extra red emitters near the sides of this Pro version. These two extra red LEDs are only activated when the accelerometer is turned on and it detects a change in movement (i.e., “braking”, when using as a bike light). To use as a bike light, make sure the accelerometer is on, and put the main red emitter into a blinking mode. When the accelerometer detects a change in movement, all three red LEDs jump to max output for a few seconds. You can easily turn the accelerometer off if you don’t want to use this feature.

You have nice and solid pocket clip on the back, which will hold the light securely to a front pocket. This is actually my preferred way to carry, as it is easy to clip on and go. Alternatively you can slip it into the included headband to use as a headlamp, or use the bike frame strap. On the short edge of the light by the main red emitter is the keychain attachment point. Overall size is a bit big for keychain carry if you ask me, although I suppose it is not that much larger than a typical car key fob.

The power/mode button is located in the centre of the light. This remains a somwhat odd placement to me, as it means you will turn the light on shinning in your eyes if you looking down at what you are pressing (makes more sense if you are using as a headlamp). At least it is easy to access by feel. Traverse is good, with a definite but soft click upon activation.

On the short edge of the light by the white emitter is the micro-USB charging port under a rubber cover. I find the cover to be fairly loosely fitting, with a slight hook to hold in place (I wouldn’t consider this very waterproof at all). It’s a shame they didn’t opt for the more common USB-C emitter, but I guess they decided to keep the physical build unchanged. According to the manual, the light still uses a lithium polymer rechargeable battery of 600 mAh capacity.

One interesting feature – according to the manual, the light can still work in “lamp” mode when you plug it into a powerbank or other USB-charging source. But see my testing results below for more information on this feature.

User Interface

As noted in my other recent Armytek reviews, the included manual is actually fairly basic, and just describes the main functions of the light. You can download a more complete manual from their website here.

pretty simple, more a description of the features than an actual set of instructions. Here is a rundown from my testing:

From Off:

  • Press-and-hold the switch. Nothing initially. However, after 4 seconds the Lock out mode is engaged. The white LED will blink once, confirming the Lock out. Press-and-hold for another 4 seconds to re-activate.
  • Single-click the switch: Turns On in last memorized state.

From On:

  • Press-and-hold the switch: Start cycling through the modes of the current colour, in repeating sequence: Firefly > Main1 > Main2 > Main3 > Beacon. Release the switch to select.
  • Single-click the switch: Turns Off.
  • Double-click the switch: Switches between the two emitter choices (i.e., if you are in white light, it switches over to the red LED).
  • Triple-click the switch: Turn the Accelerometer On or Off.
    • The flashlight turns off in all modes if it has been inactive for more than 3 minutes with the Accelerometer turned On. Changing the position, causing vibration or pressing the button activates the last used mode before auto-shutdown.
    • In all red light modes, there is a bike brake light function enabled by the Accelerometer. When braking, the accelerometer detects bicycle
      deceleration, after which the flashlight increases its brightness and the two additional red LEDs are turned on for 2 seconds.
    • Braking sensitivity increases when the flashlight is installed vertically.

The Accelerometer feature is new to the Cyrstal Pro, but otherwise the UI is unchanged from the earlier model – and fairly straight-forward. Personally, I’m not a fan of having the flashing modes on the main sequence for the two emitters. But at least it is only a slow flash (i.e., not an obnoxious strobe). And I quite like the accelerometer feature as a braking bike light.

Short-cuts:

No.

Mode memory:

Yes. The light remembers both the the last mode used and the last emitter, and returns to them upon re-activation.

Strobe/Blinking modes:

Yes, there is one beacon mode (available for each emitter).

Low voltage warning:

No.

Lock-out mode:

Yes. Press-and-hold the switch from Off for at least 4 secs to lock/unlock the light.

Reviewer Comments:

This is an OK interface, easy to remember and use (although I don’t like the beacon on the main sequence). I do question the wisdom of a sustained press-hold to lock/unlock the light, but I suppose it removes the risk of an accidental activation. The new brake light feature is pretty cool, and works really well in my testing. That said, it would have been nice to be able to activate the multiple red emitters independently of the accelerometer (i.e., in a constant on mode).

Circuit Measures

Pulse-Width Modulation (PWM):

Firefly:
Firefly

Main1:
Main1

Main2:
Main2

Main3:
Main3

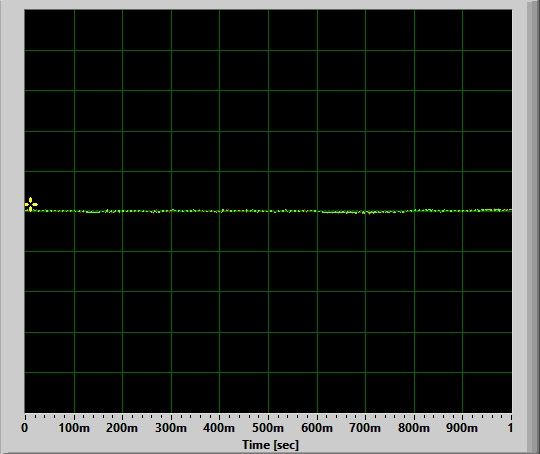
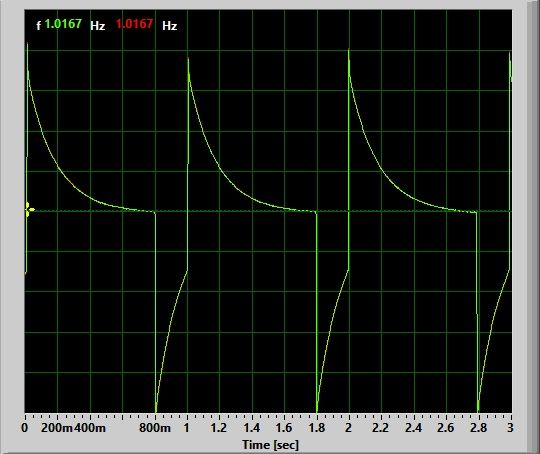
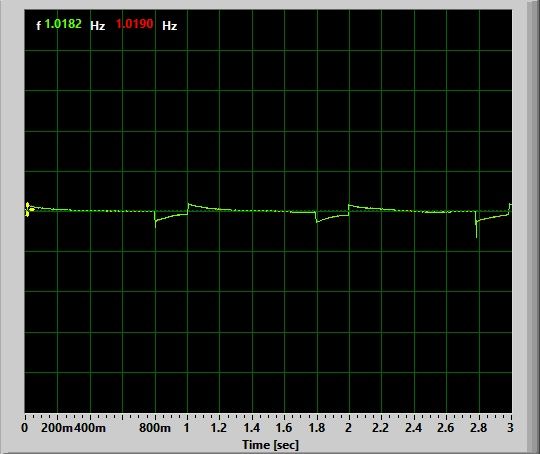
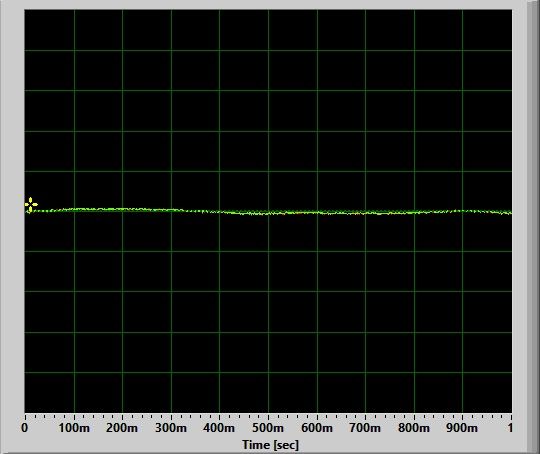
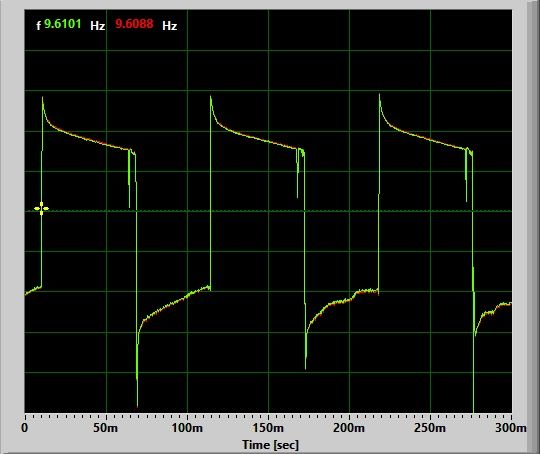
There is no sign of PWM or circuit noise on any level. The light is current-controlled, and fully flicker-free in both white and red modes. 🙂

Beacon

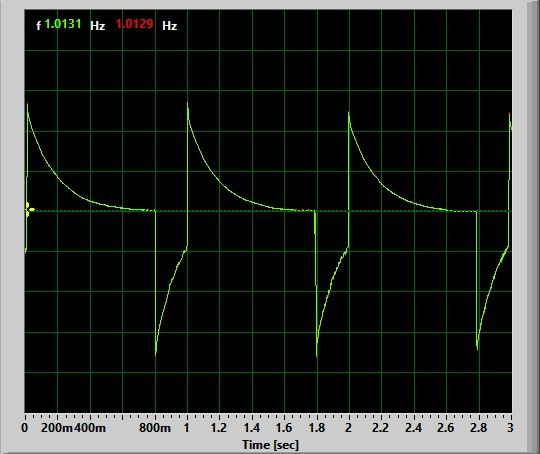
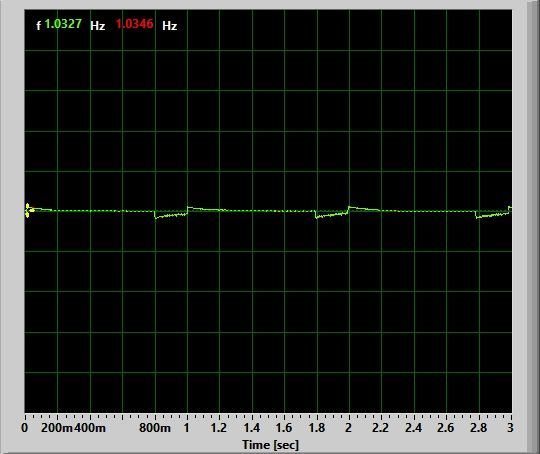
Like before, there is a single beacon mode on both red and white modes, which consists of one brief flash every second (i.e. 1 Hz). This is very reasonable as a signaling light, bike light, etc.

Charging:
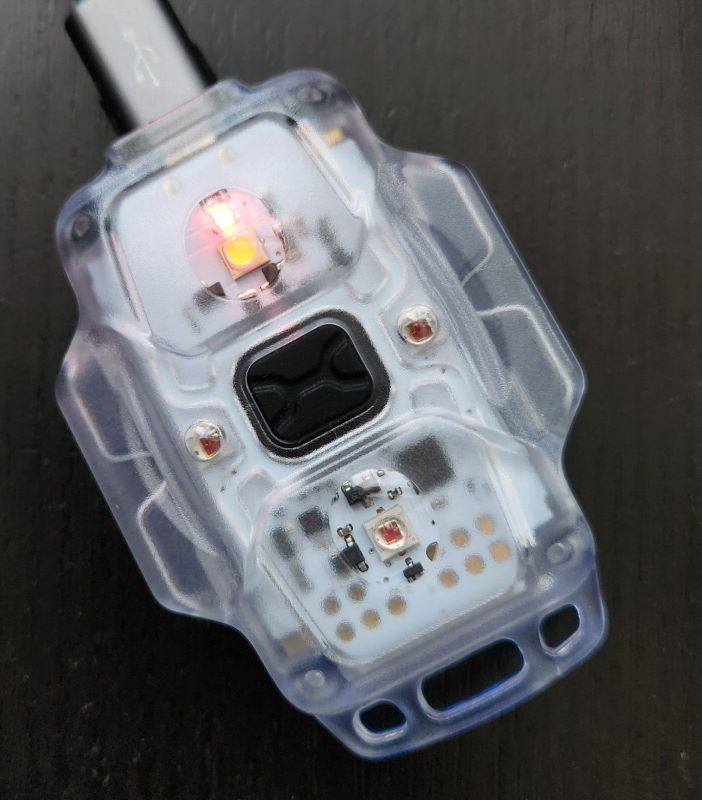
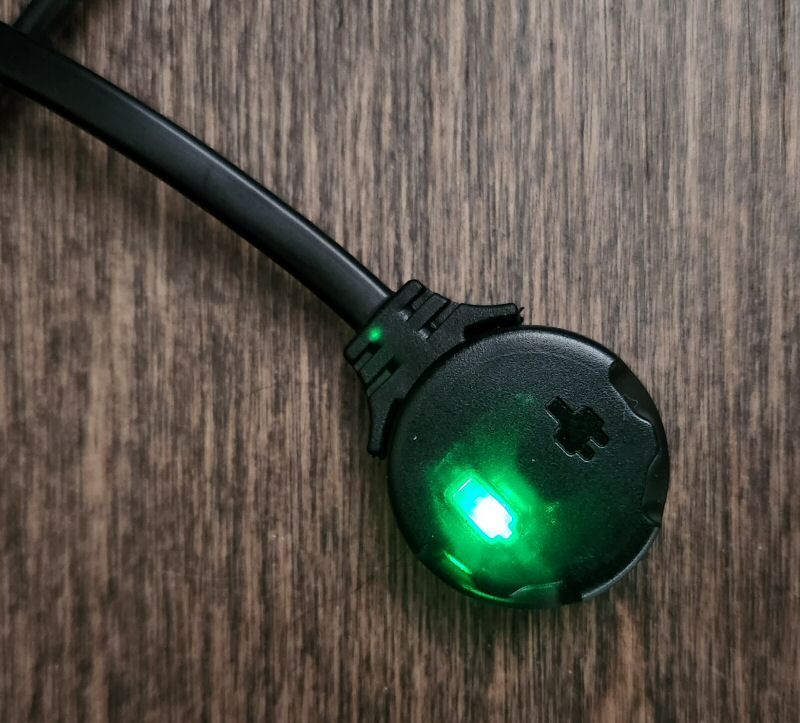
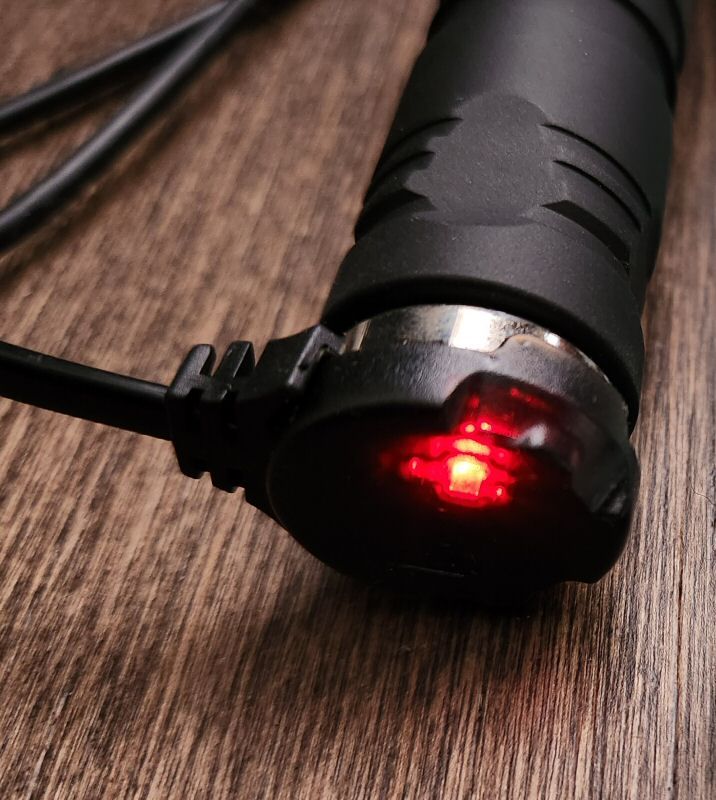
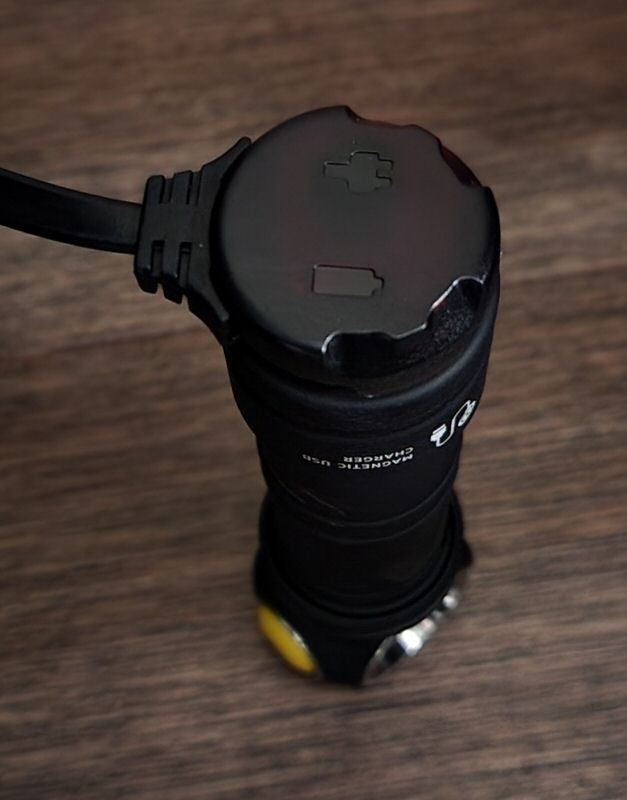
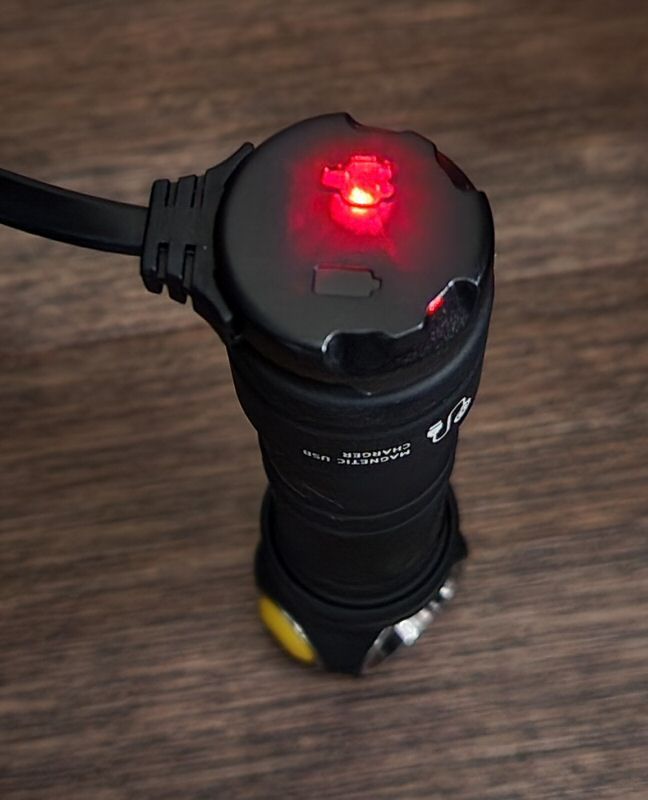
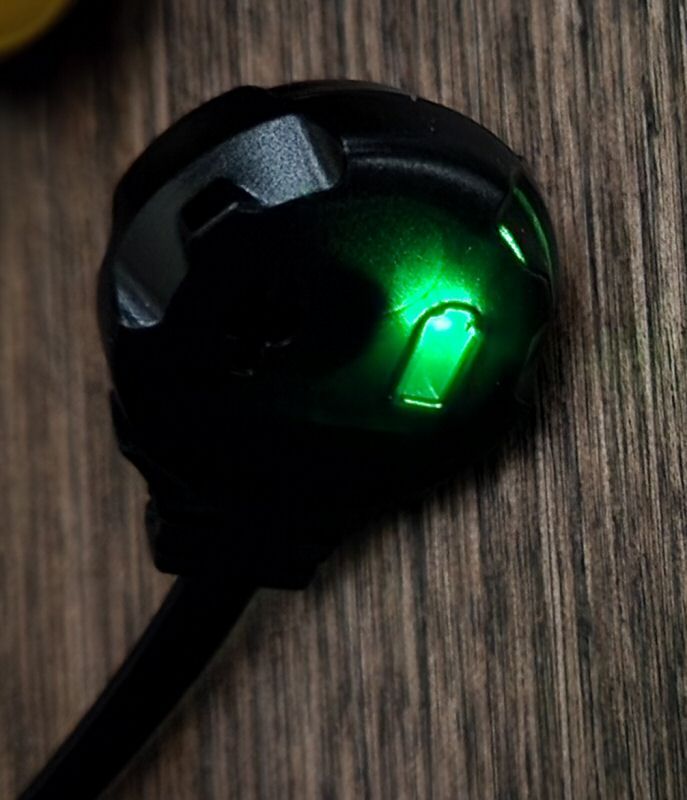
There a red/green charging indicator LED, near the white emitter. It glows solid red when charging, turning to green once it is fully charged.

Charging current:

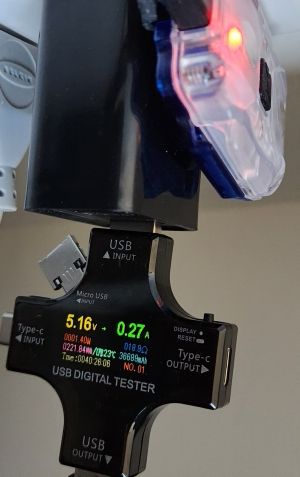
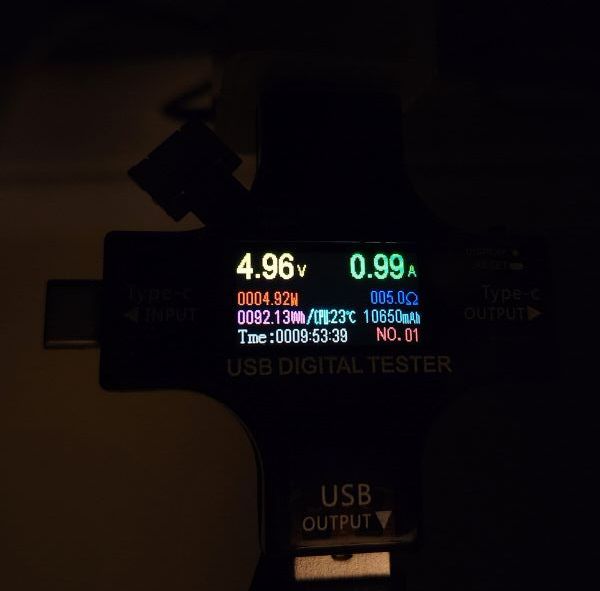
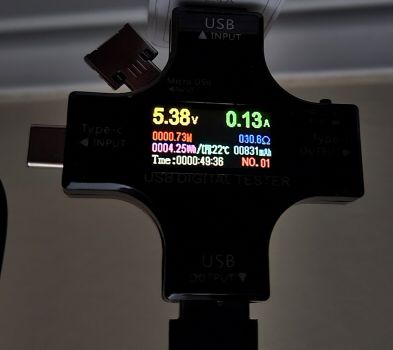
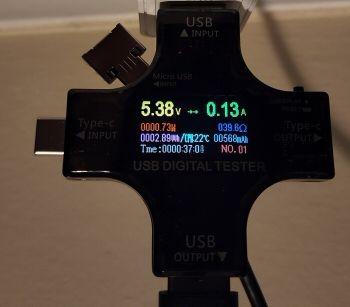
The initial charging current can be a bit lower, but it quickly jumps to ~0.30A, and then slowly drops from there as the battery charges fully.

I didn’t time how long it take to charge the light, but Armytek says is 2hr 50 mins to a full charge. Sounds about right, I don’t think it took much longer than 2 hours on any of my tests.

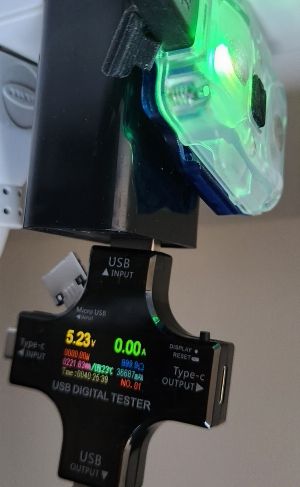
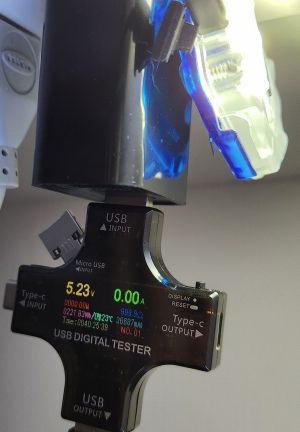
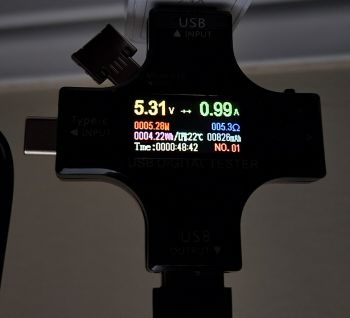
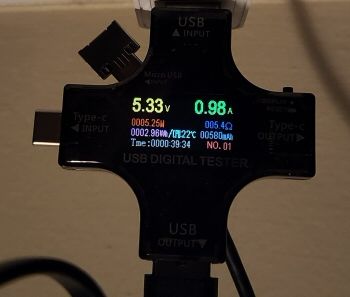
As noted in my review of the original Crystal, one interesting feature of this light is its ability to serve as a worklight when plugged into AC power or a power bank. I measured the current drain on the original Crystal light, and found it started to move up from zero at the Main 2 level, with a significant drain on Main 3 (equivalent to the charging current). However, my Crystal Pro doesn’t show this pattern – regardless of the charge status, the current drops to zero as soon as you turn the light on.

To illustrate, shown below are 3 states: the light off and charging, the light turned On in Firefly, and the light On in Main3.

Despite the light not being fully charged while plugged in, the charging LED switches to green as soon as you turn it on, and the current drops to zero (i.e., acts like it is fully charged and Off). I’m not sure what is going on here, but it suggests my sample of the Crystal Pro would no longer work as a plugged-in worklight.

Standby / Parasitic Drain:

Given the electronic nature of the switch, there must be a standby current at all times. However, without breaking it open, and I am not able to measure it.

Emitter Measures

In this section, I directly measure key emitter characteristics of my sample in terms of colour temperature, tint, and colour rendition. Please see my Emitter Measures page to learn more about what these terms mean, and how I am measuring them. As tint in particular can shift across levels, I typically stick with the highest stably regulated level for all my reported measures.

As explained on that page, since I am using an inexpensive uncalibrated device, you can only make relative comparisons across my reviews (i.e., don’t take these numbers as absolutely accurate values, but as relatively consistent across lights in my testing).

White Main 3 Level:

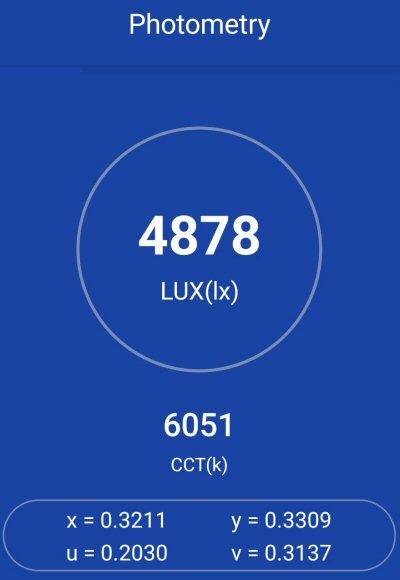
The key measures above are the colour temperature of ~6050K, and no measured tint  shift (-0.0000 Duv). For CRI (Ra), I measured a combined score of 73.

These values are very consistent with a cool white emitter – and somewhat similar to my original Crystal. But interestingly, I find there is a bluish tinge to the peripheral spill of this light – just like I found a greenish tinge on the original Crystal. This seems like further indication that the colour plastic base you choose can influence your perception of the overall tint.

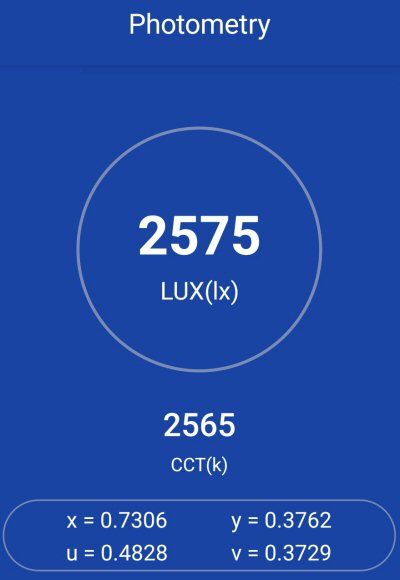
Out of curiosity, I decided to run the main red emitter through my Light Master 2 meter, to see what it reported. Although these are not designed for monochromatic light sources, its readings seemed reasonable:

Red Main3 level:

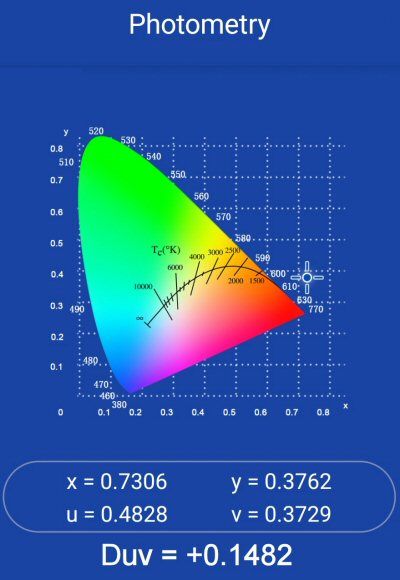
Just like my original Crystal, the red light is well off the Planckian locus, well into the red end of the spectrum (and so, the CCT and Duv are meaningless here).

Beamshots

Sorry, no beamshots for keychain lights. 🙂

Testing Results

My summary tables are generally reported in a manner consistent with the ANSI FL-1 standard for flashlight testing. In addition to the links above, please see my output measures page for more background.

All my output numbers are based on my home-made lightbox setup. As explained on that methodology page, I have devised a method for converting my lightbox relative output values to estimated lumens. My Peak Intensity/Beam Distance are directly measured with a NIST-certified Extech EA31 lightmeter.

Crystal Pro Testing Results

EmitterModeSpec LumensEstimated Lumens @0secEstimated Lumens @30 secsBeam Intensity @0secBeam Intensity @30secsBeam Distance @30secsPWM/Strobe FreqNoise FreqCharging Current <3VCharging Current >3VParasitic DrainWeight w/o BatteryWeight with BatteryCCT (K)DuvCRI
WhiteFirefly0.10.130.13-------Yes (not measured)-34 g---
WhiteMain1777-------Yes (not measured)-34 g---
WhiteMain2454342-------Yes (not measured)-34 g---
WhiteMain322024524086 cd81 cd18 m----Yes (not measured)-34 g6,0500.000073
WhiteBeacon145---------Yes (not measured)-34 g---
WhiteBeacon2220---------Yes (not measured)-34 g---
RedFirefly0.10.030.03-------Yes (not measured)-34 g---
RedMain121.71.7-------Yes (not measured)-34 g---
RedMain2121717-------Yes (not measured)-34 g---
RedMain3304543-------Yes (not measured)-34 g2,5650.1482-
RedBeacon112---------Yes (not measured)-34 g---
RedBeacon230---------Yes (not measured)-34 g---
RedBraking-105--------Yes (not measured)-34 g---

Estimated output in my lightbox is pretty close to the rated specs across all levels. Indeed, the red emitter reports higher values in my lightbox – but I never calibrated my light sensor for monochromatic sources, so that could be artifactual.

It’s great to see the true moonlight mode here, for both emitters. And the bike “braking” mode is quite bright with the 3 red emitters – just over 100 lumens in my testing!

To view and download full testing results for all modern lights in my testing, check out my Database page.

Runtimes

As always, my runtimes are done under a small cooling fan, for safety and consistency. To learn more about how to interpret runtime graphs, see my runtimes methodology page.

The Crystal Pro definitely has a white light max output advantage over the older Crystal model I tested. The white emitter Main3 output is still basically direct-drive in appearance, slowly dropping off over 2 hours as the battery drains. Main2 remains regulated over its ~6.5 hour run, with a slightly staggered pattern as it keeps the output within a narrow range (slightly higher than the old Crystal).

The red emitter Main3 output is pretty much unchanged from the Crystal, and resembles the white Main2 in its regulation pattern. It lasts ~2.5 hours in my testing.

Here is how the Crystal Pro compares to the lower output levels of some of other recent headlamps:

Headlamps

These results are very much in keeping with Armytek’s specs, and seem reasonable for the stated 600 mAh capacity of the built-in battery.

Pros and Cons

ProsCons
Good build quality and feature set, suitable as a headlamp, pocket clip, keychain or bike brake light.Fairly simple design, with power/mode button on front-face with the emitters.
Very good regulation pattern, with constant-current flat stabilization.A bit too large for a keychain light, but works well as a headlamp/pocket clip/bike light
Very floody beam without artifacts, for both cool white and red LEDsRechargeable battery built-in, but still with older micro-USB connector.
Accelerometer and extra red LEDs (new on Pro version) makes for a very effective bike brake light.
Accurate product specs.

Overall Rating

Preliminary Conclusions

The Crystal Pro is a nice upgrade from the Crystal – but probably not enough to make you want to switch if you are happy with the original model. Simply put, you get a bit more output on the white LED, and the nice bonus of a brake-light accelerometer feature which is surprisingly bright and useful as a bike tail light.

As before, this is a very versatile little headlamp/keychain/bike light. It is lightweight and easy to attach or carry in a variety ways. It has both white and red flood lights (the later is particularly good for maintaining night vision, or for not attracting bugs/animals). It has a good range of levels, including moonlight and a signaling beacon for each emitter. And its performance is excellent across all levels on its built-in rechargeable lithium polymer battery.

By design, the light is a full flooder, without much throw (i.e., there is no optic to focus the emitters). Other than that, it is mainly small issues that persist from the first generation Crystal – like the simple UI (with strobe on the main circuit), micro-USB port, and front switch location. I find it to be a great little headlamp or bike light.

Price doesn’t factor into my star rating system, but I find this light to be pretty reasonably priced considering what you get. It is is certainly a lot cheaper (and lighter) than a lot of other headlamp models out there. Of course, it won’t last as longer as larger models with heavier batteries – but the runtimes are perfectly reasonable for what you are getting here.

If you are looking for a budget headlamp that does multiple duty as a front-facing pocket light, or especially as a bike light, the Crystal Pro is good option to consider.

Acknowledgement

The Crystal Pro was provided by Armytek for review. As always, all opinions are my own and the light received the same rigourous and objective testing as all other lights that I have reviewed. At the time of review, this light retails for $35 USD (~$50 CDN).

Armytek Crystal Headlamp/Keychain

  1. Introduction
  2. Manufacturer Specifications
  3. Package Details
  4. Build
  5. User Interface
  6. Circuit Measures
  7. Emitter Measures
  8. Beamshots
  9. Testing Results
  10. Runtimes
  11. Pros and Cons
  12. Overall Rating
  13. Preliminary Conclusions
  14. Acknowledgement

Introduction

This is another mini-review of a pocket-sized headlamp/keychain rechargeable light, the Armytek Crystal. Featuring both a cool white and a red LED, this innovative design lets you strap it to your head with the accompanying band, clip on to a jacket/bag with the built-in pocket clip, strap it to bike frame, or use as a keychain fob.

I won’t be providing quite as much commentary as usual (and beamshots will definitely be out), but otherwise will provide my full suite of testing results so that you can make informed decisions around output, use and performance.

Let’s see how it performs in my testing.

Manufacturer Specifications

Note: as always, these are simply what the manufacturer provides – scroll down to see my actual testing results.

FeatureSpecsSpecs
MakerArmytekArmytek
ModelCrystalCrystal
EmitterLXNZPL696 (White)LXNZPL696 (Red)
TintCool whiteRed
Max Output (Lumens)15030
Min Output (Lumens)0.10.1
Max Runtime50 days30 days
Max Beam Intensity (cd)36 cd7 cd
Max Beam Distance (m)12 m5 m
Constant Levels44
FlashingBeaconBeacon
BatteryLi-Pol 600 mAhLi-Pol 600 mAh
Weight (w/o battery)
Weight (with battery)34 g34 g
Length63 mm63 mm
Head Diameter42.6 mm42.6 mm
Body Diameter14.8 mm14.8 mm
WaterproofIP67 1mIP67 1m

Package Details


The light ships in a colourful cardboard box, with plenty of labels and product details.  Inside, you will find the following:

  • Crystal Headlamp/Keychain light, with built-in pocket clip
  • Headband
  • Adhesive pad
  • Two large black silicone rings (to secure to a bike frame)
  • Simple manual

It’s a basic package, but has what you need to afix the light securely. No charging cable was included, and you will need one with a micro-USB port connector.

Build


From left to right: AAA NiMH, AA NiMH, Wurkkos Keychain SQ05, Armytek Crystal.


One comment to make up front – you can buy the Crystal with various coloured plastic backings. It is currently available in green, blue, red, yellow, or gray. There is also a WRB version, which features a flashing blue/red light, which comes with a blue or gray backing.

Build features a fullly transparent front cover, which allows you to see the bare emitters and the basic circuitry elements of the light. I’m guessing this is to prevent any significant colour distortions in the beam. On that front, most of the colour variations you are seeing above are really just from my camera’s auto-adjust feature, or reflections off my desk. That said, the white emitter does seem to project a somewhat greenish-tint out the edges and sides of the light, likely by reflecting off or through the green plastic backing of my sample.

You can clearly see the main white and red emitters above, on either side of the switch.

You have nice and solid pocket clip on the back, which will hold the light securely to a front pocket. This is actually my preferred way to carry, as it is easy to clip on and go. Alternatively you can slip it into the included headband to use as a headlamp, or use the bike frame securing rings. On the short edge of the light by the red emitter is the keychain attachment point. Overall size is a bit big for keychain carry if you ask me, although I suppose it is not that much larger than a typical car key fob.

The power/mode button is located in the centre of the light. This seems like a bit of an odd placement to me, as it means you will turn the light on shinning in your eyes if you looking down at what you are pressing (makes more sense if you are using as a headlamp). At least it is easy to access by feel. Traverse is good, with a definite but soft click upon activation.

On the short edge of the light by the white emitter is the micro-USB charging port under a rubber cover. I find the cover to be fairly loosely fitting, with a slight hook to hold in place (I wouldn’t consider this very waterproof at all). It’s a shame they didn’t opt for the more common USB-C emitter, but I gather this model has been around for awhile now. According to the manual, the light uses a lithium polymer rechargeable battery of 600 mAh capacity.

One interesting feature – according to the manual, the light can work in “lamp” mode when you plug it into a powerbank or other USB-charging source. I presume that means it runs directly off the power source, instead of the internal battery.

User Interface

As noted in my other recent Armytek reviews, the included manual is actually fairly basic, and just describes the main functions of the light. You can download a more complete manual from their website here.

pretty simple, more a description of the features than an actual set of instructions. Here is a rundown from my testing:

From Off:

  • Press-and-hold the switch. Nothing initially. However, after 4 seconds the Lock out mode is engaged. The white LED will blink once, confirming the Lock out. Press-and-hold for another 4 seconds to re-activate.
  • Single-click the switch: Turns On in last memorized state.

From On:

  • Press-and-hold the switch: Start cycling through the modes of the current colour, in repeating sequence: Firefly > Main1 > Main2 > Main3 > Beacon. Release the switch to select.
  • Single-click the switch: Turns Off.
  • Double-click the switch: Switches between the two emitter choices (i.e., if you are in white light, it switches over to the red LED).

And that’s it, fairly straight-forward and easy enough to remember. That said, I’m not personally a fan of having the flashing mode on the main sequence. But at least it is only a slow flash (i.e., not an obnoxious strobe).

Short-cuts:

No.

Mode memory:

Yes. The light remembers both the the last mode used and the last emitter, and returns to them upon re-activation.

Strobe/Blinking modes:

Yes, there is one beacon mode (available for each emitter).

Low voltage warning:

No.

Lock-out mode:

Yes. Press-and-hold the switch from Off for at least 4 secs to lock/unlock the light.

Reviewer Comments:

This is an OK interface, easy to remember and use (although I don’t like the beacon on the main sequence). I do question the wisdom of a sustained press-hold to lock/unlock the light, but I suppose it removes the risk of an accidental quick-click.

Circuit Measures

Pulse-Width Modulation (PWM):

Firefly:
Firefly

Main1:
Main1

Main2:
Main2

Main3:
Main3

There is no sign of PWM or circuit noise on any level. The light is current-controlled, and fully flicker-free in both white and red modes. 🙂

Beacon

There is a single beacon mode on both red and white modes, which consists of one brief flash every second (i.e. 1 Hz). This is very reasonable as a signaling light, bike light, etc.

Charging:
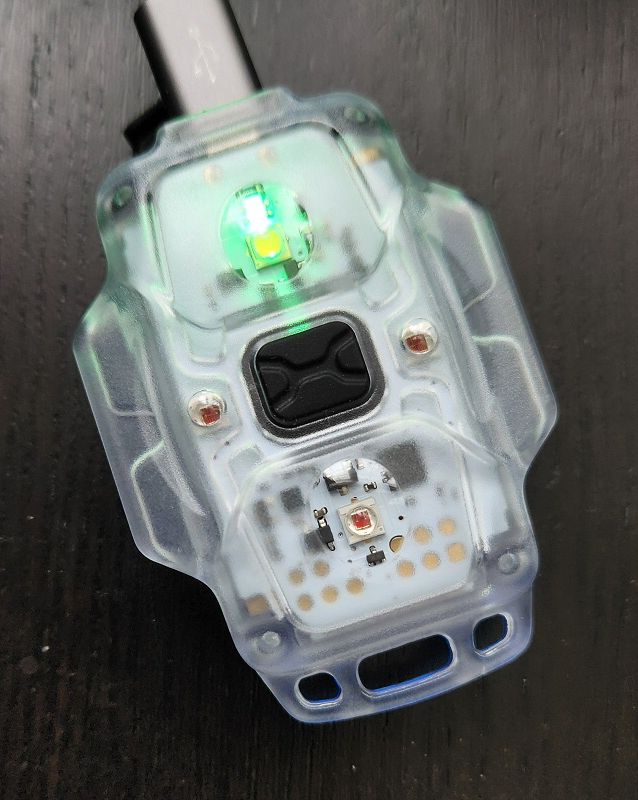
There a red/green charging indicator LED, near the white emitter. It glows solid red when charging, turning to green once it is fully charged.

Initial charging current when heavily depleted:

After a few seconds:

The initial charging current is ~0.10A, when the battery is nearly fully depleted (i.e., just a very low output from the emitters). As the light charges, the charging current quickly jumps to ~0.30A, and then slowly drops from there as the battery charges fully.

I didn’t time how long it take to charge the light, but Armytek says is 2hr 50 mins to a full charge. Sounds about right, I don’t think it took much longer than 2 hours on any of my tests.

One interesting feature of this light is its ability to serve as a worklight when plugged into AC power or a powerbank. I measured the current drain when fully charged and plugged into the wall. Sequence of the images below is:

Off > Firefly > Main1 > Main2 > Main3

As you can see above, the current drain starts to titch up from zero at the Main 2 level. When on Main 3, the current drain jumps up to an equivalent level as when it is charging from Off.

Standby / Parasitic Drain:

Given the electronic nature of the switch, there must be a standby current at all times. However, without breaking it open, and I am not able to measure it.

Emitter Measures

In this section, I directly measure key emitter characteristics of my sample in terms of colour temperature, tint, and colour rendition. Please see my Emitter Measures page to learn more about what these terms mean, and how I am measuring them. As tint in particular can shift across levels, I typically stick with the highest stably regulated level for all my reported measures.

As explained on that page, since I am using an inexpensive uncalibrated device, you can only make relative comparisons across my reviews (i.e., don’t take these numbers as absolutely accurate values, but as relatively consistent across lights in my testing).

White Main 2 Level:

The key measures above are the colour temperature of ~6140K, and no measured tint  shift (-0.0001 Duv). For CRI (Ra), I measured a combined score of 75.

These values are very consistent with a cool white, and match my visual experience of this light. As mentioned above, I did notice a greenish-yellow tinge to the peripheral spill of the light, but I think that is from reflections off the green translucent plastic base of my sample.

Just out of curiosity, I decided to run the red emitter through my Light Master 2 meter, to see what it said. Although these are not designed for monochromatic light sources, its readings seemed reasonable:

Red Main2 level:

As you can see, the red light is well off the Planckian locus, well into the red end of the spectrum (and so, the CCT and Duv are meaningless here).

Beamshots

Sorry, no beamshots for keychain lights. 🙂

Testing Results

My summary tables are generally reported in a manner consistent with the ANSI FL-1 standard for flashlight testing. In addition to the links above, please see my output measures page for more background.

All my output numbers are based on my home-made lightbox setup. As explained on that methodology page, I have devised a method for converting my lightbox relative output values to estimated lumens. My Peak Intensity/Beam Distance are directly measured with a NIST-certified Extech EA31 lightmeter.

Crystal Testing Results

EmitterModeSpec LumensEstimated Lumens @0secEstimated Lumens @30 secsBeam Intensity @0secBeam Intensity @30secsBeam Distance @30secsPWM/Strobe FreqNoise FreqCharging Current <3VCharging Current >3VParasitic DrainWeight w/o BatteryWeight with BatteryCCT (K)DuvCRI
WhiteFirefly0.10.110.12---NoNo0.10 A0.30 A--34 g---
WhiteMain154.94.9---NoNo0.10 A0.30 A--34 g---
WhiteMain23635.035---NoNo0.10 A0.30 A--34 g---
WhiteMain3150170.0160101 cd94 cd19 mNoNo0.10 A0.30 A--34 g6,140-0.000175
WhiteBeacon150-----1 HzNo0.10 A0.30 A--34 g---
RedFirefly0.10.040.04---NoNo0.10 A0.30 A--34 g---
RedMain121.61.6---NoNo0.10 A0.30 A--34 g---
RedMain2121616---NoNo0.10 A0.30 A--34 g---
RedMain3304342---NoNo0.10 A0.30 A--34 g---
RedBeacon30-----1 HzNo0.10 A0.30 A--34 g---

Estimated output in my lightbox is pretty close to the rated specs across all levels. Indeed, the red emitter reports higher values in my lightbox – but I never calibrated my light sensor for monochromatic sources, so that could be artifactual.

It’s great to see the true moonlight mode here, for both emitters.

To view and download full testing results for all modern lights in my testing, check out my Database page.

Runtimes

As always, my runtimes are done under a small cooling fan, for safety and consistency. To learn more about how to interpret runtime graphs, see my runtimes methodology page.
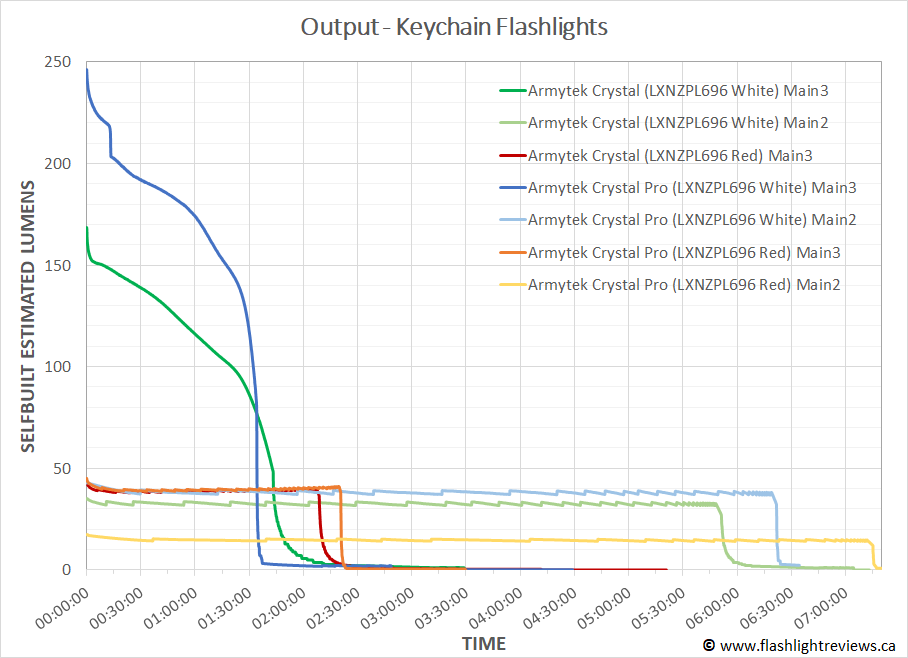
The white emitter Main3 output is basically direct-drive in appearance, slowly dropping off over 2 hours as the battery drains. In contrast Main2 is regulated over its ~6 hour run, with a slightly staggered pattern as it keeps the output within a narrow range around ~35 lumens in my lightbox.

The red emitter Main3 output resembles the white Main2 in its regulation pattern, and lasts for a little over 2 hours in my testing.

Here is how the Crystal compares to the lower output levels of my 18650 headlamps:

These results are very much in keeping with Armytek’s specs, and seem reasonable for the stated 600 mAh capacity of the built-in battery. Performance is at least an order or magnitude or two higher than the budget keychain model from Wurkkos, in comparison.

Pros and Cons

ProsCons
Good build quality and feature set, suitable as a headlamp, pocket clip or bike light.Fairly simple design, with power/mode button on front-face with the emitters.
Very good regulation pattern, with constant-current flat stabilization.A bit too large for a keychain light, but works well as a headlamp/pocket clip.
Very floody beam without artifacts, for both cool white and red LEDsRechargeable battery built-in, but with older micro-USB connector.
Accurate product specs.Strobes on main sequence.

Overall Rating

Preliminary Conclusions

The Crystal is a surprisingly versatile little headlamp/keychain light. It is lightweight and easy to attach or carry in a variety ways. It has both white and red flood lights (the later is particularly good for maintaining night vision, or for not attracting bugs/animals). It has a good range of levels, including moonlight and a signaling beacon for each emitter. And its performance is excellent across all levels on its built-in rechargeable lithium polymer battery.

Frankly, there is not much to criticize here. By design, the light is a full flooder, without much throw (i.e., there is no optic to focus the emitters). Other than that, it is mainly small issues that I’ve noted above, like the simple UI, micro-USB port, and front switch location that are not my personal preference. It is also not particularly pretty to look at, with its transparent plastic cover – but I suppose some people may like the honest aesthetic. Personally, I care more about its functional use – and I find it to be a great little headlamp.

Price doesn’t factor into my star rating system, but I find this light to be pretty reasonably priced considering what you get. It is is certainly a lot cheaper (and lighter) than a lot of other headlamp models out there. Of course, it won’t last as longer as larger models with heavier batteries – but the runtimes are perfectly reasonable for what you are getting here.

If you are looking for a budget headlamp that does multiple duty as a front-facing pocket light, bike light, and keychain light, the Crystal could well suit the bill.

Acknowledgement

The Crystal was provided by Armytek for review. As always, all opinions are my own and the light received the same rigourous and objective testing as all other lights that I have reviewed. At the time of review, this light retails for $27 USD (~$36 CDN).

Armytek Doberman Pro

  1. Introduction
  2. Manufacturer Specifications
  3. Package Details
  4. Build
  5. User Interface
  6. Circuit Measures
  7. Emitter Measures
  8. Beamshots
  9. Testing Results
  10. Runtimes
  11. Pros and Cons
  12. Overall Rating
  13. Preliminary Conclusions
  14. Acknowledgement

Introduction

Following on my Armytek Wizard C2 Pro Max and C2 Pro Nichia headlamp reviews, I thought I’d test out one of their current tactical lights, the Doberman Pro.

Based on a 1×18650 battery and a warm Cree XHP35 HI emitter, this light features Armytek’s typically solid build enhanced with a variety of recoil-proof adaptions. With an innovative protruding two-stage electronic tailcap switch – and innovative magnetic charging dock – I thought this would be an interesting light to look at.

The light is also distinctive for its beam pattern – thanks to a super deep reflector, the light has excellent throw and a much narrower spillbeam than typical. Let’s see how it performs in my testing.

Manufacturer Specifications

Note: as always, these are simply what the manufacturer provides – scroll down to see my actual testing results.

FeatureSpecs
MakerArmytek
ModelDoberman Pro
EmitterXHP35 HI
TintWarm
Max Output (Lumens)1,400
Min Output (Lumens)37
Max Runtime32 hours
Max Beam Intensity (cd)33,000 cd
Max Beam Distance (m)363 m
Constant Levels4
FlashingStrobe1/2
Battery1x18650
Weight (w/o battery)114 g
Weight (with battery)164 g
Length150 mm
Head Diameter25.4 mm
Body Diameter33.5 mm
WaterproofIP68 25m for 5 hrs

Package Details


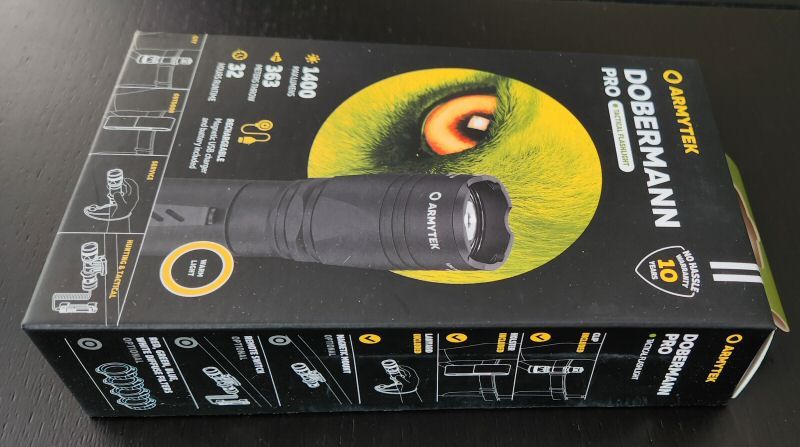
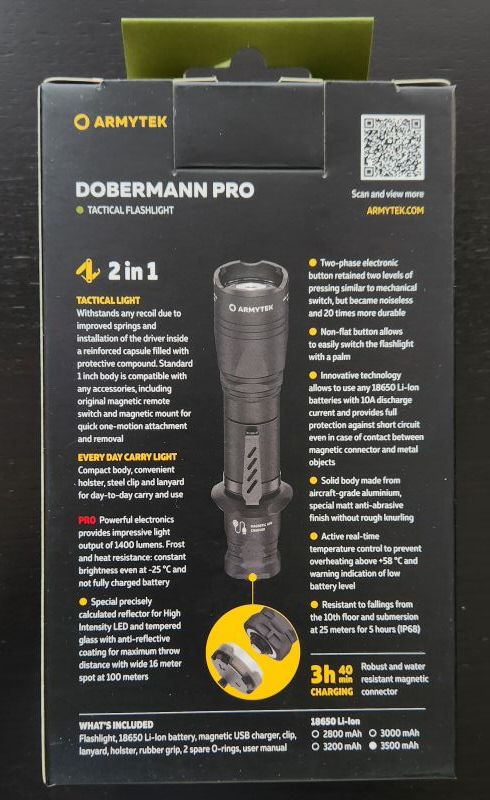
The light ships in a cardboard display box with an a lot of labels and descriptions. Inside, you will find the following.

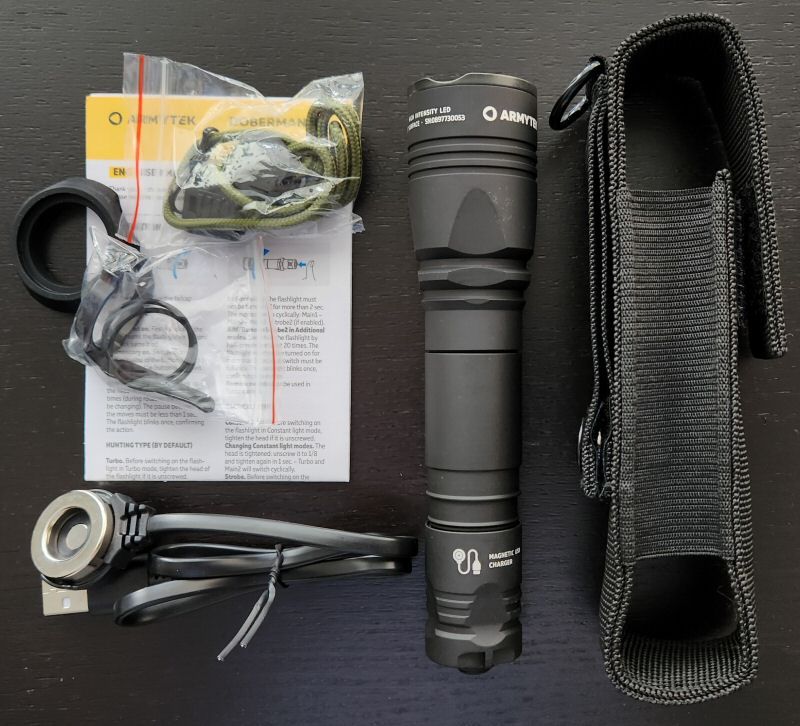
Inside the box, I found:

  • Armytek Doberman Pro flashlight
  • Armytek 18650 battery (3500mAh)
  • Stainless steel pocket clip
  • Tactical cigar grip ring
  • Magnetic USB charging dock
  • 2 spare O-rings
  • Wrist lanyard
  • Nylon belt holster
  • Manual

It’s a good package, and I particularly like seeing all the carry options included (including holster and cigar grip-ring).

As before, the multi-lingual manual is really more of a quick-start guide, and there is a slightly more detailed full manual that you can download from the Armytek website (direct PDF link here). I recommend you download the longer manual in order to take full advantage of all the features and better understand the user interface.

Note that Armytek sells a variety of optional accessories, including a magnetic mount, remote switch, and various colour filters/diffuser cover.

Build


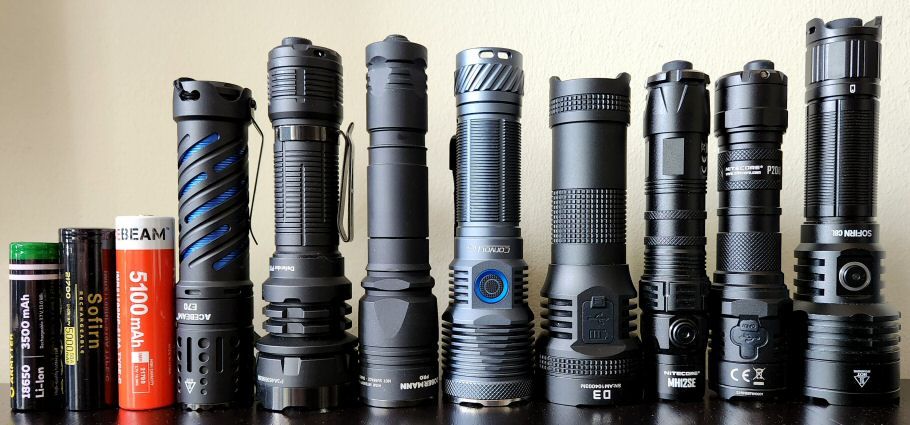
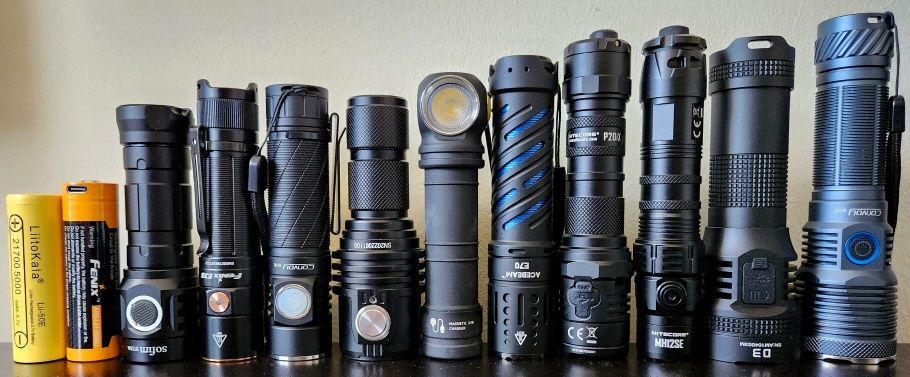
From left to right: Armytek 18650 (3500mAh), Sofirn 21700 (5000mAh), Acebeam 21700 USB-C (5100mAh), Acebeam E70, Acebeam P17, Armytek Doberman Pro, Convoy M21F, Lumintop D3, Nitecore MH12SE, Nitecore P20iX,  Sofirn C8L.


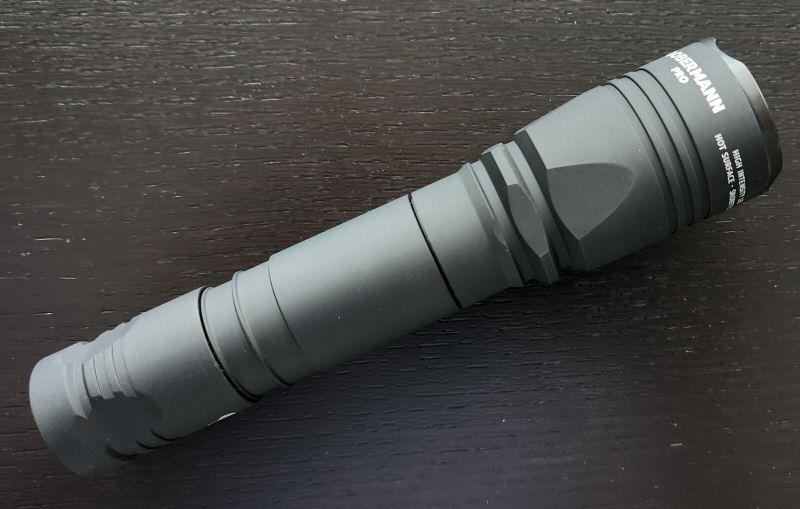
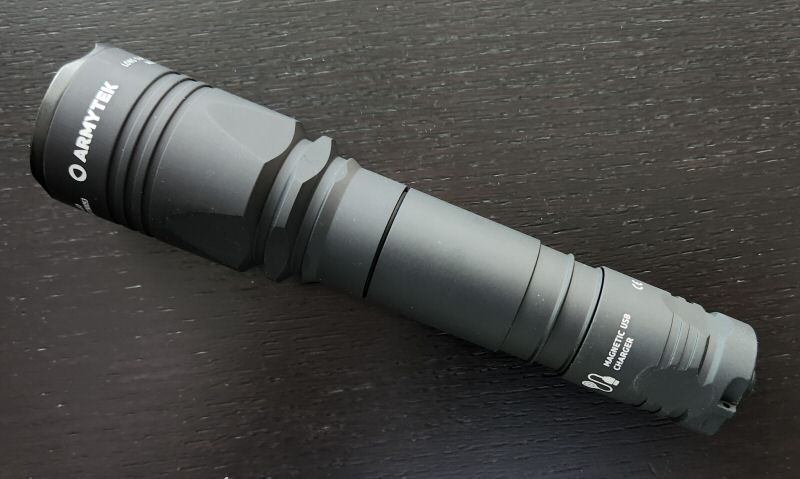
This physical build is reminiscent of the old Viking/Predator lights that I remember from long ago. Handfeel is excellent, and the light feels very solid and robust.

The anodizing looks exactly like the thick matte finish that Armytek has always been known for. Their annodizing has a unique feel, very grippy – almost rubberized in a way. As always, it appears thick and durable. While it resists deep scratches, I find it can mark up fairly easily (i.e., shows handling marks on the surface). As always, it’s clear Armytek sees their lights as work-horses, not show-horses.

The light lacks traditional knurling, but the ridge details cut-outs and grippy finish help produce good hand grip in my view. The pocket clip attaches very firmly (though may mark upon removal) and helps further with grip, just like the cigar ring.

The switch is unique in my experience. It protrudes like a physical clicky switch, but has instead a dual-stage electronic design that simulates a tactical clicky. Switch feel is good, with a light press activating the first stage, and a firmer press producing a virtual click (silent, but with a tactile “click-like” feel). Honestly, I thought this was indeed a physical switch when I first handled it.

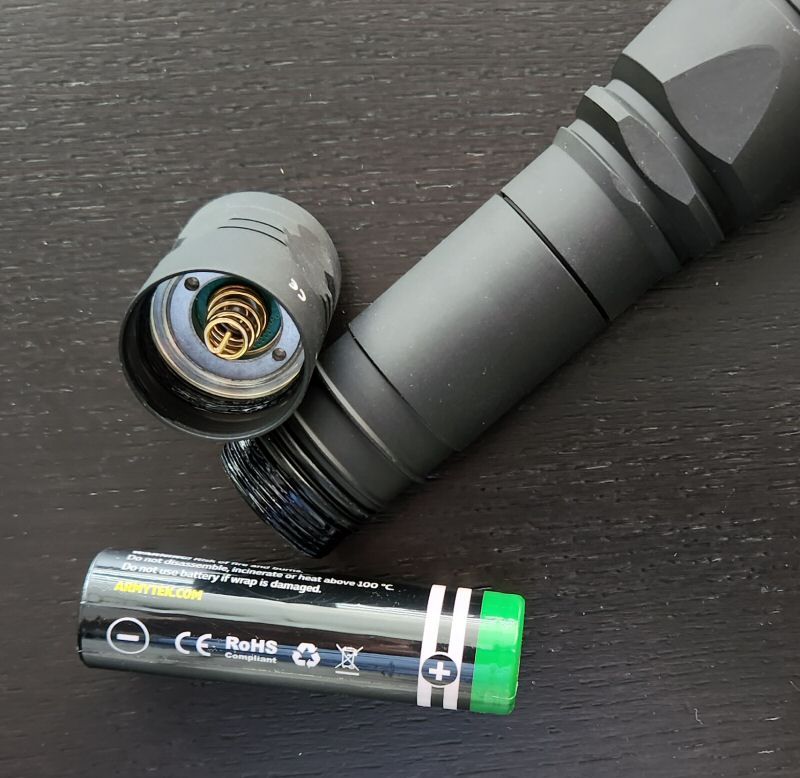
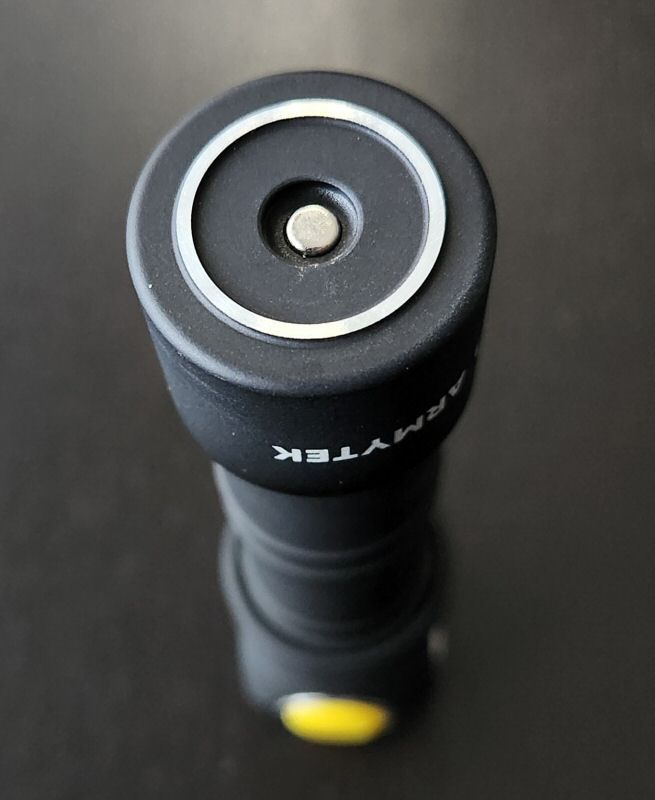
The light uses a standard flat-top 18650 cell (Armytek-branded 3500mAh in this case), so can easily be swapped out and charged in a stand-alone charger. Interestingly, the magnetic charging dock connects directly to the switch – and holds on very securely (scroll down to my circuit section for more details on how it works). Note that this charging format means that there are large exposed contact points on the tailcap that connect directly to the battery, which is concerning. Armytek says there is a short-circuit protection feature with the battery, but I don’t like relying on that. Hopefully the contacts are separated sufficiently that it should not be an issue for most people.

Tailstanding is not possible, due to the protruding tailcap. There is a cut-out on the side of the tailcap to securely attach the wrist lanyard.

There are springs in both head and the tailcap, which should hold the cell securely. Armytek says the light is hardened against recoil effects (including potting the electronics in the head), making it suitable as a weapon mount.

Tailcap threads are square-cut, and anodized, allowing you to lock out the light by a twist of the tailcap. Threads are well lubed – as are the two o-rings for waterproofness. I must say this always seems like overkill, but I guess it again shows Armytek’s commitment to robust design.

As per usual, I haven’t tried destructive testing. But this light seems pretty well bomb-proof, and is at least as robust as any other tactical light I’ve ever handled.


The Doberman Pro features a warm temperature XHP35 HI emitter, at the base of a very deep smooth reflector. Thanks to the low profile and small size of this emitter – coupled with such a deep reflector – this means you will get excellent throw with a very narrow spillbeam. See above, and the emitter measures and beamshots sections below for more details.

The black stainless steel bezel has relatively mild crenelations, allowing the light to headstand while still showing you if it is activated.

User Interface

The Doberman Pro can be configured for a pretty straightforward user interface, in keeping with its tactical nature. But there are few extra options, organized into two modes – referred to as Hunting Type (default) and Tactical Type. I will describe both in detail below, but let’s start with how you switch between them:

Mode Switching (between Hunting Type and Tactical Type)

  • Ensure the head is fully tight against the body tube, as well as the tailcap fully tightened.
  • Turn the flashlight On with a full click of the tailcap.
  • Loosen/tighten the head 10 times, completing each twist cycle in under 1 sec.
  • Flashlight blinks once to confirm mode type change.

And now, here is what you get with each of the two mode sets:

Hunting Type Mode (default, available levels: Main1, Main2, Main3, Turbo, Strobe2)

Hunting Type Mode, from OFF:

  • Fully tighten the head for Turbo, loosen by 1/8 of a turn for the additional modes.
  • Partial depress of the switch: In Turbo, Momentary On (i.e., turns Off when released). In Additional modes, turns On in last memorized mode, and repeatedly pressing (or clicking) the switch within 2 secs advances you through Additional modes in the repeating sequence Main1 > Main2 > Main3 > Strobe2.
  • Single-click switch: In Turbo, turns On in Turbo. In Additional modes, turns on in last memorized mode, and repeatedly pressing (or clicking) the switch within 2 secs advances you through Additional modes in the repeating sequence Main1 > Main2 > Main3 > Strobe2.
  • Note that you can remove Strobe2 from the sequence as follows:
    • Partially depress switch at least 20 times, with the last press being a full click.
    • Don’t take longer than 1 sec to cycle through the individual switch presses.
    • The flashlight blinks once, confirming the change.

Hunting Type Mode, from ON:

  • Partial depress of the switch: Nothing.
  • Single-click switch: Turns Off.
  • In Additional modes, repeated clicking the switch within 2 secs advances you through Additional modes in the repeating sequence Main1 > Main2 > Main3 > Strobe2.

Tactical Type Mode (available levels: Main2, Turbo, Strobe1, Strobe2)

Tactical Type Mode, from OFF:

  • Start with head fully tightened for Turbo, or head loosened for Strobe2.
  • Partial depress of the switch: Momentary On in Turbo or Strobe2, depending on head state.
  • Single-click switch: Turns On in Turbo or Strobe2 depending on head state.

Tactical Type Mode, from ON:

  • Partial depress switch: Nothing.
  • Single-click switch: Turns Off.
  • When in head tight (Turbo):
    • Loosen the head by 1/8 of a turn for Strobe2
    • Loosen/tighten the head for Main2
  • When in head loose (Strobe2)
    • Tighten the head for Turbo
    • Loosen/tighten the head when to switch to Strobe1

Short-cuts:

None.

Mode memory:

Yes, depending on the selected Type. For the Hunting Type, there is mode memory in the Additional modes – the light remembers which level you left it in last, and returns to it upon re-activation. Similarly, for Tactical Type, it remembers if you have switched to the alternate constant or strobe mode. It recalls this state even if you loosen the tailcap to cut the current.

Strobe/Blinking modes:

Yes, there is a high-frequency Strobe at full power or mid-level.

Low voltage warning:

Not that I noticed.

Lock-out mode:

Yes, but only by physically locking out the light at the tailcap.

Reviewer Comments:

This user interface has a few trade-offs – it is a bit more complicated than some tactical lights, but it can be configured to largely tactical use. Indeed, this is one case where I might consider leaving the light in Tactical Type mode, since the two constant levels through the head-twist is reasonably simple and straightforward (as long as you never leave it loose, and strobe yourself). And I find the Main2 level is a reasonably good battery-saving level. Alternatively, you can leave it in Hunting Type, and remove strobe from the sequence if you wish.

The two-stage electronic switch really does simulate a physical tactical clicky well.

Note that I can tell from older reviews online that earlier versions of this light had a second lower Turbo mode as well as Firefly modes. I’ve looked for them, and these are not present on my sample. They are not listed in current manual either – they appear to have been removed.

Circuit Measures

Pulse-Width Modulation (PWM):

Main1:
Lo

Main3:
Hi

Turbo:
Turbo

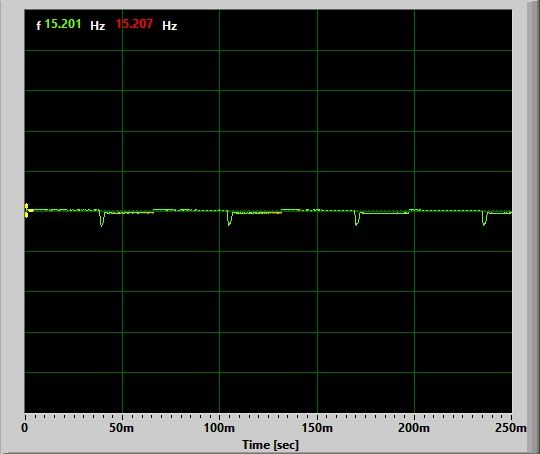
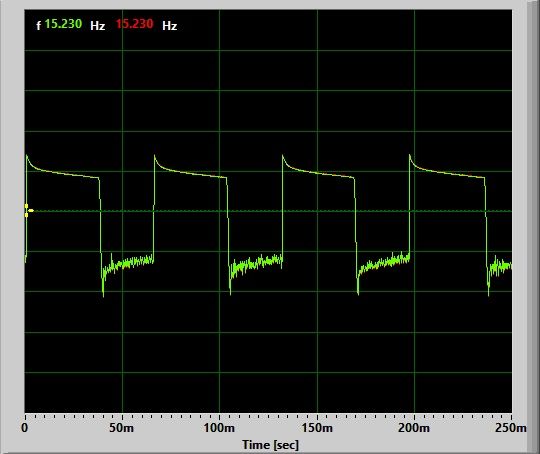
There is no sign of PWM on any level – the circuit appears to be fully current-controlled. There is some high-frequency noise only at the Turbo level, around 15 KHz, but it is variable and not very intense. It is also completely invisible to the eye, and so not a concern.

Strobes:

Strobe1:

Strobe2:

Strobes are a consistent high-frequency of 15 Hz, Strobe1 is at the lower Main2 level, and Strobe2 is full Turbo power.

Charging:

The Doberman Pro comes with a magnetic charging dock that connects to the exposed terminals on the tail switch. Charger status is given as follows:

  • Solid Green — dock is either plugged in and not connected to the light, or charging is finished if the light is connected.
  • Flashing Green — evaluating battery voltage.
  • Flashing Red — contact error, clean the external and internal contacts of the tailcap and charger.
  • Flashing Orange — USB power source voltage too low, or poor contact made, preventing full current charging. Clean the tailcap and the threads of the flashlight, or use a different power source.
  • Solid Red — charging at full charging current is progressing
  • Solid Orange — USB power source voltage is too low, so charging current is
    reduced.

The Armytek charging dock charges at a constant current of ~1.0A at the start of the cycle, regardless of the resting voltage of the cell. This differs from many lights that use dual charging rates (i.e., starting with a lower current when the cell is heavily depleted). This charge level is reasonable for 18650 cell.

Standby / Parasitic Drain:

I measured the standby current as 0.29 mA. This is a reasonably low standby drain, and it would take over 1 year and 4 months to fully drain the cell. Regardless, I always recommend you lockout the light when not in use, by twisting the tailcap.

Emitter Measures

In this section, I directly measure key emitter characteristics of my sample in terms of colour temperature, tint, and colour rendition. Please see my Emitter Measures page to learn more about what these terms mean, and how I am measuring them. As tint in particular can shift across levels, I typically stick with the highest stably regulated level for all my reported measures.

As explained on that page, since I am using an inexpensive uncalibrated device, you can only make relative comparisons across my reviews (i.e., don’t take these numbers as absolutely accurate values, but as relatively consistent across lights in my testing).

Doberman Pro on Main3:

The key measures above are the colour temperature of ~3890K, and a noticeable positive tint shift (+0.0071 Duv) to yellowy-orange at this temperature. For CRI (Ra), I measured a combined score of 63.

These values are very consistent with the rated specs for the warm white XHP35 HI emitter on my sample, and match my visual experience of this light. The light appears very warm in use.

Beamshots

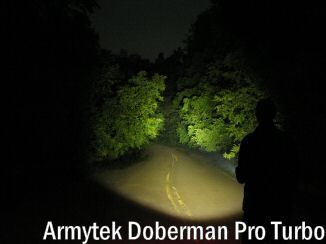
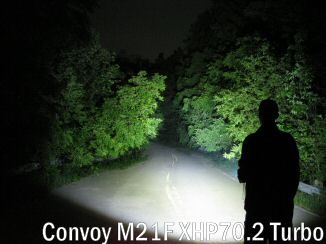
All outdoor beamshots are taken on my Canon PowerShot S5 IS at f/2.7, 0.5 secs exposure, ISO 400, daylight white balance. The bend in the road is approximately 40 meters (~45 yards) from the camera. Learn more about my outdoor beamshots here (scroll down for the floody light position used in this review).

Click on any thumbnail image below to open a full size image in a new window. You can then easily compare beams by switching between tabs.


As you can see above, the Doberman Pro has a relatively throwy beam, with an unusually narrow spillbeam width (due to the unusually deep smooth reflector). Thanks the warm XHP35 HI emitter, beam is quite warm with no obvious chromatic variations.

Testing Results

My summary tables are generally reported in a manner consistent with the ANSI FL-1 standard for flashlight testing. In addition to the links above, please see my output measures page for more background.

All my output numbers are based on my home-made lightbox setup. As explained on that methodology page, I have devised a method for converting my lightbox relative output values to estimated lumens. My Peak Intensity/Beam Distance are directly measured with a NIST-certified Extech EA31 lightmeter.

Doberman Pro Testing Results

ModeSpec LumensEstimated Lumens @0secEstimated Lumens @30 secsBeam Intensity @0secBeam Intensity @30secsBeam Distance @30secsPWM/Strobe FreqNoise FreqCharging Current <3VCharging Current >3VParasitic DrainWeight w/o BatteryWeight with BatteryCCT (K)DuvCRI
Main1404545---NoNo1.0 A1.0 A0.29 mA114 g163 g---
Main2120130130---NoNo1.0 A1.0 A0.29 mA114 g163 g---
Main3300330330---NoNo1.0 A1.0 A0.29 mA114 g163 g3,8900.007163
Turbo1,5001,6001,55036,800 cd36,000 cd379 mYes15 KHz1.0 A1.0 A0.29 mA114 g163 g---
Strobe1120-----15 HzNo1.0 A1.0 A0.29 mA114 g163 g---
Strobe21,500-----15 HzNo1.0 A1.0 A0.29 mA114 g163 g---

As usual for Armytek, I find very good concordance between published specs and what my lightbox reports for my sample. Indeed, both my lightbox and NIST-calibrated luxmeter consistently report slightly higher output and beam distance measures than the specs.

To view and download full testing results for all modern lights in my testing, check out my Database page.

Runtimes

As always, my runtimes are done under a small cooling fan, for safety and consistency. To learn more about how to interpret runtime graphs, see my runtimes methodology page.

Max

Hi

Med

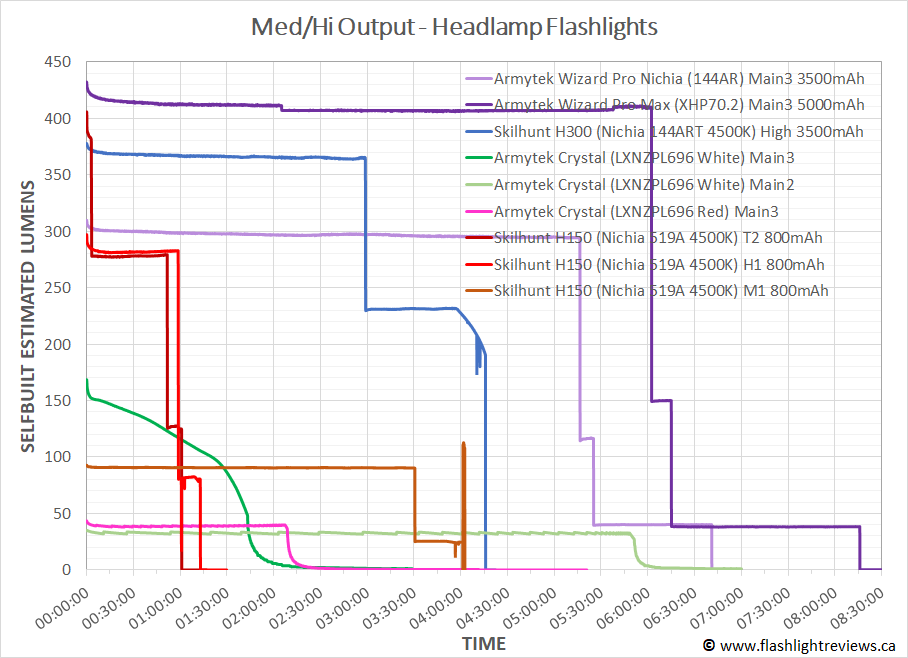
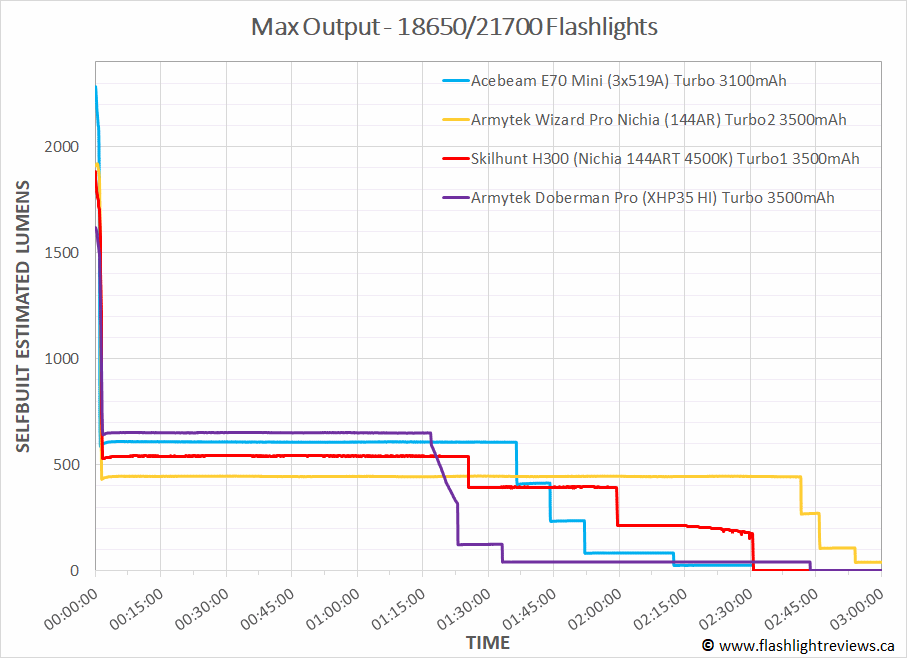
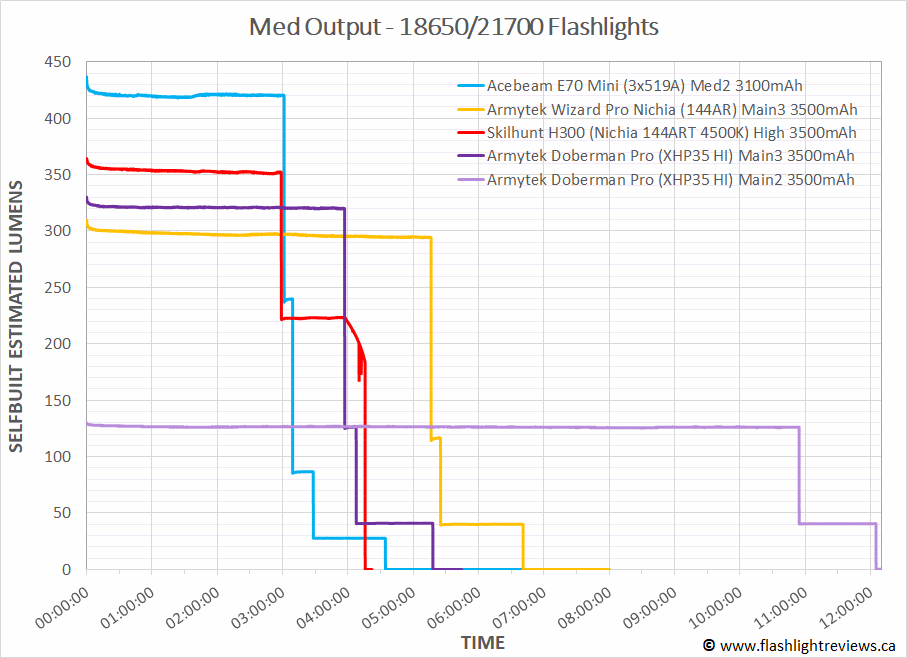
The runtime results are about what I would expect for a good-quality, current-controlled circuit running a XHP35 HI emitter on 18650. Overall output/runtime efficiency is excellent for the class, comparable to the various modern Nichia offerings shown above. I’m also pleased to see equally good regulation, with this light also showing flat outputs with defined step-downs due to heat or low voltage.

Another example of a good circuit from Armytek!

Pros and Cons

ProsCons
Light has excellent output/runtime efficiency for this emitter, at all levels.Turbo steps down fairly quickly, due to heat.
Circuit shows very good regulation, with thermally-mediated or low-voltage step-downs.Number of output levels is limited, and mode spacing may not suit everyone.
Uses an innovative two-stage electronic switch that accurately replicates a forward physical clicky without its limitations.Max output is lower than newer lights featuring higher output emitters.
Very good robust build quality and hand feel, with recoil-protective adaptations (e.g., potted electronics).Magnetic charging dock allows you to charge the battery inside the light, but raises the risk of accidental shorting given the protruding tailcap.
Comes with a lot of extras, and additional "tactical" ones are available for purchase.

Overall Rating

Preliminary Conclusions

This is another solid offering from Armytek. Indeed, solid is perhaps a bit of an understatement for the Doberman Pro – this light is designed to be a bomb-proof tactical light, suitable for a weapon mount given its ability to handle recoil without incident.

I am not a tactical guy, so have no real ability to assess its bona fides beyond what I can see from handling it as a flashlight. The extremely deep and smooth reflector – coupled with a HI emitter – does produce excellent throw, with a particularly narrow spillbeam. The warm temperature emitter also produces as a warm a beam pattern as I’ve ever seen on a commercial light.

Fit and finish are excellent, with Armytek’s classic “grippy” thick anodizing. There are plenty of extras included with the light (more than usual in fact), and plenty of extra “tactical” options to choose from as well.

One thing that I find particularly innovative is the two-stage electronic switch. This so accurately replicates a forward clicky switch that I genuinely couldn’t feel the difference – it feels and functions exactly as you’d expect a physical switch would.

I have to give Armytek credit for incorporating a magnetic charging dock on the base, given the protruding switch. But this also increases my concern about accidentally shorting the cell inside – while manageable in practice, I’m not convinced that risk is something you want in a “tactical” light.

The interface also has some quirks to it as well. I appreciate how they have tried to integrate as many options as possible (e.g., Hunting Type mode) while also staying true to a more typically classic tactical interface (i.e., Tactical Type mode with just Turbo and Strobe). But there are still a few too many options (and memory) that could lead you to not always activate in the mode you want.

The beam pattern is distinctive, and I could see this serving well for someone who wanted a throwy light with unusually narrow spill. I’m not qualified to to assess how relevant that is for a firearm carry, but I do find it somewhat limiting for general use.

I’m comfortable giving this light 4 stars, for its overall excellent build and quality, but somewhat limiting interface and emitter/optic choice. As for its suitability for any given task, I’ll leave that to the reader to assess based on the performance results presented above.

Acknowledgement

The Doberman Pro was supplied by Armytek for review. As always, all opinions are my own and the light received the same rigourous and objective testing as all other lights that I have reviewed. At the time of review, this light retails for ~$95 USD (~$125 CDN).

Armytek Wizard C2 Pro Max

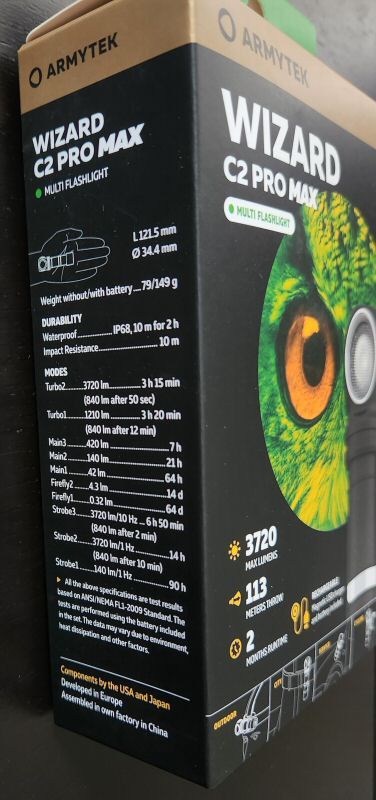
The Wizard C2 Pro Max is a solidly-built headlamp running on a single included 21700 battery. Features a sophisticated user interface and innovative magnetic charging dock.

  1. Introduction
  2. Manufacturer Specifications
  3. Package Details
  4. Build
  5. User Interface
  6. Circuit Measures
  7. Emitter Measures
  8. Beamshots
  9. Testing Results
  10. Runtimes
  11. Pros and Cons
  12. Overall Rating
  13. Preliminary Conclusions
  14. Acknowledgement

Introduction

Following on my recent review of the 1×18650 Armytek Wizard C2 Pro Nichia, I also have on hand for the testing the larger 1×21700 Max edition of this light. Very similar in design and user interface (some small differences are noted below), this Max model features a truly warm-tinted XHP70.2 emitter. This should produce more output than the smaller Nichia version, but at the cost of reduced colour rendition.

As before, this is an angle head light (i.e., the emitter is on the side of the head). This design is very helpful when carrying the light clipped on you, or as a headlamp. Let’s see how it compares to its Nichia sibling, and the competition.

Manufacturer Specifications

Note: as always, these are simply what the manufacturer provides – scroll down to see my actual testing results.

FeatureSpecs
MakerArmytek
ModelWizard C2 Pro Max
EmitterXHP70.2
TintWarm
Max Output (Lumens)3,720
Min Output (Lumens)0.32
Max Runtime2 mos
Max Beam Intensity (cd)3,300 cd
Max Beam Distance (m)113 m
Mode Levels7
FlashingStrobe1, Strobe2, Strobe3
Battery1x21700
Weight (w/o battery)79 g
Weight (with battery)149 g
Length121.5 mm
Head Diameter34.4 mm
Body Diameter23.6 mm
WaterproofIP68 10m

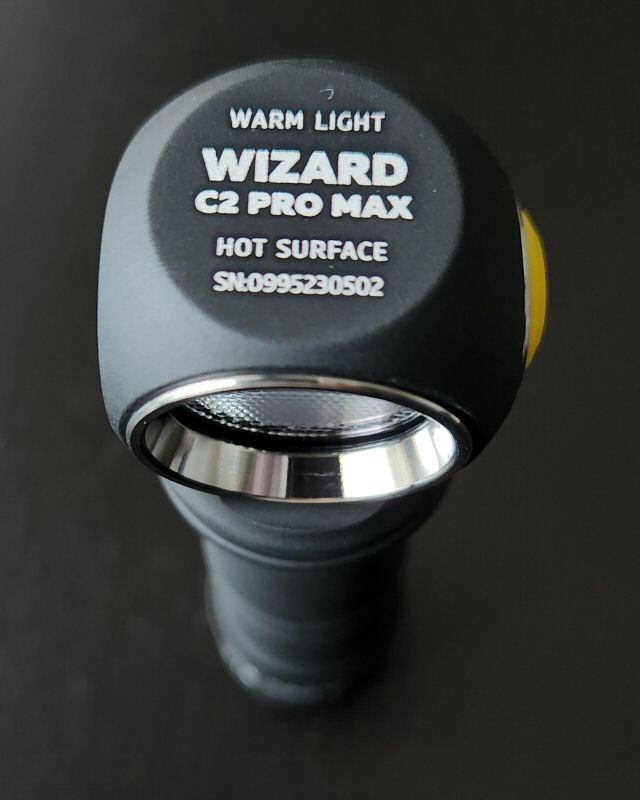
Armytek doesn’t provide an exact colour temperature for “warm light”, but it is quite  warm in tint to my eye, much warmer than the more neutral white tint of the Nichia model (see Beamshots and Emitter Measures below). I would definitely characterize this light as warm white.

Package Details

Max

Max

Max

Max

Max

Max

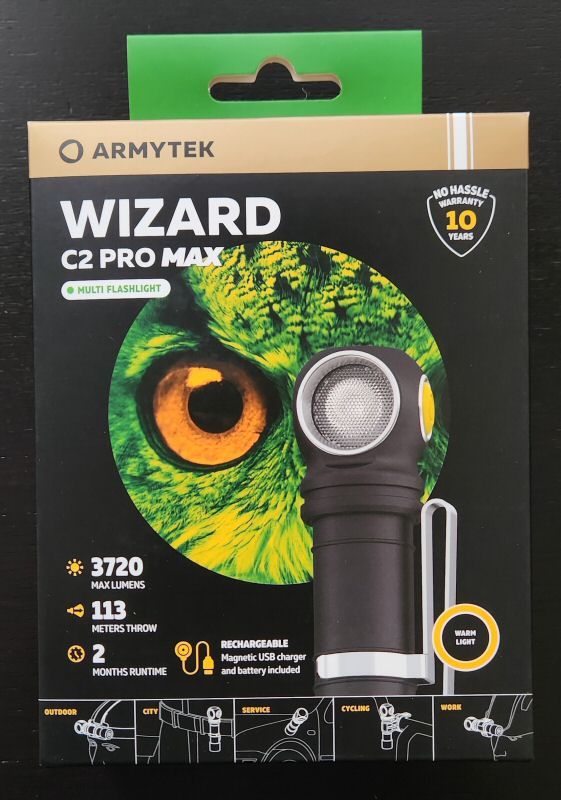
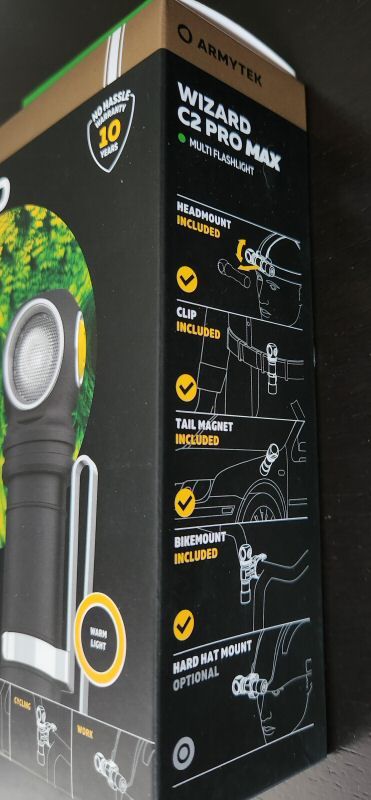
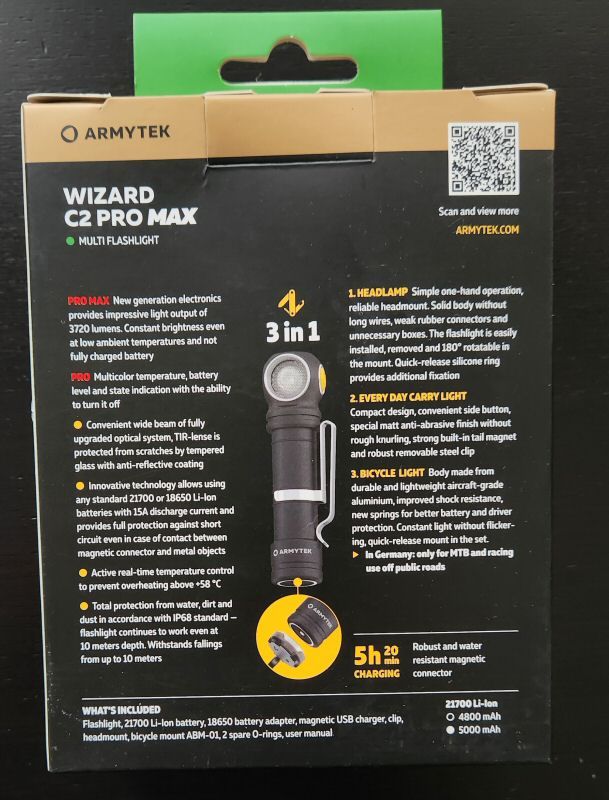
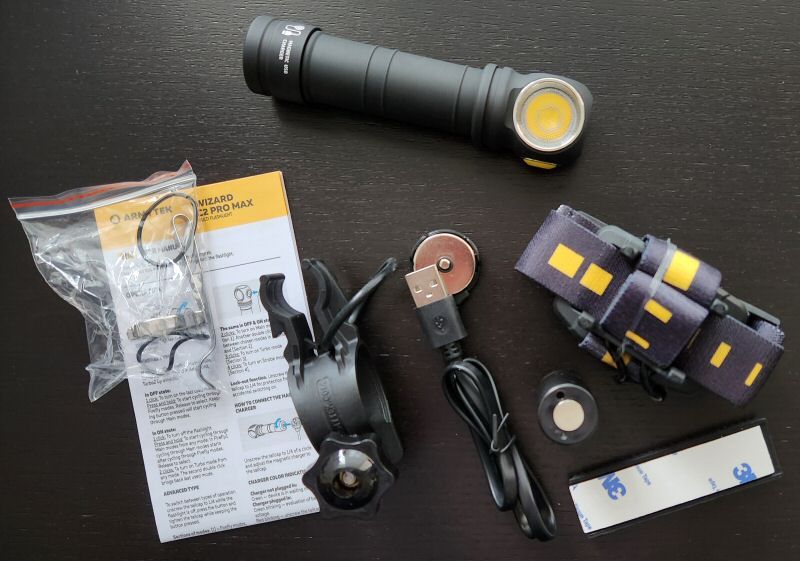
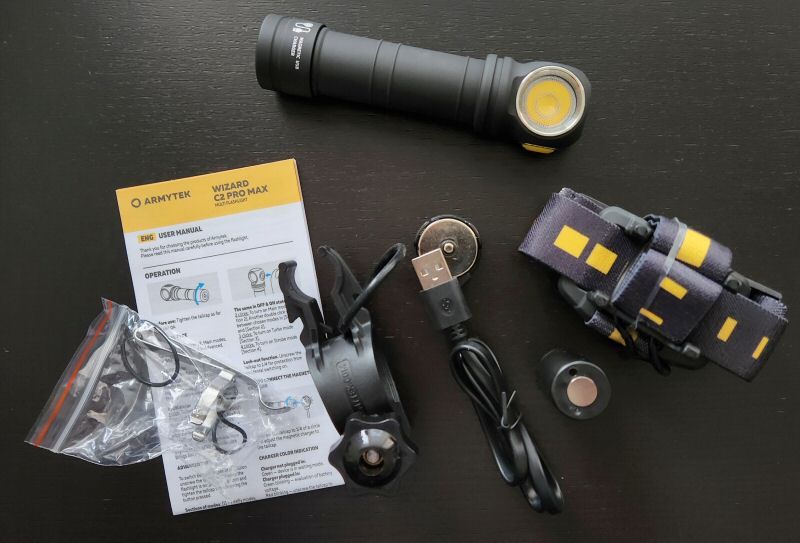
The Wizard C2 Pro Max ships in a cardboard display box with an extensive number of labels and descriptions. Inside, you will find the following:

  • Armytek Wizard C2 Pro Max flashlight
  • Stainless steel pocket clip
  • Magnetic USB charging dock
  • 21700 battery (5000mAh)
  • 18650 battery adapter
  • Headband and rubber headlamp mount
  • Bicycle mount
  • 2 spare O-rings
  • Adhesive tape strip (3M)
  • Manual

It’s a very good package of accessories, identical to its smaller sibling except the addition of the 18650 battery adapter here (a nice feature, if you wanted to swap in a smaller and lighter cell).

As before, the multi-lingual manual is really more of a quick-start guide, and there is a slightly more detailed full manual that you can download from the Armytek website (direct PDF link here). I recommend you download the longer manual in order to take full advantage of all the features and better understand the user interface.

Build


From left to right: LiitoKala 21700 (5000mAh), Fenix ARB-L21-5000U 21700 (5000mAh), Sofirm IF25A, Fenix E35 v3, Convoy S21E, Imalent MS03, Armytek Wizard C2 Pro Max, Acebeam E70, Nitecore P20iX, Nitecore MH12SE, Lumintop D3, Convoy M21F.

Max

Max

Max

Max

Max

Max

Max

Max

This physical build is basically identical to the 1×18650 Nichia version, just on a larger scale. As I said before, I find it very reminiscent of the early bomb-proof Armyteks – it feels very solid in the hand. That said, is also reasonably compact for the 1×21700 class.

The anodizing looks exactly like the old matte finish of early Armyteks, very grippy (almost feels rubberized in a way).  It appears to be thick and durable – although I find it also marks up easily (i.e., not scratched down to the bare aluminum, but shows handling marks on the surface). I guess its fair to say Armytek sees their lights as work-horses, not show-horses.

The light lacks traditional knurling, but the ridge details cut-outs and grippy finish help produce good hand grip in my view. The pocket clip attaches very firmly (likely to mark upon removal) and helps further with grip (and clip-on carry of course).

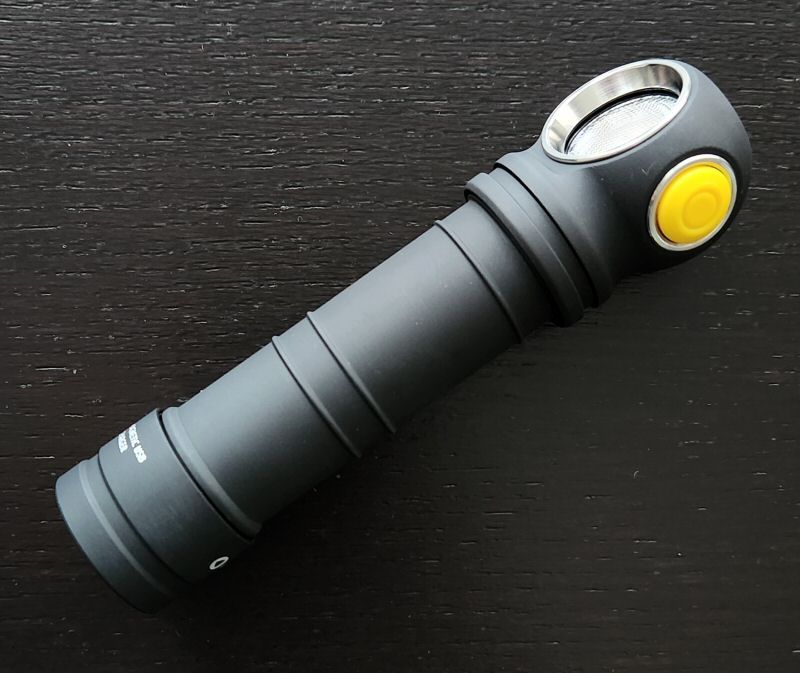
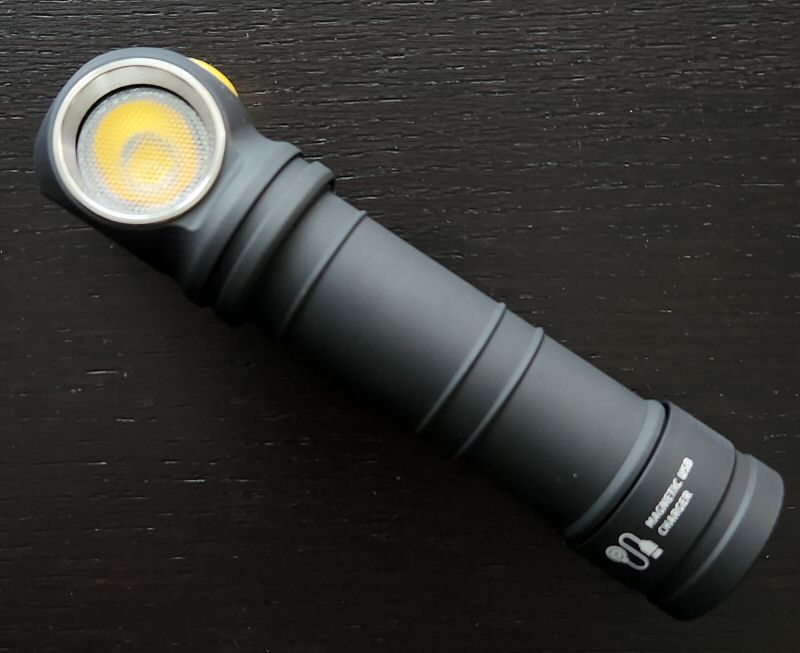
The main distinctive feature is the angle-head light source. As mentioned above, this is very helpful as a headlamp, bicycle light or when clipping onto you. It’s also reasonable to carry this way by hand, especially given the large button on the size of the head (i.e., can easily use your thumb to activate the switch). Switch feel is good, with a definite click upon press.

There is a green/red LED under the switch cover that can signal the status of the light. By default, it flashes red once when the switch is clicked (or glows red when doing a press-and-hold). You can configure it to flag a green locator beacon once every four secs if you wish (see UI section below). It also serves as a low battery and heat warning, as also described in the UI section.

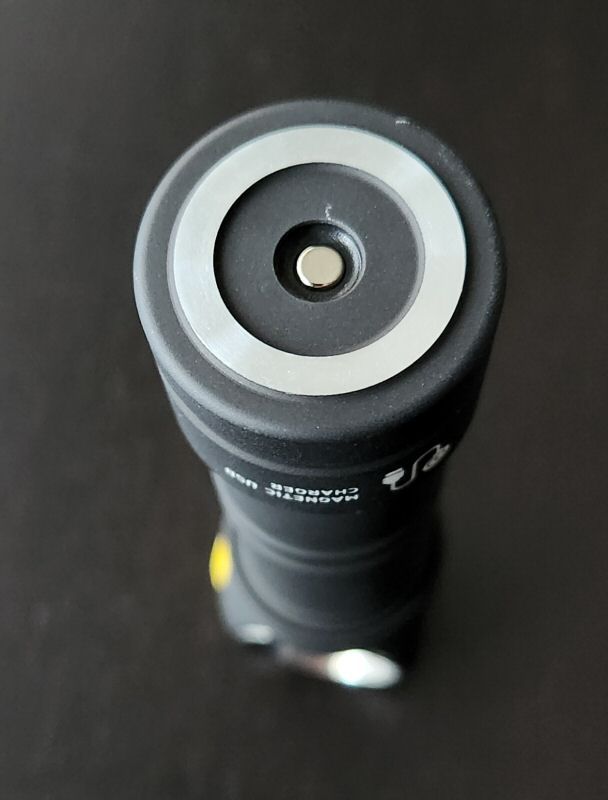
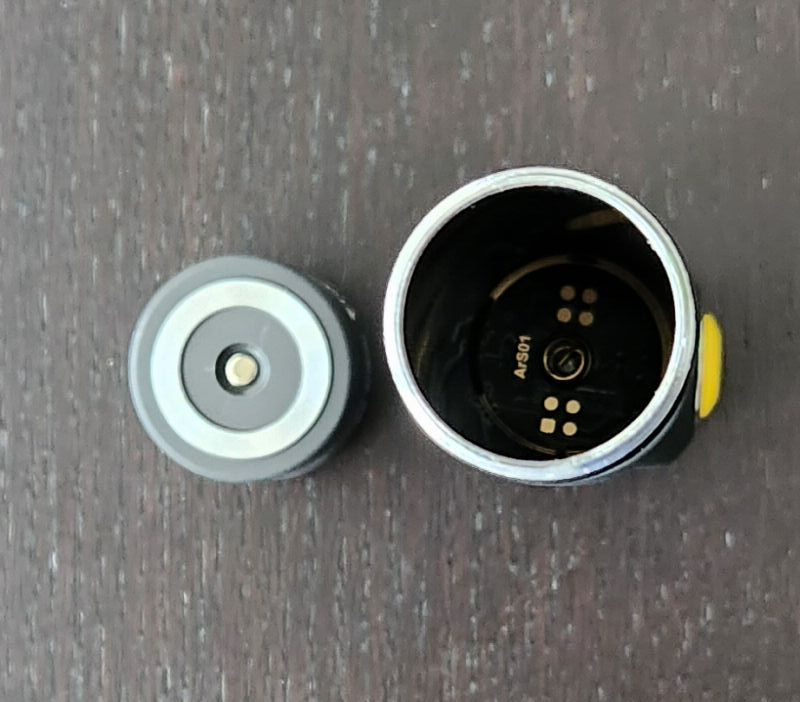
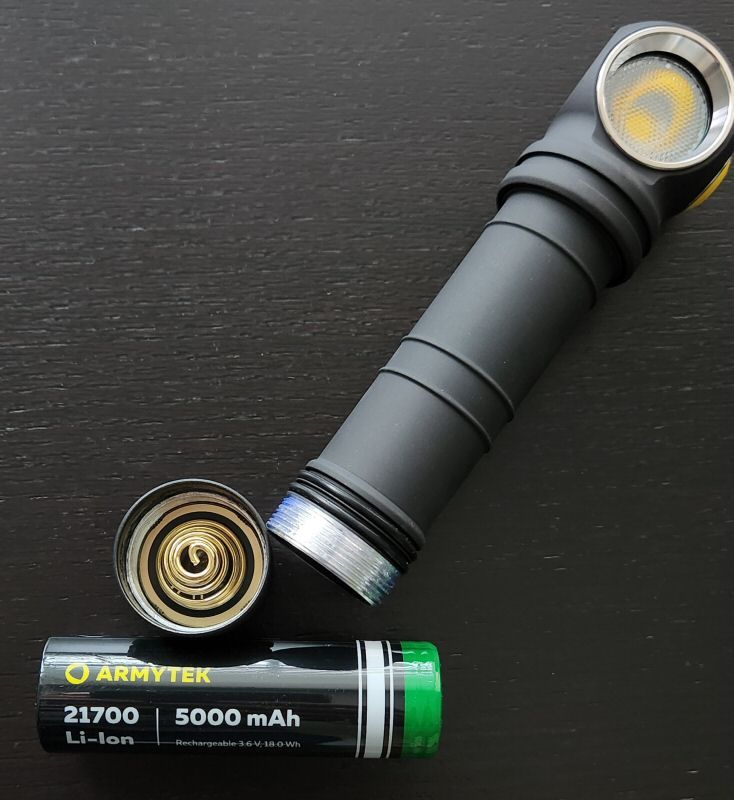
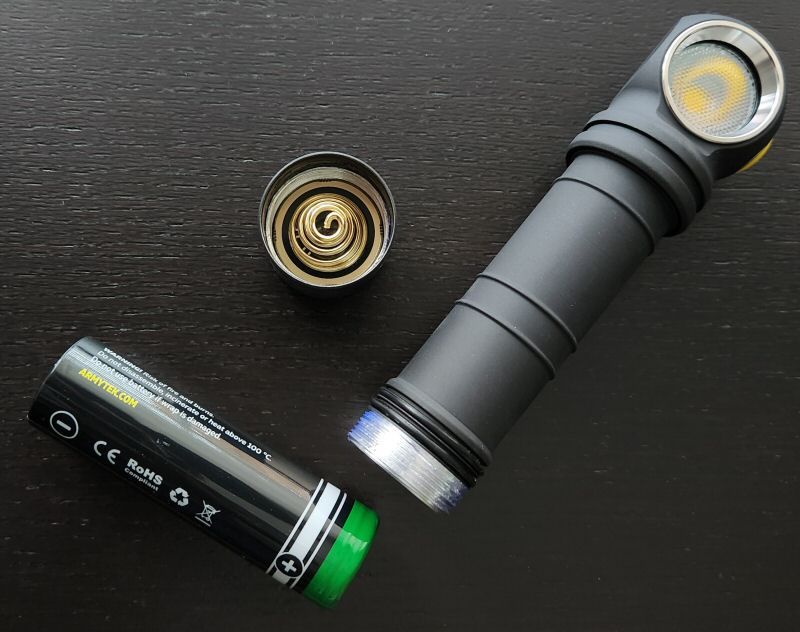
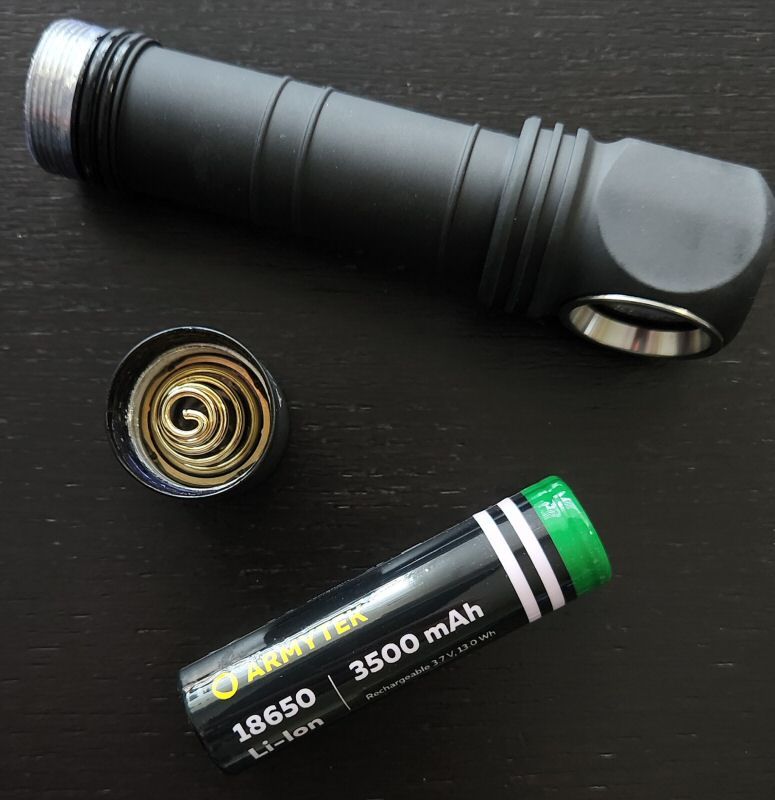
The light lacks a USB-C charging port on the body, but there is a USB-based magnetic charging dock that charges the light through the tailcap (scroll down to my Circuit section for more details on how it works). The light uses a standard flat-top 21700 cell (Armytek-branded 5000mAh in this case), so can easily be swapped out and charged in a stand-alone charger. And thanks to the included 18650 battery adapter, you you can easily run 18650 cells in this light.

Note that this charging format means that there are exposed contact points on the tailcap. However, the center contact is sufficiently recessed (and small enough) to avoid any likely problems.

The magnet is located in the tailcap (and is not user-removable). It is also very strong, and so may attract metal objects. Of course that means you can also attach it to metal surfaces to stand it as a worklight.

Max

Max

The light uses a warm white tinted XHP70.2 emitter, under a textured TIR optic. The specs claim a 110 degree hotspot and a 150 degree spill, but there is no sharp demarcation between them – this produces a very even and wide flood light. Scroll down to the Emitter measures section for a tint/CRI discussion.

The head has a flat stainless steel bezel ring.

User Interface

The user interface (UI) of this light is very similar the 1×18650 Nichia version, with a few tweaks. The main difference is that you are missing the ~1.0 lumen Firefly2 mode of that model (the brighter Firefly3 of that model has been renamed as Firefly2 here).

On the whole, I find the Armytek UI a bit complex, and somewhat reminiscent of the second generation of the inaugural model of Armytek, the Predator. Just like that earlier light, you will need to download the full manual from Armytek to learn how to use it fully (i.e., the bundled manual is more just to get you started). The detailed manual is available from the website’s product page (downloadable as PDF here). You can also follow the link from the QR code on the box, which takes you to main product page. I don’t understand why they don’t provide this better manual with the light itself, as you are likely going to find it frustrating trying to figure it out all the features from the incomplete quick-start guide alone.

That said, even the full manual doesn’t do a great job of fully explaining the implementation of the UI (although if you follow the instructions, you will likely figure it out for yourself). But to help you out, let me try to break it all down for you.

Note that if you are more of a visual learner, you can skip to the end of this section for a video overview describing how the UI works.

To start, you can switch between two types of operation mode sets (with different mode groups available) – the General UI and the Advanced UI. To do this, unscrew the tailcap by a quarter turn with the flashlight off. Then press-and-hold the button while you tighten the tailcap. The light is set by default at the factory to General UI.

General UI Operation

The General UI gives you access to both Firefly modes (Firefly1 and Firefly2), all three Main modes (Main1, Main2, Main3), but only one Turbo mode (Turbo2 by default – although you can change this to Turbo1 by going through the Advanced UI, as I’ll explain later). Note the strobe modes are not available in the General UI.

General UI, from OFF:

  • Press-and-hold: Turns On in Firefly1 and cycles through the two Firefly modes followed by the three Main modes, and then continues to loop through the Main modes (you select by releasing the switch). So, sequence is: Firefly1 > Firefly2 > Main1 > Main2 > Main3 > Main1 > Main2 > Main3 > Main 1 > etc.
  • Single-click: Turns On in the last used mode (the specific six constant modes described in the opening paragraph are all available to be memorized, including Turbo).
  • Double-click: Nothing (i.e., just turns On and then Off again – but scroll down to see what happens when already On).
  • Multiple clicks (3 or more): Nothing, the light simply turns Off and back On with successive clicks.

General UI, from ON:

  • Press-and-hold: If you are currently in a Firefly mode, it will cycle through the Firefly modes and then through all the Main modes, with in a repeating loop of Main modes (i.e., the same as press-and-hold from Off). If you are in the Main mode or Turbo mode, press-and-hold will cause it to cycle through the Main modes only.
  • Single-click: Turns the light Off.
  • Double-click: Jumps to Turbo (assuming you are not already in Turbo – in which case, it jumps back to last mode used before entering Turbo).
  • Multiple clicks (3 or more): Nothing, the light will just turn Off and back On.

This is a bit of an unusual arrangement, but it’s not that hard to get used to. I recommend you think of this General UI as fundamentally a press-and-hold interface, with single- and double-click offering access to the last memorized level and toggling to/from the Turbo level, respectively. The main tweak that I would have liked to see is a more consistent implementation of press-and-hold when On (i.e., I would like to have it always cycle through Firefly, not just when starting in Firefly) – but that’s just personal preference.

Note that General UI lacks the Strobe modes and Turbo 1 (although you can switch the default Turbo level by programming in Advanced UI if you want). General UI should work well for most users right out of the box.

Advanced UI Operation

This is not well explained in the manual, although the information is technically all there.  Simply put, Advanced UI gives you access to 4 defined Mode Group sets that you can choose between, as well as the ability to cycle through a larger subset (but not all) of the constant output modes.

Available to you in the defined Mode Group sets are both Firefly levels in the Firefly Mode Group (Firefly1, Firefly2), all three Main levels in Main Mode Group (Main1, Main2, Main3), both Turbo levels in Turbo Mode Group (Turbo1, Turbo2), and all three strobes in the Strobe Mode Group (Strobe1, Strobe2, Strobe3). The various Mode Groups are typically accessed by multiple clicks from either On or Off as described below (except for Firefly modes which are accessed by a press-and-hold, with additional modes).

In addition, when you activate the light in Advanced UI by a press-and-hold it will run through the first six constant output modes from Firefly1 up to Turbo1. Again, this is the only way to access Firefly modes (basically, think of this ramp as Firefly plus Main and some Turbo).

Advanced UI, from OFF:

  • Press-and-hold: Turns the light On, and runs through the first 6 constant output modes in sequence from Firefly1 to Turbo1, on a repeating loop (i.e., no more excluding Firefly modes after the first round, as General UI does). All modes except Turbo2 and the three Strobe modes are on this repeating sequence. When you release the switch on any level, you are now in that Mode Group set if you press-and-hold again (i.e., the light will only cycle through the levels of that Mode Group set now). So, for example, if you release the switch on Turbo1, a subsequent press-and-hold of the switch will cycle between the two Turbo modes in this Mode Group.
  • Single-click: Turns On in last used mode (note that mode memory now applies to Strobe as well as all constant output modes).
  • Double-click: Turns On in the Main Mode Group
  • Triple-click: Turns On in the Turbo Mode Group
  • 4 clicks: Turns On in the Strobe Mode Group
  • Multiple clicks (5+): Nothing (i.e., light will just activate in the Strobe Mode Group)

Advanced UI, from ON:

  • Press-and-hold: Light will cycle through the levels in the current Mode Group only.
  • Single-click: Turns the light Off.
  • Double-click: Jumps to the Main Mode Group (or jumps down to Firefly1 if already in Main Mode Group).
  • Triple-click: Jumps to the Turbo Mode Group (or does nothing if light is already in Turbo Mode Group).
  • 4 clicks: Jumps to the Strobe Mode Group (or does nothing if light is already in Strobe Mode Group). Note this means that you have to double-click or triple-click to exit Strobe modes when On (or turn Off and then press-and-hold when turning back On).
  • Multiple clicks (5+): Nothing, it just jumps Strobe mode and stays there (i.e., acts as 4 clicks).

Note that the light will memorize the last Turbo mode you used (i.e., Turbo1 or Turbo2).  If you revert back to General UI, it will continue to use that memorized Turbo mode. So this is how you can program the lower Turbo1 in the General UI if you wish.

I personally prefer Advanced UI over General UI, for the more consistent implementation of press-and-hold from Off (i.e., repeatedly cycles a wider set of modes, including Firefly levels). However, you have to remember to triple-click for Turbo now. Also, when On, you are limited to only cycling through your current Mode Group with a subsequent press-and-hold. But it’s easy enough to remember to turn Off and start a press-and-hold again to access the other modes.

What I don’t like in Advanced UI is the inconsistent effect of multiple clicks when On. The first time I activated Strobe mode for example, it took me a while to figure out how to get out (i.e., only double- or triple-click will exit, unless you turn off and reset by a press-and-hold as I prefer). This is not entirely intuitive, and at a minimum I would have liked for the same number of clicks to enter a Mode Group also be used to consistently exit it. But on the plus side, Strobes are reasonably well hidden if you don’t want to bother with them at all in Advanced UI. And you can always stick with General UI if you really don’t like it.

In terms of the strobes, I do like the slow signaling strobes here, with both high and low power (especially as a bike light).

Standby Indicator:

As mentioned in the build section, you can toggle on a standby indicator that briefly flashes the green LED under the switch cover once every four seconds. You do this in a similar way to how you switch between General UI and Advanced UI, but with an extra step: loosen the tailcap a quarter turn, hold down the button, tighten the tailcap AND then immediately loosen the tailcap a quarter turn. I haven’t measured the standby drain in this mode, but I suspect its pretty minimal.

Shortcuts:

Rather then go through it all again, please see above for how all the clicks and press-and-holds work in the two UI.  In simple terms, press-and-hold from Off is necessary to first access Firefly modes, and multiple clicks are necessary to access Turbo from either On or Off.

Mode Memory:

Yes. The light remembers the last mode used and returns to it (constant output modes only in General UI, all modes including Strobes in Advanced UI). Memory mode persists, even with a battery change.

Lock-out Mode:

Yes. Simply unscrew the tailcap a quarter turn. Even though the tailcap has non-anodized threads, it does turn Off while unscrewing from fully tight.

Low battery warning:

Yes. The switch indicator will signal the battery status once the cell is <25% (at which  point, it will flash orange every 2 seconds). Once the battery is <10%, it will flash red every second.

High temperature warning:

The switch indicator will also signal a high temperature warning, with 3 orange flashes every 2 secs. If heat is critical, it will flash red 3 times every second, and the brightness level will automatically step down.

According to the manual, the brightness decreases once the light approaches 58 degrees Celsius.

Reviewer Comments:

This is a sophisticated interface, with a lot of extra bells-and-whistles (in terms of mode groupings, standby and battery/heat indicators, etc.). It is a bit confusing to configure initially, and there are some inconsistencies in how features are implemented across UI Mode Group sets (i.e., which modes are included in a ramp, exact number of clicks to access or exit a given Mode set, etc.). And since this is not completely clear in the manual (even the extended manual online), you are likely need to refer the UI instructions here to reprogram.

But that’s really more of a quibble – any sophisticated UI is going to have complexities and inconsistencies that won’t please everyone. Once you decide which interface you want – the default General UI or the Advanced UI, you should be able to get used to things fairly quickly.  And again, I like to think of this light as fundamentally a press-and-hold style light for selecting modes, with the clicks really about shortcuts or group selections.

To help you see how all that works in practice, I’ve posted a video to my YouTube channel (@cpfselfbuilt) demonstrating the UI in practice:

Circuit Measures

Pulse-Width Modulation (PWM):

Main1:
Max

There is no sign of PWM or circuit noise at any level. The light appears to be fully constant-current controlled. 🙂

Strobe:

Strobe3:

Strobe2:

Strobe1:

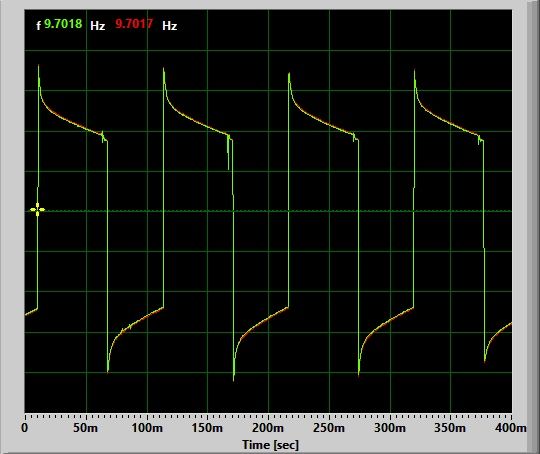
Strobe3 frequency is a fast 9.7 Hz, at full power (Turbo2). Fairly disorienting.

Strobes1 and 2 are slow signaling strobes, both at 1 Hz. Strobe 2 is full power (Turbo2), whereas Strobe 1 is reduced to the Main2 level.

This is basically unchanged from the Nichia version.

Charging:
Max
Max
Max

The charging dock is identical to the smaller Nichia version of this light – they can be used interchangeably for the two models.

As previously noted, charging this light is a little unusual. The magnetic charging base will snap on the tailcap snugly, and initiate the charge. The power LED glows red when charging, and the battery LED glows green when done (or when the dock is disconnected). The green LED will flash for a few second when first connecting, as it evaluates the charge status of the battery. Note that it will not initiate a charge if the cell is >4.0V resting (i.e., the charging status stays green).

There is also an orange blinking error feature apparently, but I haven’t seen it – it occurs if the charging source is incapable of providing enough power. Solid orange means it is charging at a reduced current.

Note: You need to unscrew the tailcap a quarter-turn, to lock out the light first, in order to charge it. If you try to charge with the tailcap fully connected, you will get a flashing red error light on the charging base. This is a very unusual design.

Resting voltage <3.0V
Max

Resting voltage >3.0V
Max

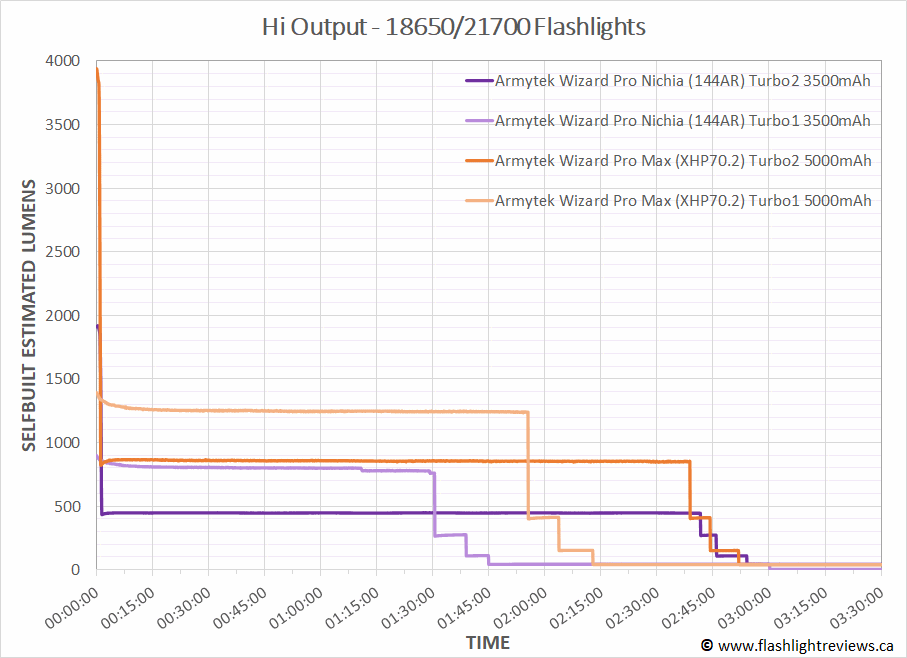
Just like the Nichia version, the Armytek Wizard C2 Pro Max shows an initial low initial charging current of ~0.13A when the cell is heavily depleted (<3.0V resting), which jumps up to ~1.0A once the cell is >3.0V resting. This two-current charging is a good design, and indicates a safe integrated charging circuit. While this max charging rate is very reasonable for a 18650 battery, I do find it a little low for the 21700 bundled here. But this is another sign they are using very much the same charging control circuit.

In my testing, once charging begins it will fully charge the cell up ~4.19V resting at termination. However, as mentioned earlier (and like the Nichia version) it will not initiate a charge above ~4.0V resting. You will need to use a stand-alone charger if you wish to top-up you cells within the ~4.0-4.2V range.

Standby / Parasitic Drain:

I measured the standby current as 8.8 uA.

Like its smaller sibling, this is completely negligible, and not a concern (i.e., it would take many years to drain the cell). Nevertheless, I always recommend you store the light locked out at the tailcap when not in use, to prevent accidental activation and cut the standby drain. A quarter turn twist of the tail will lock out this light, despite the lack of anodized screw threads. Note the charger feature still works when the light is locked out (indeed, it only works when the light is locked out, which is pretty unique).

Emitter Measures

This section is a new feature of my reviews, where I directly measure key emitter characteristics in terms of colour temperature, tint, and colour rendition. Please see my Emitter Measures page to learn more about what these terms mean, and how I am measuring them.

As explained on that page, since I am using an inexpensive uncalibrated device, you can only make relative comparisons across my reviews (i.e., don’t take these numbers as absolutely accurate values, but as relatively consistent across lights in my testing).

The key measures above are the colour temperature of ~3585K, and the moderately positive tint shift (+0.0083 Duv) to yellow at this temperature.

For CRI (Ra), I measured a combined score of 77.

These values seem reasonable for a warm-tinted XHP70.2 emitter (which tend toward positive Duvs at all CCTs), and match my visual experience of this light.

Beamshots

All outdoor beamshots are taken on my Canon PowerShot S5 IS at f/2.7, 0.5 secs exposure, ISO 400, daylight white balance. The bend in the road is approximately 40 meters (~45 yards) from the camera. Learn more about my outdoor beamshots here (scroll down for the floody light position used in this review).

Click on any thumbnail image below to open a full size image in a new window. You can then easily compare beams by switching between tabs.


It is an interesting beam pattern for these Armytek lights; a very even flood beam. The Max version here has a slightly wider spill than the Nicha version, with even less demarcation from spot to spill. I think it could make a good bicycle light, for general illumination in the immediate foreground.

Testing Results

My summary tables are generally reported in a manner consistent with the ANSI FL-1 standard for flashlight testing. In addition to the links above, please see my output measures page for more background.

All my output numbers are based on my home-made lightbox setup. As explained on that methodology page, I have devised a method for converting my lightbox relative output values to estimated lumens. My Peak Intensity/Beam Distance are directly measured with a NIST-certified Extech EA31 lightmeter.

Wizard C2 Pro Max Testing Results

ModeSpec LumensEstimated Lumens @0secEstimated Lumens @30 secsBeam Intensity @0secBeam Intensity @30secsBeam Distance @30secsPWM/Strobe FreqNoise FreqCharging Current <3VCharging Current >3VParasitic DrainWeight w/o BatteryWeight with Battery
Firefly10.320.30.3---NoNo0.13 A1.0 A8.8 uA82 g150 g
Firefly24.388---NoNo0.13 A1.0 A8.8 uA82 g150 g
Main1424141---NoNo0.13 A1.0 A8.8 uA82 g150 g
Main2140150150---NoNo0.13 A1.0 A8.8 uA82 g150 g
Main3420430430---NoNo0.13 A1.0 A8.8 uA82 g150 g
Turbo11210-8401,4001,350---NoNo0.13 A1.0 A8.8 uA82 g150 g
Turbo23,720-8403,9503,8501,710 cd1,670 cd82 mNoNo0.13 A1.0 A8.8 uA82 g150 g
Strobe1140-----1.0 HzNo0.13 A1.0 A8.8 uA82 g150 g
Strobe23,720-----1.0 HzNo0.13 A1.0 A8.8 uA82 g150 g
Strobe33,720-----9.7 HzNo0.13 A1.0 A8.8 uA82 g150 g

It’s great to see the multiple Moonlight/Firefly modes here, especially the ultra-low Firefly1 at <0.1 lumens (not sure why we have lost the ~1.0 Firefly2 mode from the Nichia model though). Spacing of modes is very good, with a great range of levels across the whole dynamic range.

At 82g/150g (without/with battery), the Wizard C2 Pro Max is noticeably heavier than the smaller Nichia model (which weighed in at 113g with battery). This may an issue for some in using the Max version as a headlamp (although it will translate into longer runtime as a bike light).

To see full testing results for all modern lights in my testing, check out my Database page.

Runtimes

As always, my runtimes are done under a small cooling fan, for safety and consistency. To learn more about how to interpret runtime graphs, see my runtimes methodology page.

To start, let’s see how the 1×21700 Max version compares to the 1×18650 Nichia version:

Hi

Med

Basically, the circuit regulation and performance is identical – although of course the larger Max version produces more output for equivalent runtime (or longer runtime for equivalent output), consistent with the XHP70.2 emitter and larger capacity cell.

And now how the Max version compares to the 21700 competition:

Max

Hi

Med

And here’s a blow-up of the first few mins, so you can see the initial Turbo step-down better:

Max

The Wizard C2 Pro Max shows excellent efficiency and regulation at all levels tested, consistent with its smaller sibling, and exactly in the same range as other XHP70.2 lights with very good efficiency circuits. It shows a very controlled step-down pattern as the battery nears exhaustion. I find this result particularly impressive, given warmer tints tend to show lower efficiency (due to the extra phosphor added compared to cool white emitters).

Note that the Turbo2 level steps down a little sooner than the Nichia version did at around 1min to a ~800 lumen level, compared to the ~1350 lumen Turbo1 level. Unless you really need the super high output of Turbo2 for that short length of time, you may find Turbo1 more generally useful (I know I do).

Pros and Cons

ProsCons
Excellent current-controlled efficiency, with stable regulation in all modes.User interface is a little unusual, with two distinct UIs with differing mode group sets (with some shortcut inconsistencies between).
Textured optic provides an extremely floody beam, with no real hotspot.Charging dock requires tailcap to be loosened, and won't initiate a charge when cell is >4.0V resting.
Great overall range of output levels, with true Moonlight modes.Need to keep tailcap and screw threads very clean, or you can get some flickering on the highest level.
Compact and easy to activate with a single large button, and a number of warning/notification modes available.
Included high-capacity battery with custom USB charging dock (magnetic).

A neutral comment is that the Wizard C2 Pro Max is an angle-head light – which is beneficial when using as a headlamp or clip-on light, but is different from most other lights.

More significantly, the first sample of the Max that Armytek sent me was defective on Turbo2. It had greatly reduced output from the start, and quickly developed a persistent flicker on this level that wouldn’t go away. The replacement sample worked perfectly from the beginning.

Overall Rating

Preliminary Conclusions

This is another strong showing from Armytek. Like its smaller sibling the 1×18650 Wizard C2 Pro Nichia, this is a powerful and versatile flood light, with a lot going for it.

Angled flood lights have a lot of very practical uses, especially for up-close work or in the near field. Of course, this is also a very high-output light, so it can light up a much wider range than typical. It’s a bit heavy for a headlamp, but the headband holds it in place well. The relatively warm tint is convenient for outdoor use – although I prefer both the neutral white tint and the much higher CRI of the Nichia version. Still, I can see this making an outstanding bike light.

Like its junior version, the performance of the circuit was outstanding – excellent regulation and output/runtime efficiency at all level tested. Given the relatively small thermal mass however, it needs to step down quickly on max (Turbo2). So here again, I recommend Turbo1 as a more practical high output level.

The build has the same solid and rugged feel as the Nichia version, with Armytek’s classic grippy matte finish. Switch action is good, and the status LEDs under the switch serve multiple uses. The charging dock is a little unusual in that it needs the tailcap loosened (and won’t initiate a charge >4.0V resting). Note that this is exactly the same dock as the 1×18650 Nichia version –  and hence, the same charging characteristics.

Mode level spacing is good, although for some reason you don’t have the ~1 lumen Firefly2 level here (you still have the <1 lumen Firefly1). The user interface is a bit complex with its General and Advanced UIs and mode sets, but you can quickly get used to it.

I had initially given the Nichia version 4.5 stars, knocking off half a star for the UI complexity and charging dock quirks. But I have since reconsidered that light as a true 5 star, since the UI isn’t that hard to get used to. In comparison, I think this Max version is more appropriate 4.5 light, given the lower CRI, missing Firefly2, and low (relative) charging rate. But it’s still a great light – and may be better suited to you if you need the great output and/or runtime.

Another strong contender in the full flood family of lights!

Acknowledgement

The Wizard C2 Pro Nichia was provided for review by Armytek. All opinions are my own however, and the light received the same rigourous and objective testing as all other lights that I have reviewed. At the time of review, this light retails for ~$95 USD (~$125 CDN).

Armytek is offering a 15% discount code to readers of my website, please use code flashlightreviews15 when checking out of the Armytek.com website.

Armytek Wizard C2 Pro Nichia

The Wizard C2 Pro Nichia is a solidly-built compact headlamp with excellent colour rendition, running on a single included 18650 battery. Features a sophisticated user interface and innovative magnetic charging dock.

  1. Introduction
  2. Manufacturer Specifications
  3. Package Details
  4. Build
  5. User Interface
  6. Circuit Measures
  7. Emitter Measures
  8. Beamshots
  9. Testing Results
  10. Runtimes
  11. Pros and Cons
  12. Overall Rating
  13. Preliminary Conclusions
  14. Acknowledgement

Introduction

I had tested a good number of Armytek lights in my previous reviewing career, and they had always performed well. Known for very robust builds, I was curious to see what their new models were like. Interestingly, the lights they sent me were both angle lights (i.e., the emitter is on the side of the head). This design is very helpful when carrying the light clipped on you, or as a headlamp.

Although I am generally focusing on the newer 1×21700 class for these first new reviews, I thought I would start with Armytek’s 1×18650 Wizard C2 Pro Nichia. It features a single Nichia 144AR Hi CRI neutral white tint emitter, which is a new one for me. Let’s see how it compares.

Manufacturer Specifications

Note: as always, these are simply what the manufacturer provides – scroll down to see my actual testing results.

FeatureSpecs
MakerArmytek
ModelWizard C2 Pro Nichia
EmitterNichia 144AR
Tint4500K >90 CRI
Max Output (Lumens)1,600
Min Output (Lumens)0.1
Max Runtime200 days
Max Beam Intensity (cd)3,200 cd
Max Beam Distance (m)113 m
Mode Levels7
FlashingStrobe1, Strobe2, Strobe3
Battery1x18650
Weight (w/o battery)65 g
Weight (with battery)115 g
Length112 mm
Head Diameter33 mm
Body Diameter20.4 mm
WaterproofIP68 10m

Armytek considers this a “warm light” in its specs and printed material, but I would characterize the 4500K CCT as neutral white.

Package Details

The Wizard C2 Pro Nichia ships in a cardboard display box with an extensive number of labels and descriptions. Inside, you will find the following:

  • Armytek Wizard C2 Pro Nichia flashlight
  • Stainless steel pocket clip
  • Magnetic USB charging dock
  • 18650 battery (3500mAh)
  • Headband and rubber headlamp mount
  • Bicycle mount
  • 2 spare O-rings
  • Adhesive tape strip (3M)
  • Manual

It’s a good package of accessories, identical to its larger sibling. Note that the multi-lingual manual is really more of a quick-start guide, and there is a slightly more detailed full manual that you can download from the Armytek website (direct PDF link here). I recommend you download the longer manual in order to take full advantage of all the features and better understand the user interface.

Build

20230402_162334
From left to right: ArmyTek 18650 (3500mAh), Acebeam 18650 (3100mAh), Armytek Wizard Pro Nichia (18650), Acebeam E70 Mini (18650), Armytek Wizard C2 Pro Max (21700), Acebeam E70 (21700), Fenix E35 v3 (21700), Convoy S21E (21700).


This physical build is reminiscent of the early bomb-proof Armyteks – it feels very solid in the hand. That said, is also quite compact, about the same length as my Acebeam E70 Mini.

The anodizing looks exactly like the old matte finish of early Armyteks, very grippy (almost feels rubberized in a way).  It appears to be thick and durable – although I find it also marks up easily (i.e., not scratched down to the bare aluminum, but shows handling marks on the surface). I guess its fair to say Armytek sees their lights as work-horses, not show-horses.

The light lacks traditional knurling, but the ridge details cut-outs and grippy finish help produce good hand grip in my view. The pocket clip attaches very firmly (likely to mark upon removal) and helps further with grip (and clip-on carry of course).

The main distinctive feature is the angle-head light source. As mentioned above, this is very helpful as a headlamp, bicycle light or when clipping onto you. It’s also reasonable to carry this way by hand, especially given the large button on the size of the head (i.e., can easily use your thumb to activate the switch). Switch feel is good, with a definite click upon press.

There is a green/red LED under the switch cover that can signal the status of the light. By default, it flashes red once when the switch is clicked (or glows red when doing a press-and-hold). You can configure it to flag a green locator beacon once every four secs if you wish (see UI section below). It also serves as a low battery and heat warning, as also described in the UI section.

The light lacks a USB-C charging port on the body, but there is a USB-based magnetic charging dock that charges the light through the tailcap (scroll down to my Circuit section for more details on how it works). The light uses a standard flat-top 18650 cell (Armytek-branded 3500mAh in this case), so can easily be swapped out and charged in a stand-alone charger.

Note that this means that there are exposed contact points on the tailcap. However, the center contact is sufficiently recessed (and small enough) to avoid any likely problems.

The magnet is located in the tailcap (and is not user-removable). It is also very strong, and so may attract metal objects. Of course that means you can also attach it to metal surfaces to stand it as a worklight.

The light uses a neutral white Nichia 144AR emitter (4500K, Hi CRI >90), under a textured TIR optic. The specs claim a 70 degree hotspot and a 120 degree spill, but there is no sharp demarcation between them – this produces a very even flood light. Scroll down to the Emitter measures section for a tint/CRI discussion.

The head has a flat stainless steel bezel ring.

User Interface

The user interface (UI) of this light is a bit complex – and somewhat reminiscent to me of the second generation of the inaugural model of Armytek, the Predator.

Just like that light, you will need to download the full manual from Armytek to learn how to use it fully (i.e., the bundled manual is more just to get you started). The detailed manual is available from the website’s product page (downloadable as PDF here). You can also follow the link from the QR code on the box, which takes you to main product page. I don’t understand why they don’t provide this better manual with the light itself, as you are likely going to find it frustrating trying to figure it out all the features from the incomplete quick-start guide alone.

That said, even the full manual doesn’t do a great job of fully explaining the implementation of the UI (although if you follow the instructions, you will likely figure it out for yourself). But to help you out, let me try to break it all down for you.

Note that if you are more of a visual learner, you can skip to the end of this section for a video overview describing how the UI works.

To start, you can switch between two types of operation mode sets (with different mode groups available) – the General UI and the Advanced UI. To do this, unscrew the tailcap by a quarter turn with the flashlight off. Then press-and-hold the button while you tighten the tailcap. The light is set by default at the factory to General UI.

General UI Operation

The General UI gives you access to the two Firefly modes (Firefly1 and Firefly2), all three Main modes (Main1, Main2, Main3), and only one Turbo mode (Turbo2 by default – although you can change this to Turbo1 by going through the Advanced UI, as I’ll explain later). Note the strobe modes are not available in the General UI.

General UI, from OFF:

  • Press-and-hold: Turns On in Firefly1 and cycles through the two Firefly modes followed by the three Main modes, and then continues to loop through the Main modes (you select by releasing the switch). So, sequence is: Firefly1 > Firefly2 > Main1 > Main2 > Main3 > Main1 > Main2 > Main3 > Main 1 > etc.
  • Single-click: Turns On in the last used mode (the specific six constant modes described in the opening paragraph are all available to be memorized, including Turbo).
  • Double-click: Nothing (i.e., just turns On and then Off again – but scroll down to see what happens when already On).
  • Multiple clicks (3 or more): Nothing, the light simply turns Off and back On with successive clicks.

General UI, from ON:

  • Press-and-hold: If you are currently in a Firefly mode, it will cycle through the Firefly modes and then through all the Main modes, with in a repeating loop of Main modes (i.e., the same as press-and-hold from Off). If you are in the Main mode or Turbo mode, press-and-hold will cause it to cycle through the Main modes only.
  • Single-click: Turns the light Off.
  • Double-click: Jumps to Turbo (assuming you are not already in Turbo – in which case, it jumps back to last mode used before entering Turbo).
  • Multiple clicks (3 or more): Nothing, the light will just turn Off and back On.

This is an unusual arrangement, but it’s not that hard to get used to for the most part. I recommend you think of this General UI as fundamentally a press-and-hold interface, with single- and double-click offering access to the last memorized level and toggling to/from the Turbo level, respectively. The main tweak that I would have liked to see is a more consistent implementation of press-and-hold when On (i.e., I would like to have it always cycle through Firefly, not just when starting in Firefly) – but that’s just personal preference.

Note that General UI lacks the Strobe modes and Turbo 1 (although you can switch the default Turbo level by programming in Advanced UI if you want). General UI should work well for most users right out of the box.

Advanced UI Operation

This is not well explained in the manual, although the information is technically all there.  Simply put, Advanced UI gives you access to 4 defined Mode Group sets that you can choose between, as well as the ability to cycle through a larger subset (but not all) of the constant output modes.

Available to you in the defined Mode Group sets are all three Firefly levels in the Firefly Mode Group (Firefly1, Firefly2, Firefly3), all three Main levels in Main Mode Group (Main1, Main2, Main3), both Turbo levels in Turbo Mode Group (Turbo1, Turbo2), and all three strobes in the Strobe Mode Group (Strobe1, Strobe2, Strobe3). The various Mode Groups are typically accessed by multiple clicks from either On or Off as described below (except for Firefly modes which are accessed by a press-and-hold, with additional modes).

In addition, when you activate the light in Advanced UI by a press-and-hold it will run through the first seven constant output modes from Firefly1 up to Turbo1 (not sure why only those, but it’s two more than the General UI). Again, this is the only way to access Firefly modes (basically, think of this ramp as Firefly plus Main and some Turbo).

Advanced UI, from OFF:

  • Press-and-hold: Turns the light On, and runs through the first 7 constant output modes in sequence from Firefly1 to Turbo1, on a repeating loop (i.e., no more excluding Firefly modes after the first round, as General UI does). All modes except Turbo2 and the three Strobe modes are on this repeating sequence. When you release the switch on any level, you are now in that Mode Group set if you press-and-hold again (i.e., the light will only cycle through the levels of that Mode Group set now). So, for example, if you release the switch on Turbo1, a subsequent press-and-hold of the switch will cycle between the two Turbo modes in this Mode Group.
  • Single-click: Turns On in last used mode (note that mode memory now applies to Strobe as well as all constant output modes).
  • Double-click: Turns On in the Main Mode Group
  • Triple-click: Turns On in the Turbo Mode Group
  • 4 clicks: Turns On in the Strobe Mode Group
  • Multiple clicks (5+): Nothing (i.e., light will just activate in the Strobe Mode Group)

Advanced UI, from ON:

  • Press-and-hold: Light will cycle through the levels in the current Mode Group only.
  • Single-click: Turns the light Off.
  • Double-click: Jumps to the Main Mode Group (or jumps down to Firefly1 if already in Main Mode Group).
  • Triple-click: Jumps to the Turbo Mode Group (or does nothing if light is already in Turbo Mode Group).
  • 4 clicks: Jumps to the Strobe Mode Group (or does nothing if light is already in Strobe Mode Group). Note this means that you have to double-click or triple-click to exit Strobe modes when On (or turn Off and then press-and-hold when turning back On).
  • Multiple clicks (5+): Nothing, it just jumps Strobe mode and stays there (i.e., acts as 4 clicks).

Note that the light will memorize the last Turbo mode you used (i.e., Turbo1 or Turbo2).  If you revert back to General UI, it will continue to use that memorized Turbo mode. So this is how you can program the lower Turbo1 in the General UI if you wish.

I personally prefer Advanced UI over General UI, for the more consistent implementation of press-and-hold from Off (i.e., repeatedly cycles a wider set of modes, including Firefly levels). However, you have to remember to triple-click for Turbo now. Also, when On, you are limited to only cycling through your current Mode Group with a subsequent press-and-hold. But it’s easy enough to remember to turn Off and start a press-and-hold again to access the other modes.

What I don’t like in Advanced UI is the inconsistent effect of multiple clicks when On. The first time I activated Strobe mode for example, it took me a while to figure out how to get out (i.e., only double- or triple-click will exit, unless you turn off and reset by a press-and-hold). This is not intuitive, and at a minimum I would have liked for the same number of clicks to enter a Mode Group also be used to consistently exit it. But on the plus side, Strobes are reasonably well hidden if you don’t want to bother with them at all in Advanced UI. And you can always stick with General UI if you really don’t like it.

In terms of the strobes, I do like the slow signaling strobes here, with both high and low power (especially as a bike light).

Standby Indicator:

As mentioned in the build section, you can toggle on a standby indicator that briefly flashes the green LED under the switch cover once every four seconds. You do this in a similar way to how you switch between General UI and Advanced UI, but with an extra step: loosen the tailcap a quarter turn, hold down the button, tighten the tailcap AND then immediately loosen the tailcap a quarter turn. I haven’t measured the standby drain in this mode, but I suspect its pretty minimal.

Shortcuts:

Rather then go through it all again, please see above for how all the clicks and press-and-holds work in the two UI.  In simple terms, press-and-hold from Off is necessary to first access Firefly modes, and multiple clicks are necessary to access Turbo from either On or Off.

Mode Memory:

Yes. The light remembers the last mode used and returns to it (constant output modes only in General UI, all modes including Strobes in Advanced UI). Memory mode persists, even with a battery change.

Lock-out Mode:

Yes. Simply unscrew the tailcap a quarter turn. Even though the tailcap has non-anodized threads, it does turn Off while unscrewing from fully tight.

Low battery warning:

Yes. The switch indicator will signal the battery status once the cell is <25% (at which  point, it will flash orange every 2 seconds). Once the battery is <10%, it will flash red every second.

High temperature warning:

The switch indicator will also signal a high temperature warning, with 3 orange flashes every 2 secs. If heat is critical, it will flash red 3 times every second, and the brightness level will automatically step down.

According to the manual, the brightness decreases once the light approaches 58 degrees Celsius.

Reviewer Comments:

This is a sophisticated interface, with a lot of extra bells-and-whistles (in terms of mode groupings, standby and battery/heat indicators, etc.). It is a bit confusing to configure, and there are some inconsistencies in how features are implemented across UI Mode Group sets (i.e., which modes are included in a ramp, exact number of clicks to access or exit a given Mode set, etc.). And since this is not completely clear in the manual (even the extended manual online), you are likely need to refer the UI instructions here to reprogram.

But that’s really more of a quibble – any sophisticated UI is going to have complexities and inconsistencies that won’t please everyone. Once you decide which interface you want – the default General UI or the Advanced UI, you should be able to get used to things fairly quickly.  And again, I like to think of this light as fundamentally a press-and-hold style light for selecting modes, with the clicks really about shortcuts or group selections.

To help you see how all that works in practice, I’ve posted a video to my YouTube channel (@cpfselfbuilt) demonstrating the UI in practice:

Circuit Measures

Pulse-Width Modulation (PWM):

Main1:

There is no sign of PWM or circuit noise at any level. The light appears to be fully constant-current controlled. 🙂

Strobe:

Strobe3:

Strobe2:

Strobe1:

Strobe3 frequency is a fast 9.6 Hz, at full power (Turbo2). Fairly disorienting.

Strobes1 and 2 are slow signaling strobes, both at 1 Hz. Strobe 2 is full power (Turbo2), whereas Strobe 1 is reduced to the Main2 level.

Charging:

Charging this light is a little unusual. The magnetic charging base will snap on the tailcap snugly, and initiate the charge. The power LED glows red when charging, and the battery LED glows green when done (or when the dock is disconnected). The green LED will flash for a few second when first connecting, as it evaluates the charge status of the battery. Note that it will not initiate a charge if the cell is >4.0V resting (i.e., the charging status stays green).

There is also an orange blinking error feature apparently, but I haven’t seen it – it occurs if the charging source is incapable of providing enough power. Solid orange means it is charging at a reduced current.

Note: You need to unscrew the tailcap a quarter-turn, to lock out the light first, in order to charge it. If you try to charge with the tailcap fully connected, you will get a flashing red error light on the charging base. This is a very unusual design.

Resting voltage <3.0V

Resting voltage >3.0V

The Armytek Wizard C2 Pro Nichia shows an initial low initial charging current of 0.13A when the cell is heavily depleted (<3.0V resting), which jumps up to 1.0A once the cell is >3.0V resting. This two-current charging is a good design, and indicates a safe integrated charging circuit. The max charging rate is also very reasonable for a 186500 battery.

In my testing, once charging begins it will fully charge the cell up ~4.19V resting at termination.  However, as mentioned earlier, it will not initiate a charge above ~4.0V resting. You will need to use a stand-alone charger if you wish to top-up you cells within the ~4.0-4.2V range.

Standby / Parasitic Drain:

I measured the standby current as 6.6 uA.

This is negligible, and not a concern (i.e., it would take many years to drain the cell). Nevertheless, I always recommend you store the light locked out at the tailcap when not in use, to prevent accidental activation and cut the standby drain. A quarter turn twist of the tail will lock out this light, despite the lack of anodized screw threads. Note the charger feature still works when the light is locked out (indeed, it only works when the light is locked out, which is pretty unique).

Emitter Measures

This section is a new feature of my reviews, where I directly measure key emitter characteristics in terms of colour temperature, tint, and colour rendition. Please see my Emitter Measures page to learn more about what these terms mean, and how I am measuring them.

As explained on that page, since I am using an inexpensive uncalibrated device, you can only make relative comparisons across my reviews (i.e., don’t take these numbers as absolutely accurate values, but as relatively consistent across lights in my testing).

The key measures above are the colour temperature of ~4170K, and the slight negative tint shift (-0.0036 Duv) to orange-rose at this temperature.

For CRI (Ra), I measured a combined score of 94.

These values seem reasonable for a Nichia 144AR emitter, and match my visual experience of this light.

As you go down in output from Turbo through to Firefly modes, the CCT consistently drops. To get an idea of the dynamic range, I measured the Turbo2 mode as ~4500K.  settling down to ~4000K in Firefly1. The Duv is a consistent negative value across all levels, and ranges from -0.0030 through -0.0055 depending on the level (I don’t see an obvious trend across outputs, but it is always within that slight negative range).

So, a very pleasant warmer-end of neutral white tint (most prefer the negative Duv, myself included). It also seems fairly accurate to the specs.

Beamshots

All outdoor beamshots are taken on my Canon PowerShot S5 IS at f/2.7, 0.5 secs exposure, ISO 400, daylight white balance. The bend in the road is approximately 40 meters (~45 yards) from the camera. Learn more about my outdoor beamshots here (scroll down for the floody light position used in this review).

Click on any thumbnail image below to open a full size image in a new window. You can then easily compare beams by switching between tabs.


It is an interesting beam pattern for these Armytek lights; a very even flood beam, with no demarcation from spot to spill. I think it could make a good bicycle light, for general illumination in the immediate foreground.

Testing Results

My summary tables are generally reported in a manner consistent with the ANSI FL-1 standard for flashlight testing. In addition to the links above, please see my output measures page for more background.

All my output numbers are based on my home-made lightbox setup. As explained on that methodology page, I have devised a method for converting my lightbox relative output values to estimated lumens. My Peak Intensity/Beam Distance are directly measured with a NIST-certified Extech EA31 lightmeter.

Wizard C2 Pro Nichia Testing Results

ModeSpec LumensEstimated Lumens @0secEstimated Lumens @30 secsBeam Intensity @0secBeam Intensity @30secsBeam Distance @30secsPWM/Strobe FreqNoise FreqCharging Current <3VCharging Current >3VParasitic DrainWeight w/o BatteryWeight with Battery
Firefly10.10.040.04---NoNo0.13 A1.0 A6.6 uA64 g113 g
Firefly21.00.90.9---NoNo0.13 A1.0 A6.6 uA64 g113 g
Firefly34.65.35.3---NoNo0.13 A1.0 A6.6 uA64 g113 g
Main1344141---NoNo0.13 A1.0 A6.6 uA64 g113 g
Main290120120---NoNo0.13 A1.0 A6.6 uA64 g113 g
Main3250310300---NoNo0.13 A1.0 A6.6 uA64 g113 g
Turbo1750-440900900---NoNo0.13 A1.0 A6.6 uA64 g113 g
Turbo21,600-4401,9001,9004,490 cd4,110 cd128 mNoNo0.13 A1.0 A6.6 uA64 g113 g
Strobe190-----1.0 HzNo0.13 A1.0 A6.6 uA64 g113 g
Strobe21,600-----1.0 HzNo0.13 A1.0 A6.6 uA64 g113 g
Strobe31,600-----9.6 HzNo0.13 A1.0 A6.6 uA64 g113 g

It’s great to see the multiple Moonlight/Firefly modes here, especially the ultra-low Firefly1 at <0.1 lumens. Spacing of modes is very good, with a great range of levels across the whole dynamic range.

At 64g/113g (without/with battery), the Wizard C2 Pro Nichia is noticeably lighter and smaller than other lights in my testing.

To see full testing results for all modern lights in my testing, check out my Database page.

Runtimes

As always, my runtimes are done under a small cooling fan, for safety and consistency. To learn more about how to interpret runtime graphs, see my runtimes methodology page.

18650-Max

18650-Hi

18650-Med

And here’s a blow-up of the first few mins of the Wizard C2 Pro Nichia on Turbo/Hi, so you can see the initial Turbo step-down better.

18650-Max

The Wizard C2 Pro Nichia shows excellent efficiency and regulation at all levels tested, consistent with its larger sibling and other good current-controlled lights. It shows a very controlled step-down pattern as the battery nears exhaustion.

This is my first Nichia 144AR emitter, but it seems to be remarkably efficient. It seems to beat out the 519A emitter competition in terms of runtimes, but that’s hard to say for certain given the differing battery capacities in those other lights.

Note that the Turbo2 level steps down over 1-1.5mins to ~440 lumen level, compared to the ~800 lumen Turbo1 level. Unless you really need the super high output of Turbo2 for that short length of time, you may find Turbo1 more generally useful.

Pros and Cons

ProsCons
Excellent current-controlled efficiency, with stable regulation in all modes.User interface is a little unusual, with two distinct UIs with differing mode group sets (with some shortcut inconsistencies between).
Textured optic provides an extremely floody beam, with no real hotspot.Charging dock requires tailcap to be loosened, and won't initiate a charge when cell is >4.0V resting.
Great overall range of output levels, with several true Moonlight modes.Need to keep tailcap and screw threads very clean, or you can get some flickering on the highest level.
Compact and easy to activate with a single large button, and a number of warning/notification modes available.
Included high-capacity battery with custom USB charging dock (magnetic).

A neutral comment is that the Wizard C2 Pro Nichia is an angle-head light – which is beneficial when using as a headlamp or clip-on light, but is different from most other lights.

Overall Rating

Preliminary Conclusions

I am really impressed with this light. It has a great tint and beam, with my preferred neutral white tint and all the benefits of Hi CRI. The full flood is also very useful in a lot of situations. Armytek obviously considers this a headlamp and a bike light, and I would agree with both assessments. I would also throw in dog-walking. Like for biking at night, I’ve always found the involuntary “follow the bouncing ball” perceptual effect of a hotspot distracting, and prefer full flood. So the pocket/belt clip is also appreciated.

The performance of the circuit was great – excellent regulation and output/runtime efficiency at all levels tested. Given the small thermal mass however, it needs to step down fairly quickly on max (Turbo2) – so I suspect you will find constantly-regulated Turbo1 to be more generally useful.

The build feels sufficiently solid and rugged, with Armytek’s classic grippy finish (although I’ve noticed previously that their lights can mark up easily). Switch action is good, and the status LEDs under the switch serve multiple uses. The charging dock is a little unusual in that it needs the tailcap loosened (and won’t initiate a charge >4.0V resting). But the charging circuit works well, with very reasonable charging rates.

Mode level spacing is good, and I really like seeing all the Firefly (aka Moonlight) modes.

The main issue is the complex and somewhat inconsistent user interface. I had initially knocked off half a star for this complexity, but I have since reconsidered. It’s always hard to have a sophisticated interface on a single switch without some compromises. It certainly has a lot of good features, and you can easily get used to it with a bit of practice. Note they could also improve the length and clarity of the manual in this regard, but the UI section above should you maximize your use of the light.

If you are in the market for a floody light with great tint and colour rendition, and a great range of levels, the Wizard C2 Pro Nichia has a lot to offer. Certainly a top pick.

Acknowledgement

The Wizard C2 Pro Nichia was provided for review by Armytek. All opinions are my own however, and the light received the same rigourous and objective testing as all other lights that I have reviewed. At the time of review, this light retails for ~$95 USD (~$125 CDN).

Armytek is offering a 15% discount code to readers of my website, please use code flashlightreviews15 when checking out of the Armytek.com website.