Armytek Crystal Pro

The Crystal Pro is a compact headlamp/keychain/bike flashlight with a full-flood white beam and red beam. It runs on an integrated Li-Po battery.
- Introduction
- Manufacturer Specifications
- Package Details
- Build
- User Interface
- Circuit Measures
- Emitter Measures
- Beamshots
- Testing Results
- Runtimes
- Pros and Cons
- Overall Rating
- Preliminary Conclusions
- Acknowledgement
Introduction
Last year Armytek updated its Crystal headlamp/keychain light to a new Pro version, adding some additional functionality.
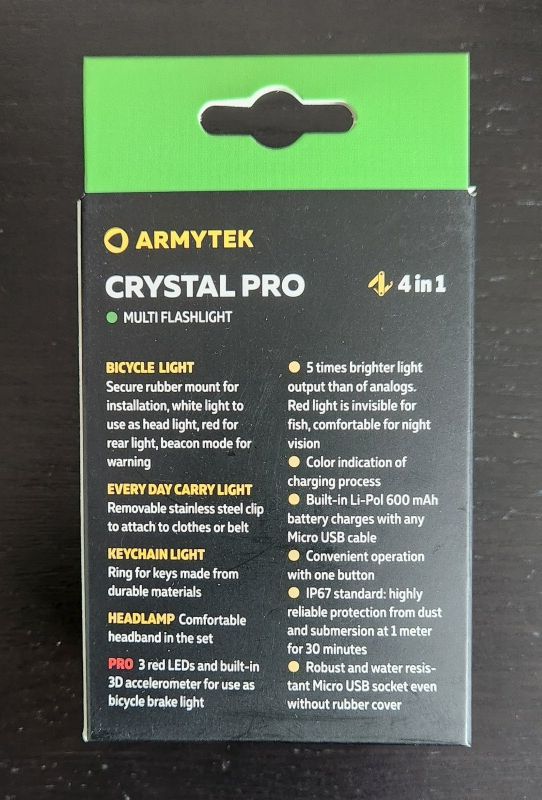
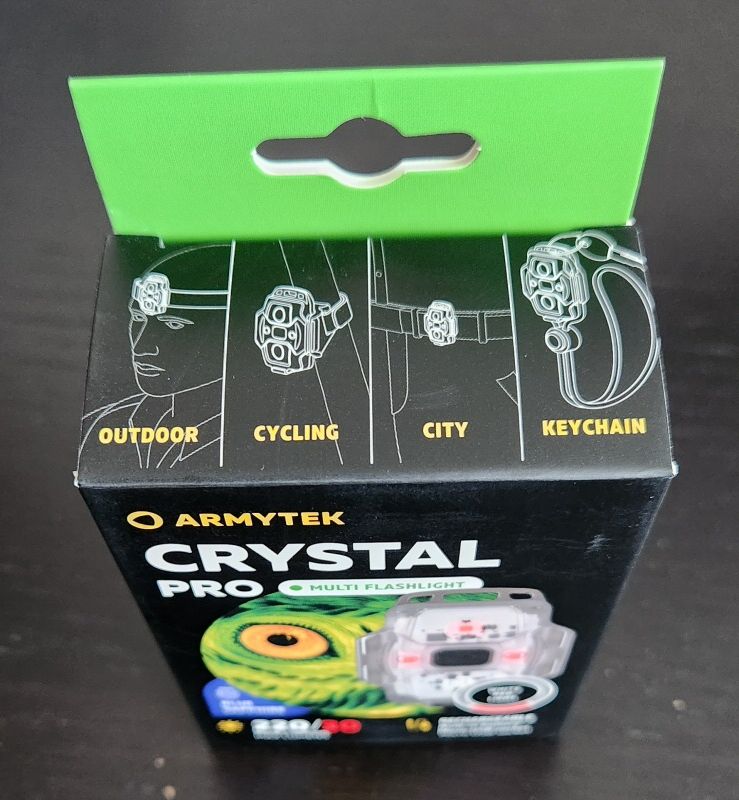
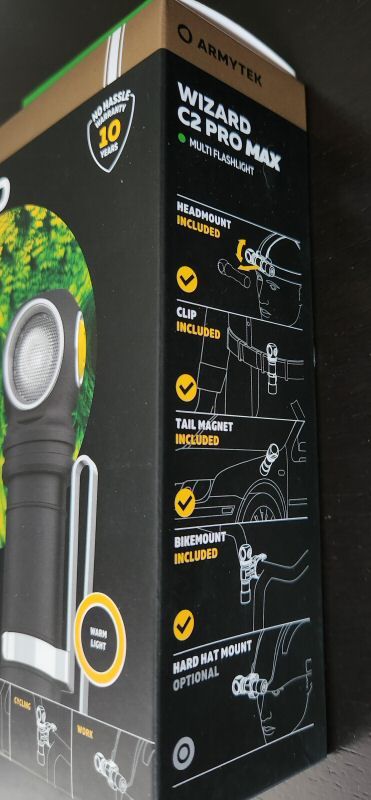
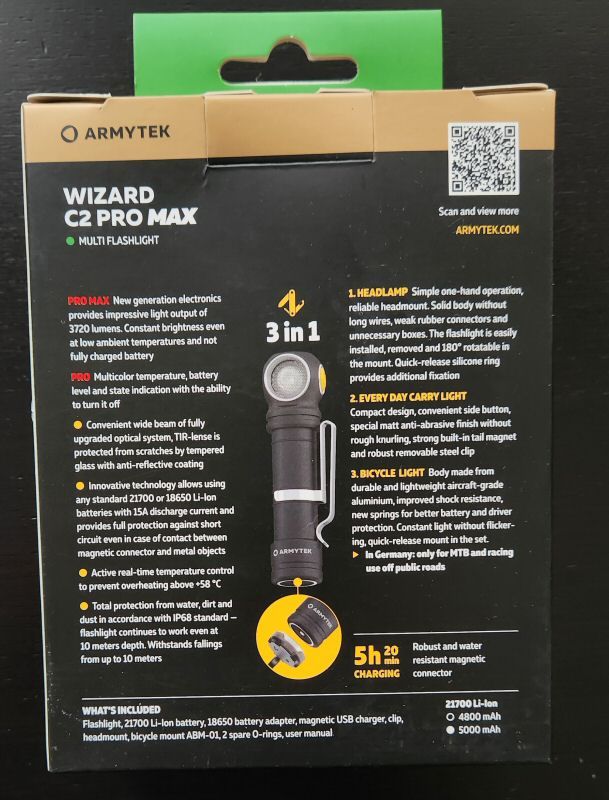
At first glance, this model doesn’t look all that different from the original pocket-sized headlamp/keychain rechargeable light that I reviewed last year. But it does offer a number of upgrades, include increased output and a novel accelerometer feature, as I will describe below. Featuring both cool white and red LEDs, this distinctive Armytek design lets you strap it to your head with the accompanying band, clip on to a jacket/bag with the built-in pocket clip, strap it to bike frame, or use as a keychain fob.
Let’s see how it performs in my testing.
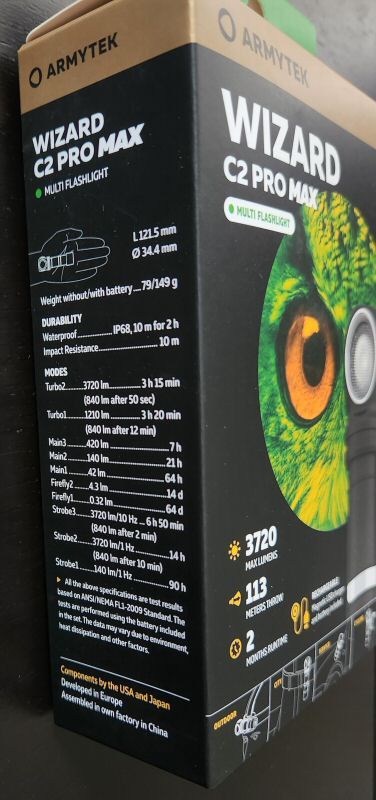
Manufacturer Specifications
Note: as always, these are simply what the manufacturer provides – scroll down to see my actual testing results.
| Feature | Specs | Specs |
|---|---|---|
| Maker | Armytek | Armytek |
| Model | Crystal Pro | Crystal Pro |
| Emitter | LXNZPL696 (White) | LXNZPL696 (Red) |
| Tint | White | Red |
| Max Output (Lumens) | 220 | 30 |
| Min Output (Lumens) | 0.1 | 0.1 |
| Max Runtime | 50 days | 30 days |
| Max Beam Intensity (cd) | - | - |
| Max Beam Distance (m) | 14 m | - |
| Constant Levels | 5 | 5 |
| Flashing | Beacon1, Beacon2 | Beacon1, Beacon2, Braking |
| Battery | Li-Pol 600 mAh | Li-Pol 600 mAh |
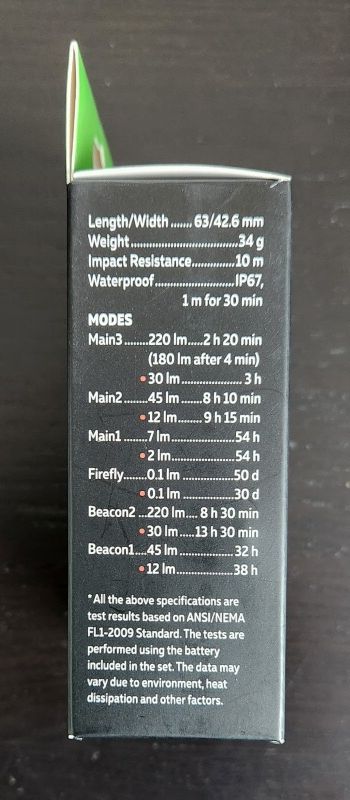
| Weight (w/o battery) | ||
| Weight (with battery) | 34 g | 34 g |
| Length | 63 mm | 63 mm |
| Head Diameter | 42.6 mm | 42.6 mm |
| Body Diameter | 15 mm | 15 mm |
| Waterproof | IP67 1m | IP67 1m |
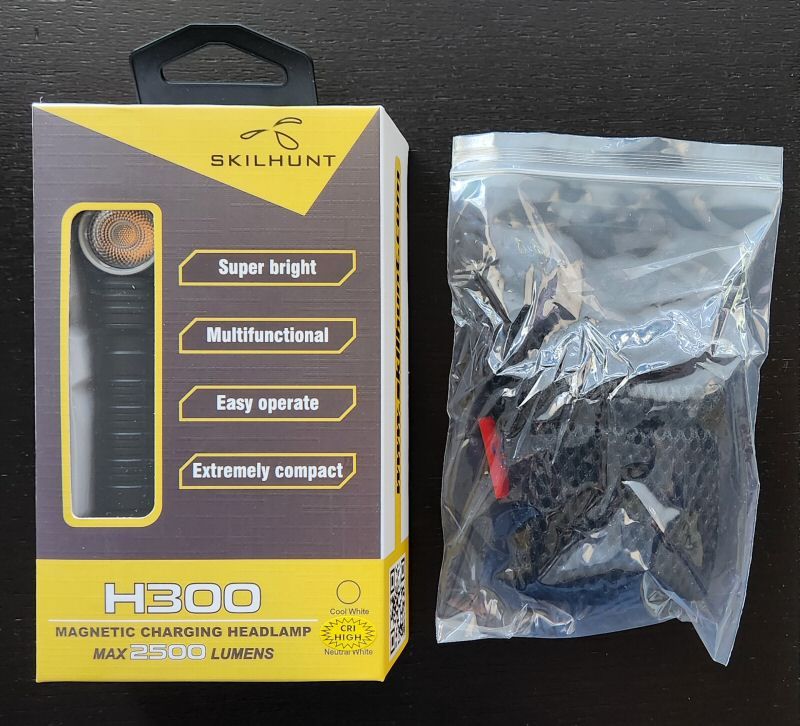
Package Details
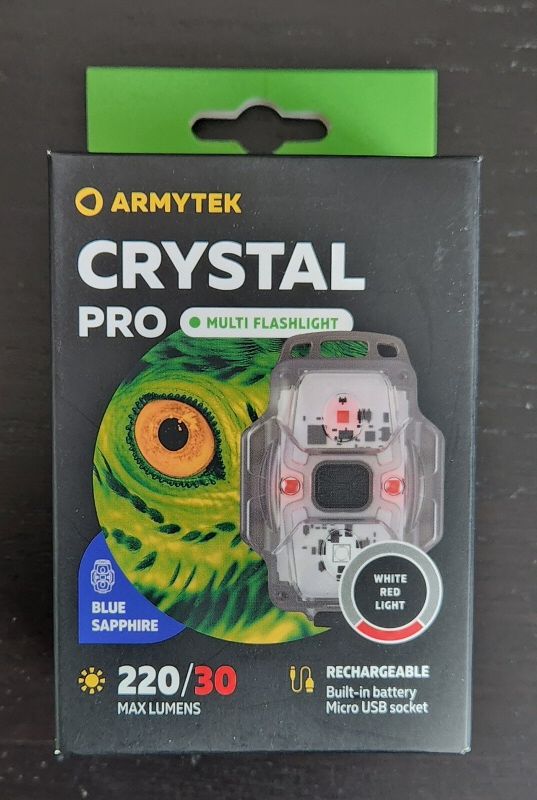
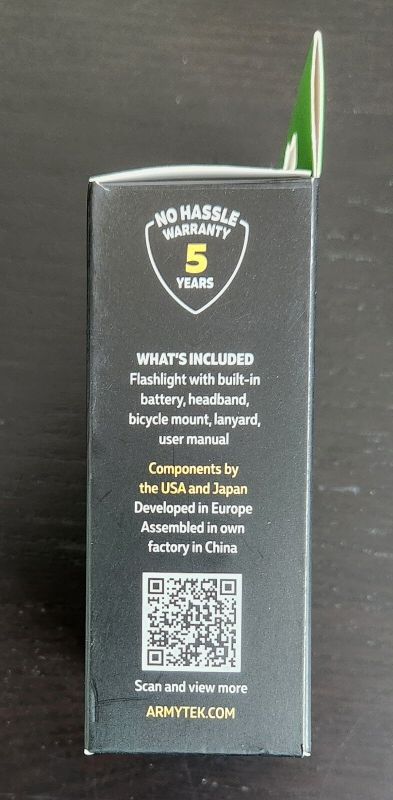
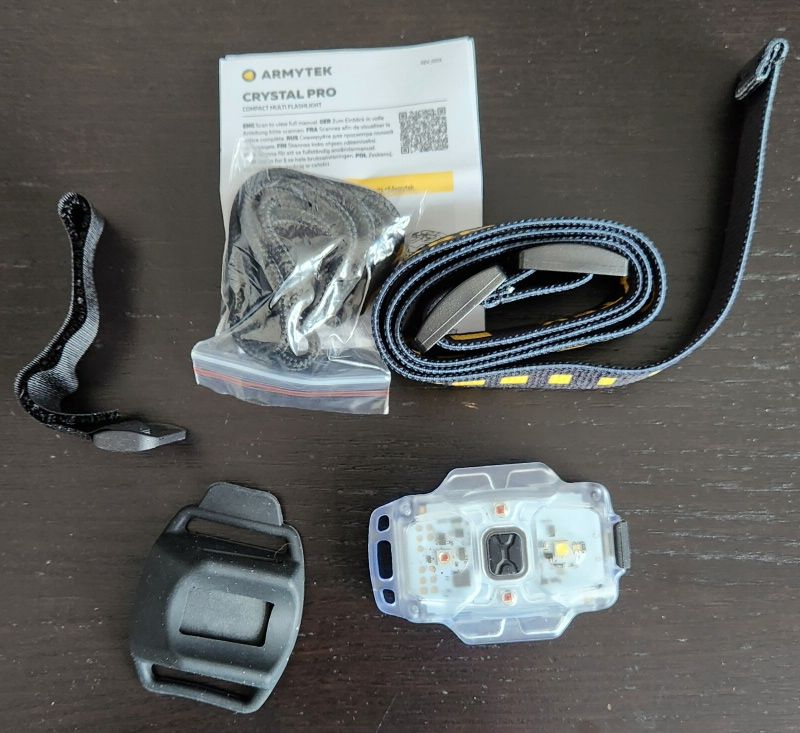
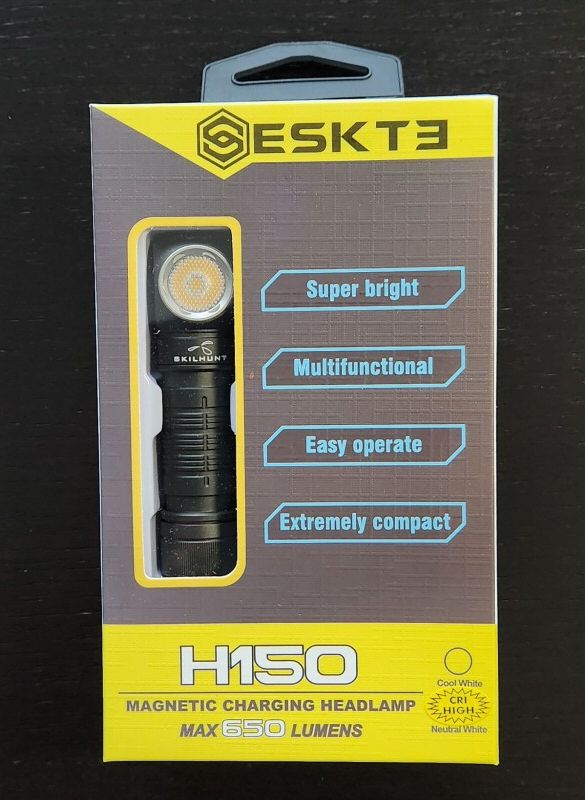
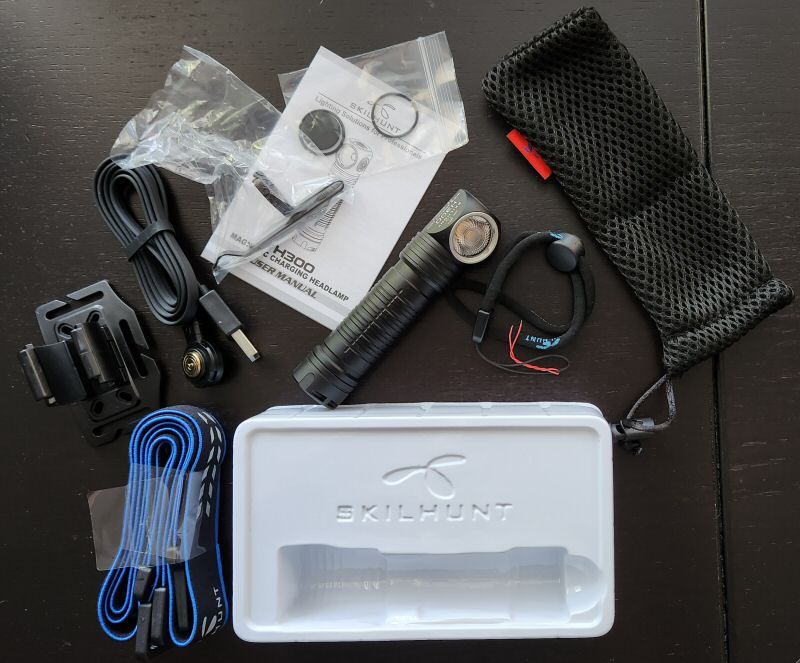
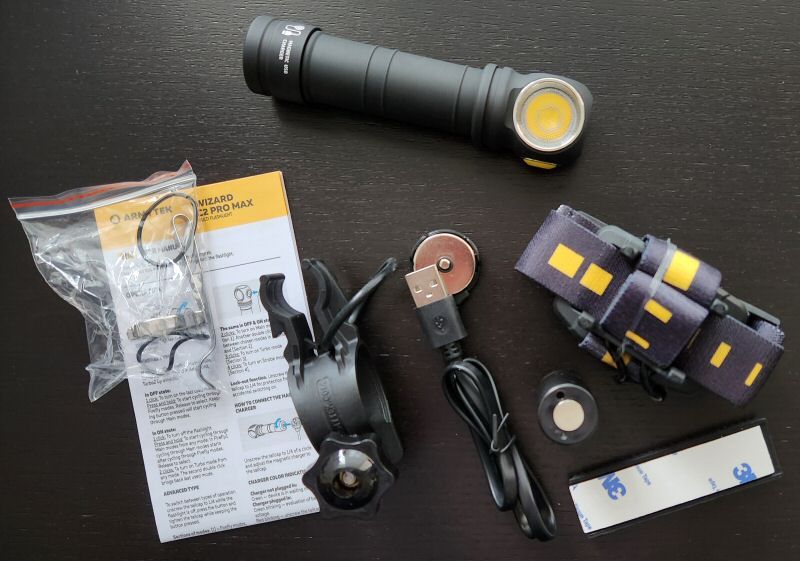
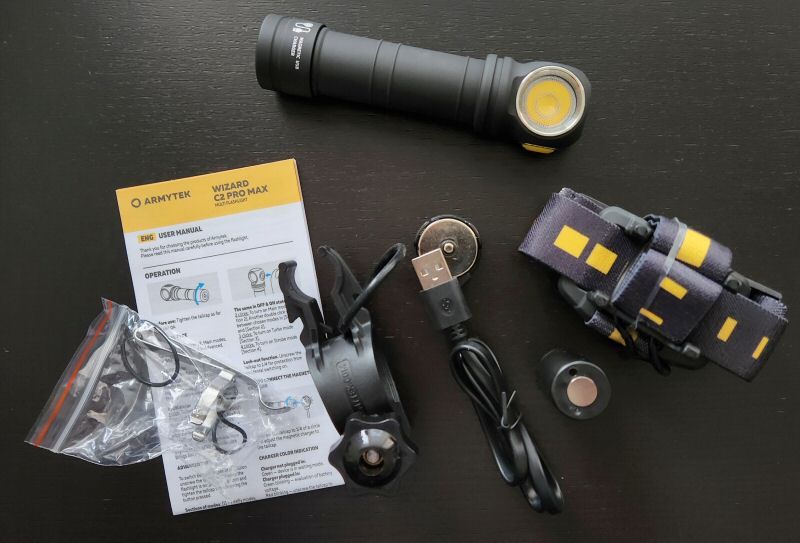
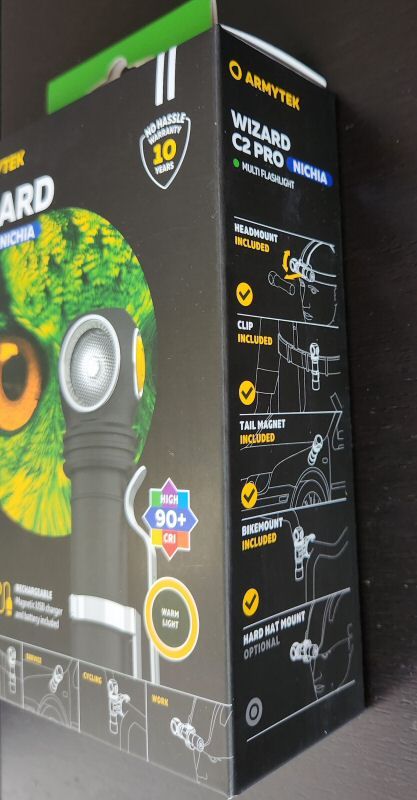
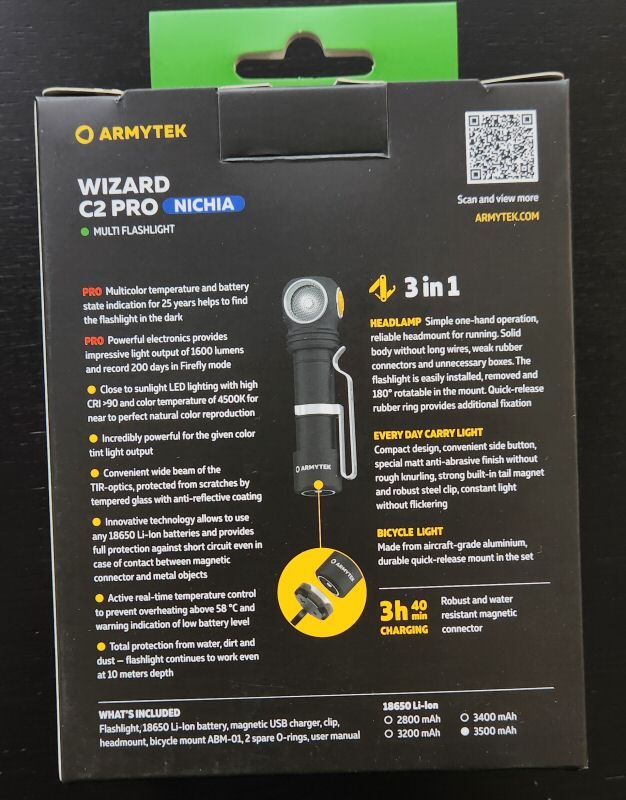
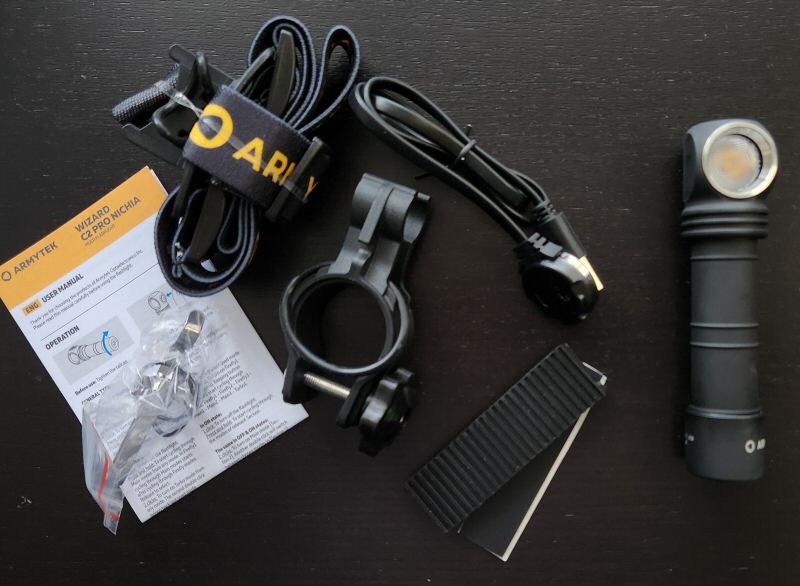
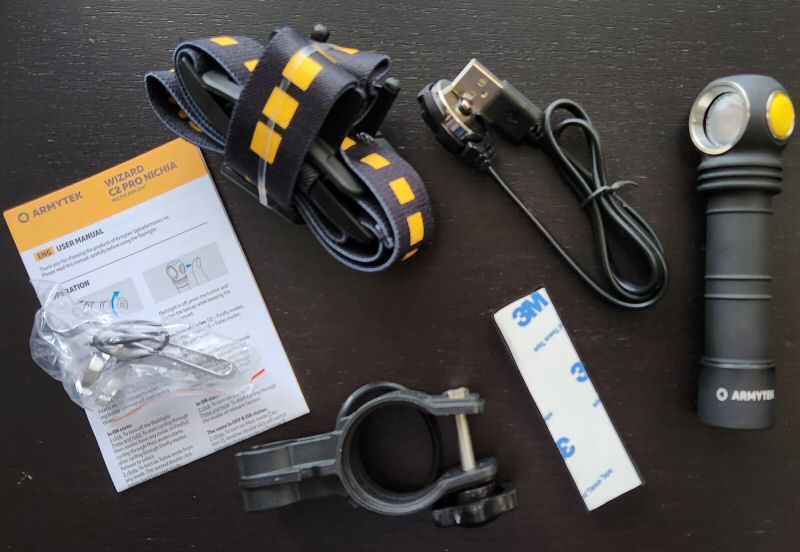
As before, the light ships in a colourful cardboard box, with plenty of labels and product details. Inside, you will find the following:
- Crystal headlamp/keychain light, with built-in pocket clip
- Headband
- Bike mounting bracket and strap
- Wrist lanyard
- Simple manual
The package has been upgraded, with some additional ways to carry or afix the light securely. I particularly like the new bike light accessory, making it easy to mount. No charging cable was included, and you will still need one with a micro-USB port connector. It’s too bad they weren’t able to upgrade to USB-C.
Build
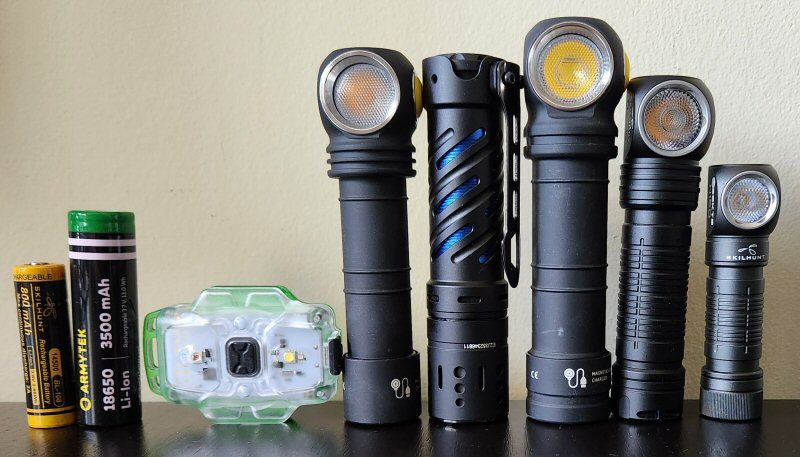
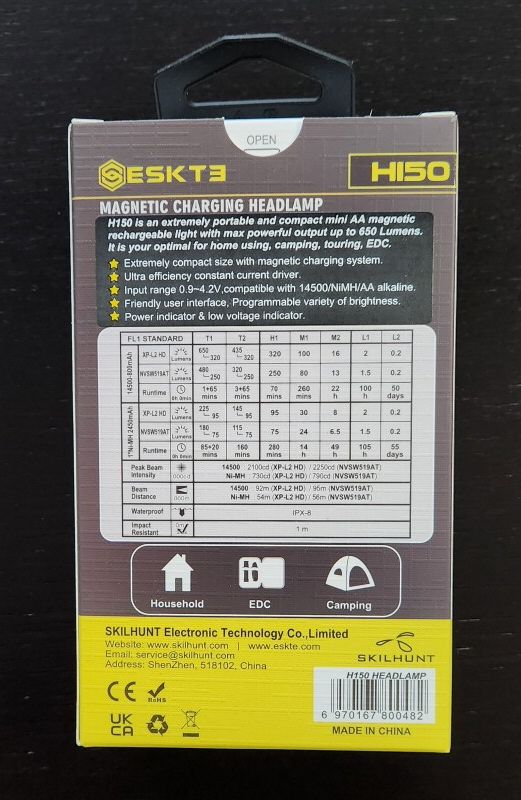
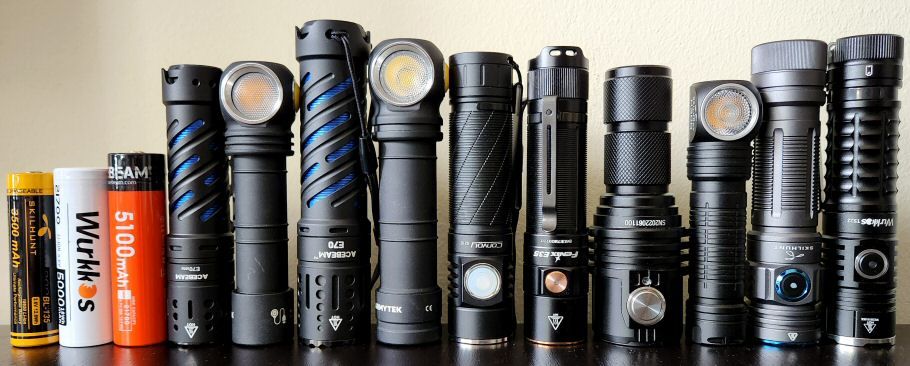
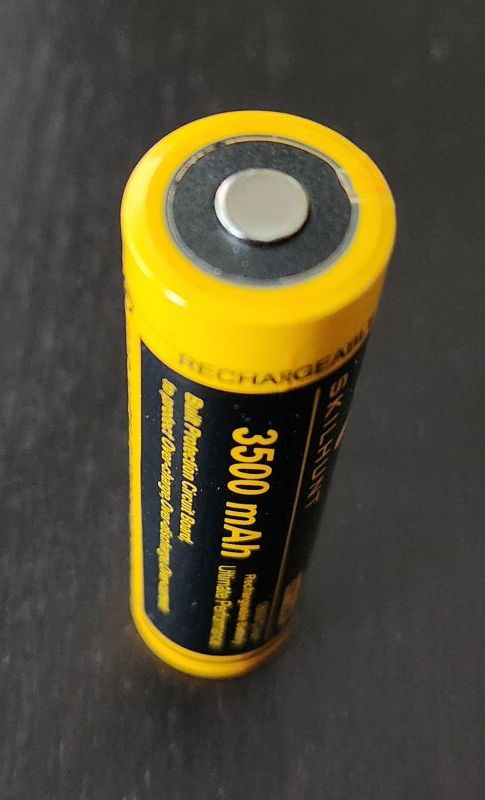
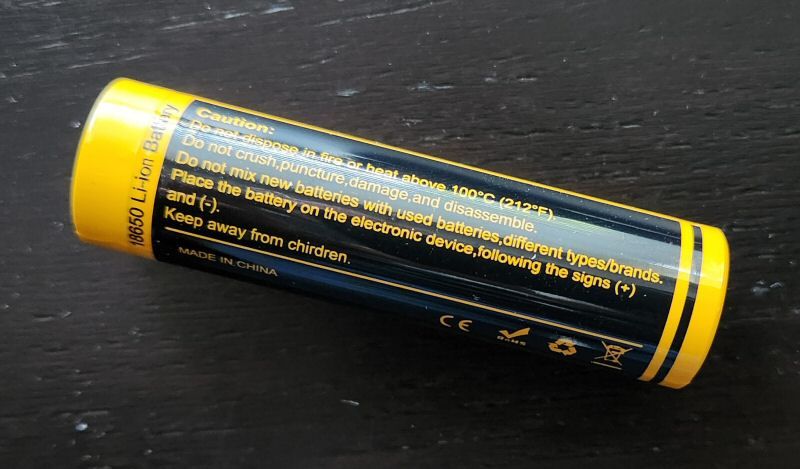
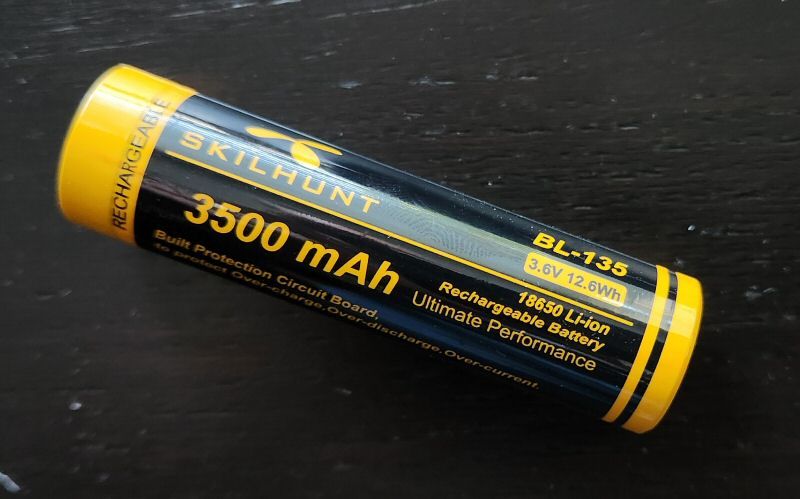
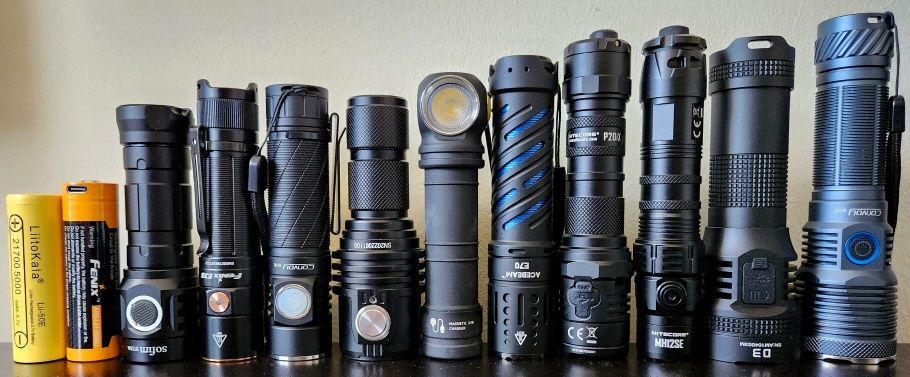
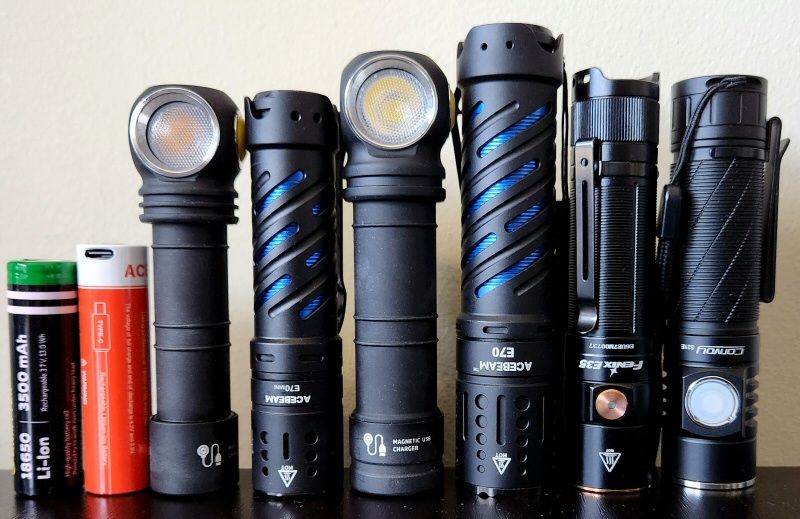
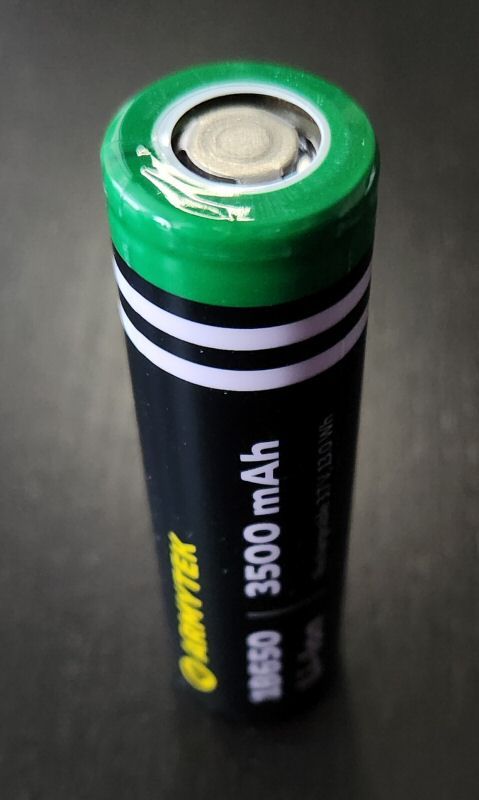
From left to right: Skilhunt 14500 (800mAh), Armytek 18650 (3500mAh), Armytek Crystal, Armytek Wizard C2 Pro Nichia, Acebeam E70 Mini, Armytek Wizard C2 Pro Max, Skilhunt H300, Skilhunt (ESKTE) H150. Note that the Crystal Pro is the same size and dimensions as the original Crystal shown above.
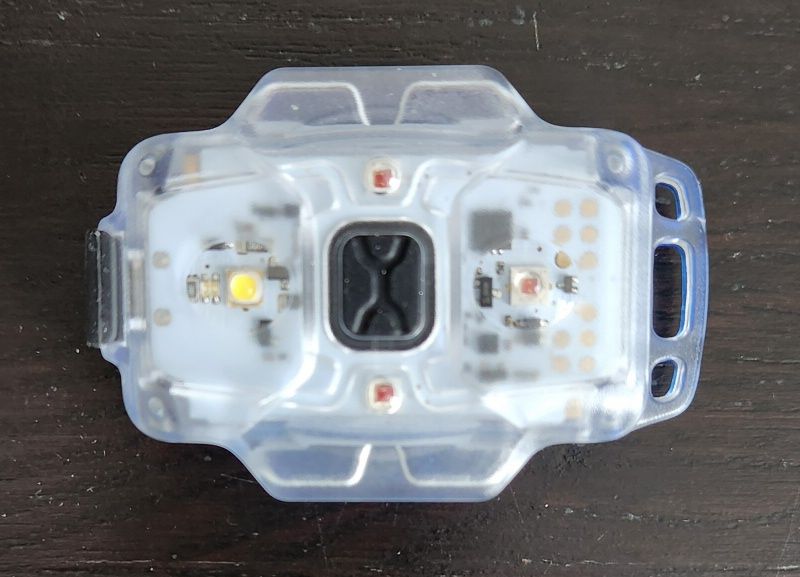
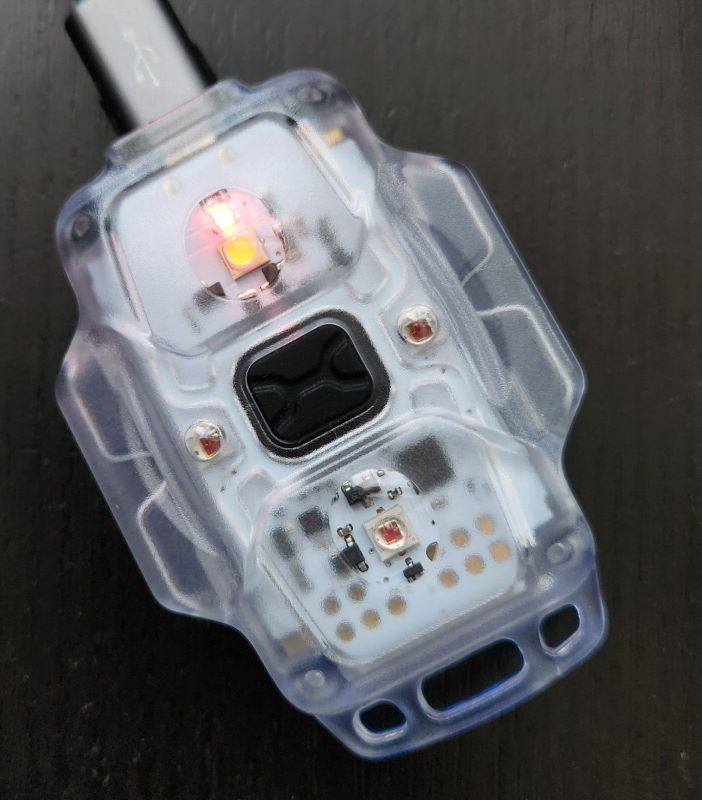
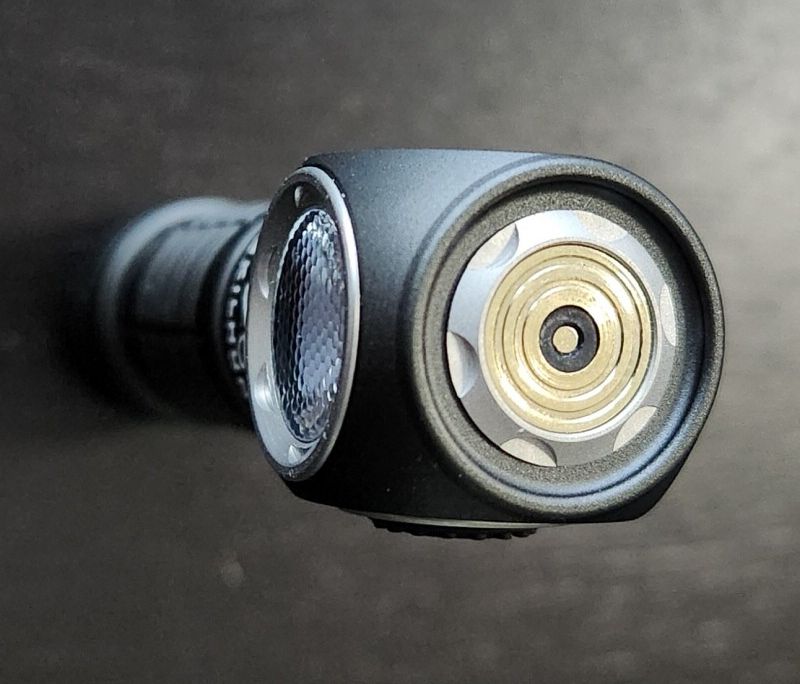
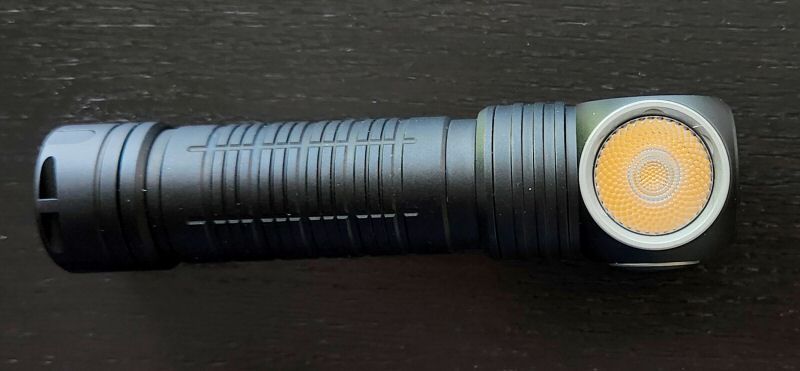
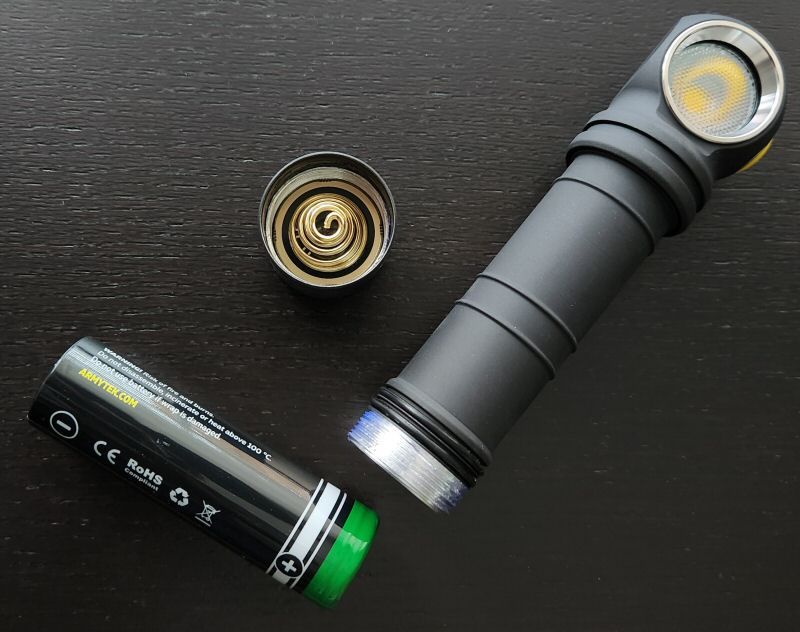
At first glance, the Crystal Pro looks very much the same as the original Crystal – at least in terms of external physical build. But on closer view, you can see there are a lot more circuit elements under the clear cover – as well as two additional red LEDs on the side.
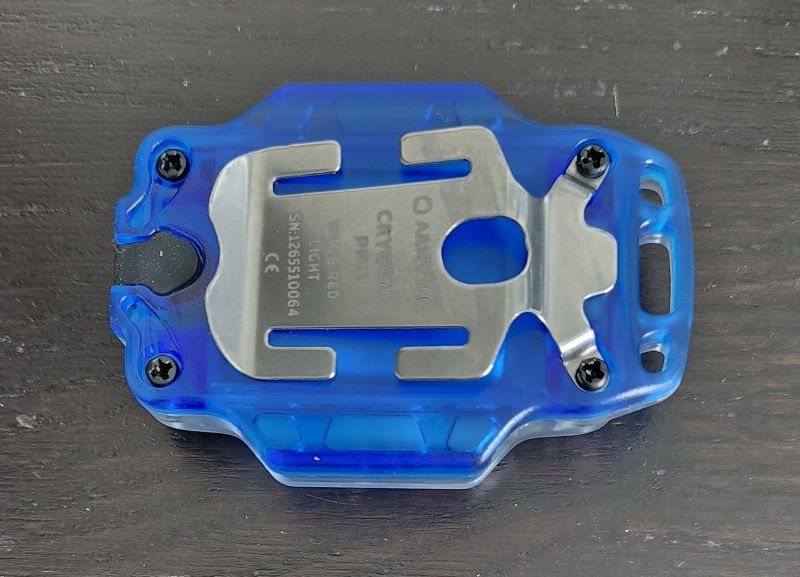
Like before, you can buy the Crystal Pro with various coloured plastic backings. It is currently available in green, blue, red, yellow, or gray.
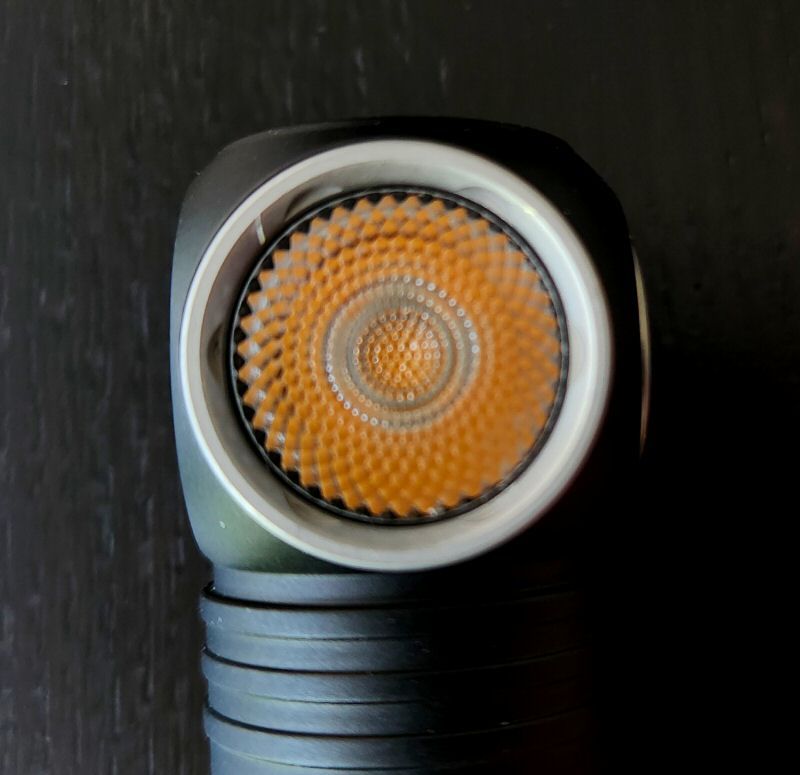
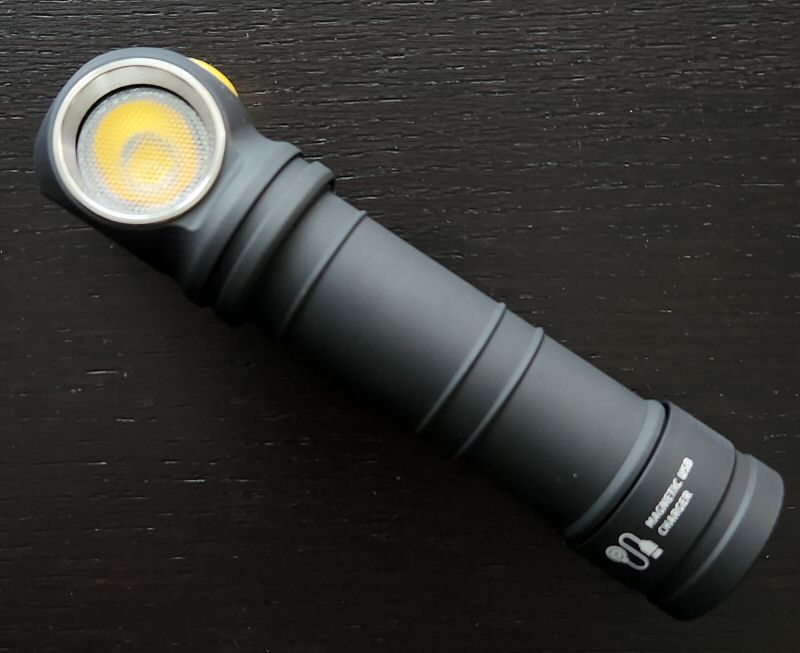
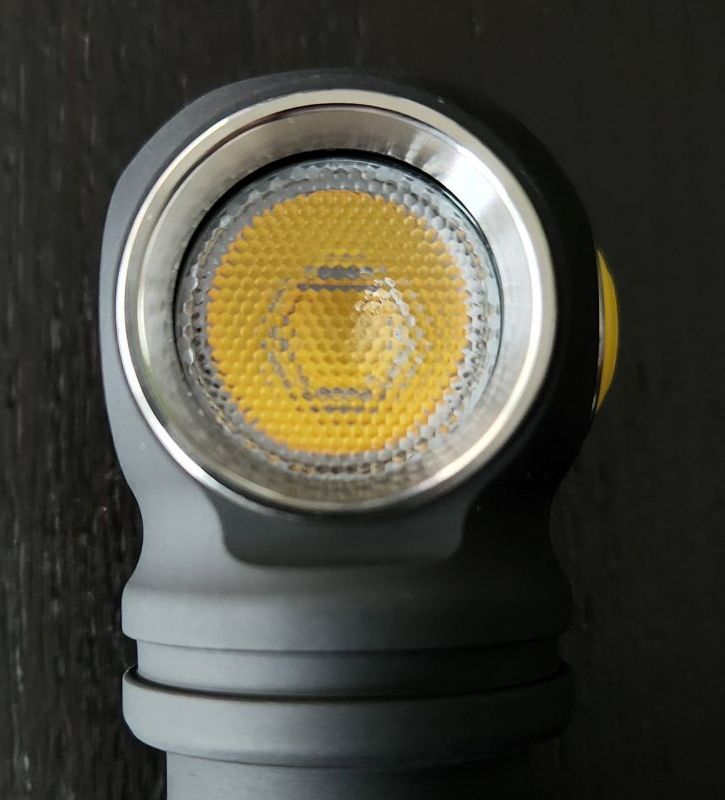
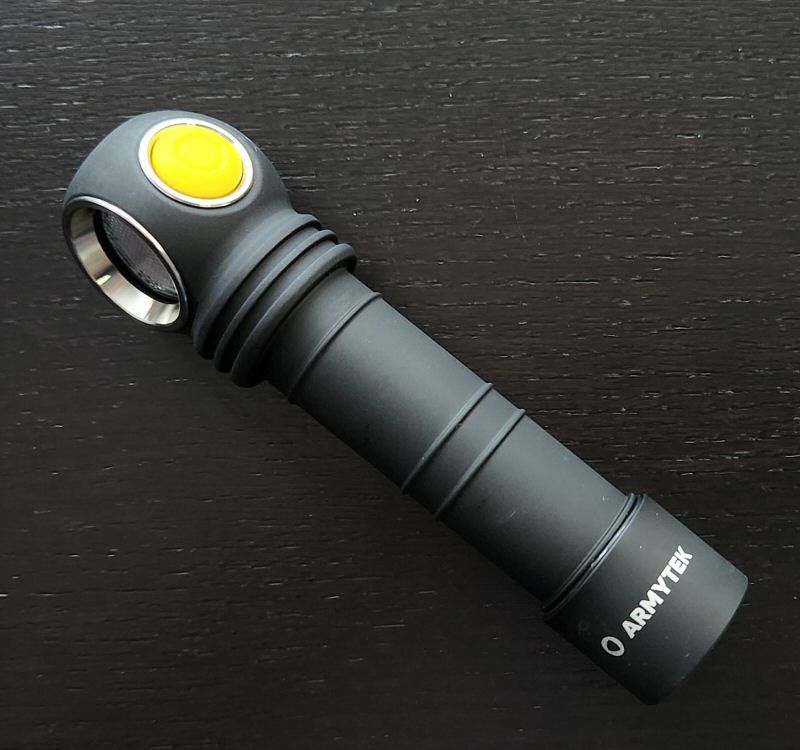
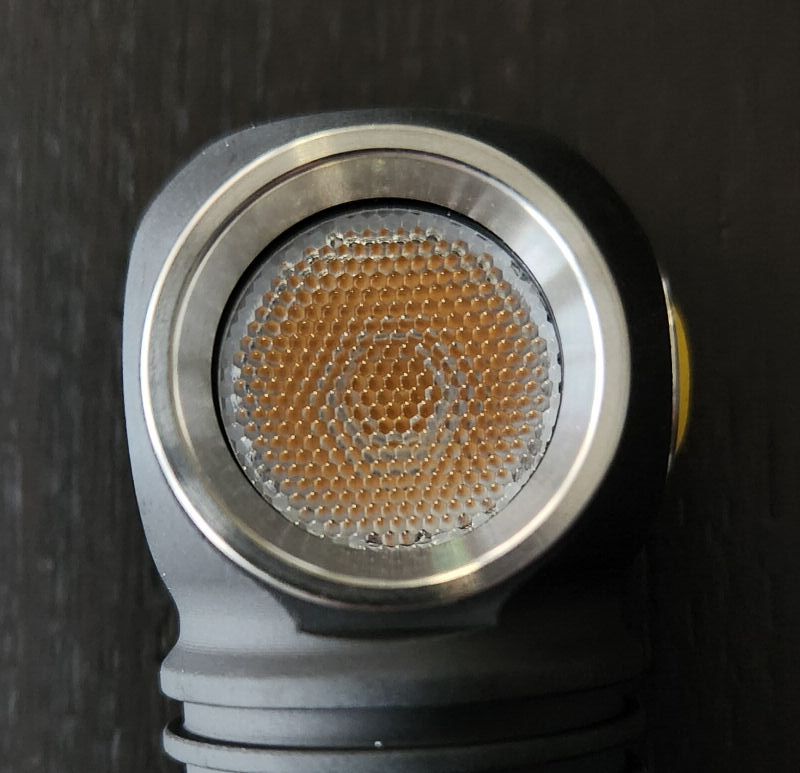
Build features a fullly transparent front cover, which allows you to see the bare emitters and the basic circuitry elements of the light. I’m guessing this is to prevent any significant colour distortions in the beam. That said, my original Crystal (on white) seemed to project a somewhat greenish-tint out the edges and sides of the light, whereas this Crystal Pro has a cooler white profile (which may in part reflect the green vs blue coloured bases).
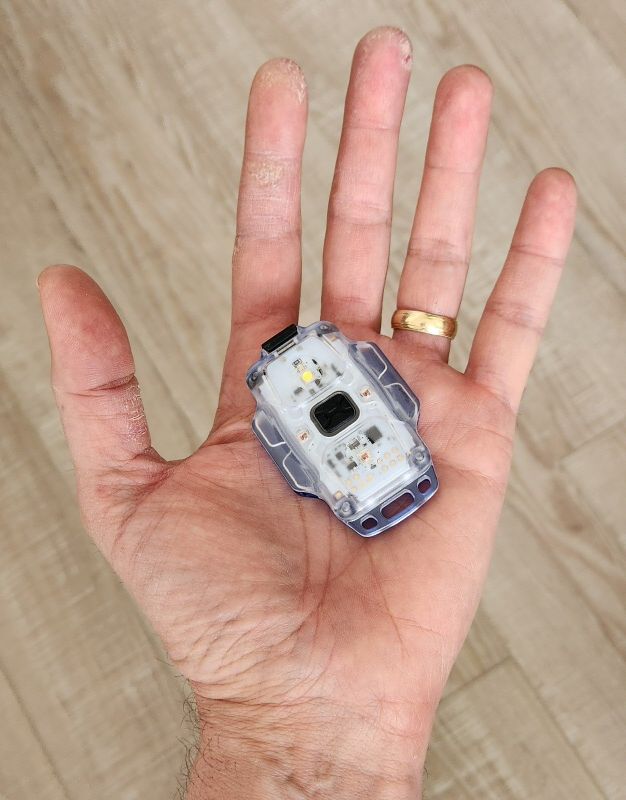
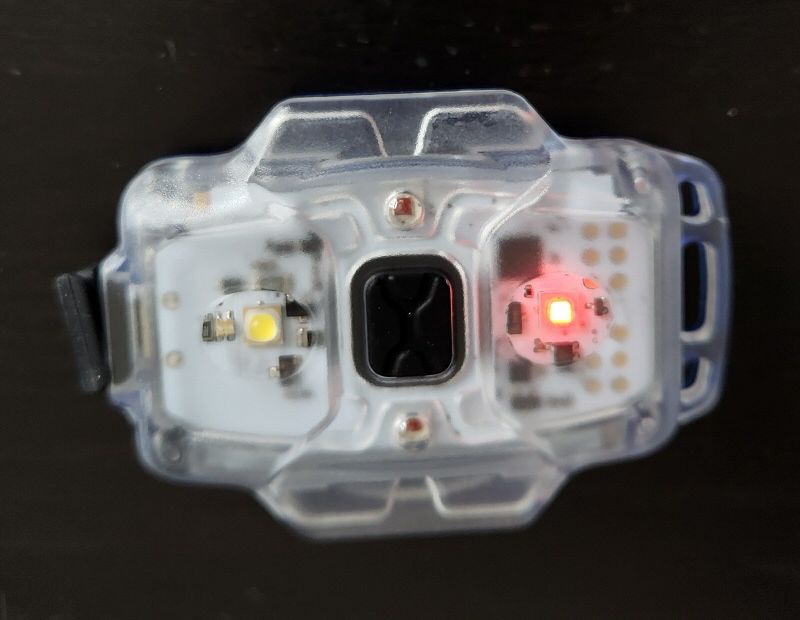
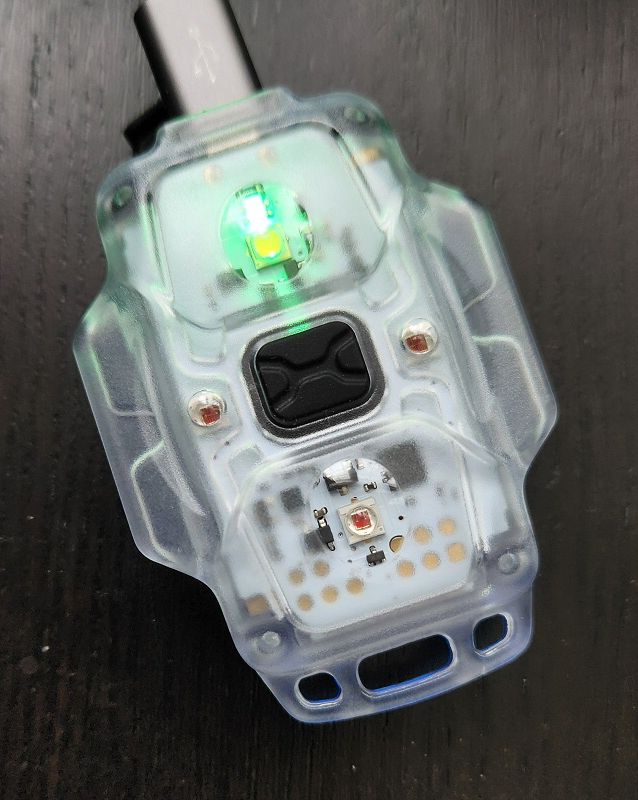
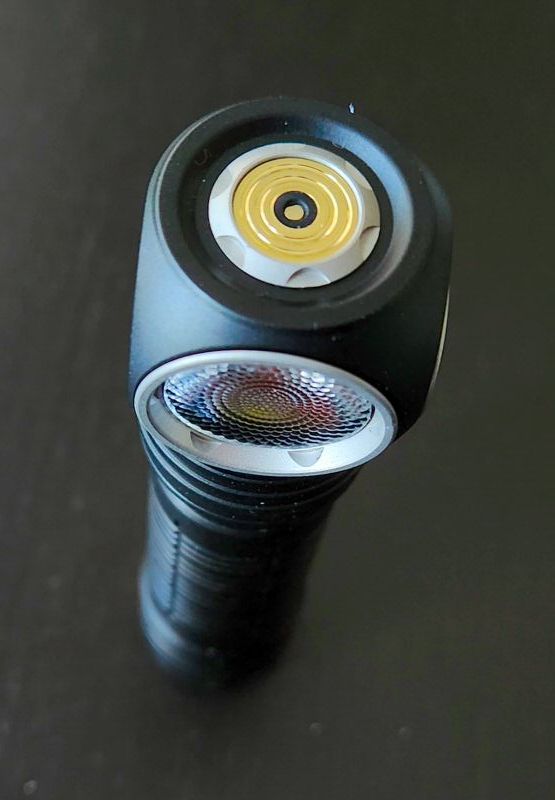
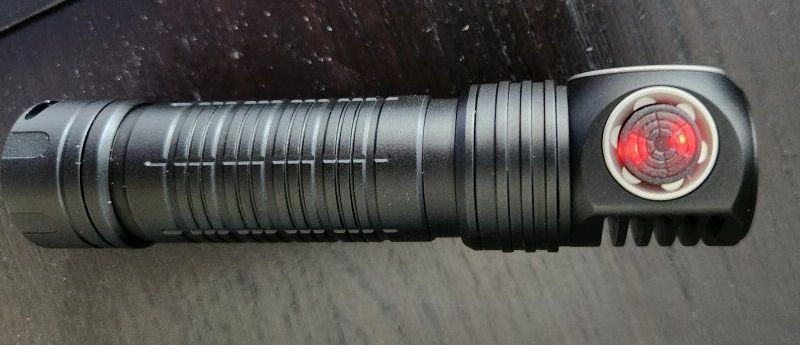
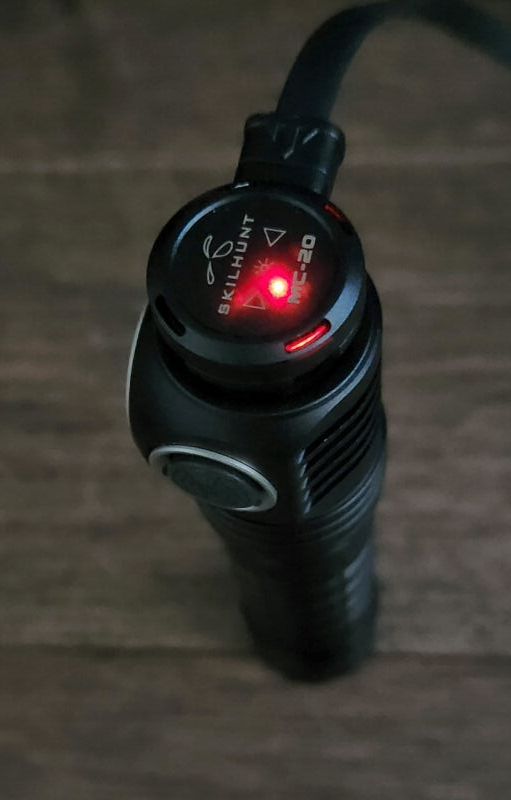
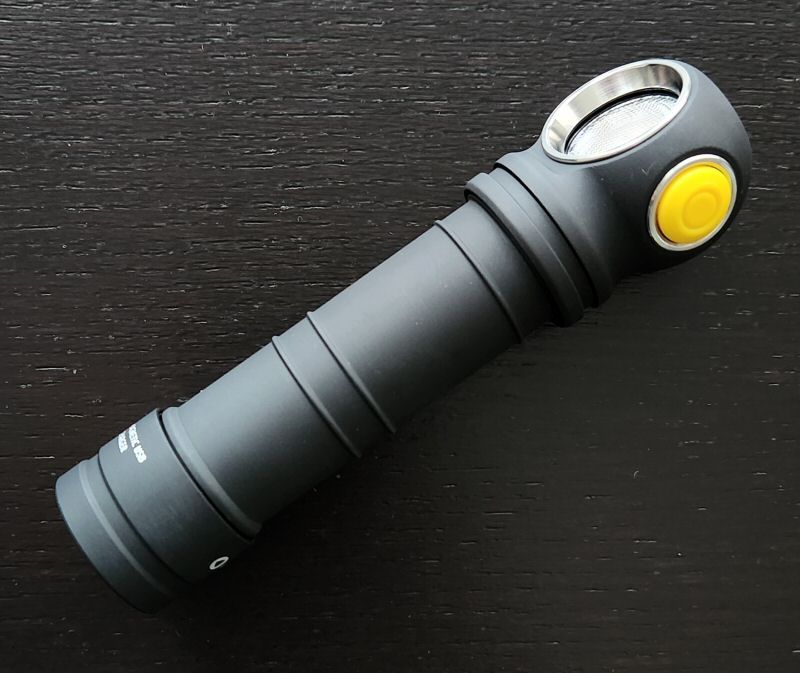
You can clearly see the main white and red emitters above, on either side of the switch, as well as the two extra red emitters near the sides of this Pro version. These two extra red LEDs are only activated when the accelerometer is turned on and it detects a change in movement (i.e., “braking”, when using as a bike light). To use as a bike light, make sure the accelerometer is on, and put the main red emitter into a blinking mode. When the accelerometer detects a change in movement, all three red LEDs jump to max output for a few seconds. You can easily turn the accelerometer off if you don’t want to use this feature.
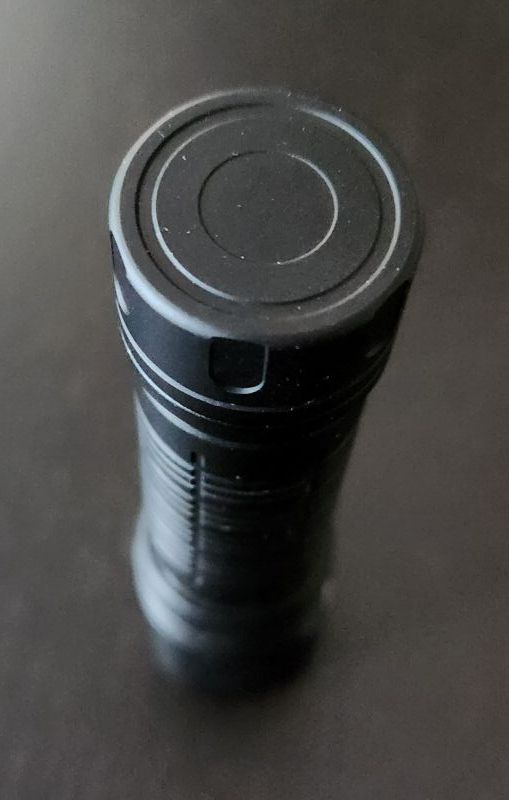
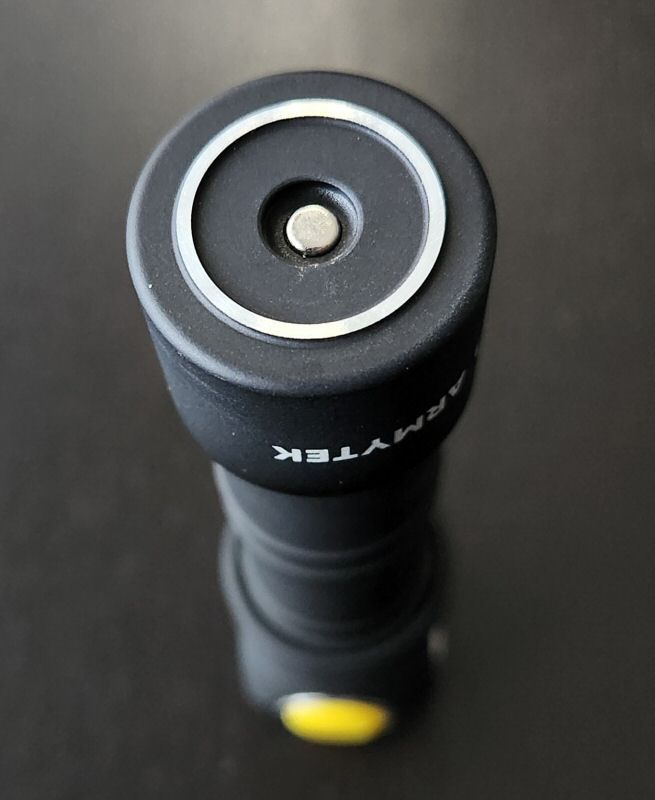
You have nice and solid pocket clip on the back, which will hold the light securely to a front pocket. This is actually my preferred way to carry, as it is easy to clip on and go. Alternatively you can slip it into the included headband to use as a headlamp, or use the bike frame strap. On the short edge of the light by the main red emitter is the keychain attachment point. Overall size is a bit big for keychain carry if you ask me, although I suppose it is not that much larger than a typical car key fob.
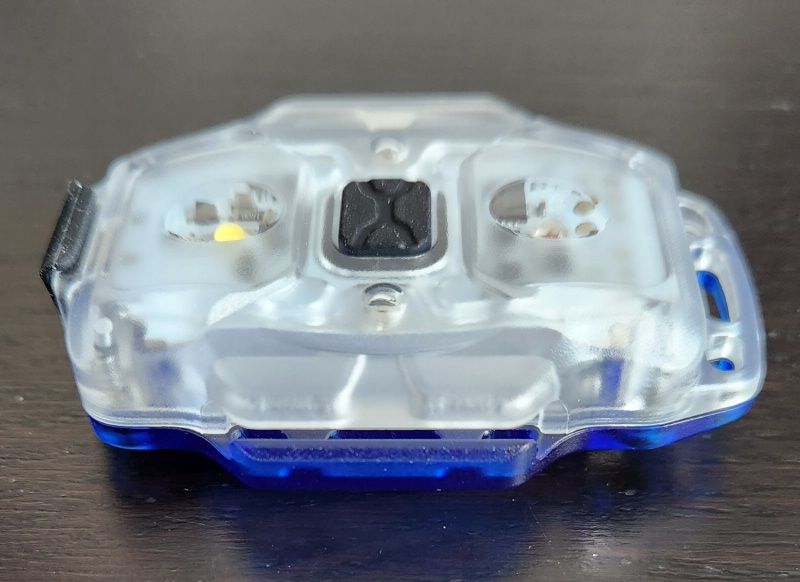
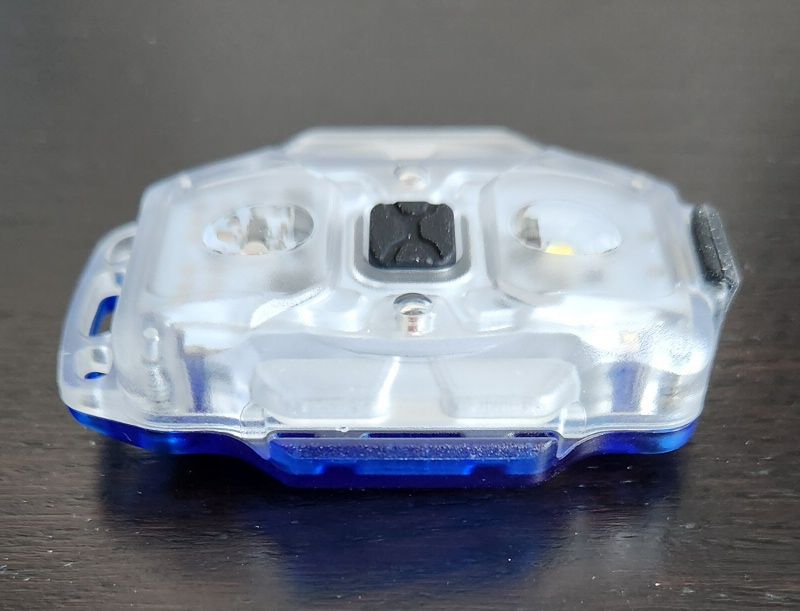
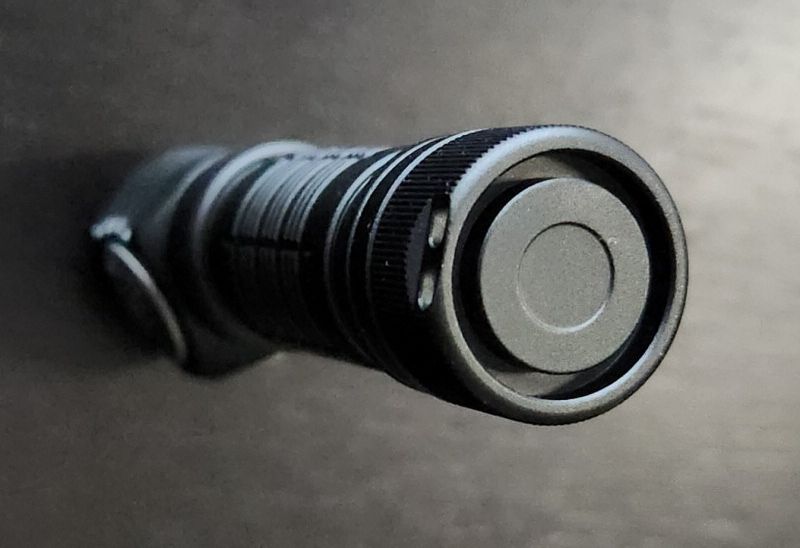
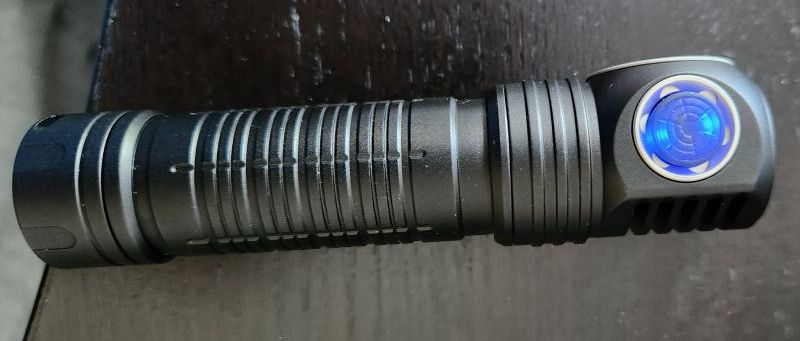
The power/mode button is located in the centre of the light. This remains a somwhat odd placement to me, as it means you will turn the light on shinning in your eyes if you looking down at what you are pressing (makes more sense if you are using as a headlamp). At least it is easy to access by feel. Traverse is good, with a definite but soft click upon activation.
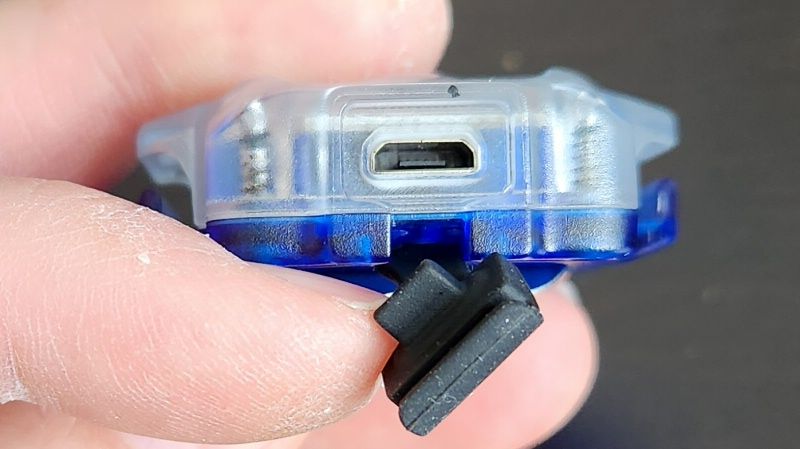
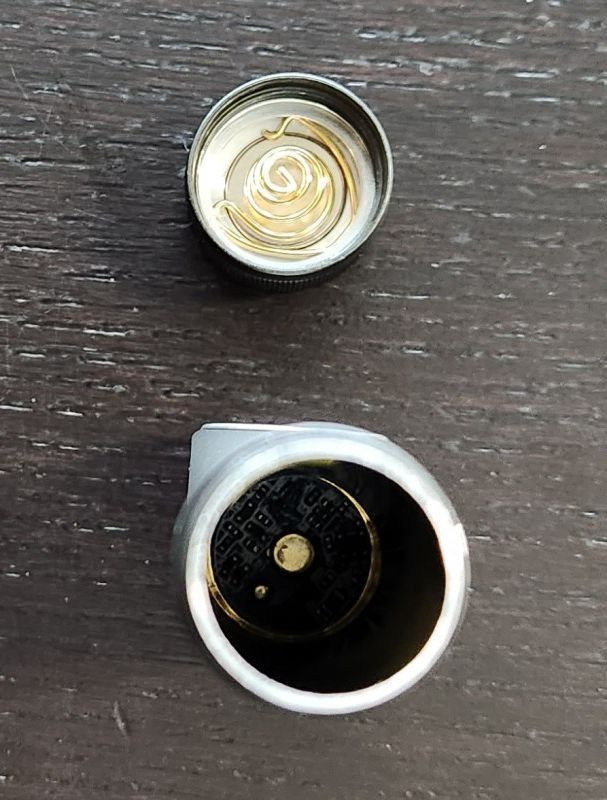
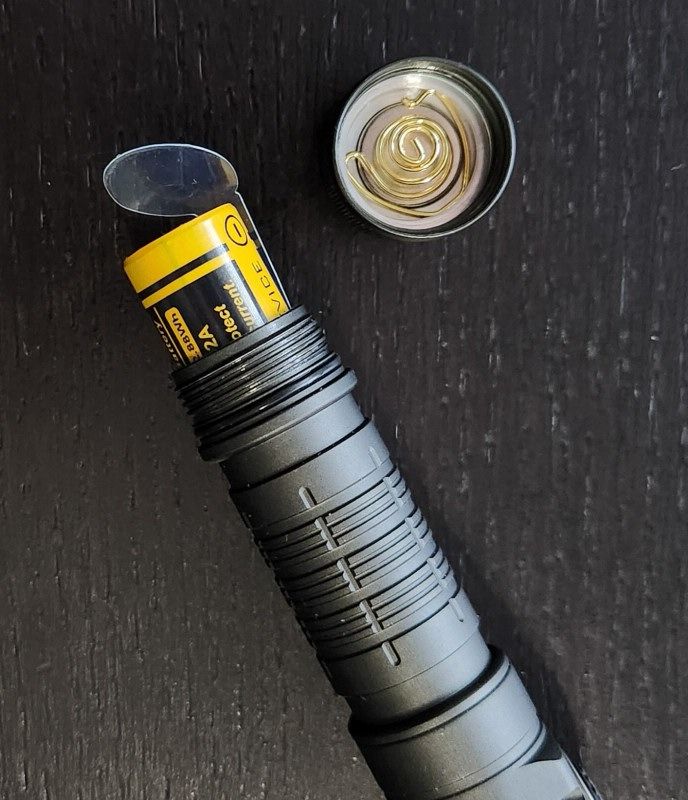
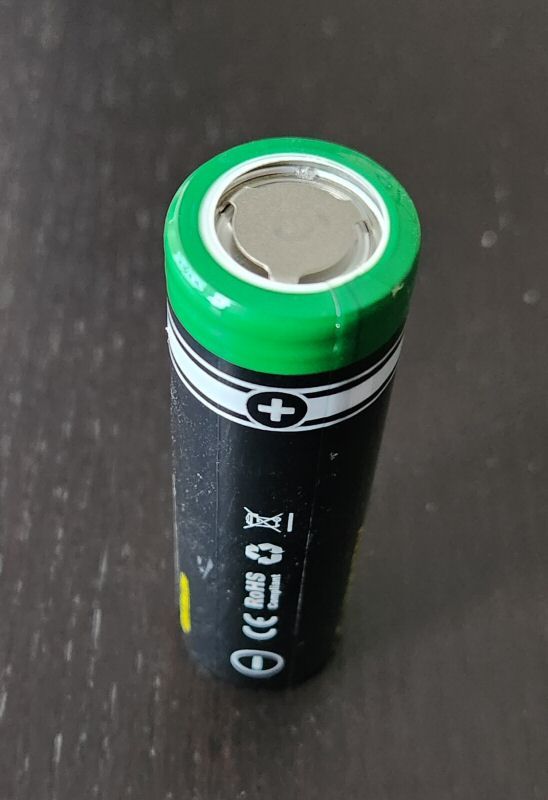
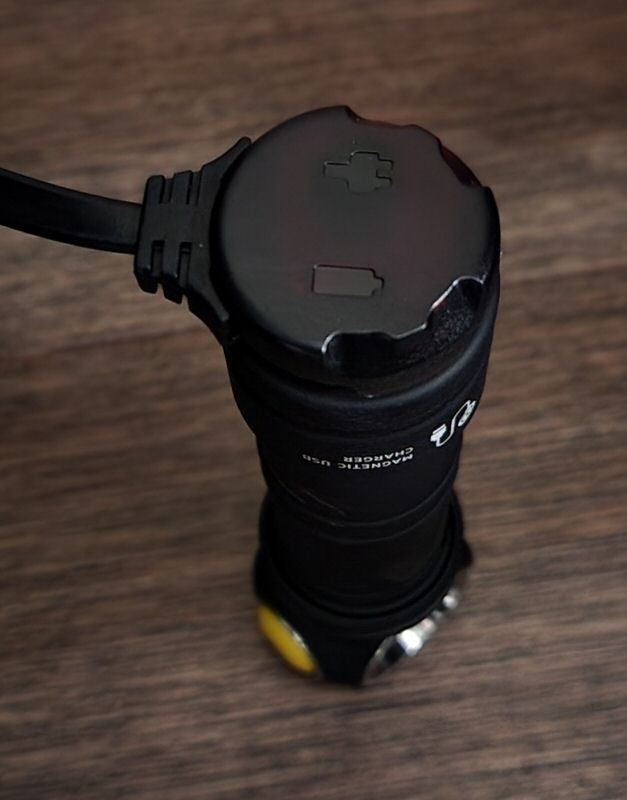
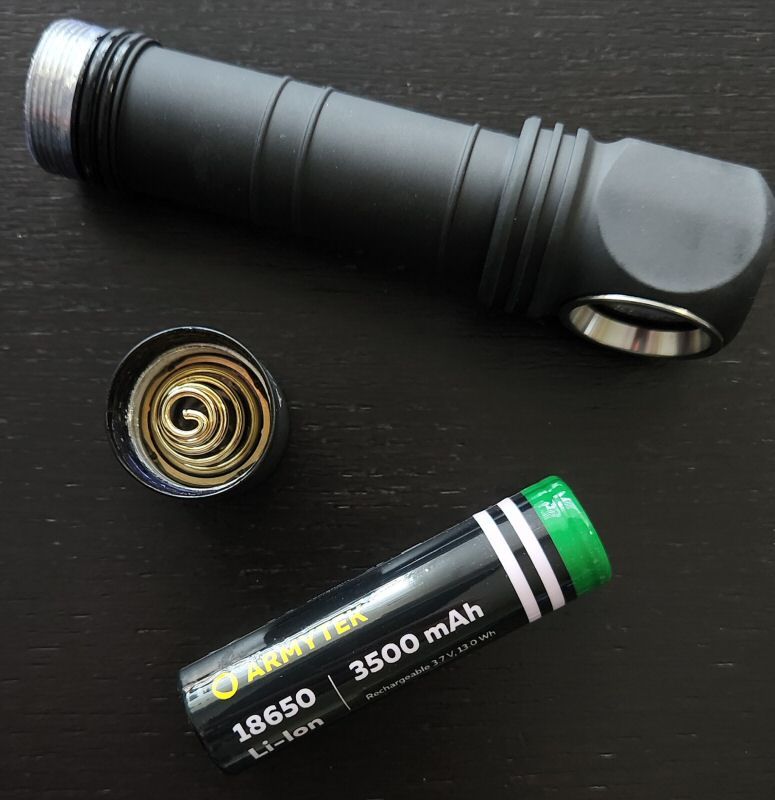
On the short edge of the light by the white emitter is the micro-USB charging port under a rubber cover. I find the cover to be fairly loosely fitting, with a slight hook to hold in place (I wouldn’t consider this very waterproof at all). It’s a shame they didn’t opt for the more common USB-C emitter, but I guess they decided to keep the physical build unchanged. According to the manual, the light still uses a lithium polymer rechargeable battery of 600 mAh capacity.
One interesting feature – according to the manual, the light can still work in “lamp” mode when you plug it into a powerbank or other USB-charging source. But see my testing results below for more information on this feature.

User Interface
As noted in my other recent Armytek reviews, the included manual is actually fairly basic, and just describes the main functions of the light. You can download a more complete manual from their website here.
pretty simple, more a description of the features than an actual set of instructions. Here is a rundown from my testing:
From Off:
- Press-and-hold the switch. Nothing initially. However, after 4 seconds the Lock out mode is engaged. The white LED will blink once, confirming the Lock out. Press-and-hold for another 4 seconds to re-activate.
- Single-click the switch: Turns On in last memorized state.
From On:
- Press-and-hold the switch: Start cycling through the modes of the current colour, in repeating sequence: Firefly > Main1 > Main2 > Main3 > Beacon. Release the switch to select.
- Single-click the switch: Turns Off.
- Double-click the switch: Switches between the two emitter choices (i.e., if you are in white light, it switches over to the red LED).
- Triple-click the switch: Turn the Accelerometer On or Off.
- The flashlight turns off in all modes if it has been inactive for more than 3 minutes with the Accelerometer turned On. Changing the position, causing vibration or pressing the button activates the last used mode before auto-shutdown.
- In all red light modes, there is a bike brake light function enabled by the Accelerometer. When braking, the accelerometer detects bicycle
deceleration, after which the flashlight increases its brightness and the two additional red LEDs are turned on for 2 seconds. - Braking sensitivity increases when the flashlight is installed vertically.
The Accelerometer feature is new to the Cyrstal Pro, but otherwise the UI is unchanged from the earlier model – and fairly straight-forward. Personally, I’m not a fan of having the flashing modes on the main sequence for the two emitters. But at least it is only a slow flash (i.e., not an obnoxious strobe). And I quite like the accelerometer feature as a braking bike light.
Short-cuts:
No.
Mode memory:
Yes. The light remembers both the the last mode used and the last emitter, and returns to them upon re-activation.
Strobe/Blinking modes:
Yes, there is one beacon mode (available for each emitter).
Low voltage warning:
No.
Lock-out mode:
Yes. Press-and-hold the switch from Off for at least 4 secs to lock/unlock the light.
Reviewer Comments:
This is an OK interface, easy to remember and use (although I don’t like the beacon on the main sequence). I do question the wisdom of a sustained press-hold to lock/unlock the light, but I suppose it removes the risk of an accidental activation. The new brake light feature is pretty cool, and works really well in my testing. That said, it would have been nice to be able to activate the multiple red emitters independently of the accelerometer (i.e., in a constant on mode).
Circuit Measures
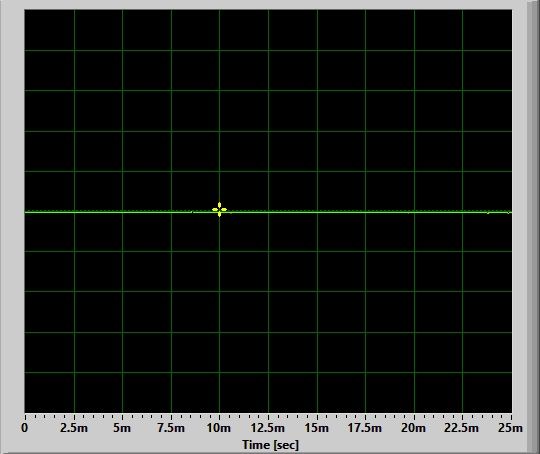
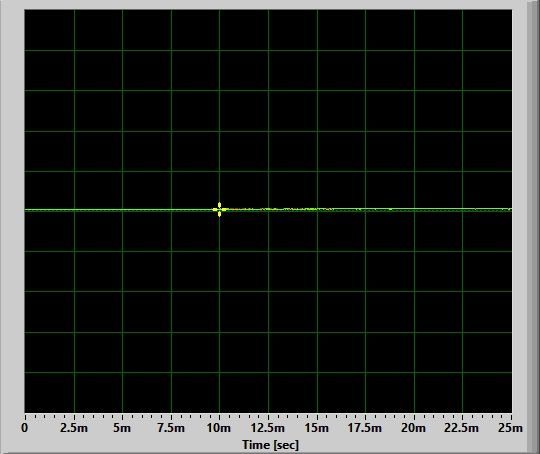
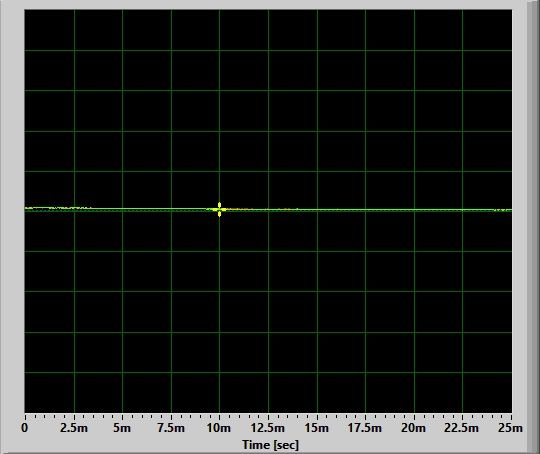
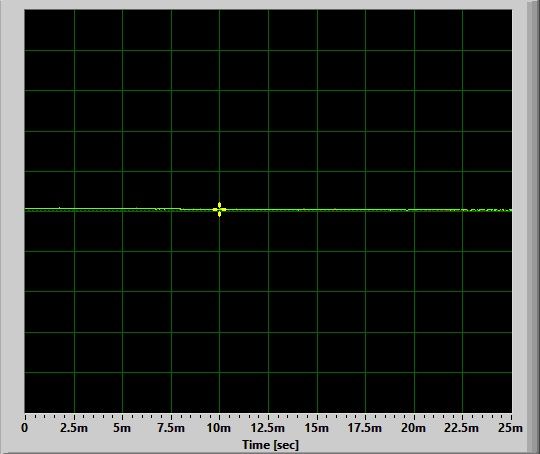
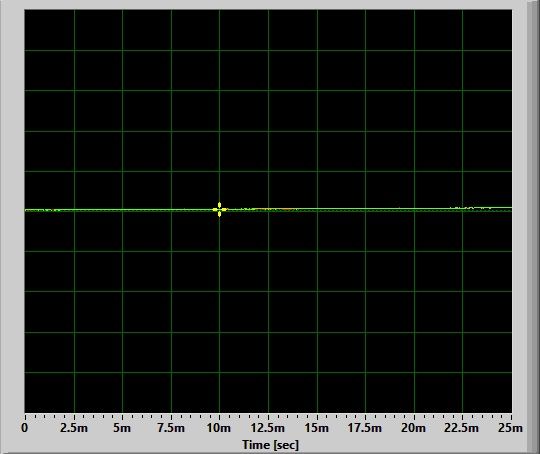
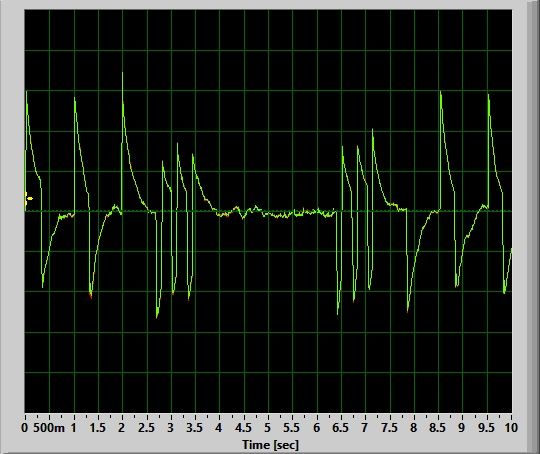
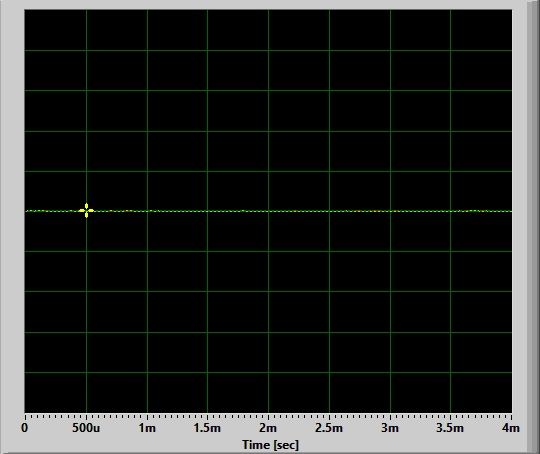
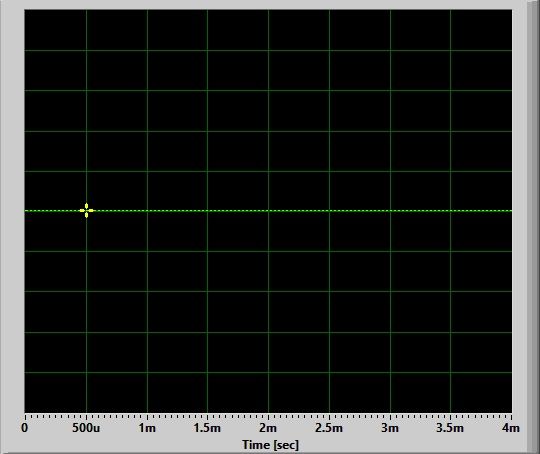
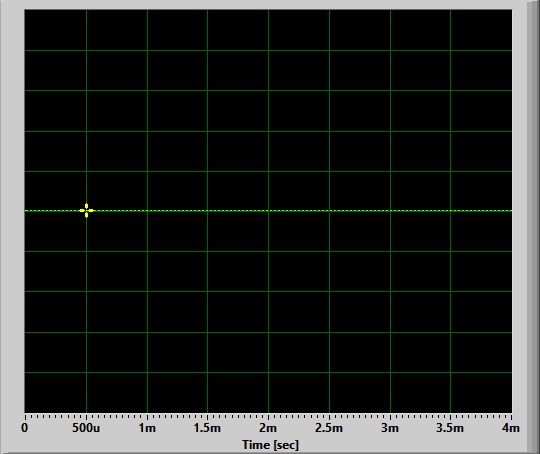
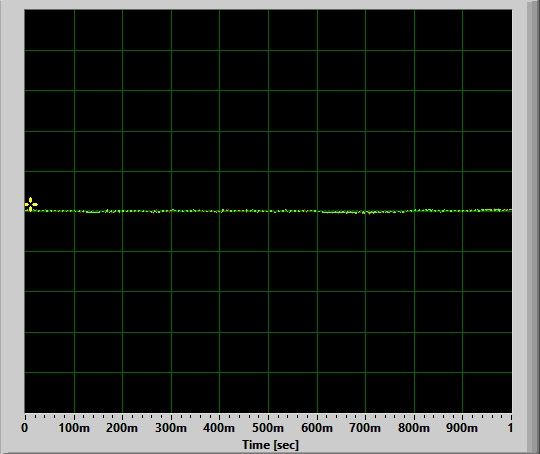
Pulse-Width Modulation (PWM):
Firefly:

Main1:

Main2:

Main3:

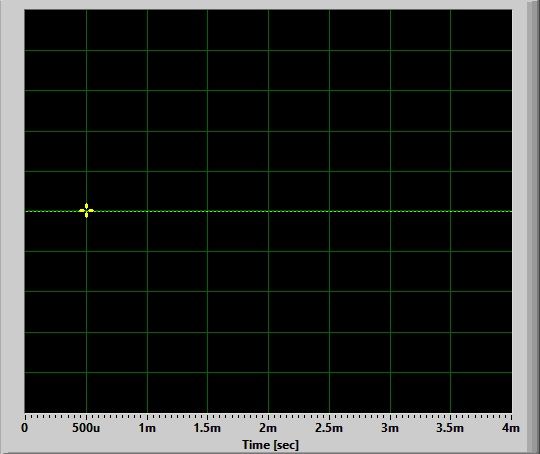
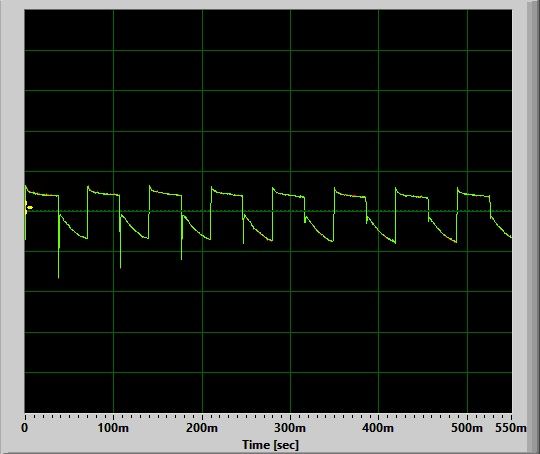
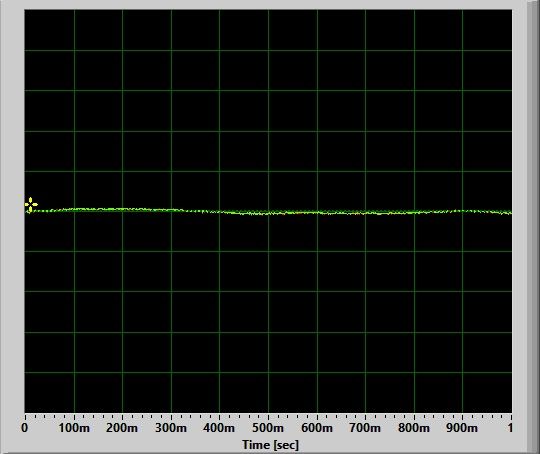
There is no sign of PWM or circuit noise on any level. The light is current-controlled, and fully flicker-free in both white and red modes. 🙂
![]()
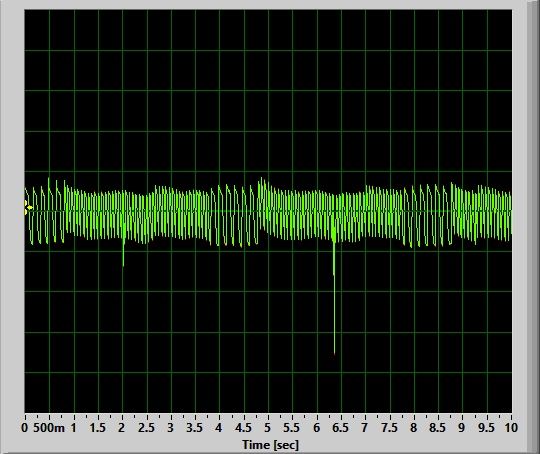
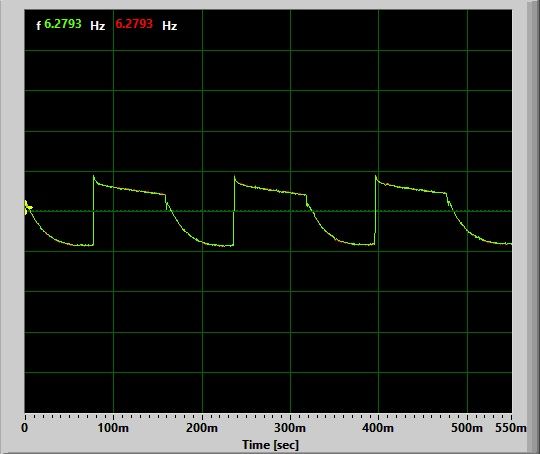
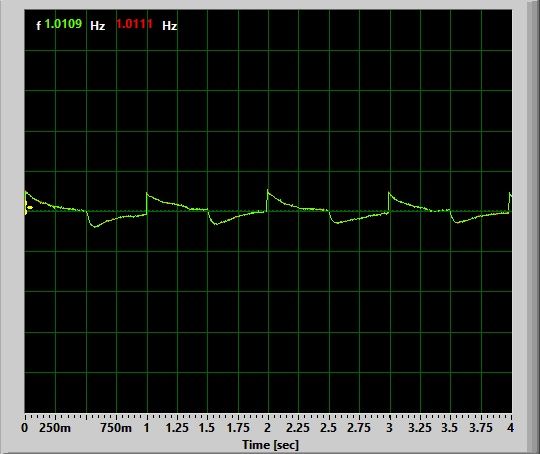
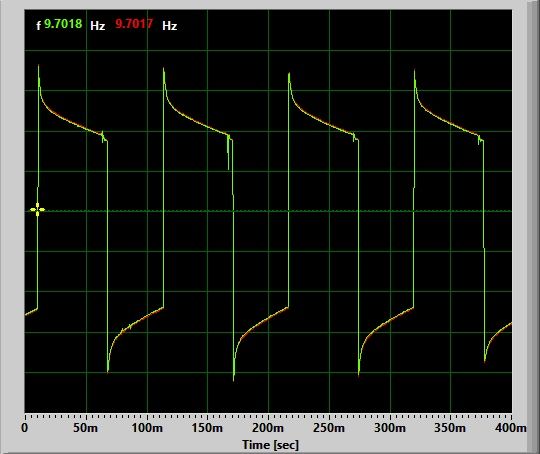
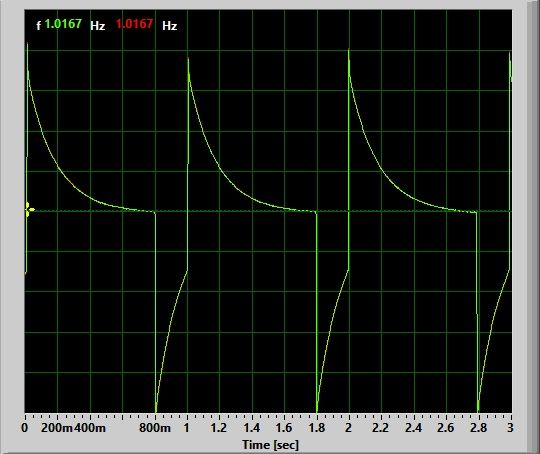
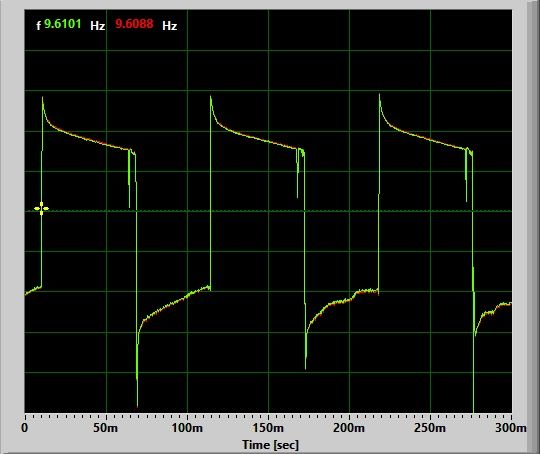
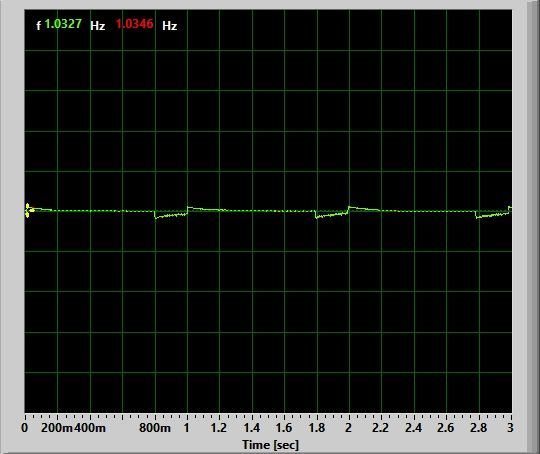
Like before, there is a single beacon mode on both red and white modes, which consists of one brief flash every second (i.e. 1 Hz). This is very reasonable as a signaling light, bike light, etc.
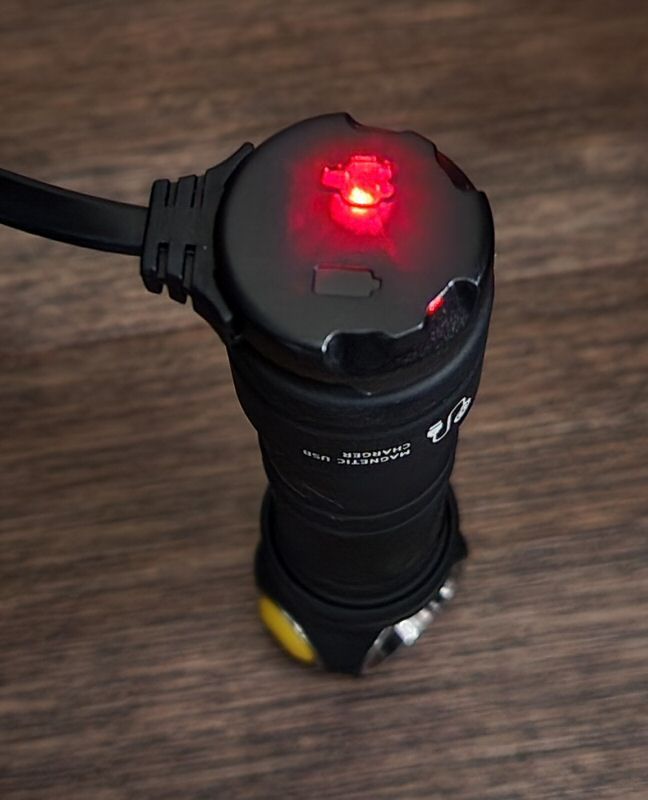
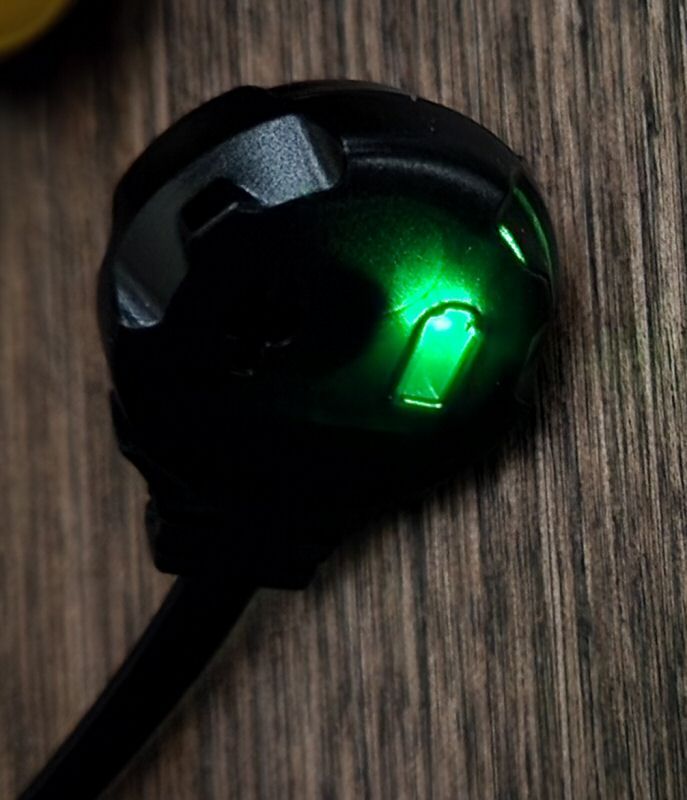
Charging:
There a red/green charging indicator LED, near the white emitter. It glows solid red when charging, turning to green once it is fully charged.
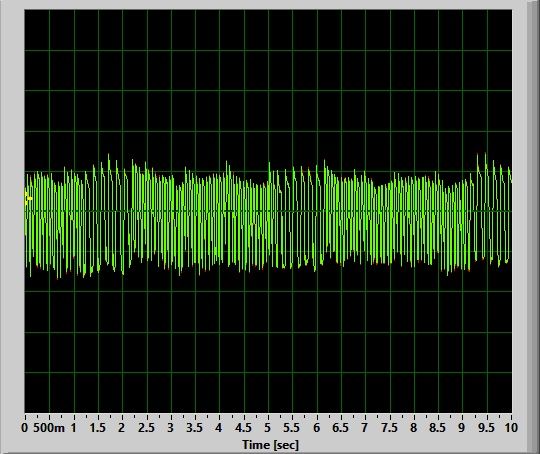
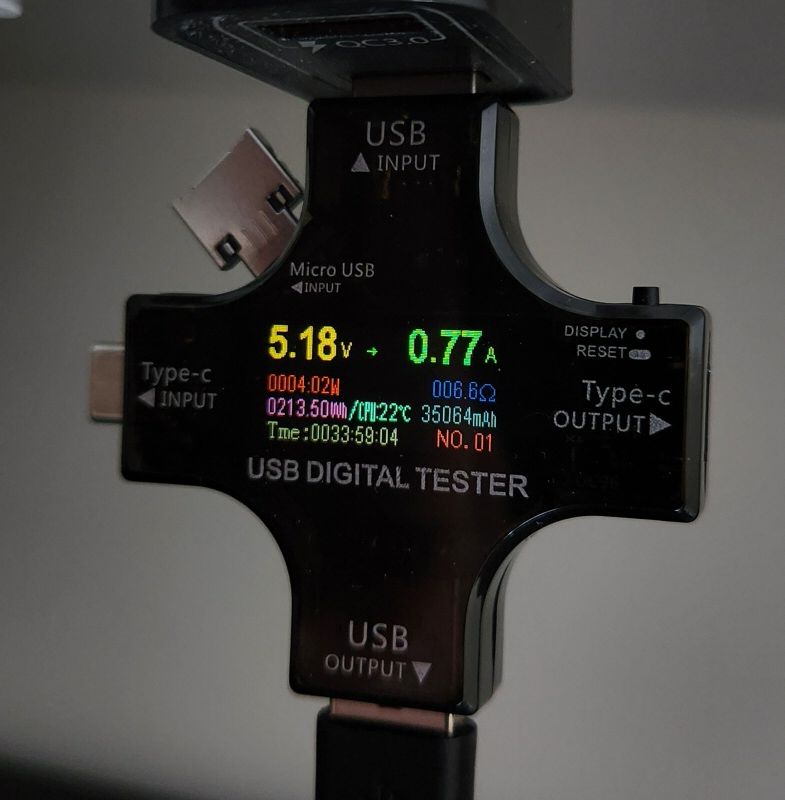
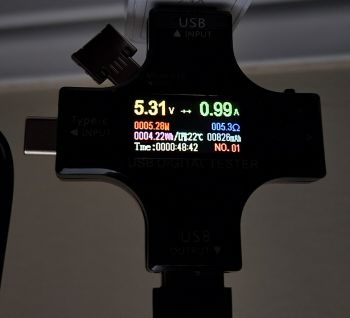
Charging current:

The initial charging current can be a bit lower, but it quickly jumps to ~0.30A, and then slowly drops from there as the battery charges fully.
I didn’t time how long it take to charge the light, but Armytek says is 2hr 50 mins to a full charge. Sounds about right, I don’t think it took much longer than 2 hours on any of my tests.
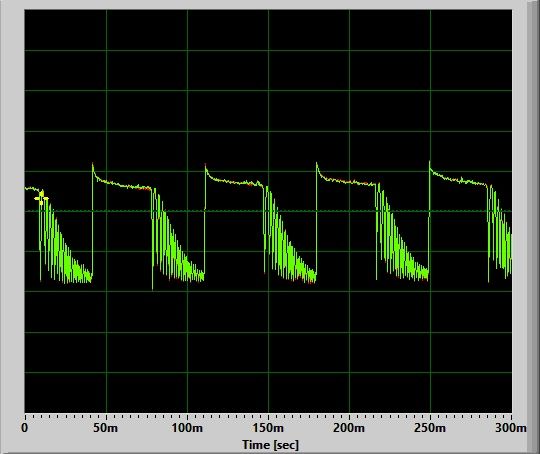
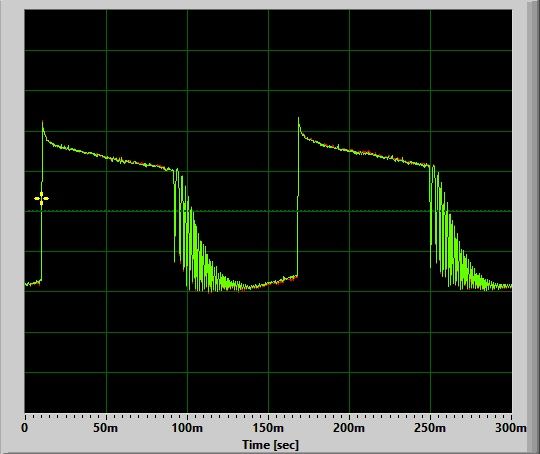
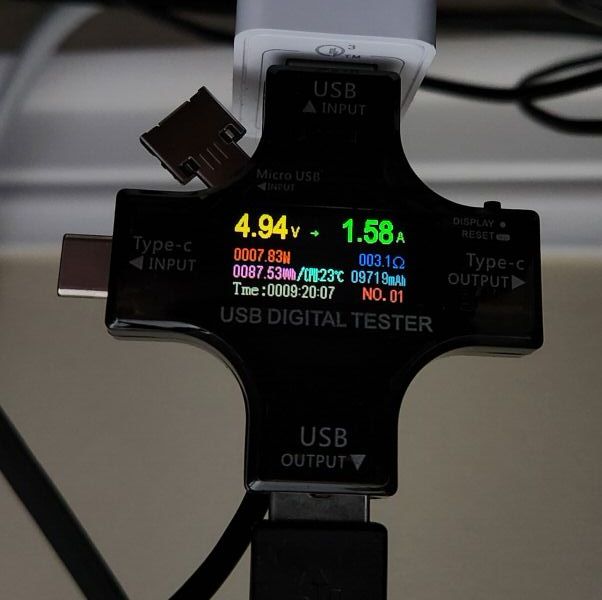
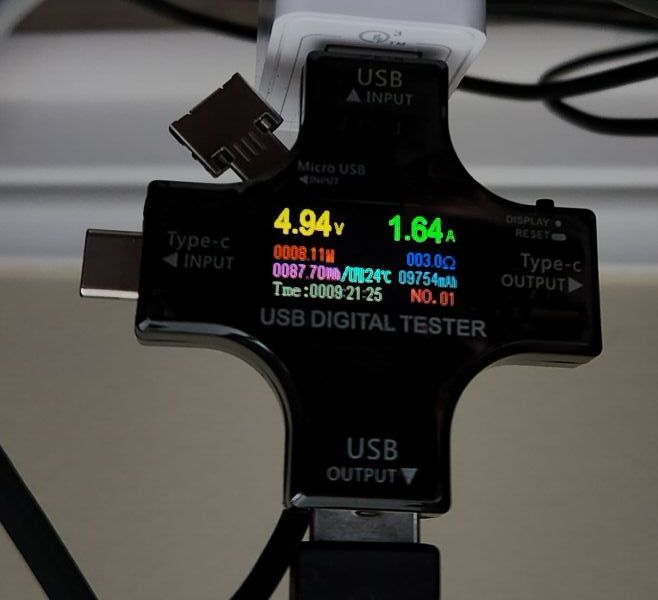
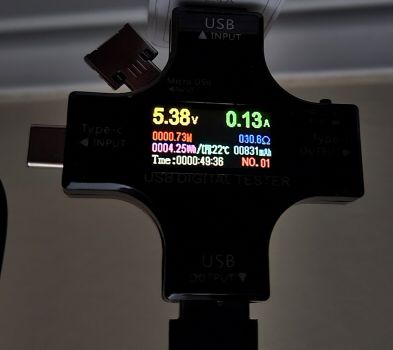
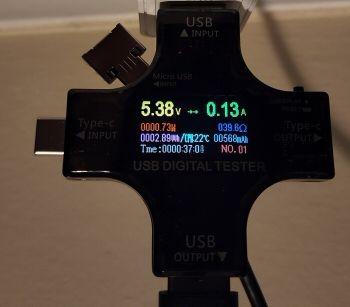
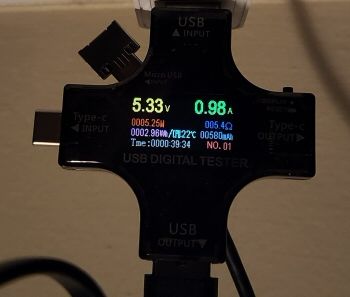
As noted in my review of the original Crystal, one interesting feature of this light is its ability to serve as a worklight when plugged into AC power or a power bank. I measured the current drain on the original Crystal light, and found it started to move up from zero at the Main 2 level, with a significant drain on Main 3 (equivalent to the charging current). However, my Crystal Pro doesn’t show this pattern – regardless of the charge status, the current drops to zero as soon as you turn the light on.
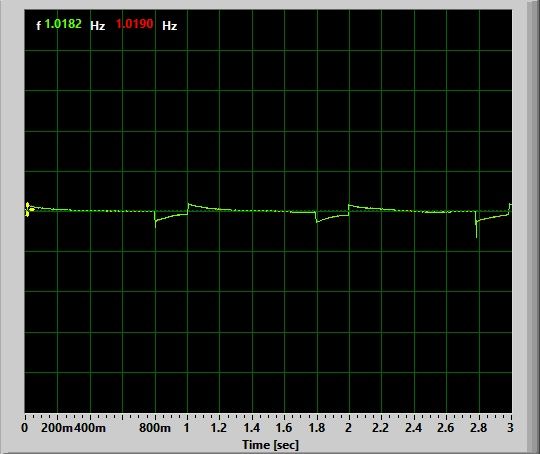
To illustrate, shown below are 3 states: the light off and charging, the light turned On in Firefly, and the light On in Main3.
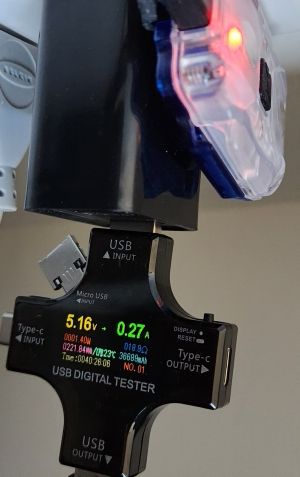
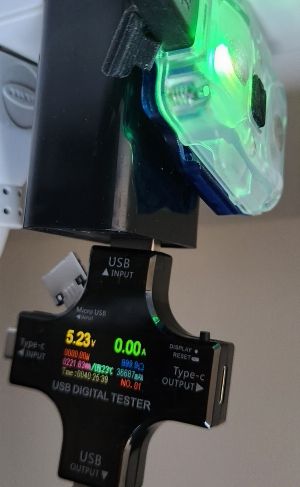

Despite the light not being fully charged while plugged in, the charging LED switches to green as soon as you turn it on, and the current drops to zero (i.e., acts like it is fully charged and Off). I’m not sure what is going on here, but it suggests my sample of the Crystal Pro would no longer work as a plugged-in worklight.
Standby / Parasitic Drain:
Given the electronic nature of the switch, there must be a standby current at all times. However, without breaking it open, and I am not able to measure it.
Emitter Measures
In this section, I directly measure key emitter characteristics of my sample in terms of colour temperature, tint, and colour rendition. Please see my Emitter Measures page to learn more about what these terms mean, and how I am measuring them. As tint in particular can shift across levels, I typically stick with the highest stably regulated level for all my reported measures.
As explained on that page, since I am using an inexpensive uncalibrated device, you can only make relative comparisons across my reviews (i.e., don’t take these numbers as absolutely accurate values, but as relatively consistent across lights in my testing).
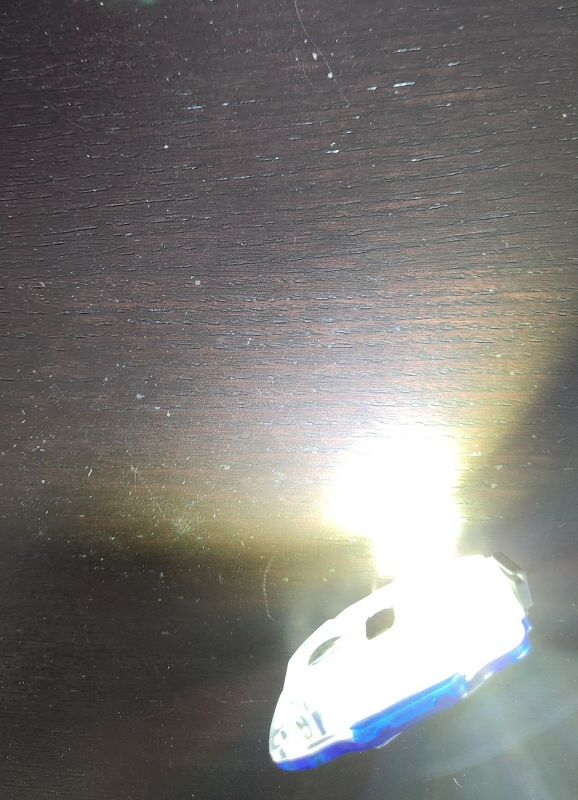
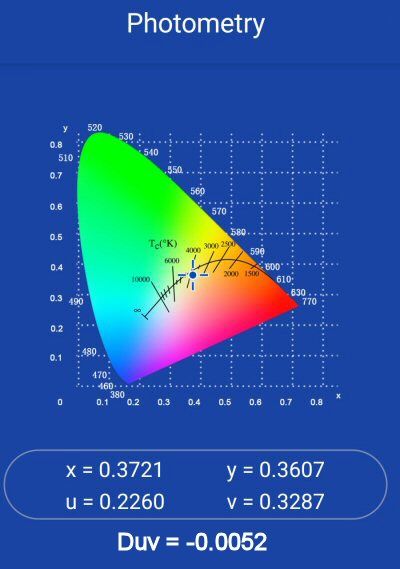
White Main 3 Level:


The key measures above are the colour temperature of ~6050K, and no measured tint shift (-0.0000 Duv). For CRI (Ra), I measured a combined score of 73.
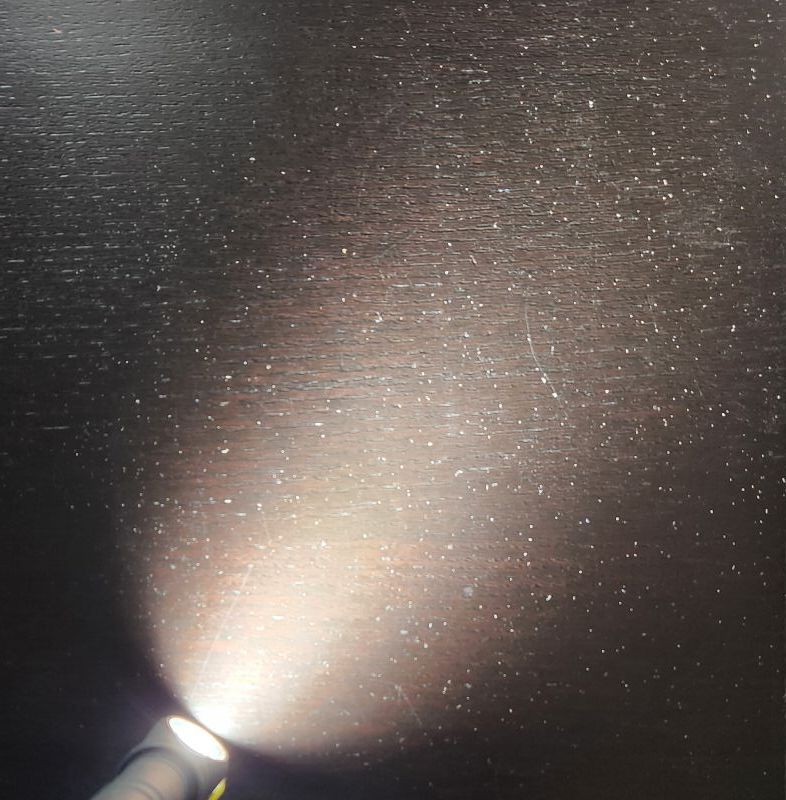
These values are very consistent with a cool white emitter – and somewhat similar to my original Crystal. But interestingly, I find there is a bluish tinge to the peripheral spill of this light – just like I found a greenish tinge on the original Crystal. This seems like further indication that the colour plastic base you choose can influence your perception of the overall tint.
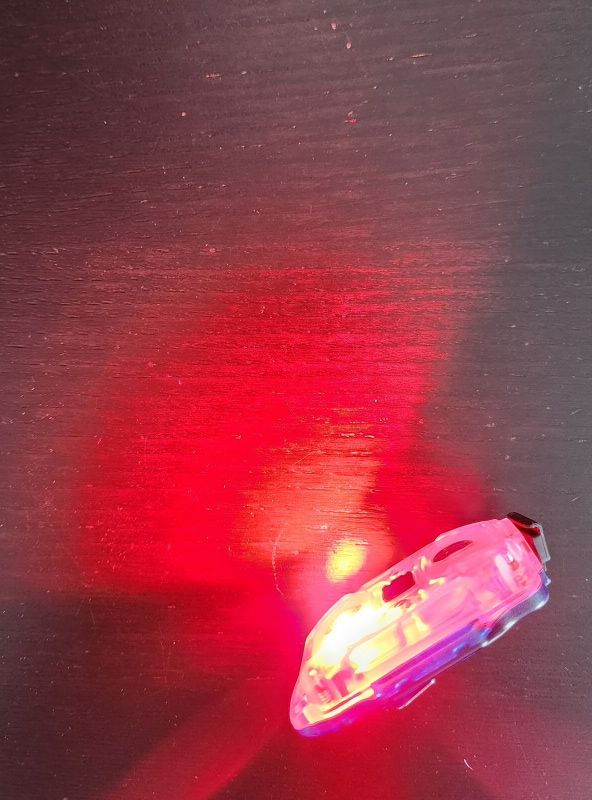
Out of curiosity, I decided to run the main red emitter through my Light Master 2 meter, to see what it reported. Although these are not designed for monochromatic light sources, its readings seemed reasonable:
Red Main3 level:
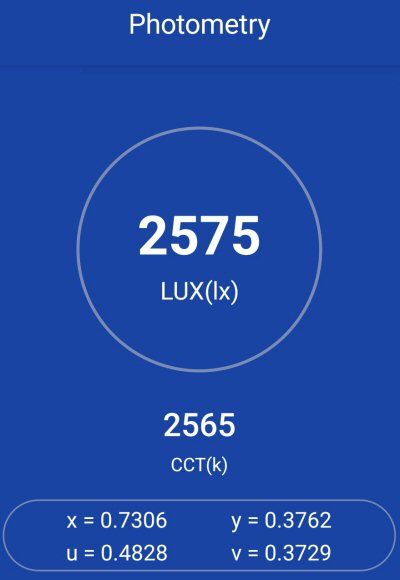

Just like my original Crystal, the red light is well off the Planckian locus, well into the red end of the spectrum (and so, the CCT and Duv are meaningless here).
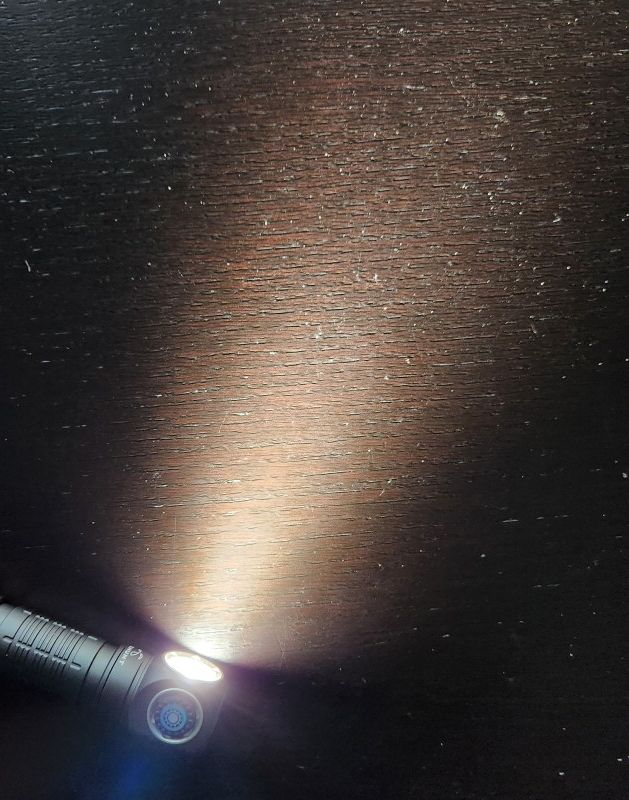
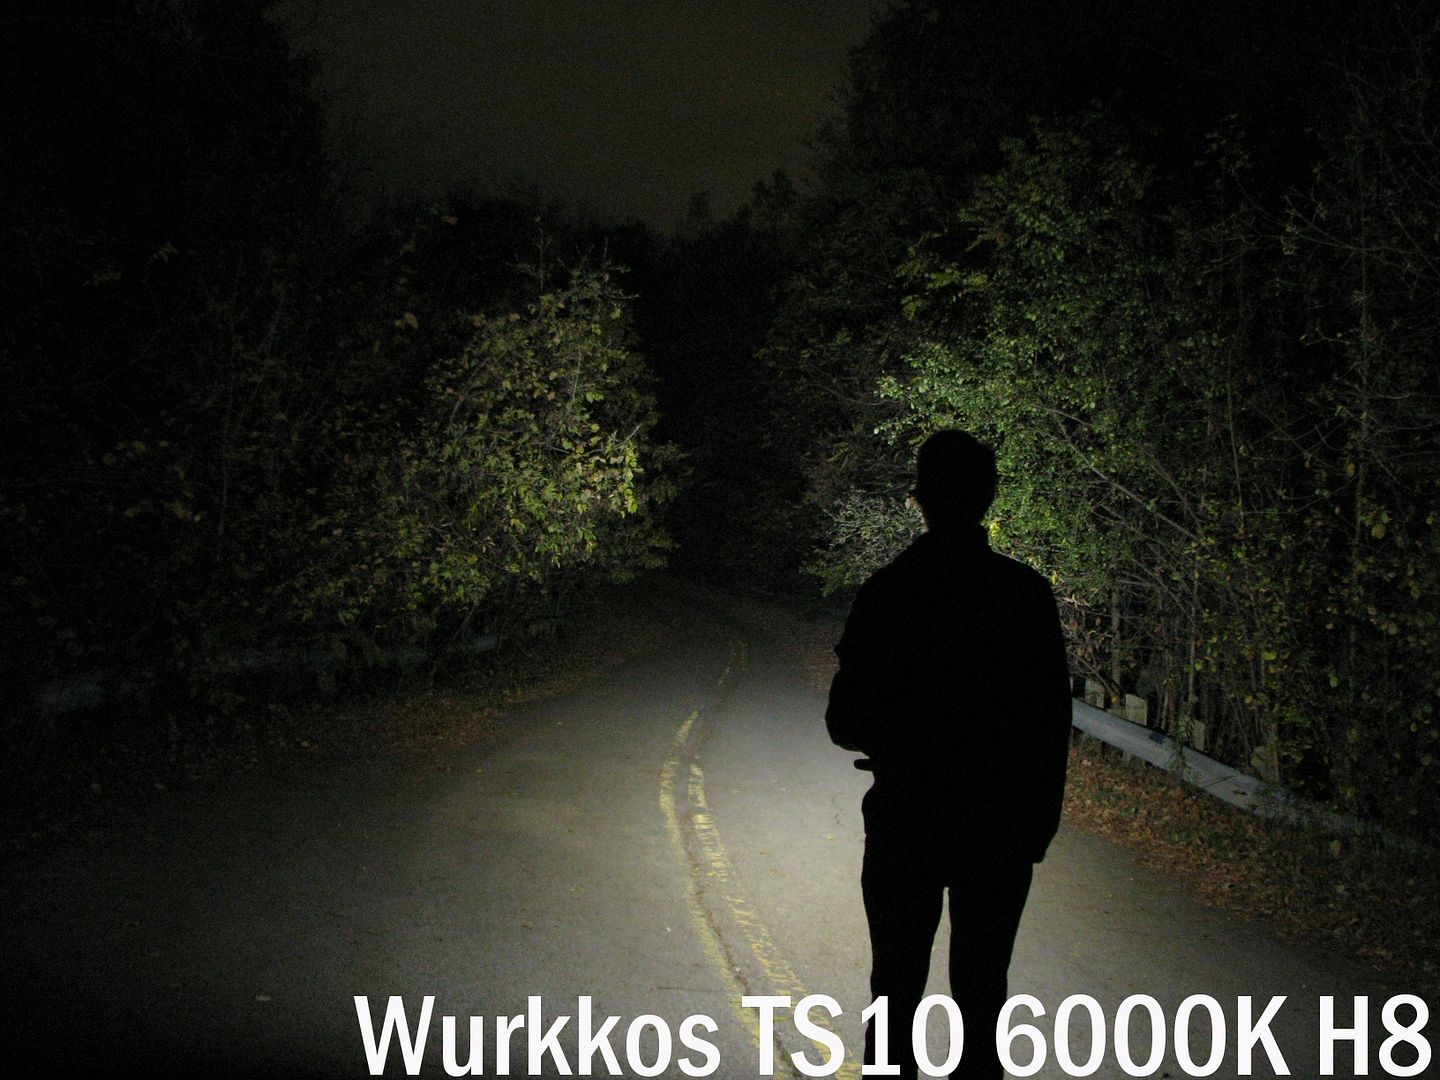
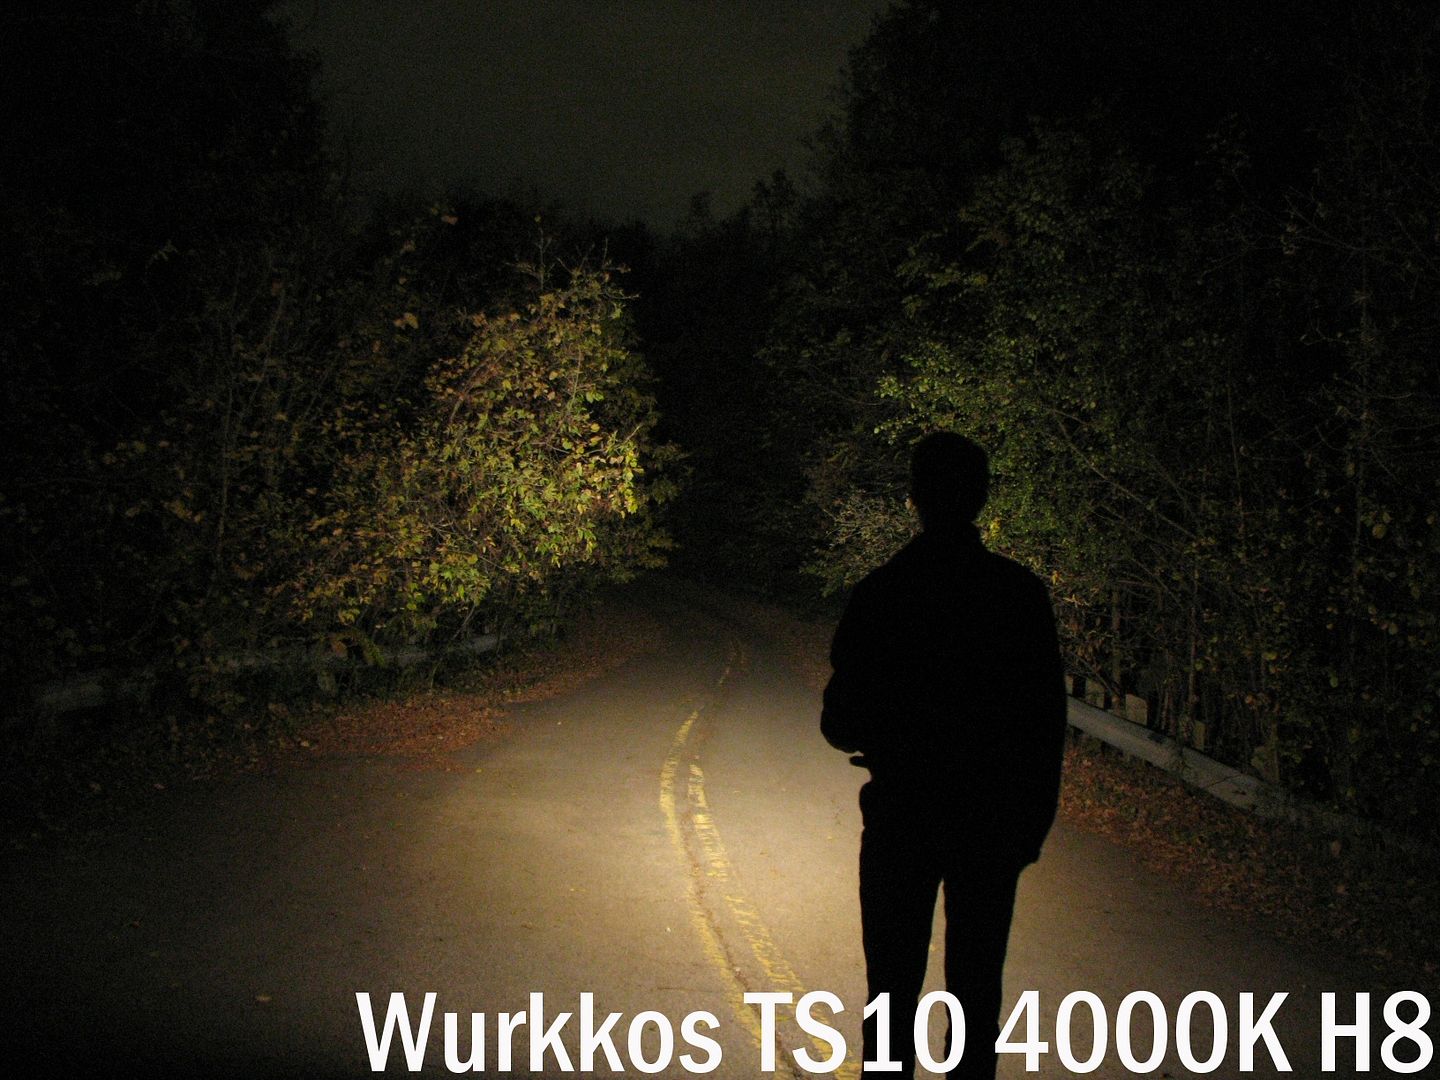
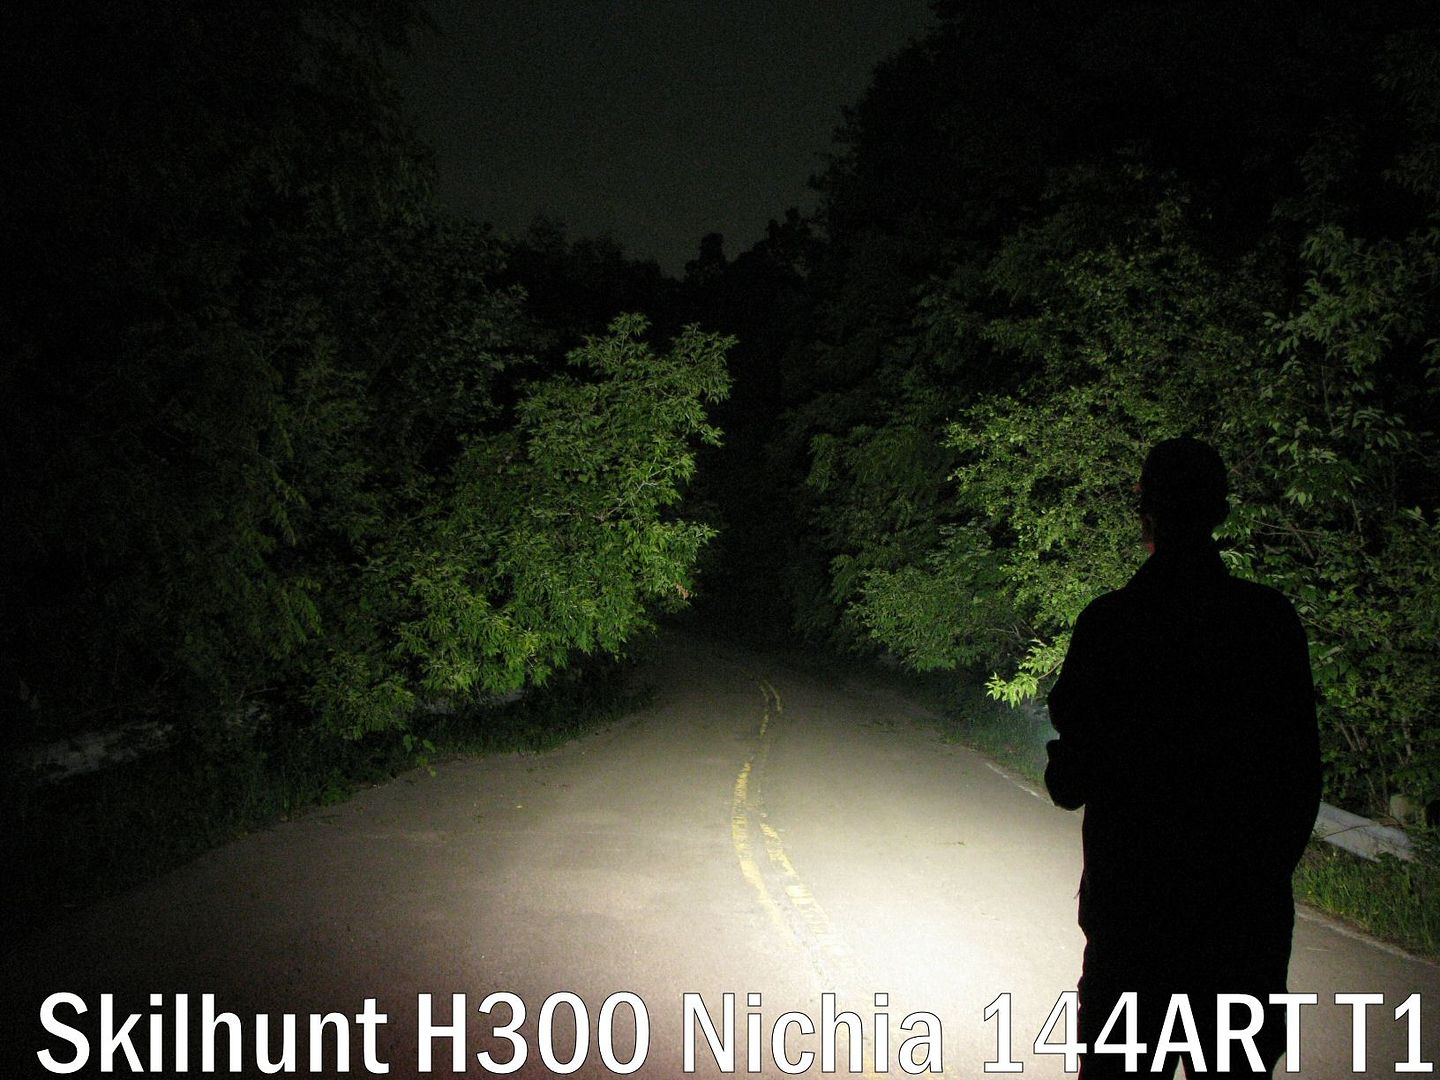
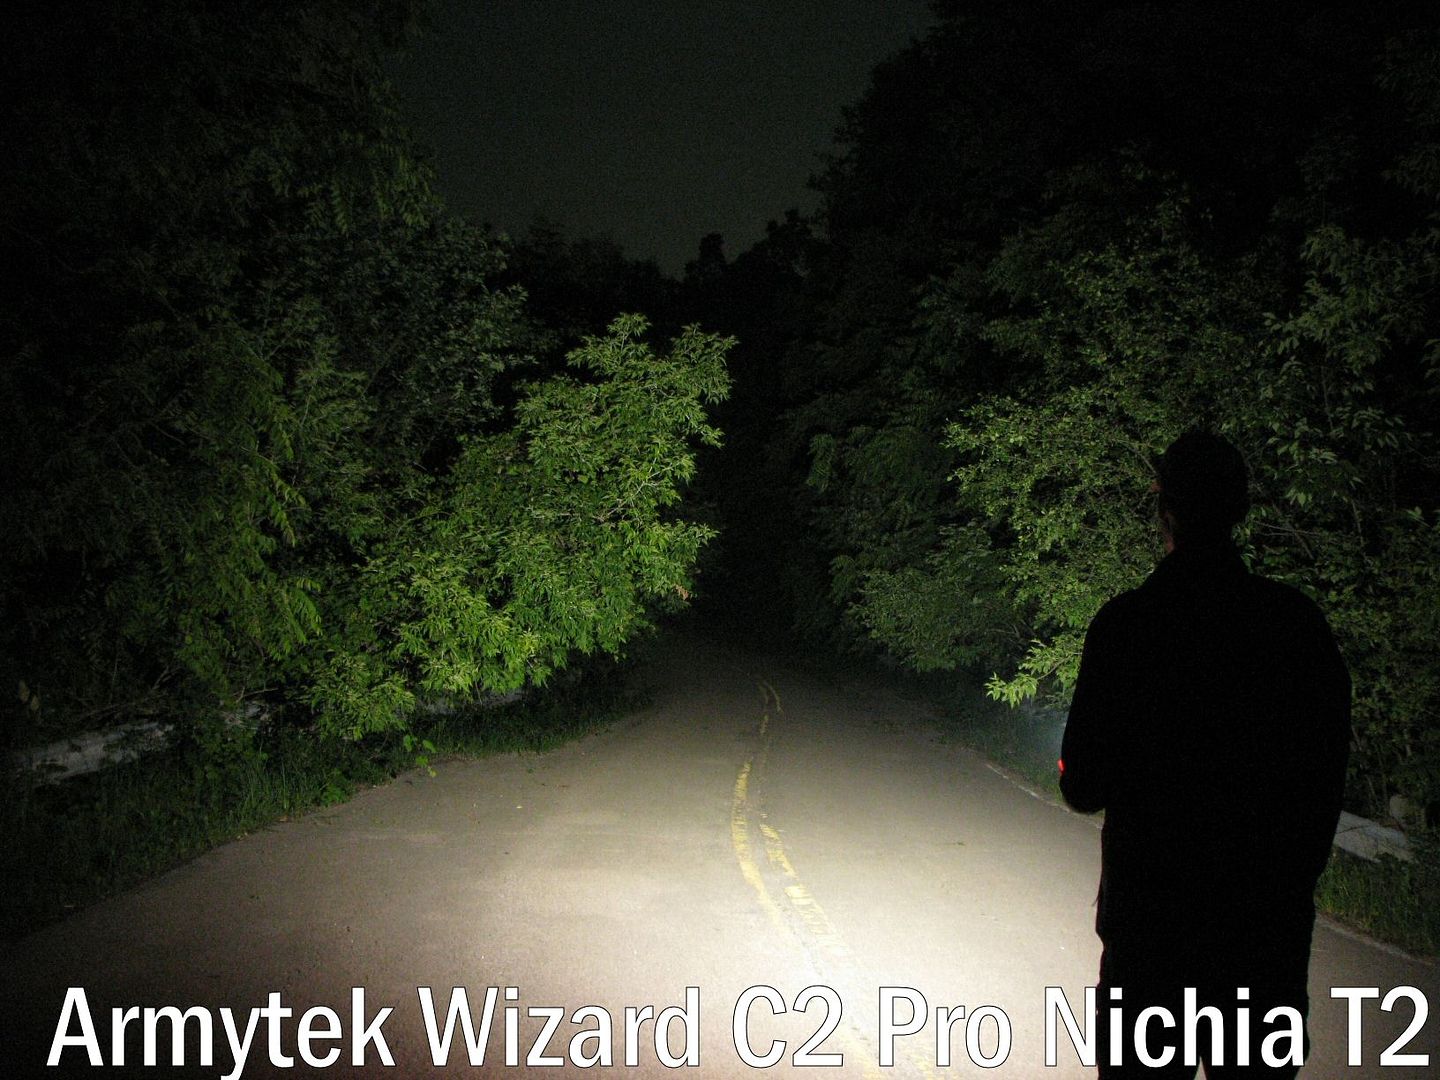
Beamshots
Sorry, no beamshots for keychain lights. 🙂
Testing Results
My summary tables are generally reported in a manner consistent with the ANSI FL-1 standard for flashlight testing. In addition to the links above, please see my output measures page for more background.
All my output numbers are based on my home-made lightbox setup. As explained on that methodology page, I have devised a method for converting my lightbox relative output values to estimated lumens. My Peak Intensity/Beam Distance are directly measured with a NIST-certified Extech EA31 lightmeter.
Crystal Pro Testing Results
| Emitter | Mode | Spec Lumens | Estimated Lumens @0sec | Estimated Lumens @30 secs | Beam Intensity @0sec | Beam Intensity @30secs | Beam Distance @30secs | PWM/Strobe Freq | Noise Freq | Charging Current <3V | Charging Current >3V | Parasitic Drain | Weight w/o Battery | Weight with Battery | CCT (K) | Duv | CRI |
|---|---|---|---|---|---|---|---|---|---|---|---|---|---|---|---|---|---|
| White | Firefly | 0.1 | 0.13 | 0.13 | - | - | - | - | - | - | - | Yes (not measured) | - | 34 g | - | - | - |
| White | Main1 | 7 | 7 | 7 | - | - | - | - | - | - | - | Yes (not measured) | - | 34 g | - | - | - |
| White | Main2 | 45 | 43 | 42 | - | - | - | - | - | - | - | Yes (not measured) | - | 34 g | - | - | - |
| White | Main3 | 220 | 245 | 240 | 86 cd | 81 cd | 18 m | - | - | - | - | Yes (not measured) | - | 34 g | 6,050 | 0.0000 | 73 |
| White | Beacon1 | 45 | - | - | - | - | - | - | - | - | - | Yes (not measured) | - | 34 g | - | - | - |
| White | Beacon2 | 220 | - | - | - | - | - | - | - | - | - | Yes (not measured) | - | 34 g | - | - | - |
| Red | Firefly | 0.1 | 0.03 | 0.03 | - | - | - | - | - | - | - | Yes (not measured) | - | 34 g | - | - | - |
| Red | Main1 | 2 | 1.7 | 1.7 | - | - | - | - | - | - | - | Yes (not measured) | - | 34 g | - | - | - |
| Red | Main2 | 12 | 17 | 17 | - | - | - | - | - | - | - | Yes (not measured) | - | 34 g | - | - | - |
| Red | Main3 | 30 | 45 | 43 | - | - | - | - | - | - | - | Yes (not measured) | - | 34 g | 2,565 | 0.1482 | - |
| Red | Beacon1 | 12 | - | - | - | - | - | - | - | - | - | Yes (not measured) | - | 34 g | - | - | - |
| Red | Beacon2 | 30 | - | - | - | - | - | - | - | - | - | Yes (not measured) | - | 34 g | - | - | - |
| Red | Braking | - | 105 | - | - | - | - | - | - | - | - | Yes (not measured) | - | 34 g | - | - | - |
Estimated output in my lightbox is pretty close to the rated specs across all levels. Indeed, the red emitter reports higher values in my lightbox – but I never calibrated my light sensor for monochromatic sources, so that could be artifactual.
It’s great to see the true moonlight mode here, for both emitters. And the bike “braking” mode is quite bright with the 3 red emitters – just over 100 lumens in my testing!
To view and download full testing results for all modern lights in my testing, check out my Database page.
Runtimes
As always, my runtimes are done under a small cooling fan, for safety and consistency. To learn more about how to interpret runtime graphs, see my runtimes methodology page.
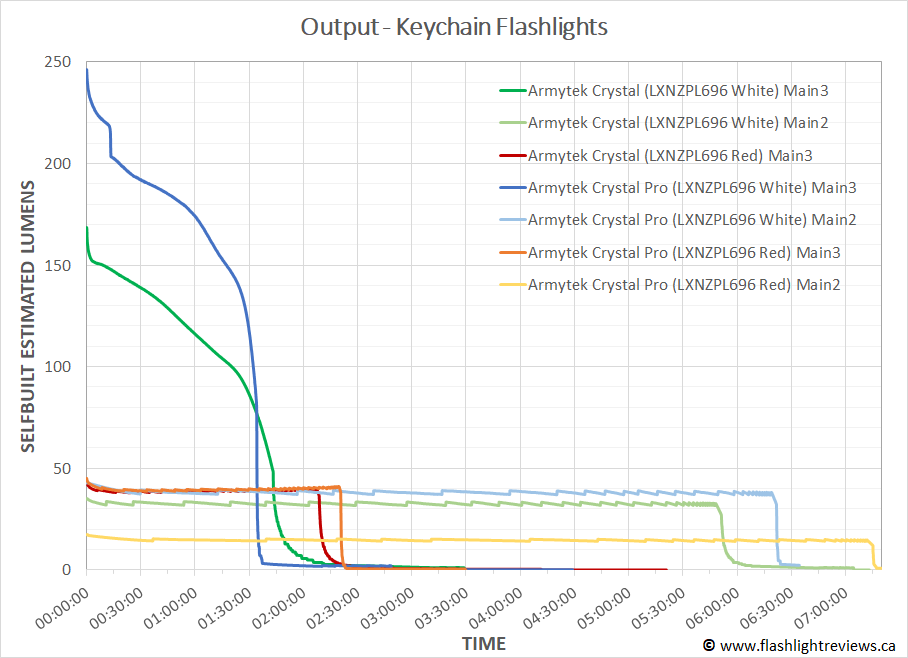
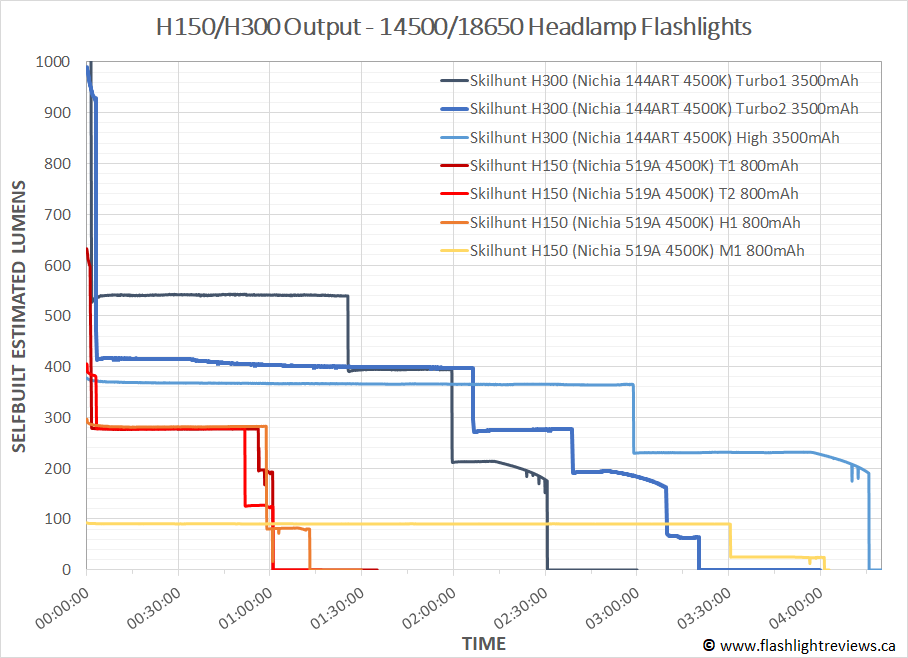
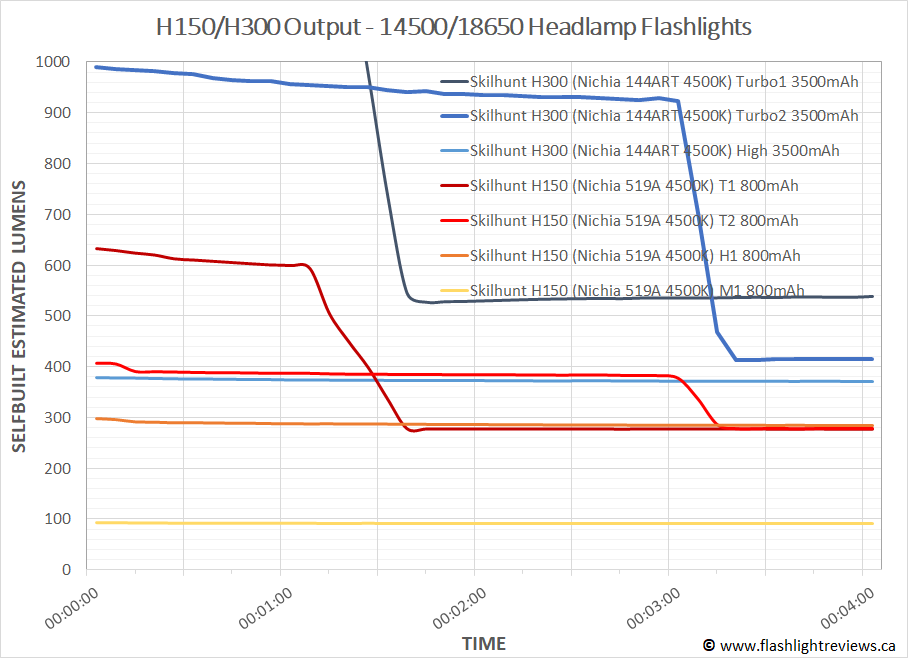
The Crystal Pro definitely has a white light max output advantage over the older Crystal model I tested. The white emitter Main3 output is still basically direct-drive in appearance, slowly dropping off over 2 hours as the battery drains. Main2 remains regulated over its ~6.5 hour run, with a slightly staggered pattern as it keeps the output within a narrow range (slightly higher than the old Crystal).
The red emitter Main3 output is pretty much unchanged from the Crystal, and resembles the white Main2 in its regulation pattern. It lasts ~2.5 hours in my testing.
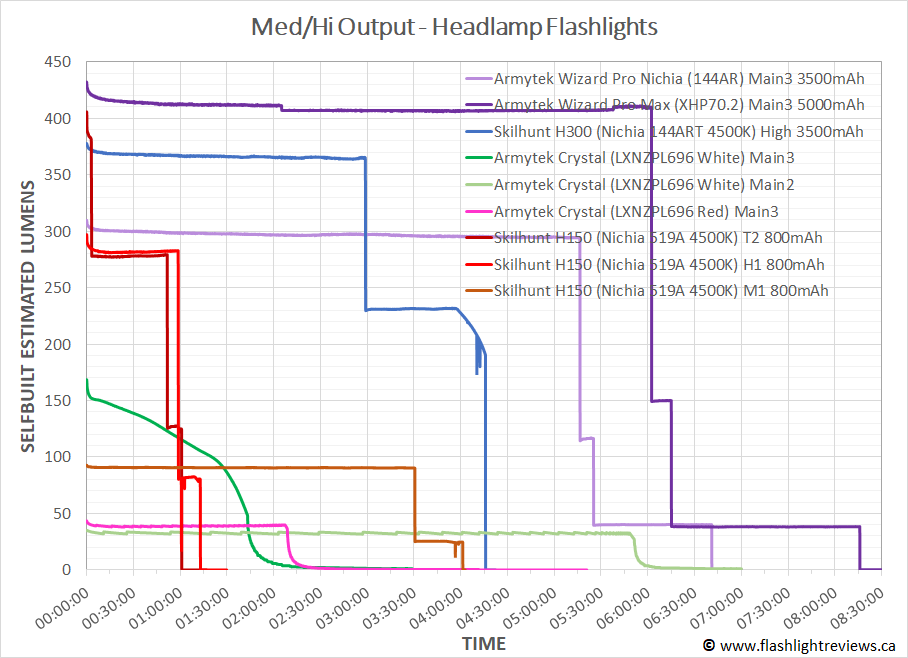
Here is how the Crystal Pro compares to the lower output levels of some of other recent headlamps:
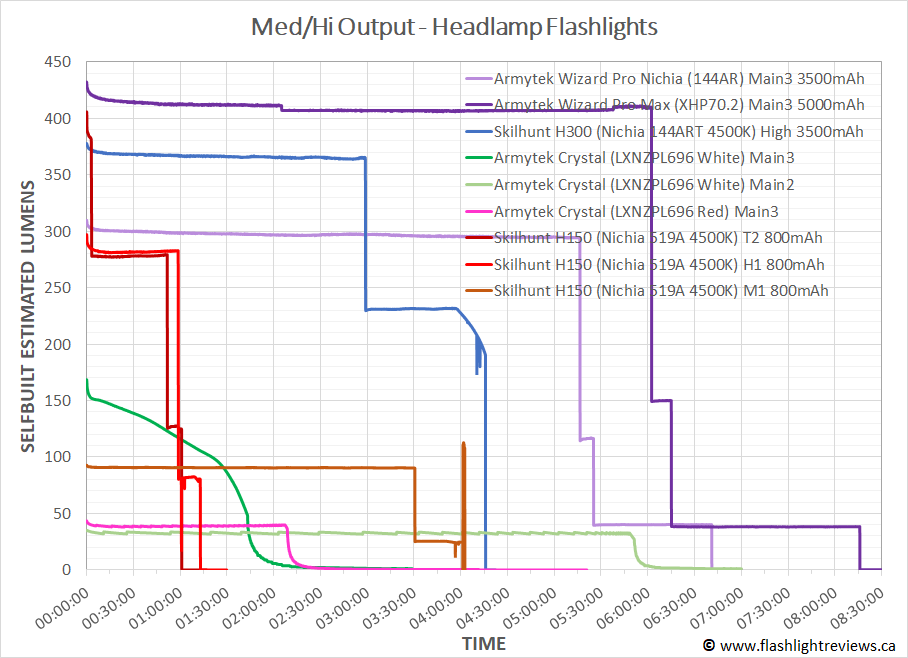
These results are very much in keeping with Armytek’s specs, and seem reasonable for the stated 600 mAh capacity of the built-in battery.
Pros and Cons
| Pros | Cons |
|---|---|
| Good build quality and feature set, suitable as a headlamp, pocket clip, keychain or bike brake light. | Fairly simple design, with power/mode button on front-face with the emitters. |
| Very good regulation pattern, with constant-current flat stabilization. | A bit too large for a keychain light, but works well as a headlamp/pocket clip/bike light |
| Very floody beam without artifacts, for both cool white and red LEDs | Rechargeable battery built-in, but still with older micro-USB connector. |
| Accelerometer and extra red LEDs (new on Pro version) makes for a very effective bike brake light. | |
| Accurate product specs. |
Overall Rating

Preliminary Conclusions
The Crystal Pro is a nice upgrade from the Crystal – but probably not enough to make you want to switch if you are happy with the original model. Simply put, you get a bit more output on the white LED, and the nice bonus of a brake-light accelerometer feature which is surprisingly bright and useful as a bike tail light.
As before, this is a very versatile little headlamp/keychain/bike light. It is lightweight and easy to attach or carry in a variety ways. It has both white and red flood lights (the later is particularly good for maintaining night vision, or for not attracting bugs/animals). It has a good range of levels, including moonlight and a signaling beacon for each emitter. And its performance is excellent across all levels on its built-in rechargeable lithium polymer battery.
By design, the light is a full flooder, without much throw (i.e., there is no optic to focus the emitters). Other than that, it is mainly small issues that persist from the first generation Crystal – like the simple UI (with strobe on the main circuit), micro-USB port, and front switch location. I find it to be a great little headlamp or bike light.
Price doesn’t factor into my star rating system, but I find this light to be pretty reasonably priced considering what you get. It is is certainly a lot cheaper (and lighter) than a lot of other headlamp models out there. Of course, it won’t last as longer as larger models with heavier batteries – but the runtimes are perfectly reasonable for what you are getting here.
If you are looking for a budget headlamp that does multiple duty as a front-facing pocket light, or especially as a bike light, the Crystal Pro is good option to consider.
Acknowledgement
The Crystal Pro was provided by Armytek for review. As always, all opinions are my own and the light received the same rigourous and objective testing as all other lights that I have reviewed. At the time of review, this light retails for $35 USD (~$50 CDN).


_20230729_100058.png)

_20230729_100423.png)
.jpg)


.jpg)
.jpg)
.jpg)
.jpg)


.jpg)
.jpg)


_wtNckiQHzZEgwy398fP7nz.jpg)
_4fo18JqnQbithUkrBeEBys.jpg)
_05_47zC7WAoZEVj353B8um7Ux.JPG)
_05_spqisJcT7JPWnpYvYy6No5.JPG)
_05.JPG)
_05.JPG)
_05_3qpnSz17JCXCDo3FBwuk5N.JPG)
_05_konN9xoDtcwHtsox8aAfSt.JPG)


_u1yJijzufEcqAKX58ysUNi.jpg)
_uJG1wfF2FvBAybDDBtzfEZ.jpg)
_05_6xufWKrQKnW4MEhtSH4zdz.JPG)