Sofirn SC29

The SC29 is a general-purpose flashlight running on a single included rechargeable 21700 battery. It features USB-C charging and a distinctive TIR optic.
- Introduction
- Manufacturer Specifications
- Package Details
- Build
- User Interface
- Circuit Measures
- Emitter Measures
- Beamshots
- Testing Results
- Runtimes
- Pros and Cons
- Overall Rating
- Preliminary Conclusions
- Acknowledgement
Introduction
Still working through my backlog – this SC29 sample was received back in March of this year.
The SC29 is another in a long line of compact 1×21700 flashlights from Sofirn, this time featuring the mid-range Cree XHP50.2 emitter. What’s distinctive here is the TIR (total internal reflection) optic, which I expect will help with the typical chromatic aberrations you can see on XHP50.2 HD emitters (especially the older ones). It also features in-light charging and a magnetic tailcap. It comes with a ~6000K cool white emitter, and Sofirn-branded 5000mAh 21700 battery.
I’ve been pleased with the quality and performance of many Sofirn lights for their price. They generally have reasonably good circuit efficiency, although with fairly basic linear regulators (to help keep the cost down). How does the SC29 stack up? Let’s find out …
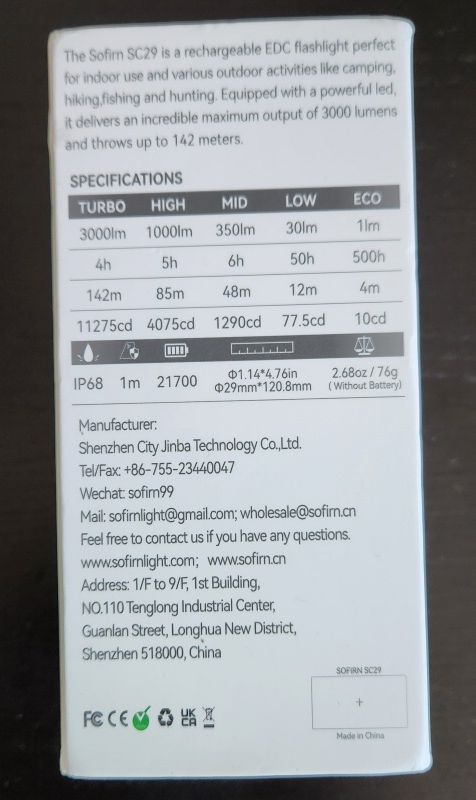
Manufacturer Specifications
Note: As always, these are simply what the manufacturer provides – scroll down to see my actual runtimes.
| Feature | Specs |
|---|---|
| Maker | Sofirn |
| Model | SC29 |
| Emitter | XHP50.2 |
| Tint | Cool |
| Max Output (Lumens) | 3,000 |
| Min Output (Lumens) | 1 |
| Max Runtime | 500 hours |
| Max Beam Intensity (cd) | 11,275 cd |
| Max Beam Distance (m) | 142 m |
| Constant Levels | 5 |
| Flashing | Strobe |
| Battery | 1x21700 |
| Weight (w/o battery) | 76.5 g |
| Weight (with battery) | - |
| Length | 120.8 mm |
| Head Diameter | 29 mm |
| Body Diameter | - |
| Waterproof | IP68 |
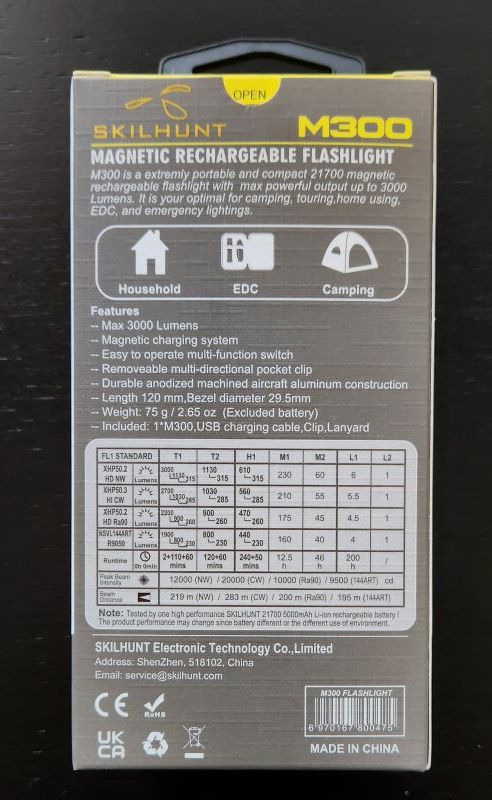
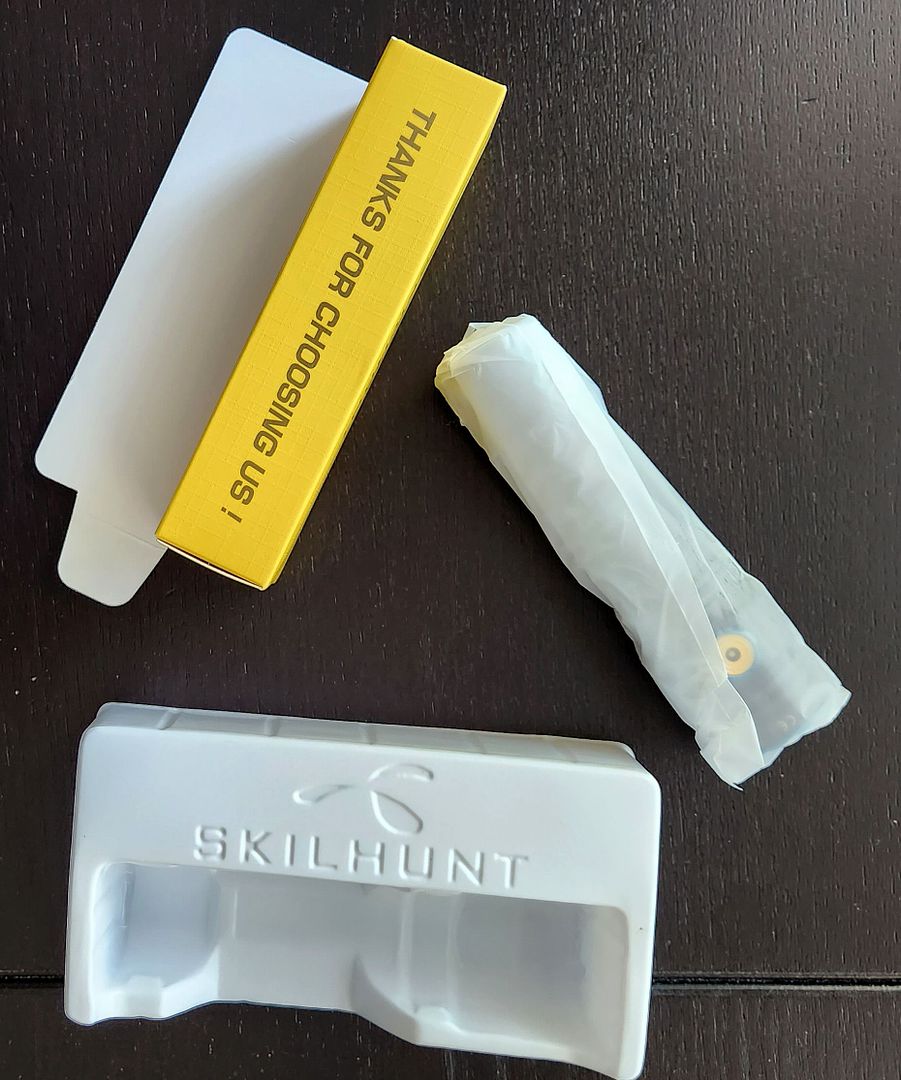
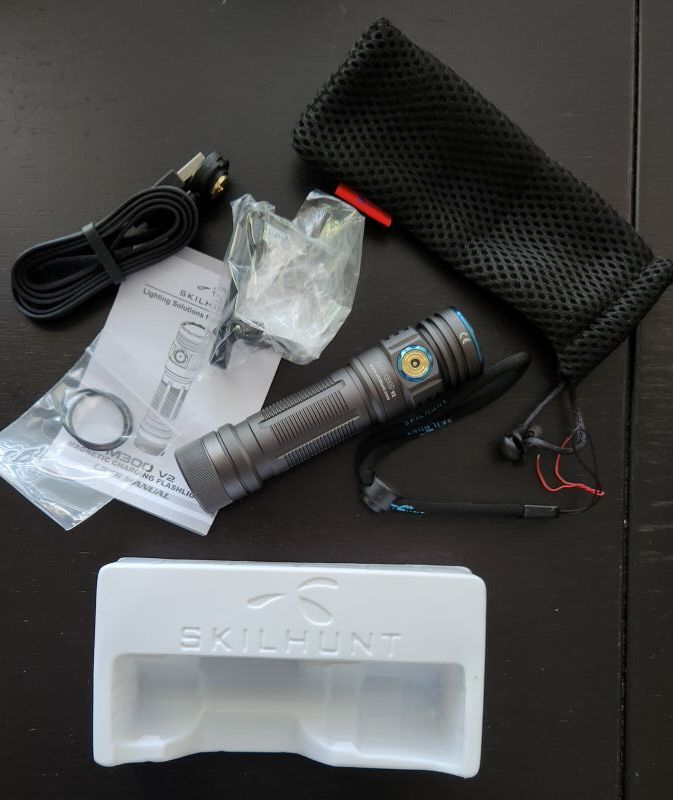
Package Details
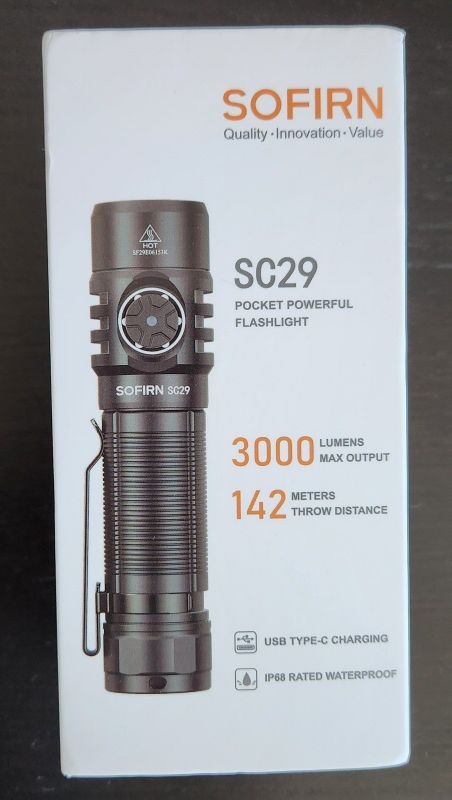
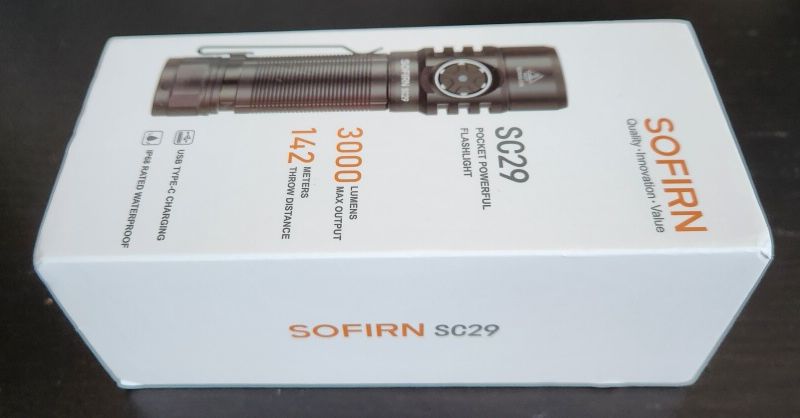
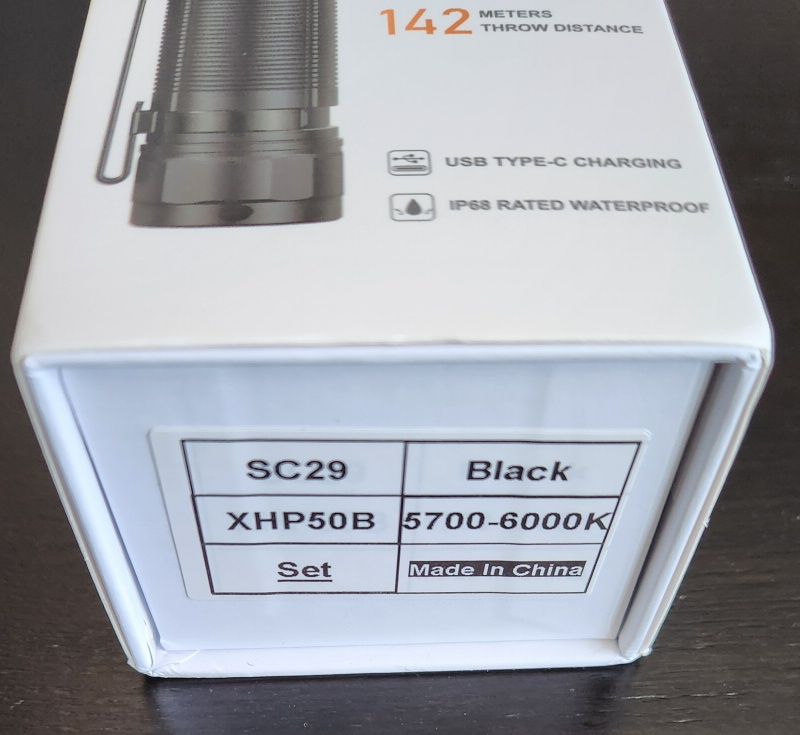
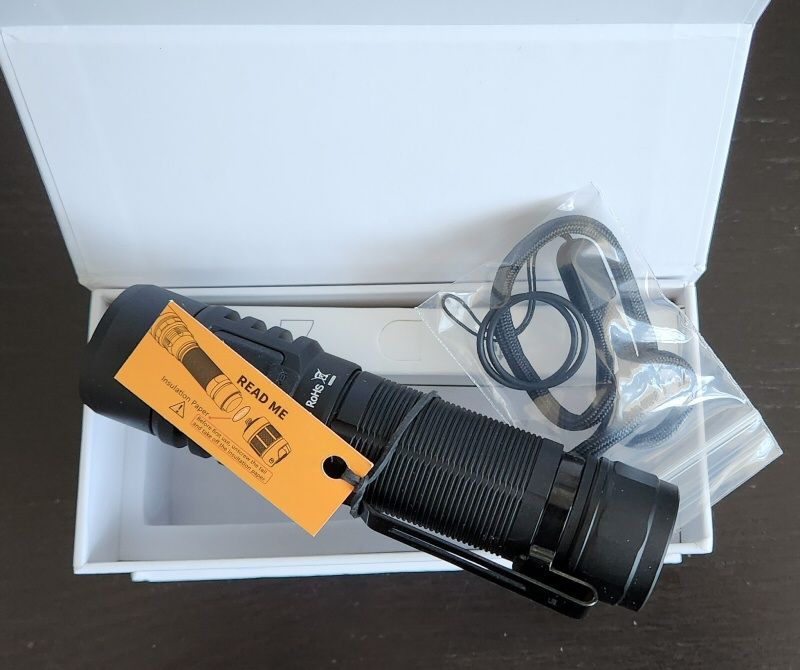
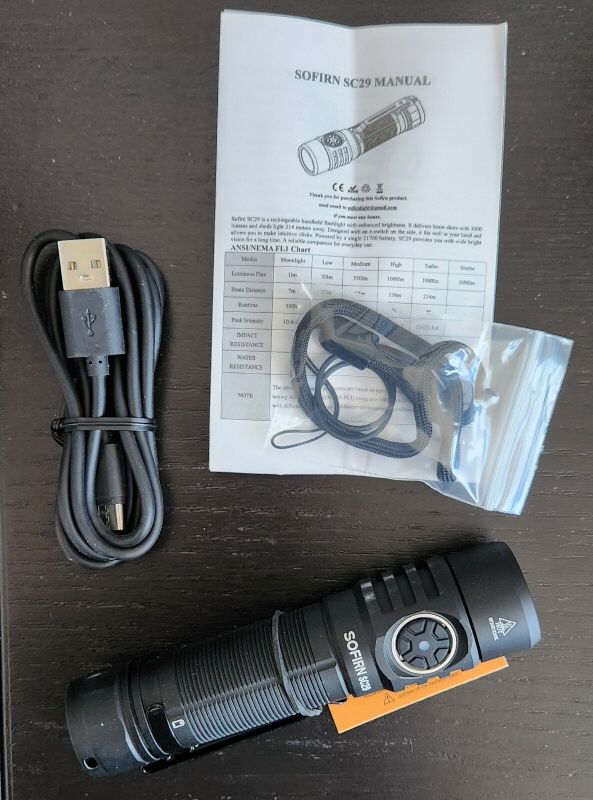
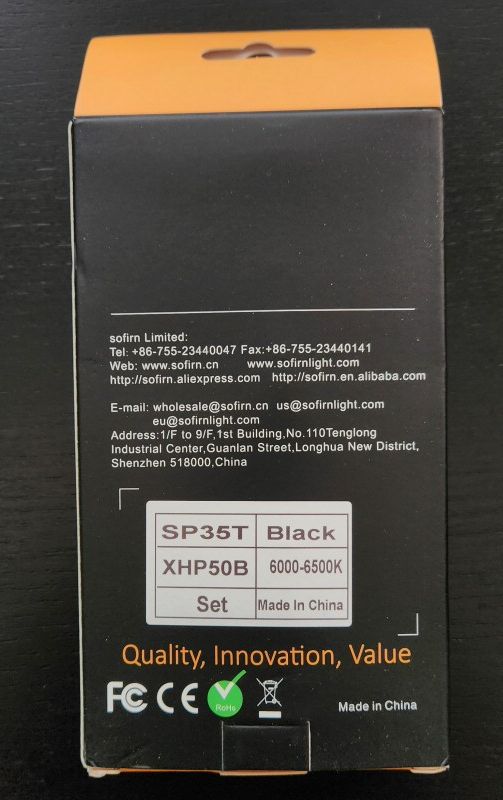
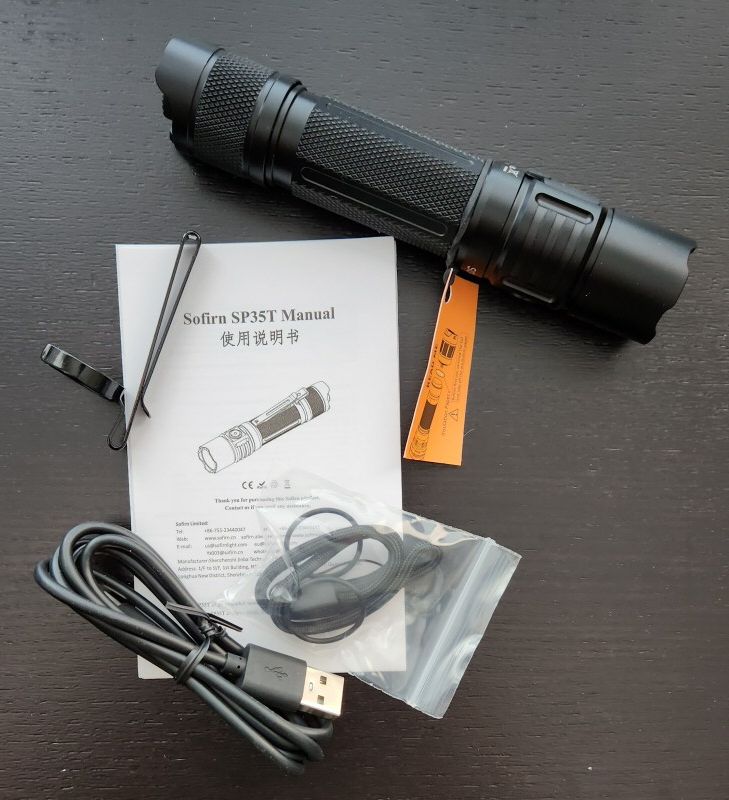
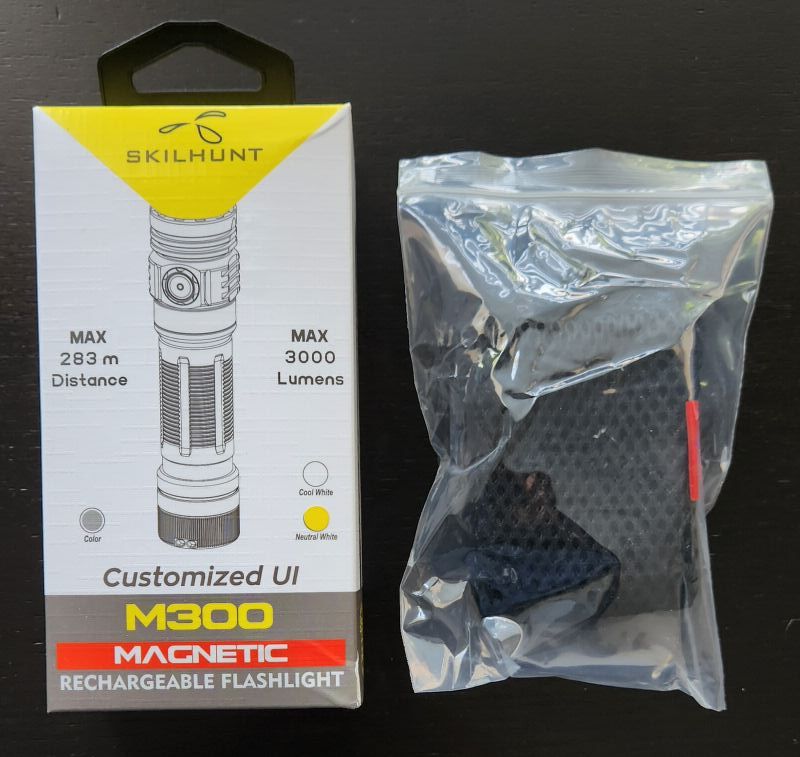
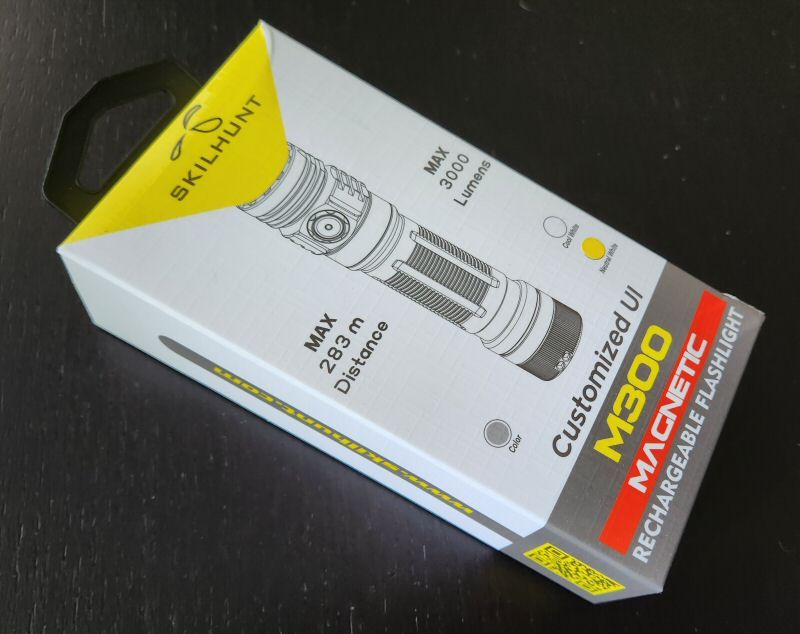
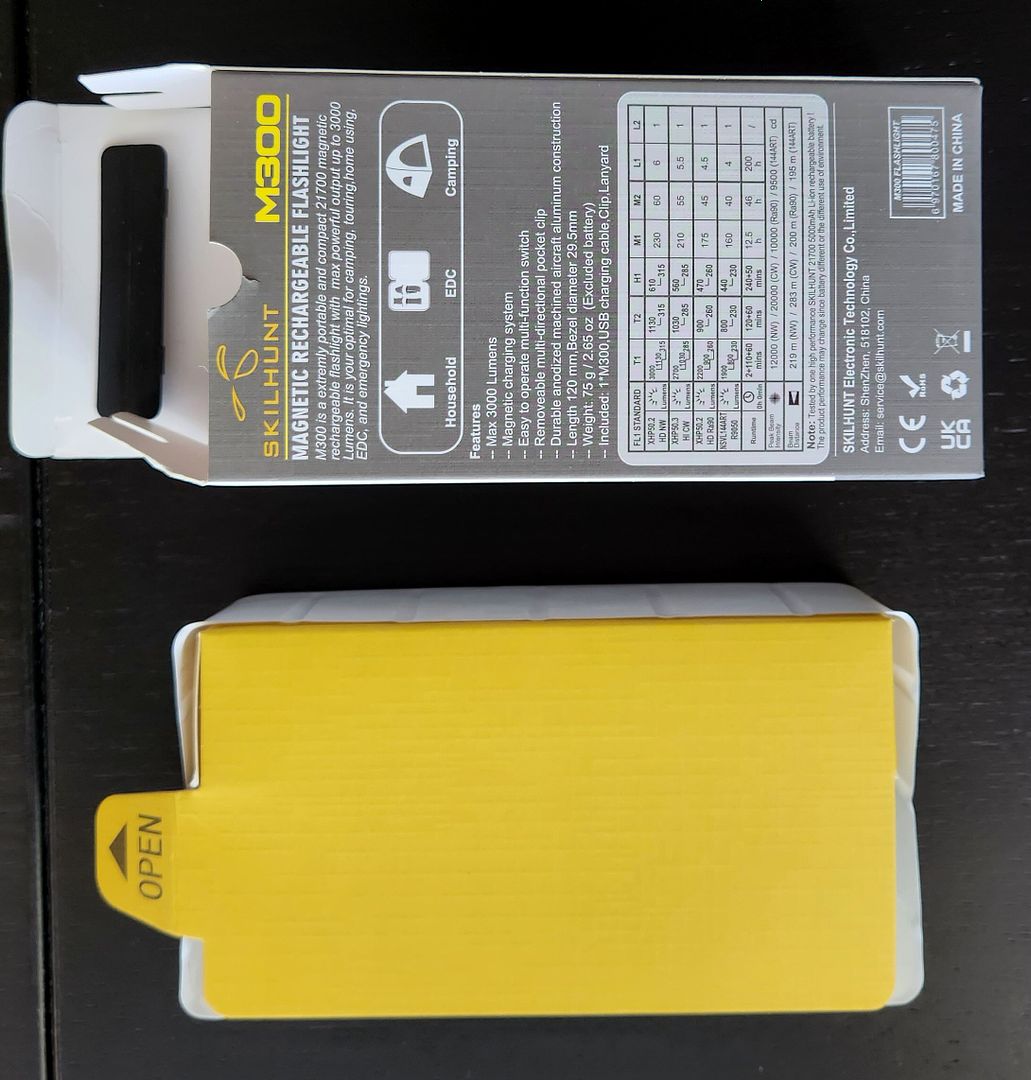
The SC29 came in the modern “cellphone box” style packaging common for higher-end Sofirn and Wurkkos models, with a good number of descriptive labels on the outside. Included:
- Sofirn SC29 flashlight
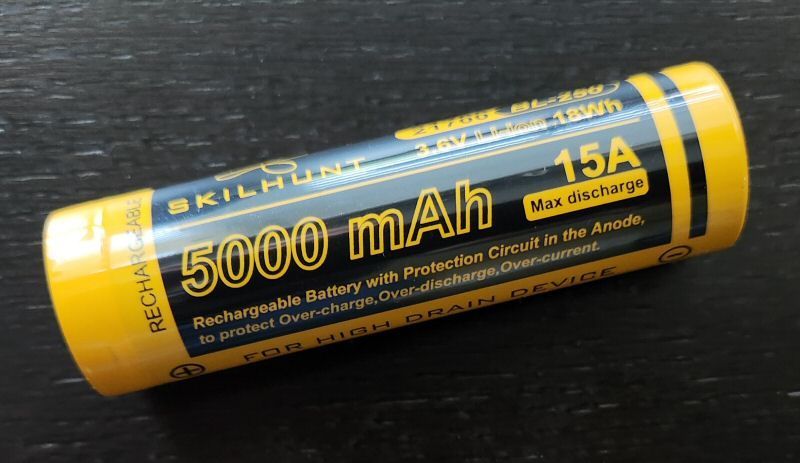
- Sofirn-branded 5000mAh 21700 battery
- Pocket clip (removable)
- Wrist lanyard
- USB-C charging cable
- 2 Spare O-rings
- Manual
Al always, this is a decent package for a “budget” build. But I would like to see a holster included.
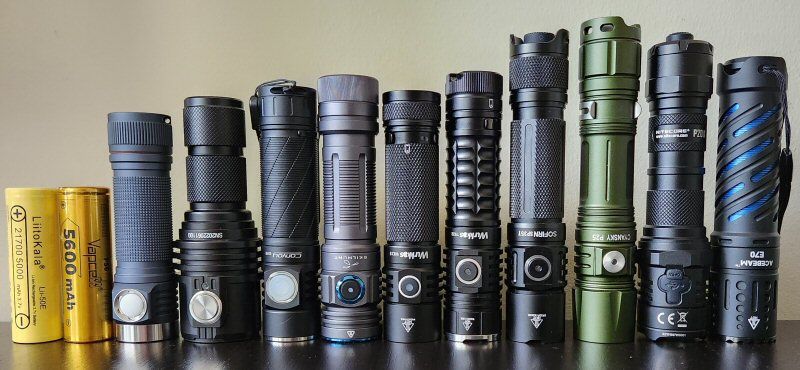
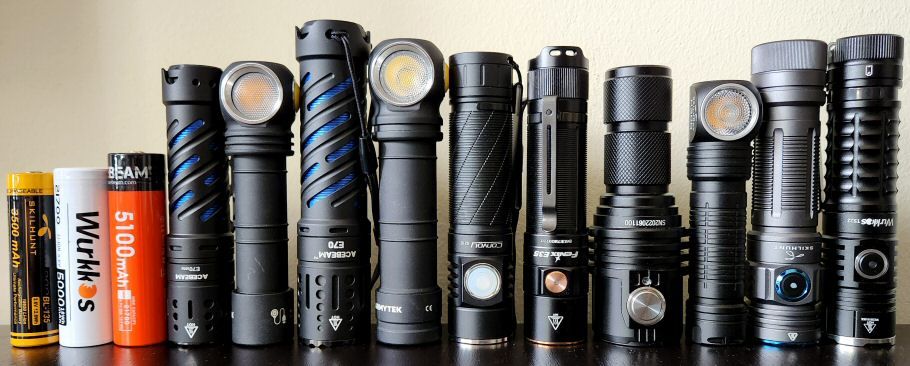
Build

From left to right: Wurkkos 21700 (5000mAh), Vapcell 21700 F56 (5600mAh), Emisar D4K, Wurkkos WK15, Armytek Wizard C2 Max, Wurkkos TS22, Sofrin SC29, Speras E21, Wuben X1 Falcon, Sofirn SC33, Sofirn SP35T, Cyansky P50R, Cyansky P25.
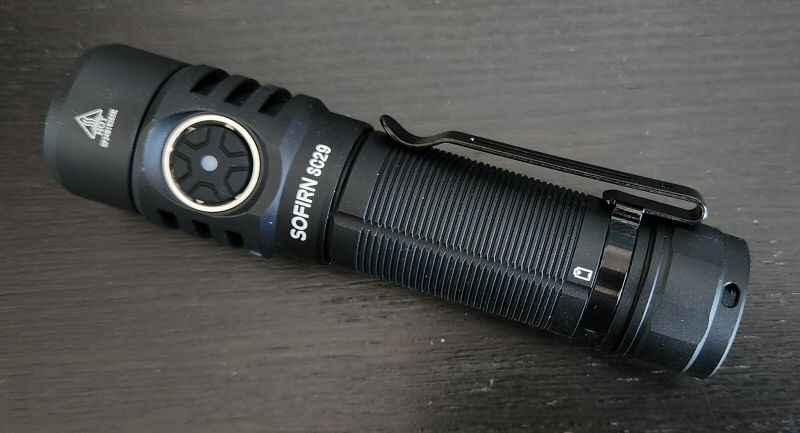
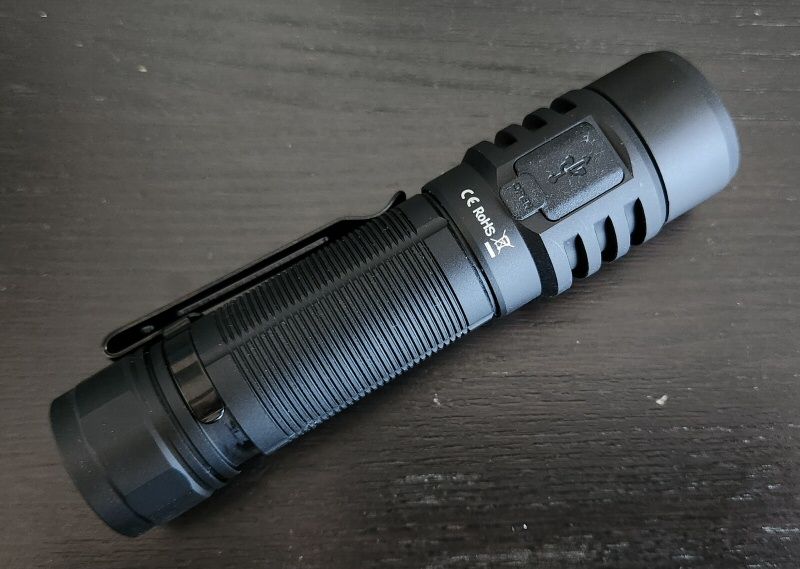
The SC29 is definitely smaller than the SC33 (or SP35T) that I reviewed earlier this year – it is more in keeping with compact Wurkkos TS22. I find it a very comfortable size to hold and use, a good mid-range size (although larger than the similarly powered Wurkkos WK15).
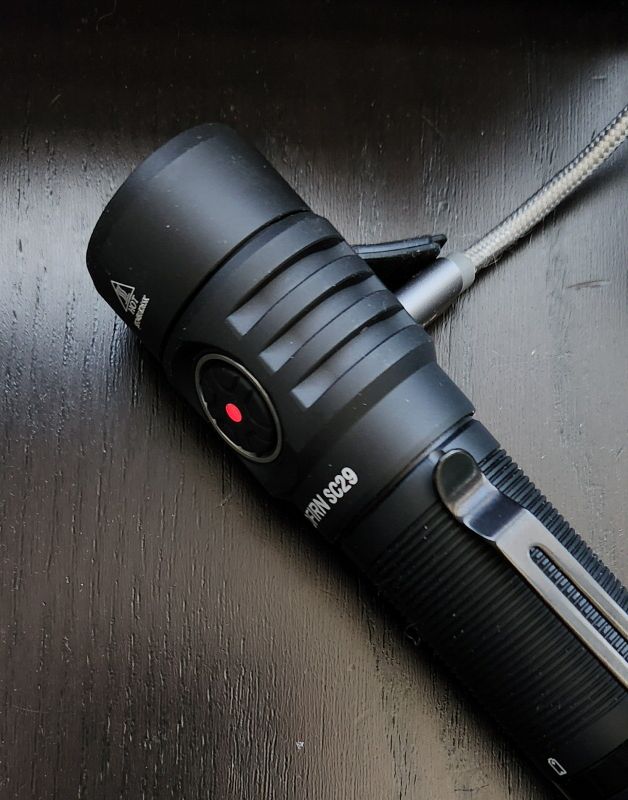
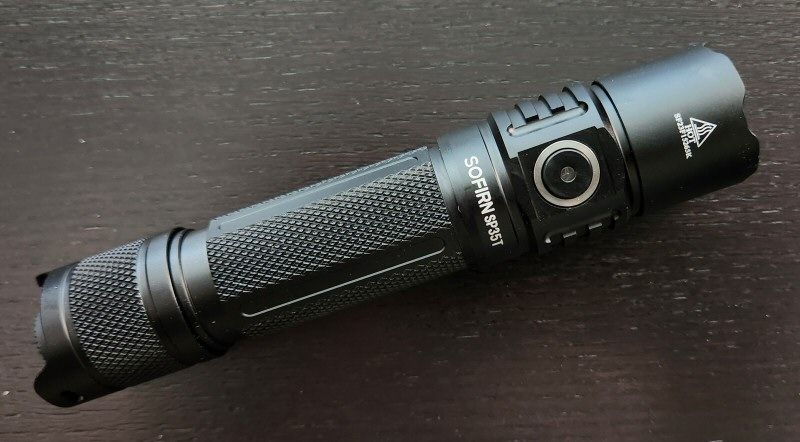
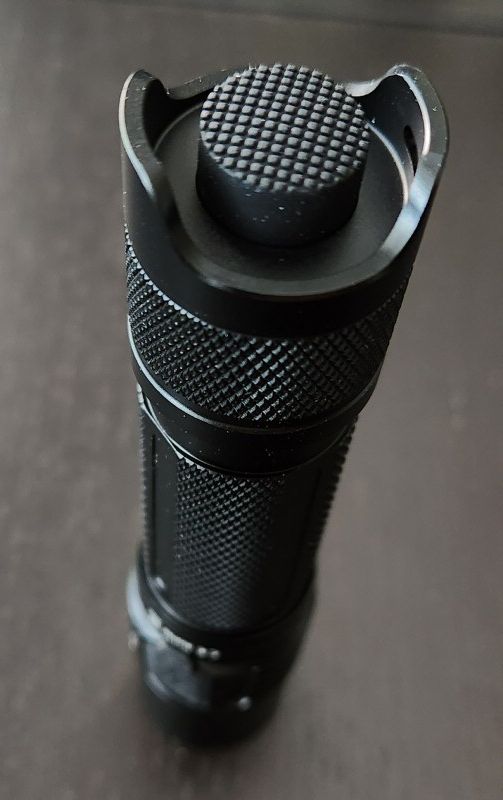
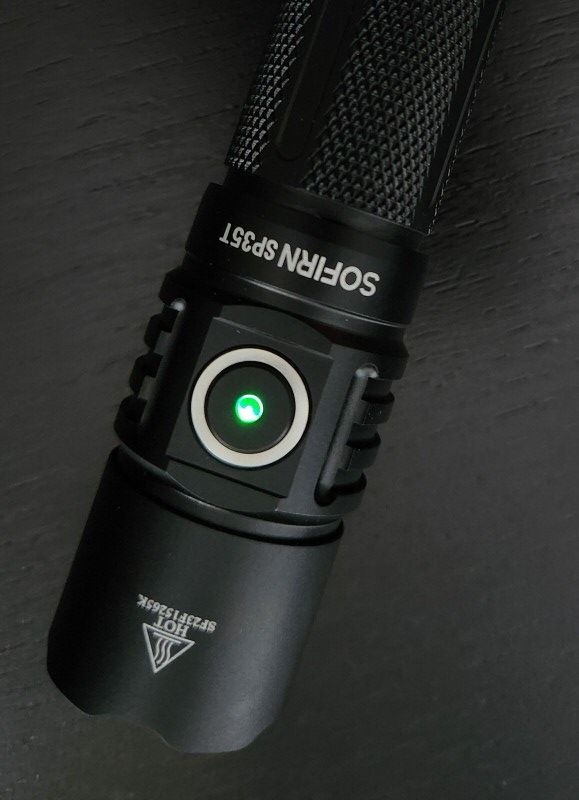
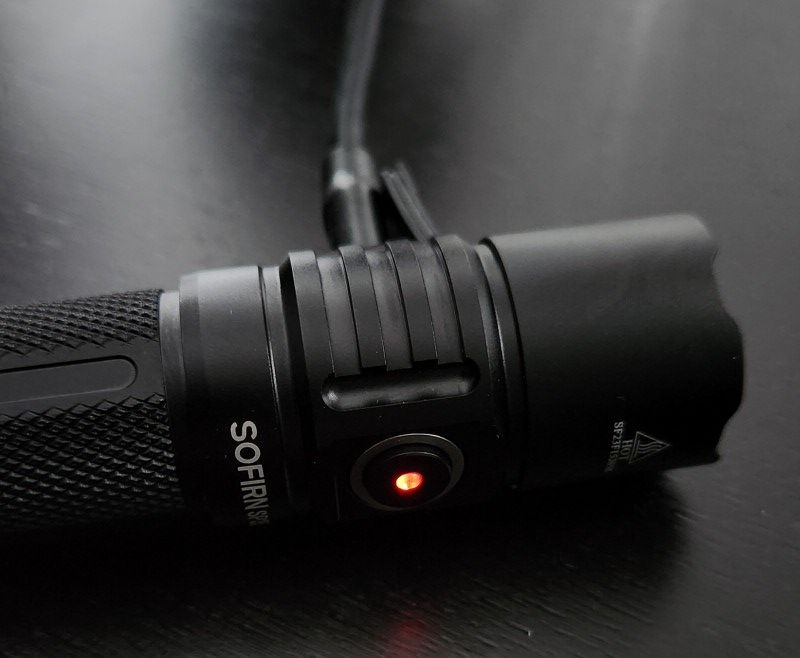
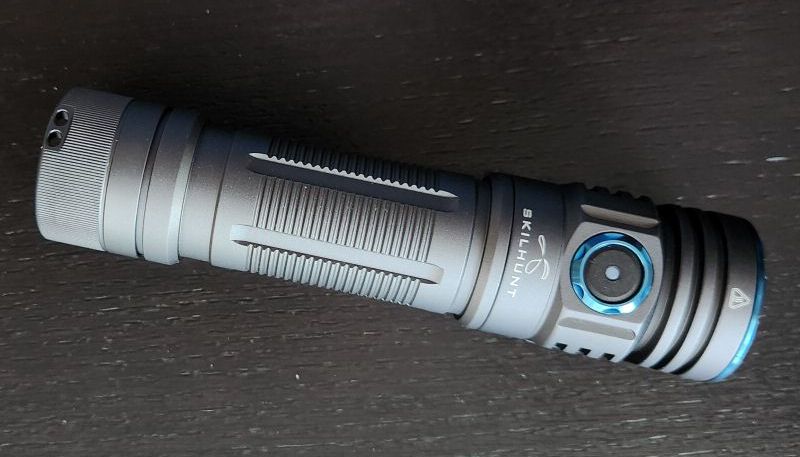
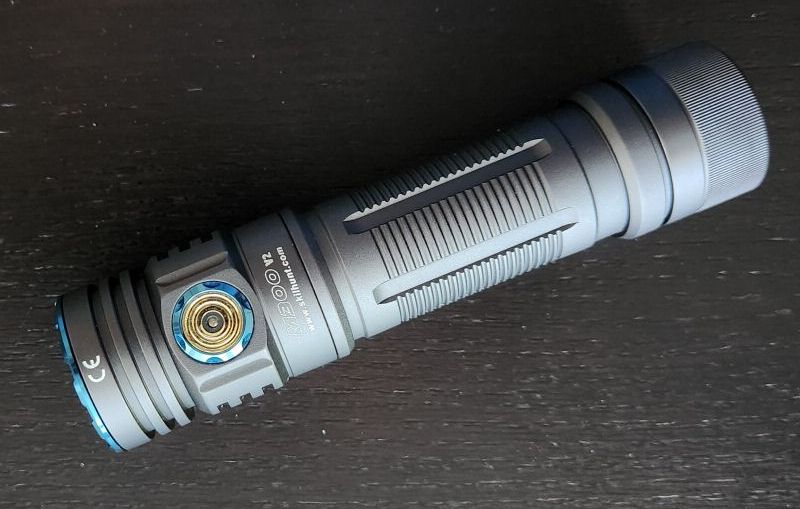
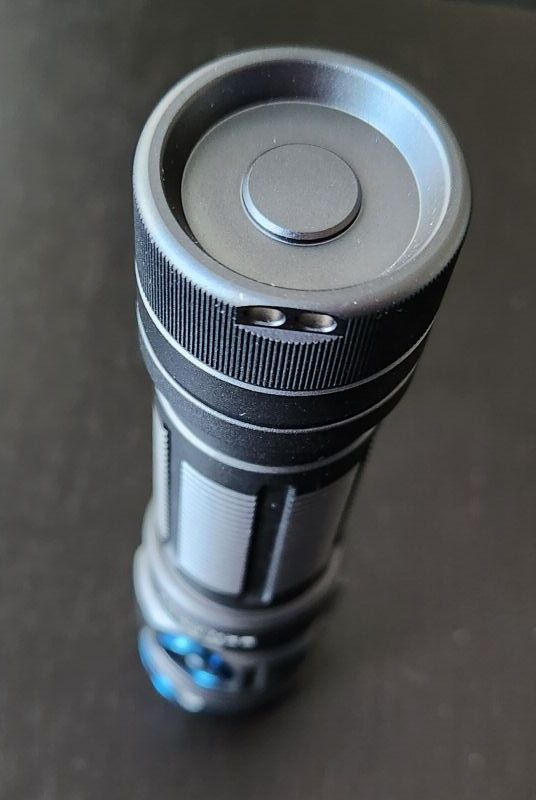
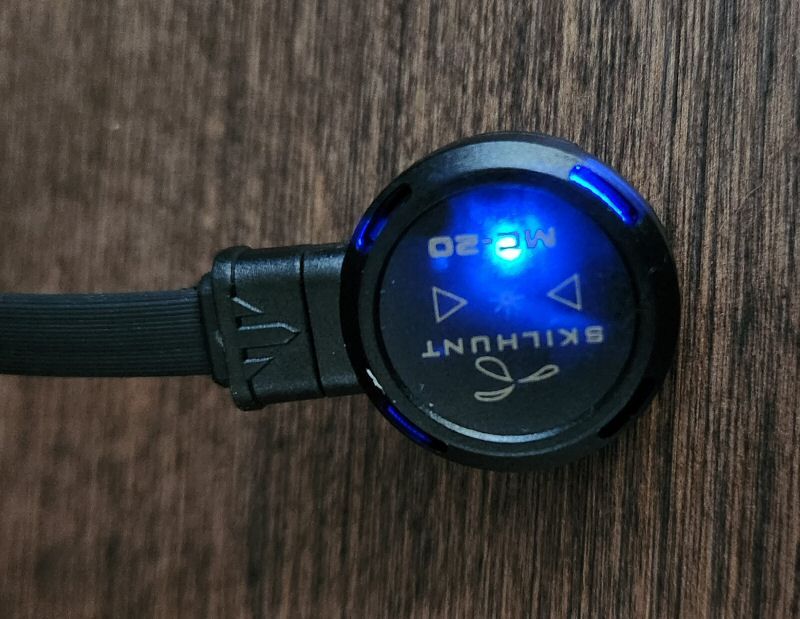
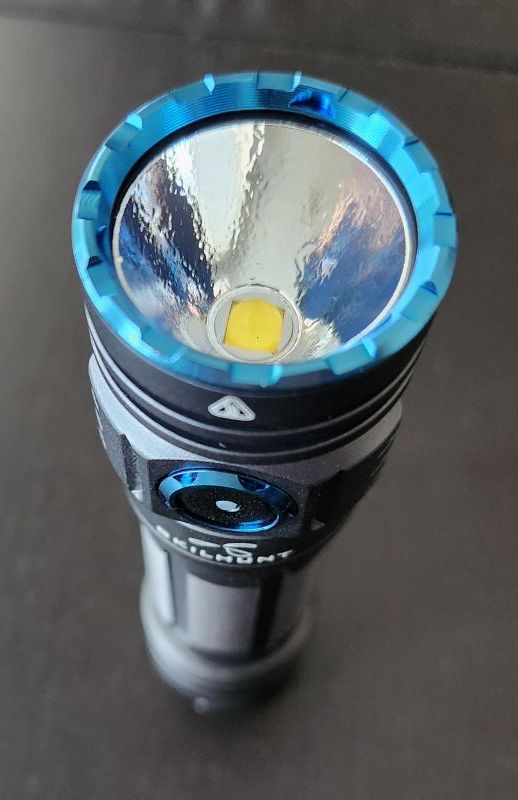
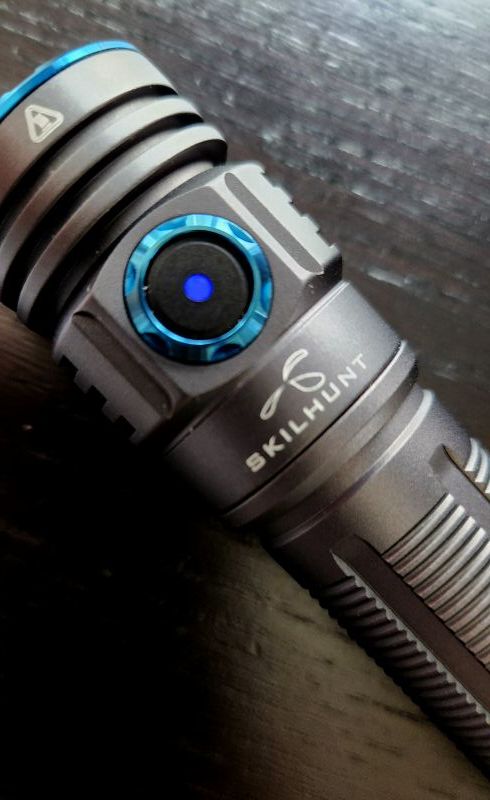
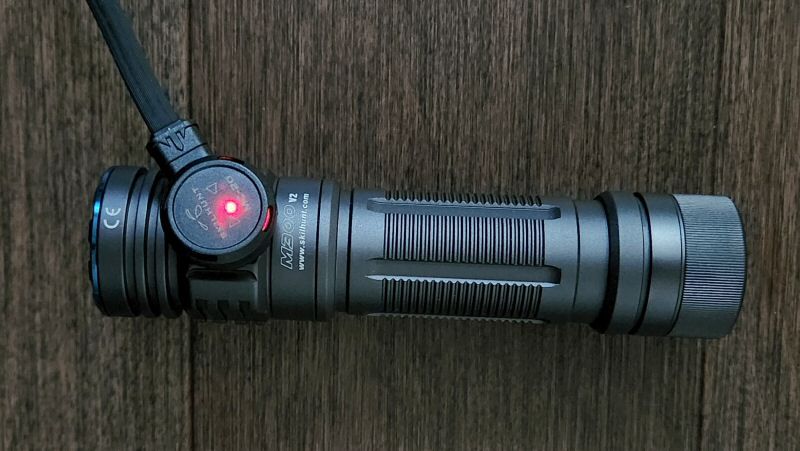
The switch is located in the head, and has a good look and feel. It is larger than some competing lights, and slightly concave, making it easier to find by touch than many. In the center is a green/red LED to show you charge and battery status.
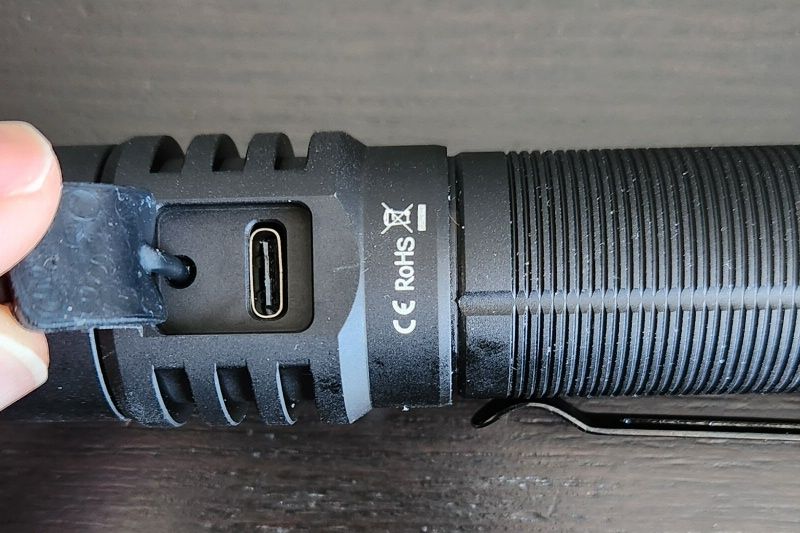
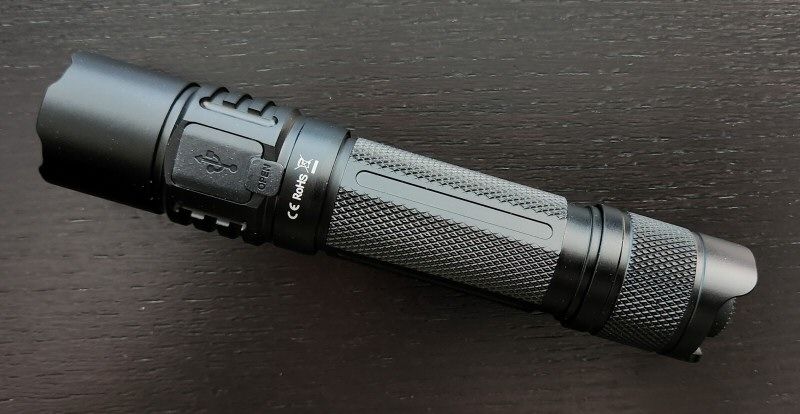
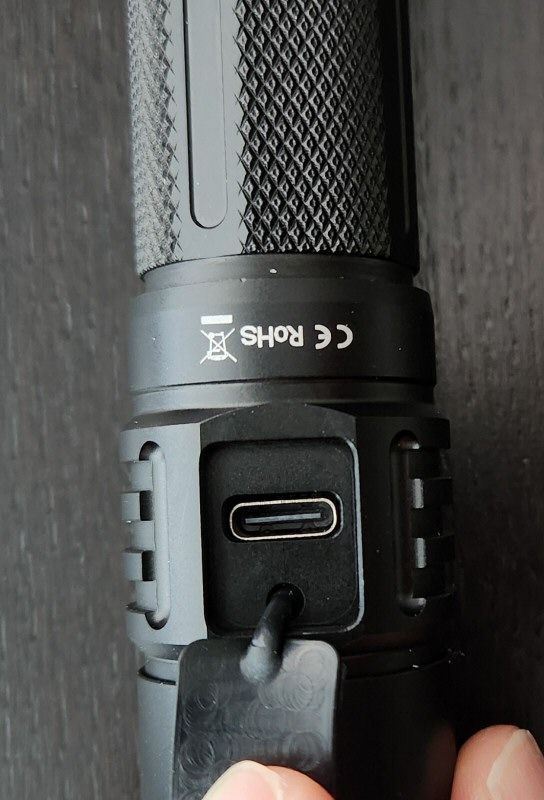
The charging port is located on the other side of the head from the switch, under rubber dust cover. This should provide decent splash-resistance, but I wouldn’t recommend dunking the light in water.
The pocket clip is the simple press-on variety, but seems to hold in please fairly sturdily.The clip is not reversible or bi-directional though, bezel-down carry is the only option.
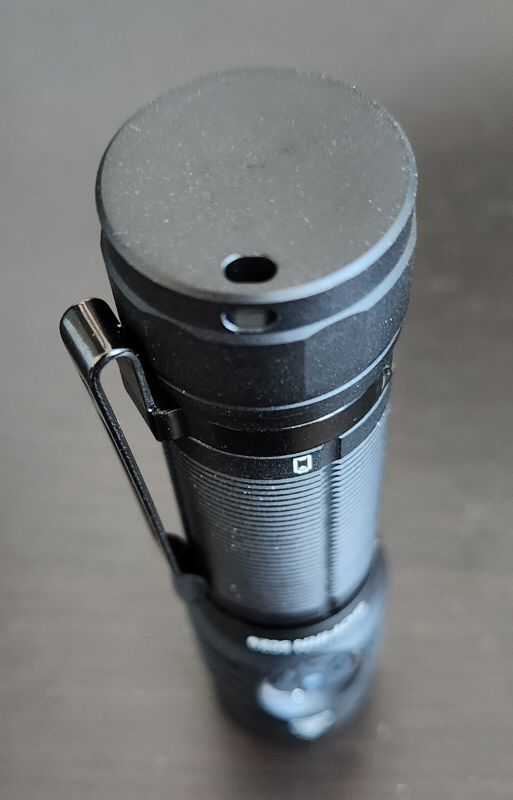
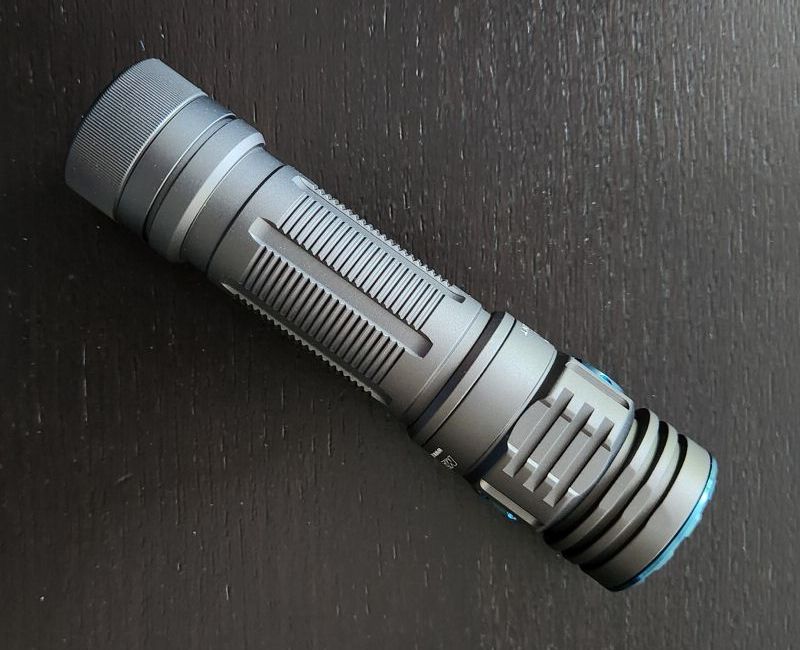
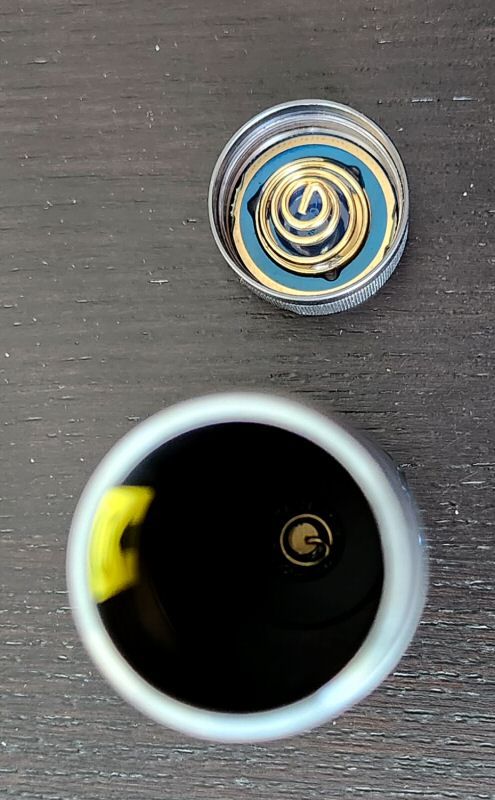
The tailcap is flat with a small cut-out for the wrist lanyard. The light tailstands stably (but the lanyard may introduce a wobble, given its location). There is a strong magnet in the tailcap, which will affix the light to a metal surface should you desire hands-free operation.
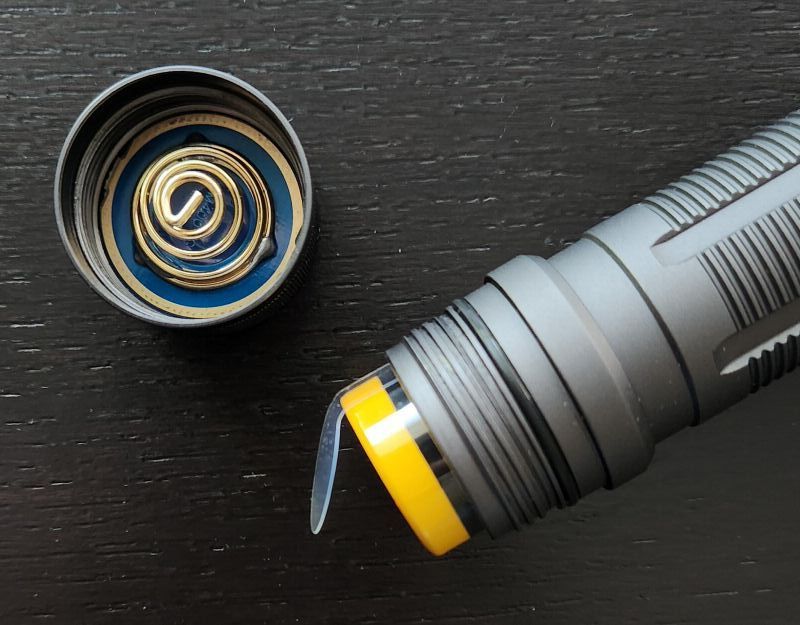
Body threads at both the head and tail are square-cut and anodized, allowing you to physically lock-out the light with a simple twist.
The SC29 uses a concentric ring design on the body, with some additional cut-outs on the head, to help with grip. With the included clip installed, I would say grip is excellent. Also thanks to included clip, the light will not roll when laid on its side. Anodizing looks to be good quality, with no damage on my sample. I would describe the finish as matte.
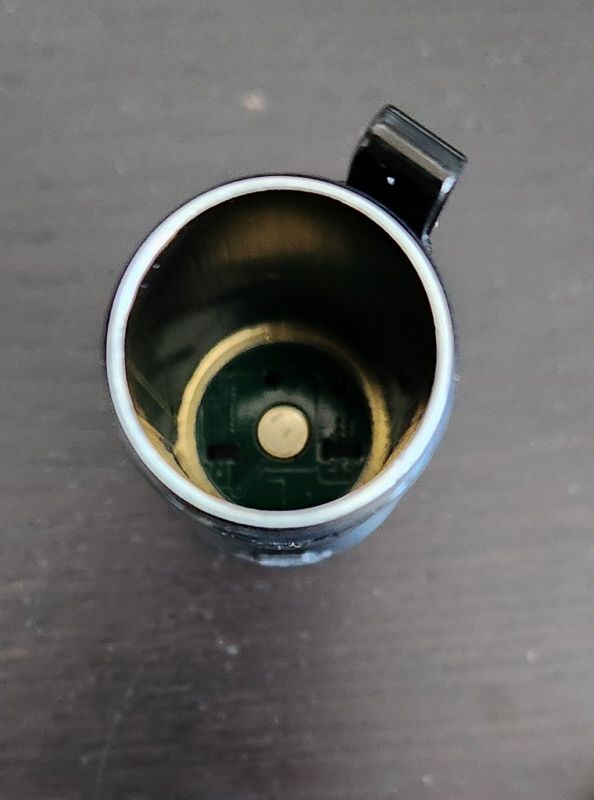
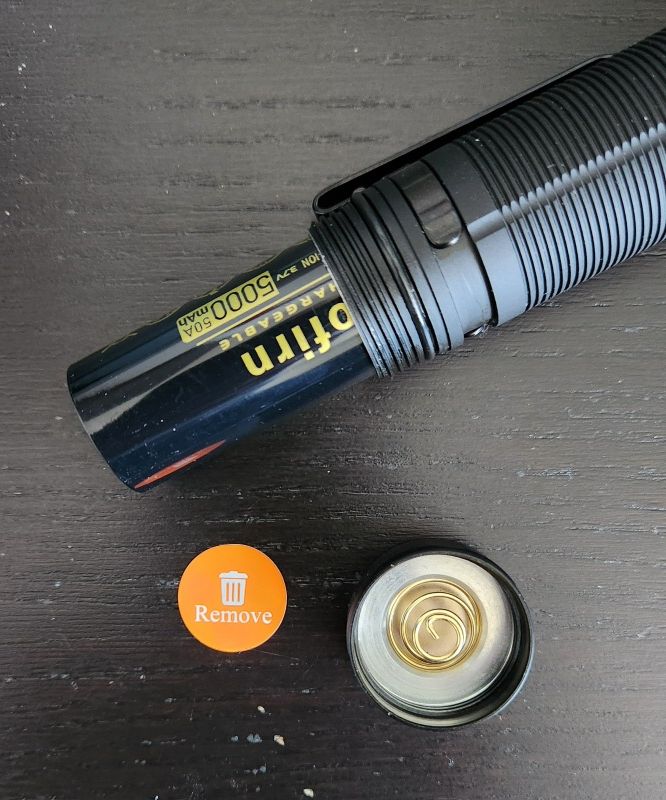
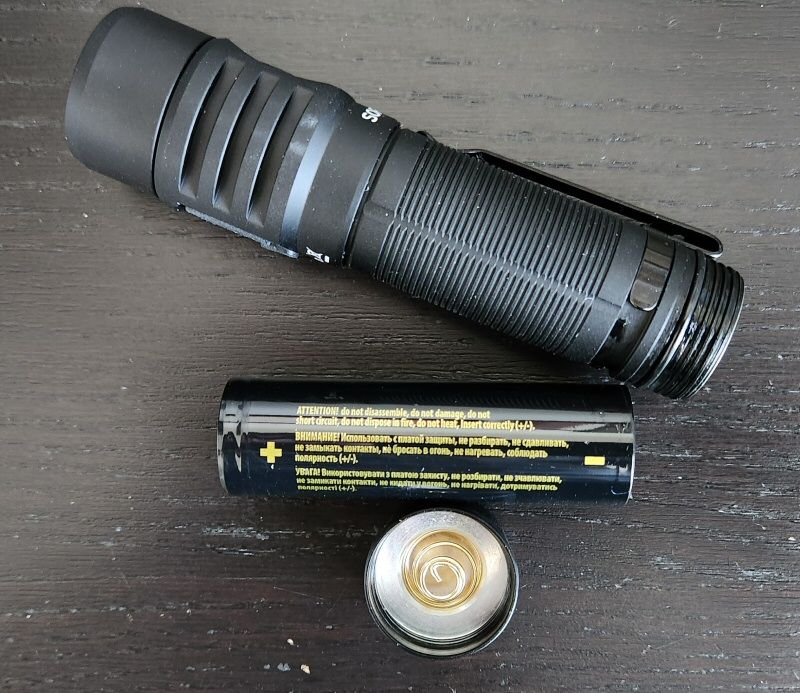
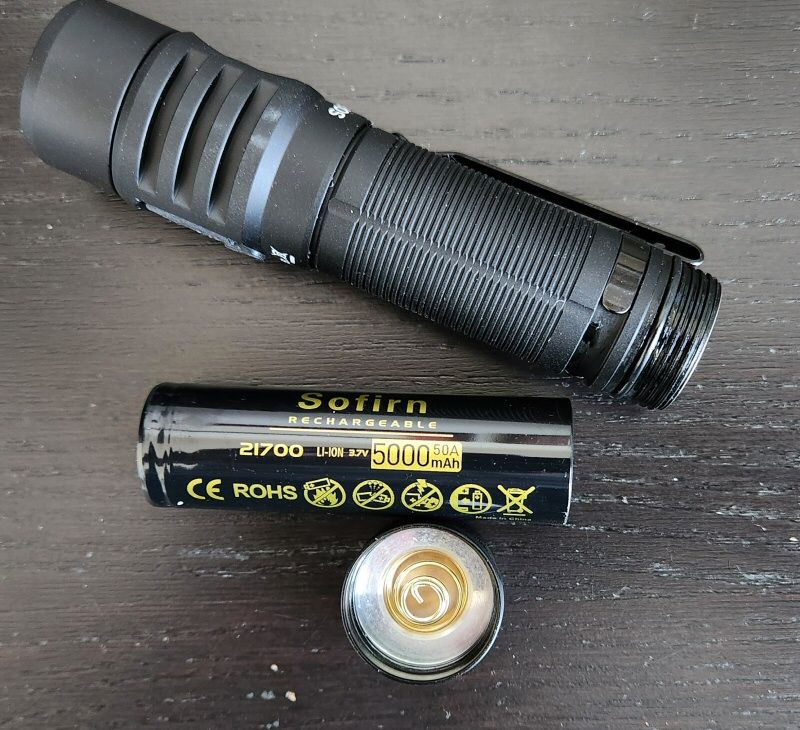
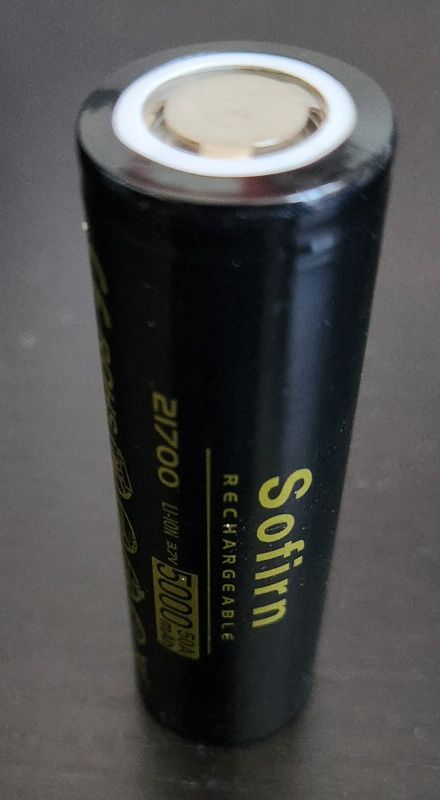
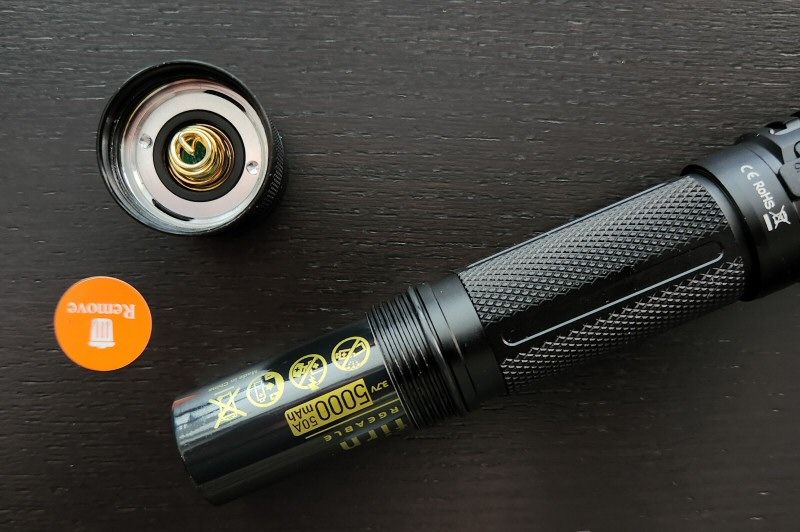
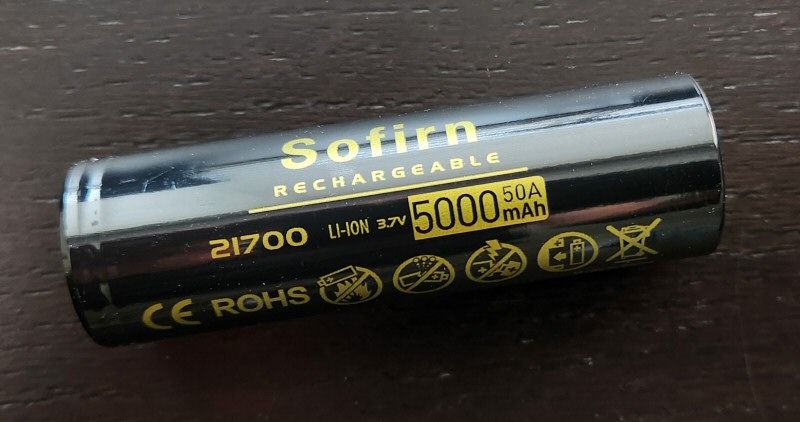
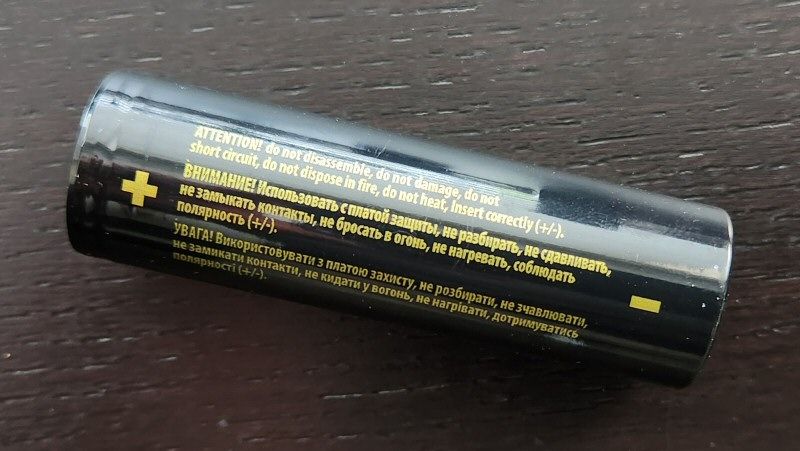
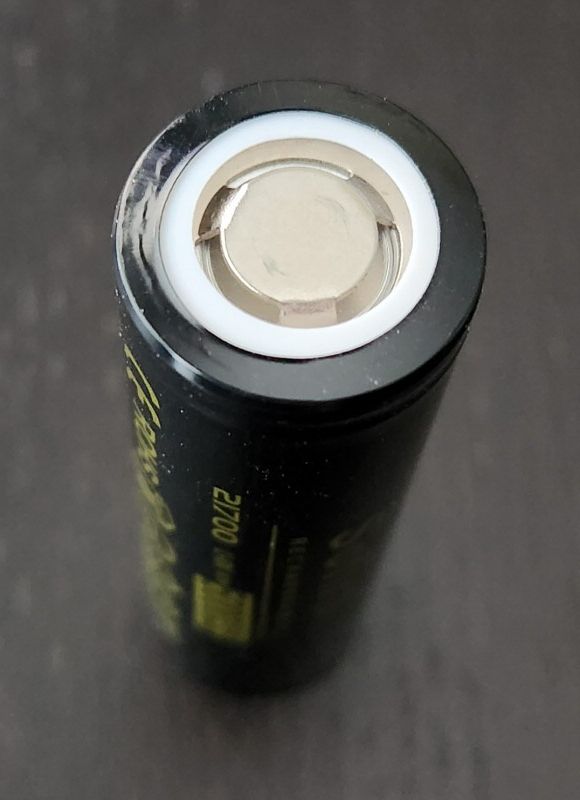
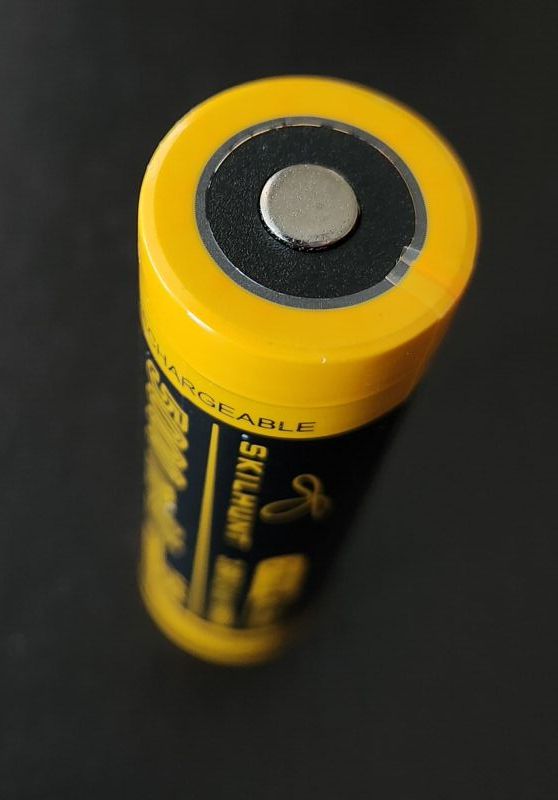
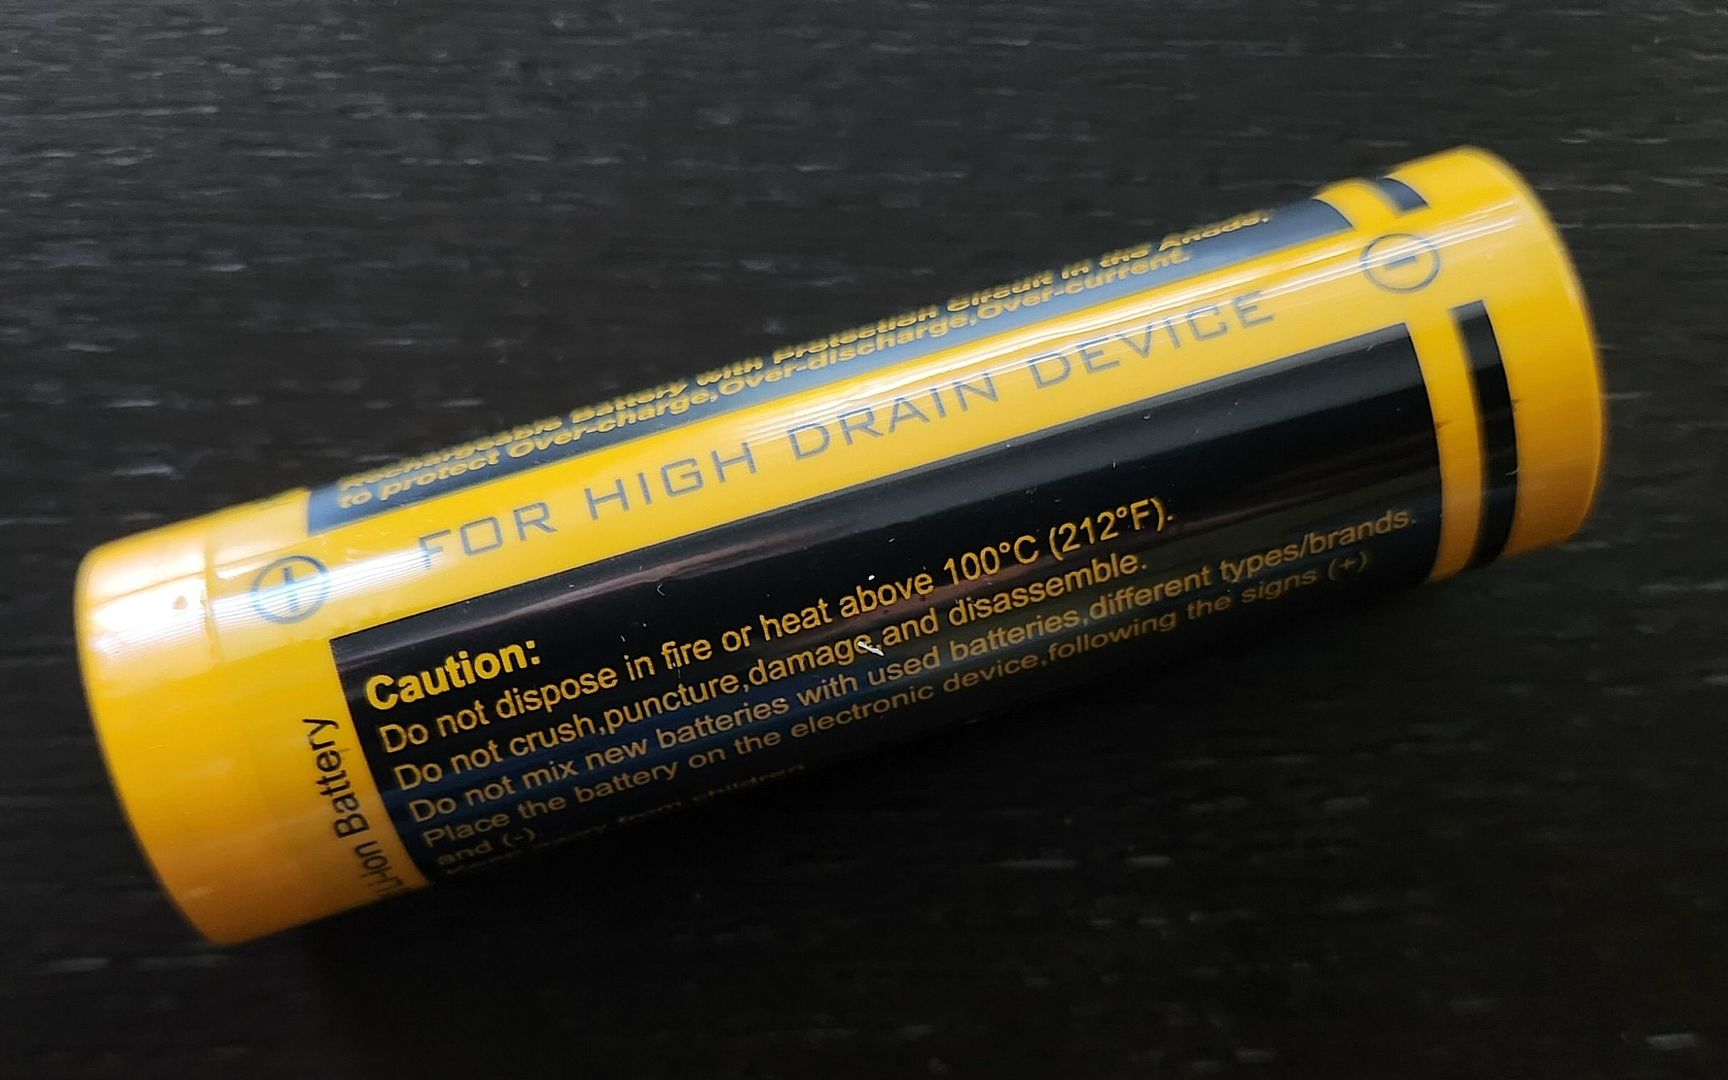
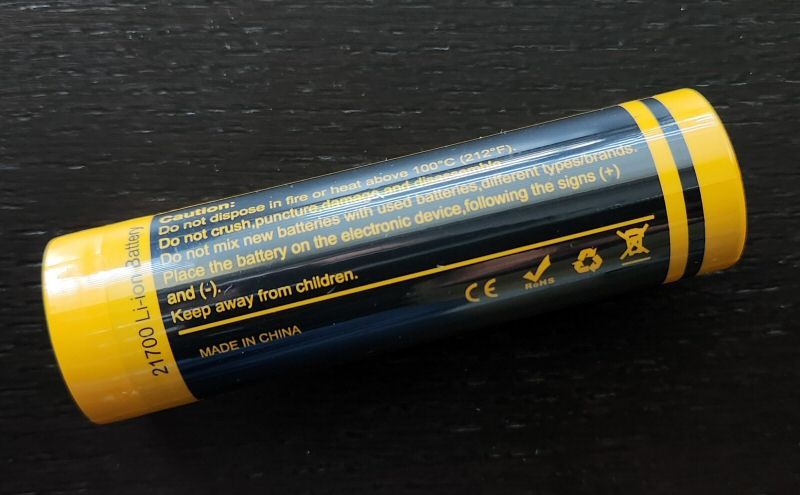
Inside, the light comes with a Sofirn-branded standard-sized 5000mAh 21700 battery, with a slightly raised flat-top. There is no spring in the head, just a slightly raised post (helping keep the length down).
This is a solid but comfortable light, with good grip and handfeel. I would consider it still “pocketable”, but at the upper-end of that range.
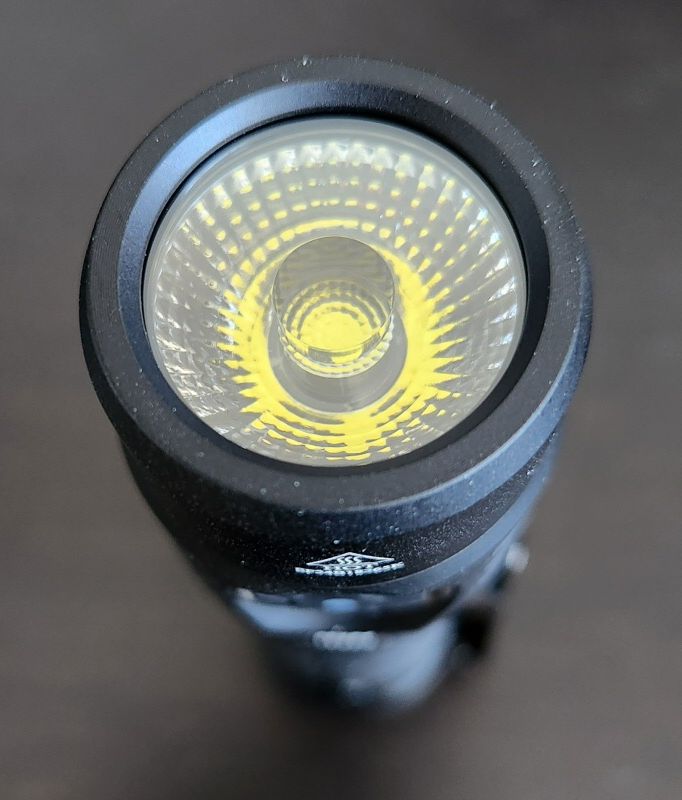
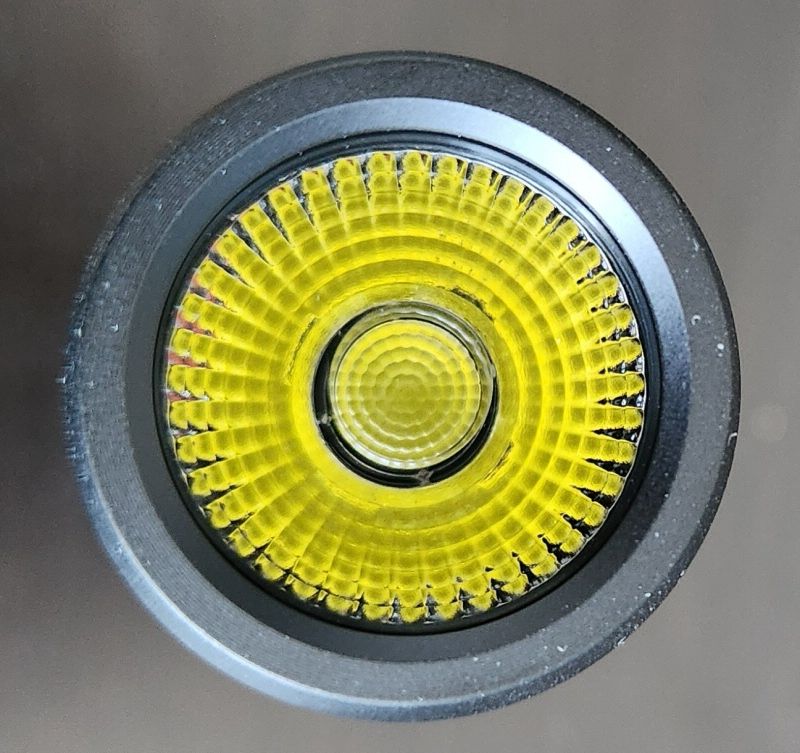
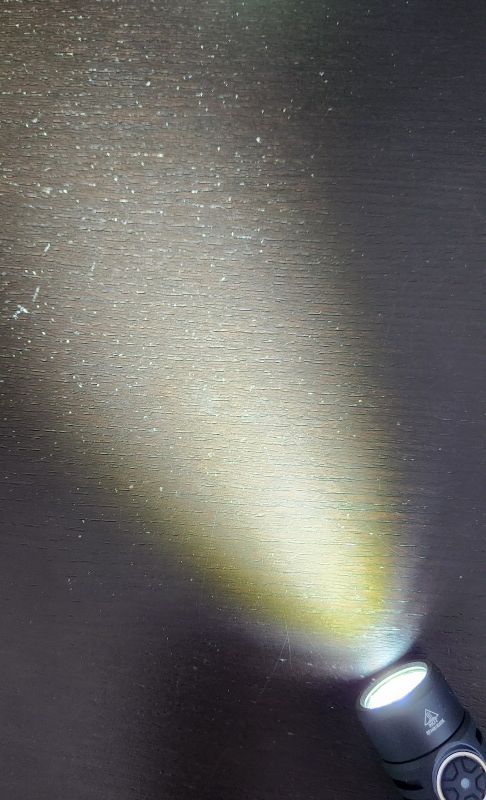
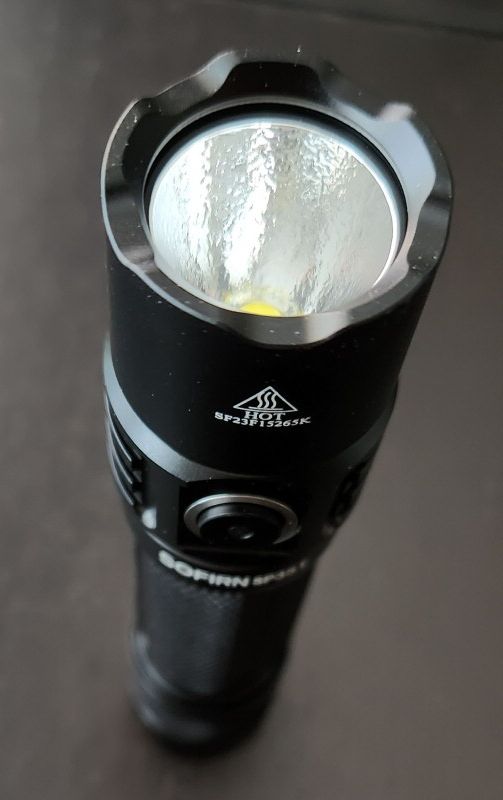
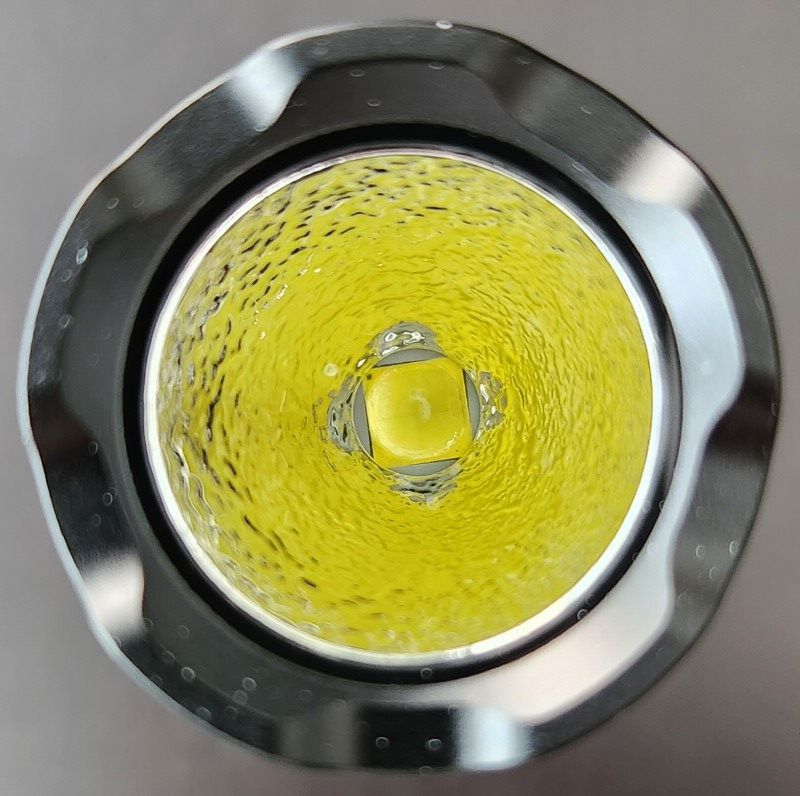
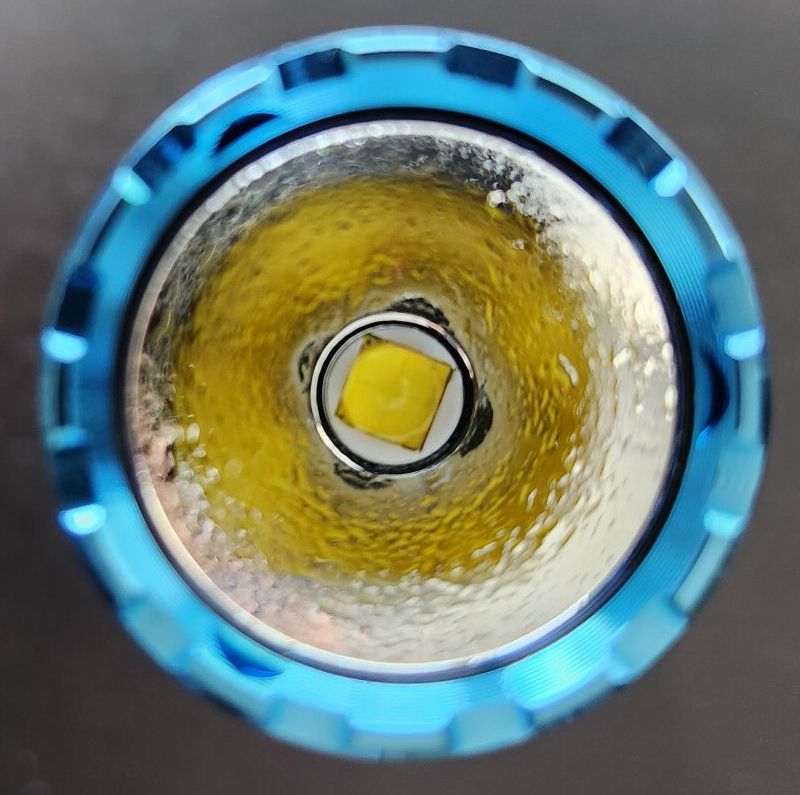
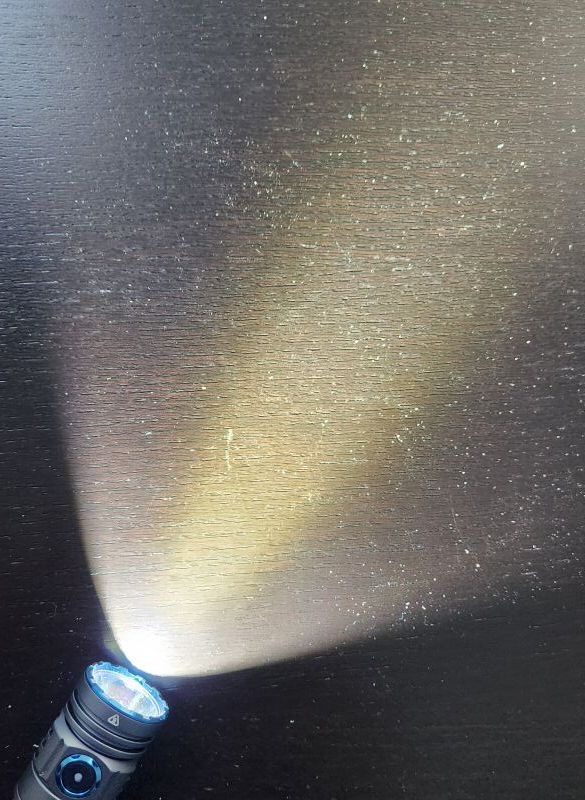
The SC29 comes with a pretty distinctive TIR optic, with a nice smooth beam. But don’t let the pic above mislead you – the beam is actually very white in practice. There is a greenish-yellow tint shift near the immediate edge of the spillbeam – but his is only noticeable in the very near distance at the angle my desk is capturing it. Rest assured you can’t see this at a distance. In fact, I find the spot and main spill to both be very even and very white. Scroll down to see actual outdoor beamshots.
There doesn’t seem to be any kind of anti-reflective coating on the lens. The bezel is flat aluminum, with no crenelations. Light can headstand stably.
User Interface
The SC29 uses a paired-down, basic interface compared to the SC33 (which had the option of both stepped and smooth ramping). The SC29 has stepped levels only. It also lacks the Moonlight and additional blinky modes of the SC33.
Levels: Eco, Low, Mid, High, Turbo, Strobe.
From OFF:
- Press-and-hold: Turns on in Eco mode.
- Single-click: Turns On in last memorized mode.
- Double-click: Turns On in Turbo.
- Triple-click: Activates Lockout mode. Triple-click to unlock and return to memorized mode.
From ON:
- Press-and-hold: Advances through the output modes.
- Single-click: Turns Off.
- Double-click: Jumps to Turbo. Single click returns to last memorized mode. Double-click jumps you to Strobe.
From Lockout:
- Press-and-hold: Momentary Eco mode, until you release
- Single-click: Nothing (does a double flash to show lockout status)
- Double-click: TNothinge.
- Triple-click: Disable Auto-Lockout.
Mode memory:
Yes.
Shortcuts:
- Eco mode: Press and hold the switch.
- Turbo mode: Double-click the switch from On or Off.
- Strobe mode: Double-click the switch from Turbo.
Battery indicator:
When first activating the light, the indicator on the side switch shows the battery capacity remaining (lasts for ~5 secs upon activation):
- Solid green: ~75-100%
- Solid red: ~25-50%
Low voltage warning:
Yes, the button will flash red as the battery is nearly completely drained.
Lockout mode:
Physically at the tailcap, or electronically by a triple-click lockout. No auto-lockout that I have found.
Reviewer Comments:
This interface is very straight-forward, and largely performs as you would expect. It does have a few quirks though. Unlike most modern light lights, lock-out mode is on triple-click instead of four-click. And there is no way to activate Strobe from off (i.e., the usual triple-click option) – you need to go through Turbo first. This takes a little getting used to, but is not a deal-breaker for me.
I would have liked to have seen a true Moonlight mode, a Beacon mode, and the choice of smooth ramping or stepped levels. At least there was no auto-lock-out mode here (which enthusiasts tend to find annoying).
Circuit Measures
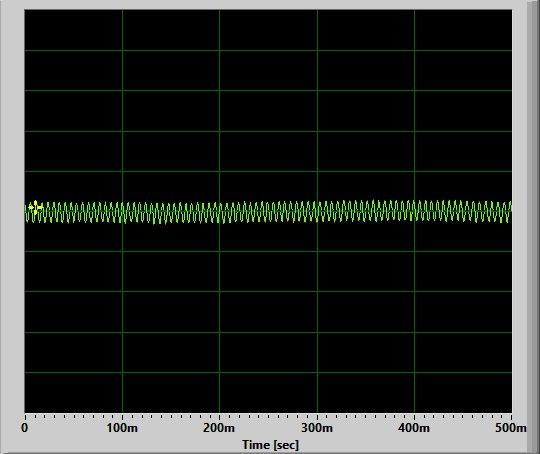
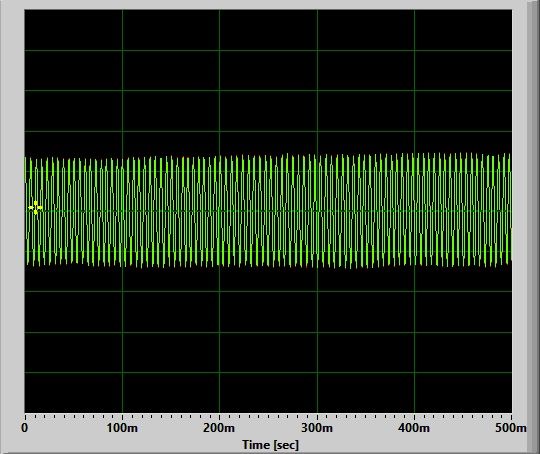
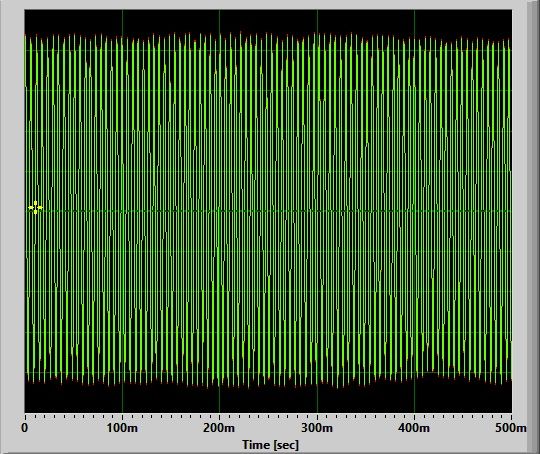
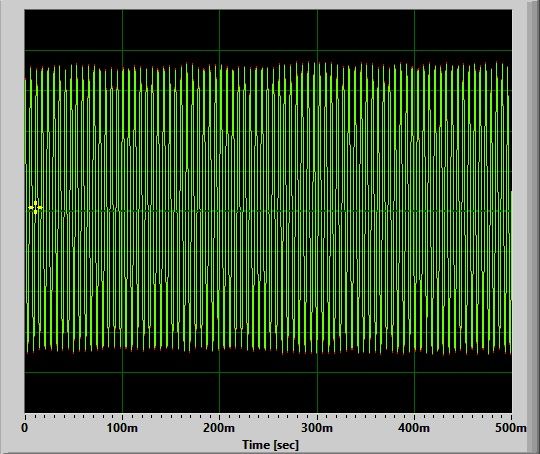
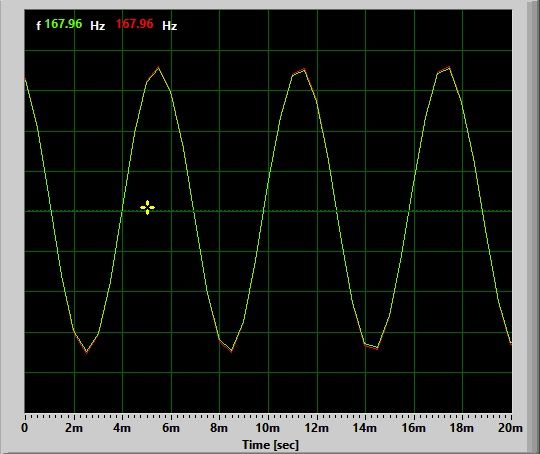
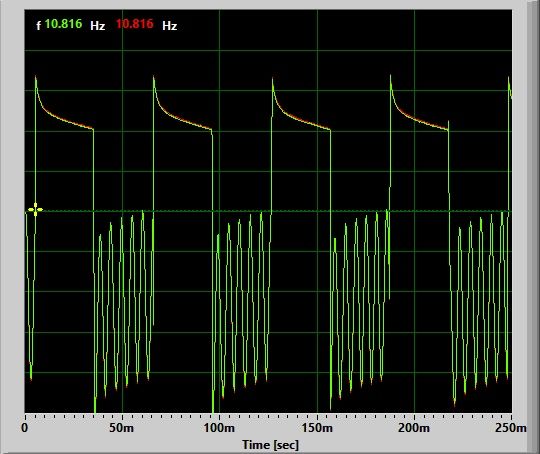
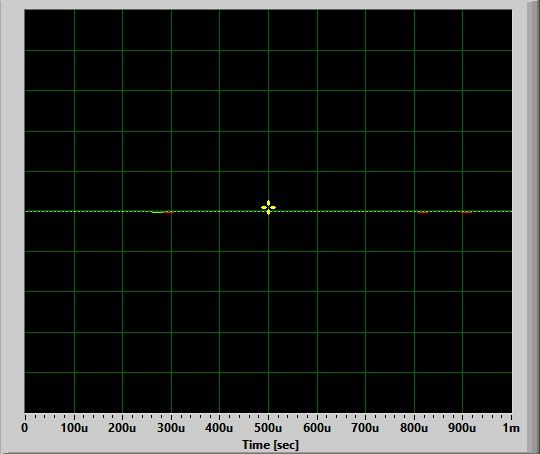
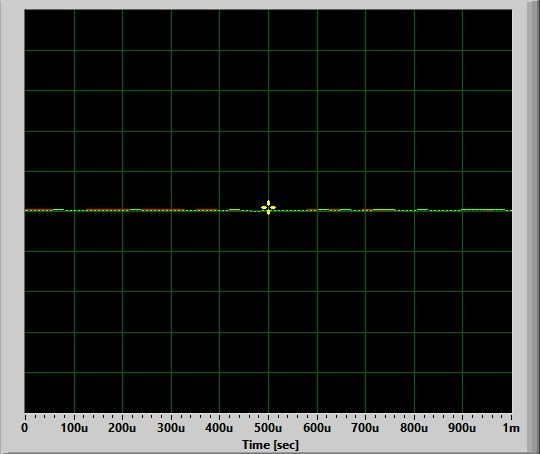
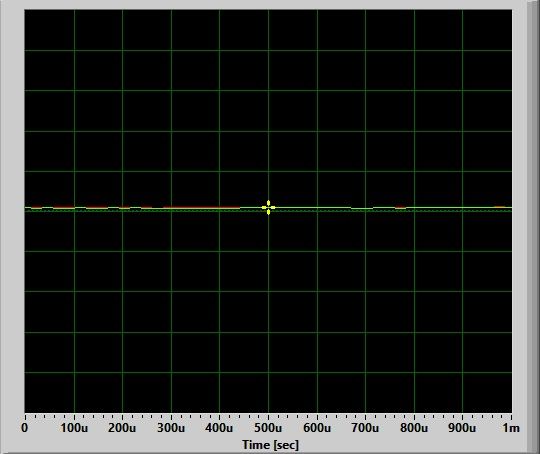
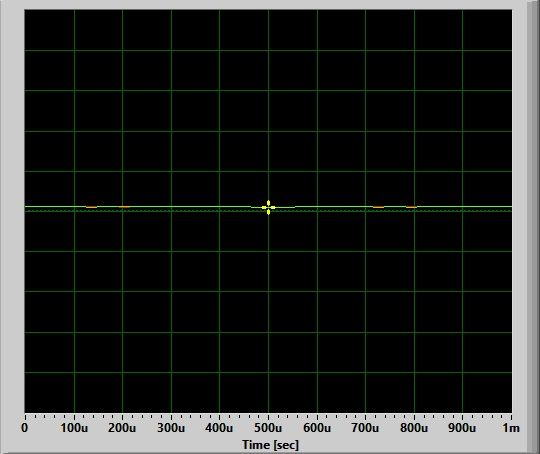
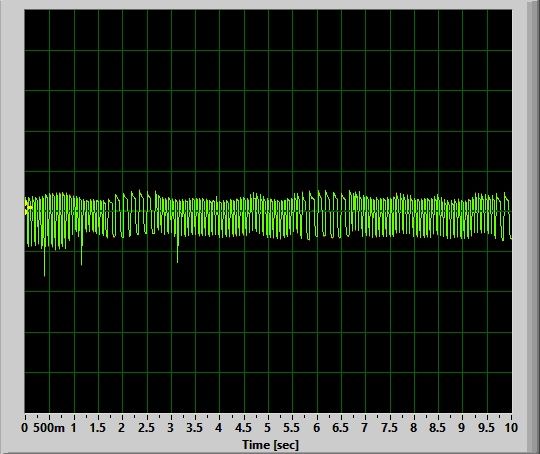
No Pulse-Width Modulation (PWM):
Moon:

Lo:

Med:
High:

Turbo:
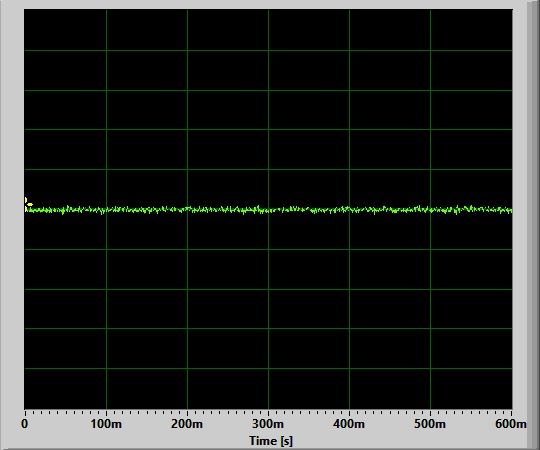
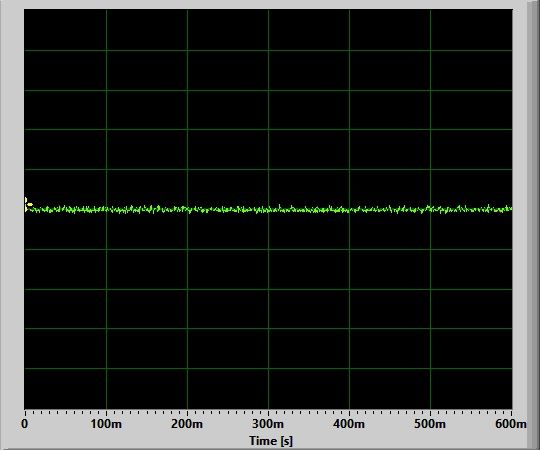
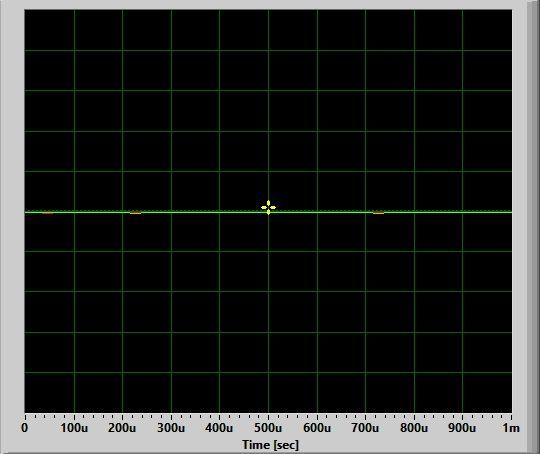
There is no sign of PWM, the circuit appears to be fully current-controlled. There is no circuit noise on any level. This is a very good result, similar to the SC33.
Note that circuit noise is not a concern, as it common to many lights. But do find that its absence (as in this case) bodes very well in terms of regulation and output/runtime efficiency. Scroll down to see actual results.
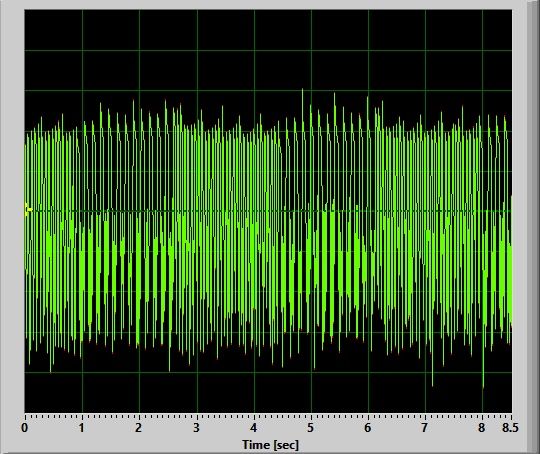
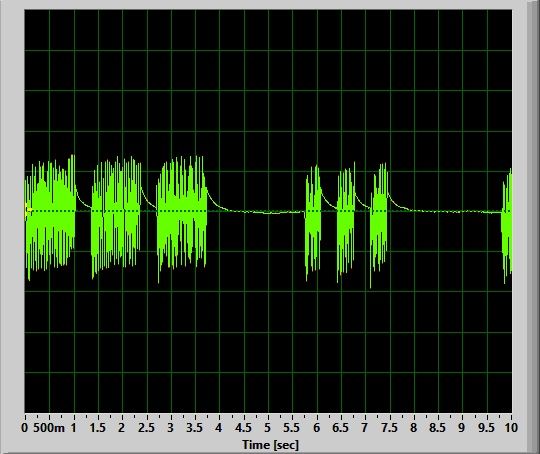
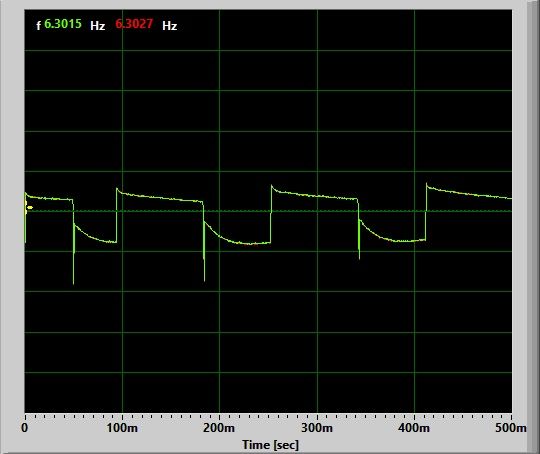
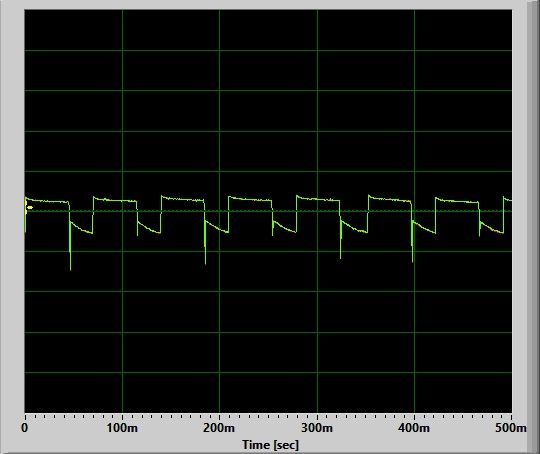
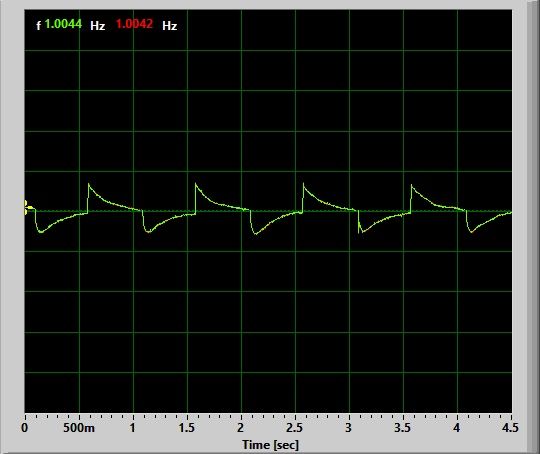
Strobes:
Strobe:
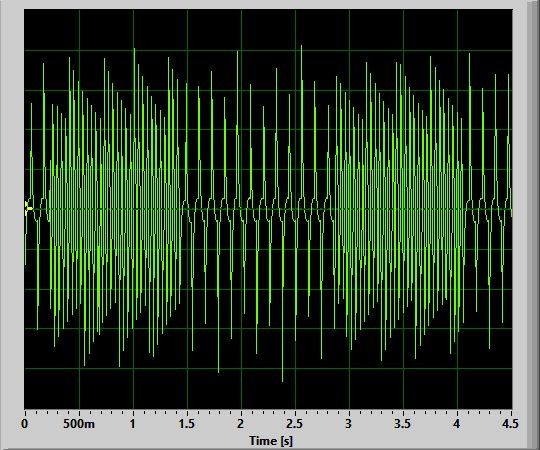
Strobe alternates between 8 Hz and 25 Hz every ~1.5 secs or so. Very disorienting and distracting.
There is no Beacon or SOS mode on the SC29.
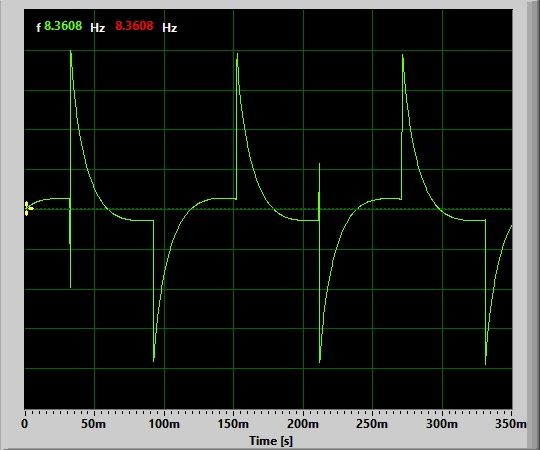
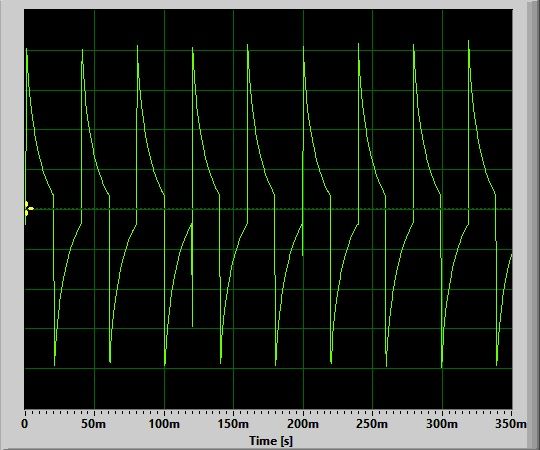
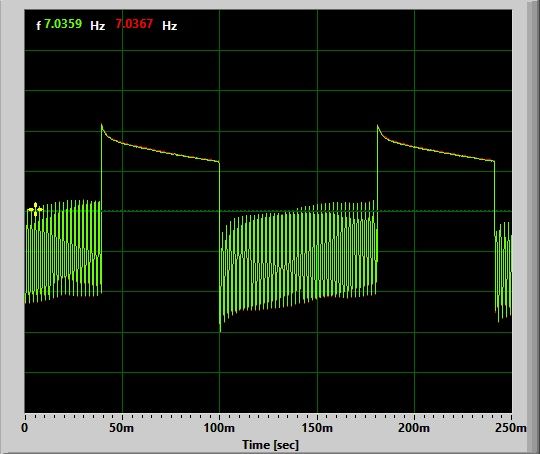
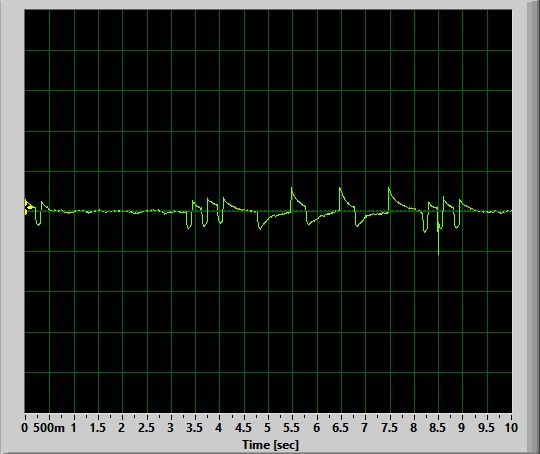
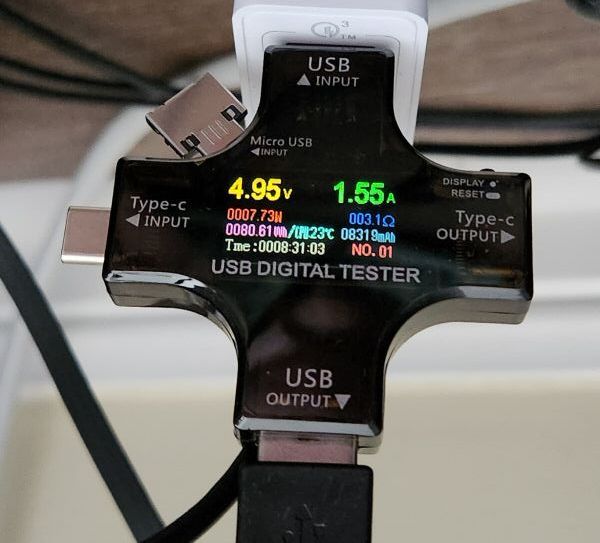
Charging:
There is a small LED under the switch which shows solid red when the light is charging. Changes to solid green when the charging is complete.
Resting voltage <3.0V
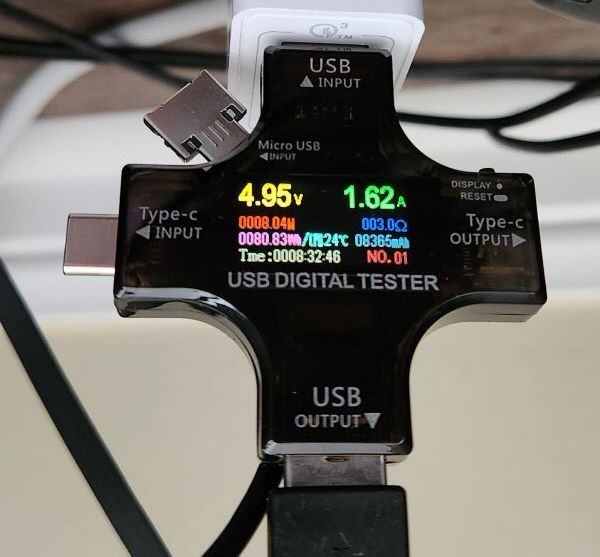
Resting voltage >3.0V
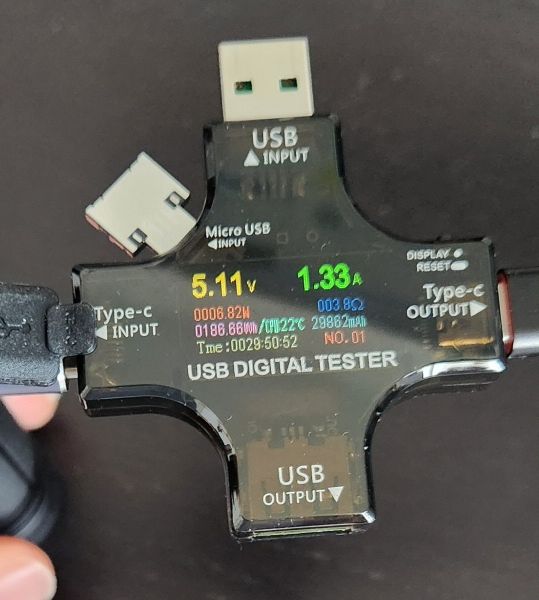
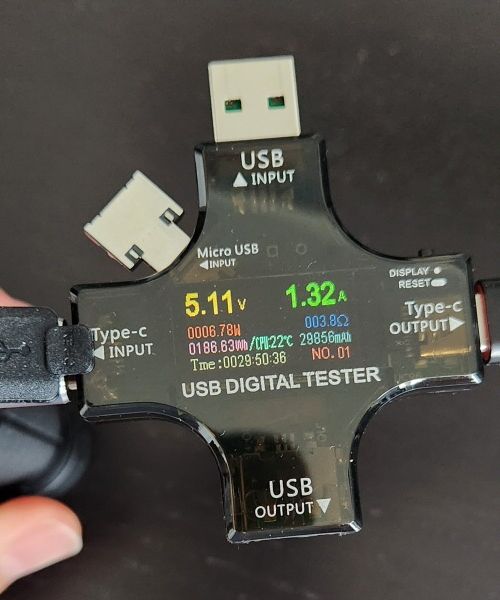
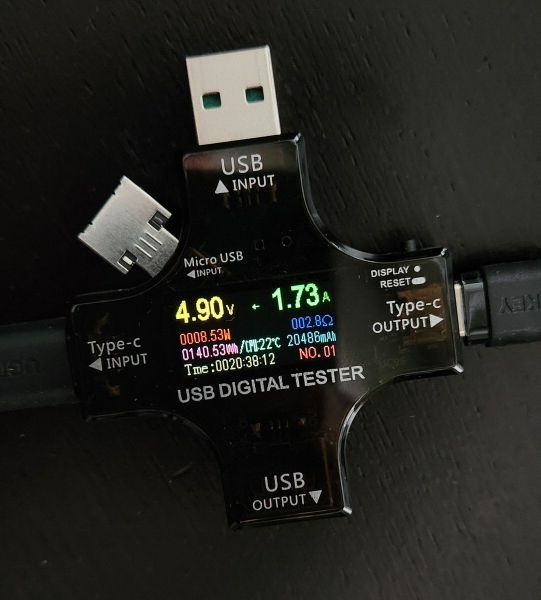
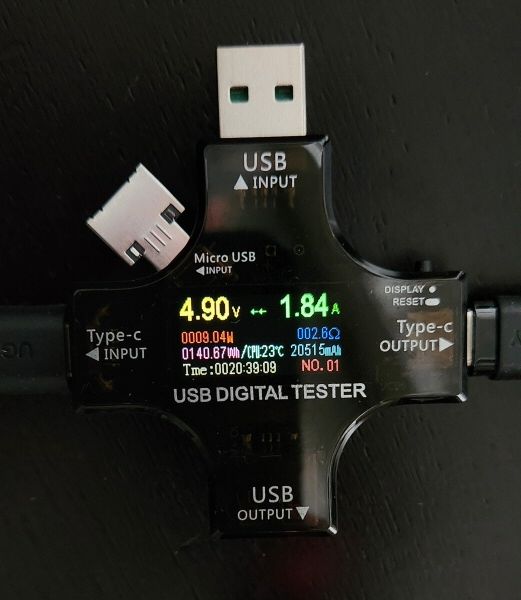
Unlike a number of modern lights (e.g. SC33), the SC29 does not show two-stage charging (i.e., where there is a lower initial charging rate when the cell is heavily discharged). Here, the initial charging rate starts at ~1.33A and slowly rises as the cell charges. This is a reasonable charging rate for the class, and will charge a 21700 cell relatively quickly.
Standby / Parasitic Drain:
Due to electronic switch, there is bound to be a parasitic standby drain when the light is not in use. I measured this as 26 uA, which is completely negligible (i.e., it would take nearly 22 years to fully discharge the cell). Still I recommend you store the light locked-out, either electronically or at the tailcap, when not in use.
Emitter Measures
In this section, I directly measure key emitter characteristics in terms of colour temperature, tint, and colour rendition. Please see my Emitter Measures page to learn more about what these terms mean, and how I am measuring them. As tint in particular can shift across levels, I typically stick with the highest stably regulated level for all my reported measures.
As explained on that page, since I am using an inexpensive uncalibrated device, you can only make relative comparisons across my reviews (i.e., don’t take these numbers as absolutely accurate values, but as relatively consistent across lights in my testing).
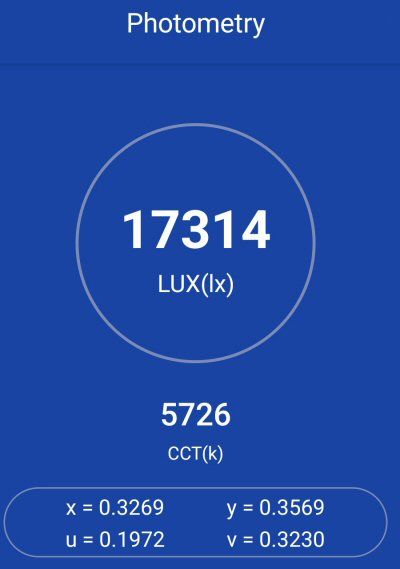
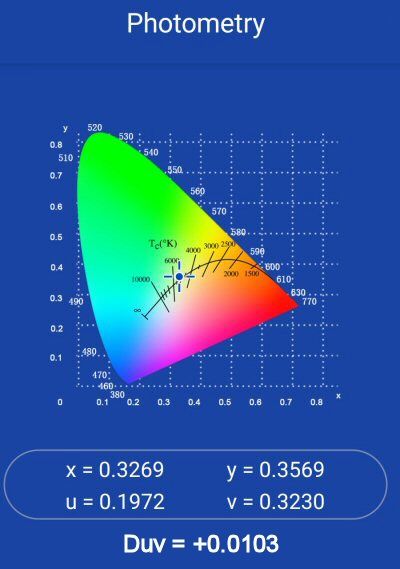
SC29 on Hi:
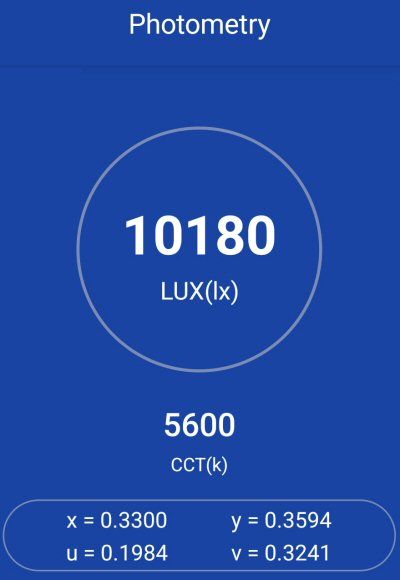
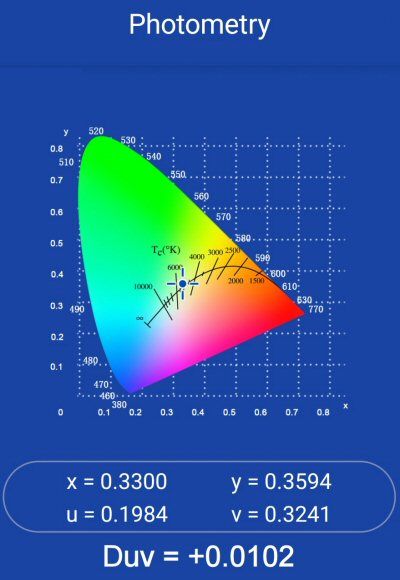
The key measures above are the colour temperature of ~5600K, and a small positive tint shift (+0.0102 Duv) to a slight greenish-yellow at this temperature. For CRI (Ra), I measured a combined score of 63.
These values are consistent with the performance of a cool white XHP50.2 emitter, although I find the main beam to be very white in actual use. I must say, there is much less tint variation than on other lights with XHP50.2 HD emitters that I’ve examined.
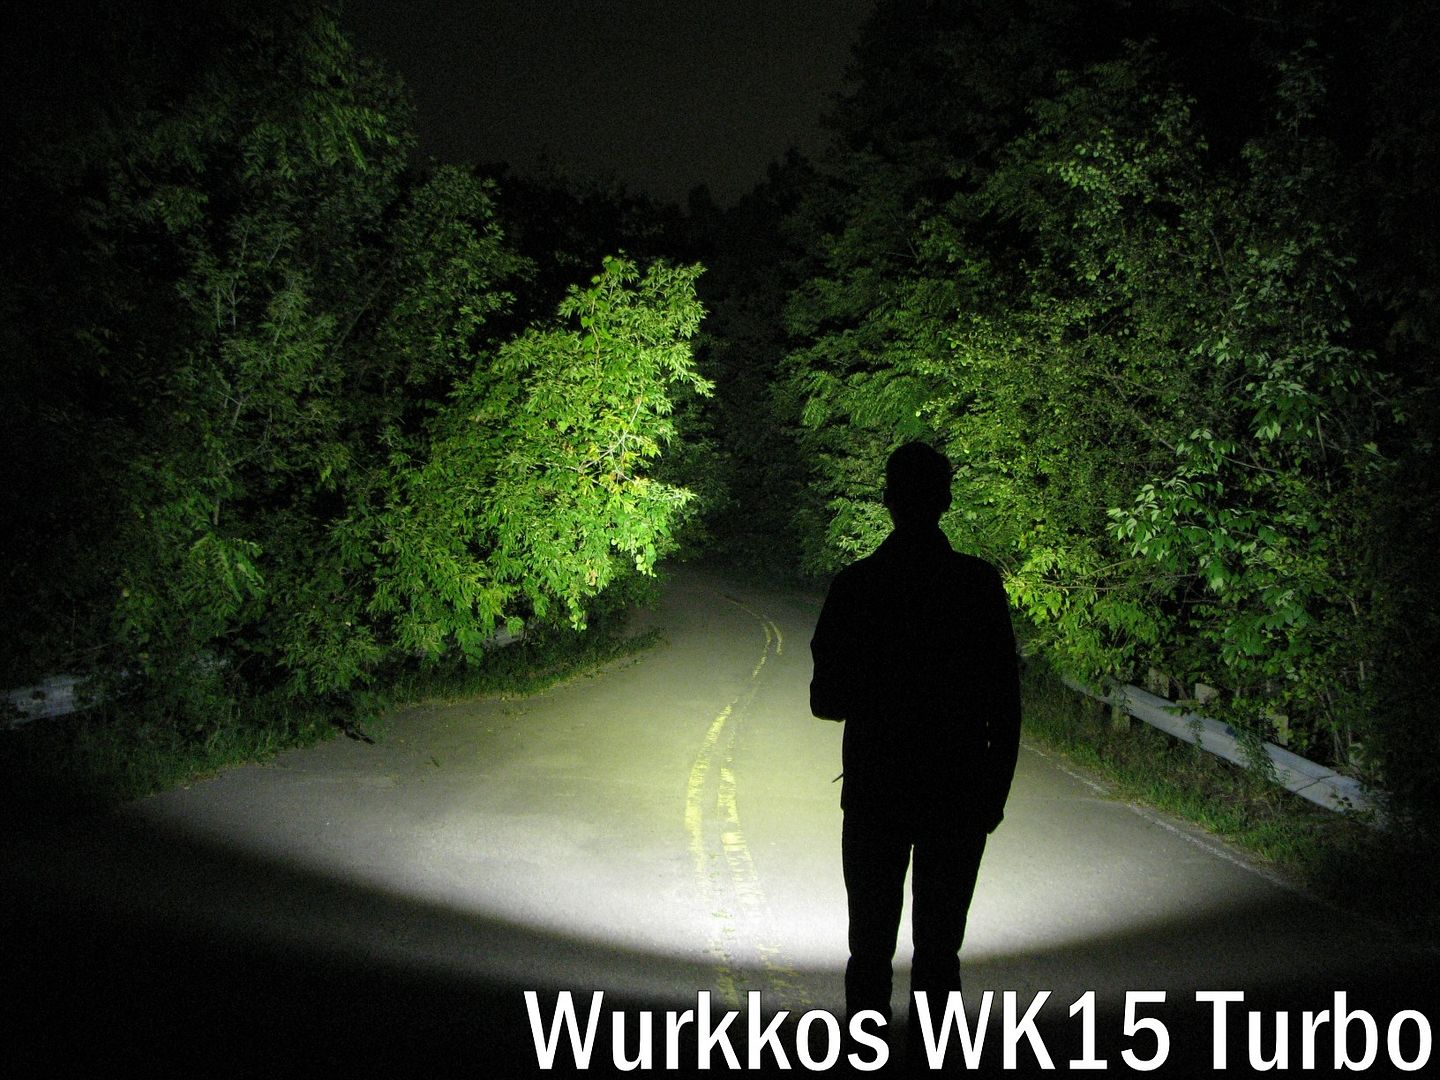
Beamshots
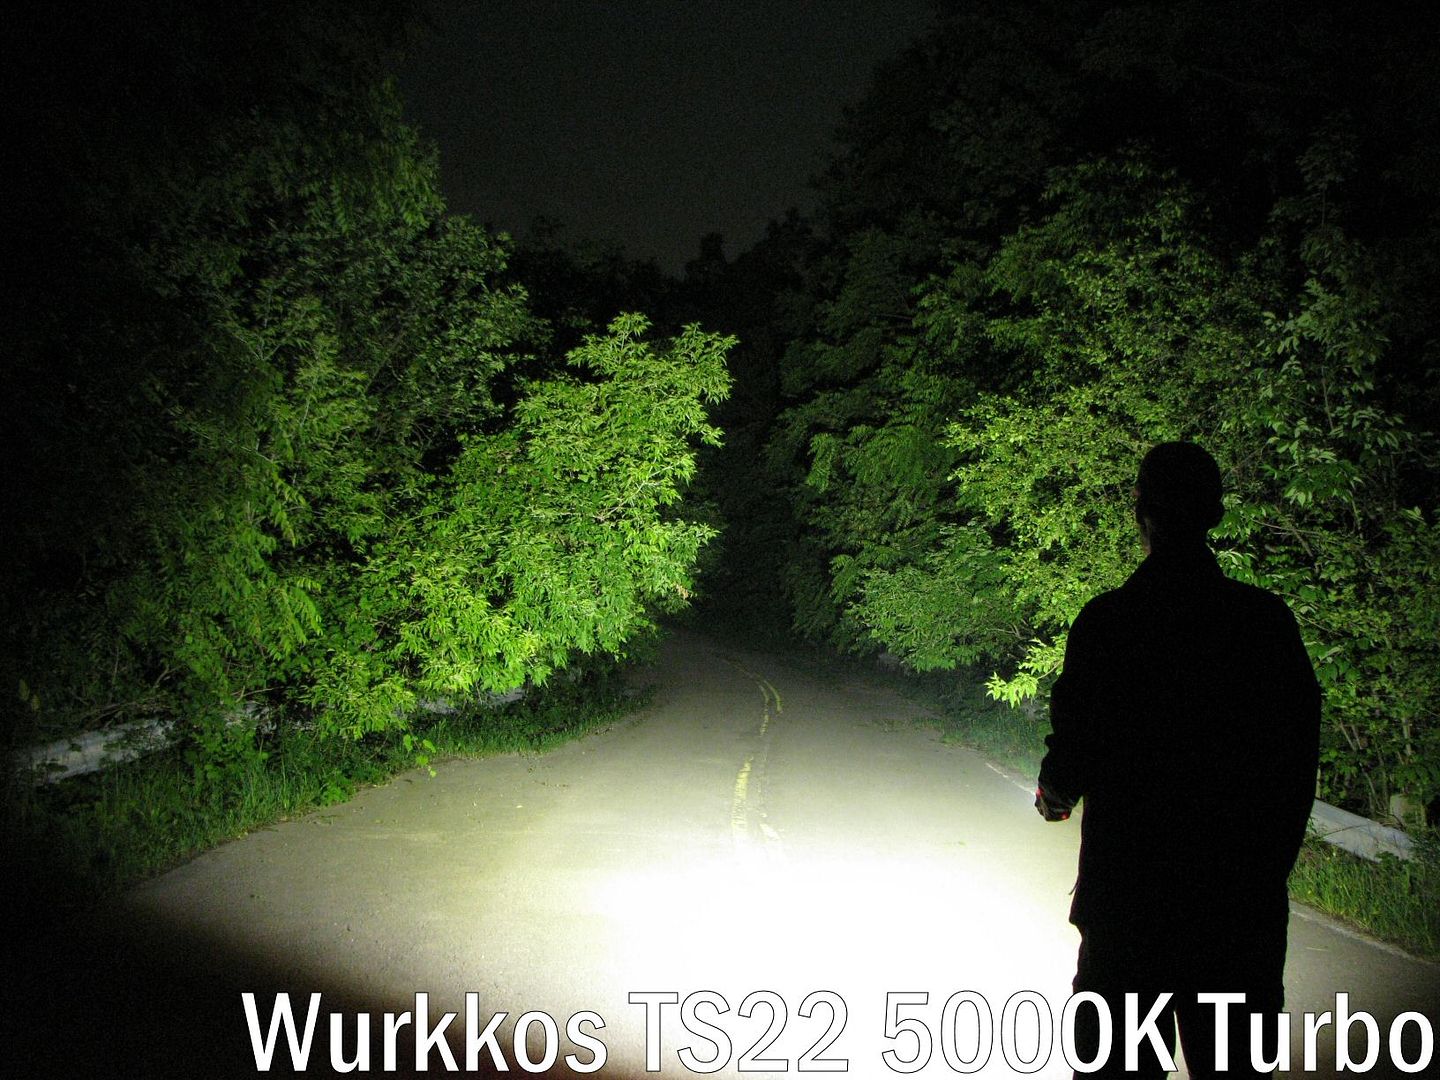
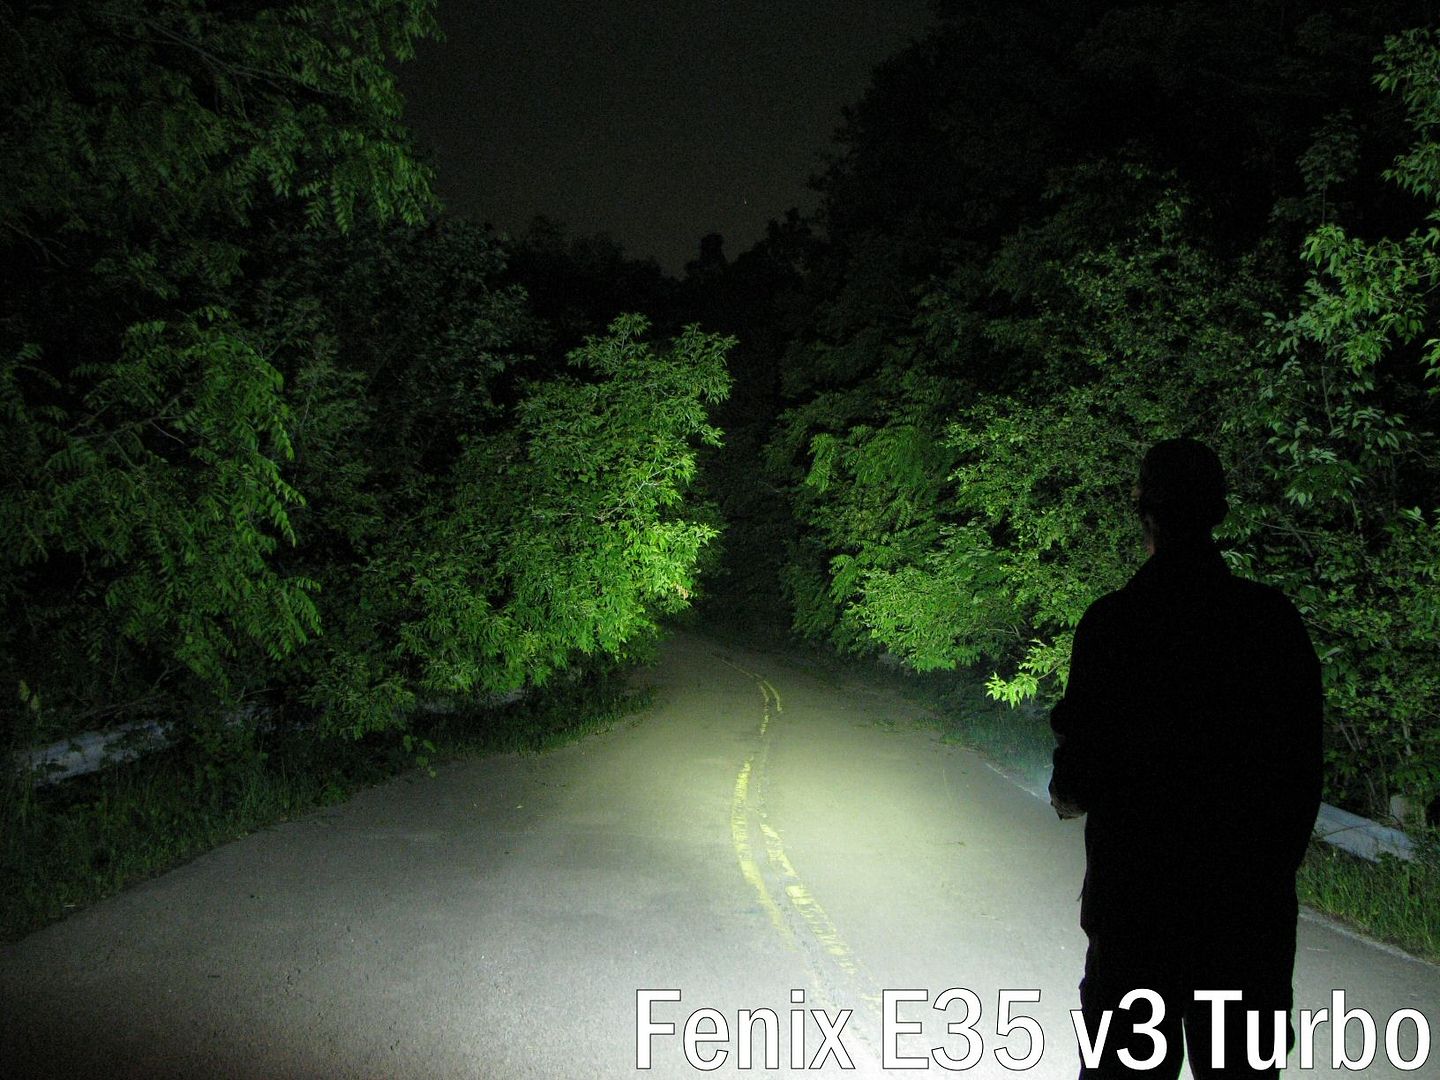
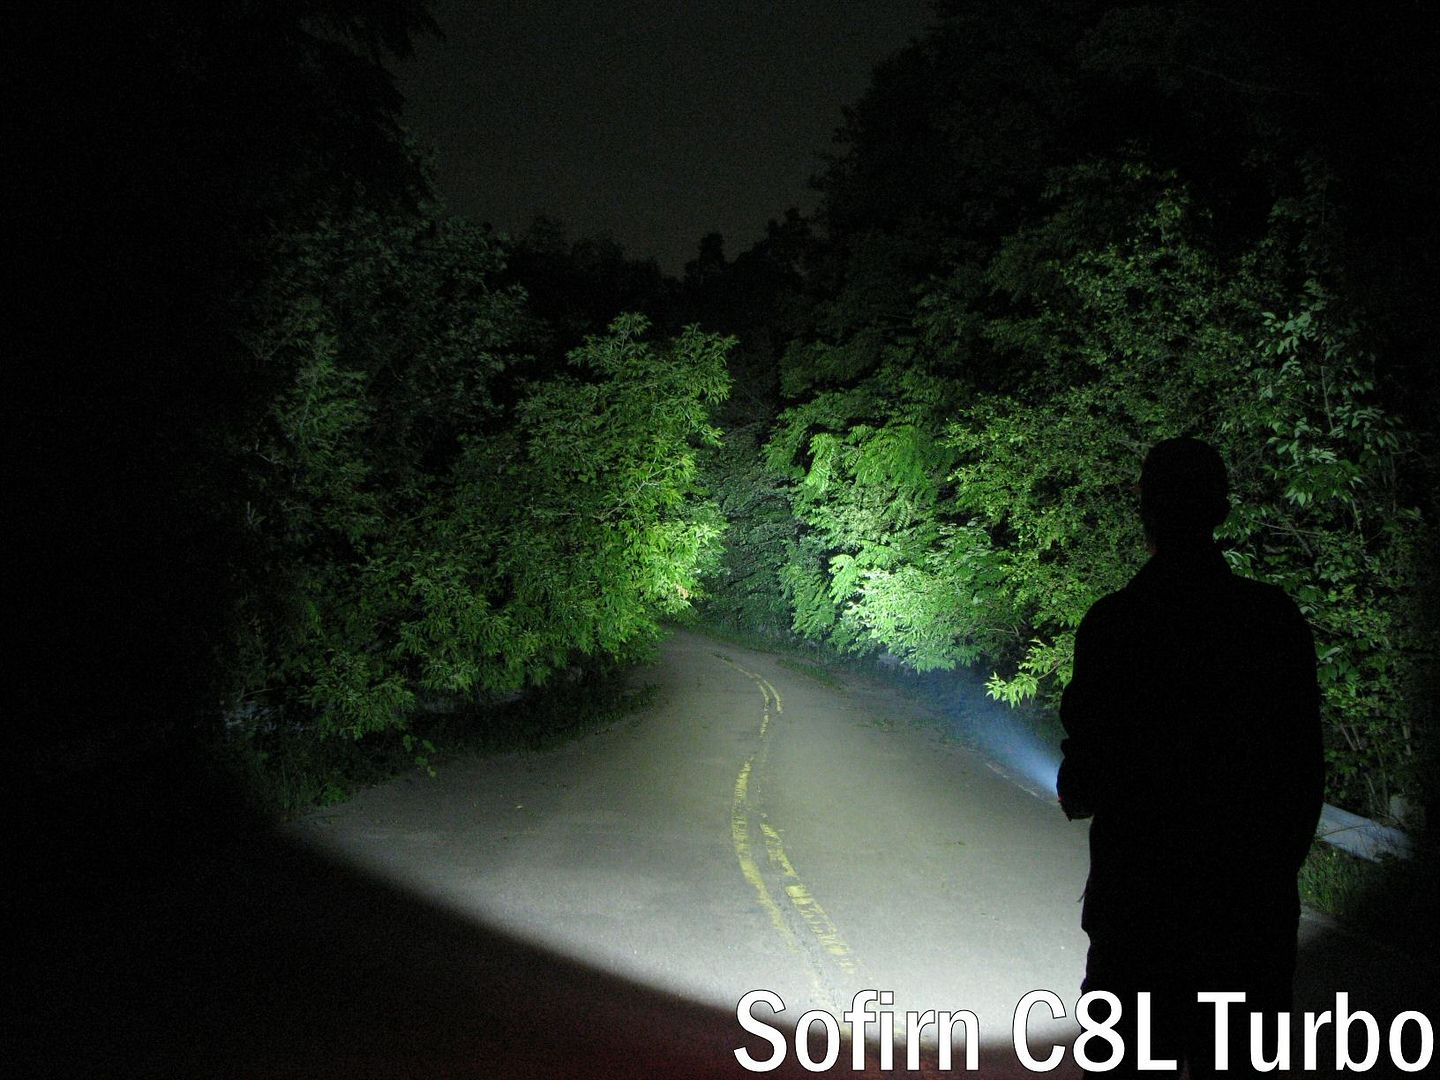
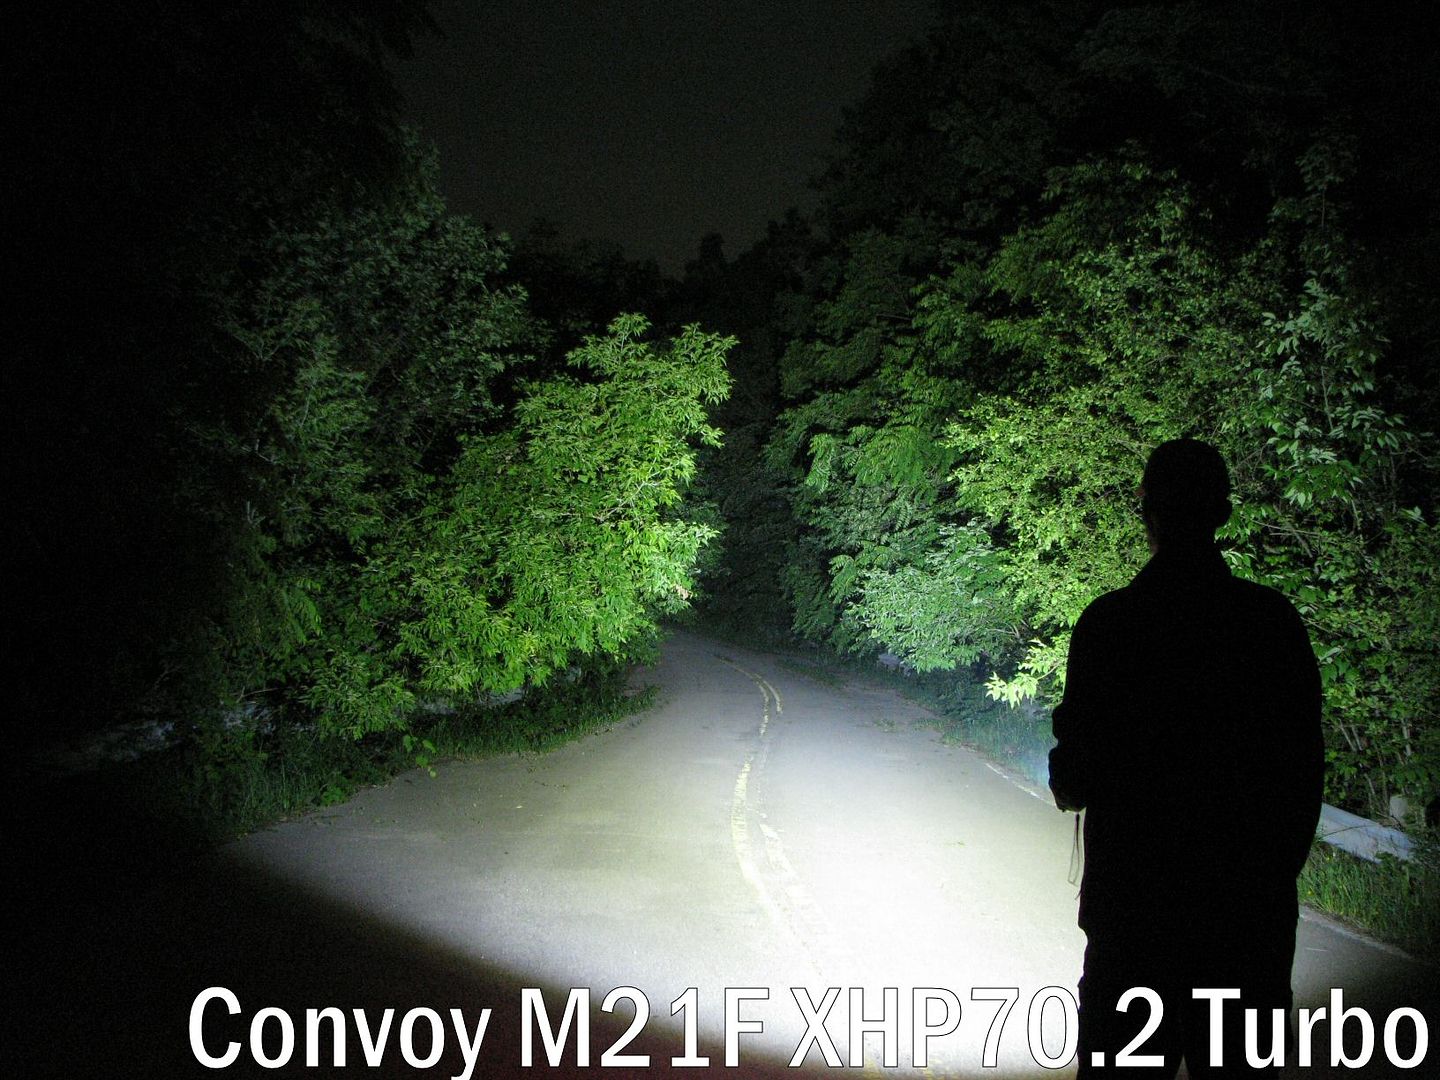
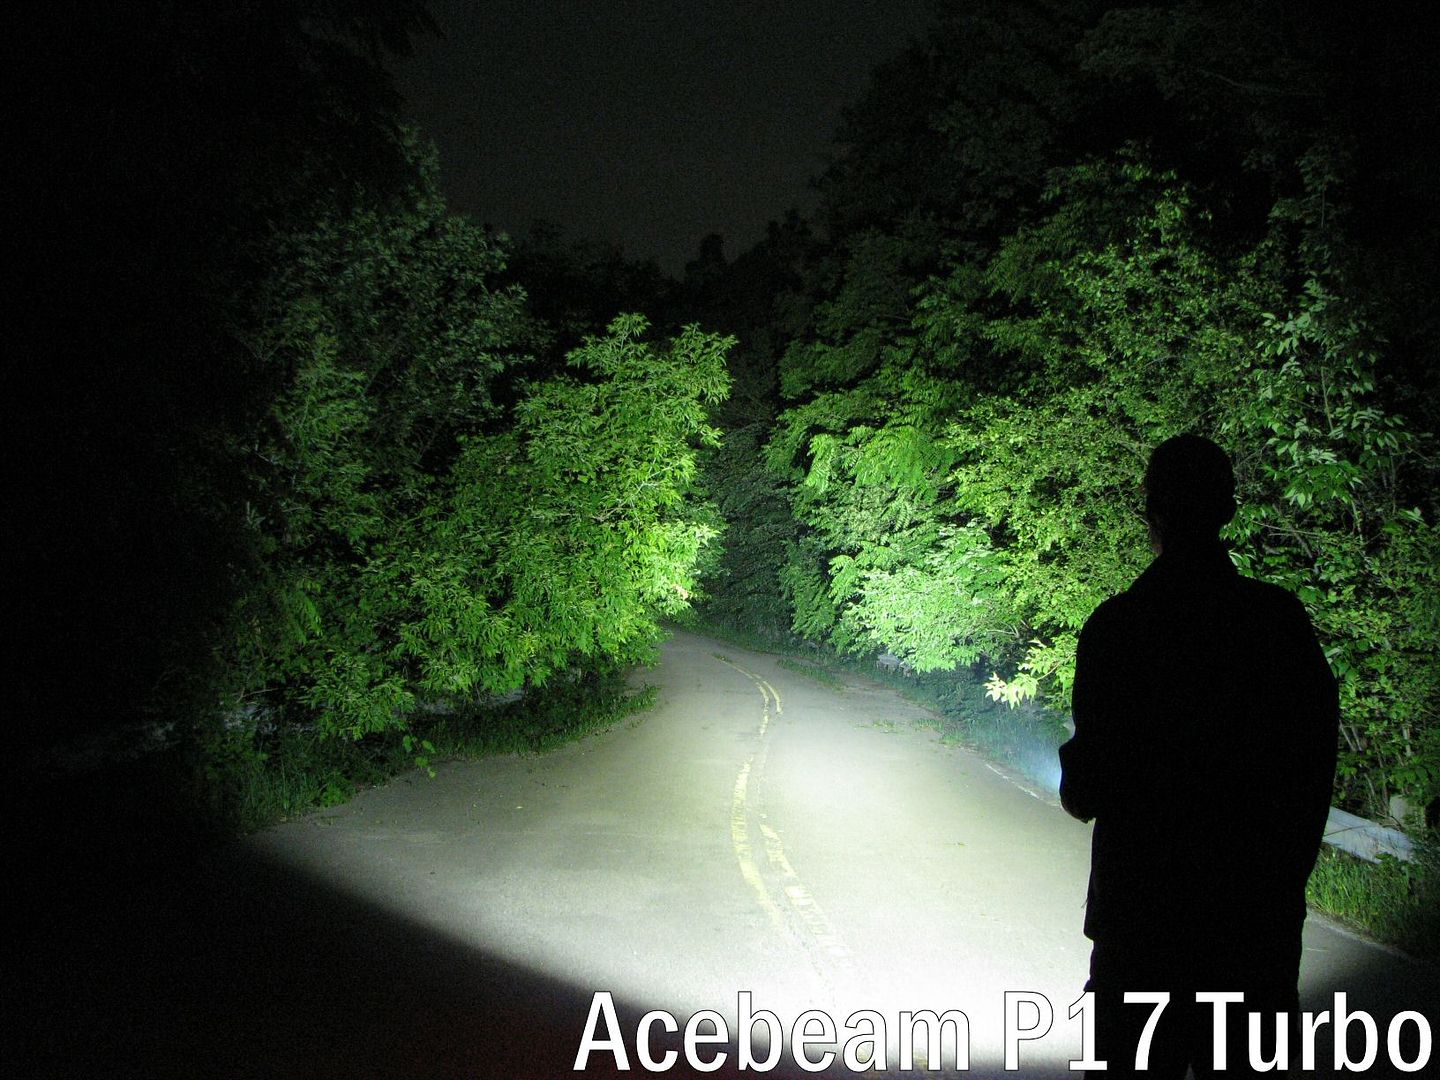
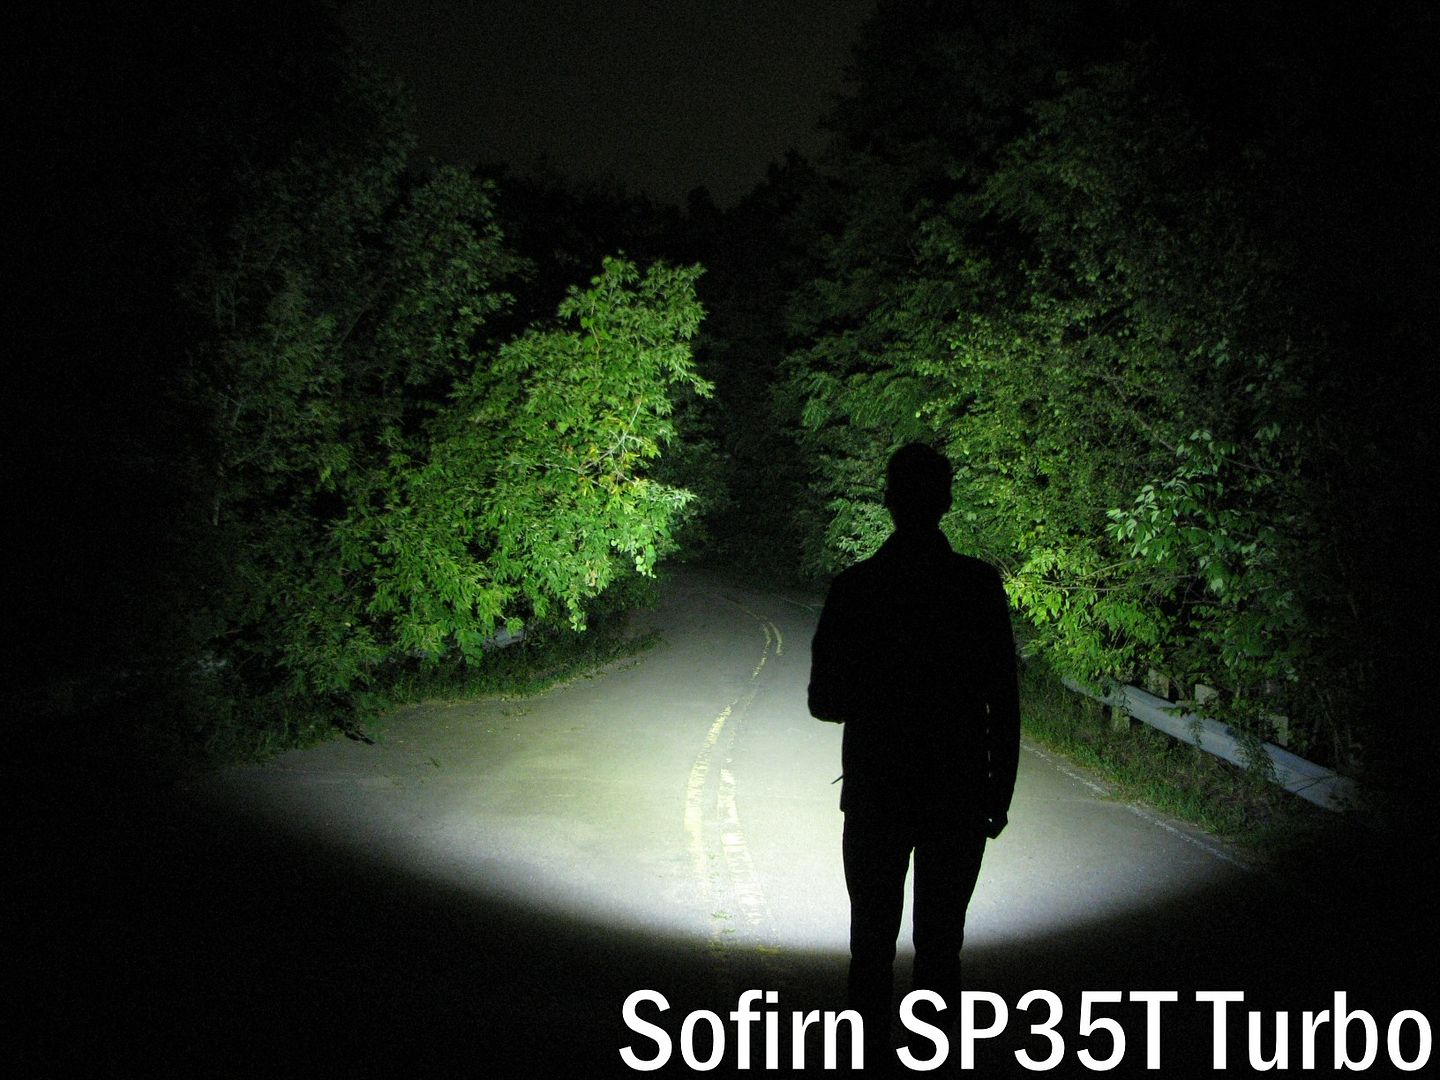
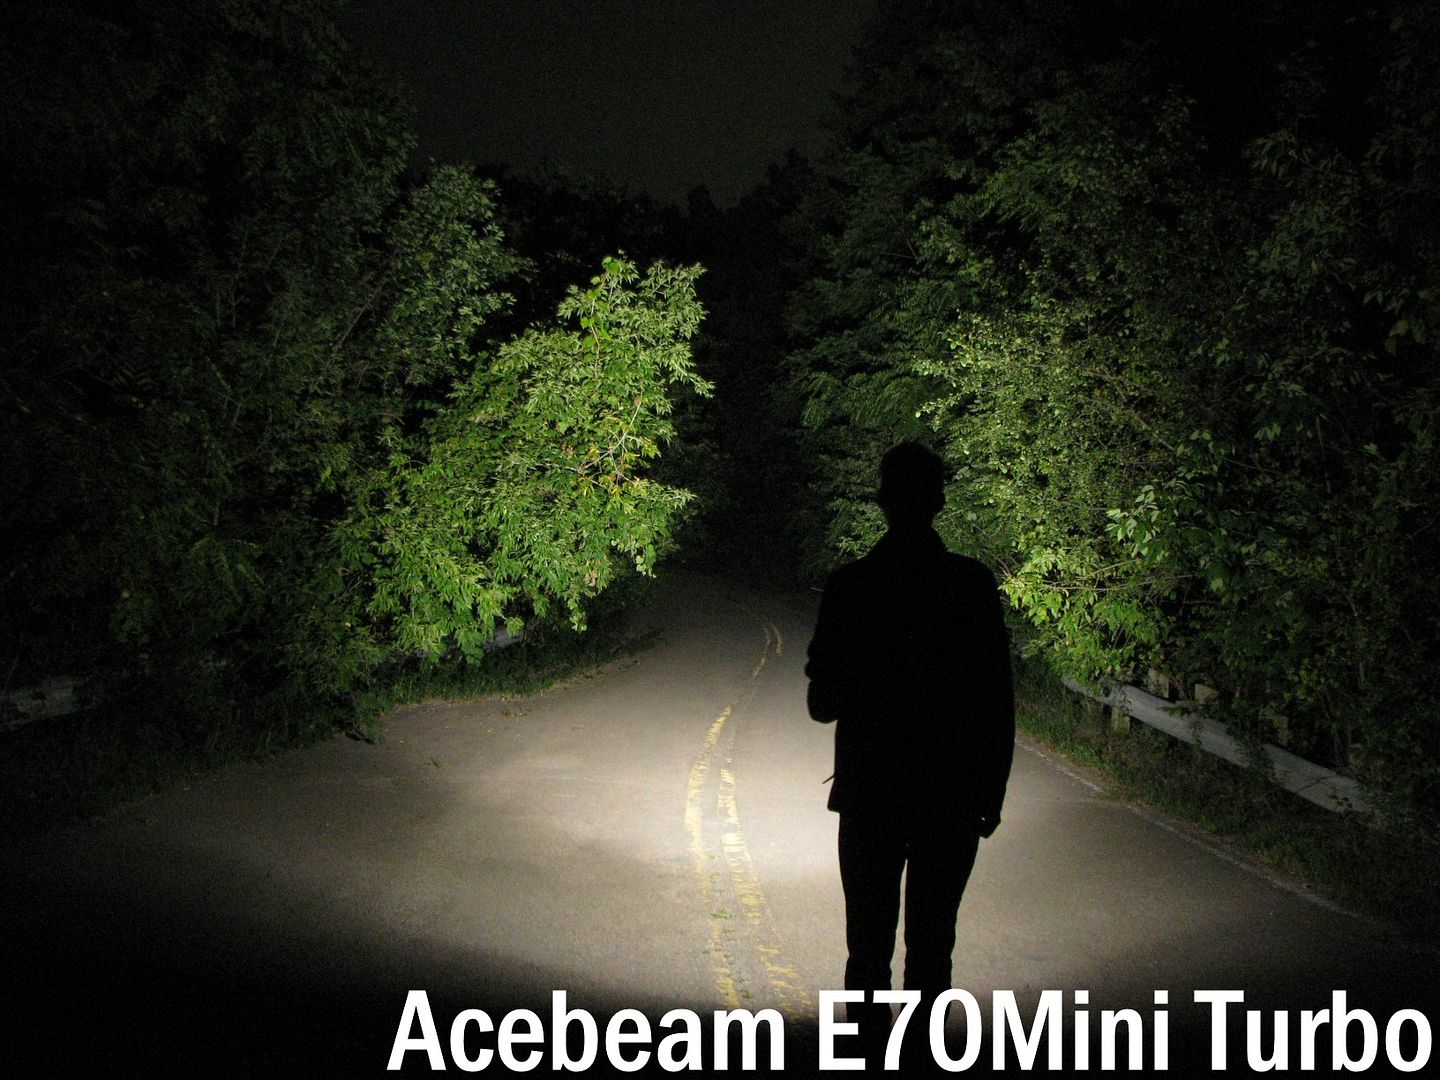
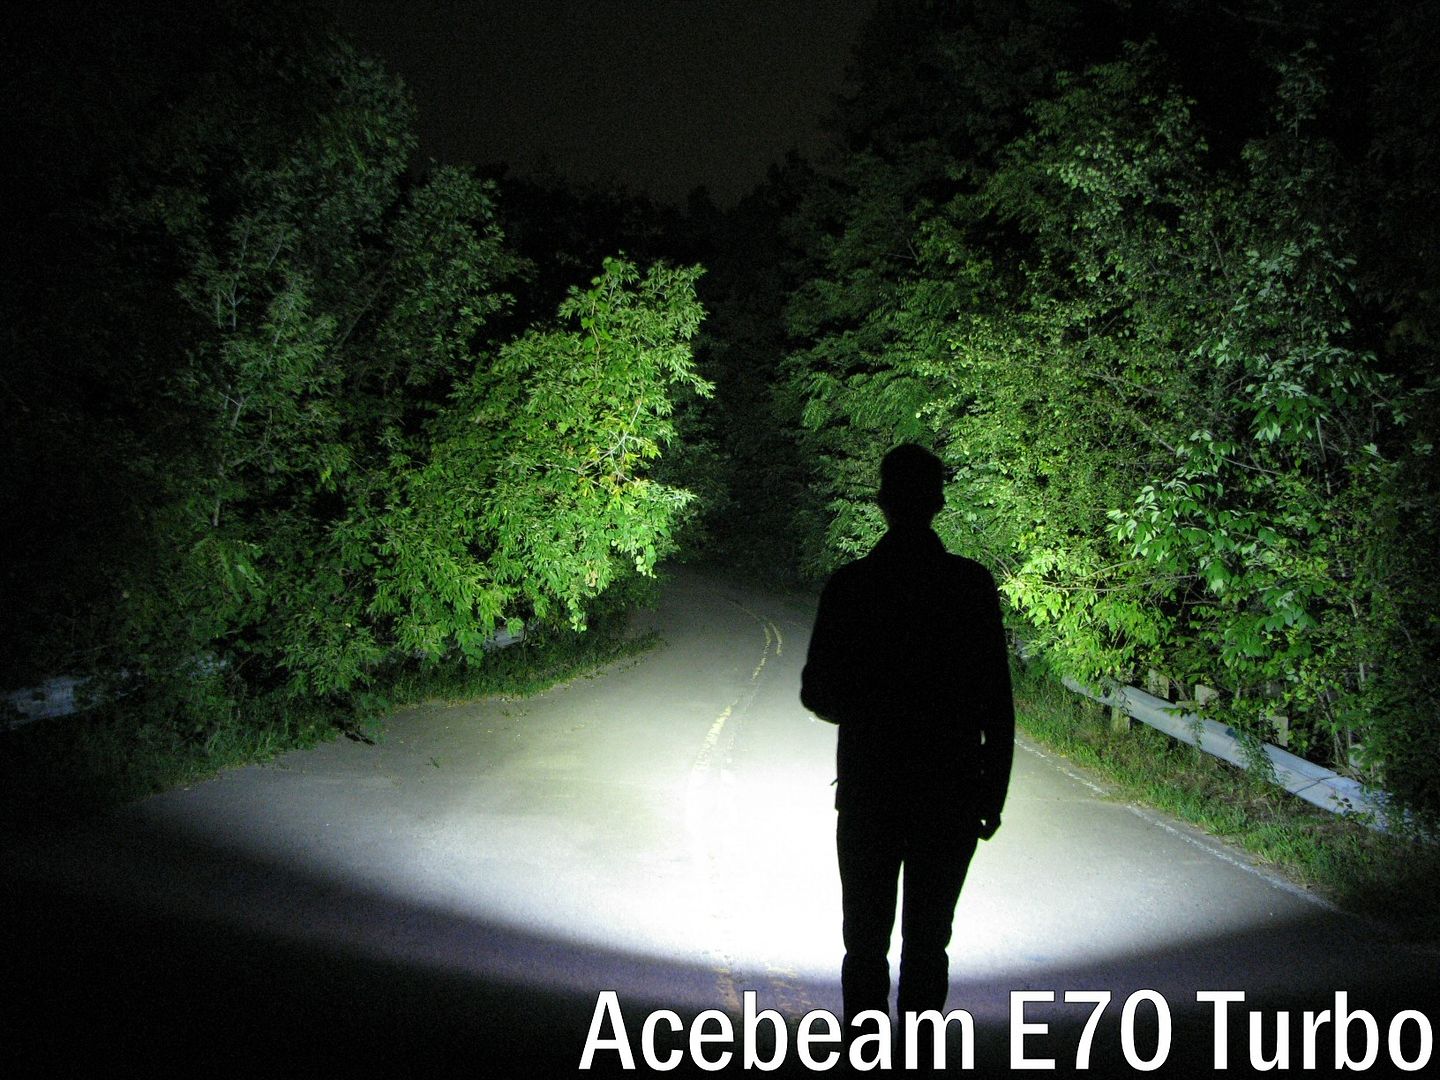
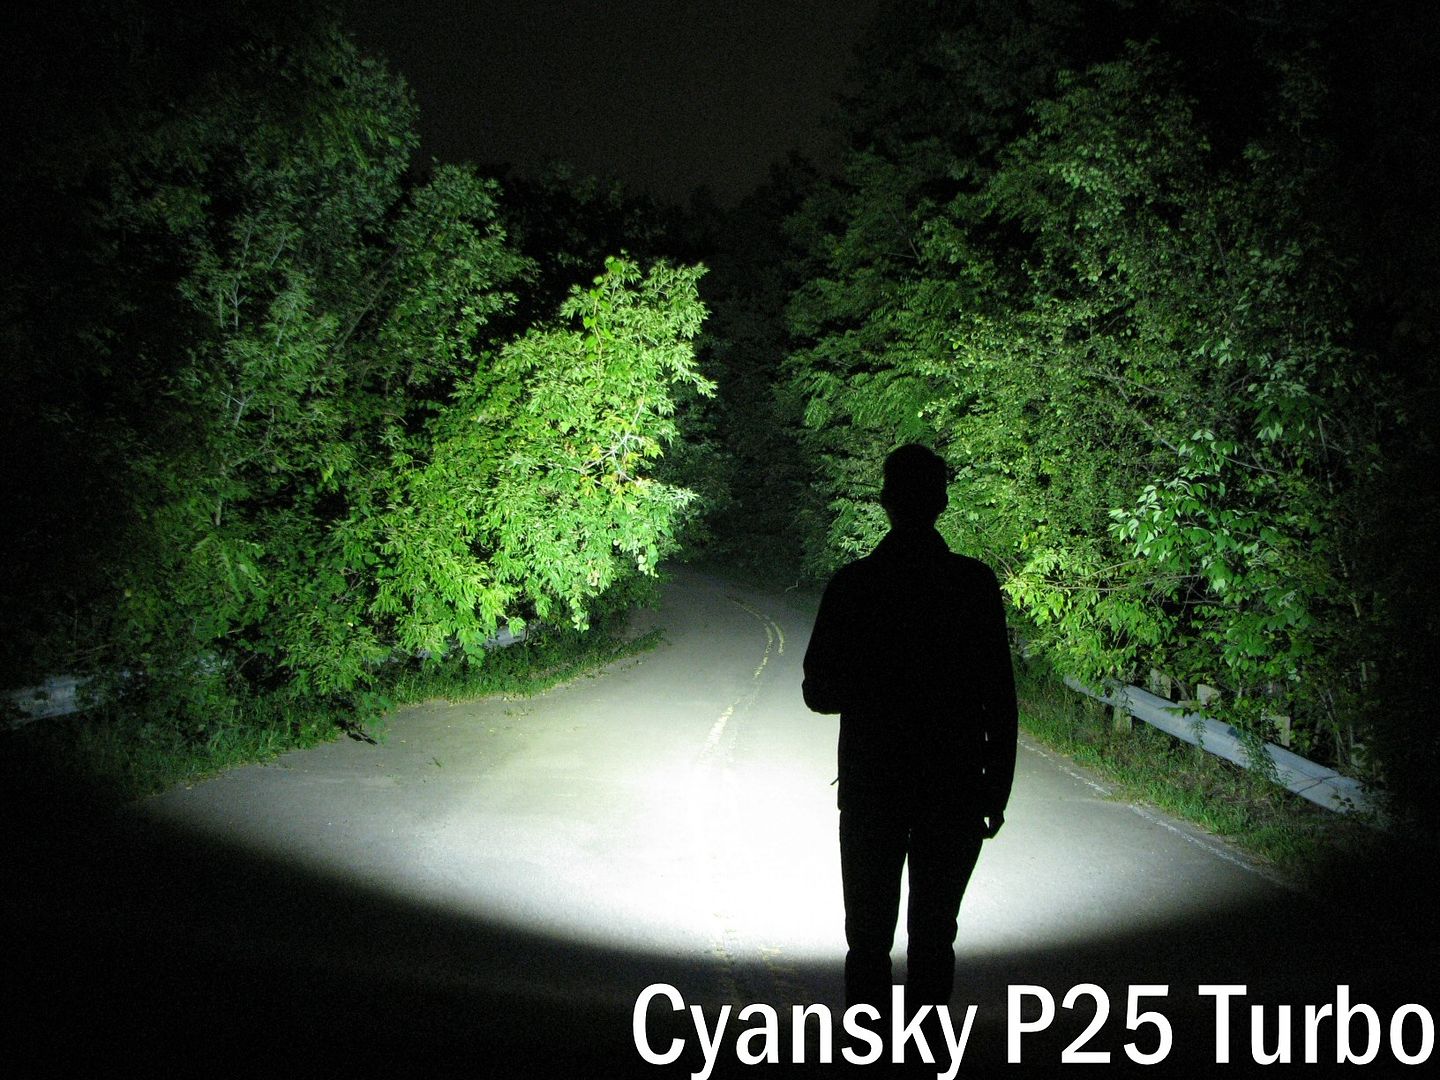
All outdoor beamshots are taken on my Canon PowerShot S5 IS at f/2.7, 0.5 secs exposure, ISO 400, daylight white balance. Learn more about my outdoor beamshots here.
Click on any thumbnail image below to open a full size image in a new window. You can then easily compare beams by switching between tabs.
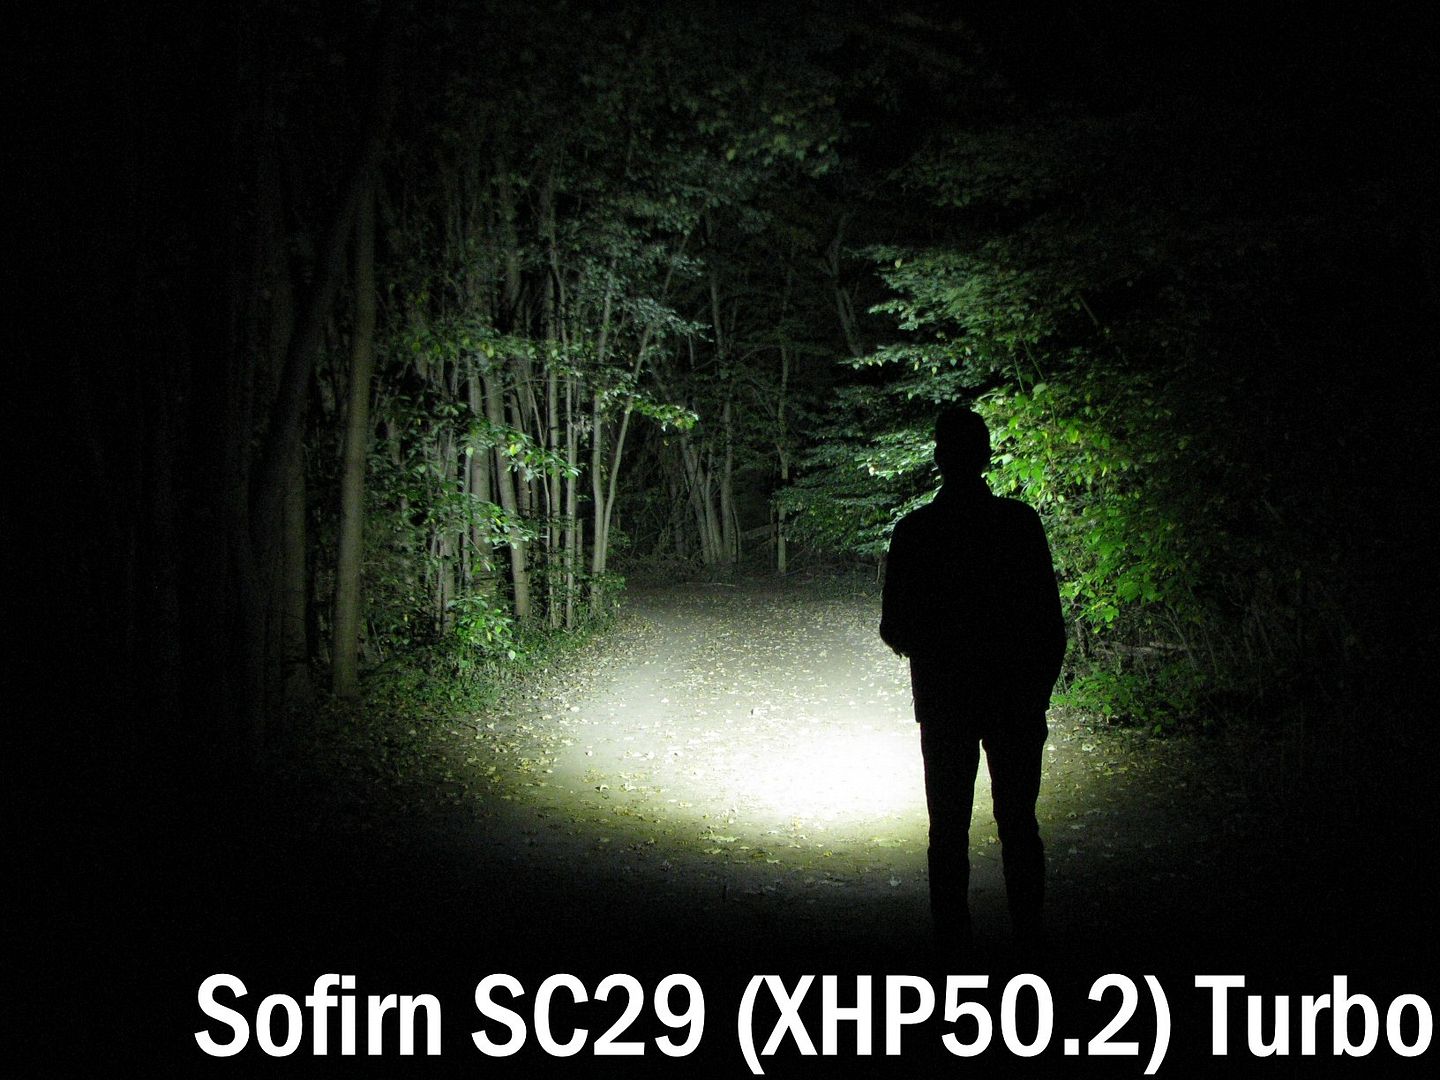
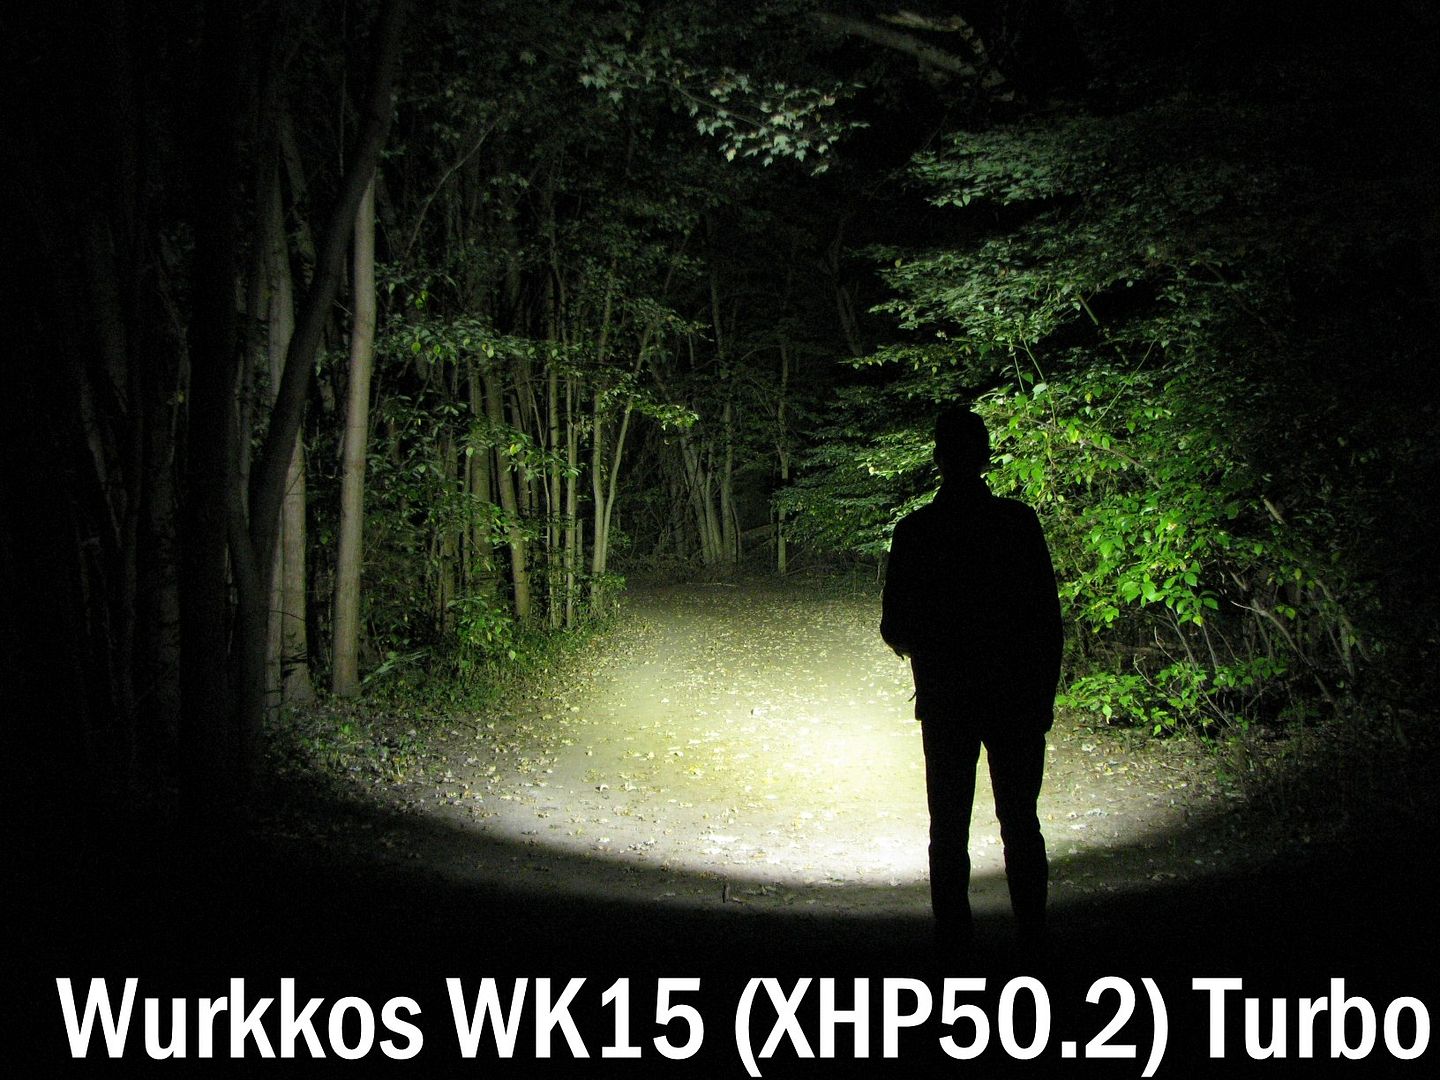
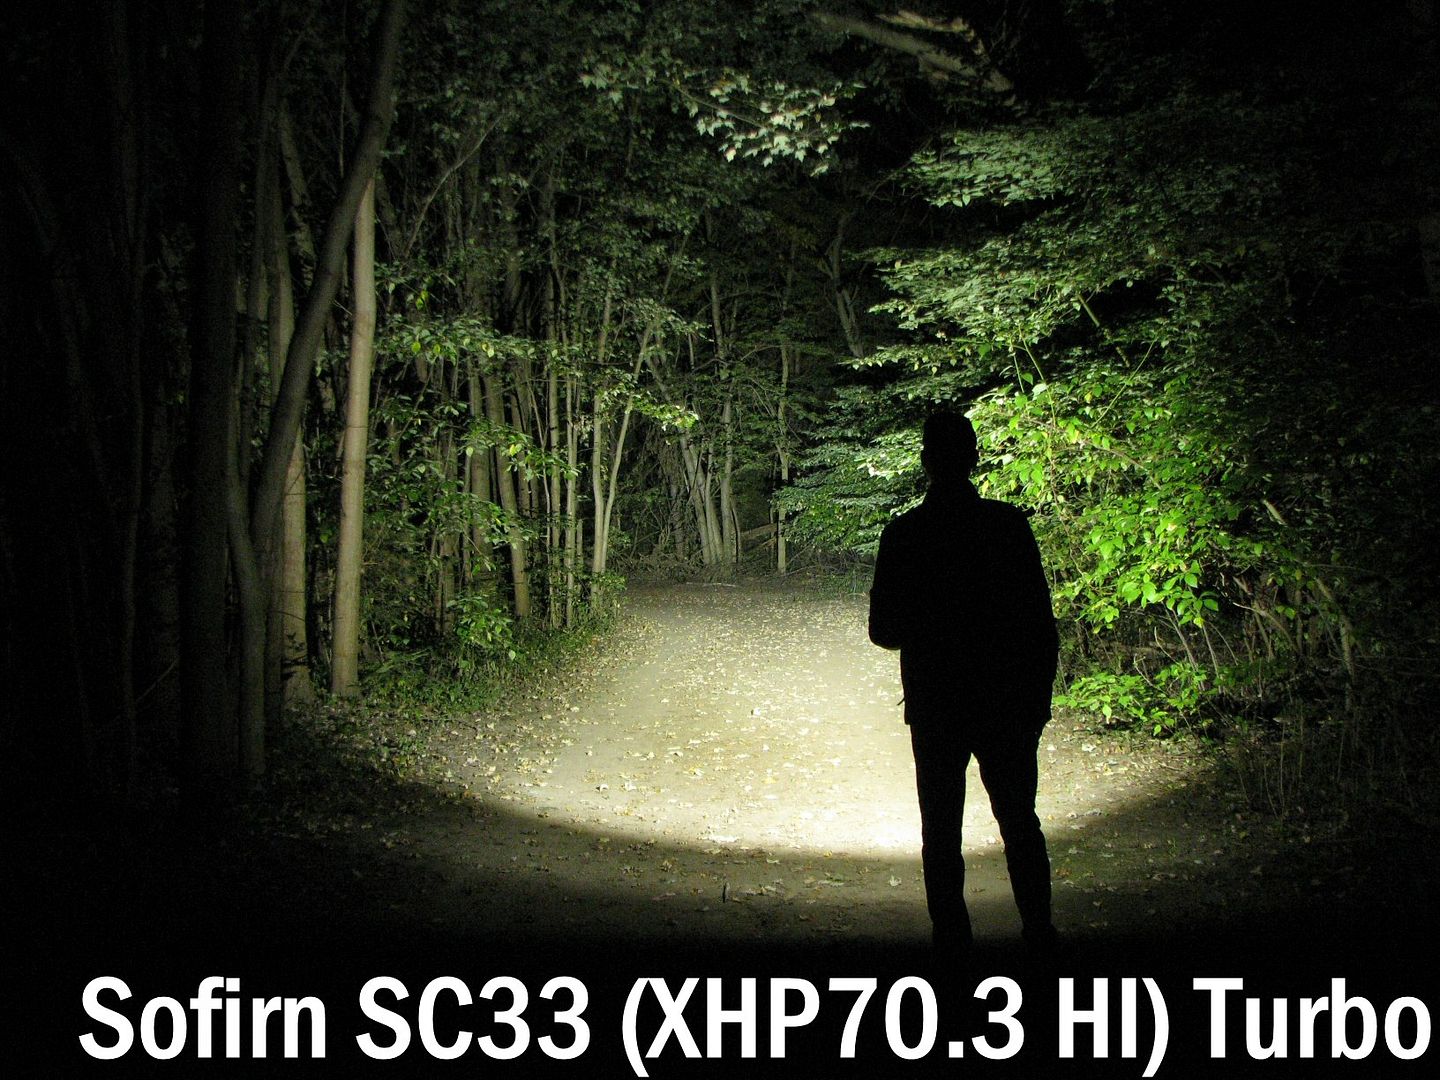

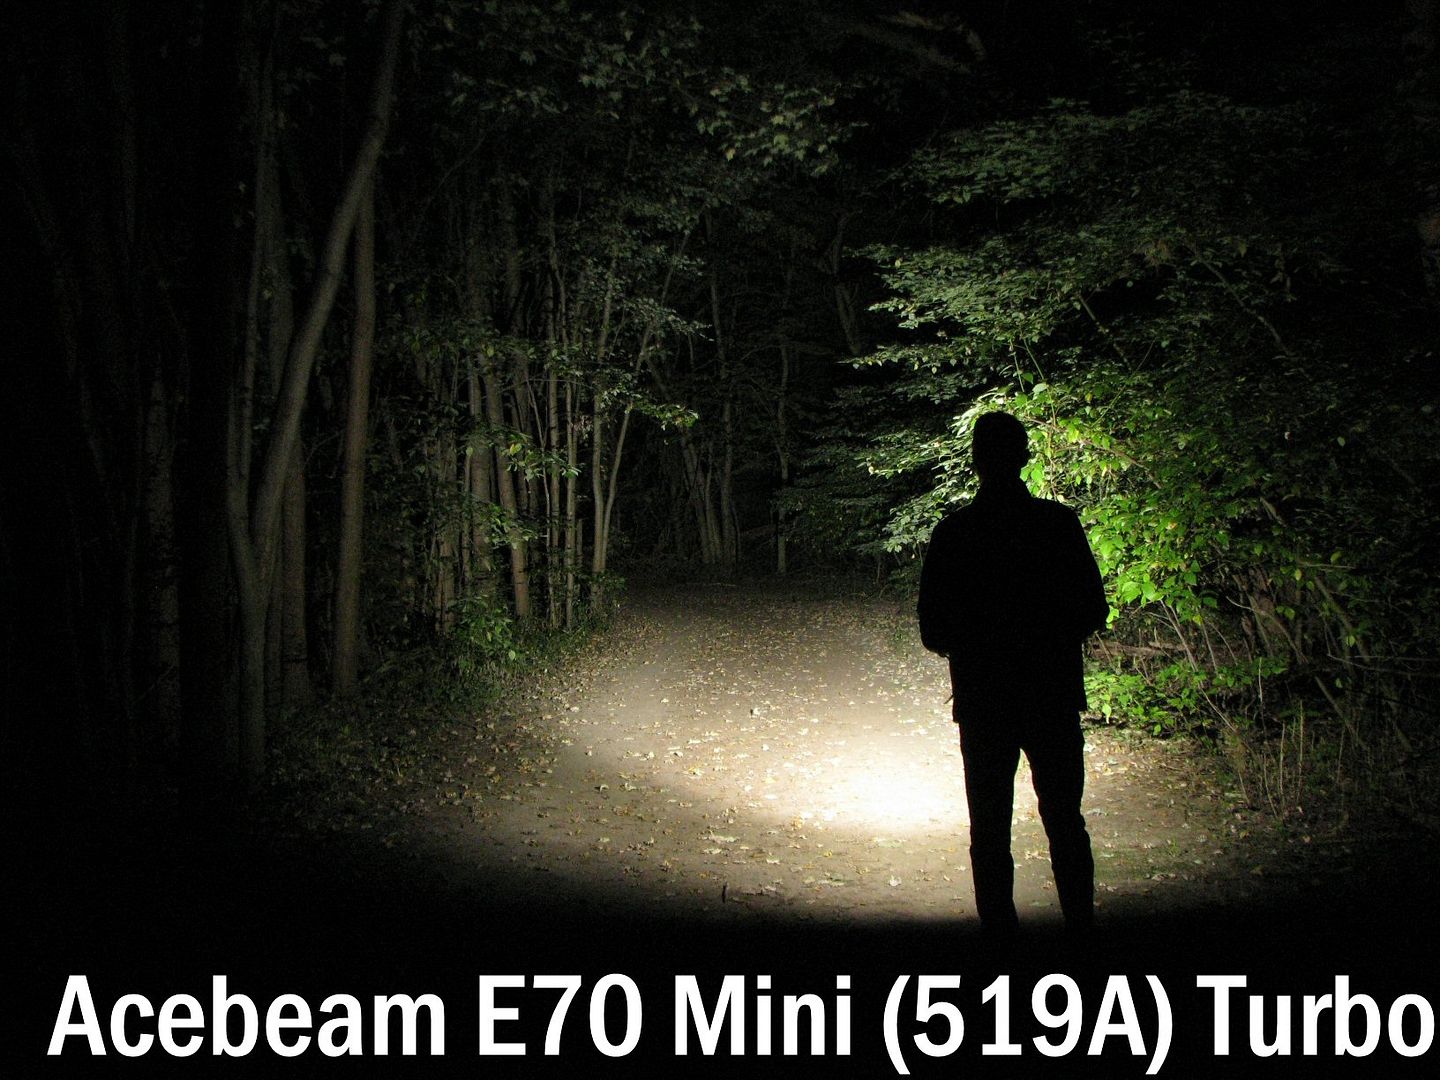
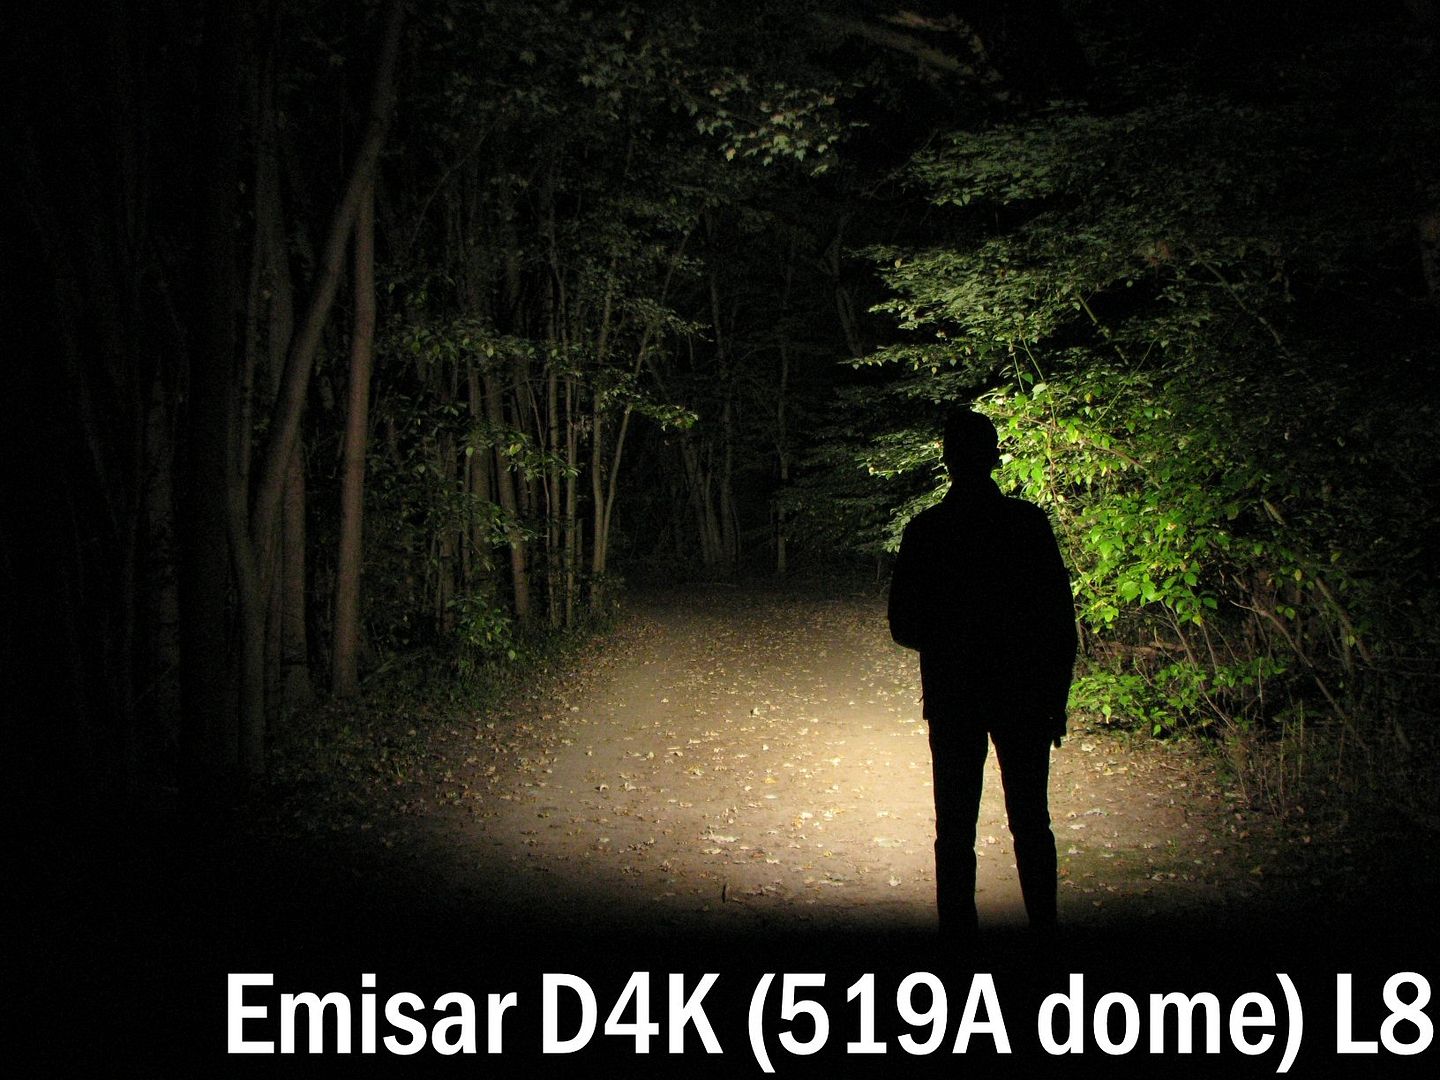
As you can see above, the SC29 has a narrower spill than the reflectored lights, with more relative light in the mid-ground and distance. Personally, I think the SC33 achieves a better balance between throw and flood – although it is a slightly larger light (with more powerful XHP70.3 HI emitter).
But also note that the green-yellow tint shift at the edge of the periphery is actually not very noticeable in actual use. In fact, I find far less visible tint shifting here than in most XHP50.2 lights
Testing Results
My summary tables are generally reported in a manner consistent with the ANSI FL-1 standard for flashlight testing. In addition to the links above, please see my output measures page for more background.
All my output numbers are based on my home-made lightbox setup. As explained on that methodology page, I have devised a method for converting my lightbox relative output values to estimated lumens. Note that my lightbox calibration runs higher than most hobbyists today, but I’ve kept it to remain consistent with my earlier reviews (when the base calibration standard was first established). On average though, I find my lumen estimates are ~20% higher than most other modern reviewers.
My Peak Intensity/Beam Distance are directly measured with a NIST-certified Extech EA31 lightmeter.
SC29 Testing Results
| Mode | Spec Lumens | Estimated Lumens @0sec | Estimated Lumens @30 secs | Beam Intensity @0sec | Beam Intensity @30secs | Beam Distance @30secs | PWM/Strobe Freq | Noise Freq | Charging Current <3V | Charging Current >3V | Parasitic Drain | Weight w/o Battery | Weight with Battery | CCT (K) | Duv | CRI |
|---|---|---|---|---|---|---|---|---|---|---|---|---|---|---|---|---|
| Eco | 1 | 1 | 1 | - | - | - | 8-25 Hz | No | 1.33 A | 1.33 A | 26 uA | 158 g | 186 g | - | - | - |
| Low | 30 | 50 | 50 | - | - | - | 8-25 Hz | No | 1.33 A | 1.33 A | 26 uA | 158 g | 186 g | - | - | - |
| Med | 350 | 450 | 440 | - | - | - | 8-25 Hz | No | 1.33 A | 1.33 A | 26 uA | 158 g | 186 g | - | - | - |
| High | 1,000 | 1,350 | 1,300 | - | - | - | 8-25 Hz | No | 1.33 A | 1.33 A | 26 uA | 158 g | 186 g | 5,600 | 0.0102 | 63 |
| Turbo | 3,000 | 3,300 | 3,150 | 11,000 cd | 10,300 cd | 203 m | 8-25 Hz | No | 1.33 A | 1.33 A | 26 uA | 158 g | 186 g | - | - | - |
| Strobe | 3,000 | - | - | - | - | - | 8-25 Hz | No | 1.33 A | 1.33 A | 26 uA | 158 g | 186 g | - | - | - |
The SC29 seems to match fairly closely to the specs on all levels (given that my lightbox’s relative calibration is generously high). I also like the overall spacing. Note that “Eco” is lower than most lights – mainly would consider this more of a “Moonlight” mode (although I would prefer a sub-lumen level for that).
My NIST-calibrated luxmeter is accurately calibrated to an absolute standard, and similarly reports fairly comparable beam intensity on Turbo compared to the specs (although it drops down by 30 secs post-activation to just slightly below spec). I find these output and throw measures very reasonable for this kind of emitter.
To view and download full testing results for all modern lights in my testing, check out my Database page.
Runtimes
As always, my runtimes are done under a small cooling fan, for safety and consistency. To learn more about how to interpret runtime graphs, see my runtimes methodology page. Note again that on average, my lightbox’s calibration seems to be ~20% higher than most modern reviewers.
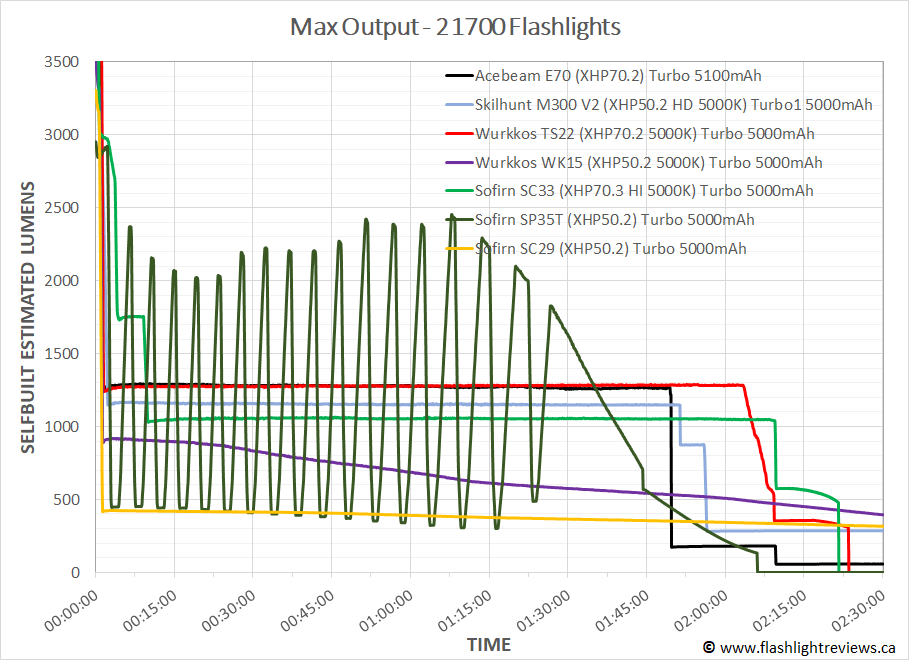
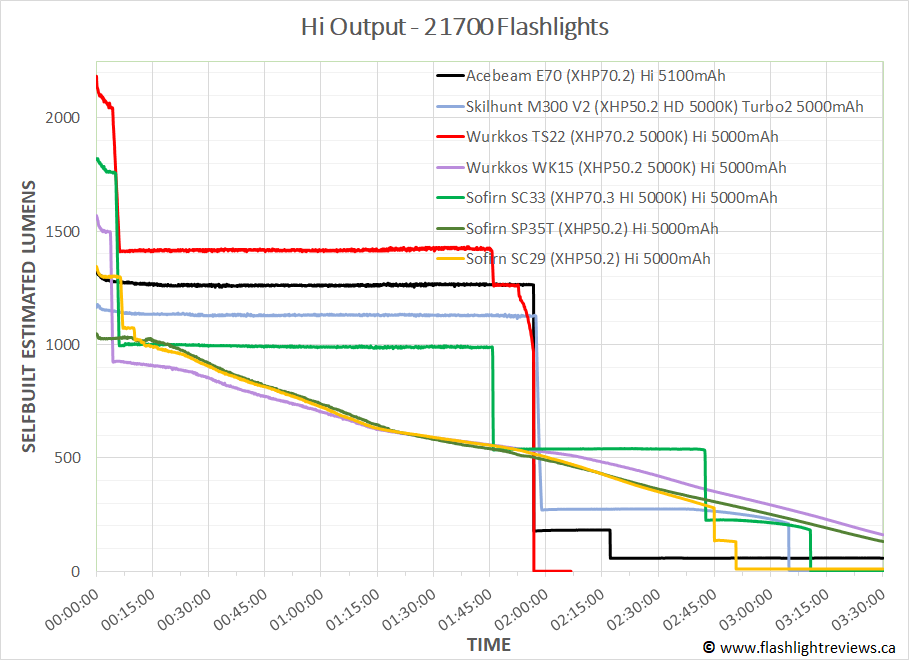
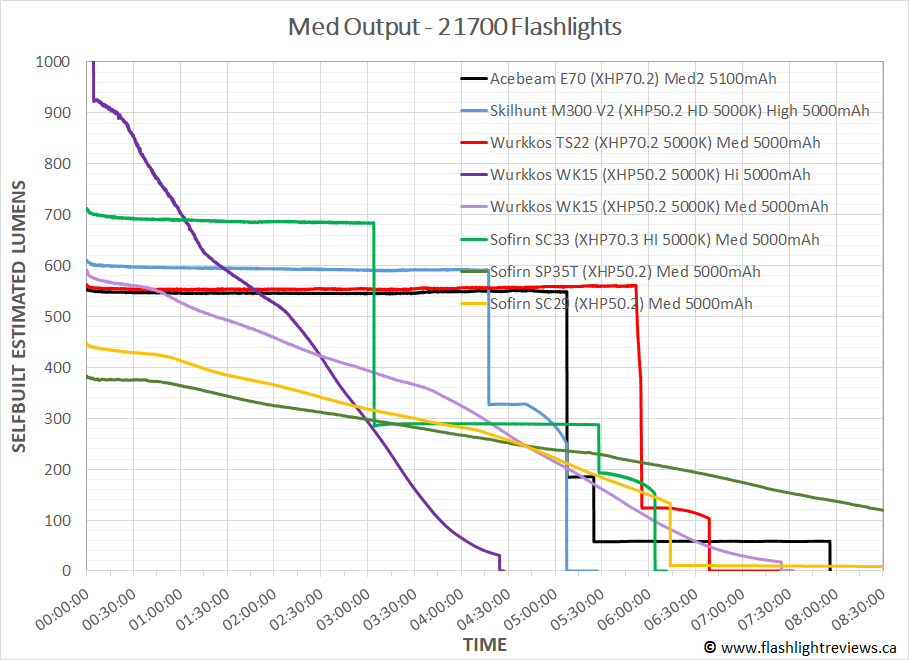
Overall performance is *very* comparable to the Wurkkos WK15 – which similarly uses the XHP50.2 emitter. Both lights have a relatively efficient, if basic, linear regulation drivers (i.e., you can see the generally direct-drive pattern above). Note however that the SC29 does have some explicit step-downs near the end of the run, which is a good way to extend performance when the battery is nearly exhausted.
This is very reasonable for a budget light, and I do find the level spacing good. Note however that the initial step-down level on Turbo is lower than most lights.
Since I know many are interested in how the initial Turbo modes compare (i.e., how quickly and how far the lights step-down), here is a blow-up of the first few mins of runtime on max output:
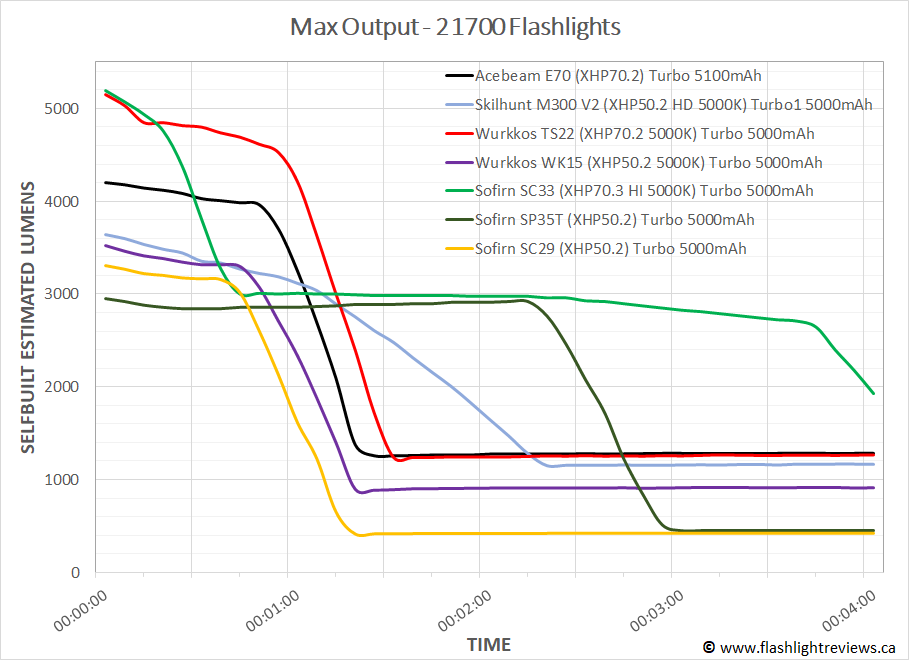
Again, very similar performance to the Wurkkos WK15.
Pros and Cons
| Pros | Cons | |
|---|---|---|
| Light has a solid build with a large easy-to-access button switch. | Circuit is a simple linear regulator, producing a slowly decreasing output instead of flat runtimes. | |
| Light has an effective and straightforward user interface. | The circuit is less efficient than higher-end, current-controlled lights with flat regulation. | |
| Light uses a TIR optic for more focused throw. | Although the TIR does better than most reflectors, the XHP50.2 HD emitter does produce tint shifts across the beam. Noticeable here only in the spillbeam periphery. | |
| Price is reasonably low | Light is a bit larger and heavier than some budget lights in the compact 21700 class. |
Overall Rating

Preliminary Conclusions
The SC29 is a more budget-oriented light than SC33, with a scaled down emitter and circuit, as you might expect. In a sense, the SC29 is basically a TIR optic version of the budget Wurkkos WK15, in a slightly beefier build with some revised output levels and a tweaked user interface. It mainly comes down to which beam pattern you prefer between the two.
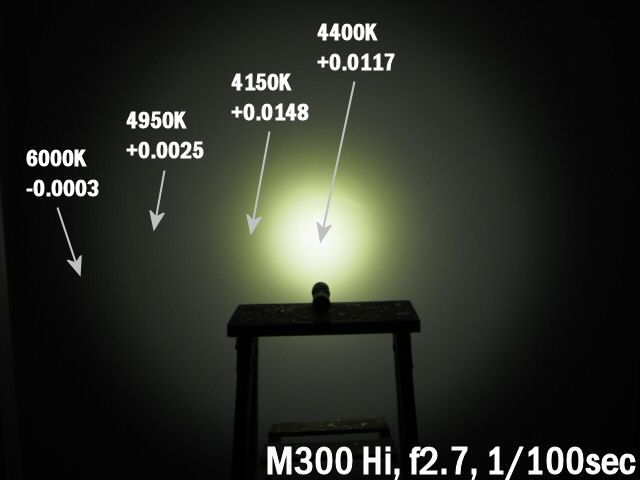
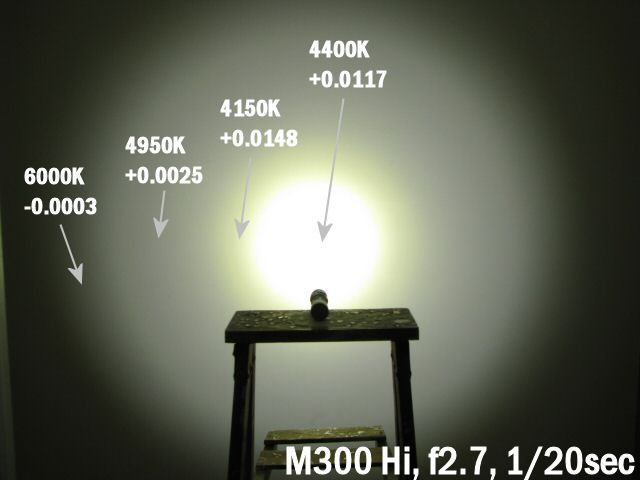
The circuit performance is certainly reasonable for the budget class, as it features a linear regulator with good efficiency. Of course, this doesn’t compare to the fully-regulated competition, such as the efficient Wurkkos TS22 or the Skilhunt M300 V2 – but those light are also more expensive.
I do like that the published output specs seem pretty accurate for this model, and the range of output levels is good.
The XHP50.2 HD emitter is known for a lot of tint/chromatic variation across its beam, but the TIR seems to be helping here. It is only at the periphery of the beam that you will notice the tint shift.
The build and handfeel is a small step up from the WK15, but I still think this light fills the same niche with the same overall performance (just a different beam profile). As such, I think 3.5 stars is a reasonable score here as well. A very decent budget TIR pocket light, it would be a good choice for the general-use crowd.
Acknowledgement
The SC29 was supplied by Sofirn for review. As always, all opinions are my own and the light received the same rigourous and objective testing as all other lights that I have reviewed. At the time of review, this light with battery retails for ~$30 USD (~$40 CDN) on sale on the Sofirn website here.


.jpg)
.jpg)


.jpg)
.jpg)