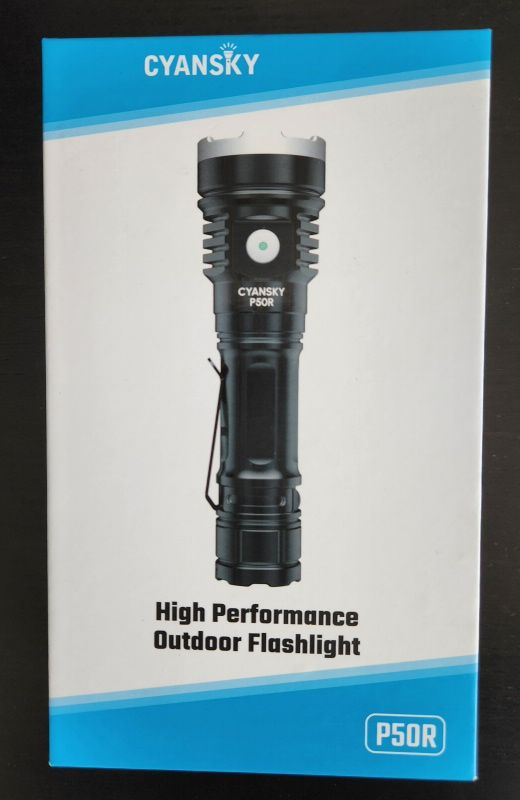
Cyansky P50R

The P50R is a very high-output flashlight featuring four XHP50.3 HI emitters running on a single high-discharge 21700 battery.
- Introduction
- Manufacturer Specifications
- Package Details
- Build
- User Interface
- Circuit Measures
- Emitter Measures
- Beamshots
- Testing Results
- Runtimes
- Pros and Cons
- Overall Rating
- Preliminary Conclusions
- Acknowledgement
Introduction
I’m still working on clearing my backlog – the P50R was received in the Fall of 2023.
This is the second Cyansky light that I’ve reviewed since my recent return to reviewing, following on the tactical P25. It features a whopping four XHP50.3 HI emitters in a pretty compact head, and is thus rated for relatively high output for the 1×21700 class.
In the old days, I used to dread handling multi-emitter reflectored lights, given all the typical beam artifacts. But things have really come a long way in both optics and emitter design, and I find modern multi-emitter lights (with latest generation of LEDs) to have far fewer artifacts then they used to. It can be an efficient way to get super high output in a compact build.
Let’s see how it performs in my testing.
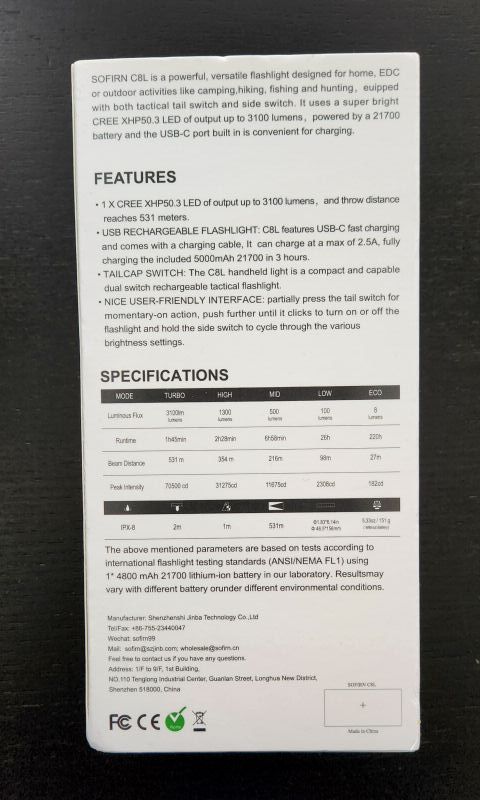
Manufacturer Specifications
Note: As always, these are simply what the manufacturer provides – scroll down to see my actual runtimes.
| Feature | Specs |
|---|---|
| Maker | Cyansky |
| Model | P25 V2.0 |
| Emitter | XHP70.3 |
| Tint | Cool |
| Max Output (Lumens) | 3,600 |
| Min Output (Lumens) | 5 |
| Max Runtime | 80 hours |
| Max Beam Intensity (cd) | 10,800 cd |
| Max Beam Distance (m) | 208 m |
| Constant Levels | 5 |
| Flashing | Strobe, SOS |
| Battery | 1x21700 |
| Weight (w/o battery) | 98 g |
| Weight (with battery) | - |
| Length | 145.4 mm |
| Head Diameter | 30 mm |
| Body Diameter | 24.4 mm |
| Waterproof | IPX8 2m |
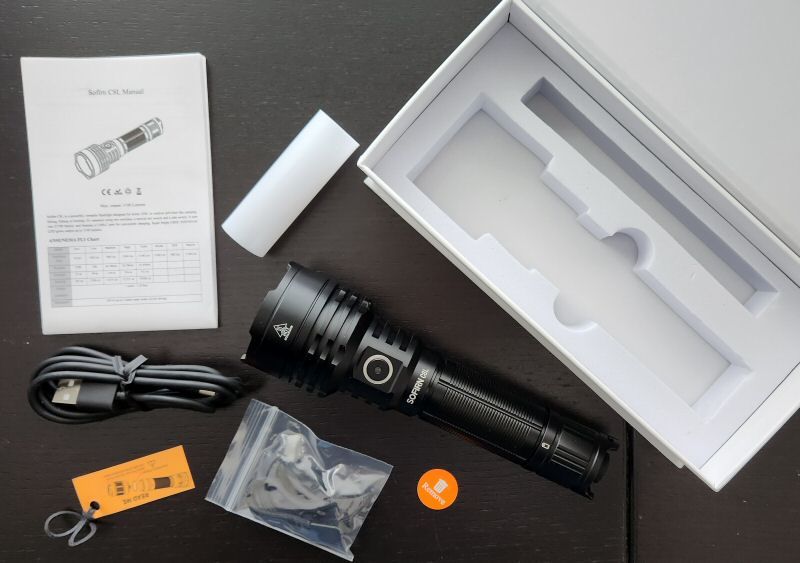
Package Details
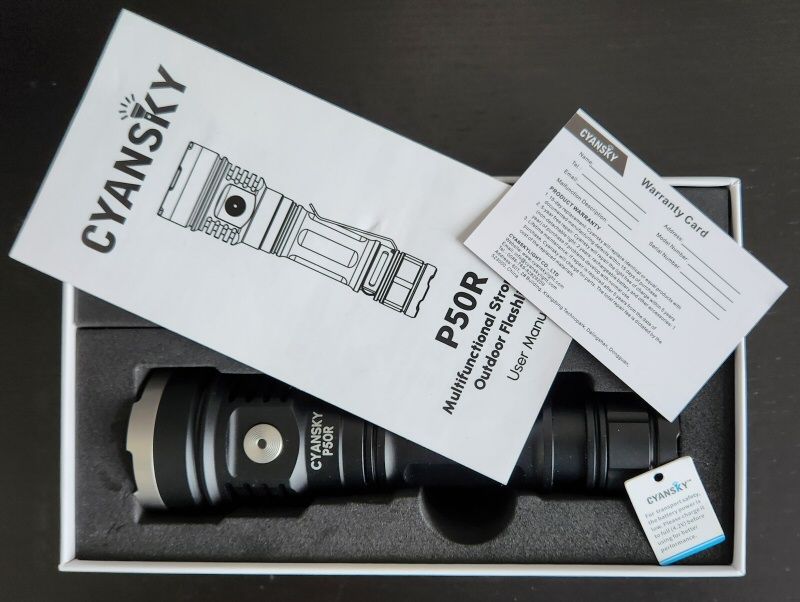
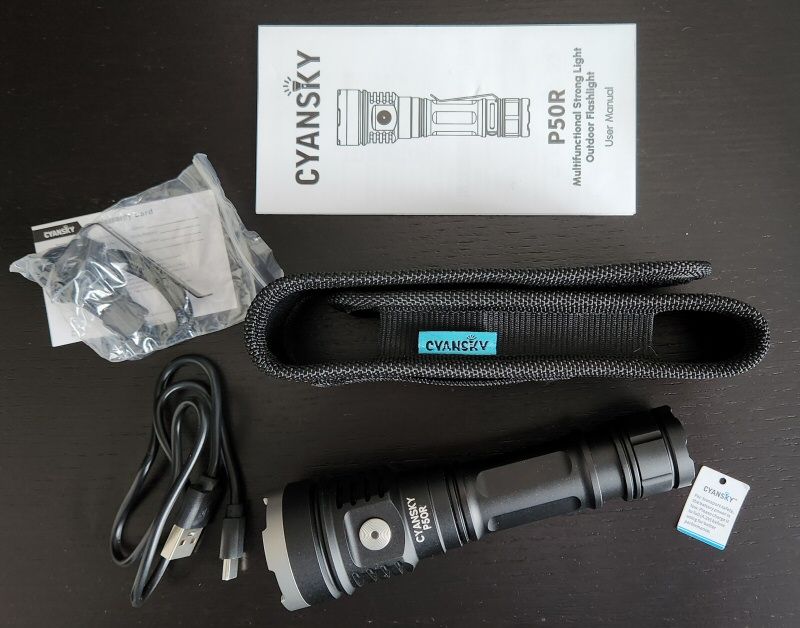
The P50R comes in a more substantial box than the P25 (which was fairly basic). Inside the hard carboard box you find all the extras in a little thin box next to the cut-out foam for the light. Inside the box I found:
- Cyansky P50R flashlight
- Cyansky-branded 4000mAh high-drain 21700 battery
- Pocket clip
- Holster with velcro closing flap
- Wrist lanyard
- USB-C charging cable
- 2 Spare O-rings
- Manual
- Warranty card
It’s a very decent package, and I am particularly glad to see the holster included – very rare these days.
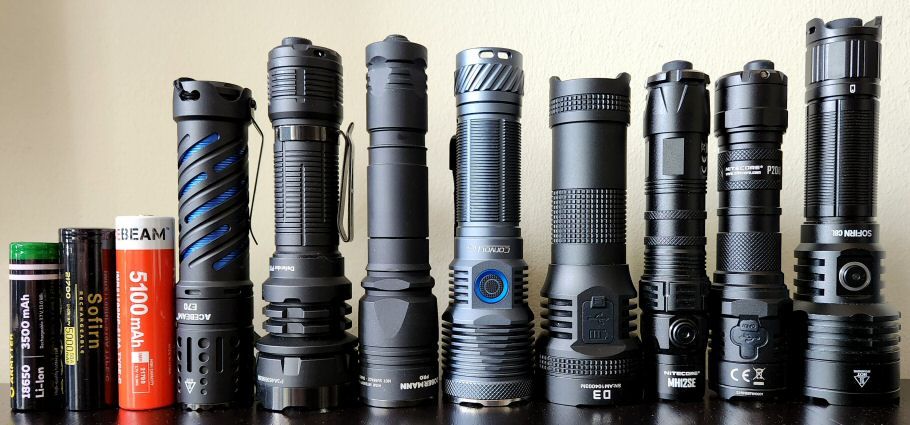
Build

From left to right: Wurkkos 21700 (5000mAh), Vapcell 21700 F56 (5600mAh), Emisar D4K, Wurkkos WK15, Armytek Wizard C2 Max, Wurkkos TS22, Sofrin SC29, Speras E21, Wuben X1 Falcon, Sofirn SC33, Sofirn SP35T, Cyansky P50R, Cyansky P25.
4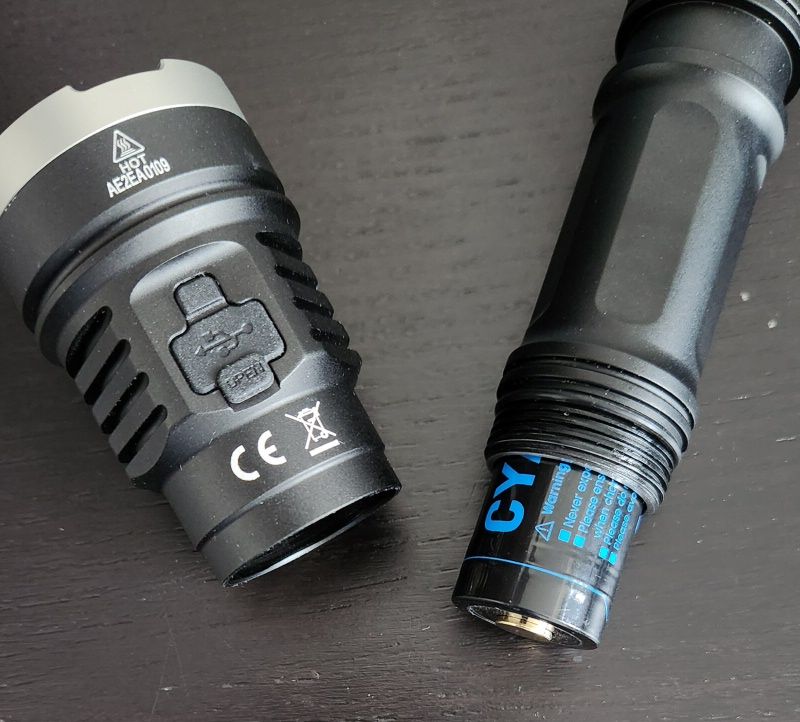
Note: that this review is based on the initial release of the P50R. In the interim, a revised model with a new user interface has replaced it. But as the build is substantially the same, I have continued with this review and highlighted the differences as we go.
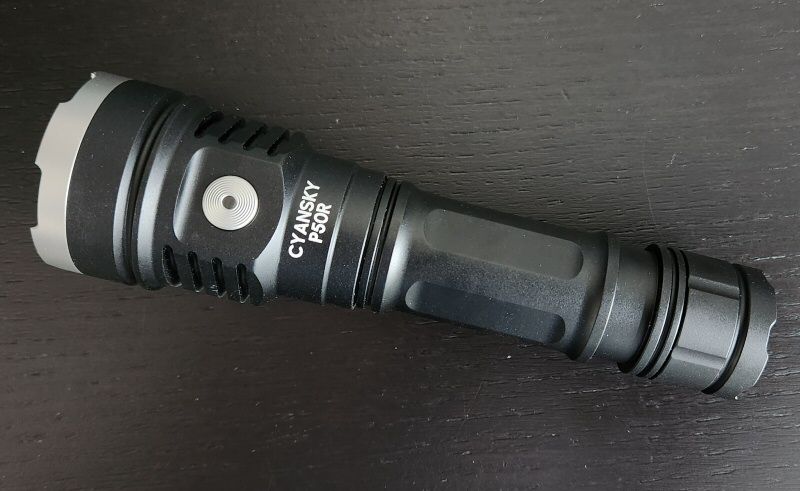
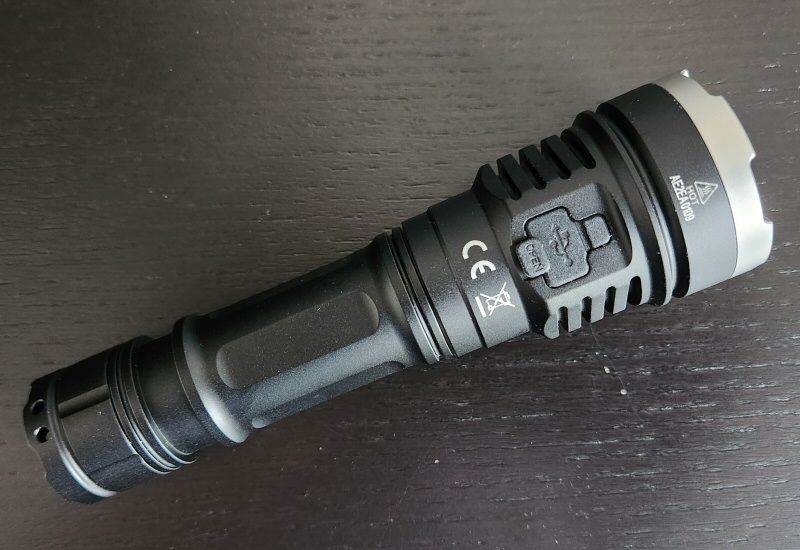
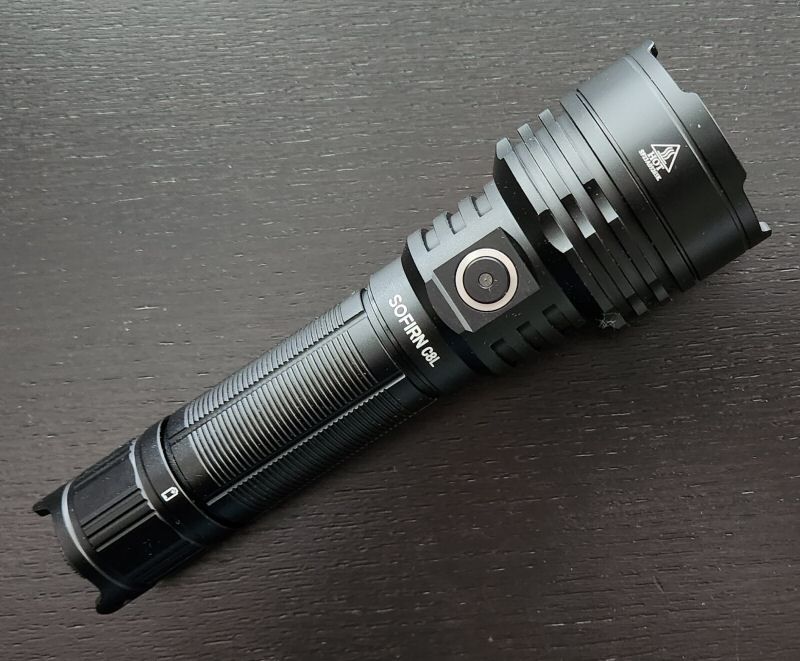
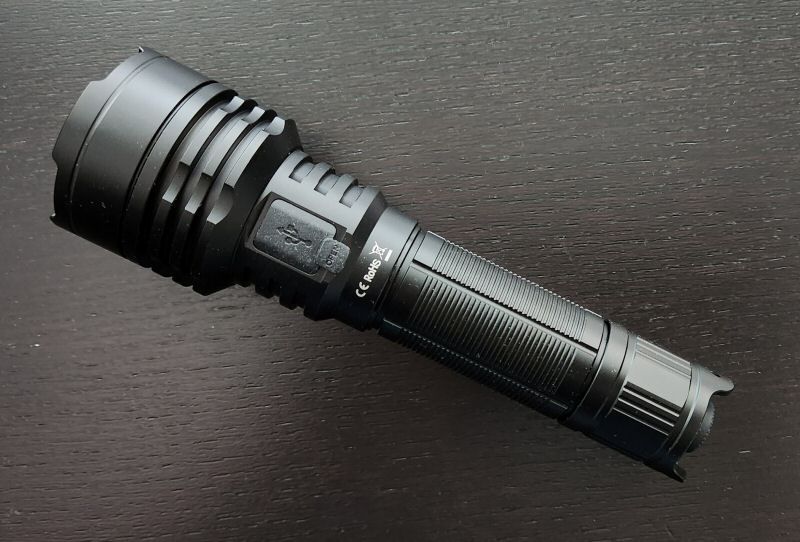
The P50R is a substantial light, of reasonable length for a high-output 4x emitter model in the 21700 class. I find the light comfortable to hold and use.
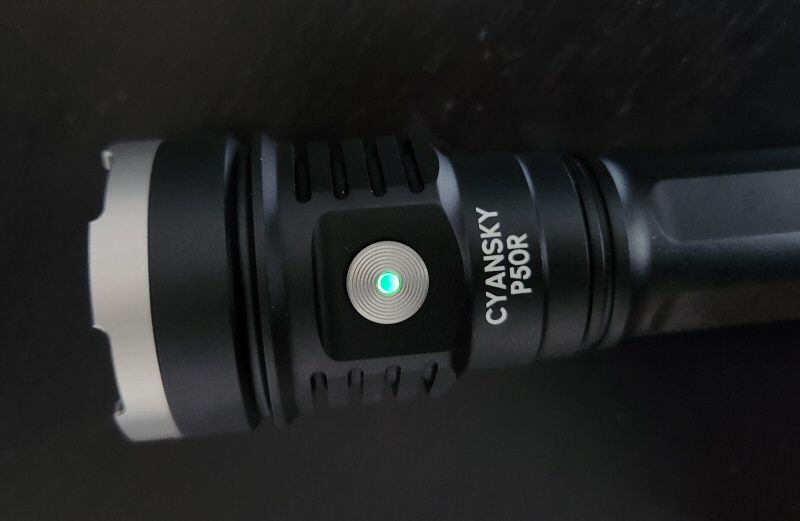
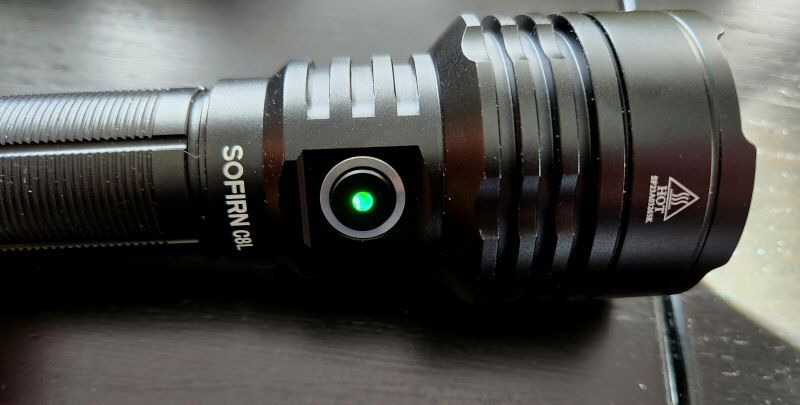
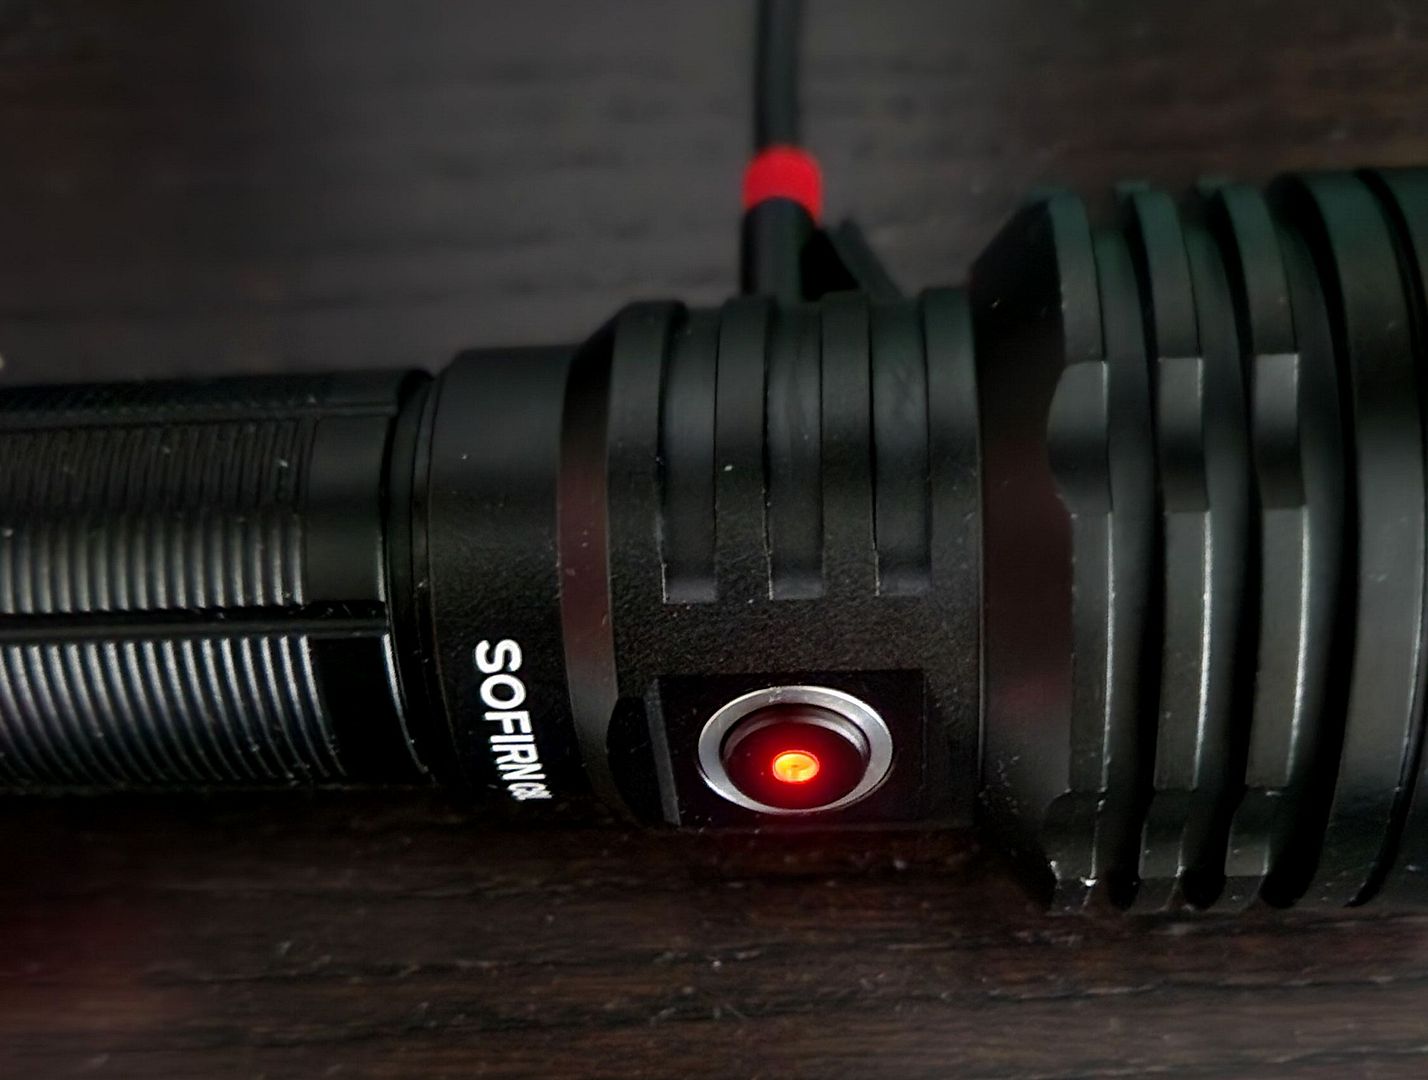
Just like the P25, there is a raised side-mounted electronic switch on the side of the head, with red and green LEDs underneath to show battery charge status. Feel and traverse of the electronic switch seems identical to the P25, and is very similar to a lot of modern lights.
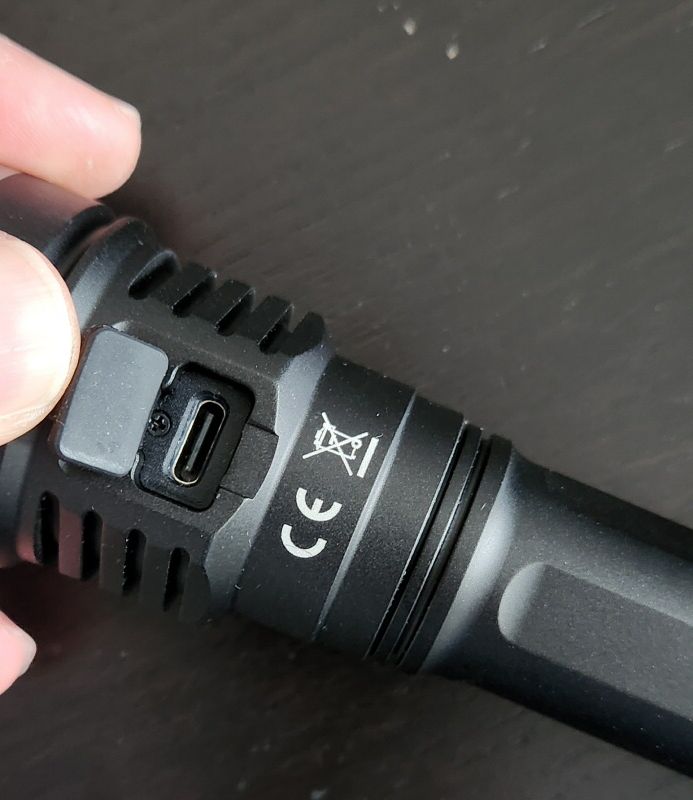
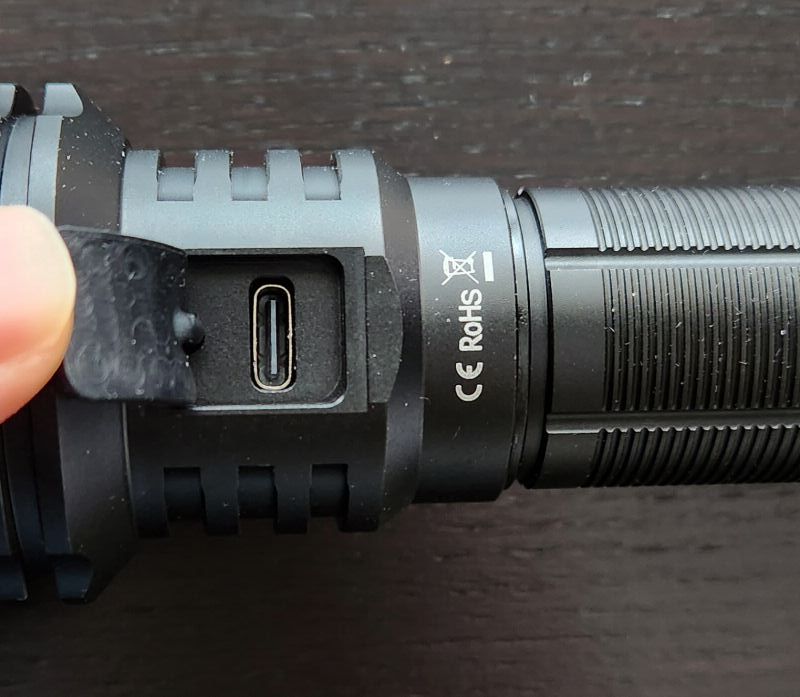
There is in-light USB charging through a port on the head, on the other side from the switch. The rubber dust cover fits pretty well – I expected waterproofness to be decent for this design of light (i.e., splashable, but not dunkable).
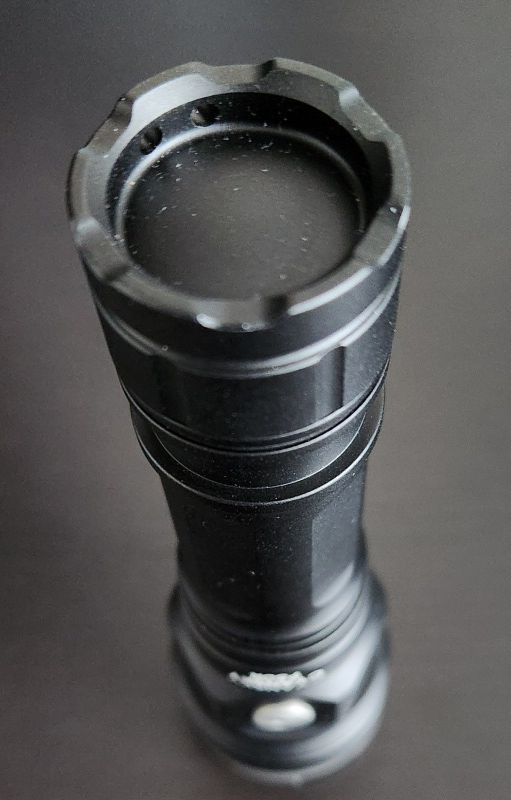
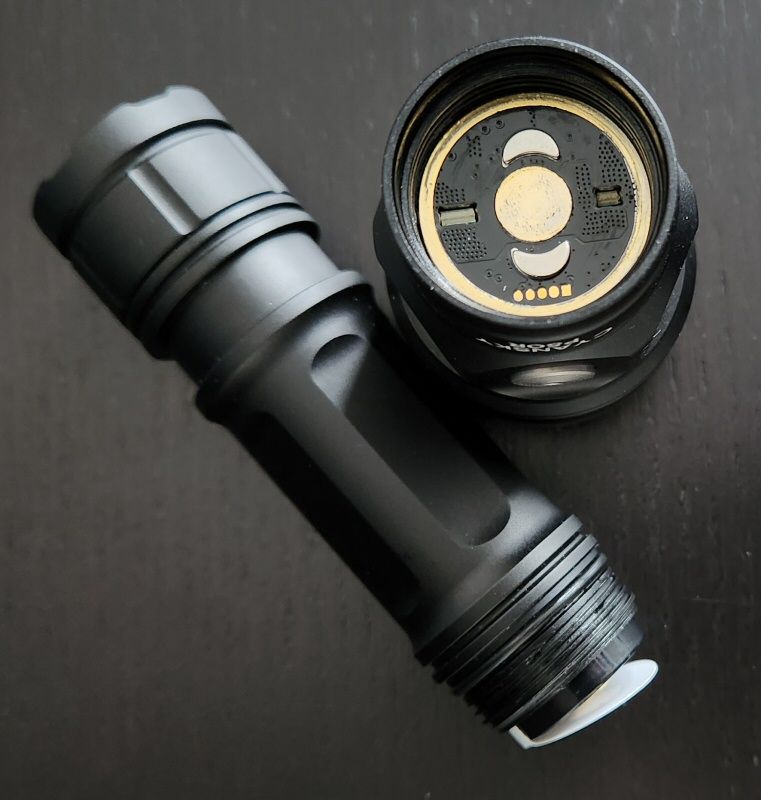
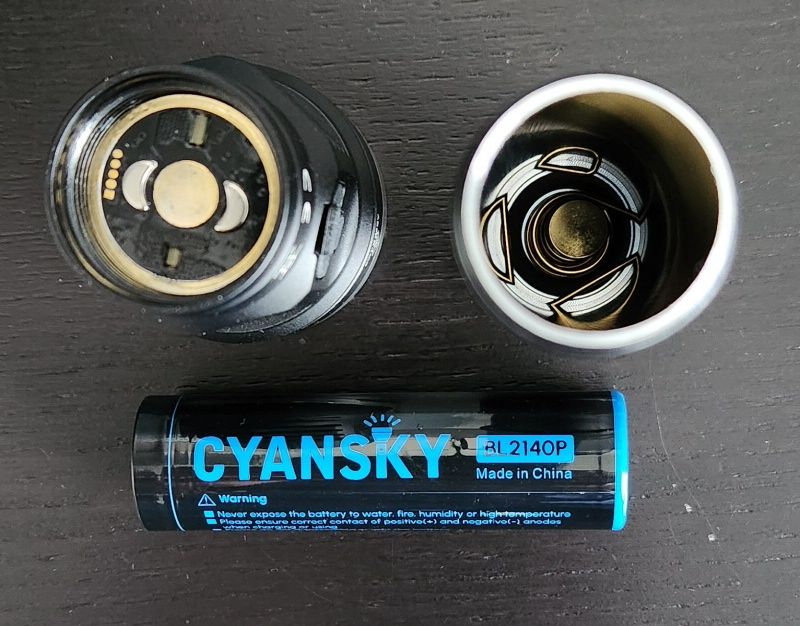
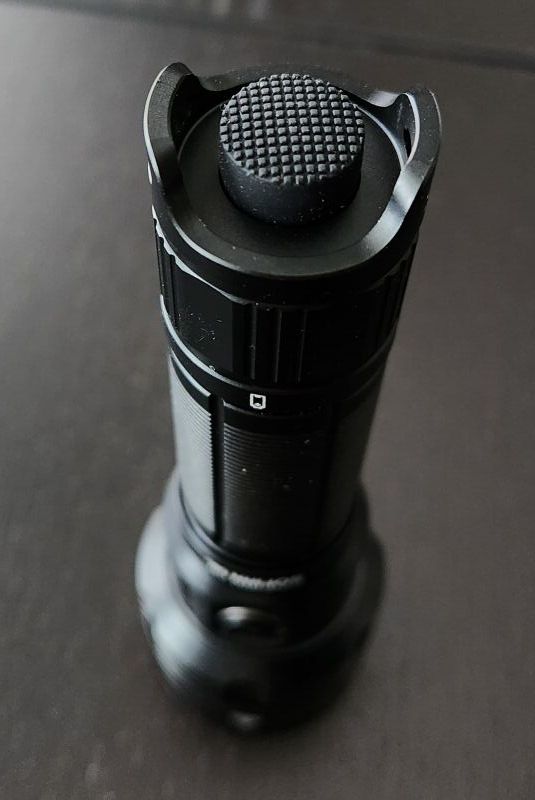
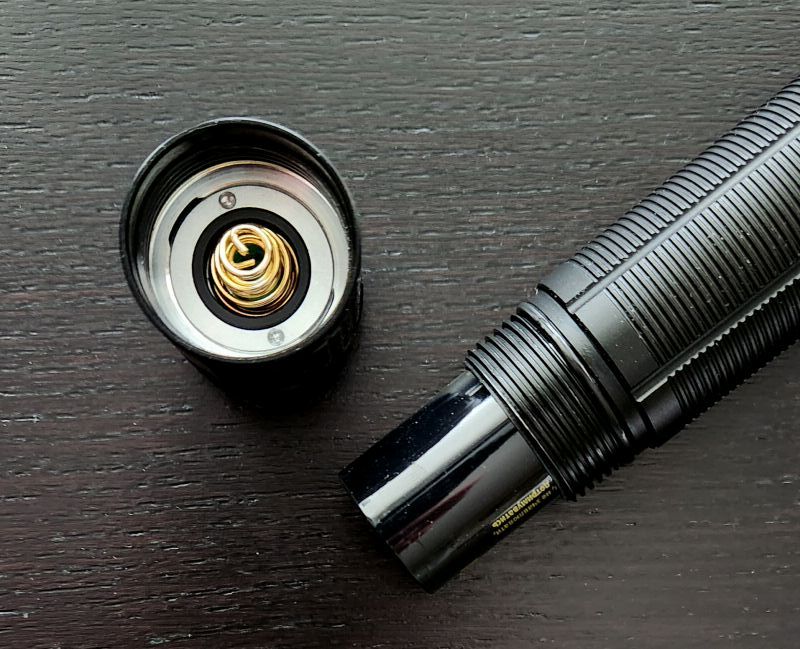
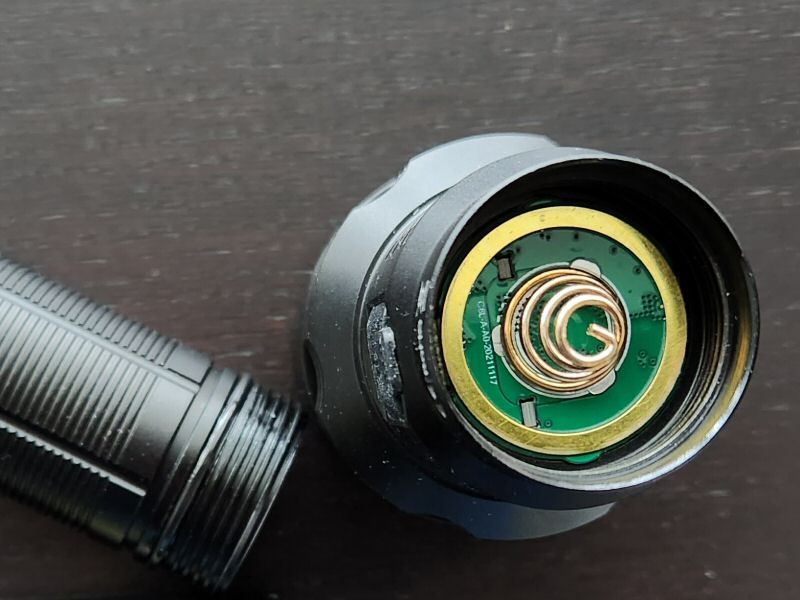
The tailcap has a little bit of ridge detail, but still allows for tailstanding stably. It has the wrist lanyard attachment point on the side. Inside, the body tube base spring has a large flat disc that makes contact with the battery (presumably to help with good current flow, given the high-drain nature of the light). I like seeing this design, as other makers of high-drain lights sometime opt for dense springs that can scratch or damage the cell.
Body tube threads are square-cut and anodized, with good feel. Thanks to the anodized tailcap threads, you can easily lock-out this light by a simple twist of the head.
There is no real knurling on the light, but there are a number of cut-outs to help with grip. The slightly raised side switch on a square cut-out helps limit the ability of the light to roll somewhat – but the pocket clip is particularly recommended in that regard.
My sample came with black anodizing, but other colours are available (e.g., like the green on my P25). Anodizing looks to be good quality (for presumed type II, given the colour range). I would describe the finish as matte.
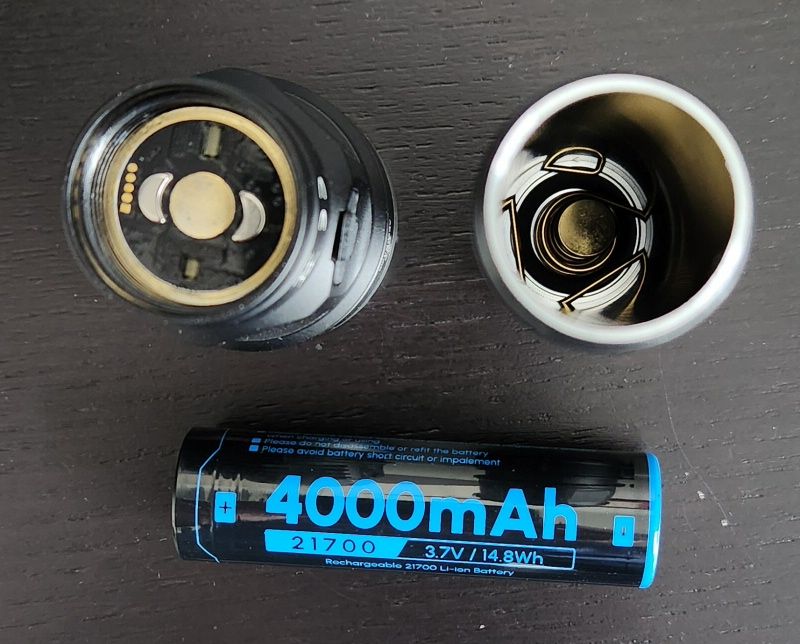
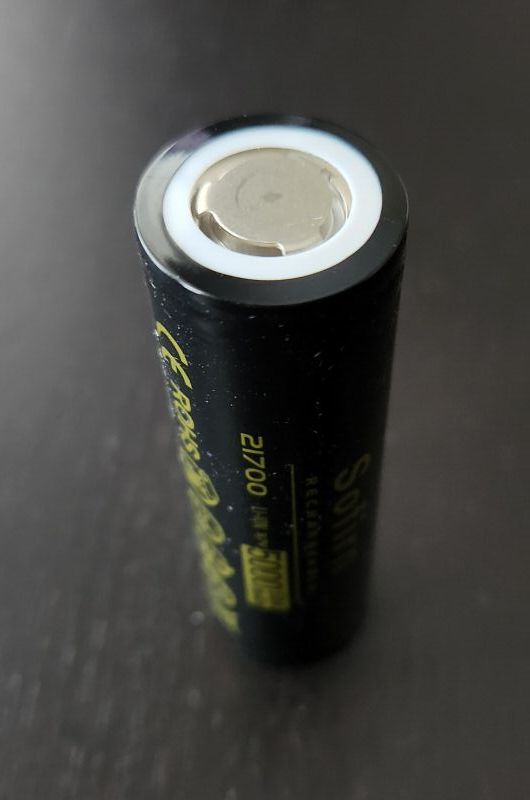
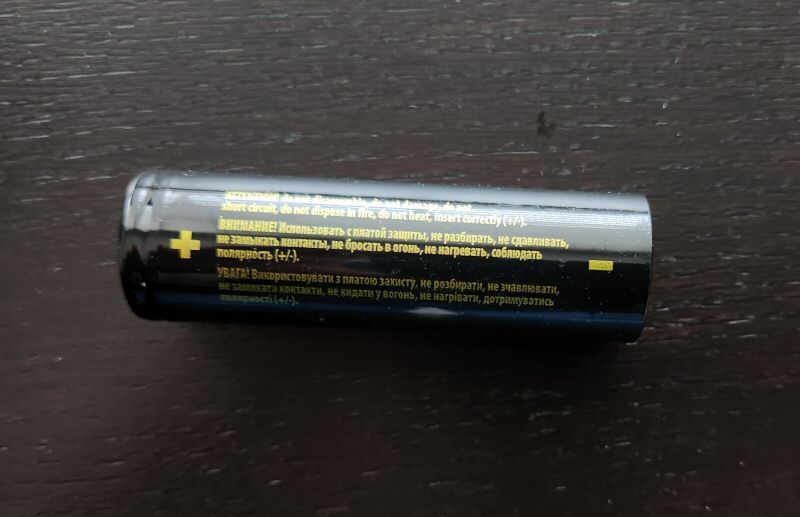
Inside, the light comes with a Cyansky-branded high drain 4000mAh 21700 battery, with a slightly raised button-top. There is a flat contact in the head of the light, along with a reverse polarity detection feature. I strongly recommend you stick with the high-drain cell, especially if you plan to run the light on the higher modes.
This is a solid and well-made light, with decent hand feel (although it could be grippier). It is a bit longer than most in this class, which is something to keep in mind.
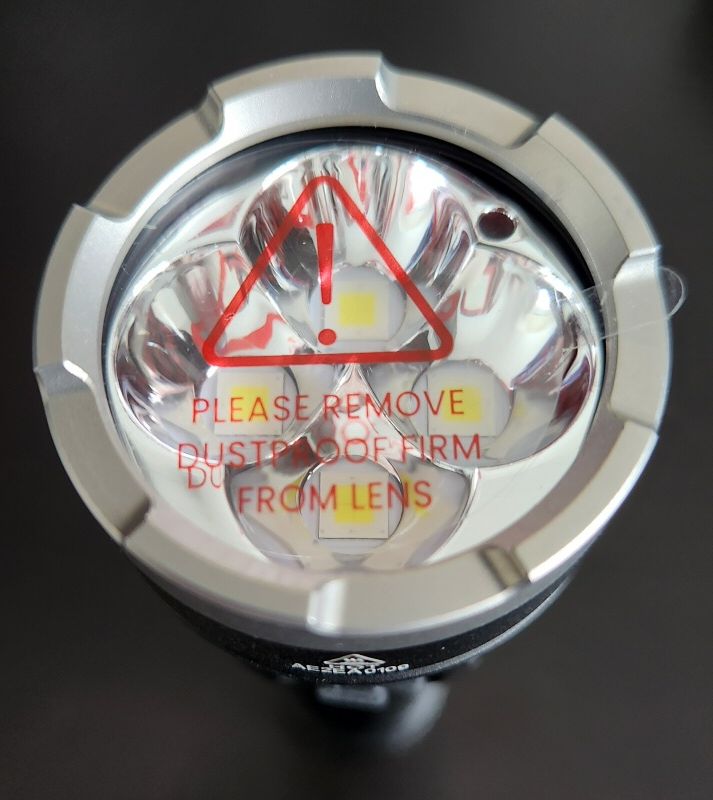
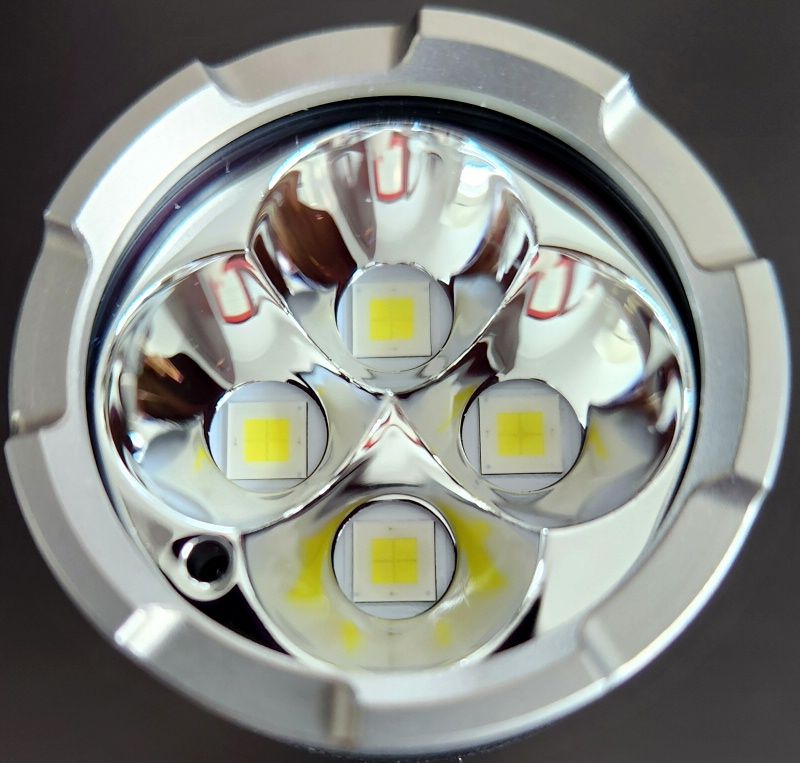
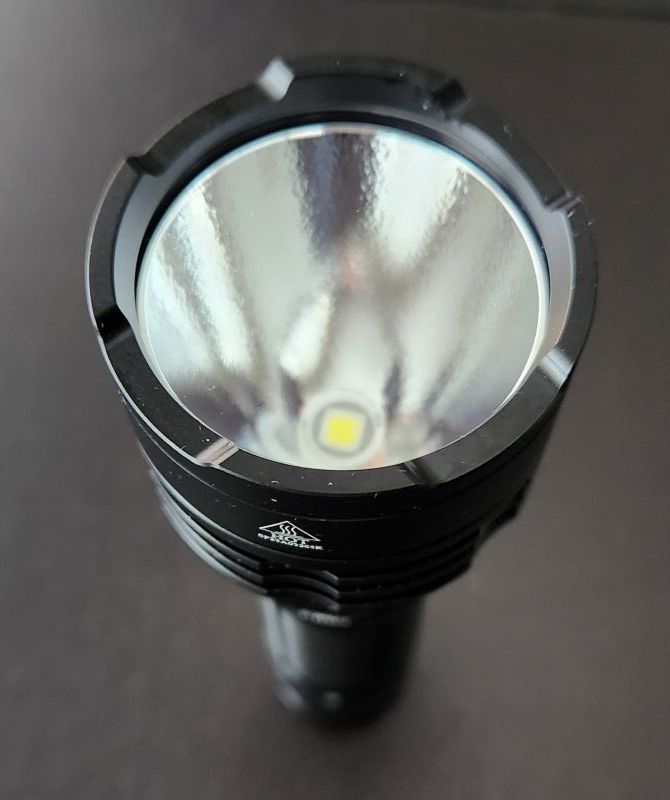
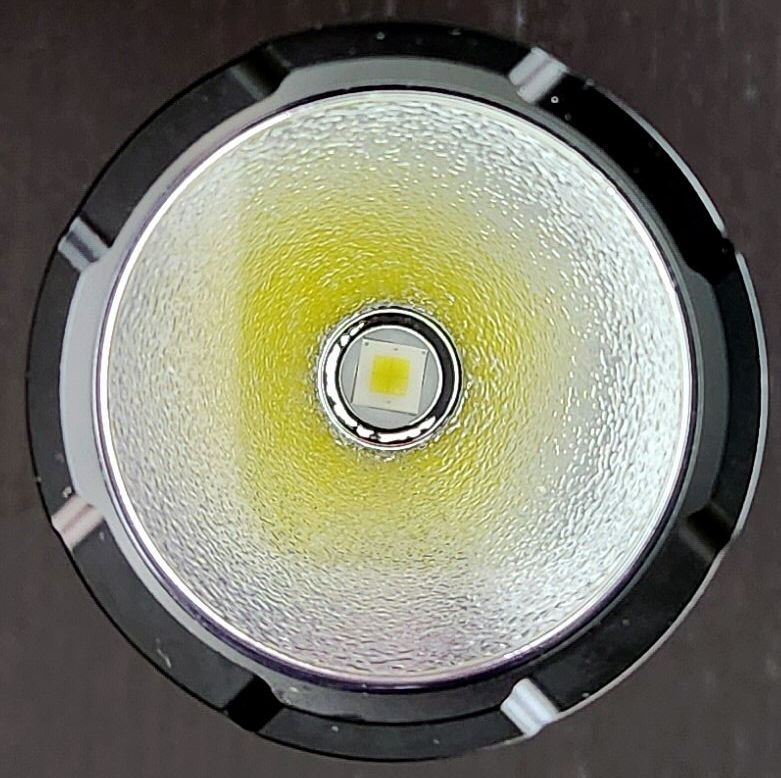
The P50R comes with a slightly crenelated stainless steel bezel, in bead-blasted finish (to help match with the rest of the light – a nice touch). The crenelations are mild enough that you can still tailstand stably, and are not likely to catch or rip on fabric. Light can headstand stably.
The lens is apparently hardened mineral glass and has a mild purplish anti-reflective coating. This should provide excellent light transmission.
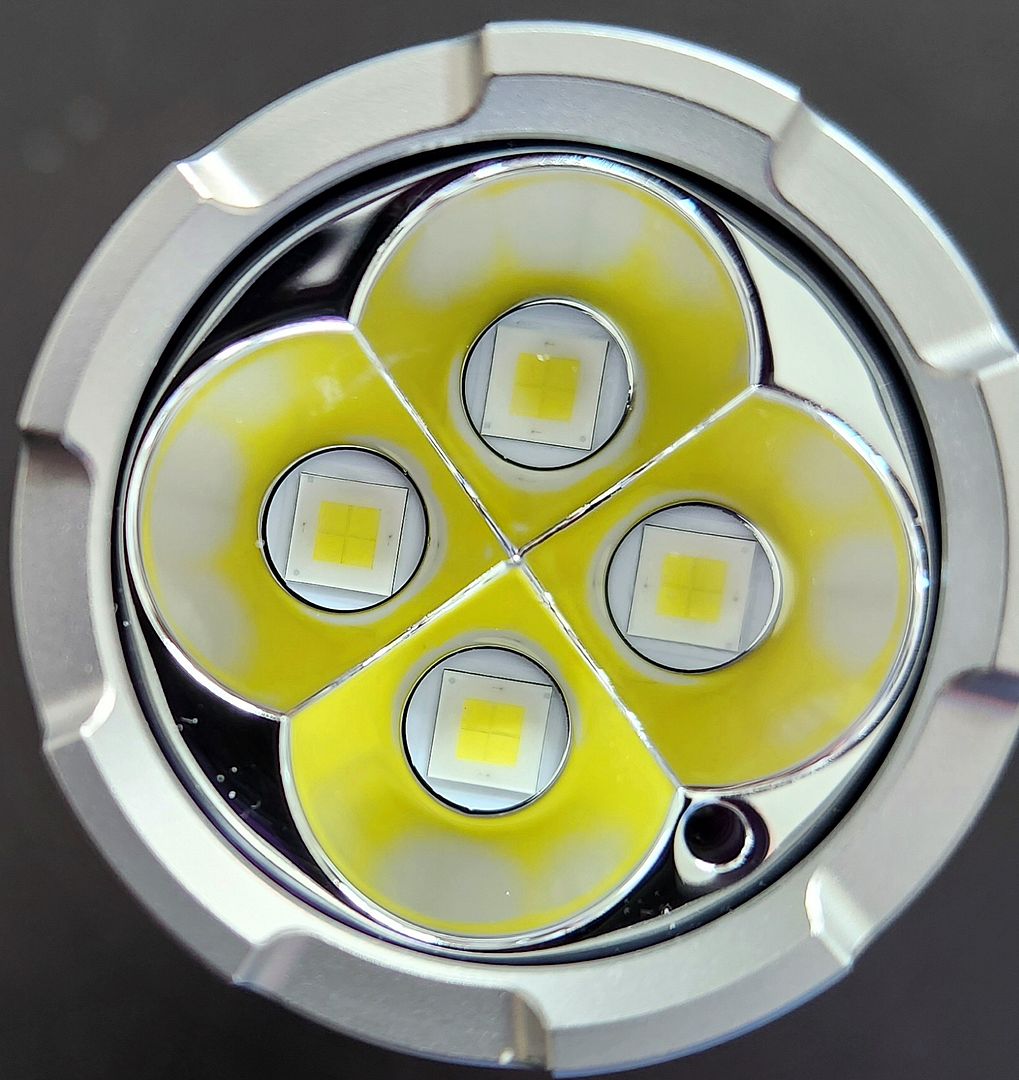
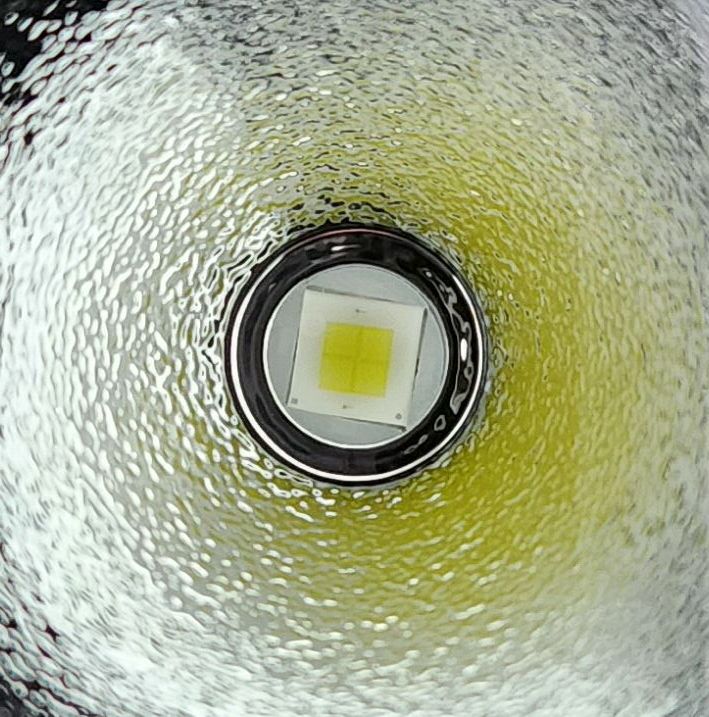
At the heart of this beast are four Cree XHP50.3 HI emitter. These appear to be the latest generation of the Cree 5050 build quad-die high-intensity domeless LEDs, so I expect a LOT less colour/tint variation than the early domed XHP50.2 HD emitters (seen in many of my earlier reviews of this class).
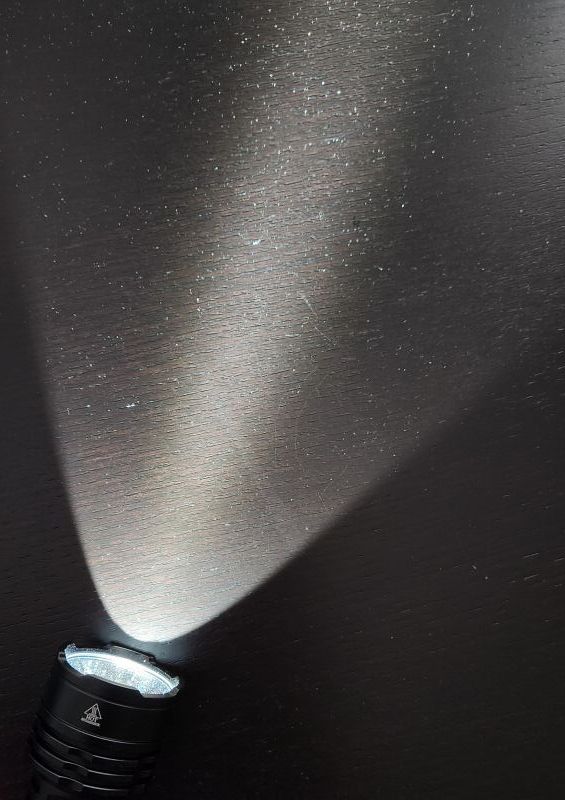
The multi-well reflector is smooth and relatively shallow. I would expect a nicely floody beam.
User Interface
Note: As mentioned above, Cyansky has completely updated the user interface with a revised selection of modes and a completely different mode selection method. This is a positive development in my view, as I am not a fan of the original UI of my first generation sample.
Given the UI on my preliminary sample has been abandoned, I will skip my usual detailed description and present the the illustrated image from the manual with some comments.
Preliminary model UI:
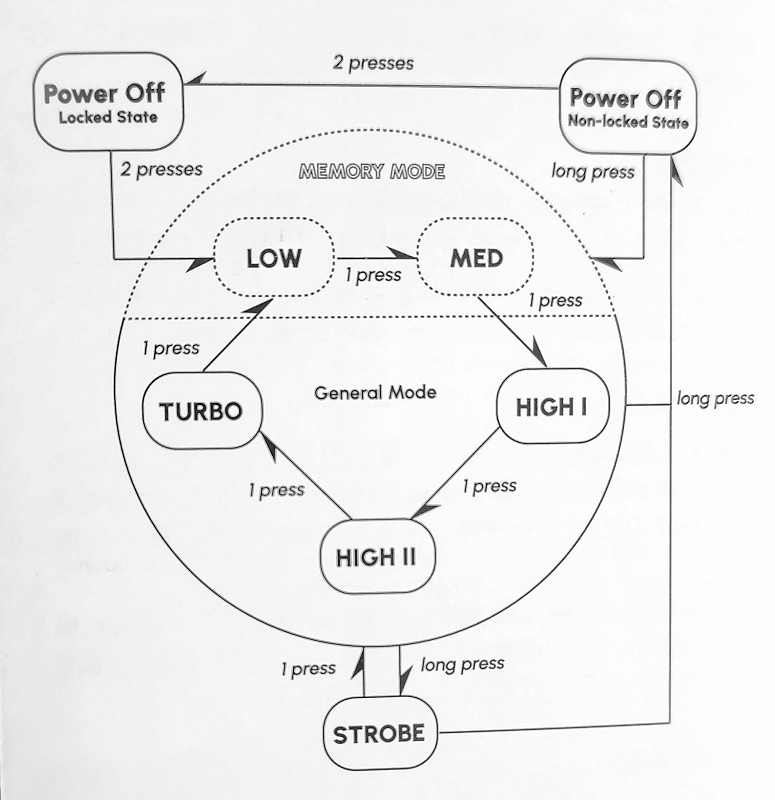
There are numerous issues with this now thankfully replaced interface. To start with, using clicks to advance modes and press-and-hold to turn On/Off is completely counter-intuitive given how almost every other modern light works (i.e., it is the reverse arrangement).
The press-and-hold (from either On or Off) had be released quickly – if you held for 2 secs you will wind up strobing yourself. And if the light enters the locked out state, you need to remember to double-click to turn on the light (which is completely inconsistent with the rest of interface and hard to remember). I particularly missed not being able to access Turbo by a double-click (like most lights do). I also found it odd to have a memory mode for only Lo and Med.
I am happy to report that the revised P50R UI on currently shipping lights works more as you would expect: Click to turn On/Off in memorized mode (everything but strobe and turbo), press-and-hold when Off for Eco mode, press-and-hold when On to advance modes, double-click for turbo, triple-click for strobe, etc.
You’ll have to check out other reviews to confirm the full details for the currently-shipping user interface, but this is very reassuring.
Circuit Measures
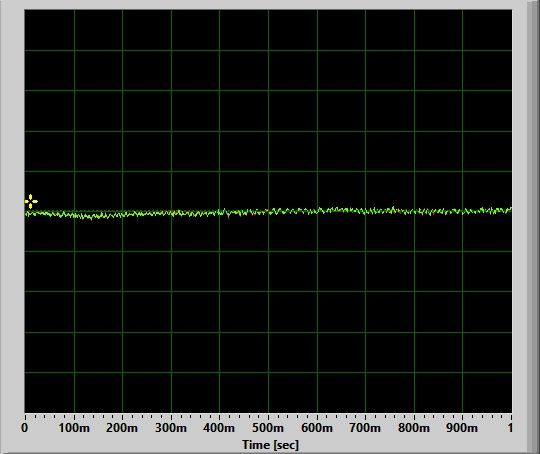
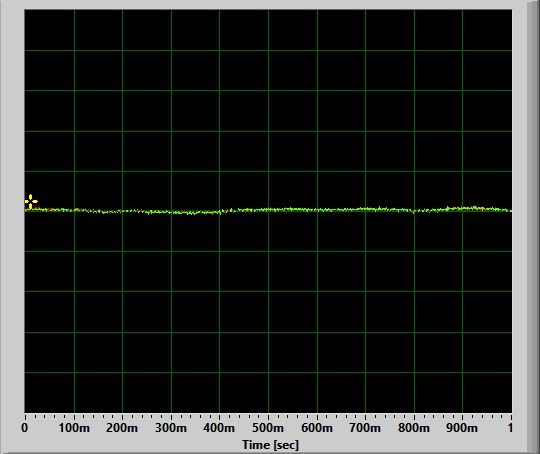
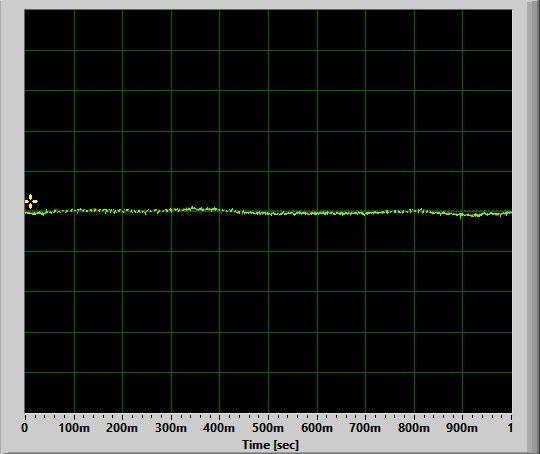
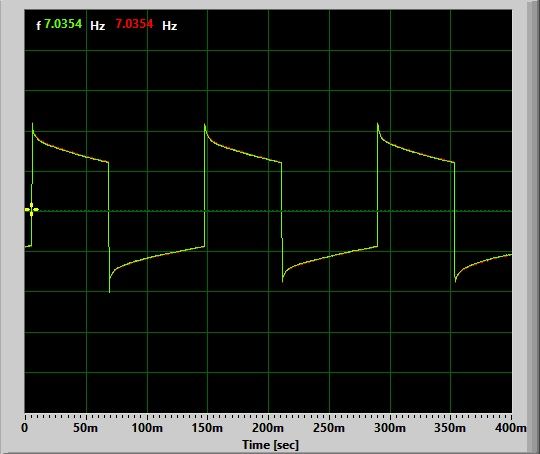
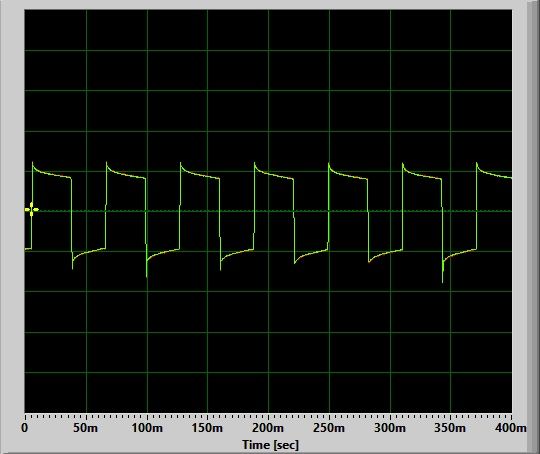
No Pulse-Width Modulation (PWM):
Lo:
Med:

High 1:
High 2:
Turbo:
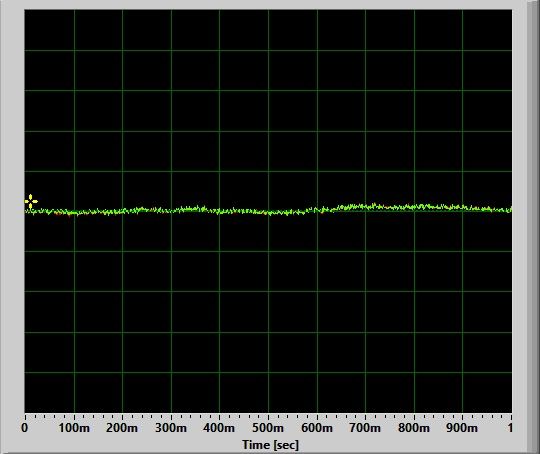
There is no sign of PWM, the circuit appears to be fully current-controlled. There is also no circuit noise on any level, which is always great to see. Note that circuit noise is not a problem per se, but I find that its absence (as in this case) bodes very well in terms of regulation and output/runtime efficiency. Scroll down to see actual results.
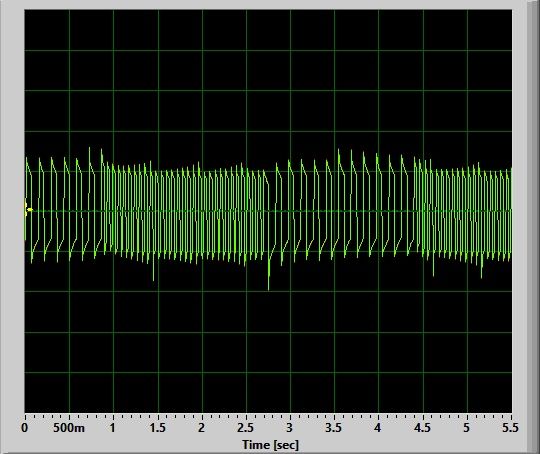
Strobes:
Strobe:
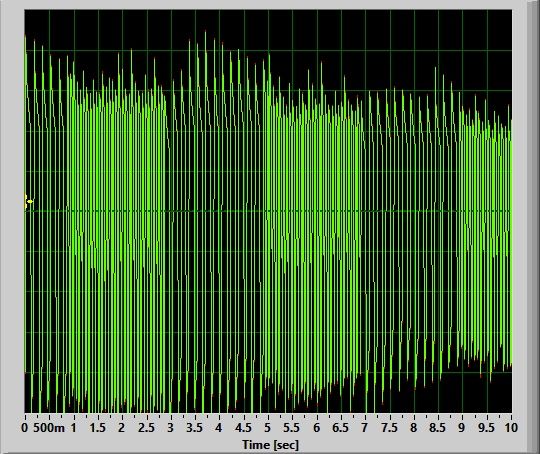
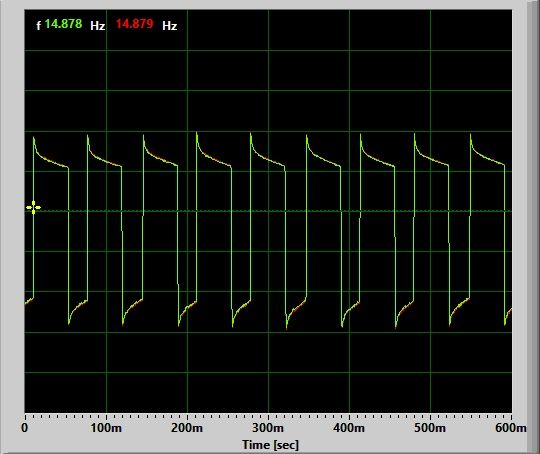
Strobe alternates between 8 Hz and 15 Hz every ~2 secs or so. Very disorienting and distracting.
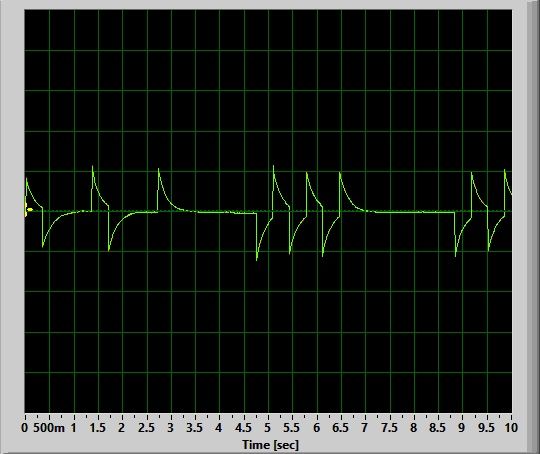
SOS:
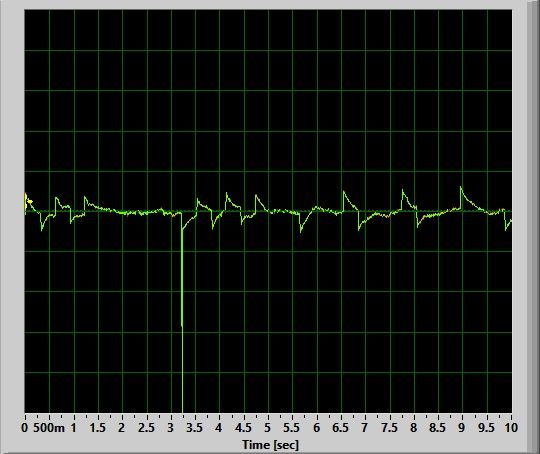
A standard SOS mode, relatively slow.
Charging:
There is a small LED in the switch which shows solid red when the light is charging. Changes to solid green when the charging is complete.
<3.0V Resting
>3.0V Resting
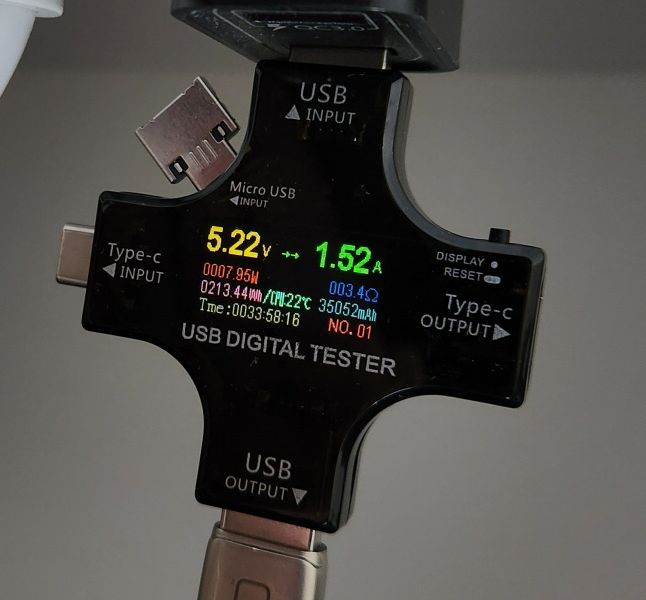
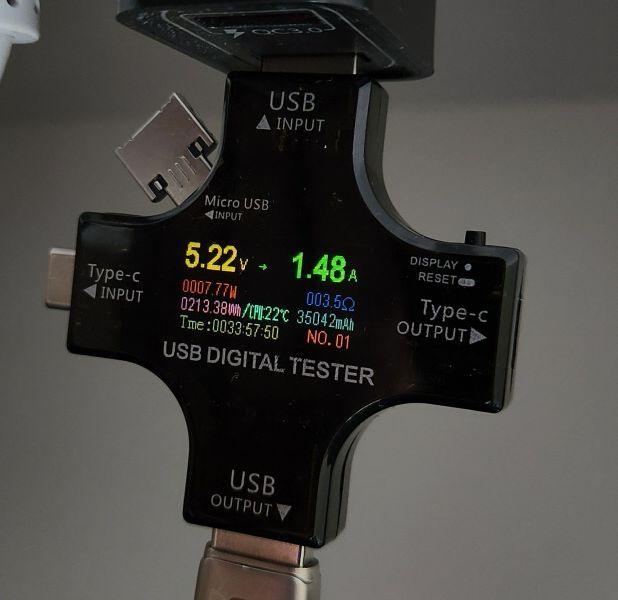
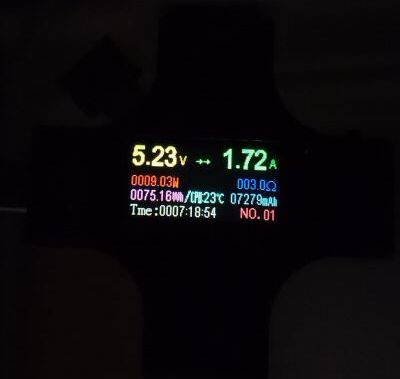
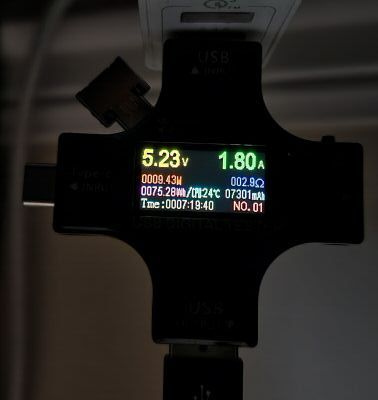
Even when heavily depleted the P50R starts charging at a relatively high current, ~1.5A. A lot of other modern lights start with slow ramp, but the P50R jumps right to it. This is a good charging rate, and will charge the cell relatively rapidly.
Standby / Parasitic Drain:
Due to electronic switch, there is bound to be a parasitic standby drain when the light is not in use. I measured it as 59uA, which is completely negligible – it would take nearly 8 years to fully drain the cell. Still, I recommend you store the light locked out at the tailcap when not in use, to prevent any risk of accidental activation.
Emitter Measures
In this section, I directly measure key emitter characteristics in terms of colour temperature, tint, and colour rendition. Please see my Emitter Measures page to learn more about what these terms mean, and how I am measuring them. As tint in particular can shift across levels, I typically stick with the highest stably regulated level for all my reported measures.
As explained on that page, since I am using an inexpensive uncalibrated device, you can only make relative comparisons across my reviews (i.e., don’t take these numbers as absolutely accurate values, but as relatively consistent across lights in my testing).
P50R on Hi:
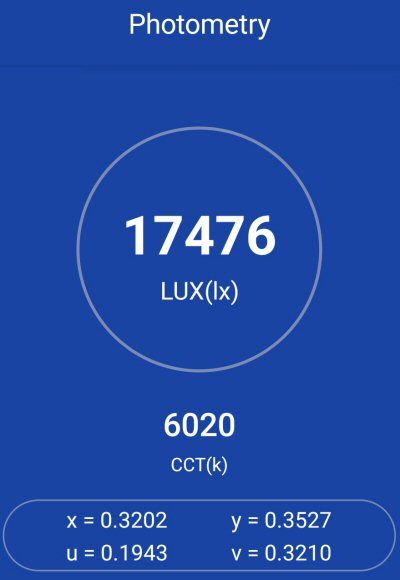
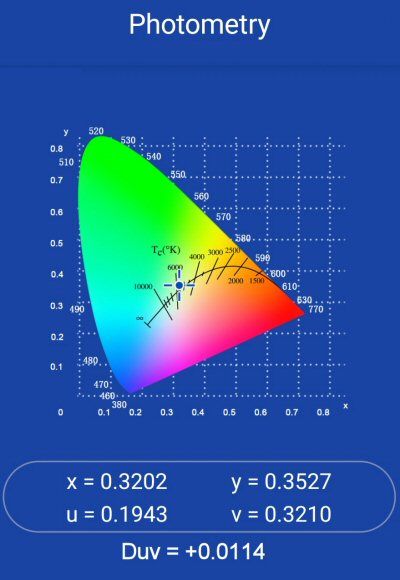
The key measures above are the colour temperature of ~6020K, and a small positive tint shift (+0.0114 Duv) to slightly greenish-yellow at this temperature. For CRI (Ra), I measured a combined score of 70.
These values are fairly typical for cool white XHP50.3 emitters in my testing, with a typical CRI level. I didn’t notice any significant chromatic aberrations across the beam profile.
Beamshots
All outdoor beamshots are taken on my Canon PowerShot S5 IS at f/2.7, 0.5 secs exposure, ISO 400, daylight white balance. The bend in the road is approximately 40 meters (~45 yards) from the camera. Learn more about my outdoor beamshots here (scroll down for the floody light position used in this review).
Click on any thumbnail image below to open a full size image in a new window. You can then easily compare beams by switching between tabs.
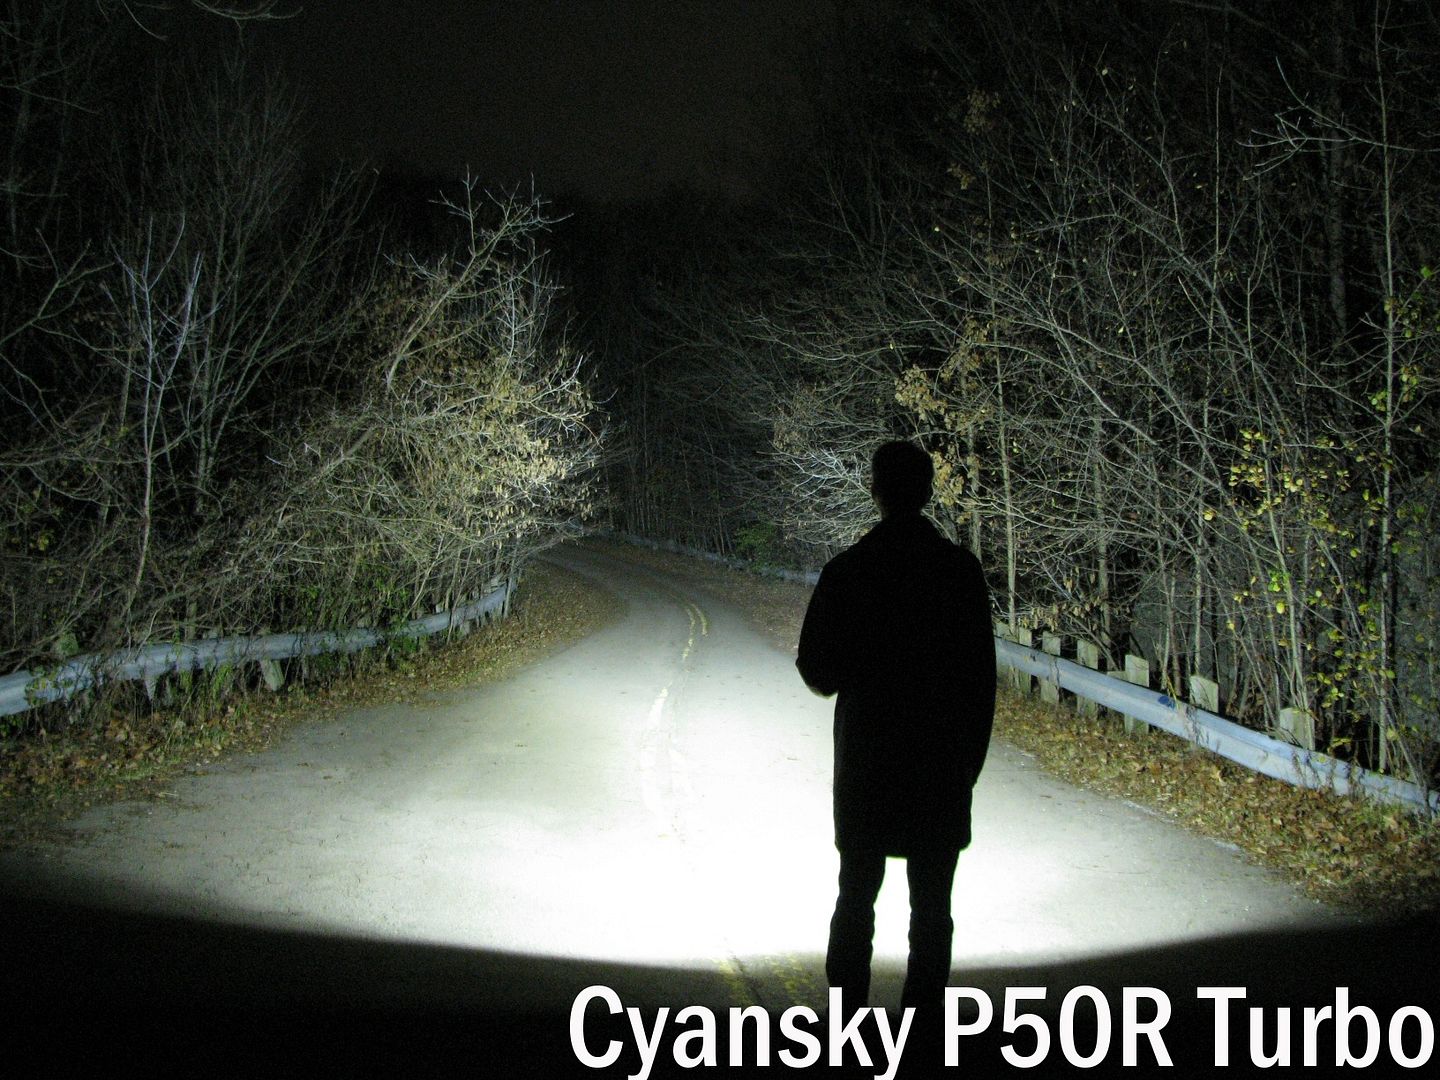
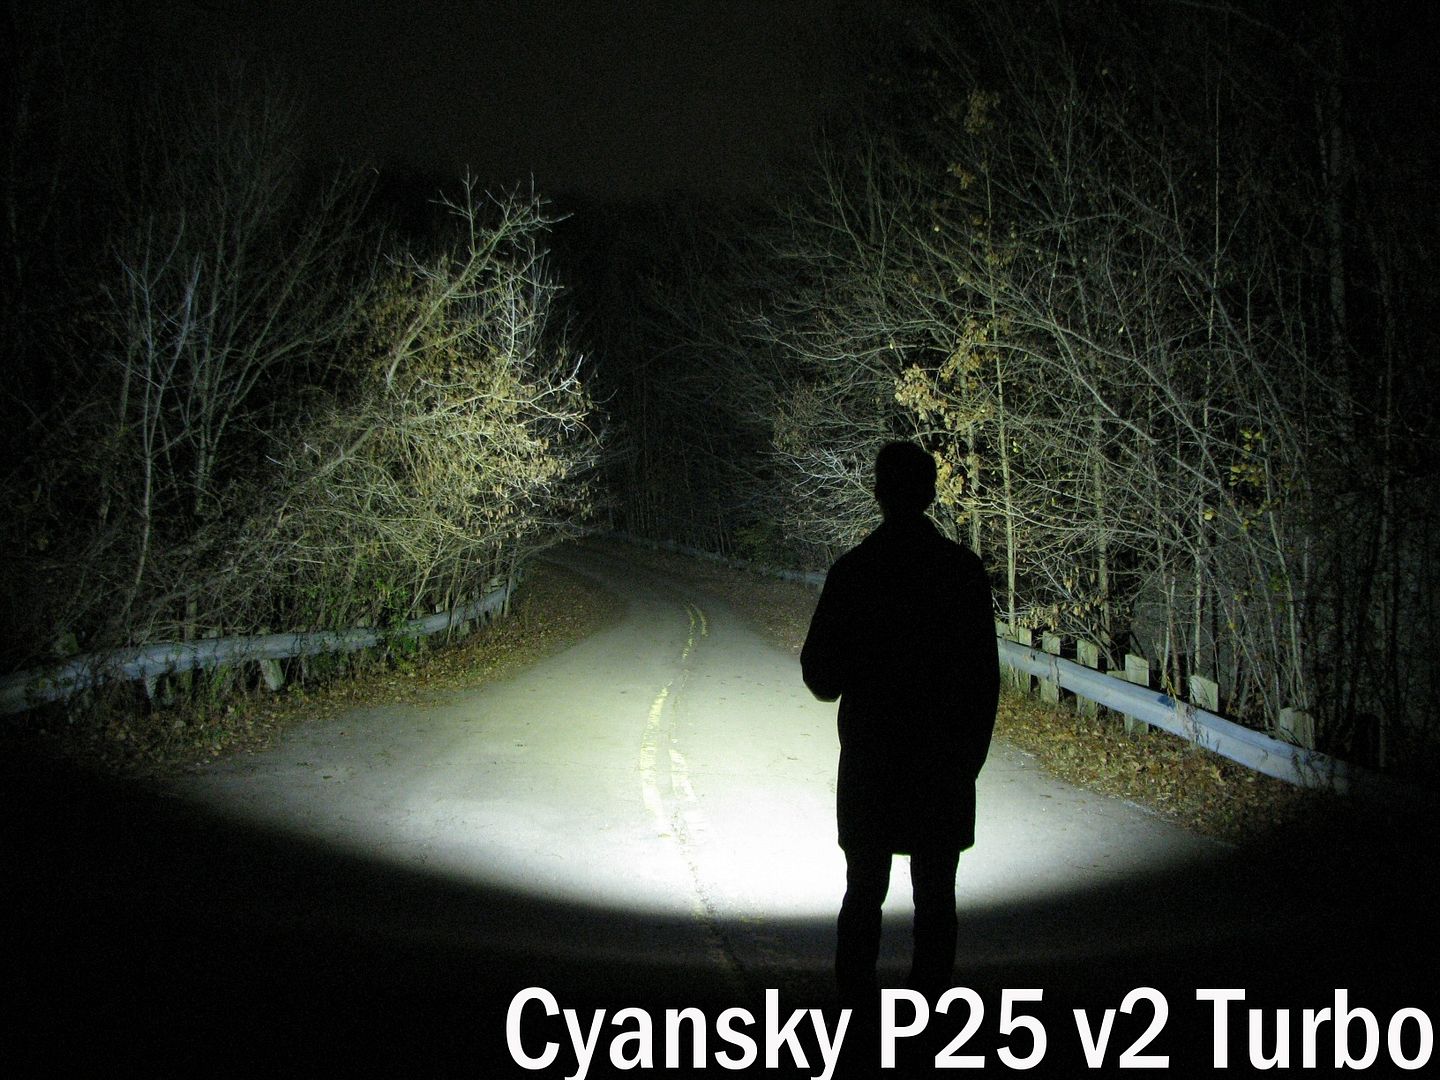
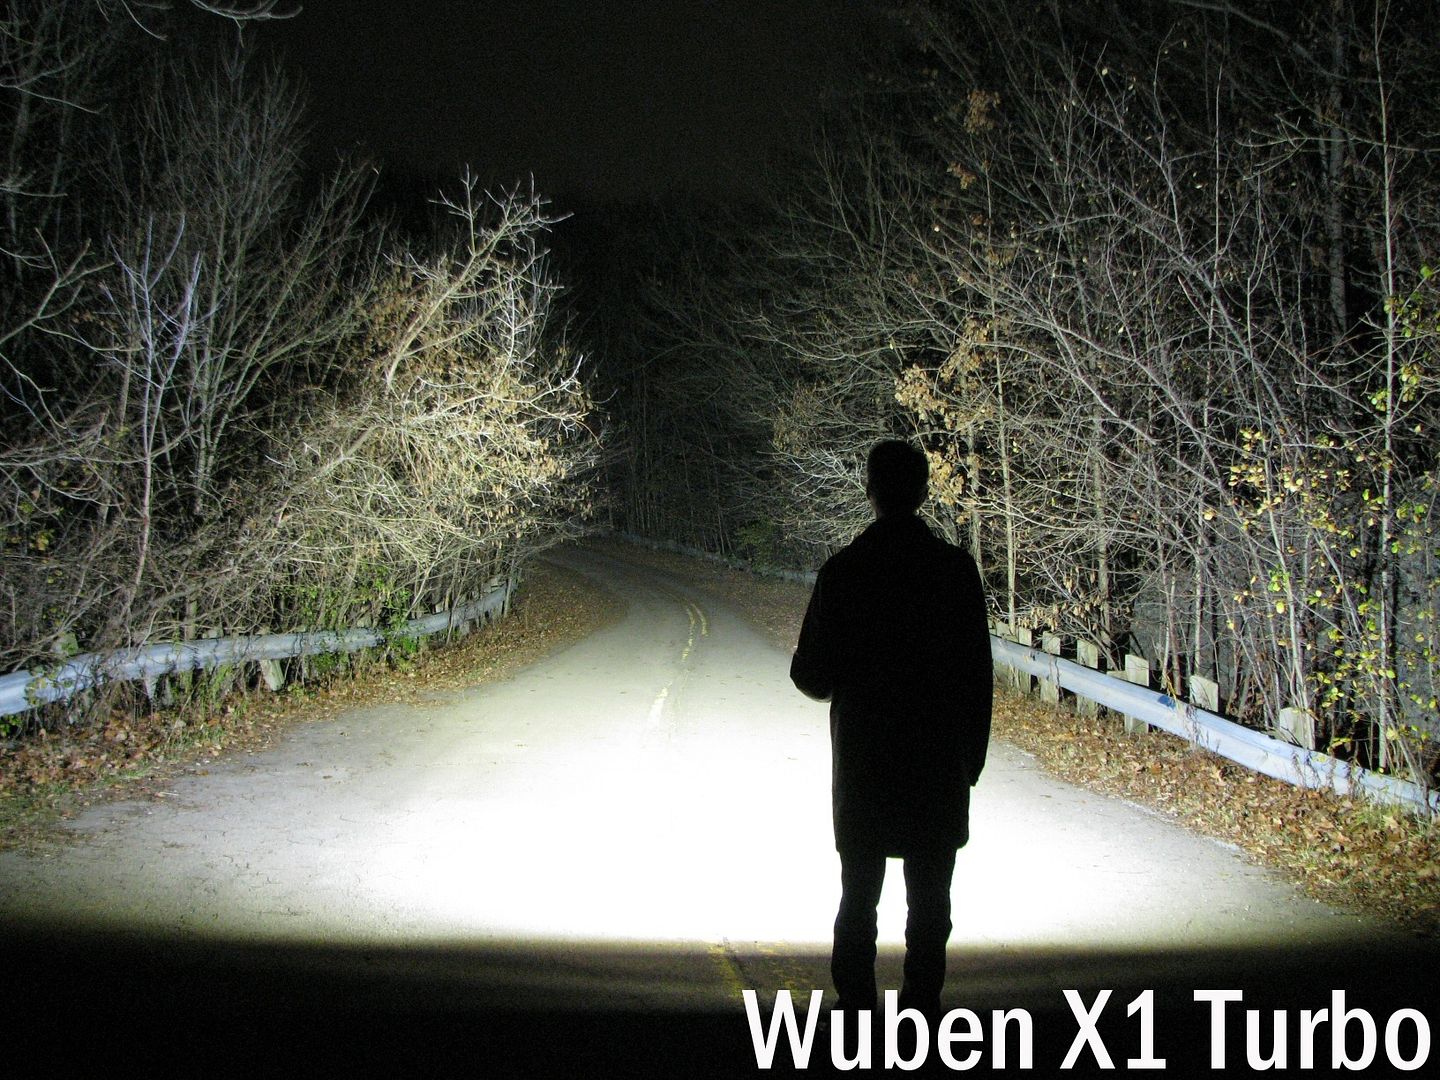
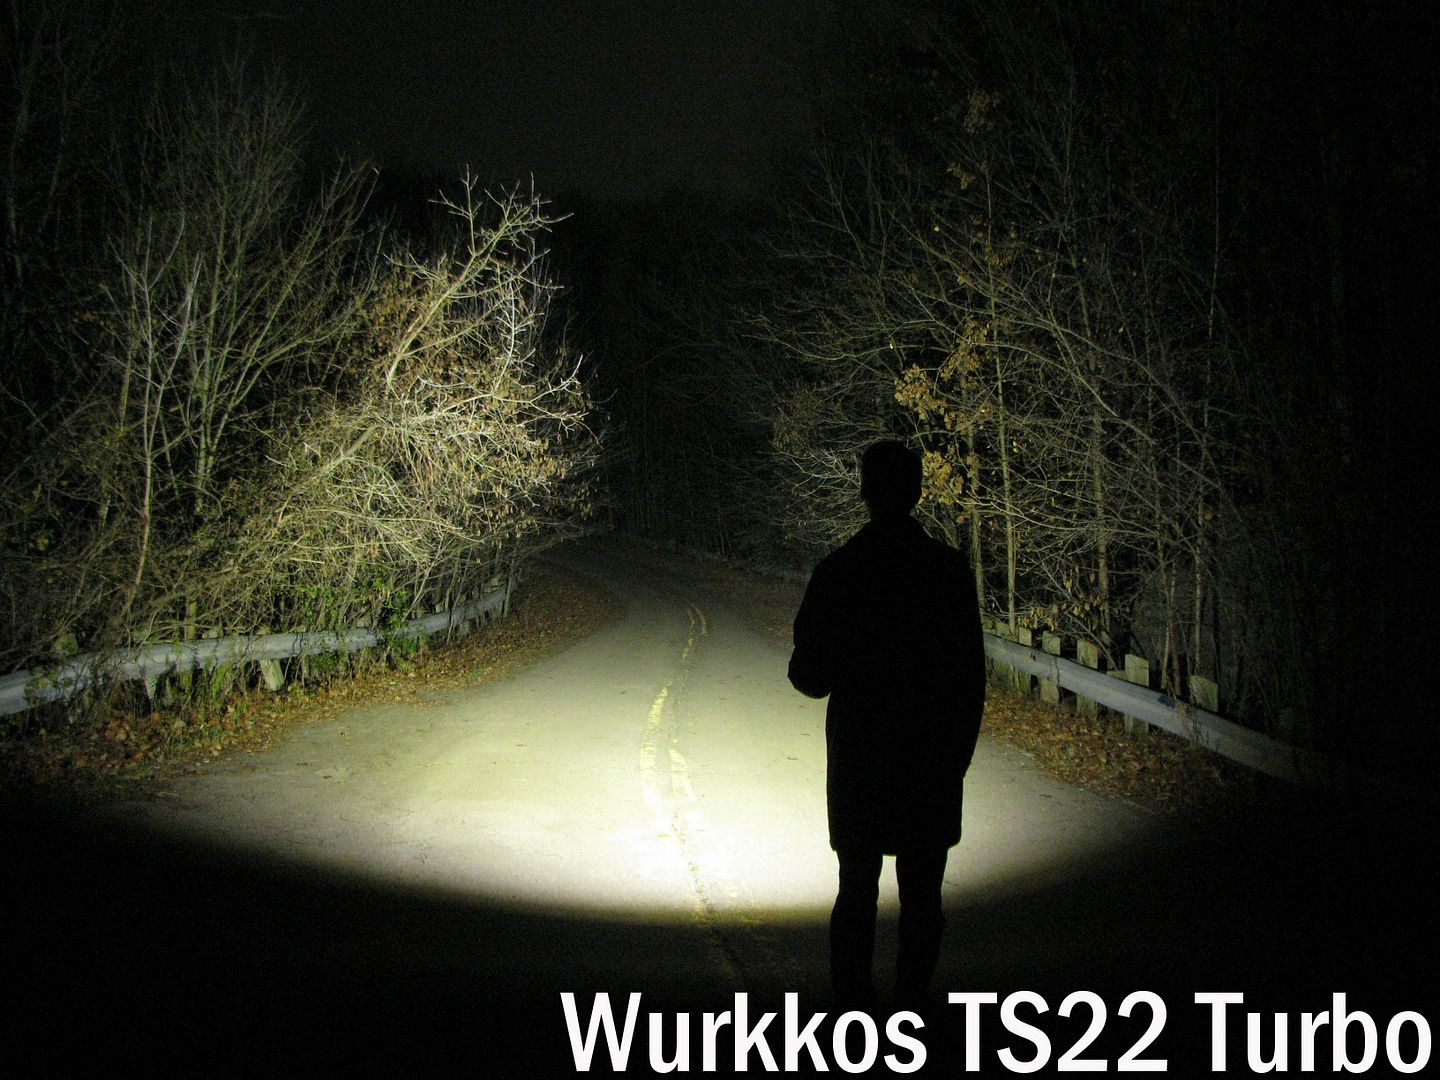
As you can see above, the P50R puts out a lot of light, with a wider and brighter spill thant then the single-emitter P25. It’s not quite as bright or wide a beam as the Wuben X1, but this is a good result for a multi-emitter light.
Testing Results
My summary tables are generally reported in a manner consistent with the ANSI FL-1 standard for flashlight testing. In addition to the links above, please see my output measures page for more background.
All my output numbers are based on my home-made lightbox setup. As explained on that methodology page, I have devised a method for converting my lightbox relative output values to estimated lumens. Note that my lightbox calibration runs higher than most hobbyists today, but I’ve kept it to remain consistent with my earlier reviews (when the base calibration standard was first established). On average though, I find my lumen estimates are ~20% higher than most other modern reviewers.
My Peak Intensity/Beam Distance are directly measured with a NIST-certified Extech EA31 lightmeter.
P50R Testing Results
| Mode | Spec Lumens | Estimated Lumens @0sec | Estimated Lumens @30 secs | Beam Intensity @0sec | Beam Intensity @30secs | Beam Distance @30secs | PWM/Strobe Freq | Noise Freq | Charging Current <3V | Charging Current >3V | Parasitic Drain | Weight w/o Battery | Weight with Battery | CCT (K) | Duv | CRI |
|---|---|---|---|---|---|---|---|---|---|---|---|---|---|---|---|---|
| Eco | 5 | 10 | 10 | - | - | - | No | No | 0.13 A | 1.20 A | No | 99 g | 171 g | - | - | - |
| Low | 50 | 60 | 60 | - | - | - | No | No | 0.13 A | 1.20 A | No | 99 g | 171 g | - | - | - |
| Med | 200 | 255 | 250 | - | - | - | No | No | 0.13 A | 1.20 A | No | 99 g | 171 g | - | - | - |
| High | 800 | 940 | 940 | - | - | - | No | No | 0.13 A | 1.20 A | No | 99 g | 171 g | 5,530 | 0.0103 | 69 |
| Turbo | 3,600 | 4,450 | 4,300 | 14,300 cd | 13,800 cd | 235 m | No | No | 0.13 A | 1.20 A | No | 99 g | 171 g | - | - | - |
| Strobe | 1,600 | - | - | - | - | - | 6-15 Hz | No | 0.13 A | 1.20 A | No | 99 g | 171 g | - | - | - |
| SOS | 200 | - | - | - | - | - | No | No | 0.13 A | 1.20 A | No | 99 g | 171 g | - | - | - |
The P50R does not live up to its rated 12,000 lumen max output spec – not by a long shot (note again that my lightbox calibration is on the generous side). That said, the Med and the two Hi modes actually seem to be brighter than the specs indicate.
My NIST-calibrated luxmeter is accurately calibrated to an absolute standard, and similarly reports much lower beam intensity on Turbo compared to the specs.
To view and download full testing results for all modern lights in my testing, check out my Database page.
Runtimes
Note: Given the new user interface of the currently shipping light, I can’t guarantee that output levels are comparable. But I would expect overall output/runtime efficiency to be unchanged.
As always, my runtimes are done under a small cooling fan, for safety and consistency. To learn more about how to interpret runtime graphs, see my runtimes methodology page. Note that on average, my lightbox’s calibration seems to be ~20% higher than most modern reviewers.
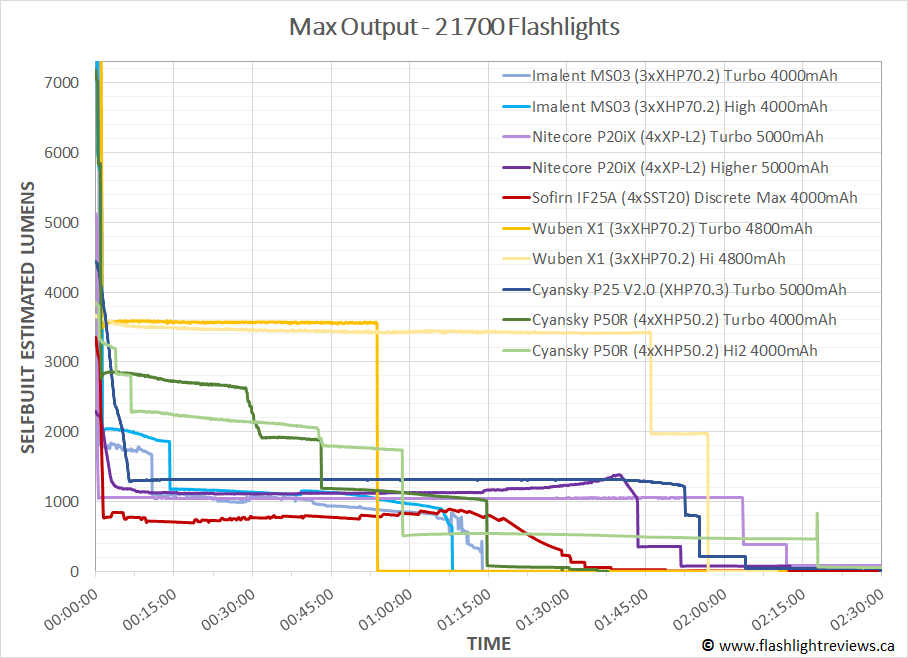

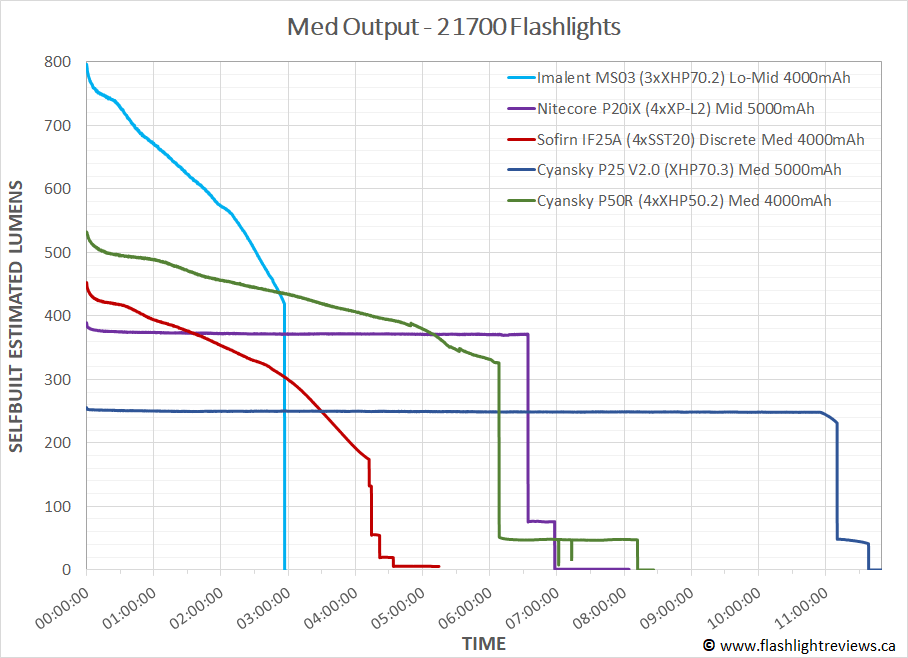
Performance is quite decent for a 4000 mAh cell – overall output/runtime efficiency seems very good (note that the X1 above is a 2×21700 light). That said, the regulation pattern is not flat-stabilized like some of the higher-end lights – you see a more typical direct-drive pattern here, like the Imalent and Sofirn lights.
That said, the light does have a step-down pattern over the course of the runs. Here is a blow-up of the first few hours of runtime on Hi1, Hi2 ans Turbo output:

Personally, I do not find the Turbo mode very useful here – you might as well stick with Hi2 for several minutes of high output before step-down. Or, the Hi1 level, for a more sustained high level.
Pros and Cons
| Pros | Cons |
|---|---|
| The light has a solid build, with a tactical forward clicky switch in the tail and a side electronic switch. | Lacks a moonlight mode or a beacon/signalling mode. |
| Circuit is fully voltage-regulated, with excellent output/runtime efficiency. | XHP70.3 HD cool white emitter produces high output, but no option for neutral/warm tint, high CRI, or greater throw. |
| The light has a serviceable user interface, comparable to other lights with this configuration. | More expensive than competing lights. |
| Good range of output levels, actually exceeding rated specs. | |
Overall Rating

Preliminary Conclusions
Overall, the P50R is an impressive showing from Cyansky – but only with the new revised user interface. If the light had continued with the original interface of the early sample tested here, it would have gotten a significantly reduced rating above. So please take the 4 stars in this review to reflect the currently shipping model.
It’s true that the P50R does not have the perfectly flat regulation of some of its competitors. But this is not something that you will notice in practice, and the choice of initial outputs and step-down levels (and their frequency) is good in my view. It makes the light far more practical and functional than some of the competition that chase initial output measures. Indeed, this is a light that I can see myself using in regular practice (e.g., I think it will serve as an admirable bike headlight).
The above being said, the reported output specs are way out of whack for the Hi2 and Turbo levels especially (and in opposite directions). Again, I actually find this functional and useful, but accuracy in marketing is important. I am also not sure if they have adjusted the performance along with the new UI in the currently shipping versions. As such, taken all together, I feel 4 stars is the highest I can go for this light (and again, that is with the reported revised UI).
This is the first time I’ve seen a light that uses multiples of the latest generation of low-profile XHP50.3 emitters, and I think it was a smart design choice. I am very impressed with quality of the beam – specifically, it’s lack of visual artifacts from the multi-well reflector and its relative lack of chromatic aberrations. This emitter choice has also likely contributed to the excellent output/runtime efficiency.
Ergonomics of the light are fine, in keeping with what you should expect for the feature set. Sure, there are more compact high-output lights out there, but you pay for that in terms of reduced heatsinking and dented batteries (the latter due to the robustness of contact needed for high-drain applications). Note again however that I haven’t tested the revised shipping version, so I don’t know if there have been additional changes here.
All said, this light is well worth your attention in the high-output 1×21700 class. It is not cheap though, so you are going to want to weigh your options carefully.
Acknowledgement
The P50R was supplied by Cyansky for review. As always, all opinions are my own and the light received the same rigourous and objective testing as all other lights that I have reviewed. At the time of review, this light retails for ~$135 USD (~$185 CDN) online.


_gqcpyHhAQFEUfdCdkfN1WV.jpg)
_dwN9eNAEDNm458XnsQY3a2.jpg)
_05.JPG)
_05_sT82YVKHUit9Y5nmYpDhrZ.JPG)
_05_6xufWKrQKnW4MEhtSH4zdz.JPG)
_05.JPG)
_05_3qpnSz17JCXCDo3FBwuk5N.JPG)
_05_konN9xoDtcwHtsox8aAfSt.JPG)