Emisar D1

The D1 is a high-quality Hank light built as a compact thrower, and running on a single 18650/18500/18350 battery. Features a wide range of customizable options, and uses the sophisticated Anduril user interface.
- Introduction
- Manufacturer Specifications
- Package Details
- Build
- User Interface
- Circuit Measures
- Emitter Measures
- Beamshots
- Testing Results
- Runtimes
- Pros and Cons
- Overall Rating
- Preliminary Conclusions
- Acknowledgement
Introduction
Following up on my inaugural Hank light, the multi-emitter Emisar D4K, I also purchased the popular 1×18650/18500/18350 pocket thrower model, the Emisar D1. Sorry it took me this long to get it, but life got in the way of my reviews for a few months.
As with other Hank offerings, there are a dizzying array of emitters to choose from, along with other customizable options. That is the point to all Hank lights – they are effectively custom-built, to your specifications, based on a wide range of options available for each build/model. That includes multiple options for the main emitter, auxillary/side emitters, circuits, body tubes, optics, accessories, etc. And as before, this light uses a newer implementation of the sophisticated Anduril user interface. Taken together, you can see how these lights are geared to the expert flashlight enthusiast market.
I will get into the specific options I chose below, but I opted for maximum throw here, to complement the very floody D4K previously reviewed. Let’s see how it performs in my testing.
Manufacturer Specifications
Note: as always, these are simply what the manufacturer provides (although in this case, specific to my custom specs). Scroll down to see my actual runtimes.
| Maker | Emisar |
|---|---|
| Model | D1 |
| Emitter | W1 Osram CSLNM1.TG |
| Tint | 6000 K |
| Max Output (Lumens) | 900 |
| Min Output (Lumens) | - |
| Max Runtime | - |
| Max Beam Intensity (cd) | 110,000 cd |
| Max Beam Distance (m) | 663 m |
| Constant Levels | 150 |
| Flashing | 6 |
| Battery | 1x18650 |
| Weight (w/o battery) | - |
| Weight (with battery) | 89 g |
| Length | 109 mm |
| Head Diameter | 35 mm |
| Body Diameter | 24 mm |
| Waterproof | IP67 1m |
| Waterproof | IP67 1m |
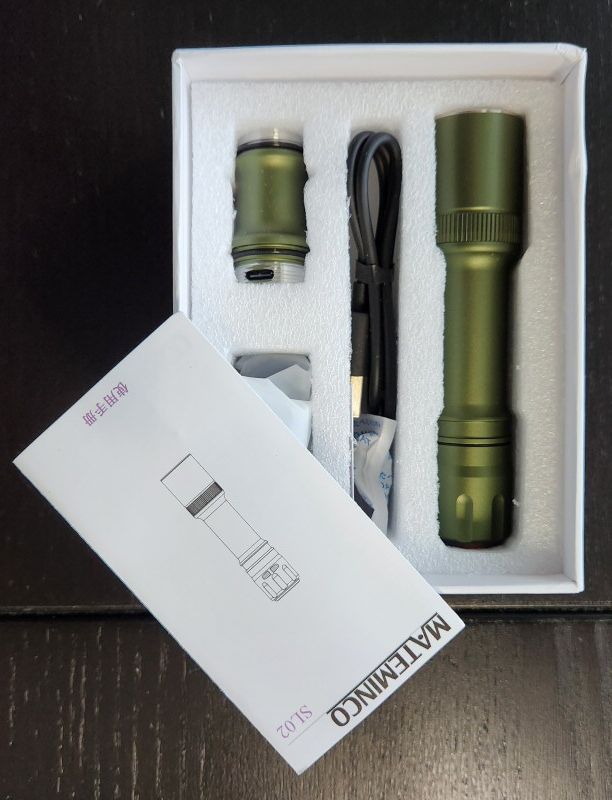
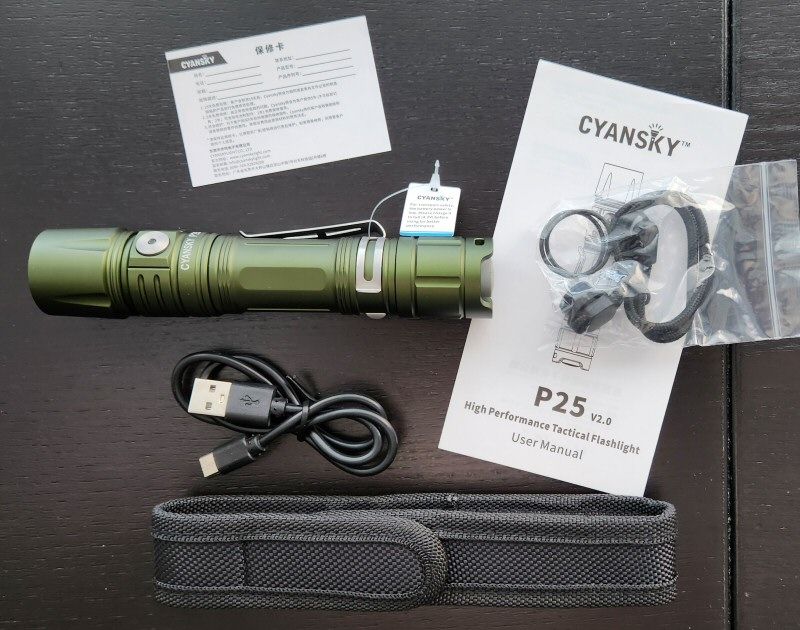
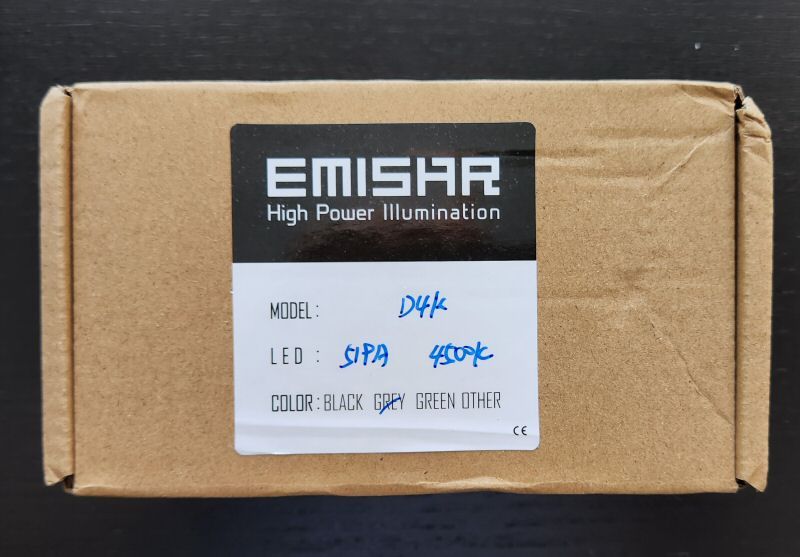
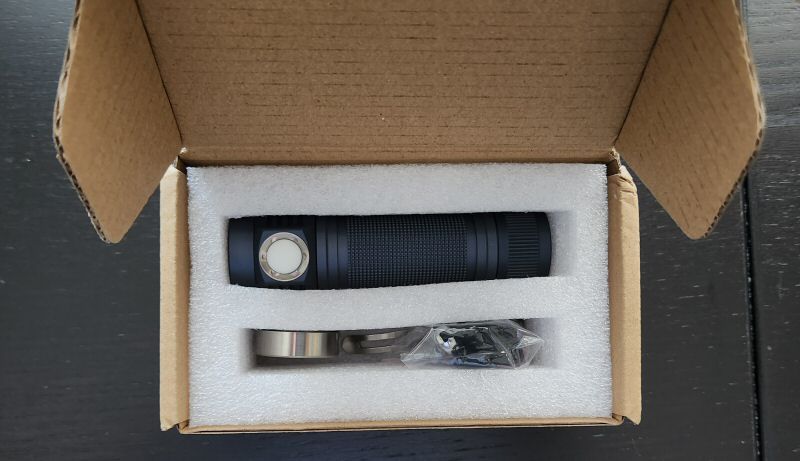
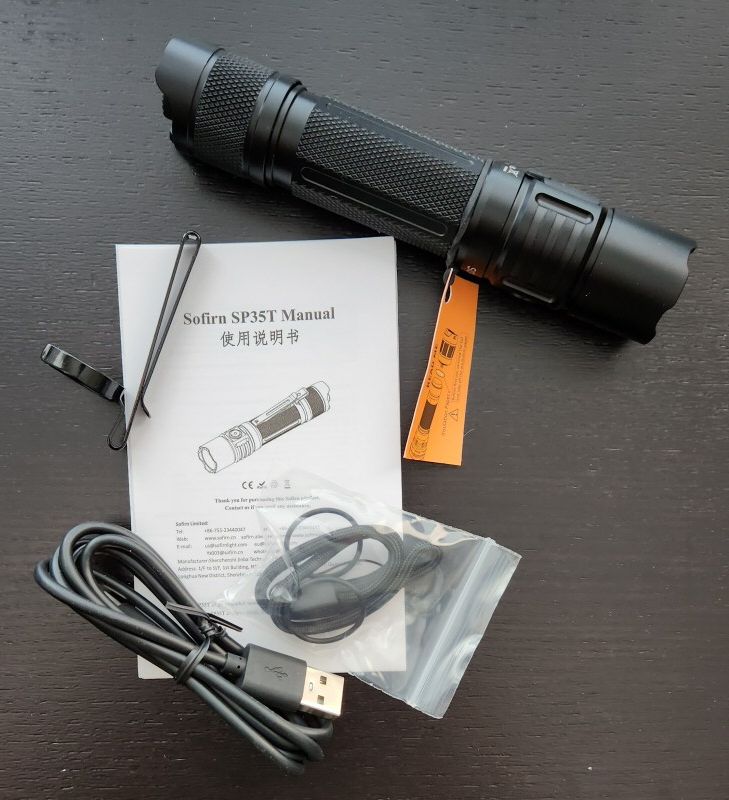
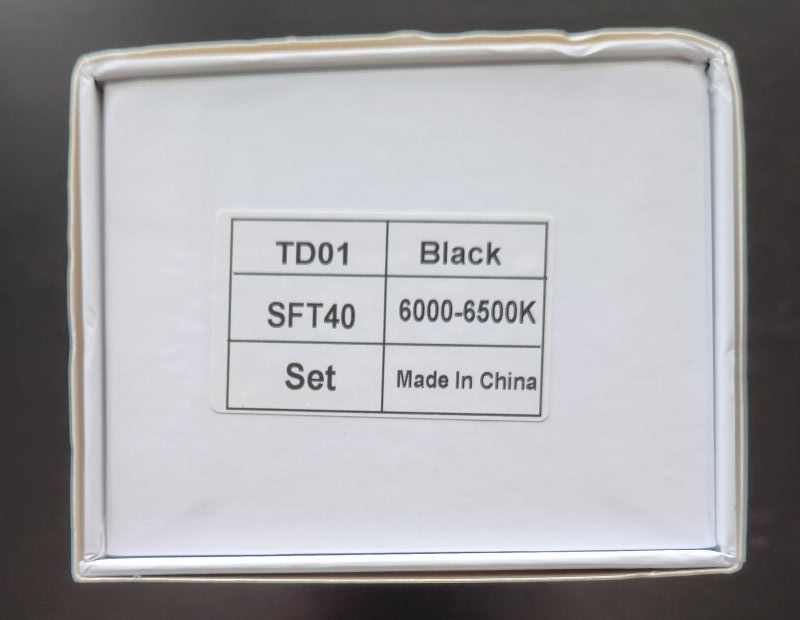
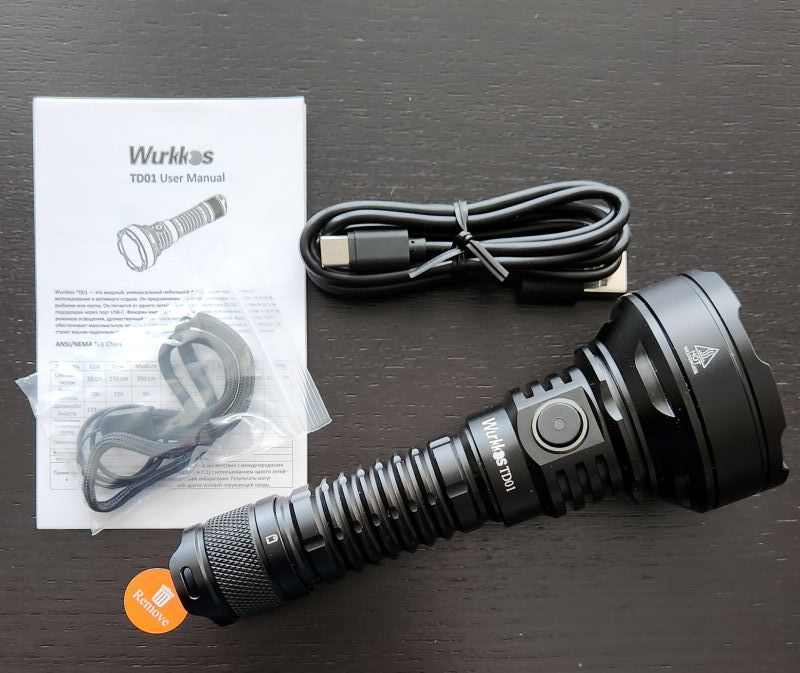
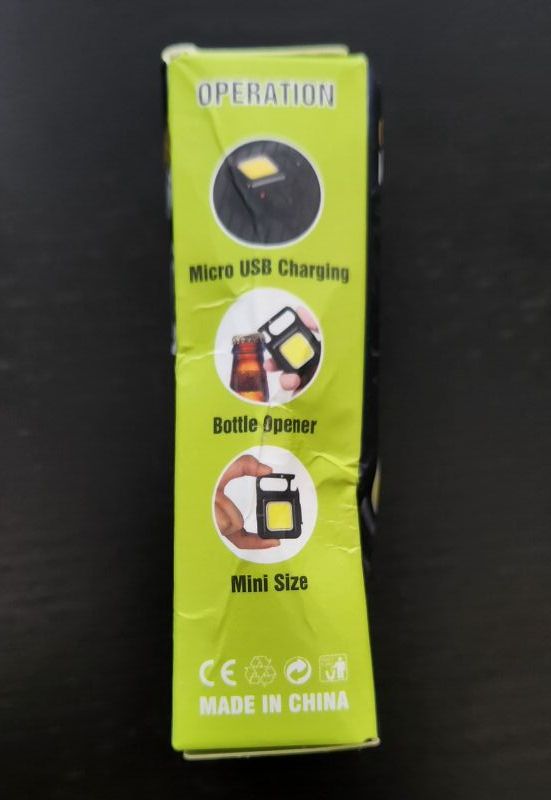
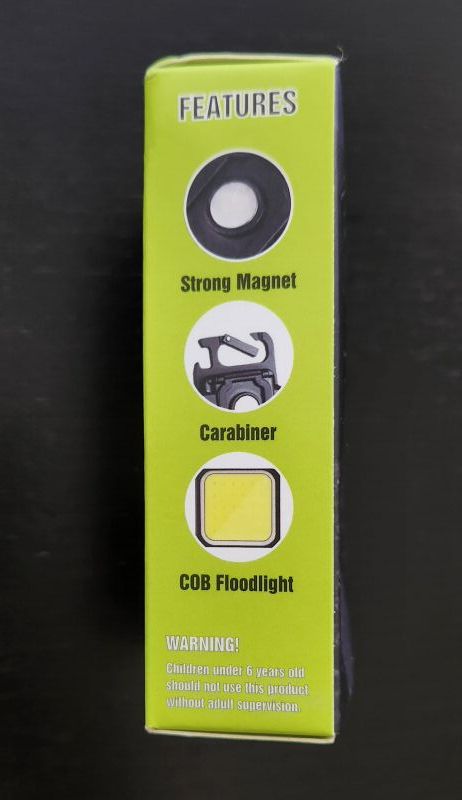
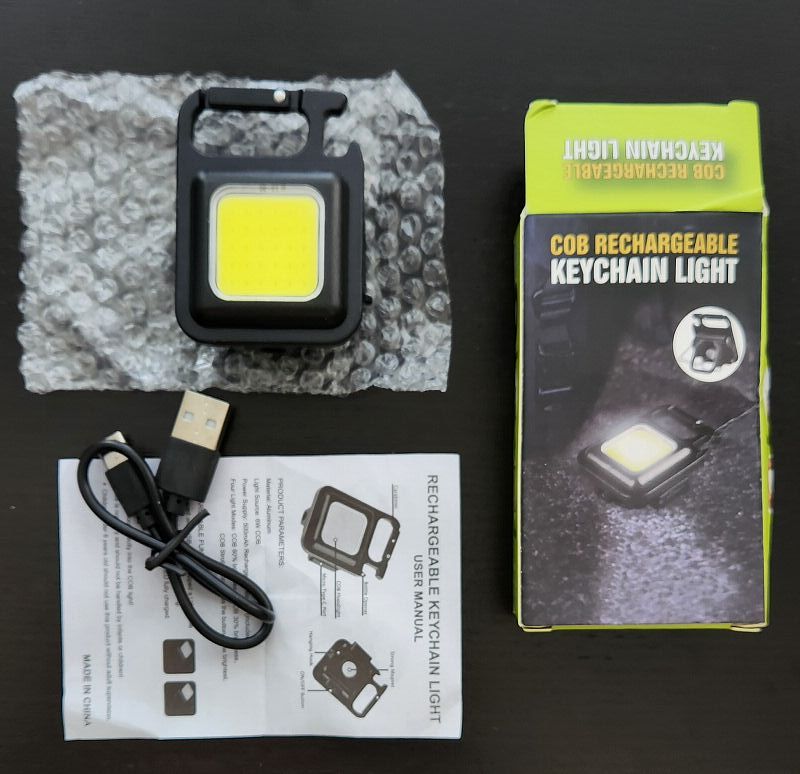
Package Details
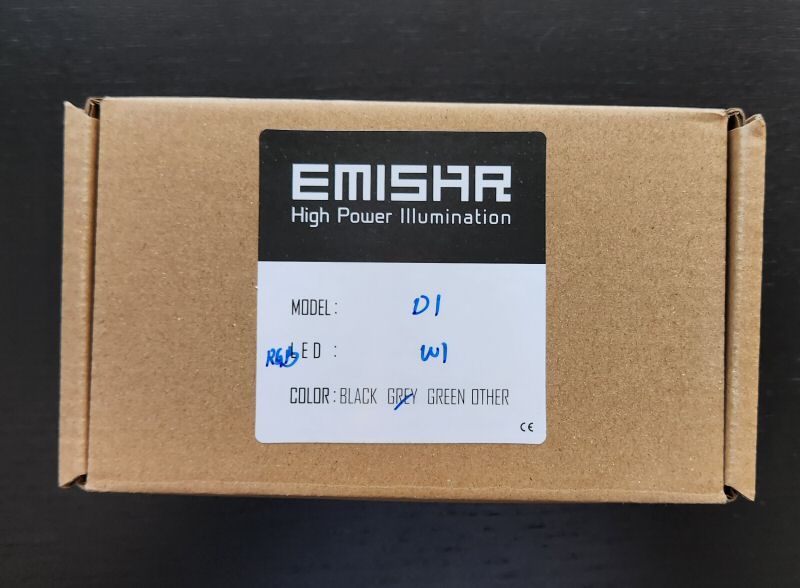
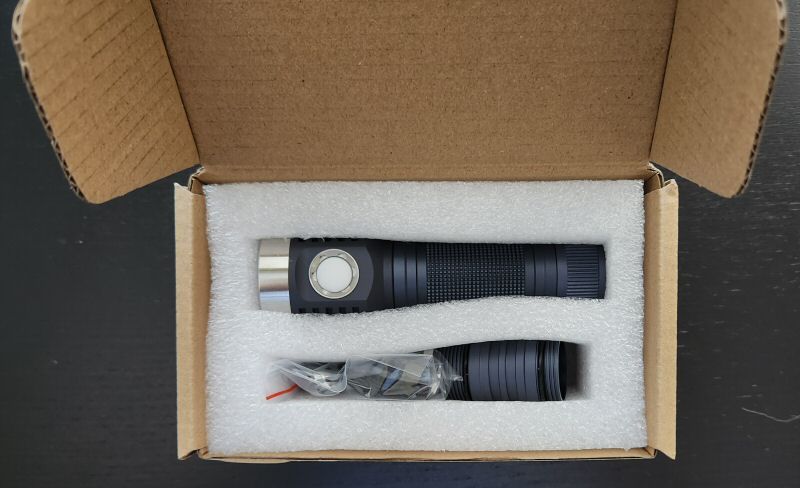
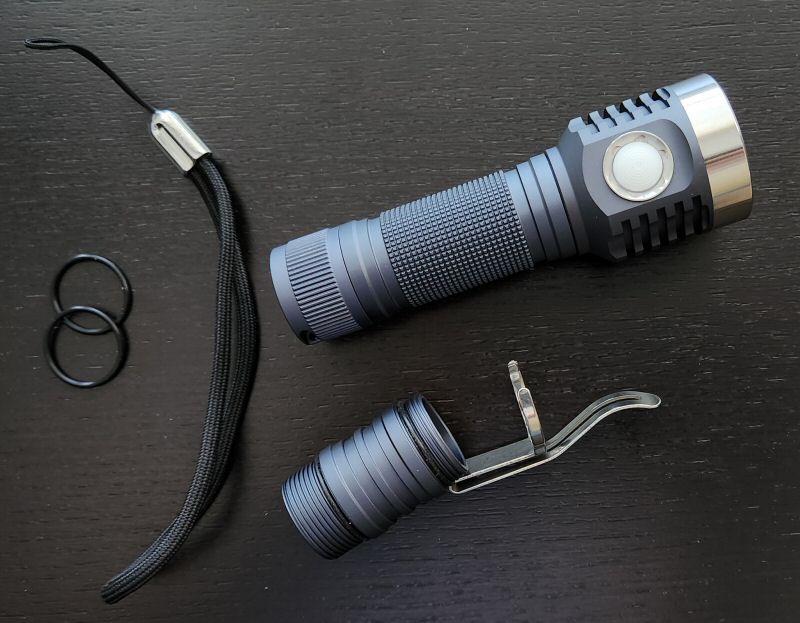
The packaging for Hank’s lights is fairly basic – a cardboard box with some hand-written description of the features selected. Inside is cut-out foam holding the light and your extras. Here is what I selected, reflected in the package above:
- D1 in Dark Grey
- Flat threaded switch ring
- RGB switch backlight
- LED: Osram W1 6000K
- Optional 18350 body tube
- Optional pocket clip
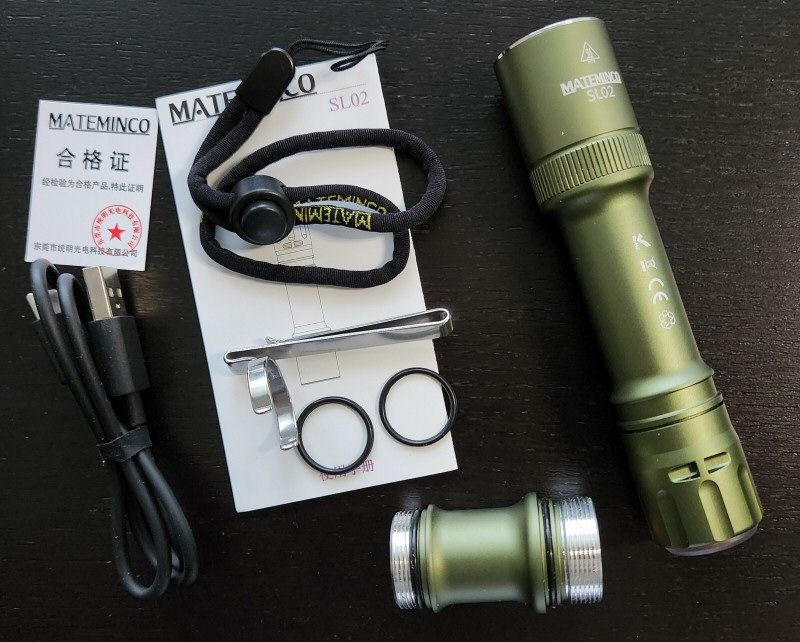
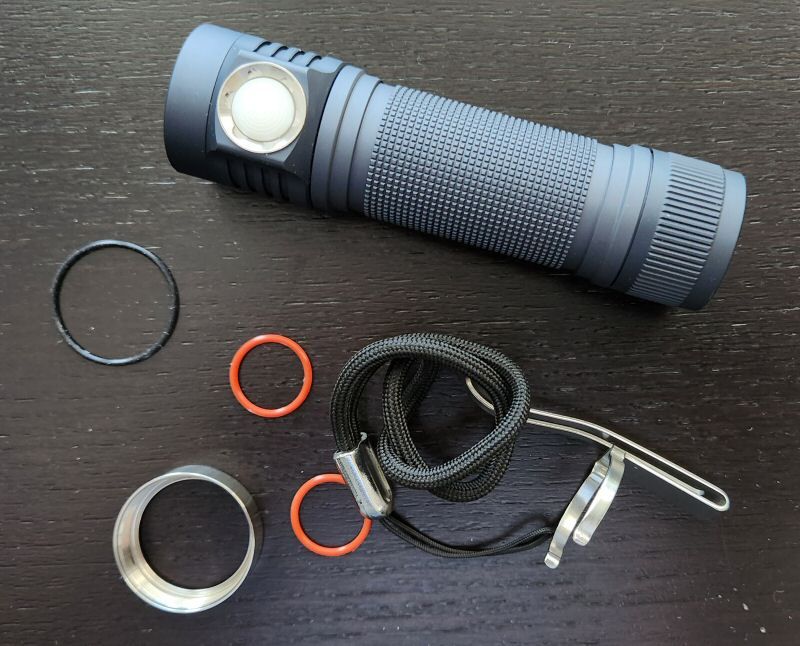
All lights also come with:
- Wrist lanyard
- 2 Spare body tube o-rings
In terms of emitters, Hank provides everything from this tiny Osram LED all the way up to the massive SBT90.2. Indeed, last time I counted there were 29 different options in total, including dedomed and monochromatic coloured LEDs. I choose the W1 cool white because it has the highest rated throw of any option (110,000 cd) albeit with the lowest overall max output (900 lumens).
I choose the RGB LEDs for the side switch given the versatility this brings, as explained below.
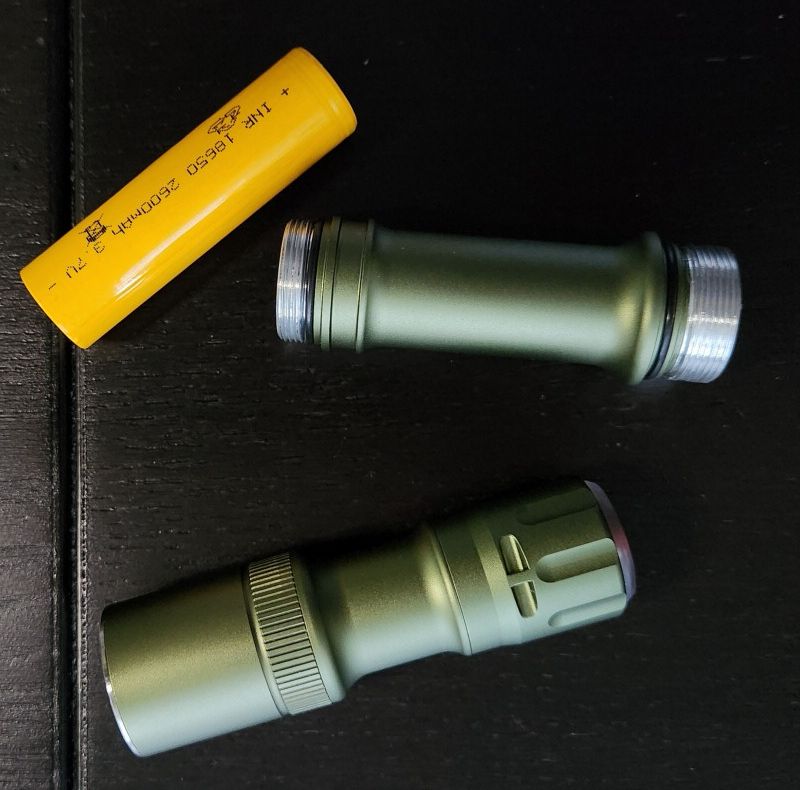
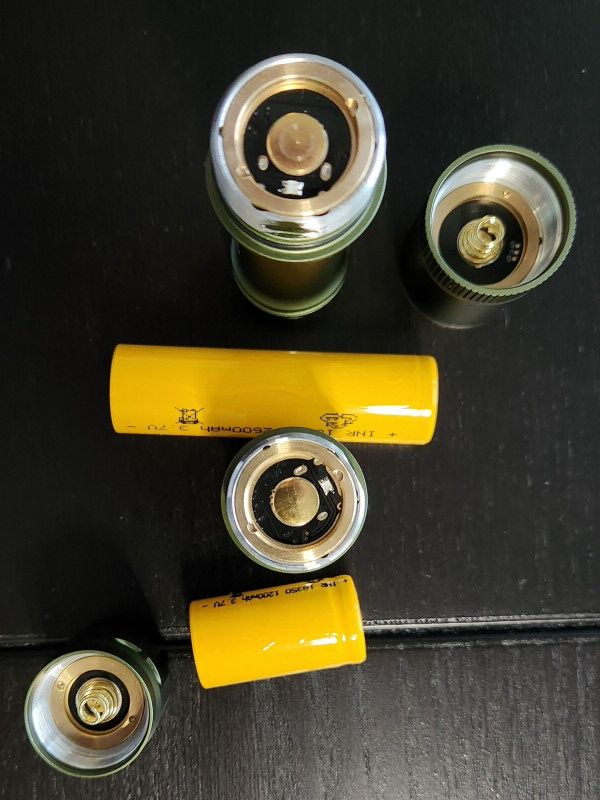
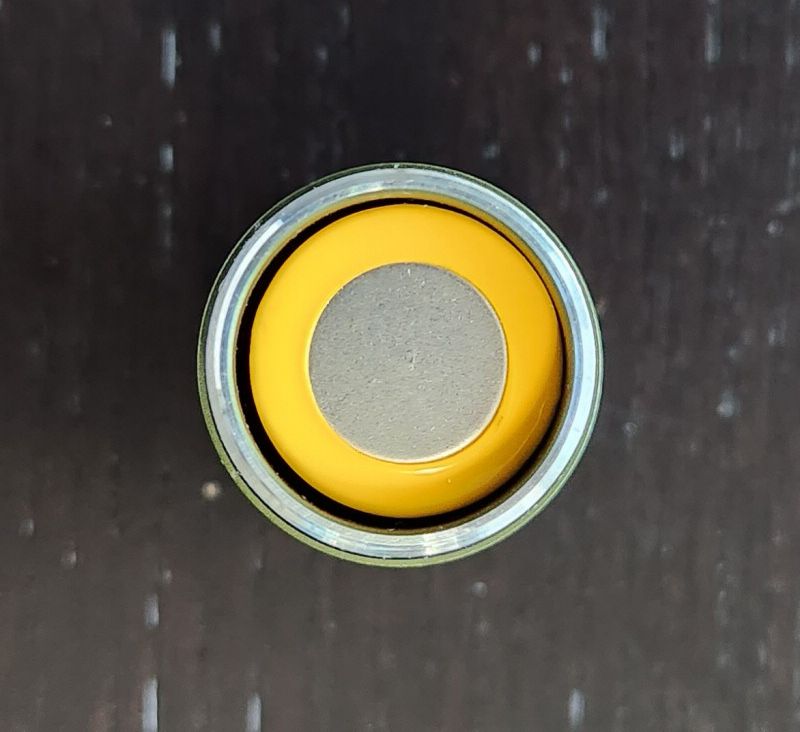
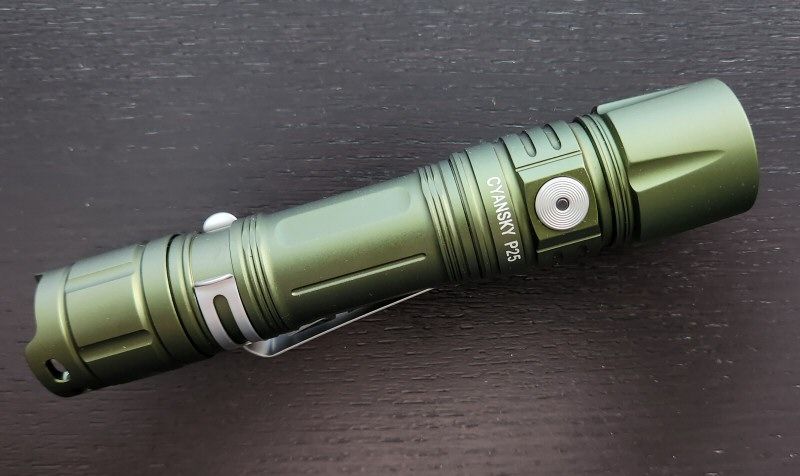
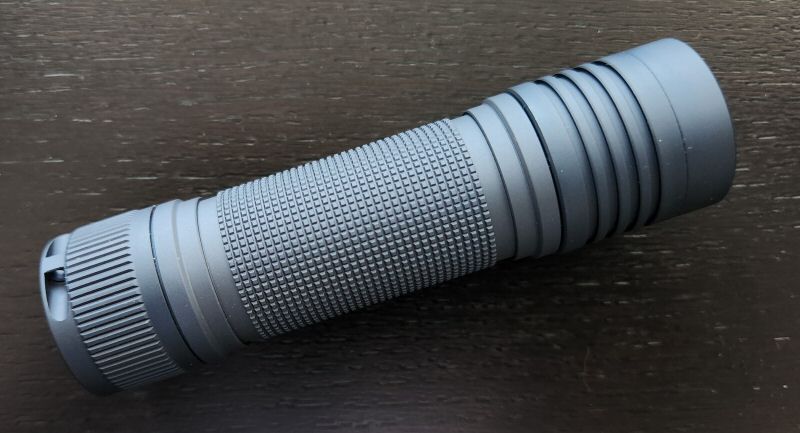
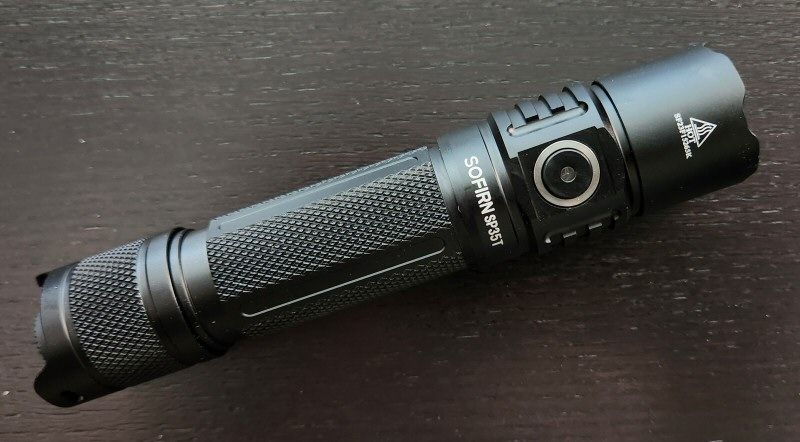
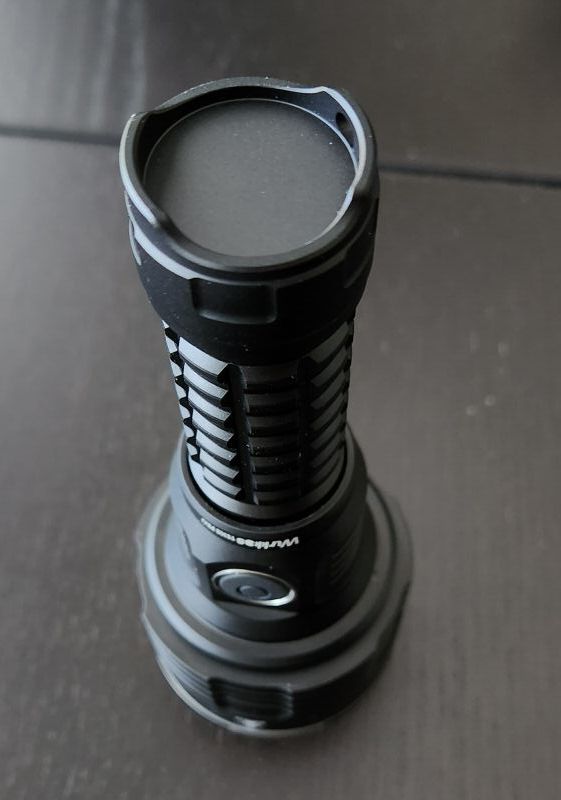
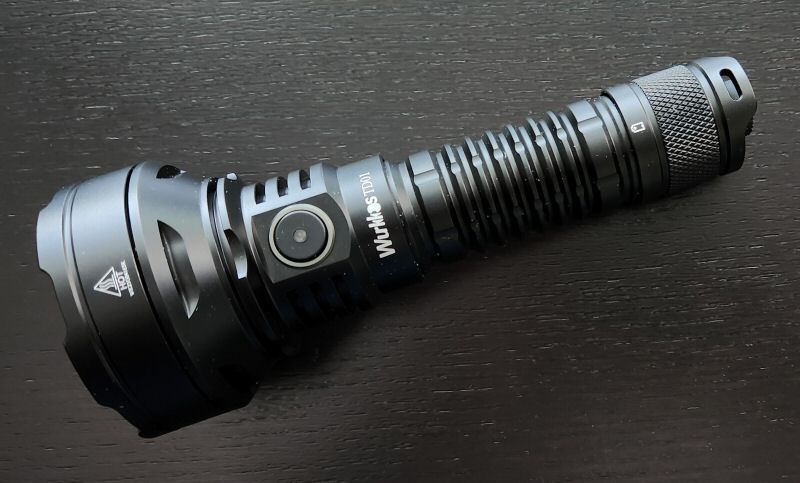
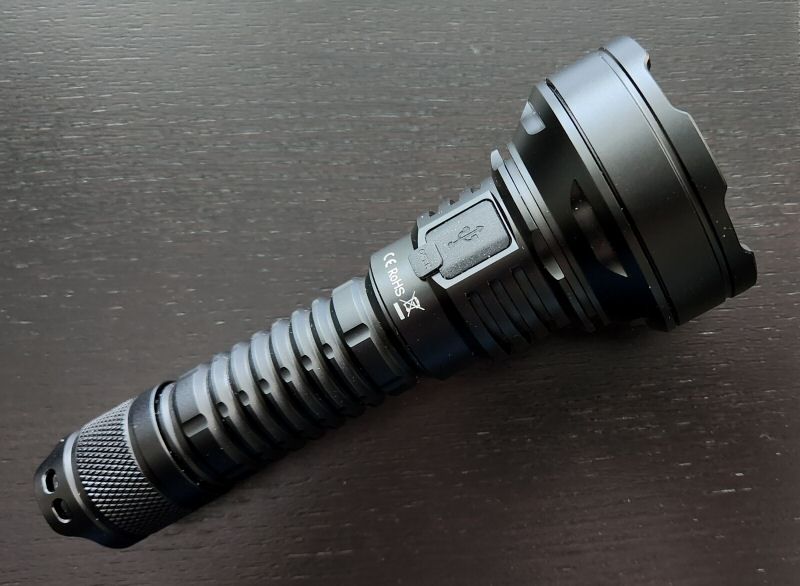
Build
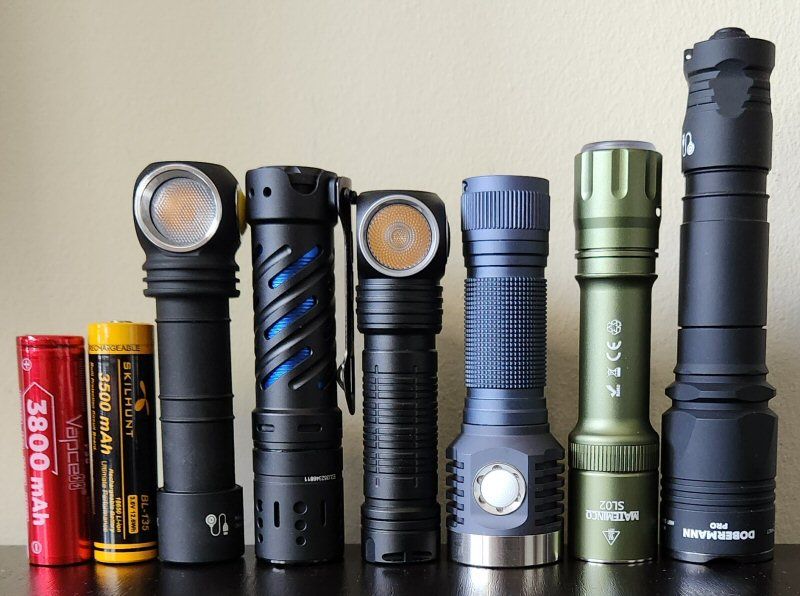
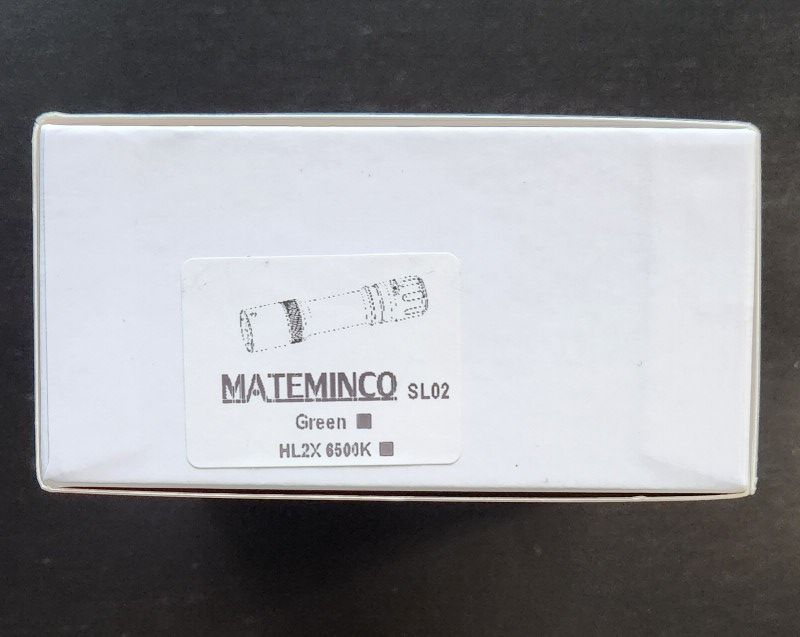
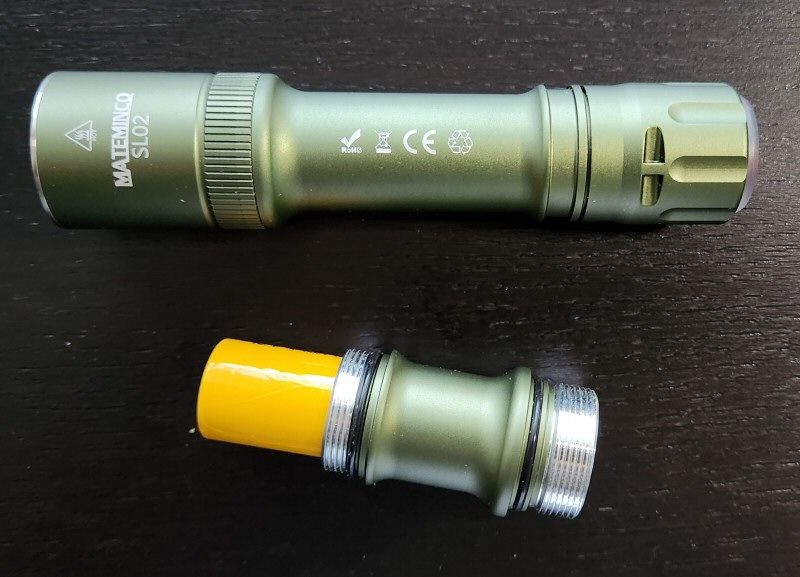
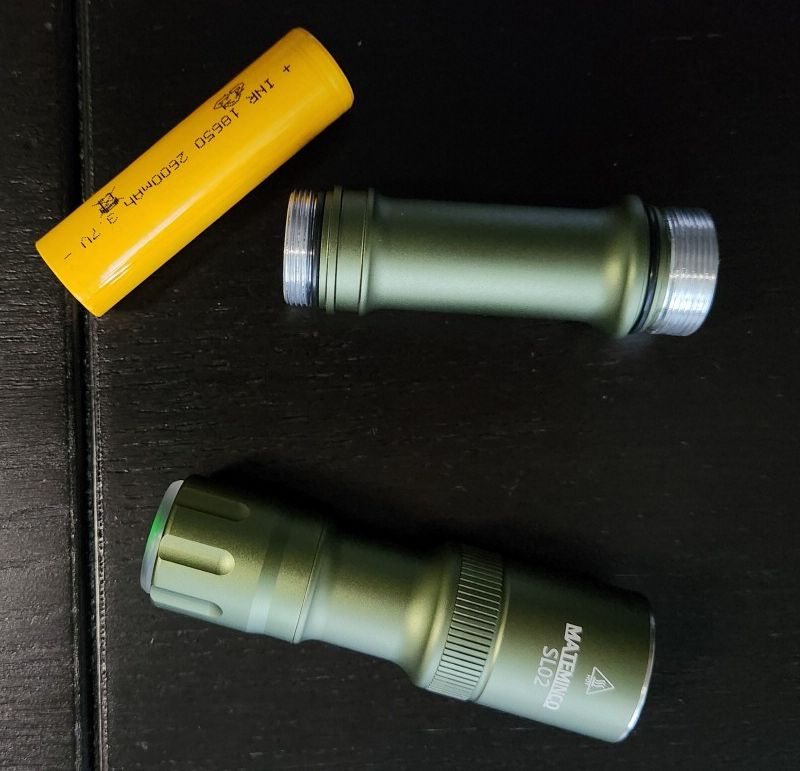
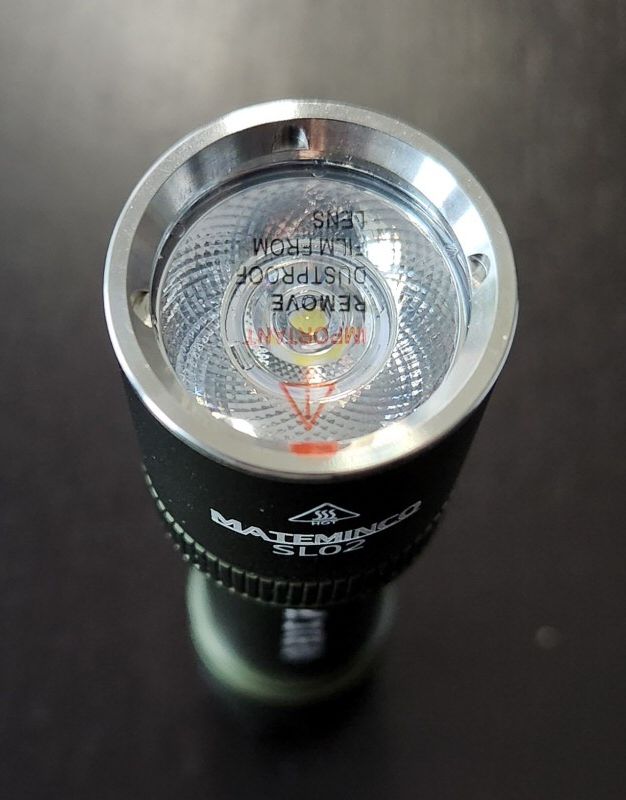
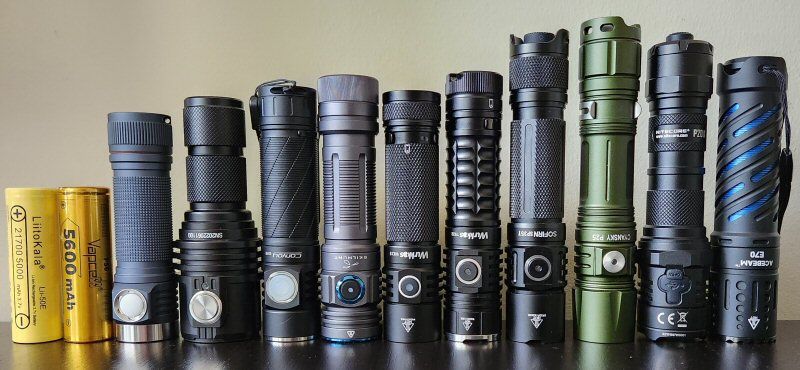
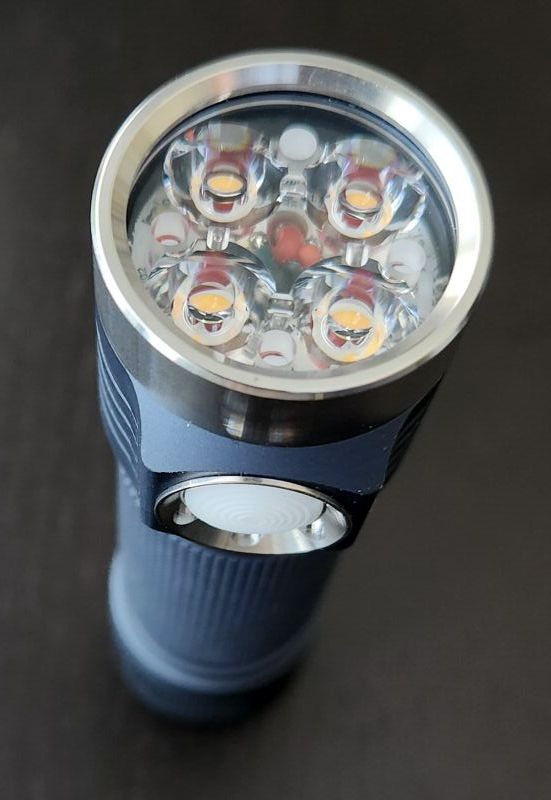
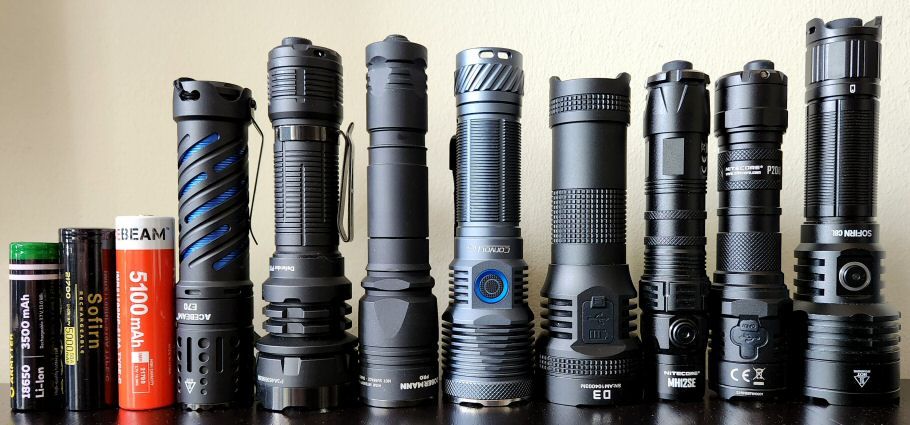
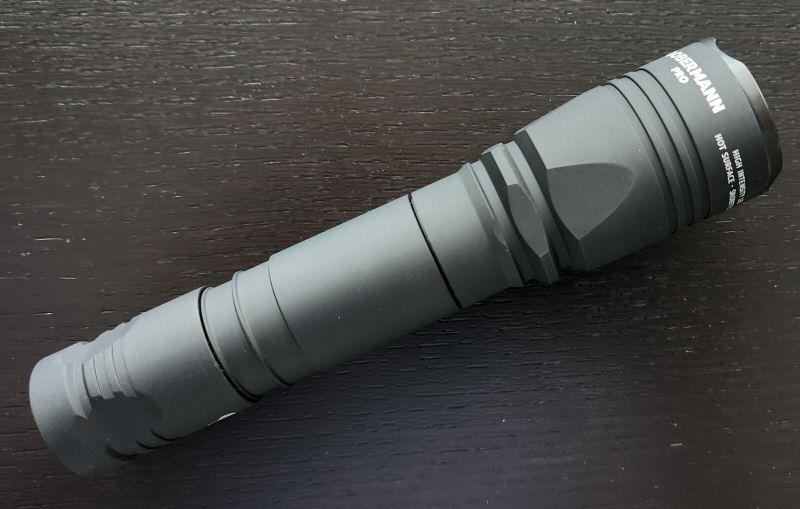
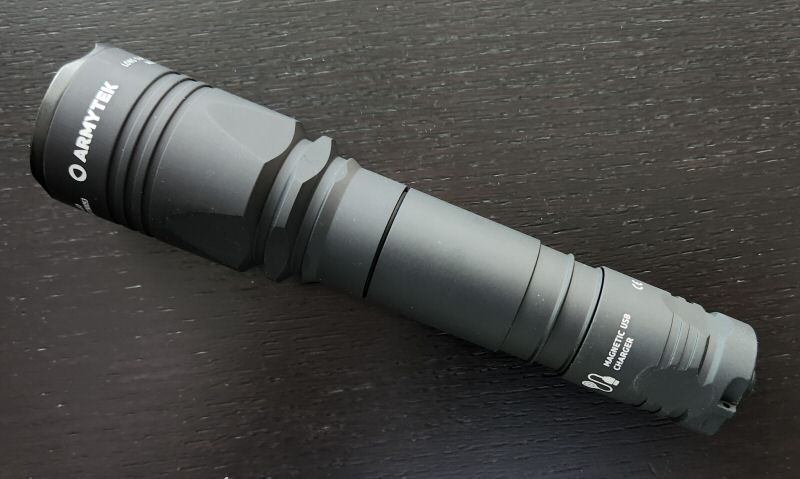
From left to right: Vapcell F38 18650 (3800mAh), Skilhunt 18650 (3500mAh), Armytek C2 Wizard Pro Nichia, Acebeam E70 Mini, Skilhunt H300, Emisar D1, Mateminco Sl02, Armytek Doberman Pro.
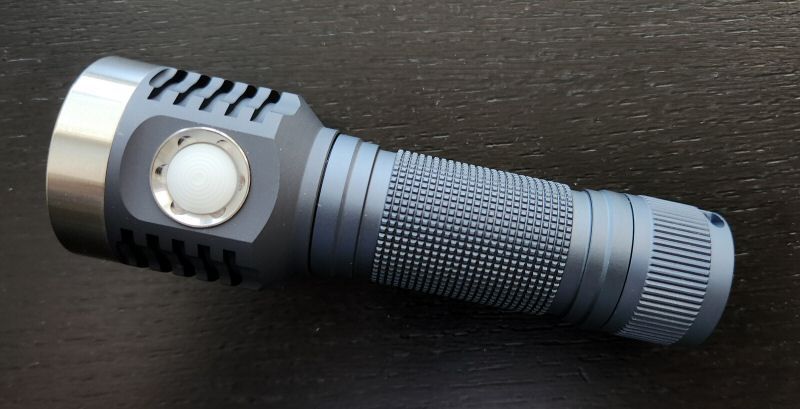
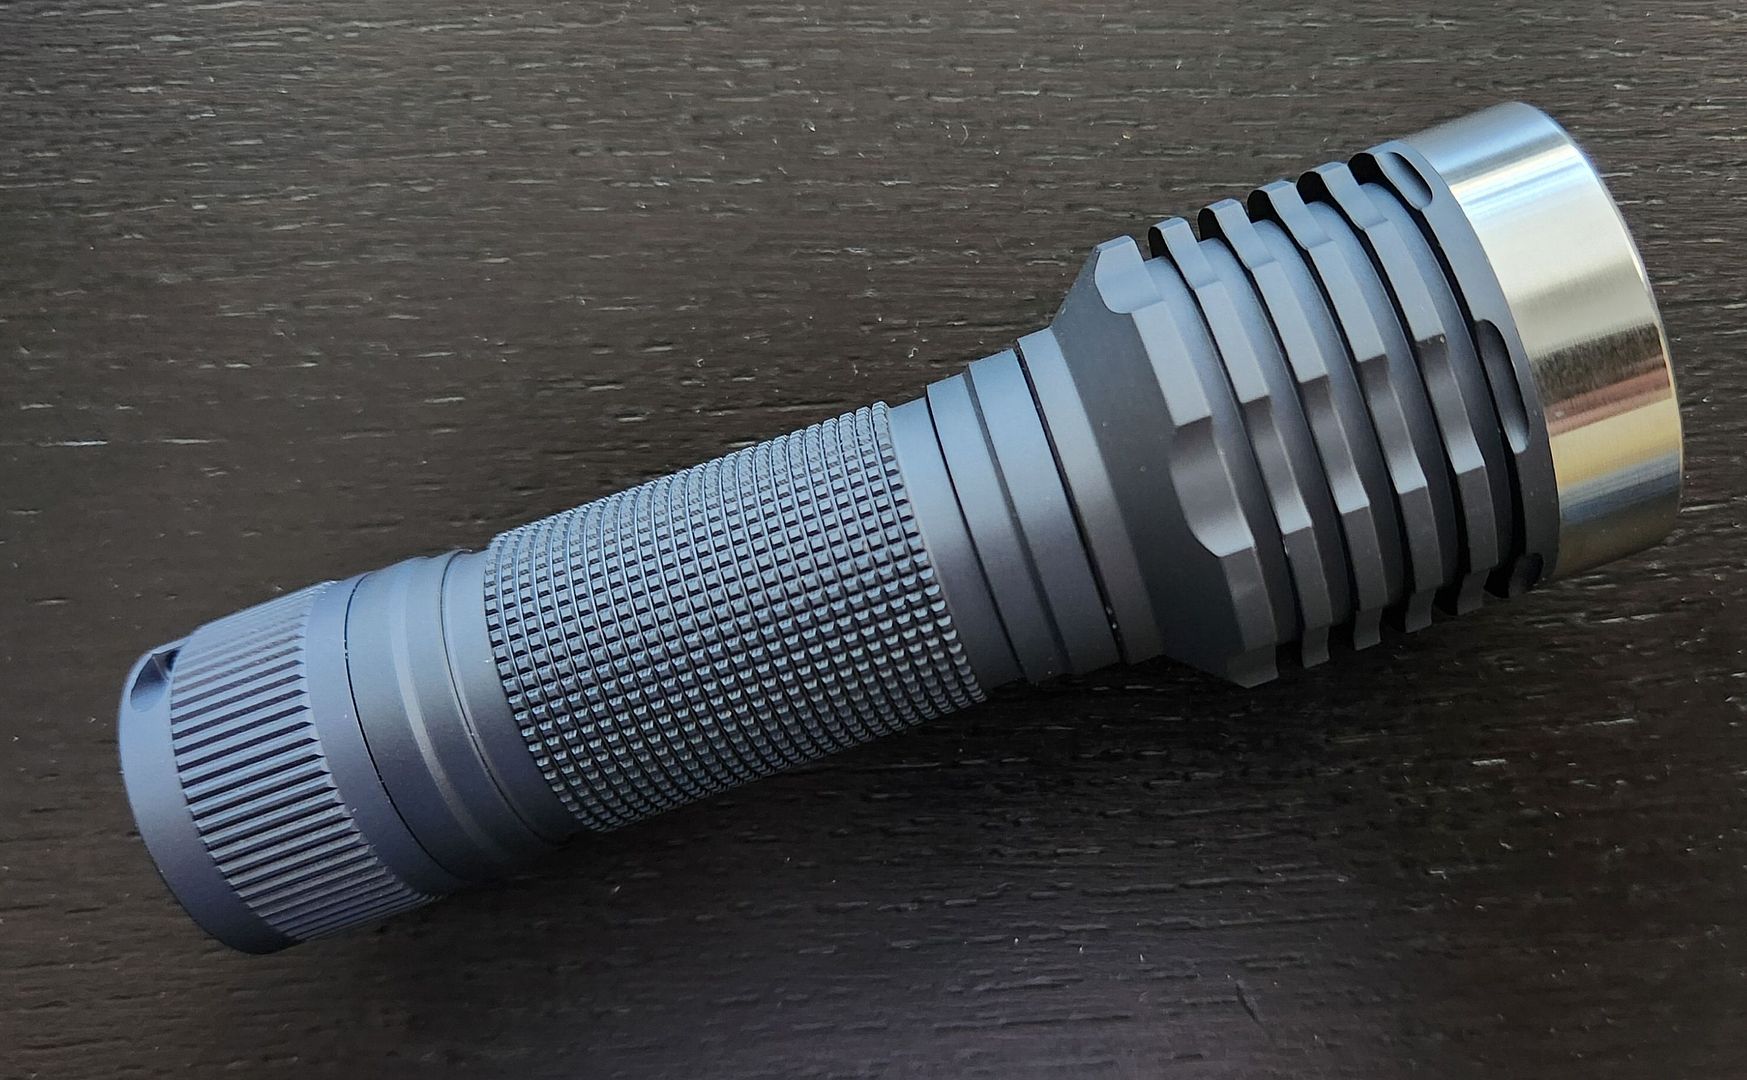
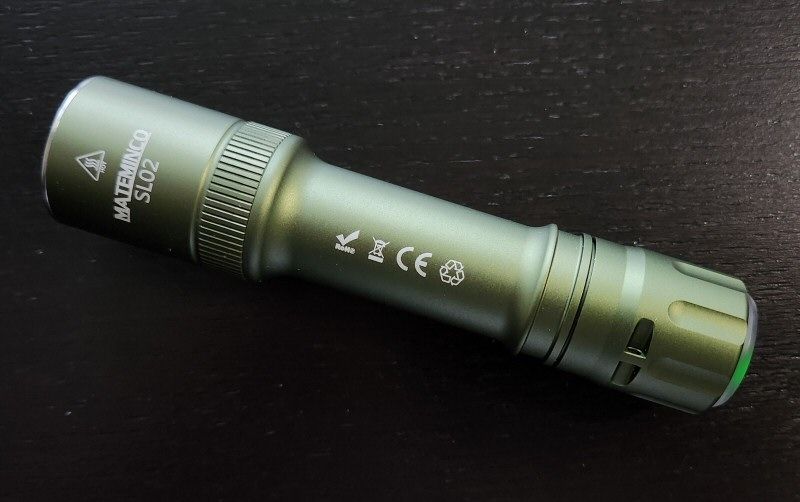
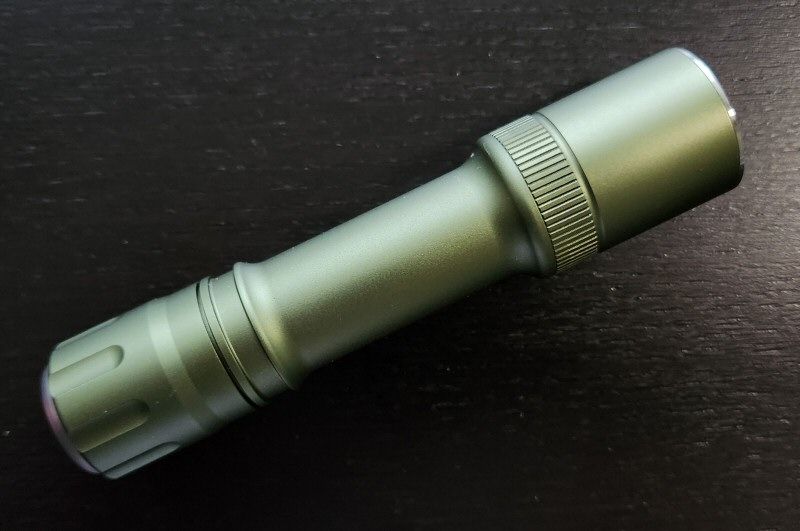
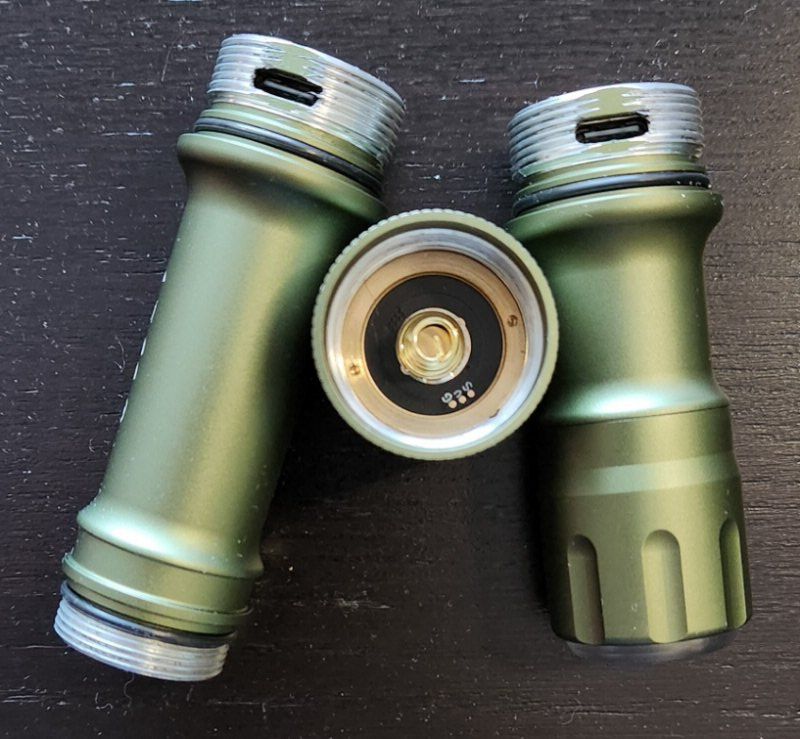
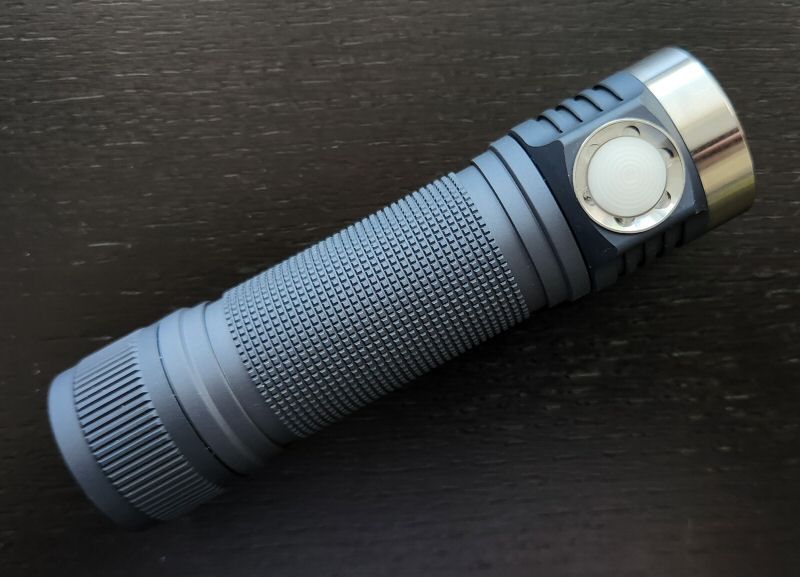
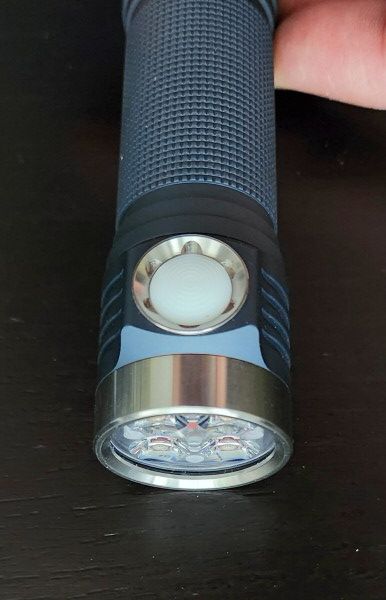
The build is very reminiscent of the D4K. It is fairly compact, with relatively thin walled body tubes.
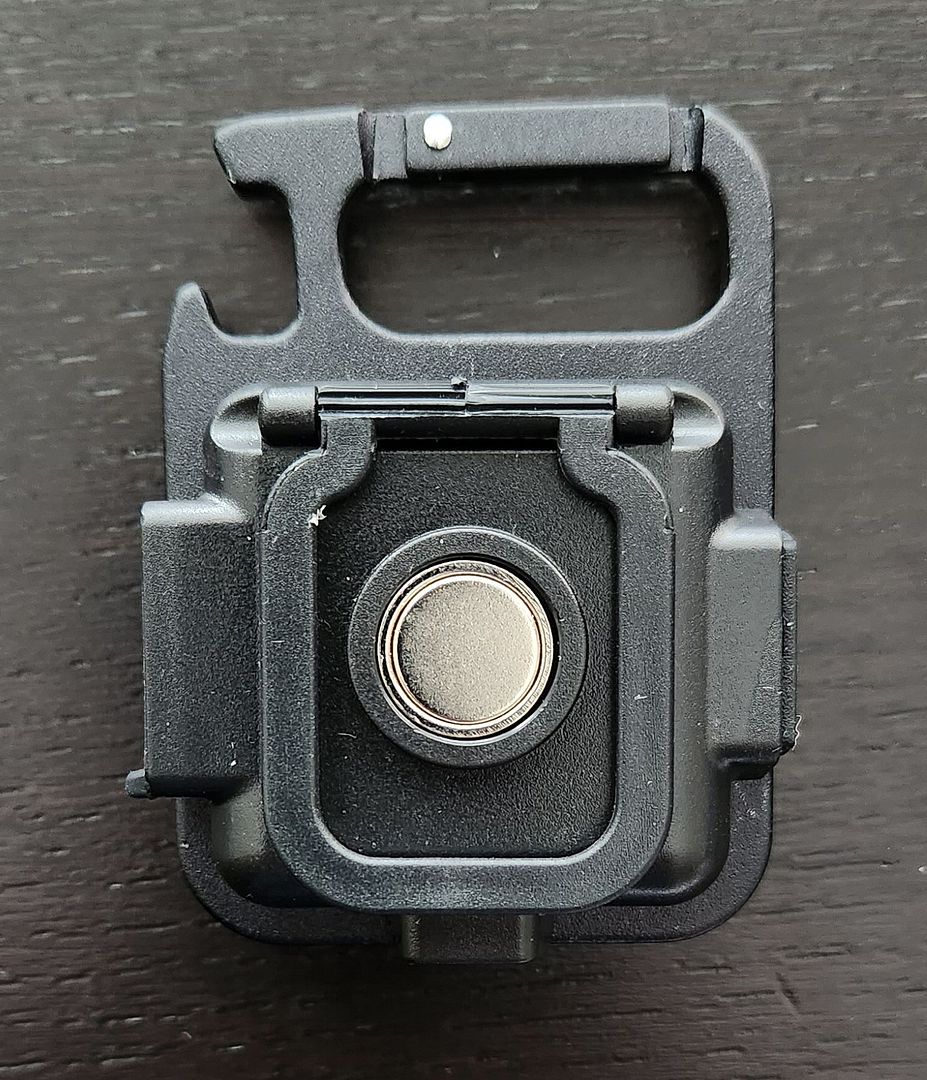
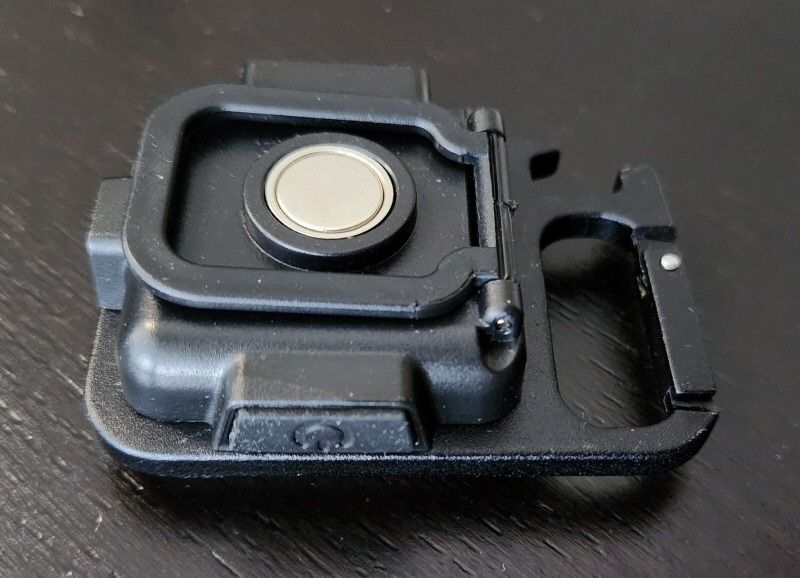
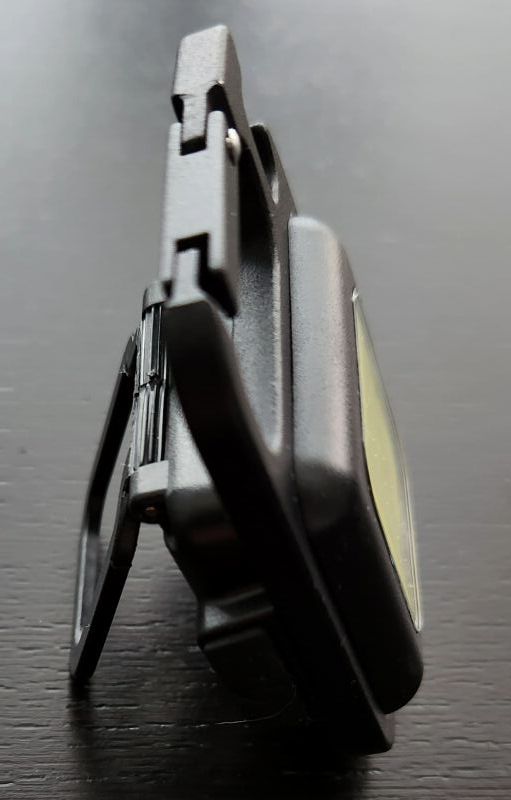
I opted for the stainless steel pocket clip, as I don’t find wrist lanyards very useful. This is great option, as the body tube allows placement near the head or the tail of the light (for stable head-up or head-down carry). I didn’t opt for the tailcap magnet, but that’s a good option if you are considering using the light as a work light (not so relevant as a thrower, methinks).
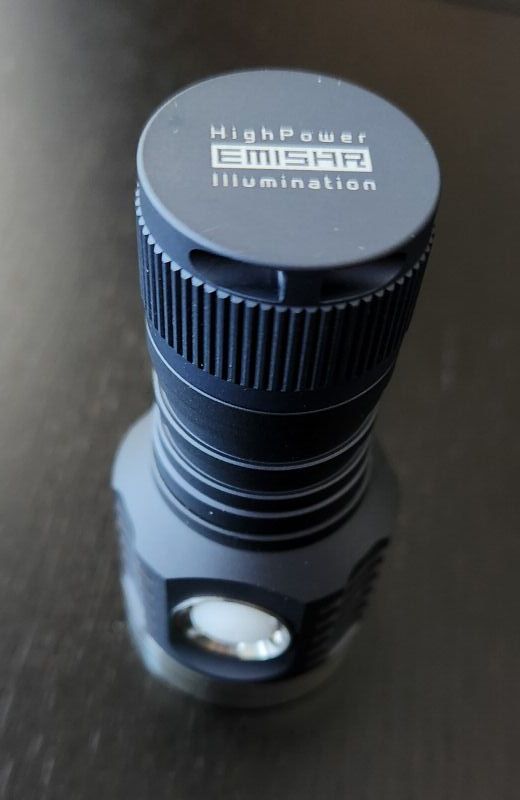
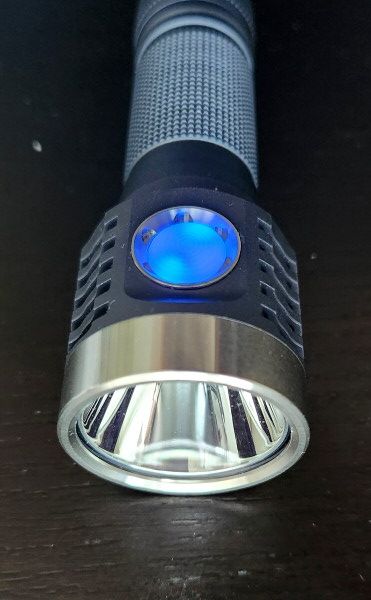
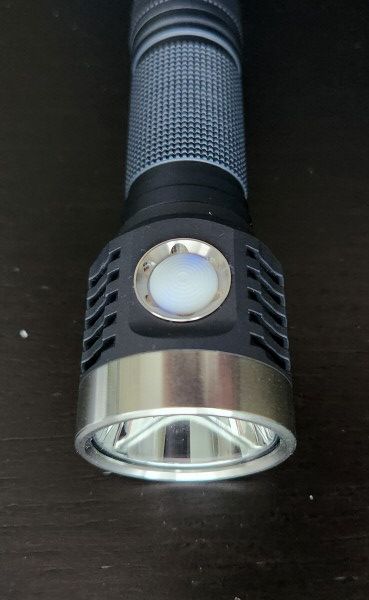
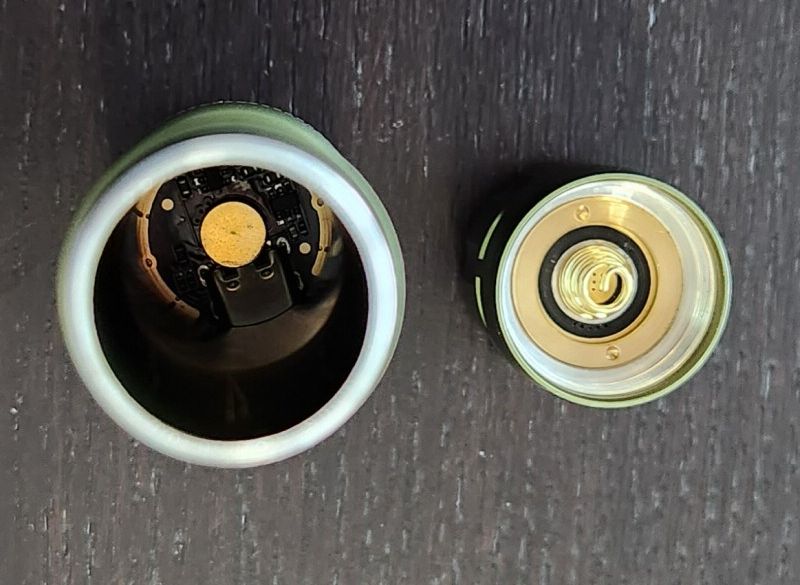
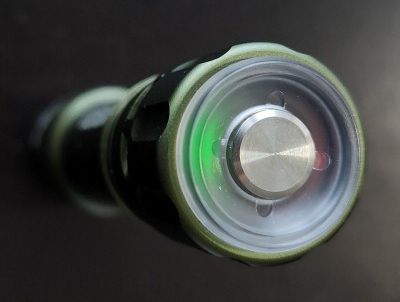
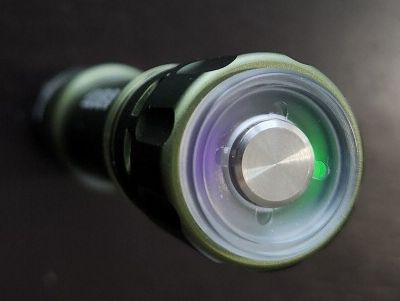
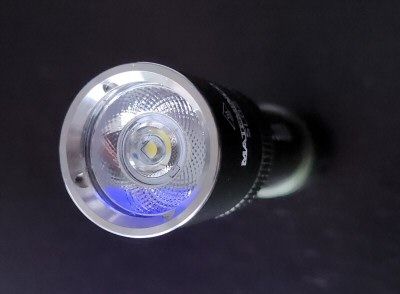
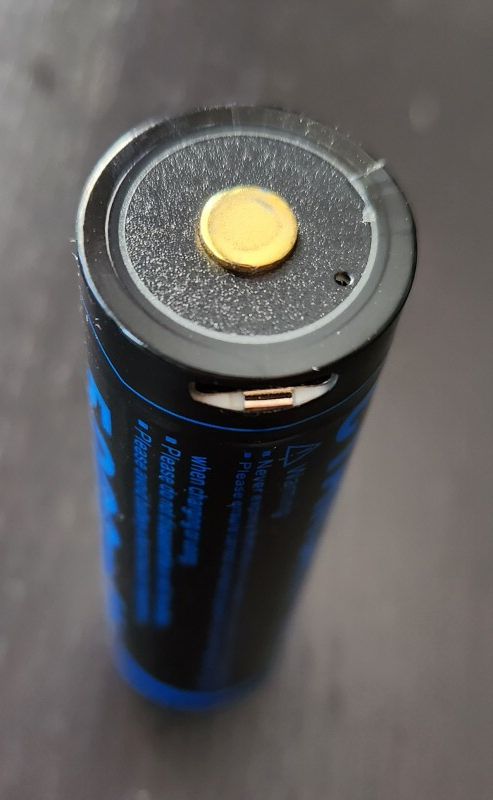
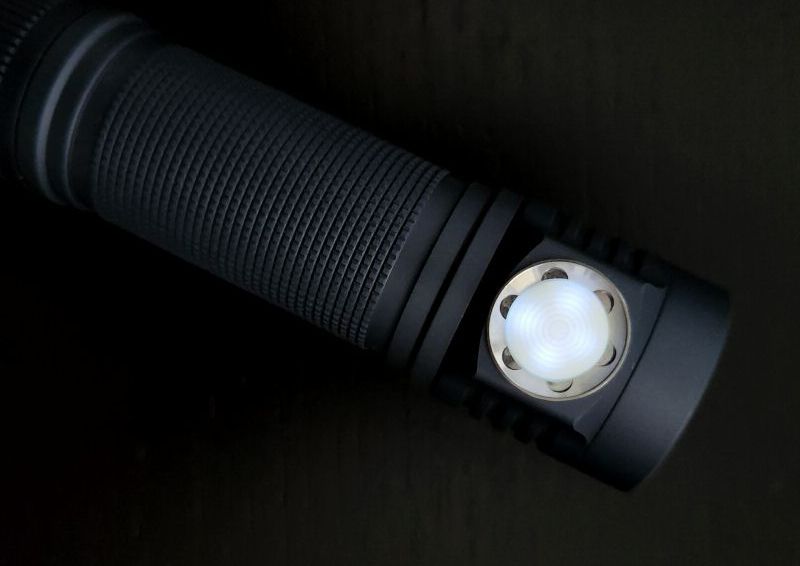
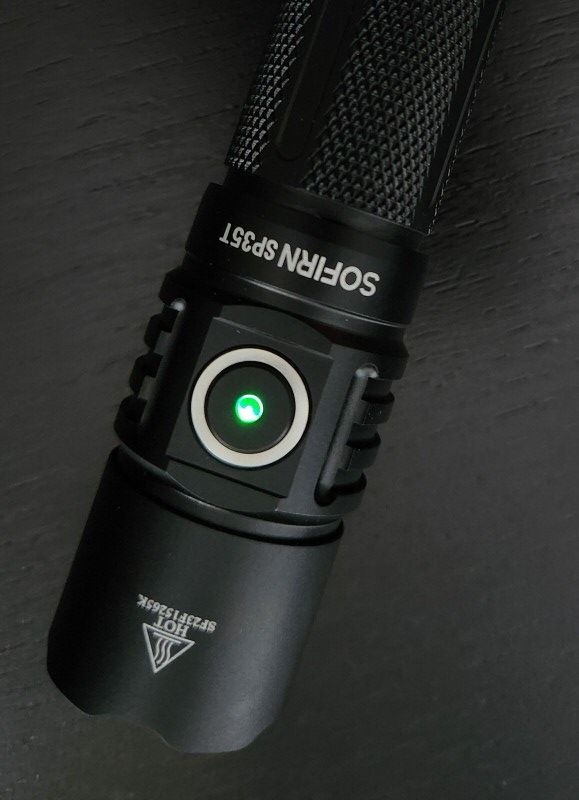
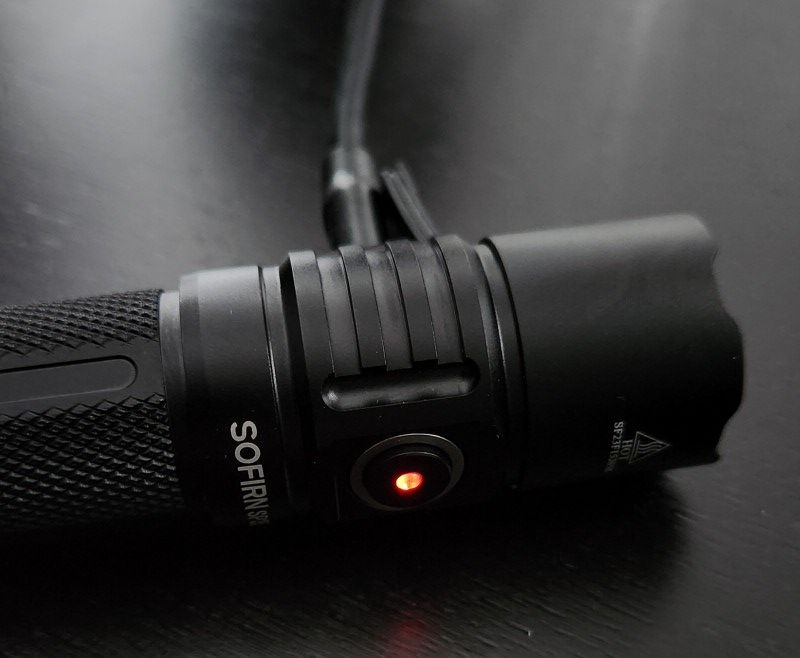
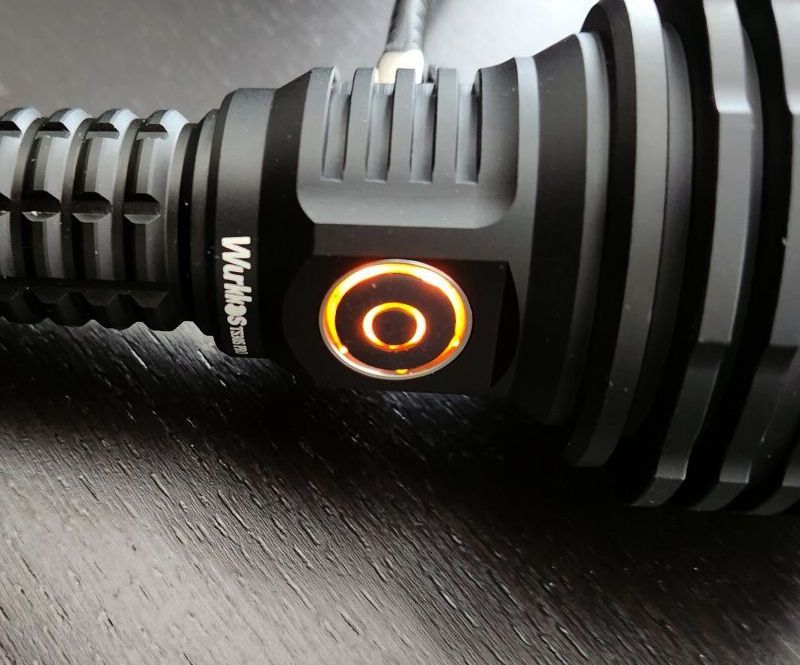
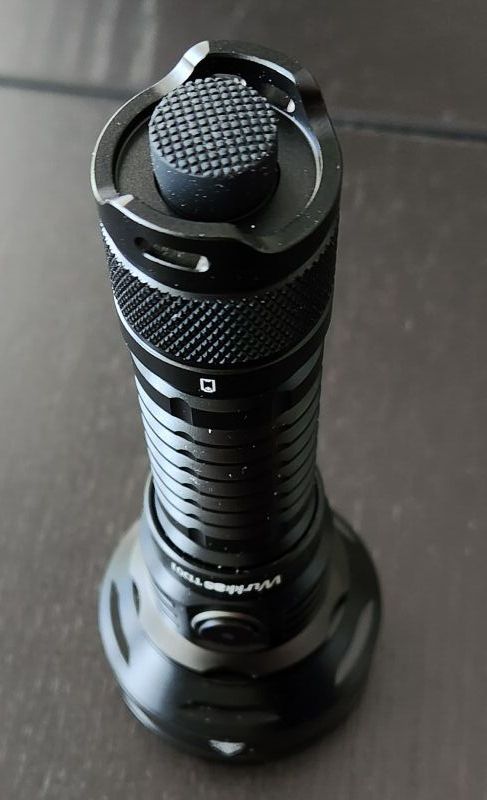
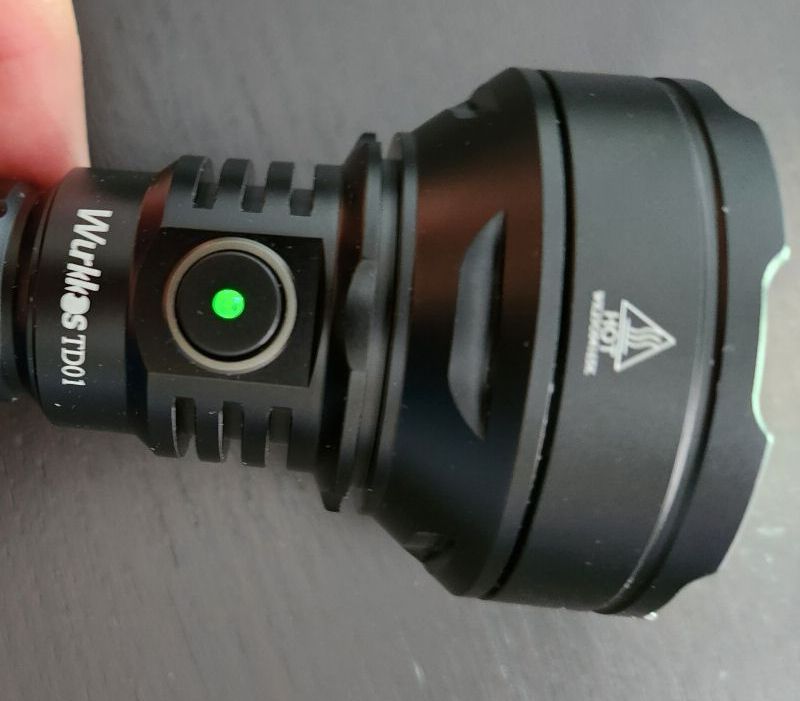
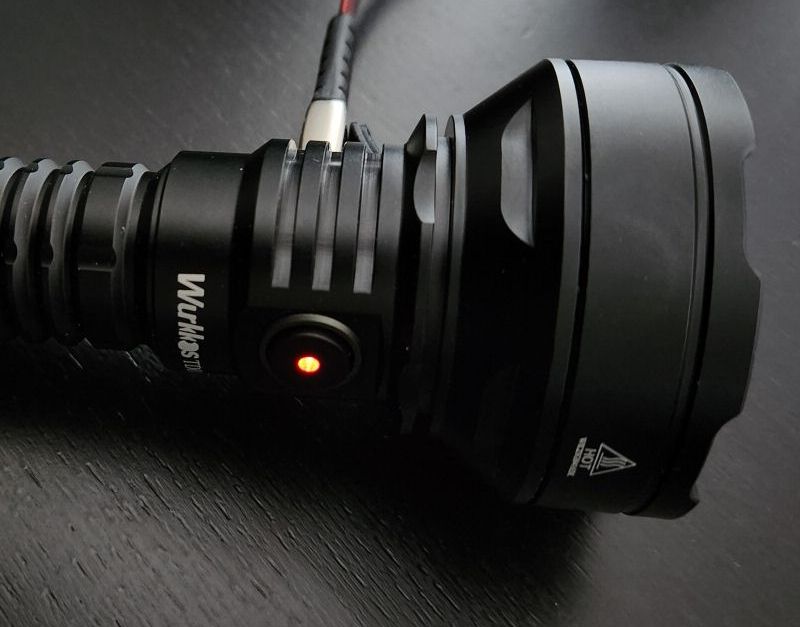
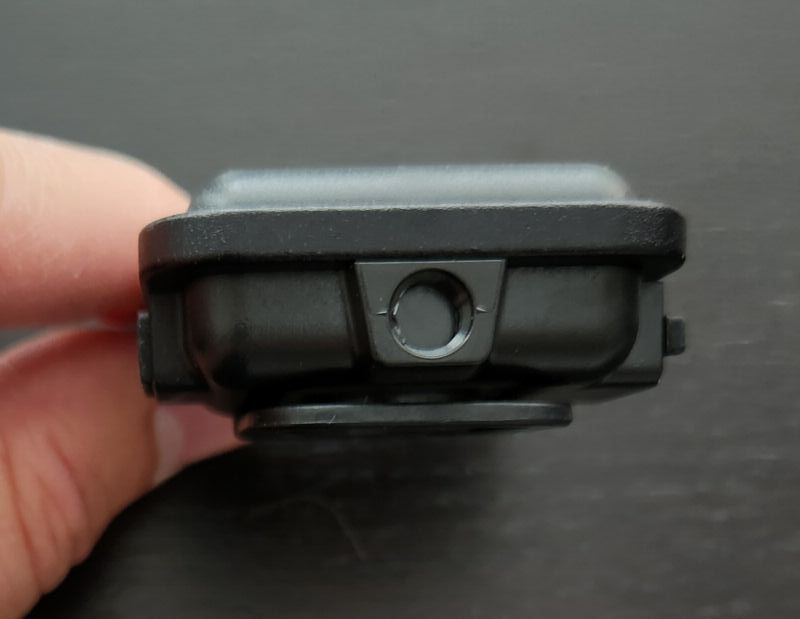
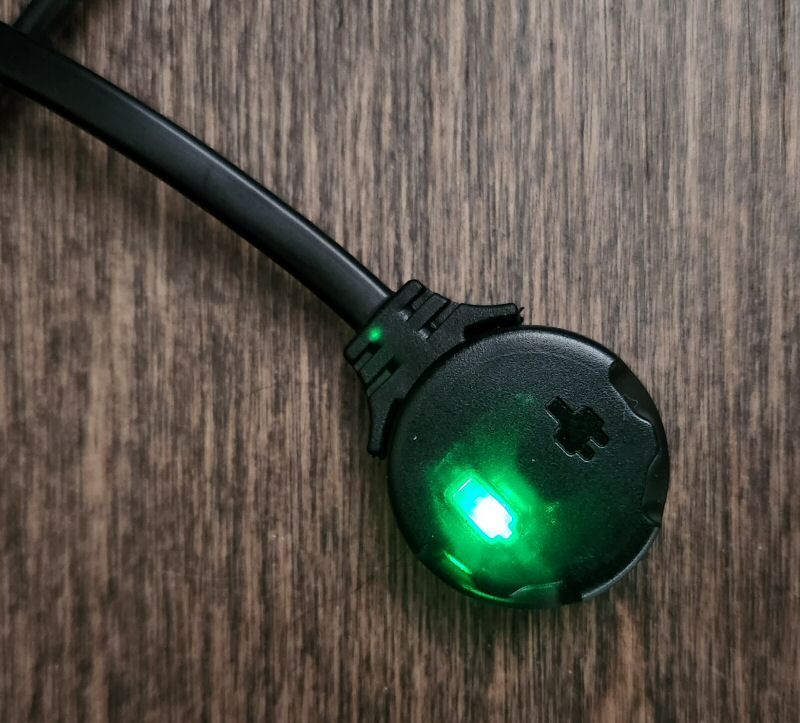
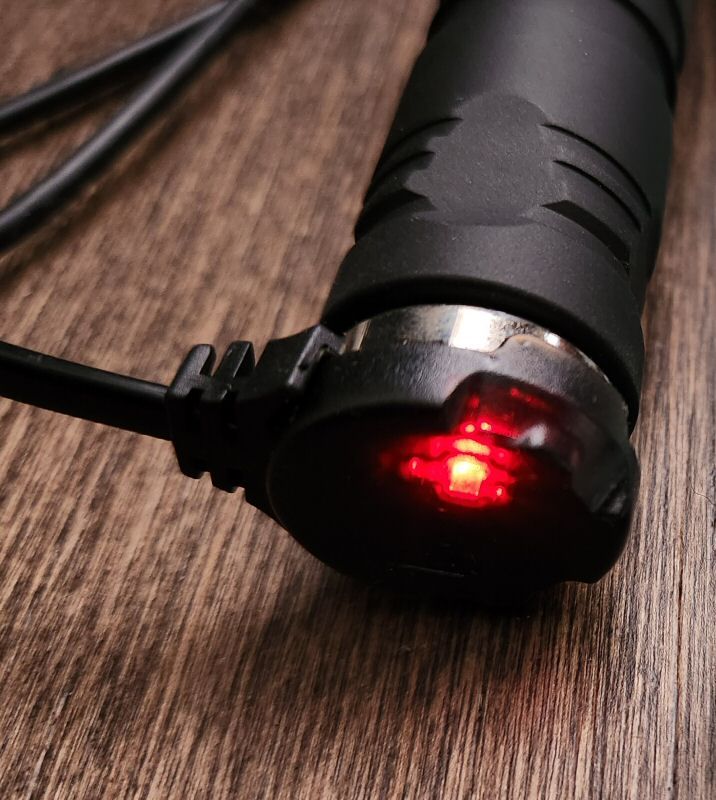
The light is controlled by an electronic side switch in the head, with a somewhat transparent rubberized cover. Feel and traverse of the electronic switch is good, with a firm click and typical traverse. There are a lot of options for the switch emitter LED, and I opted for the multi-colour RGB LED option. Although set to Off by default, you can configure the auxillary switch LED through Anduril to light up when a battery is connected (at two different intensities). See the user interface section below for more information.
I also went for the flat threaded switch ring, as I was worried the raised model might catch on clothing, etc. It is still easy to find the switch by feel, if you are leaving the standby indicator off.
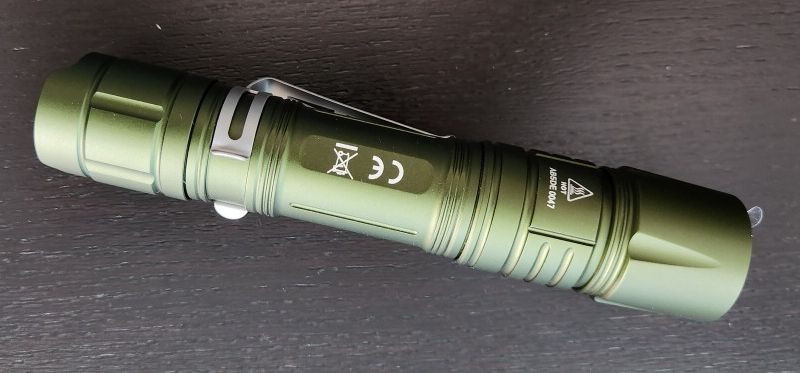
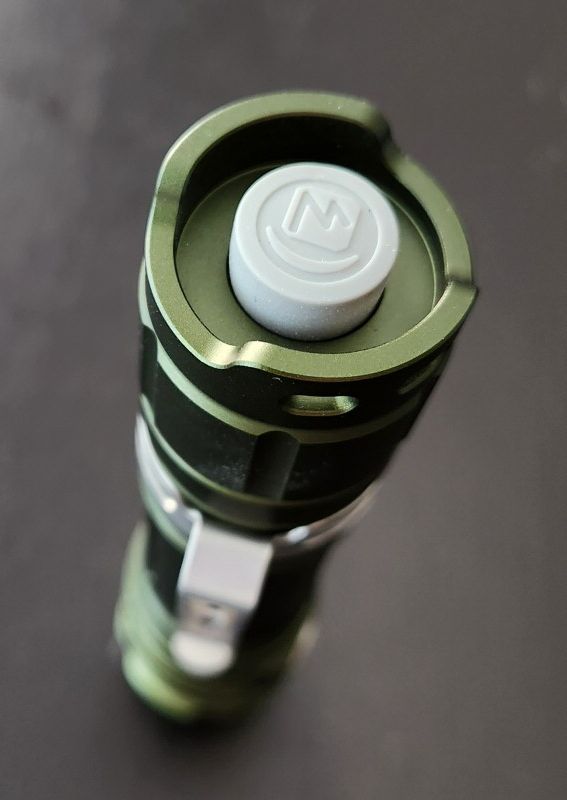
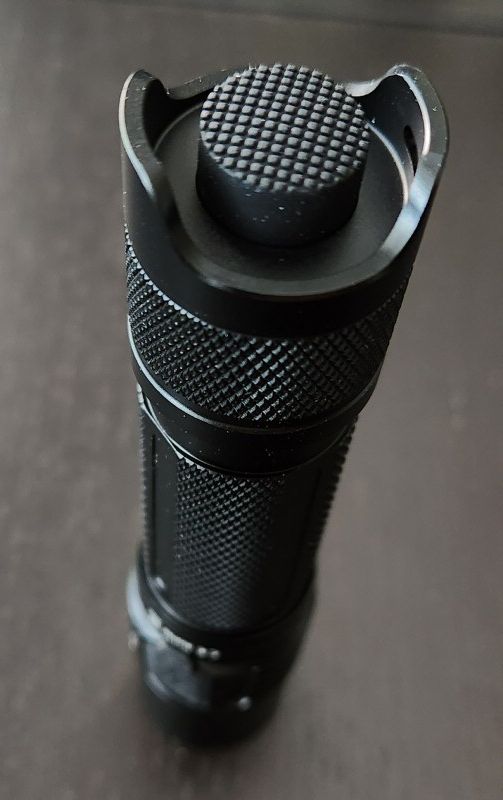
The tailcap is perfectly flat, so the light is able to tailstand fairly stably. There is a small cut-out on the side for the simple wrist lanyard.
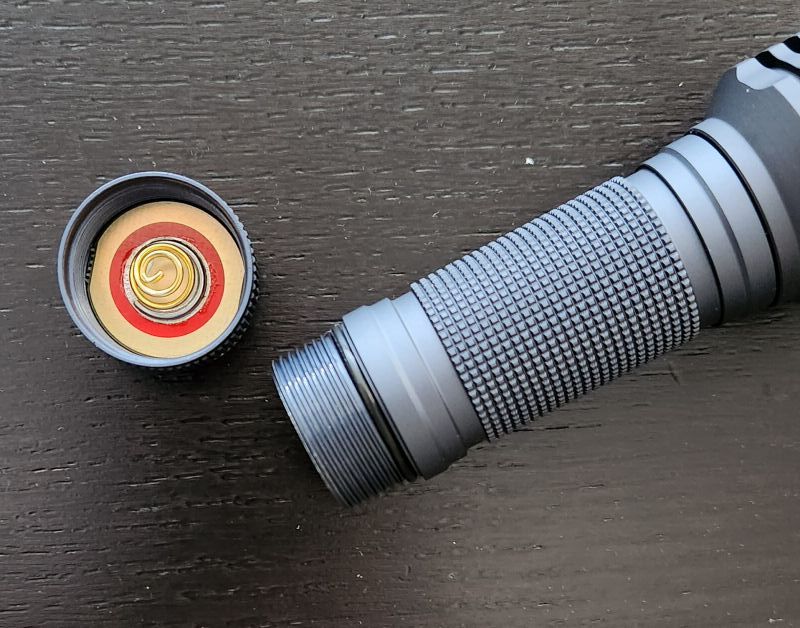
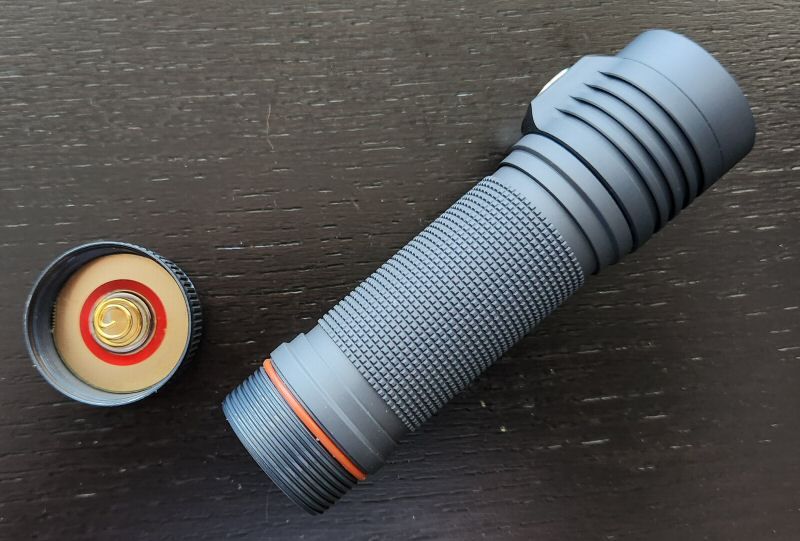
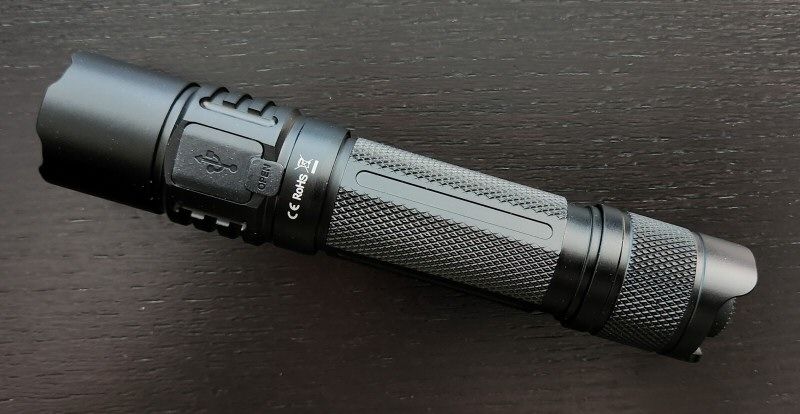
Threads are square-cut and anodized, with good feel – at both ends of the battery tube. Note there was no lubrication anywhere on the samples I received, so I recommend you add a good non-conducting lube for both the o-rings and the threads. I also always recommend you keep the light stored locked out when not in use. Thanks to the anodized tailcap threads, you can do this easily by a simple twist of the tailcap (or the head for that matter, in this case).
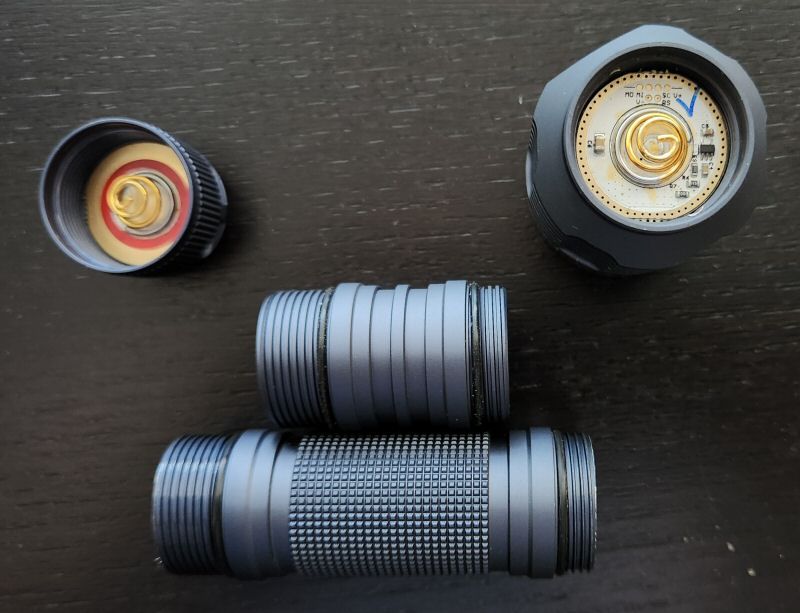
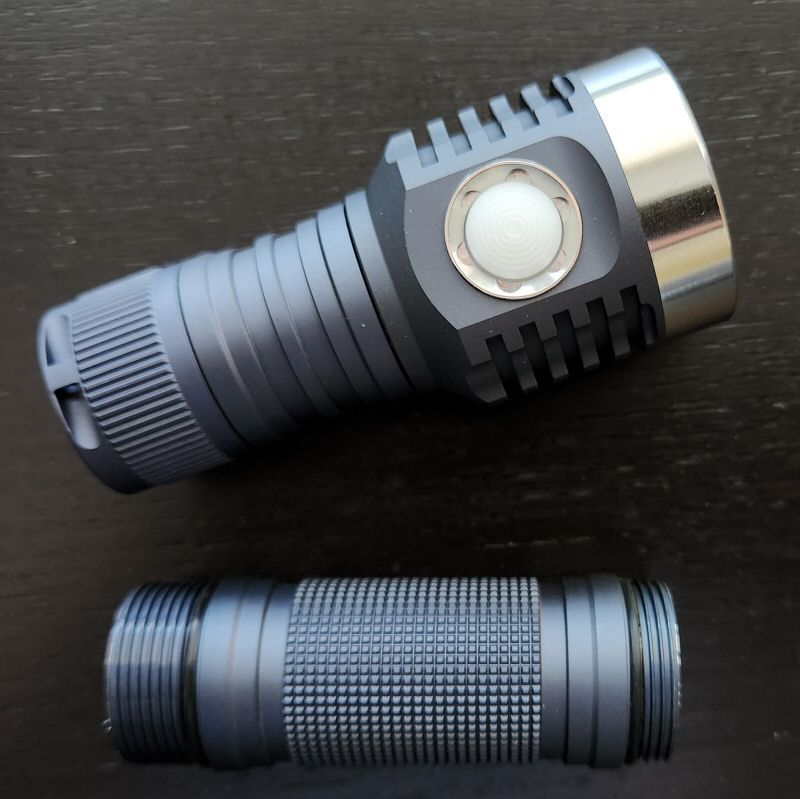
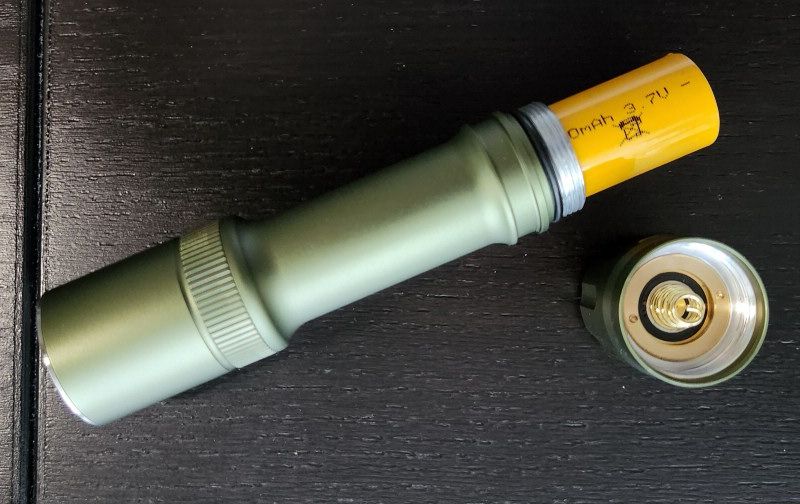
Same applies to the optional 18350 body tube I picked up. It’s a great way to turn then D1 into a true pocket thrower, to slip into a pocket or purse.
With the o-rings in place, I expect waterproofness to be good on this build.
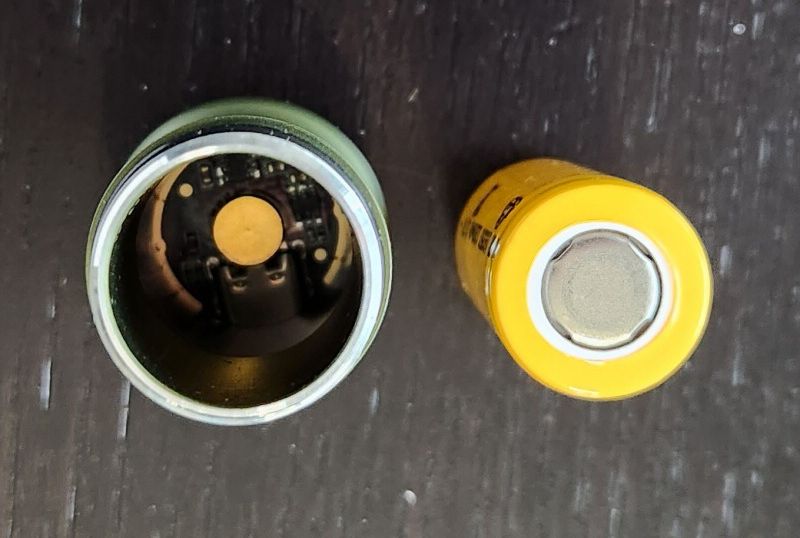
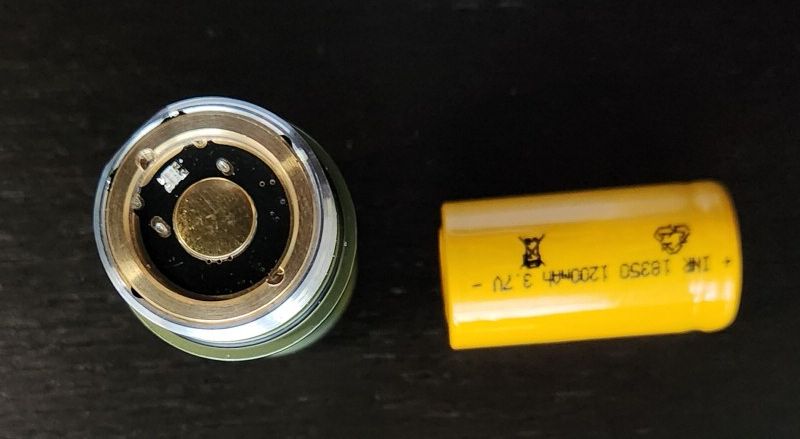
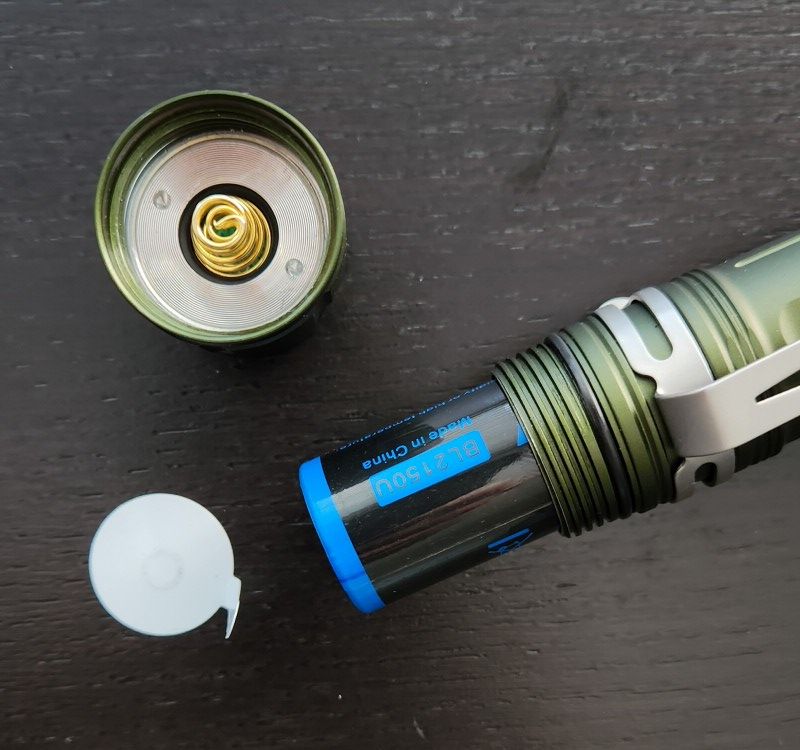
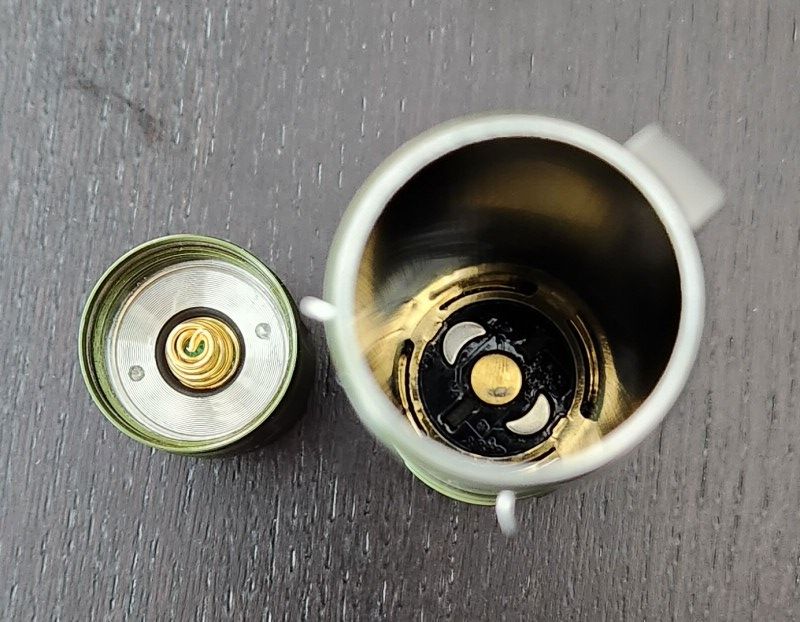
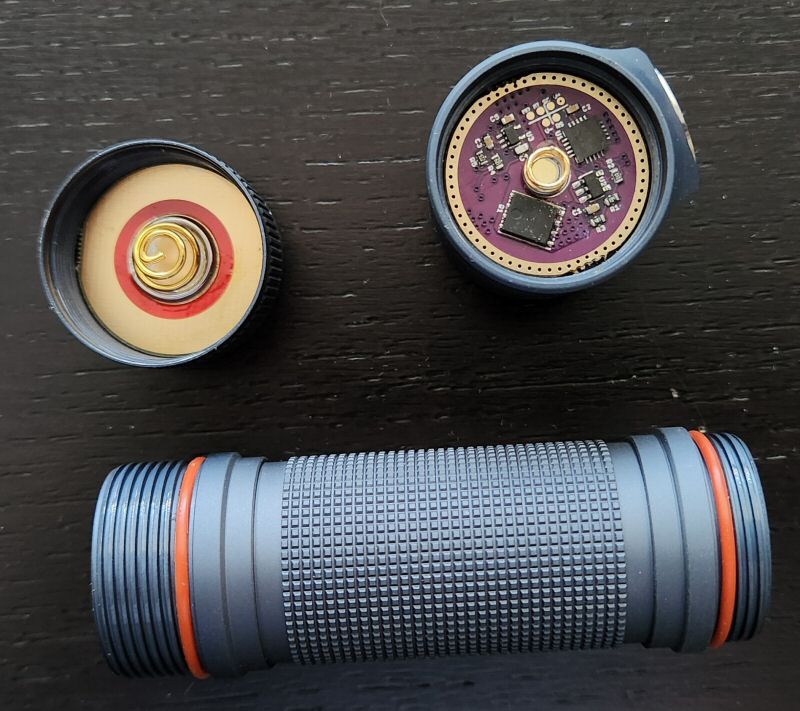
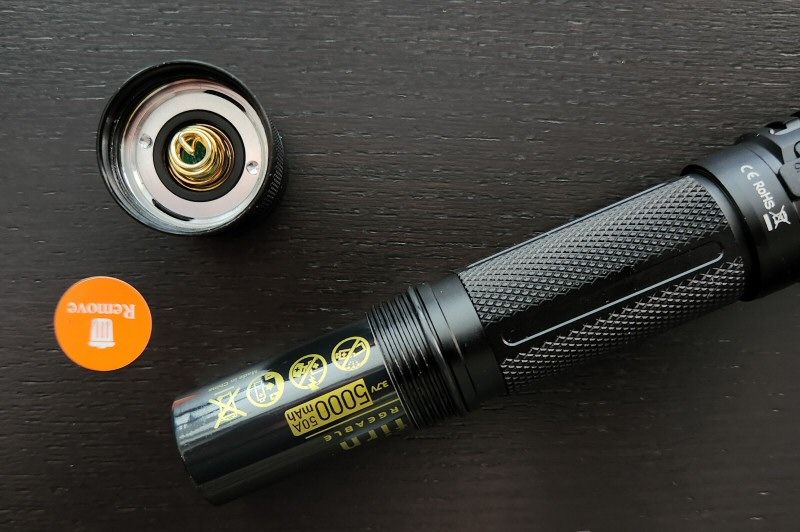
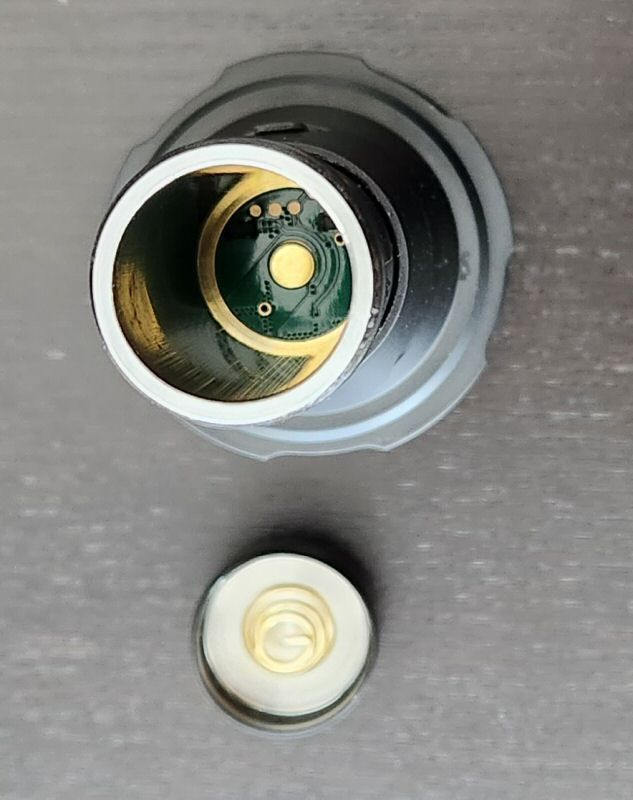
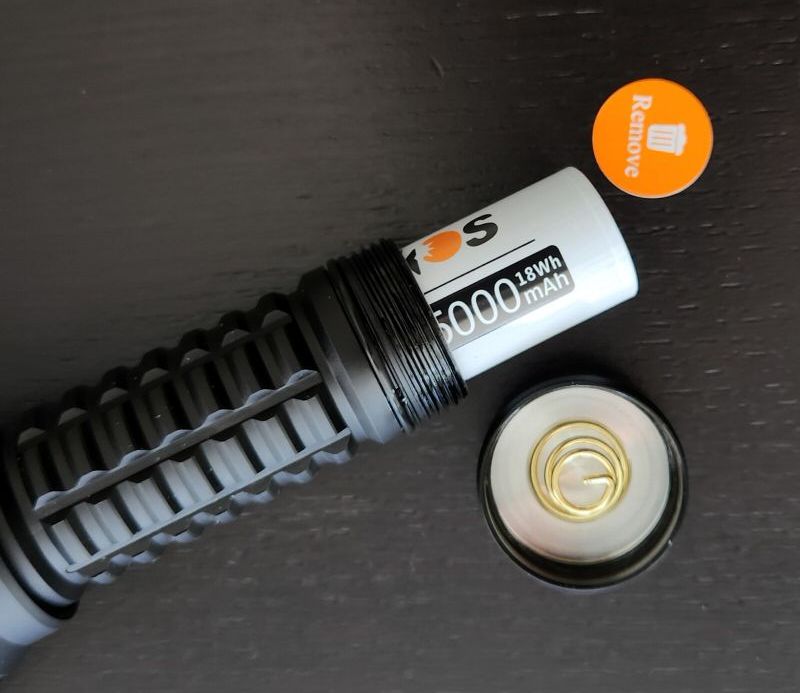
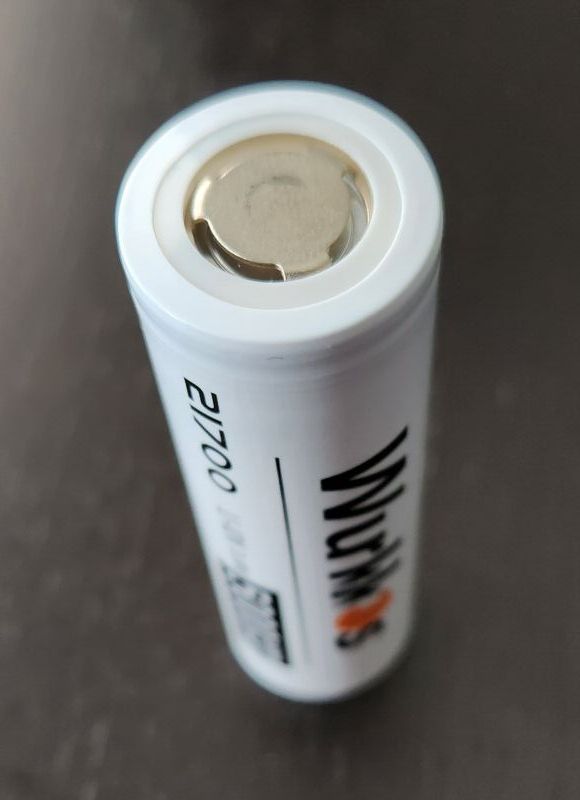
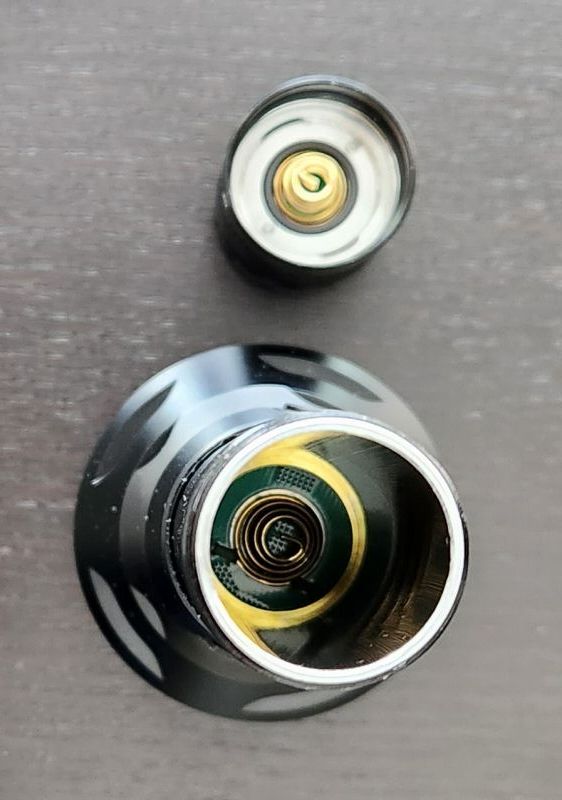
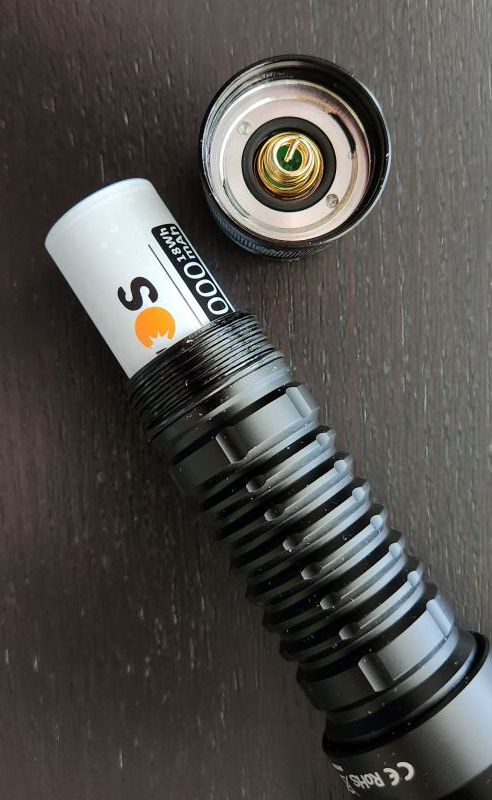
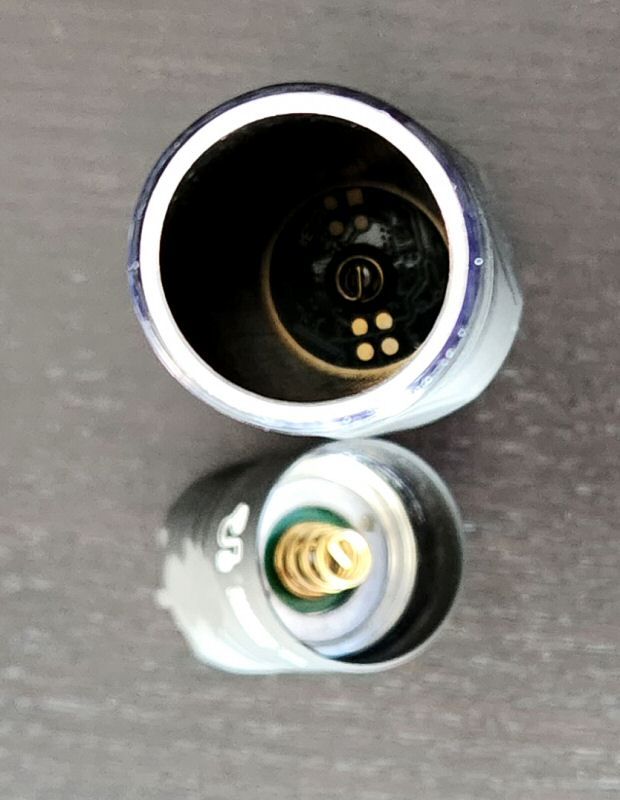
There are conical springs in both the head and tail, sporting a fairly thick gauge. As such, be careful about using longer cells in this light – you may dent the cell if you use overly long cells. Note that Hank advises uprotected, flat-top, high-drain batteries only.
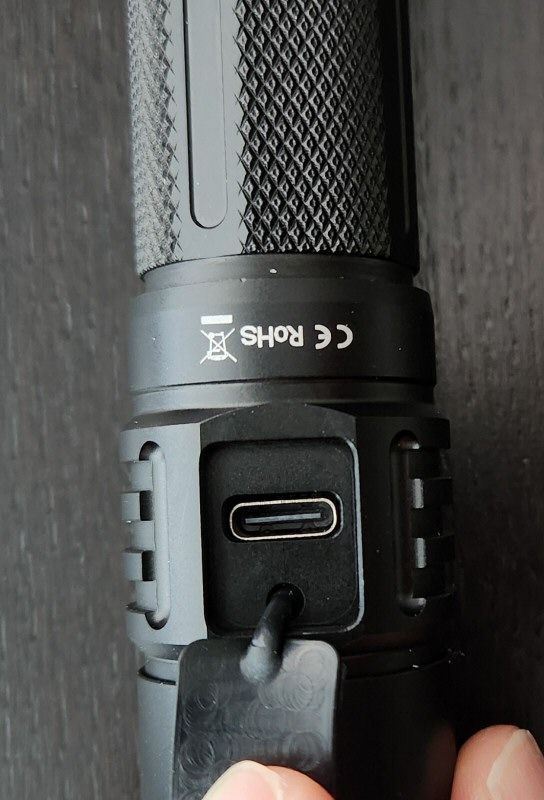
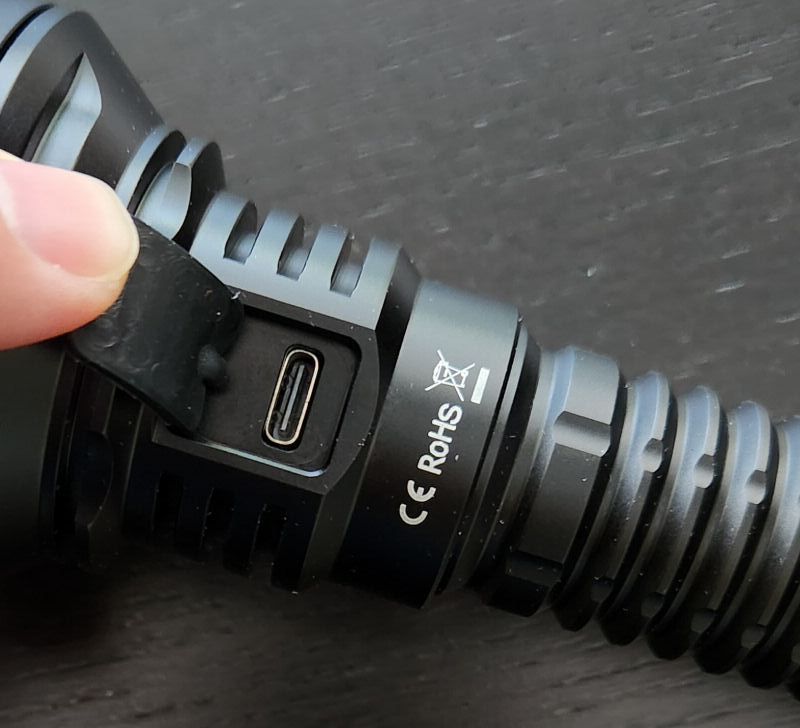
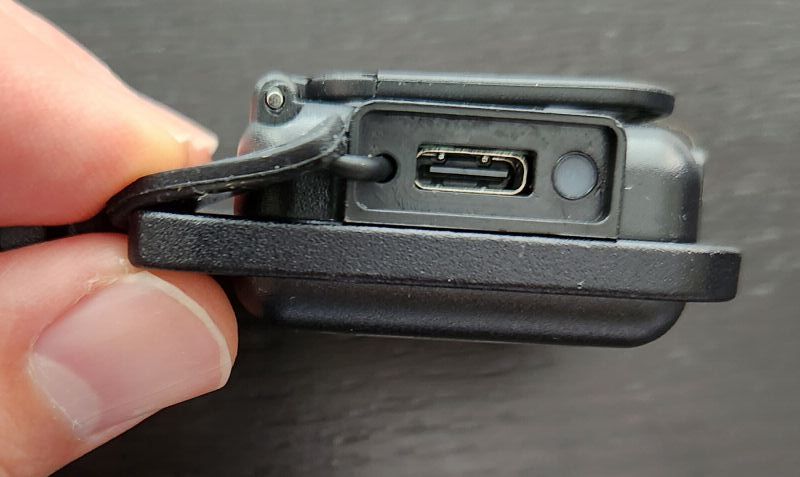
Unlike almost all the other lights I am reviewing these days, there is no built-in charger for batteries on the Emisar/Noctigon lights (or any bundled branded cells either). In keeping with the audience of flashlight enthusiasts, the assumption is that you have your own batteries and chargers on hand (and you can buy an optional charger from Hank).
Knurling is not particularly aggressive – it is really more of a fine checkered or line pattern. It does feel a bit more grippy than most lights I’ve handled these days, which typically seem to be a bit smooth. Combined with the ridge detail, I would say overall grip is pretty good. Note that the light can roll, but the switch button cover helps limit this. Anodizing looks to be good quality (for presumed type II, give the colour range), with no damage on my sample. I would describe the finish as matte.

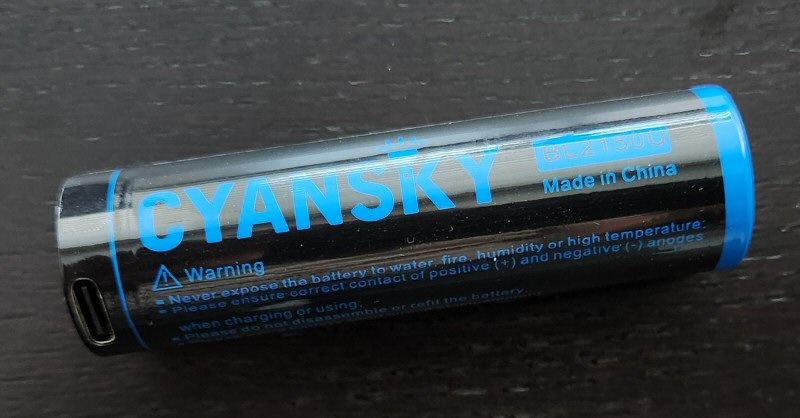
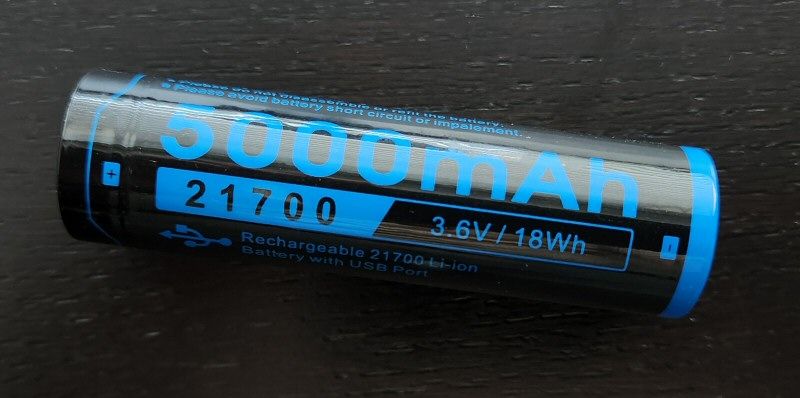
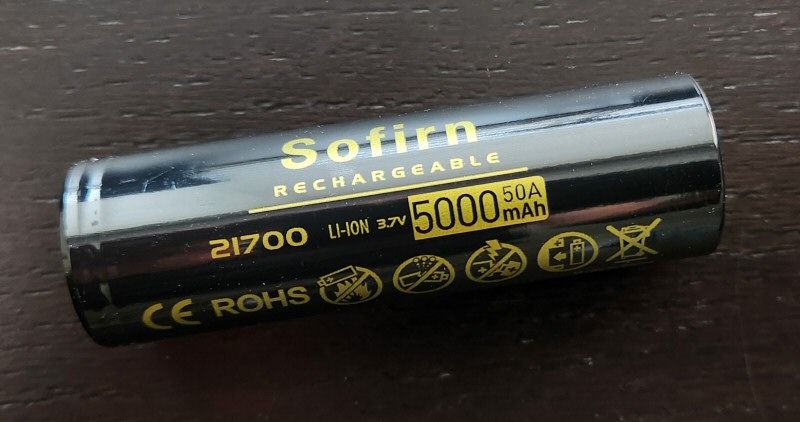
Although unprotected high-drain cells are recommend, I thought this might be a good opportunity to try out the high-capacity 18650 and 18350 cells Vapcell has sent me (although they are particularly high drain). Note that the Vapcell batteries are fairly substantial, so there is a risk of denting the cells when using in a compact light with dual springs like this.
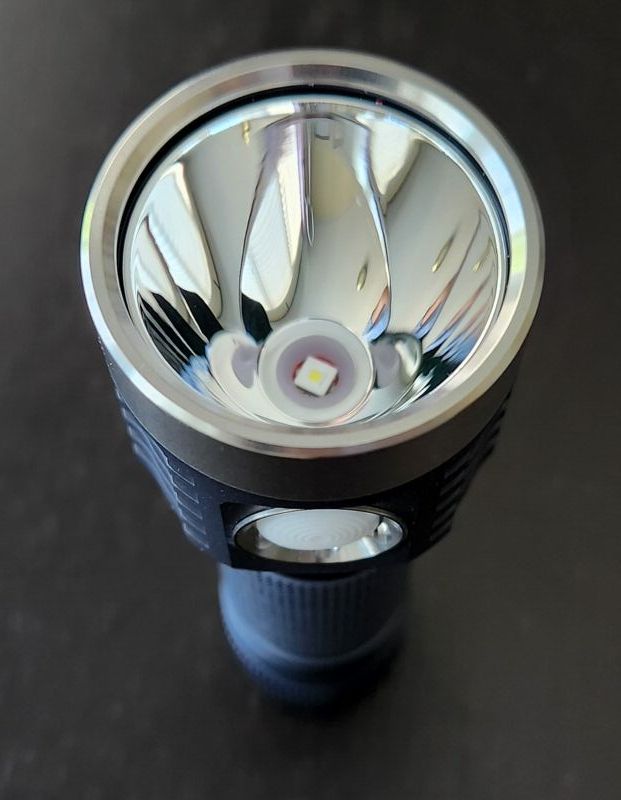
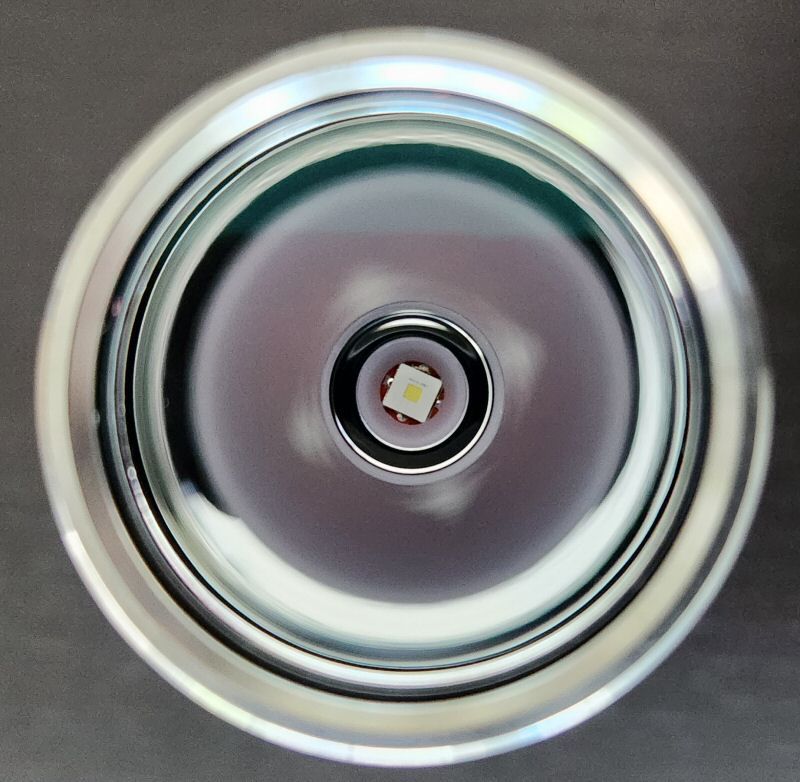
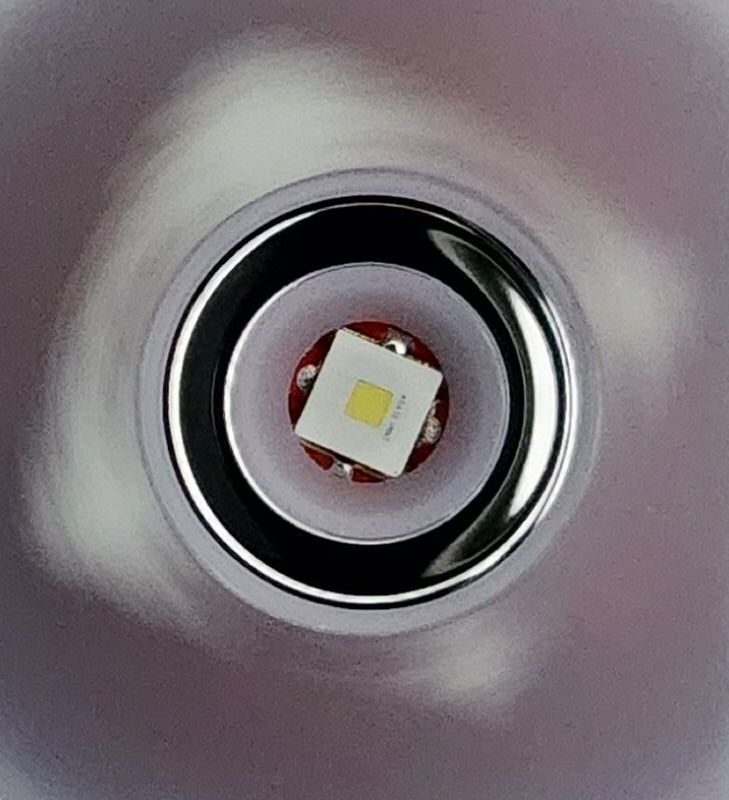
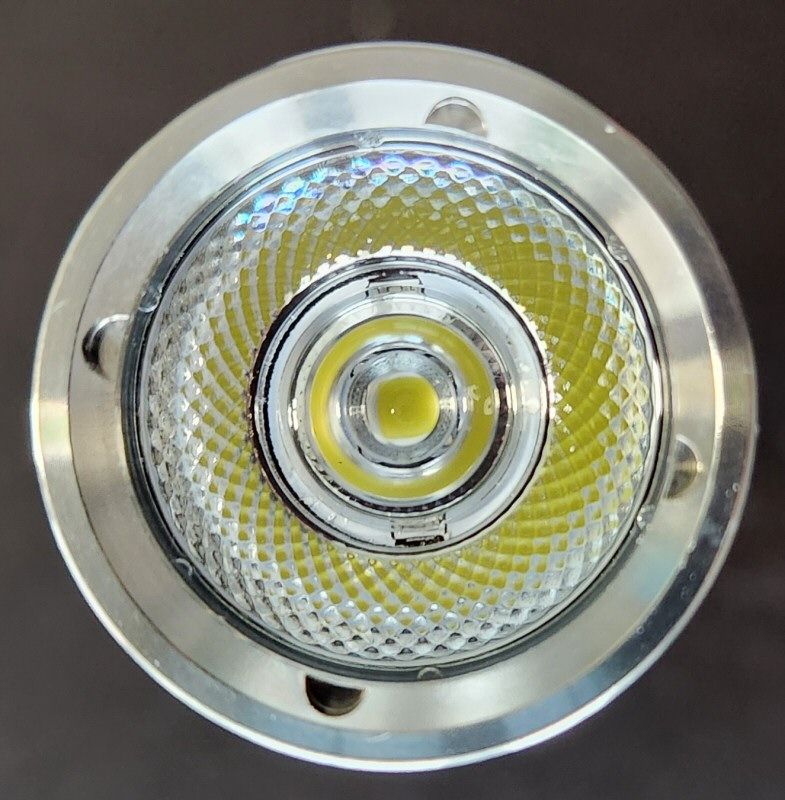
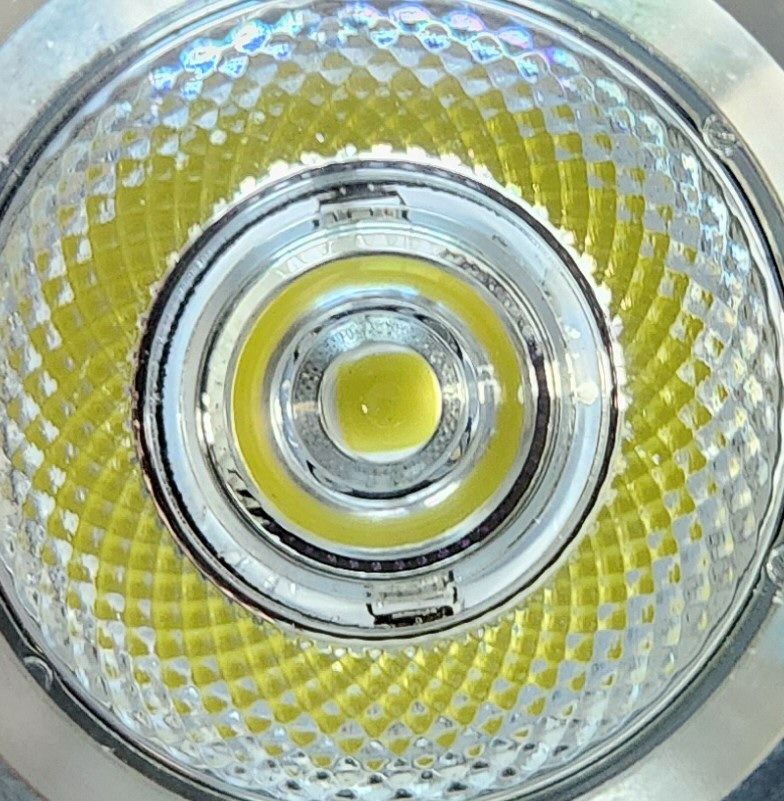
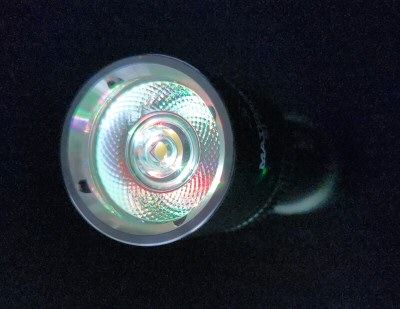
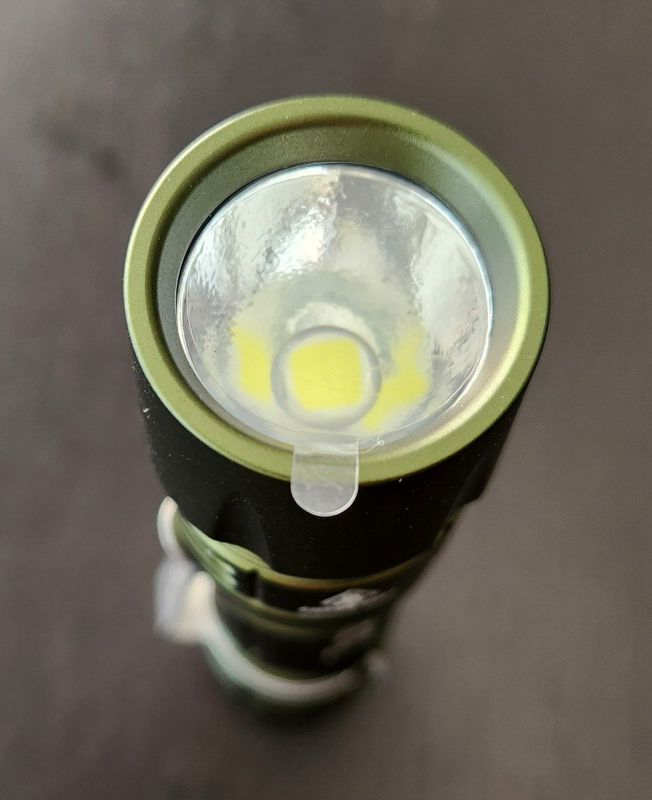
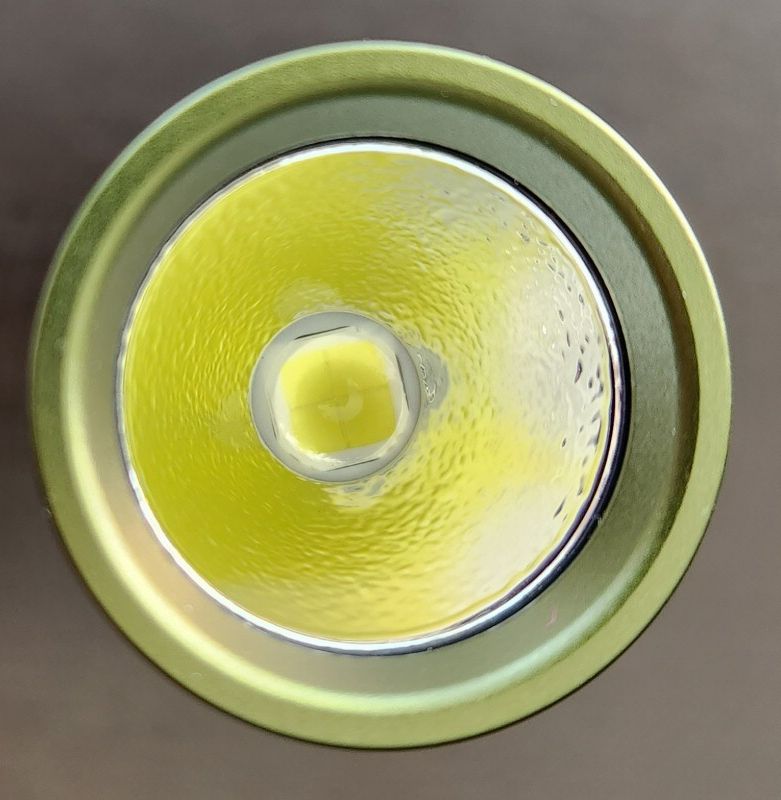
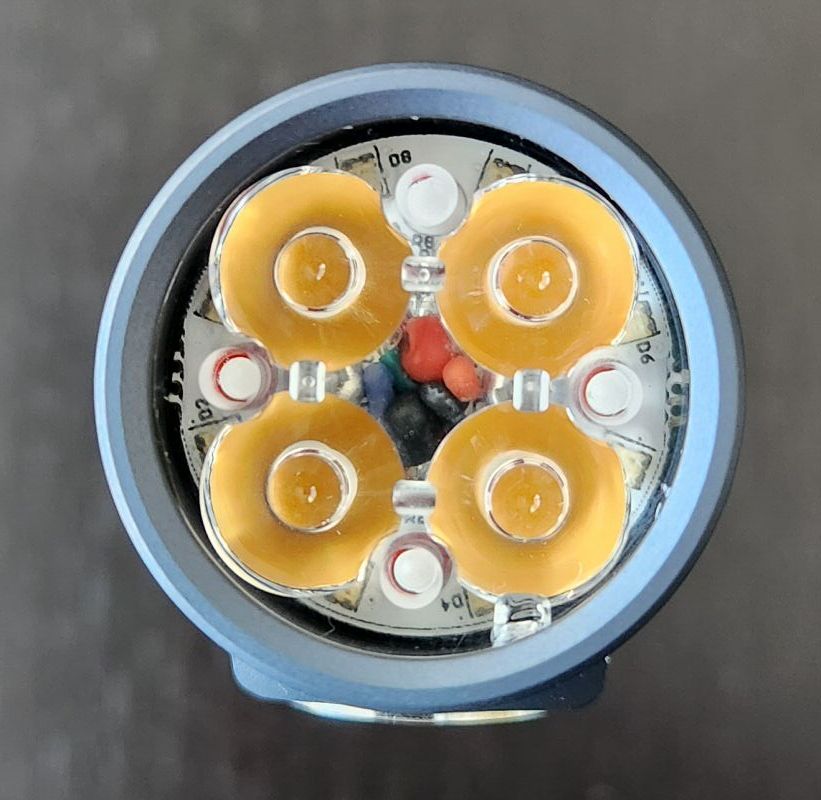
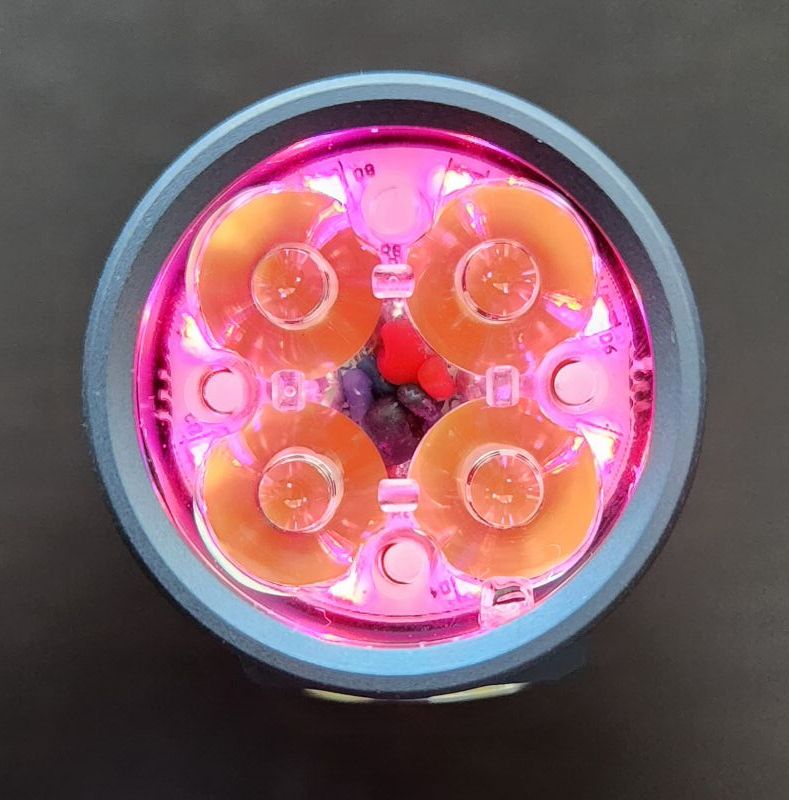
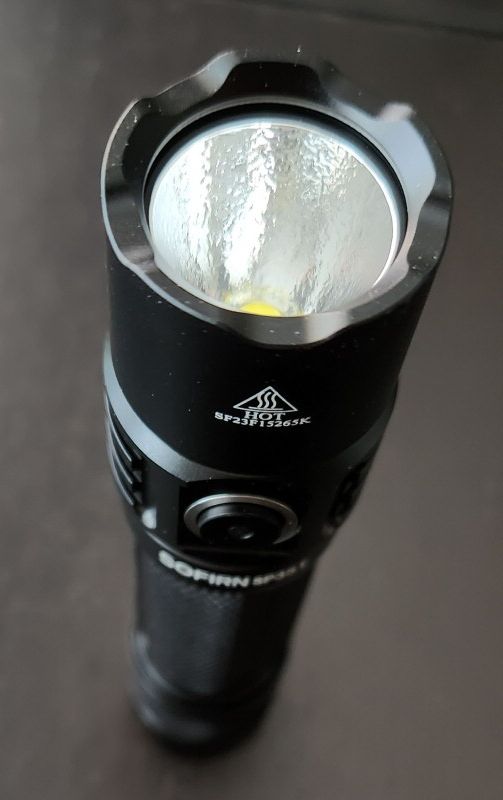
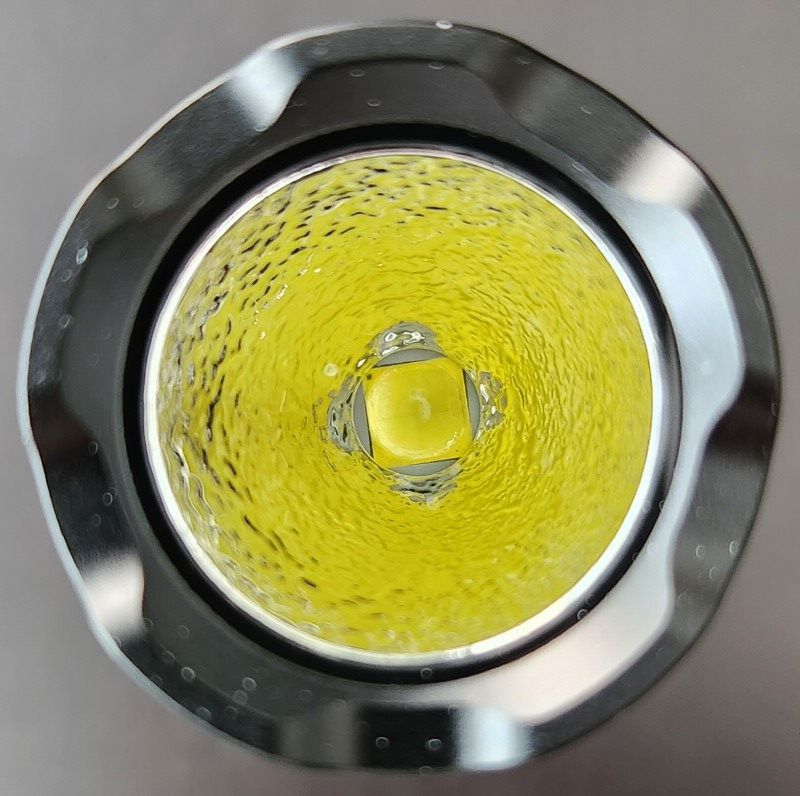
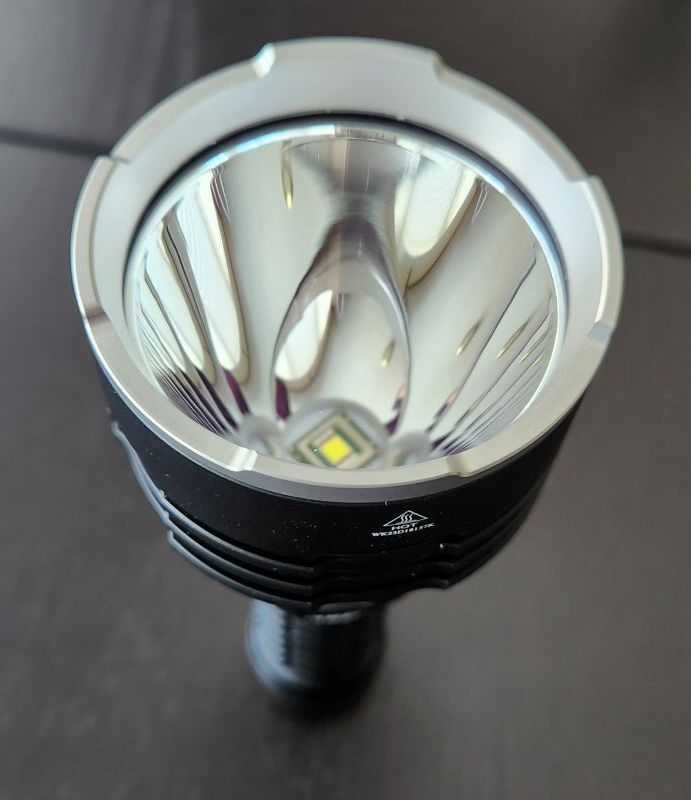
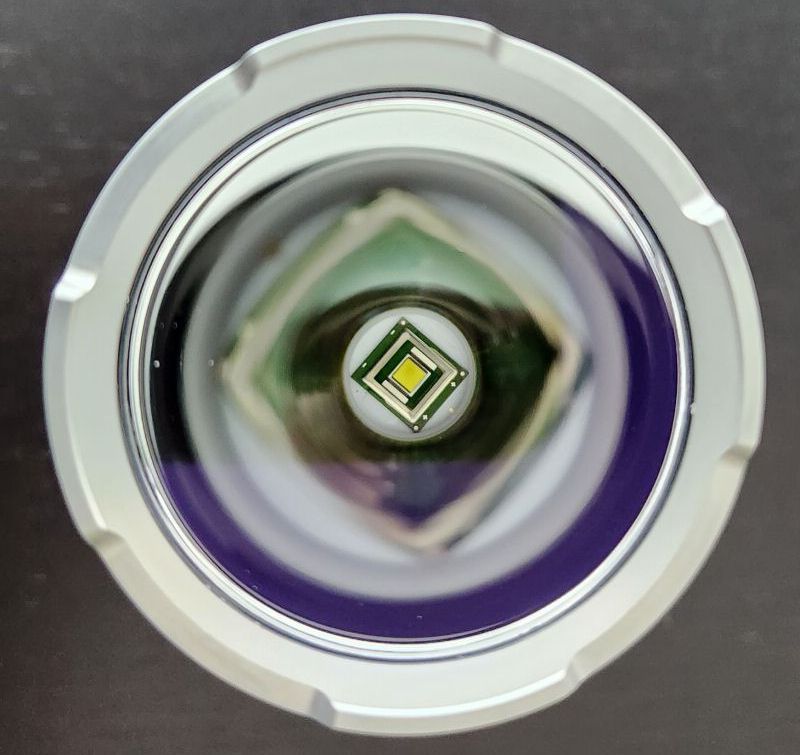
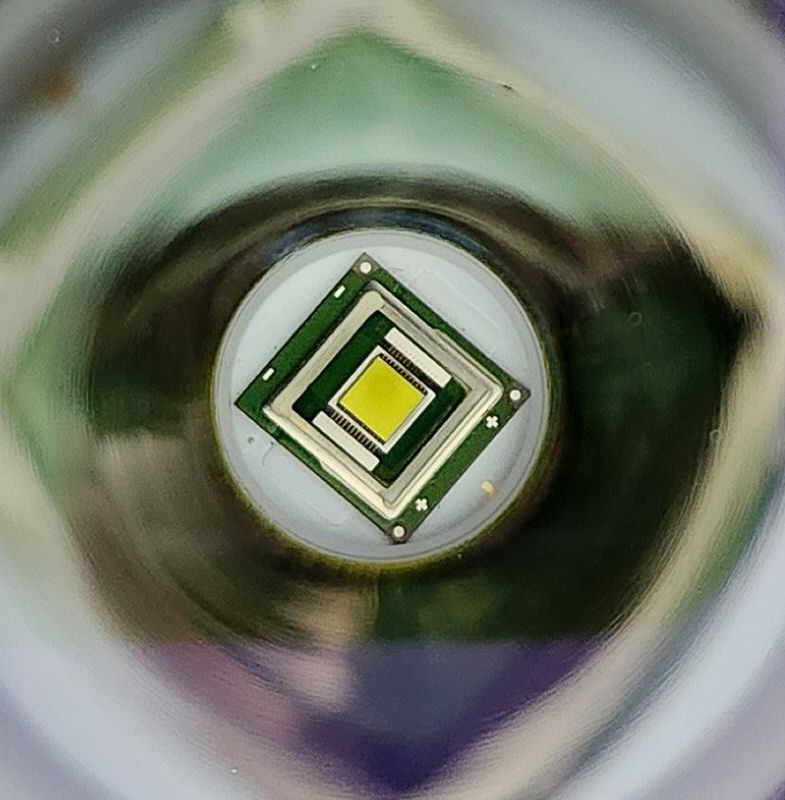
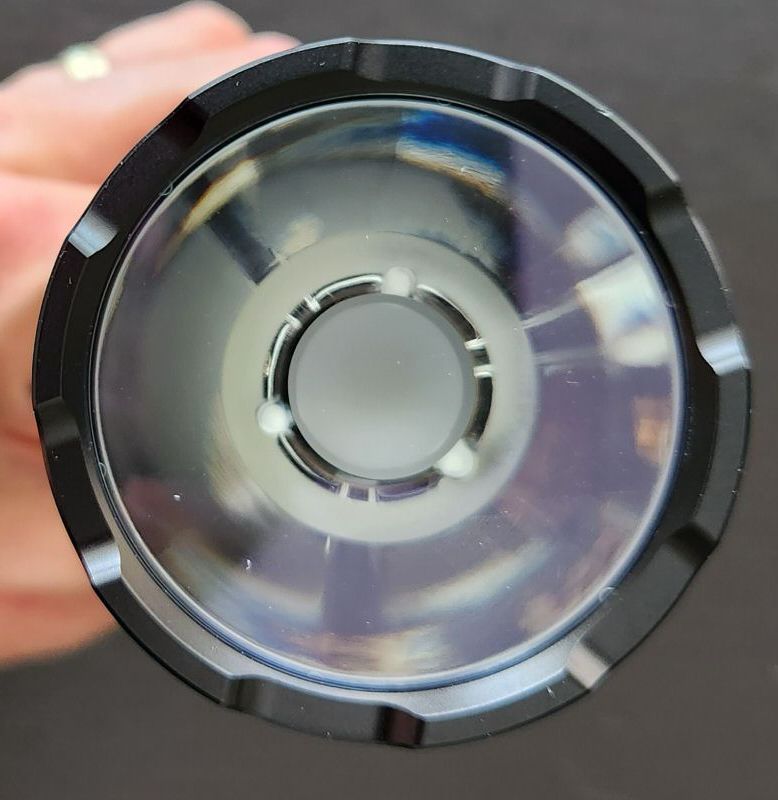
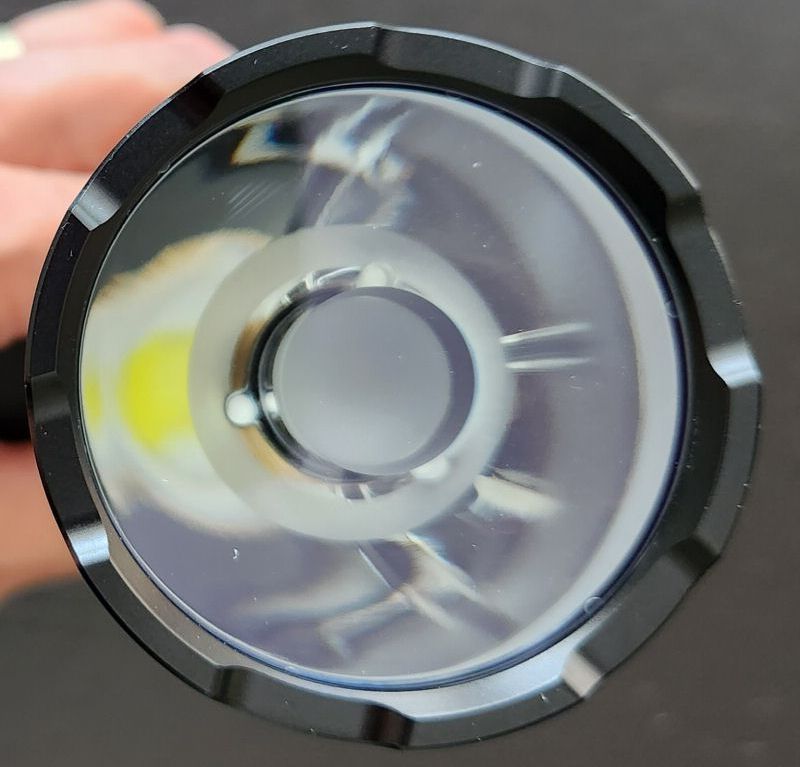
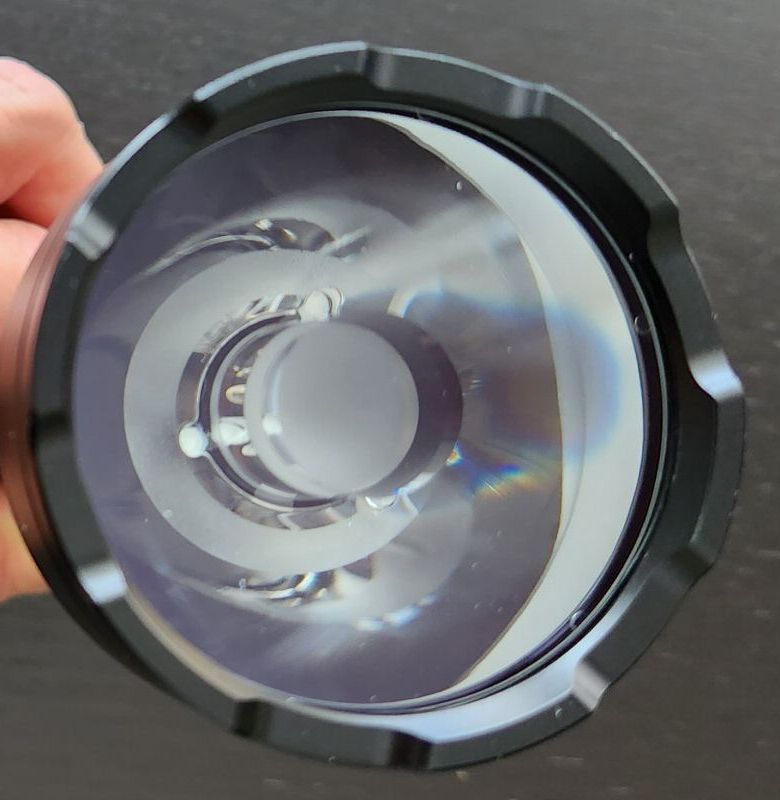
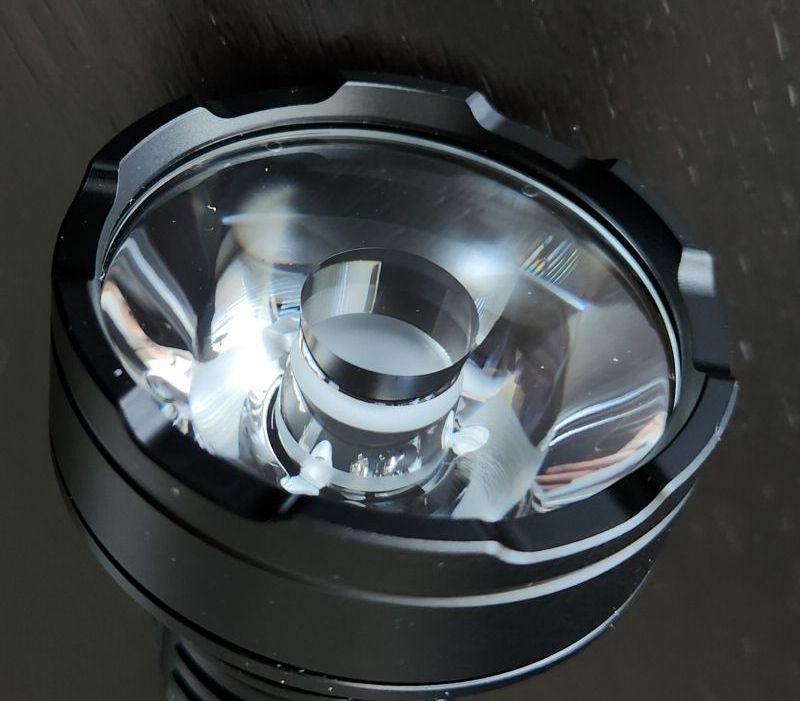
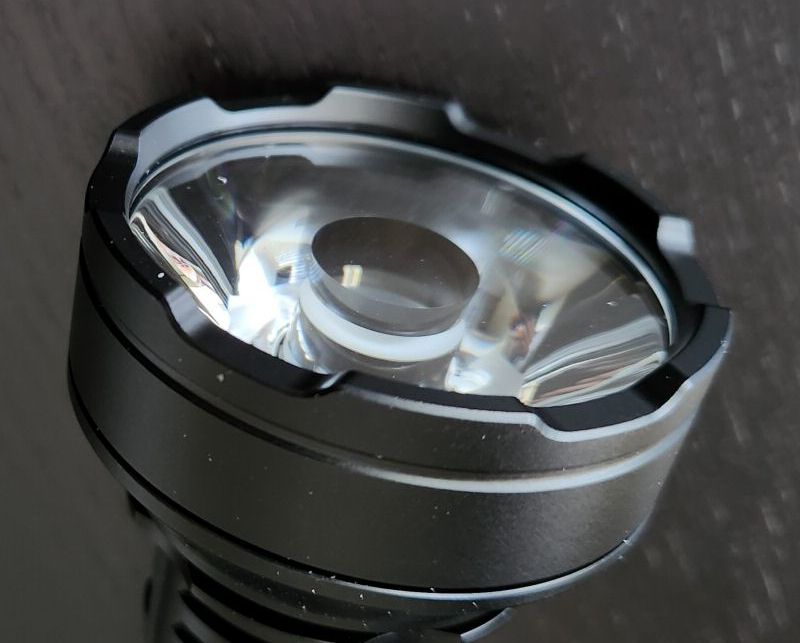
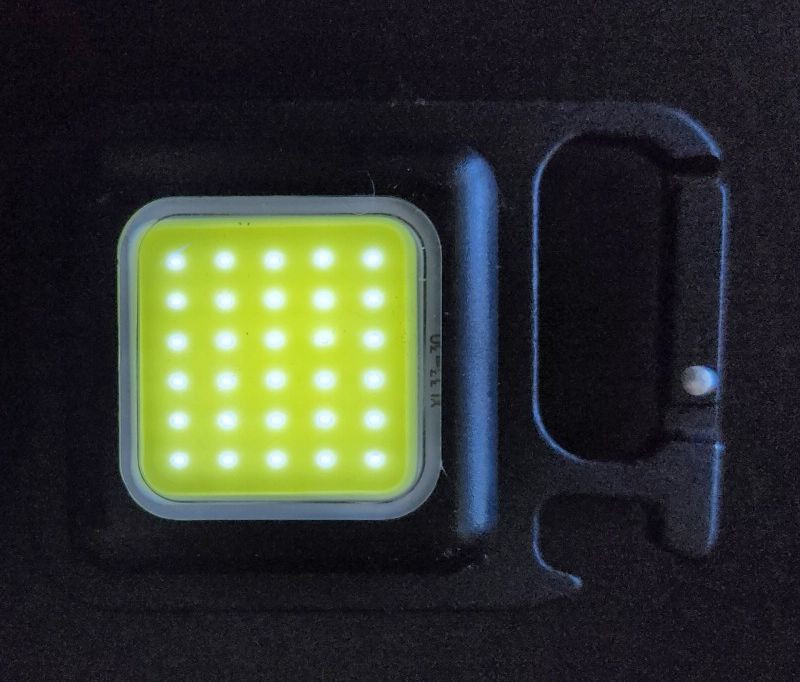
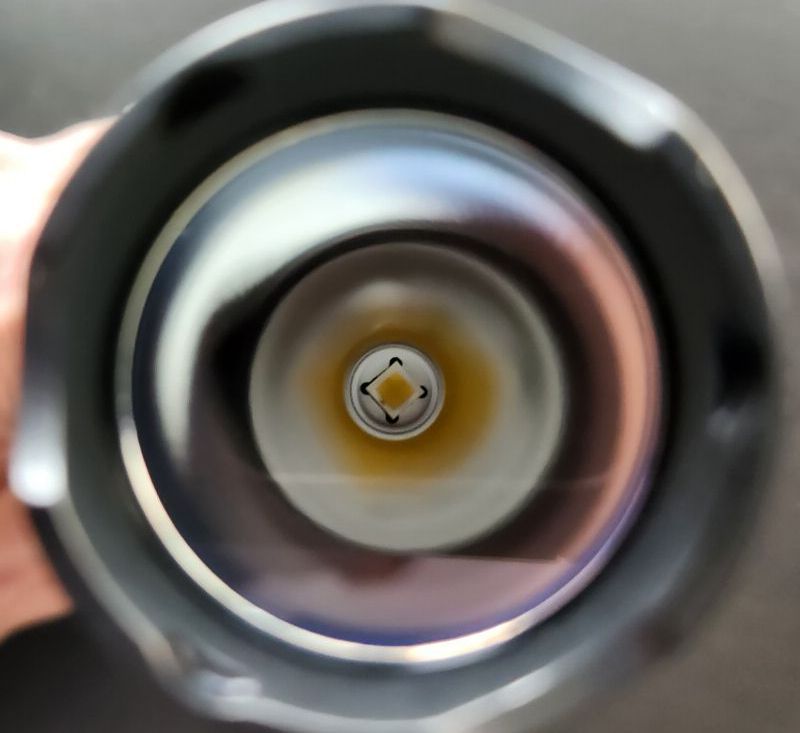
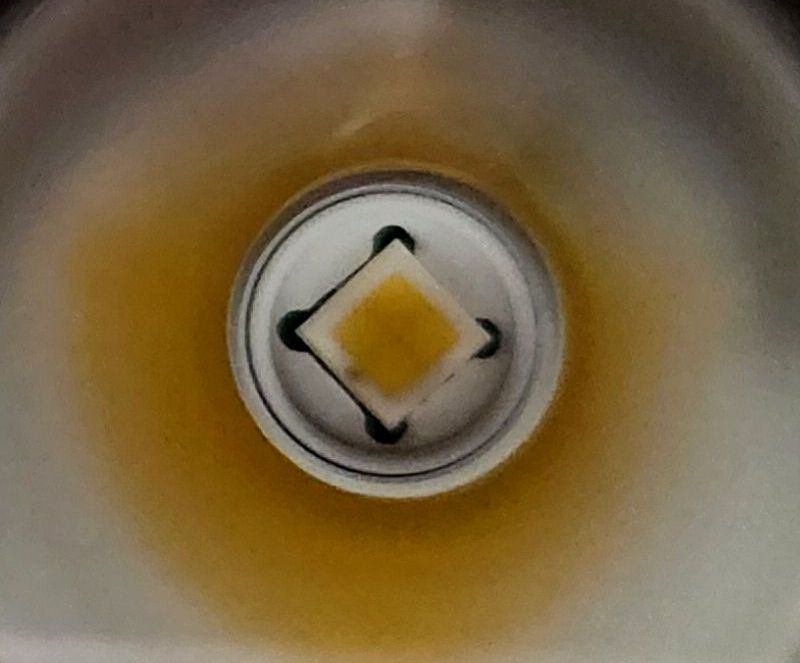
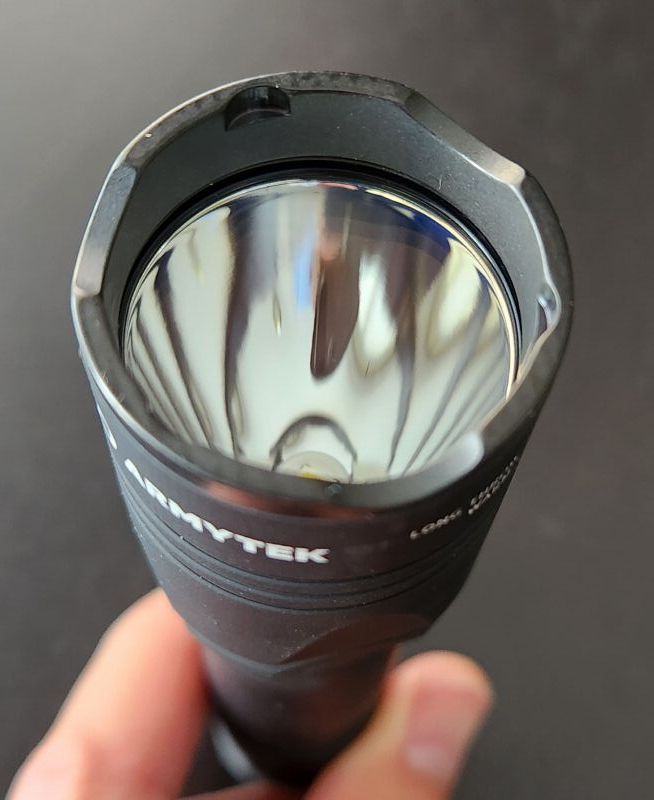
Except for the dedomed options, most of the D1 emitter options come with the smooth reflector shown above. I opted for the Osram W1 because of its tiny size and outstanding throw. Scroll down for actual outdoor beamshots.
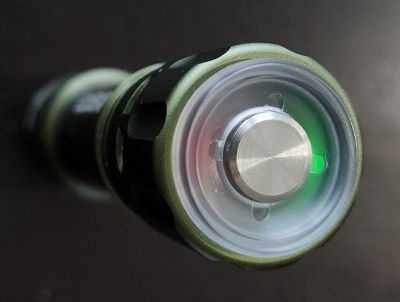
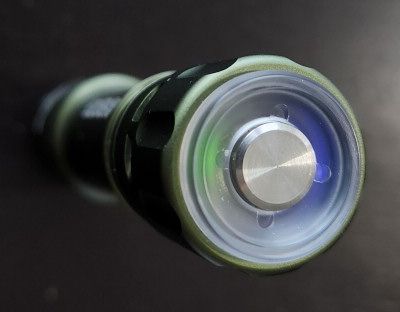
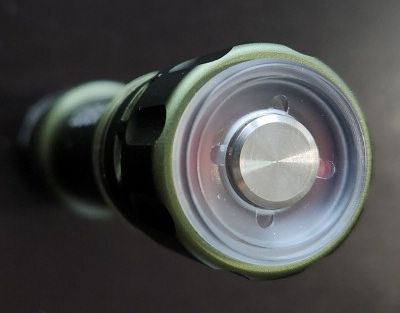
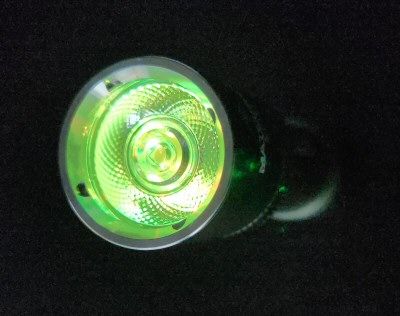
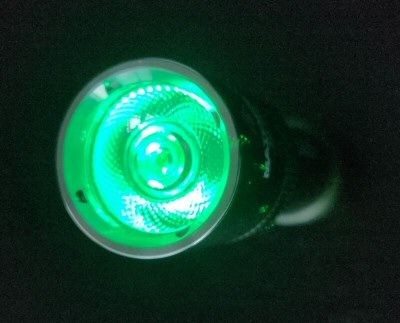
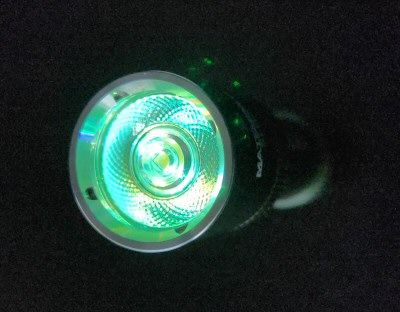
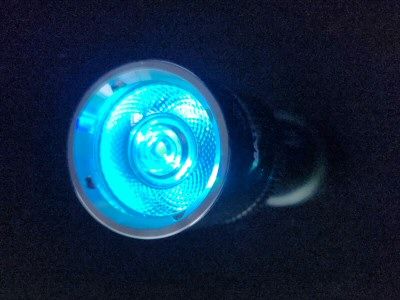
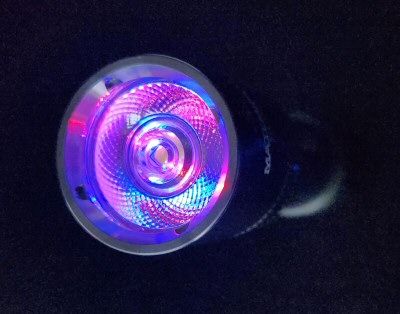
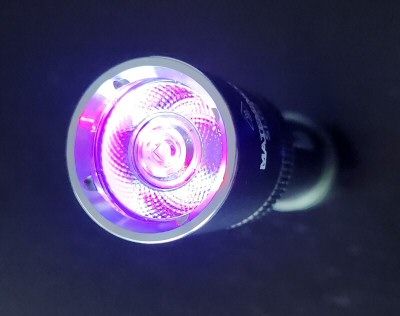
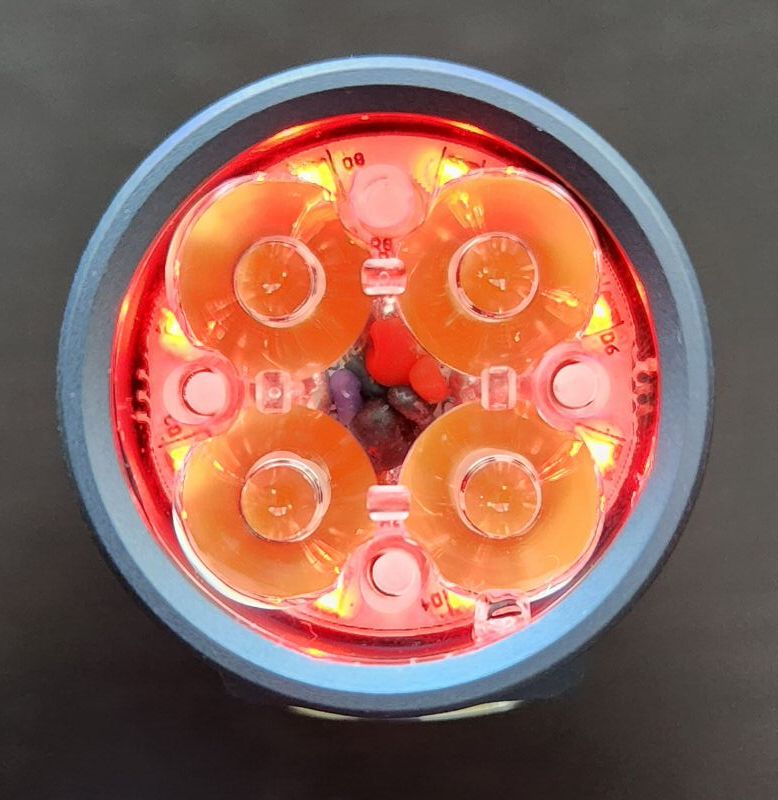
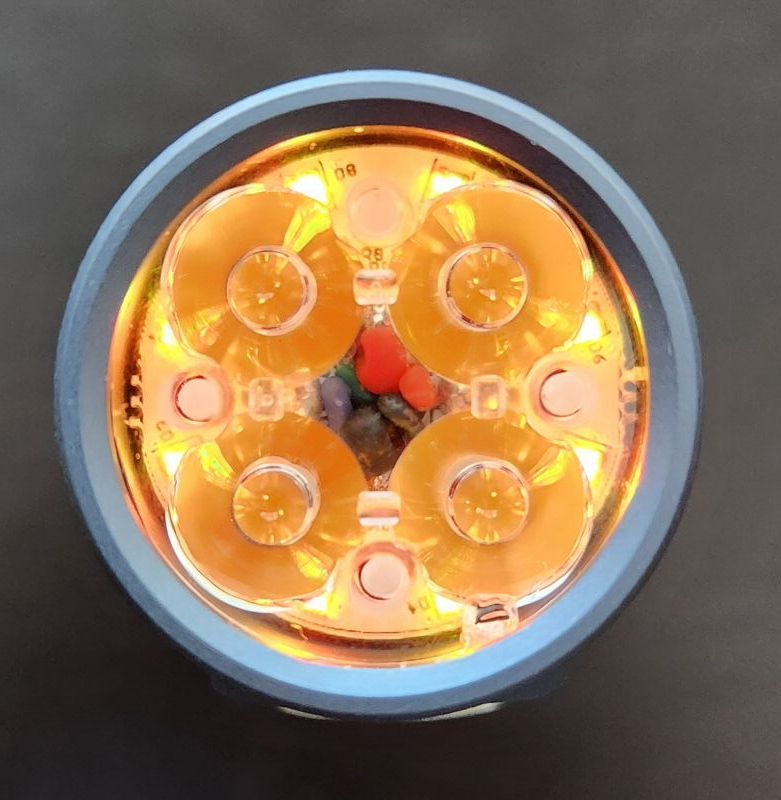
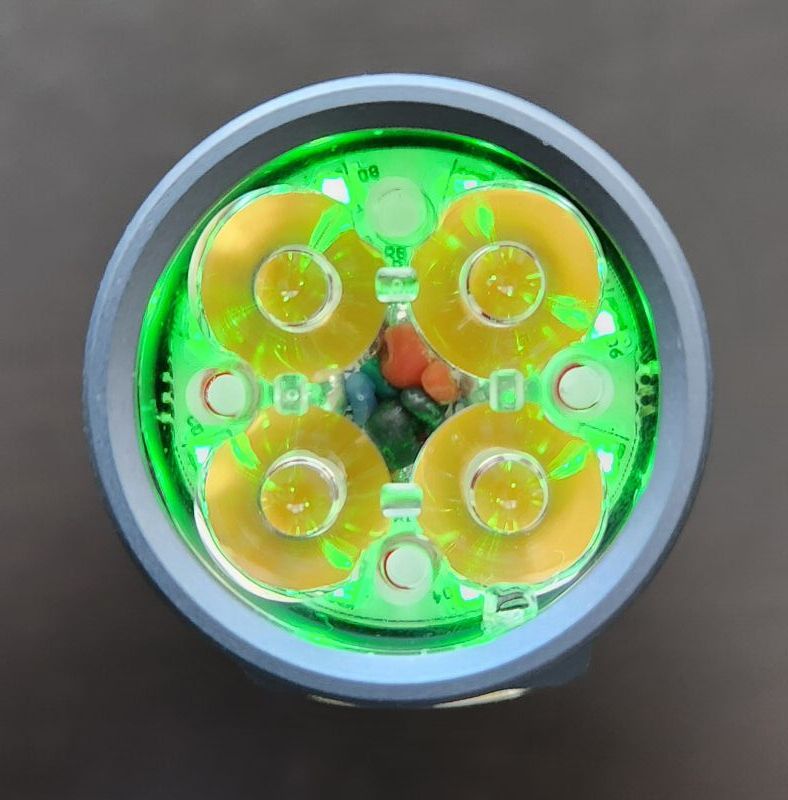
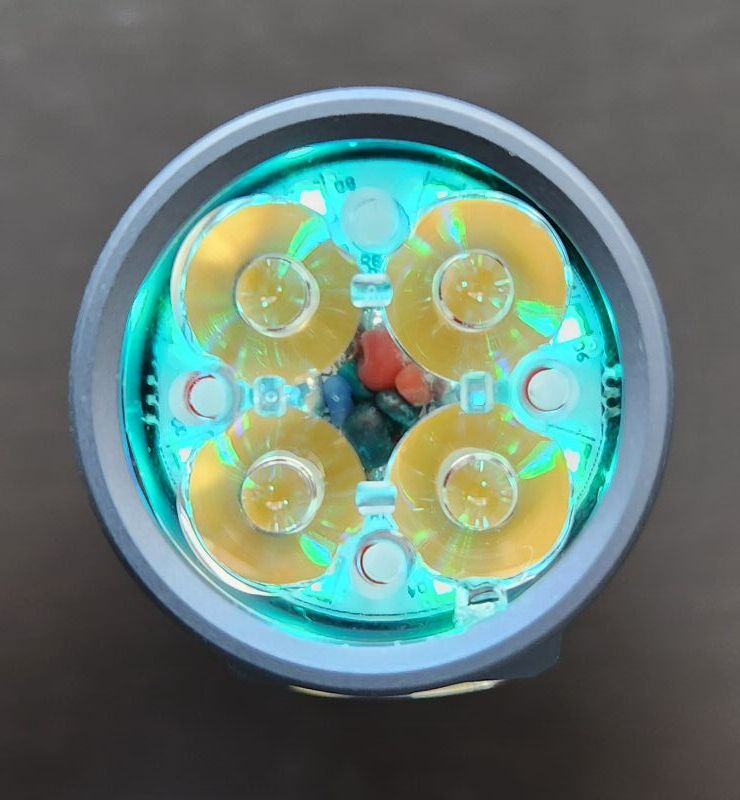
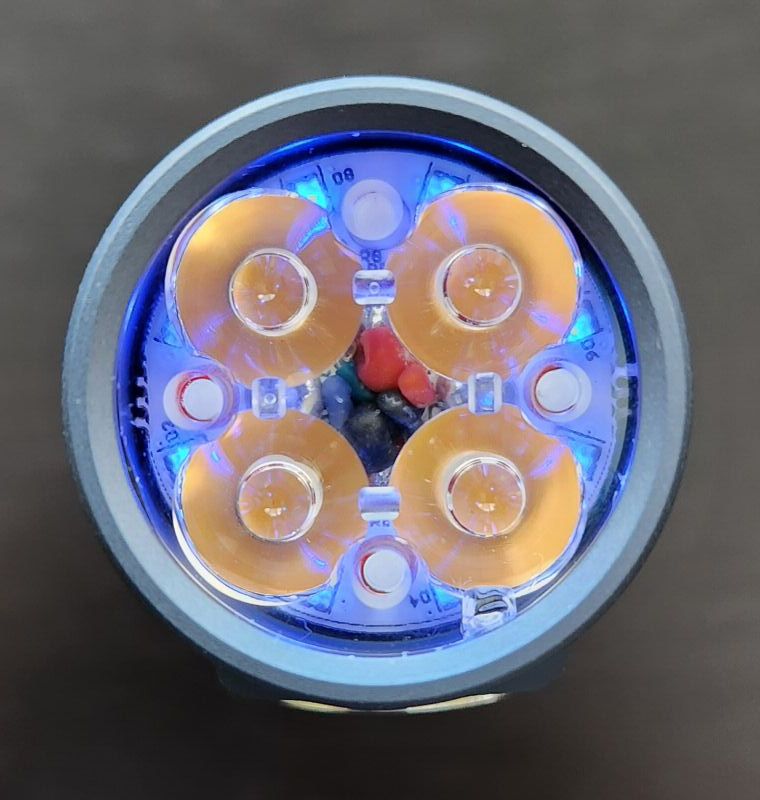
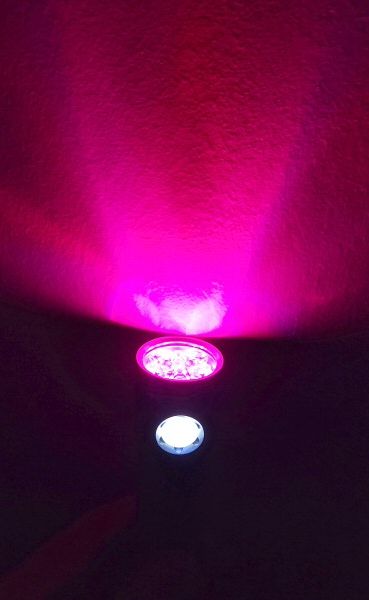
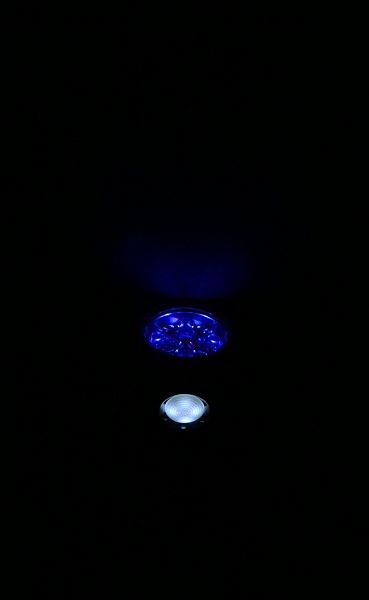
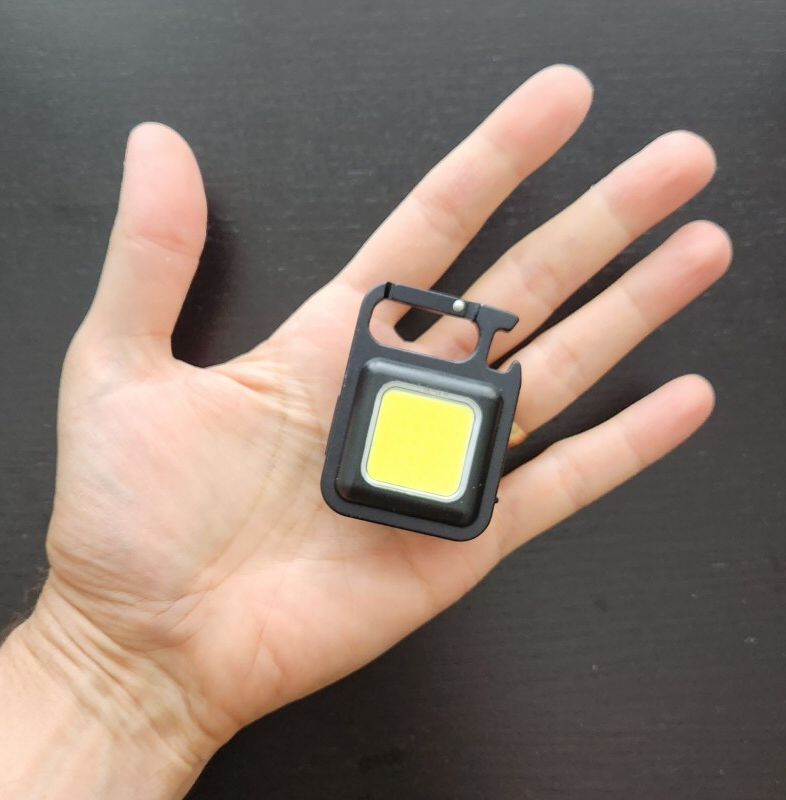
Here is what the auxillary side switch RGB LEDs look like, shown on the High output level (colour modes in sequence):

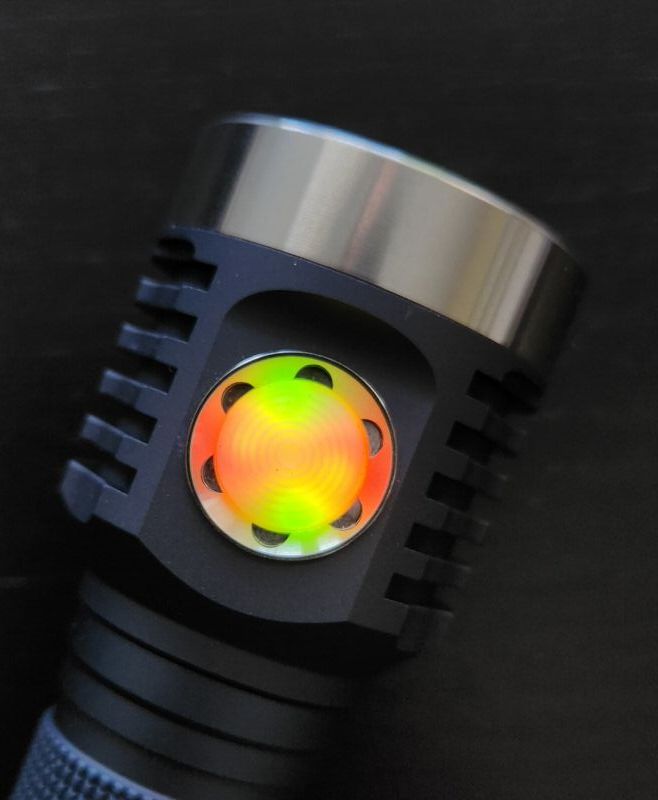
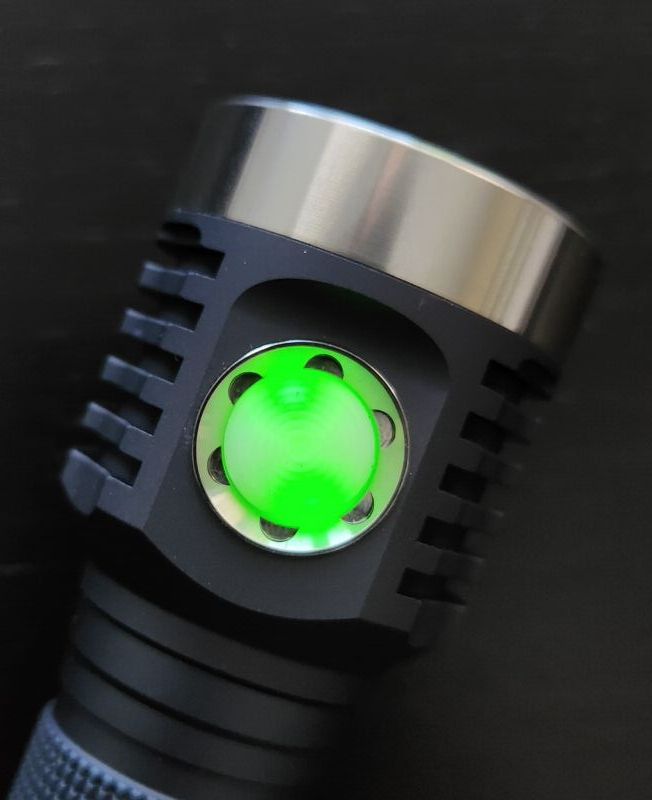
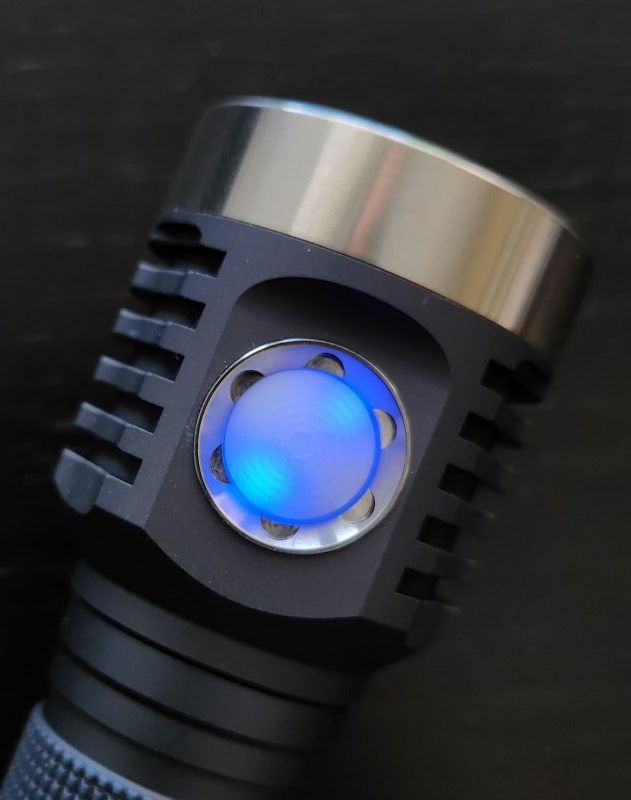
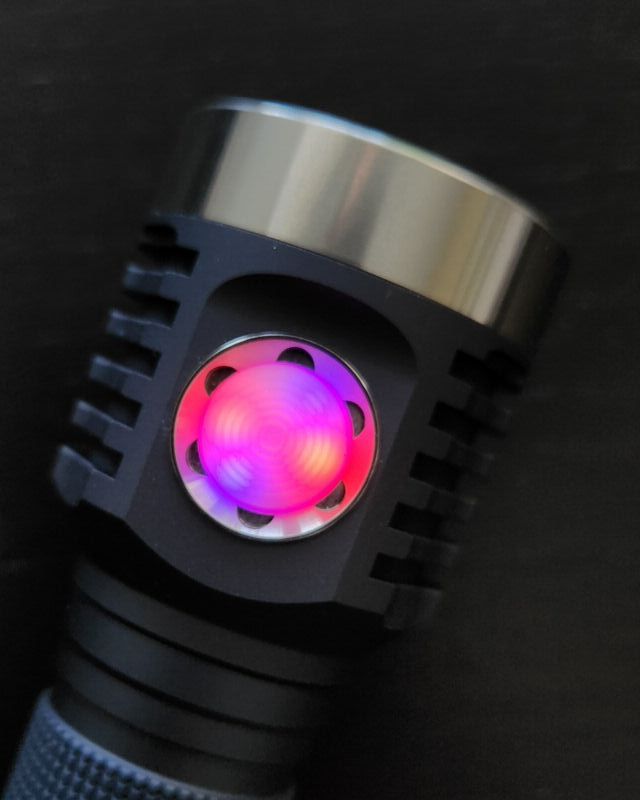
You can configure through Anduril’s AUX setting the individual colours of the switch RGB LEDs, or have it cycle through all colours, or use it as a colour-coded battery voltage readout. You can set it to one of two intensities, or flash, or leave off.
In my handling, I find the High level for the side switch LEDs is surprisingly bright – and the Low level is surprisingly low (so low in fact that it doesn’t register in my lightbox). Here are a couple of pictures showing the side switch in ambient room light on an overcast day, first on High and then Low:
As you can tell, the Low setting is very dim – you can just tell that the blue LEDs are on in this case, but just barely. Here are a couple of pictures in the dark though:
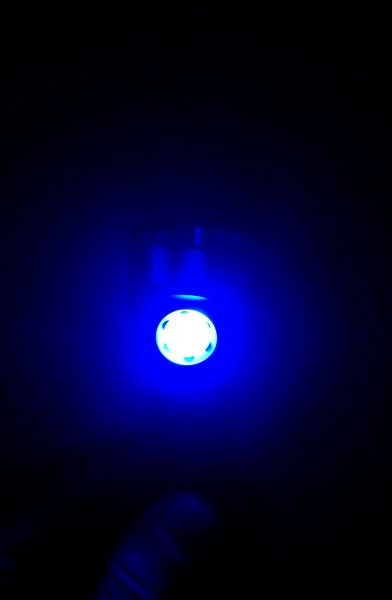
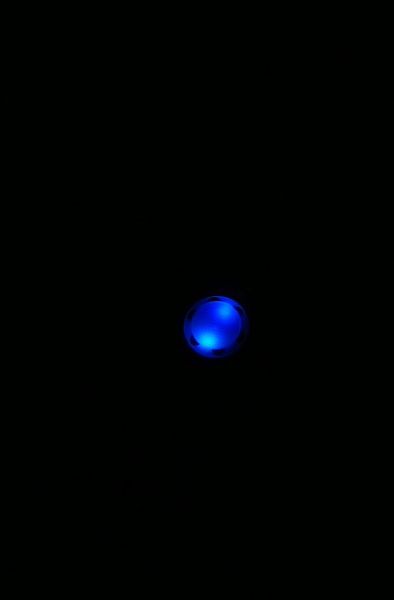
It’s not exactly a perfect comparison, as I’m using my cell phone camera’s auto-adjust, but this gives you a general idea of the significant difference between the Aux output modes. Scroll down for current draws and output measures, where possible.
User Interface
The D1 uses the open-source Anduril 2 user interface (UI). Anduril has two distinct UIs mode sets: Simple and Advanced. The labels are a bit misleading, as both are fairly sophisticated – it is just that the Advanced UI has a lot of extra options not available on the scaled-down Simple UI. Note that both the Simple and Advanced UI now include the discrete Stepped level mode as well as the continuously-variable Smooth Ramping mode.
To switch from the default Simple UI to Advanced UI, you need to do 10 clicks from Off with a hold on the 10th click (10H), with 10 clicks (10C) to return to simple UI. Advanced UI has a lot more options available. It’s easier to show the UIs rather than explain them in words, so here is a helpful pic:
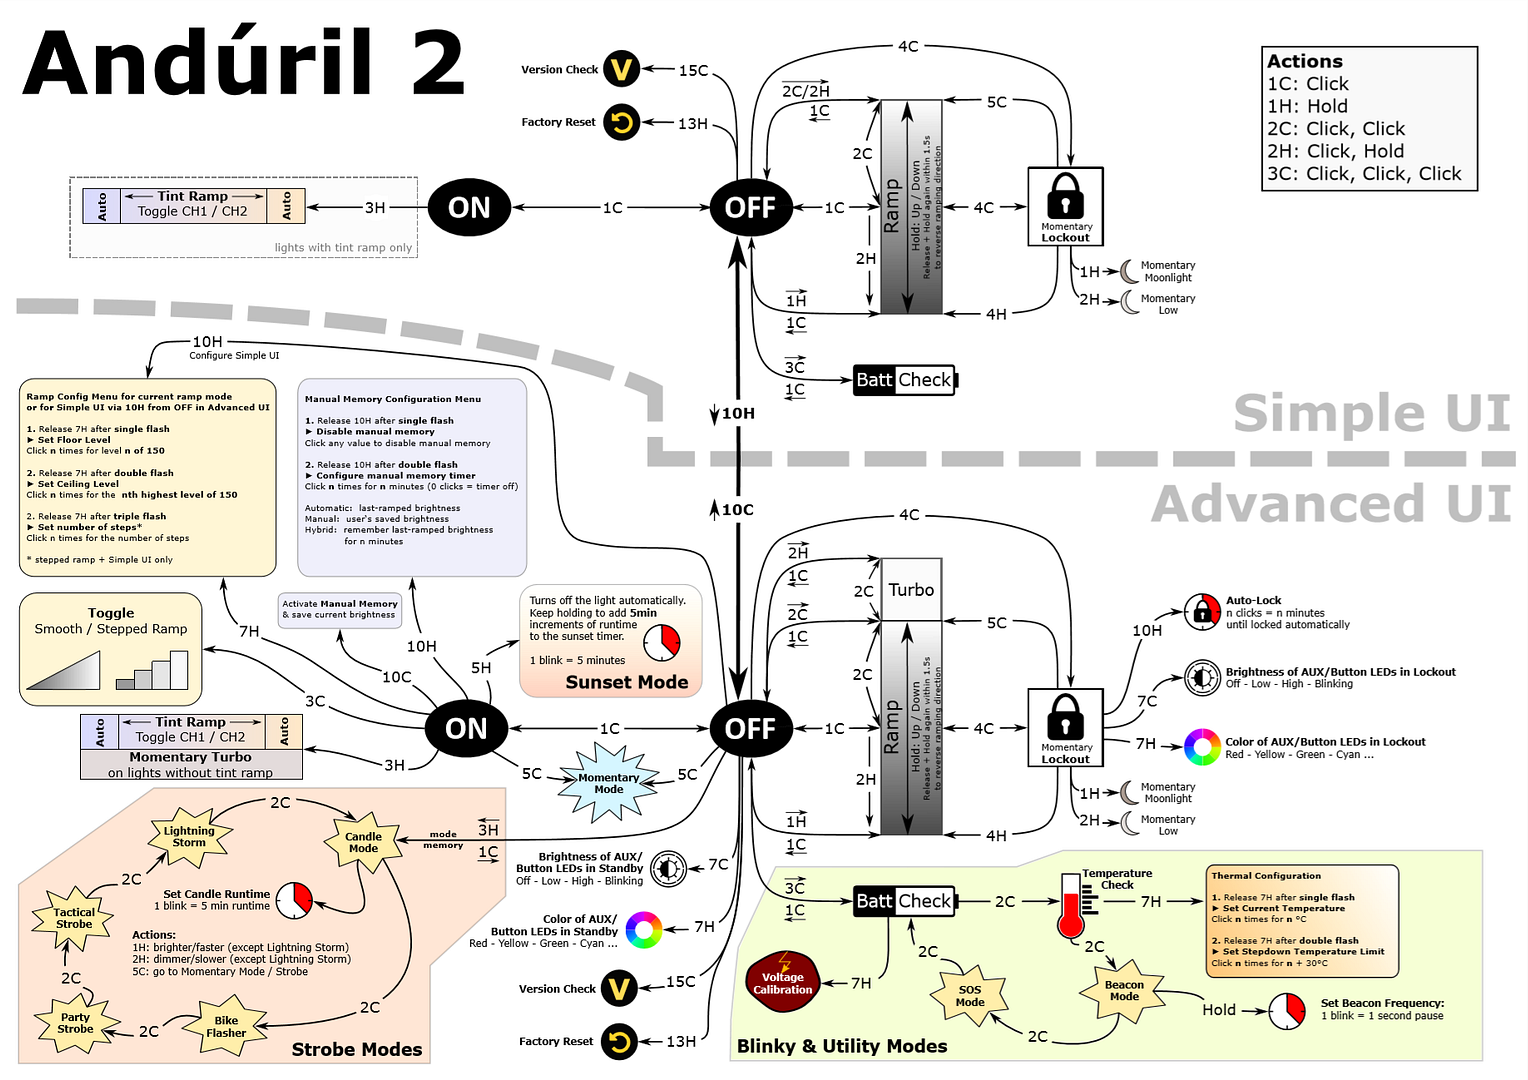
You can also download a plain text-based manual from Anduril creator ToyKeeper, or a more interactive one with version control here.
This implementation of Anduril 2 has eight discrete Stepped levels, which I’ve numbered in this review as L1 through L8 (with L1 being the lowest level, and L8 being Turbo).
According to the firmware Version Check, my D1 sample (purchased in the summer of 2023) is model 0125. Full info is 2022-07-29-01-25 (version code is Year-Month-Day the firmware was compiled, followed by a 2-digit brand ID and 2-digit product ID).
Again, check the image and link above for more info, but here is a simplified description of the UI to get you started.
From OFF:
- Press-and-hold (1H): Turns On in lowest output, in either Ramping mode or Stepped mode depending on which mode is enabled (and which UI you are in)
- Single-click (1C): Turns on in last memorized mode used (Ramping or Stepped)
- Double-click (2C): Turns on to Turbo (aka the Ramping max output)
- Triple-click (3C): Battery check (voltage read out a single time) and basic flashing/strobe modes.
- Triple-click-and-hold (3H): Special strobe modes, but only when in Advanced UI (remembers last strobe mode used)
- 4 clicks (4C): Lockout mode. In lockout mode you have different options available:
- Press-and-hold (1H): Momentary Moonlight
- Double-click-and-hold (2H): Momentary Low
- 4 clicks (4C): Turns On in memorized output level
- 4 clicks and hold (4H): Turns On in the lowest level
- 5 clicks (5C): Turns On in Turbo
- 10 clicks and hold (10H): Configure the lock timeout threshold (in Advanced UI only), allowing you to pre-set the timeout time of the lock.
- 7 clicks (7C): (Advanced UI only) Enters AUX/Button LED config for the next mode. There are four modes you can switch between; constant low, blinking low, off, constant high. Click 7 times again to advance to the next option, in sequence. The light auto-memorizes the last option you select.
- 7 clicks-and-hold (7H): (Advanced UI only) Enters AUX/Button LED config for the next colour. The colours follow the sequence: Red, Yellow (Red+Green), Green, Cyan (Green+Blue), Blue, Purple (Blue+Red), White (Red+Green+Blue), Disco (fast random colors), Rainbow (cycles through all colors in order more slowly), and Voltage read-out (uses colour to display battery charge).
From ON:
- Press-and-hold (1H): Ramps up (or Steps up, depending on the mode). Ramps/steps down if you do it again.
- Single-click (1C): Turns Off
- Double-click (2C): Jumps to Turbo
- Double-click-and-hold (2H): Ramps down (or Steps down)
- Triple-click (3C): Switch between Ramping and Stepped modes
- 4 clicks (4C): Lockout mode (see above for options)
Mode memory:
Yes, the circuit memorizes the last constant On output level in either Ramping or Stepped modes.
Strobe/Blinking modes:
Yes, quite a few actually. The strobe/blinking modes are accessible from Off with a triple-click (3C) or triple-click-and-hold (3H), but in Advanced UI only. You can switch between strobe/blinking modes with 2 clicks (2C), in the following sequence (see testing results below to see what these look like):
Triple-click (3C):
- Battery check
- Temperature check
- Beacon mode
- SOS mode
Triple-click-and hold (3H):
- Candle mode
- Bike flasher mode
- Party strobe mode
- Tactical strobe mode
- Lightning mode
Low voltage warning:
Sort of. In operation, the light drops in brightness in steps, and runs for an extended time at a very low level. Apparently it shuts off when the cell is ~2.8V (although I haven’t run it that long to confirm).
Lock-out mode:
Yes. In either Simple UI or Advanced UI, lockout is accessed by 4 clicks (4C) from On or Off (repeat to unlock). The lockout mode is unusual with Anduril, as it actually enables momentary operation in the minimum modes. There are other lockout modes available, as explained above. As always though, I recommend you physically lock out at the light at the tailcap, if you want to guarantee no accidental activation.
Temperature check and thermal calibration mode:
This is a little complicated (and beyond the needs of most users), so I will just refer you to the diagram from the manual above. With default settings, I find this light steps down fairly quickly due to heat (unsurprising, given default Anduril thermal settings are conservative). I have not tried to reconfigure my sample. Note that if you get into any trouble (or wish to reset any custom configurations), you can easily reset the light to the factory defaults by 13 clicks-and-hold (13H).
Reviewer Comments:
Anduril is a sophisticated setup – a choice of Simple or Advanced UI, Stepped and Ramping modes, etc. Of course, you will never please everyone, and many may prefer a simpler interface. But as this light is directed toward flashaholics, I think it is a very good choice.
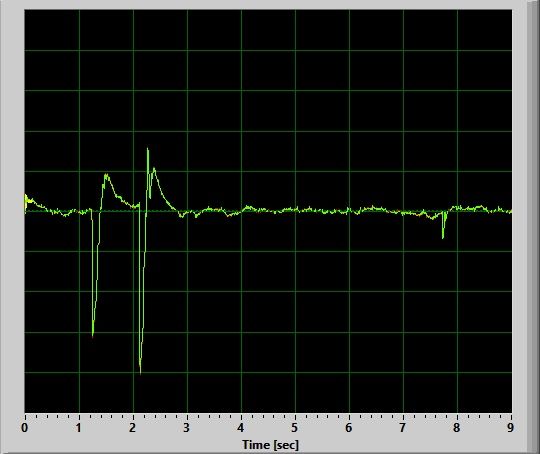
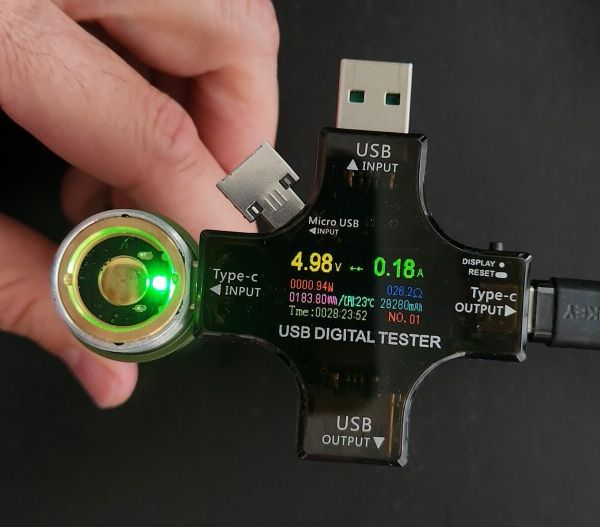
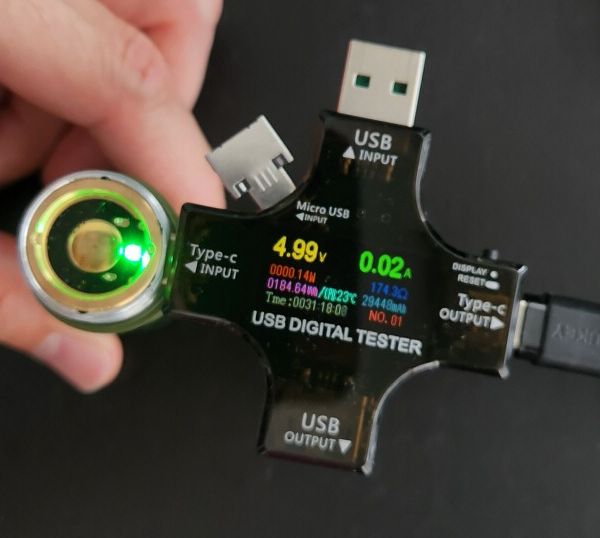
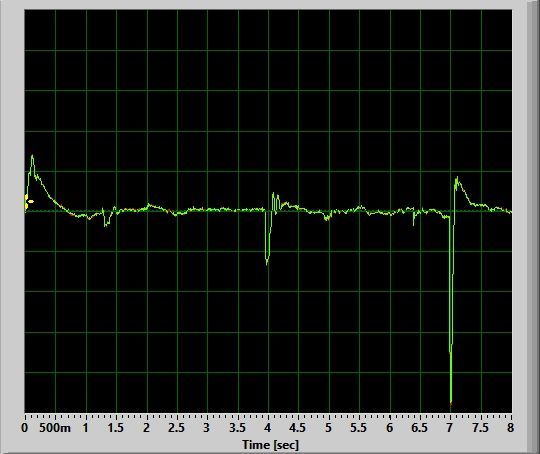
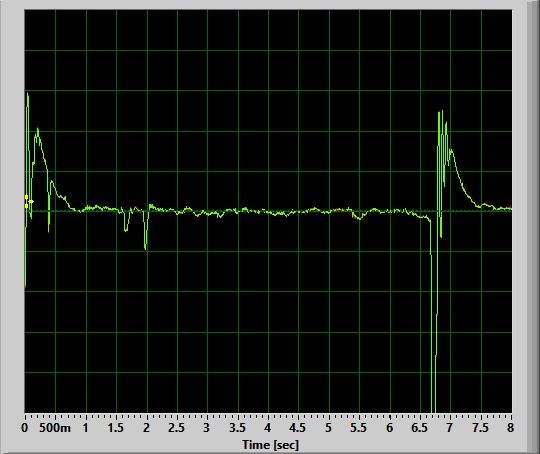
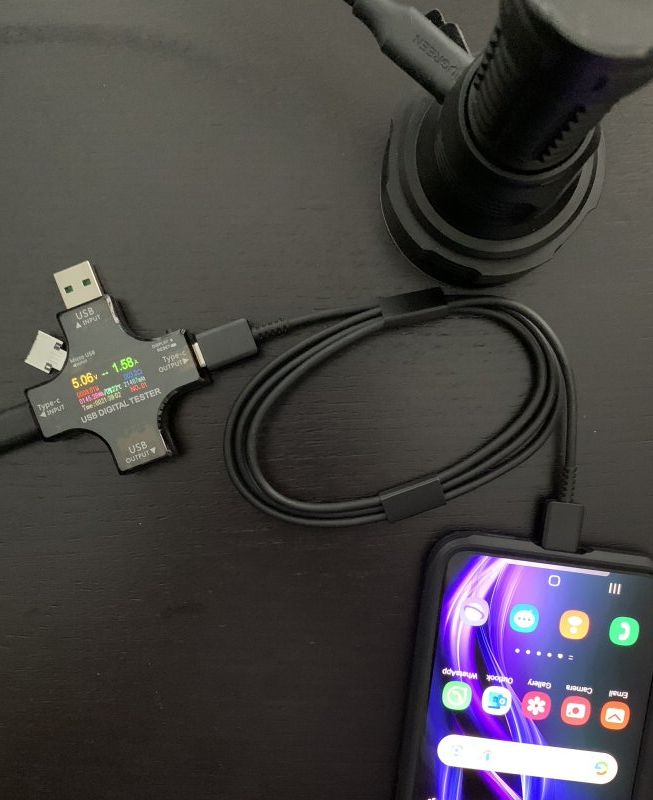
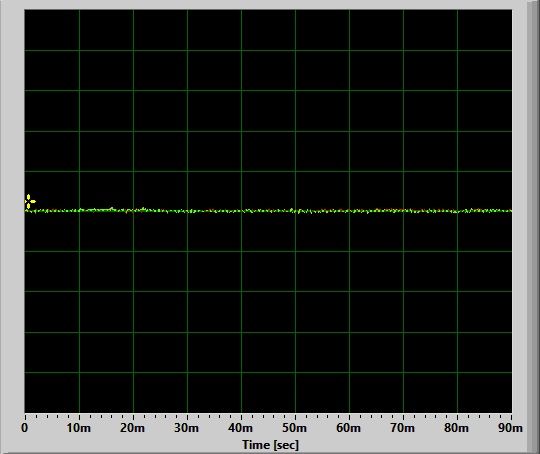
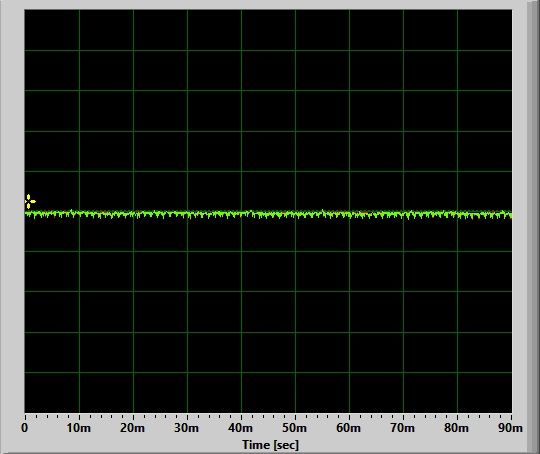
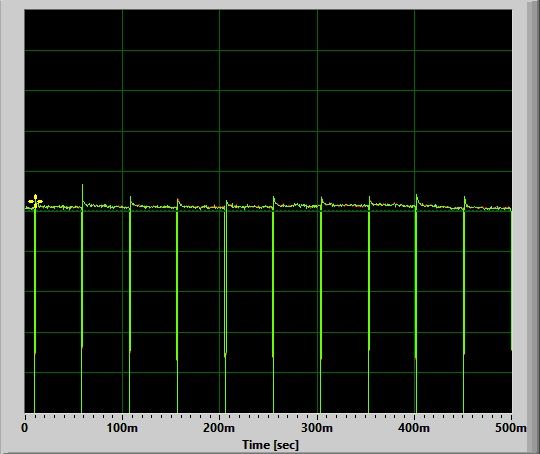
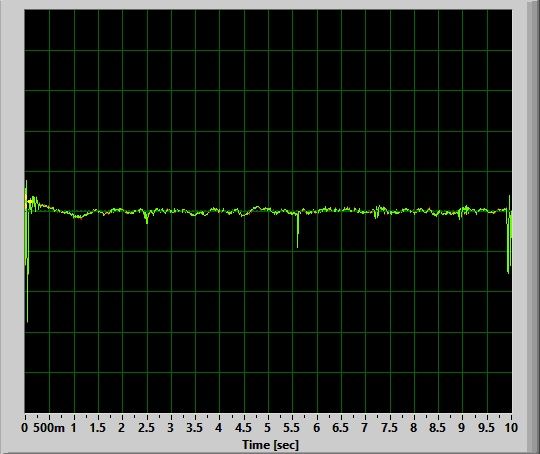
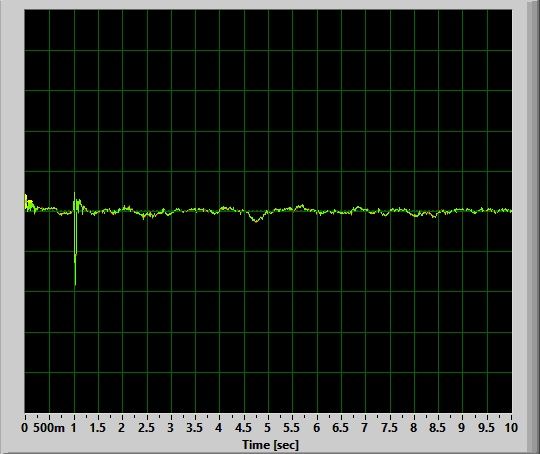
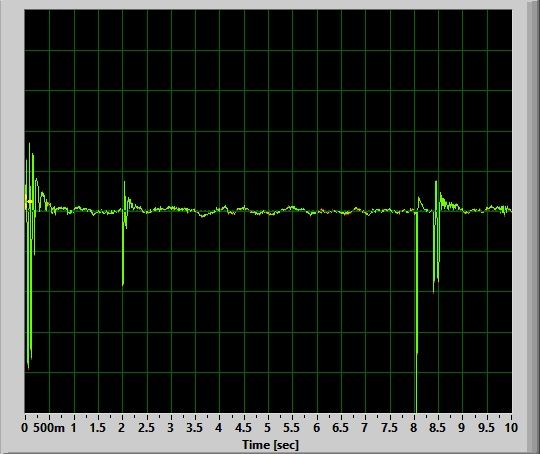
Circuit Measures
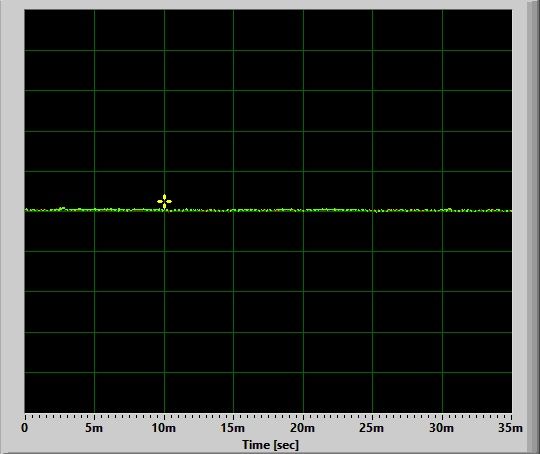
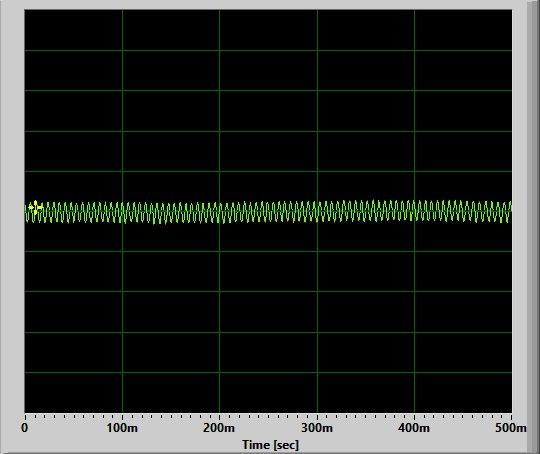
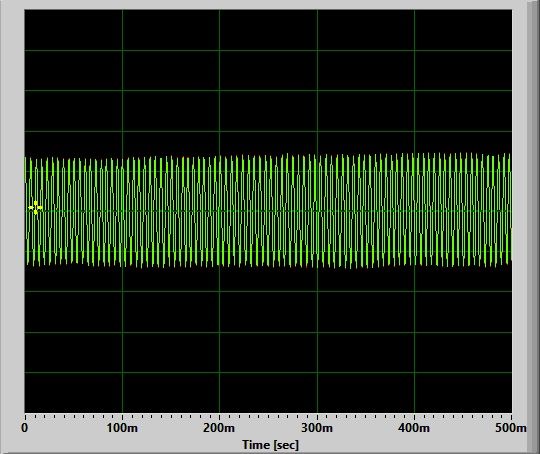
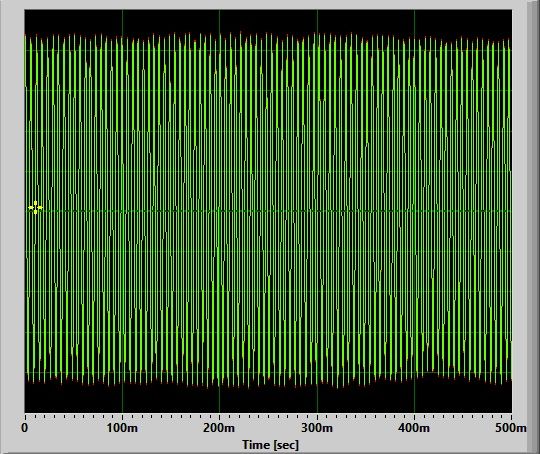
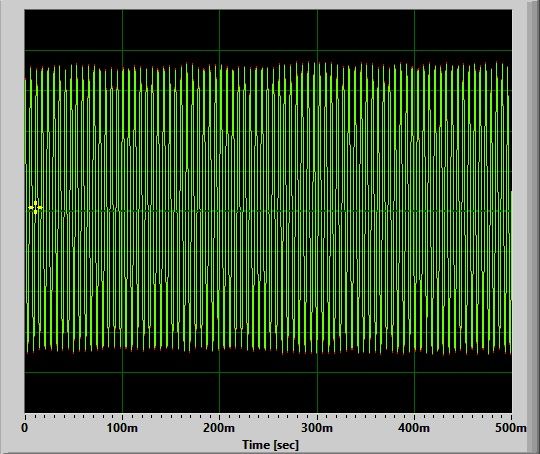
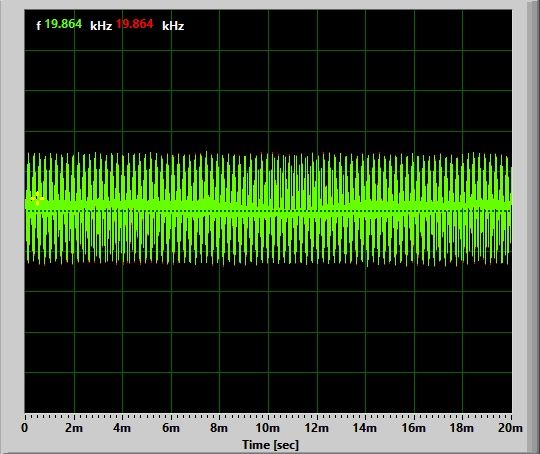
Pulse-Width Modulation (PWM):
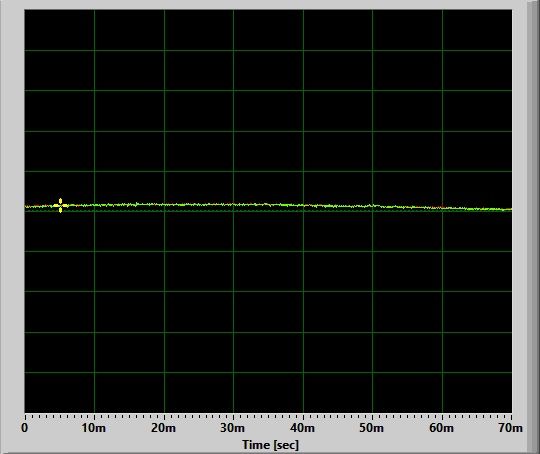
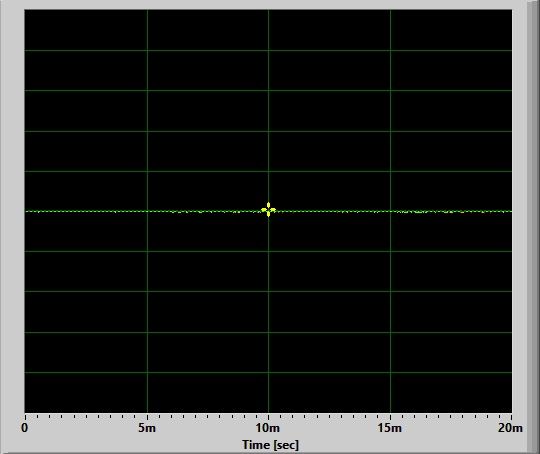
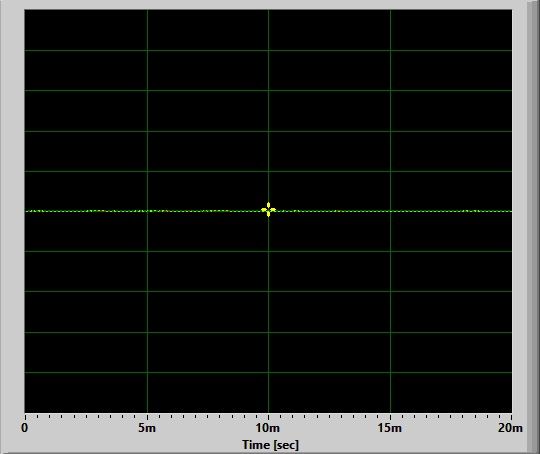
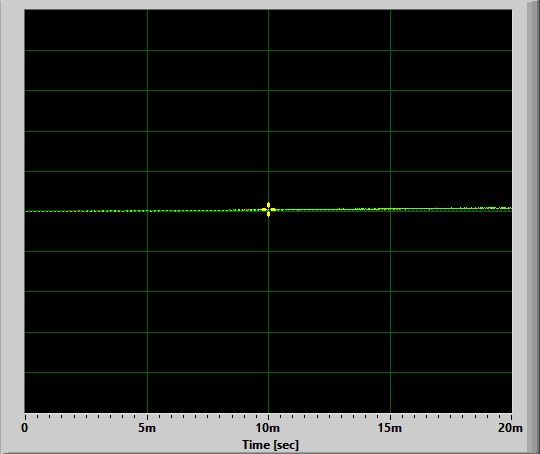
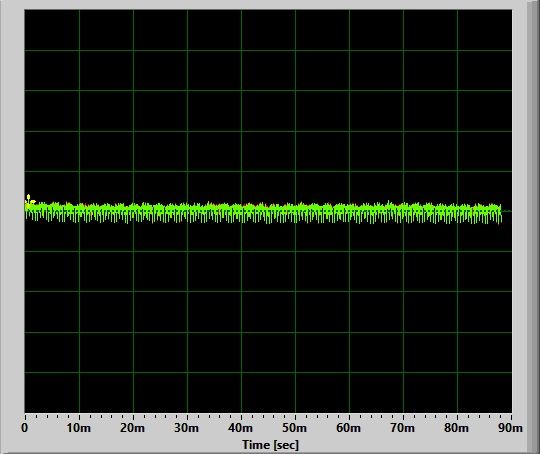
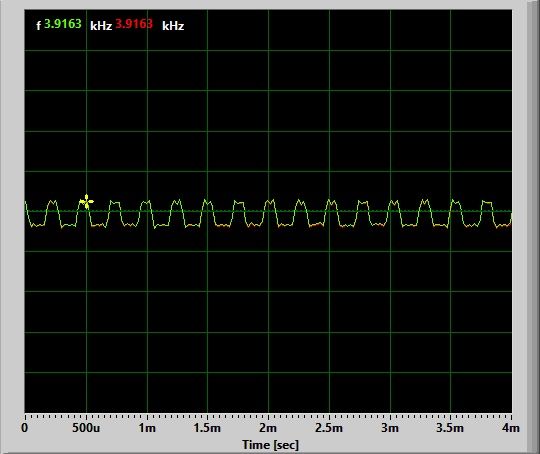
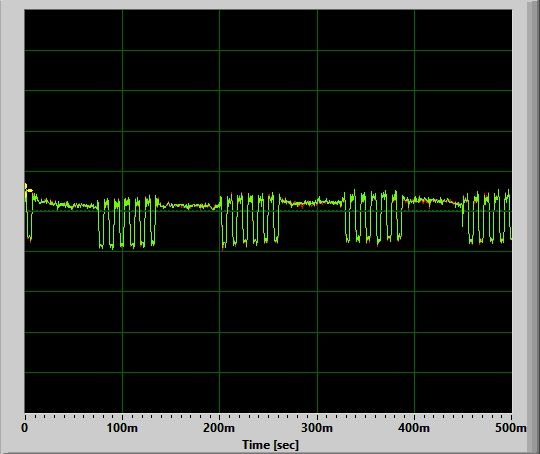
There is no sign of PWM on any level, the circuit appears to be fully current-controlled.
There is also no sign of high frequency noise at any level (unlike many of the budget Anduril lights with simple FET drivers).
L1:

L7:
L8:
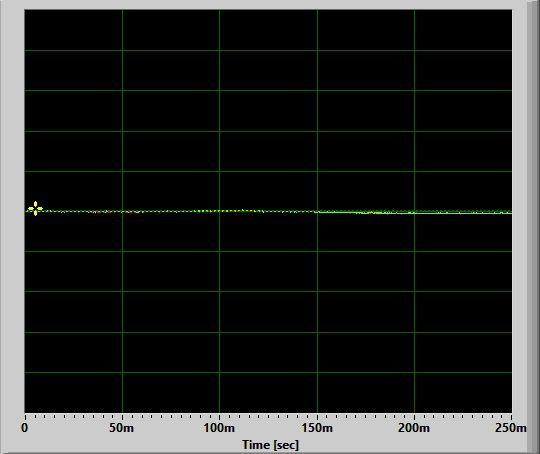
Nice to see the continued lack of circuit noise on these Hank lights – well done.
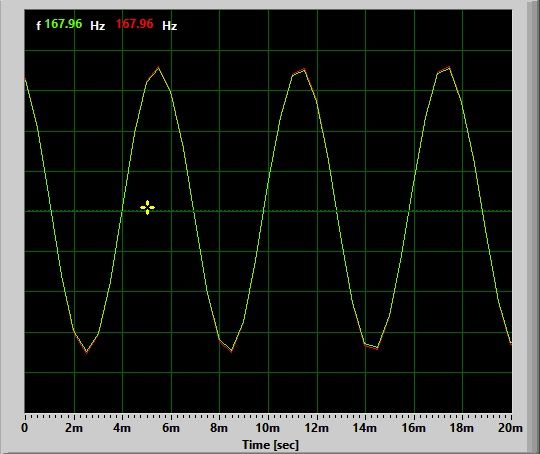
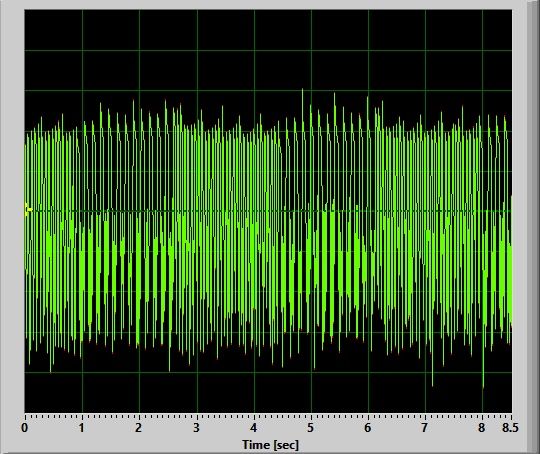
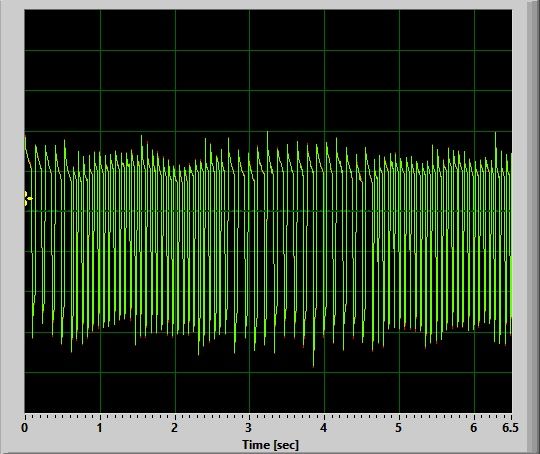
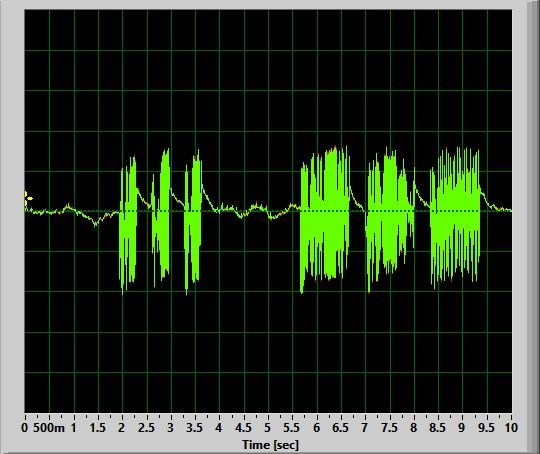
Strobe Modes:
Note that for most of the strobe / flashing modes below, the actual frequency and intensity are both configurable. What I am showing below is the default speed and/or brightness setting. By pressing and holding the switch (1H or 2H) you can select the frequency. And in some cases, brightness is set from the last-used ramp level.
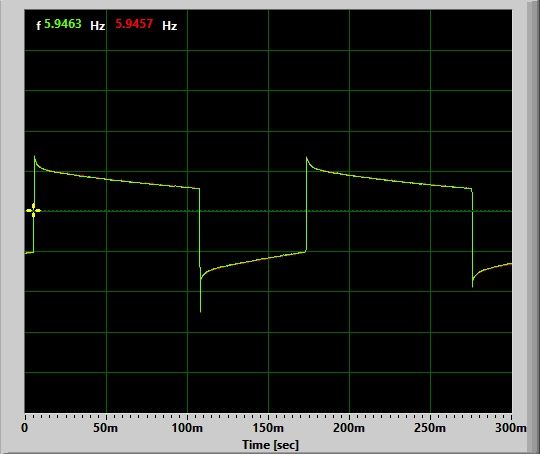
Beacon:
![]()
Beacon strobe is a single flash every ~1.8 secs (so, 0.55 Hz), by default.
SOS:
A fairly typical SOS mode.
Candle:
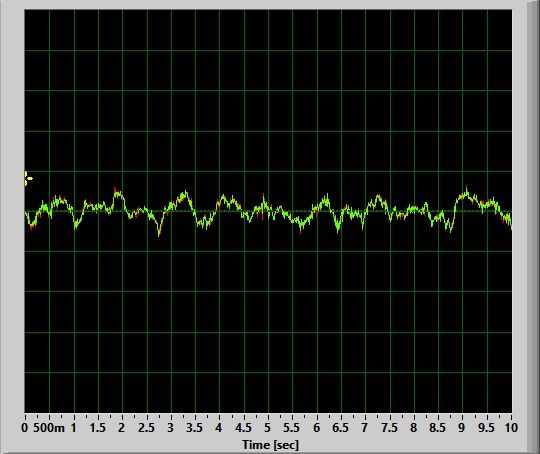
Candle strobe is a continuous flicker, of varying intensity (again, accurately simulating a candle).
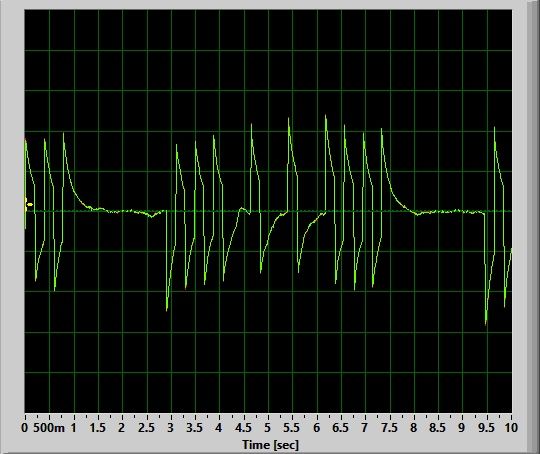
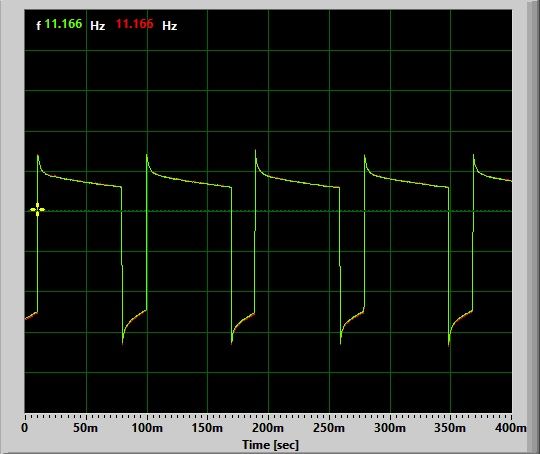
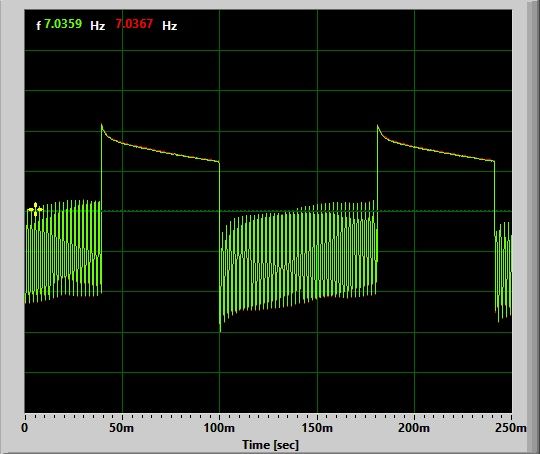
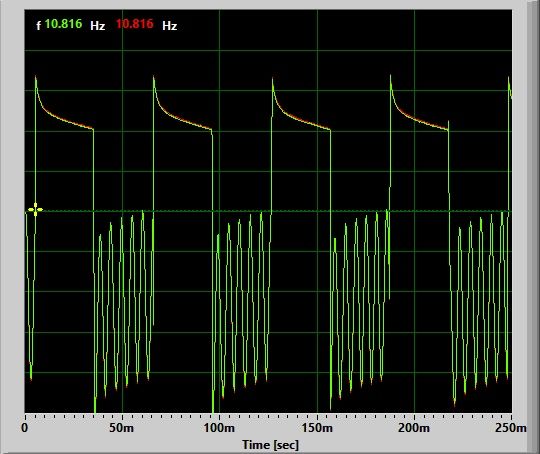
Bike Strobe:
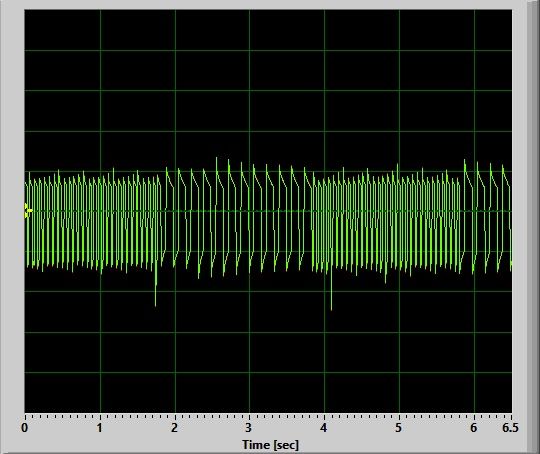
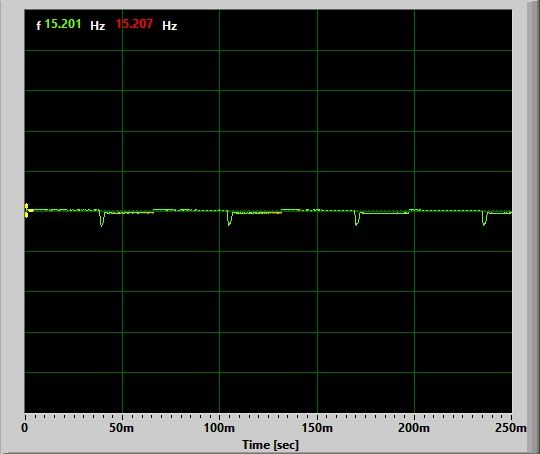
Bike strobe is a bit unusual. It is constant On at a lower level, with four brief flashes to max (over ~0.25 secs) every ~1 sec or so by default. It certainly is an attention grabber.
Party Strobe:
Party strobe is a super-fast (and annoying) frequency of ~20 Hz, by default.
Tactical Strobe:
Tactical strobe is ~10 Hz by default.
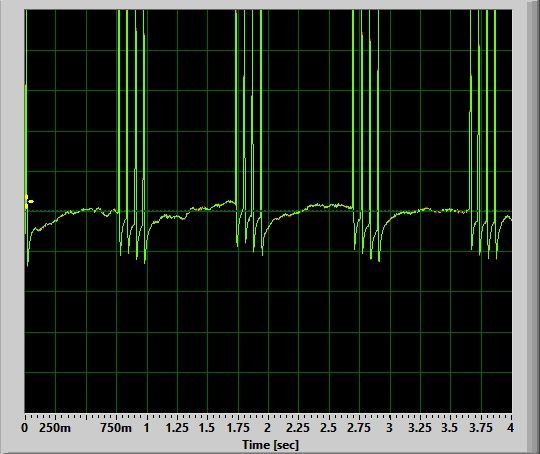
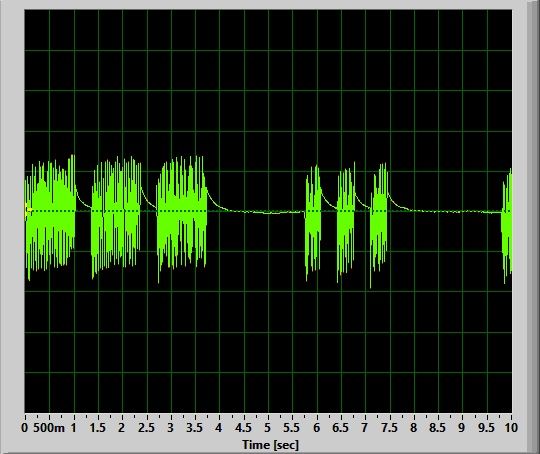
Lightning Strobe:
I’ve shown three 10-sec cycles above, so you can a feel for the frequency and intensity of light flashes. Lightning strobe is a fairly realistic lightning simulation, with variable intensity and time between flashes.
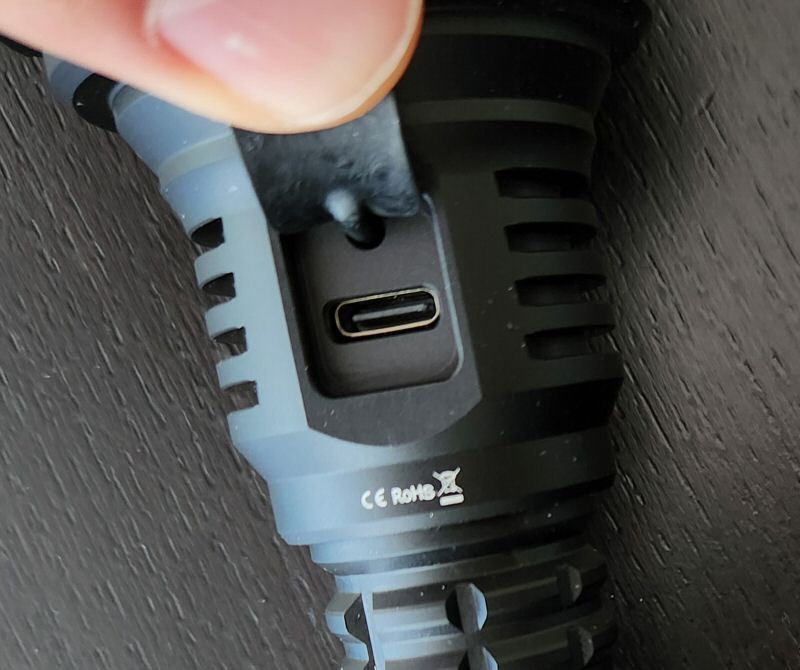
Charging:
The Emisar D1 does not come with built-in charging. You will have look into stand-alone battery chargers.
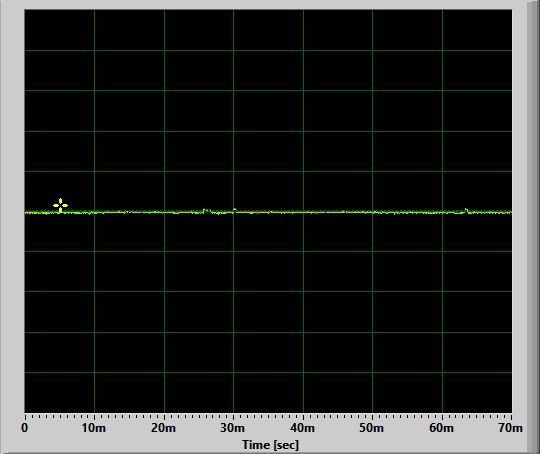
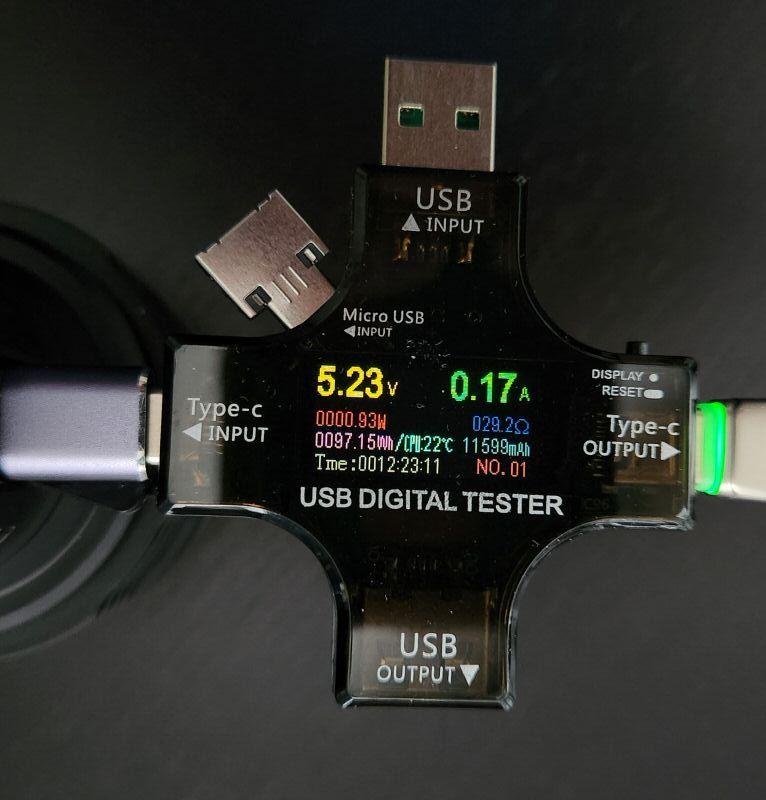
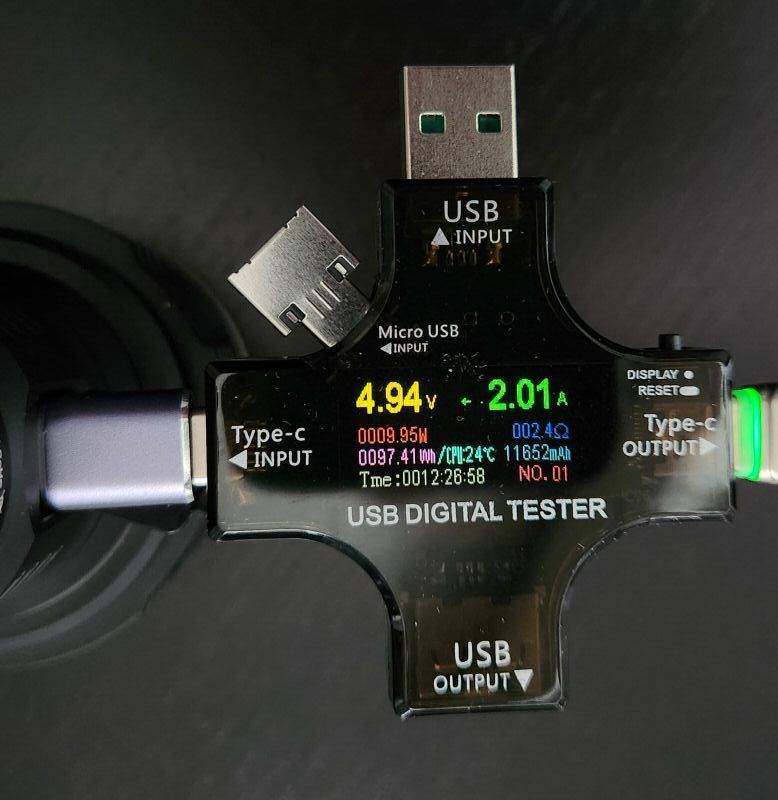
Standby / Parasitic Drain:
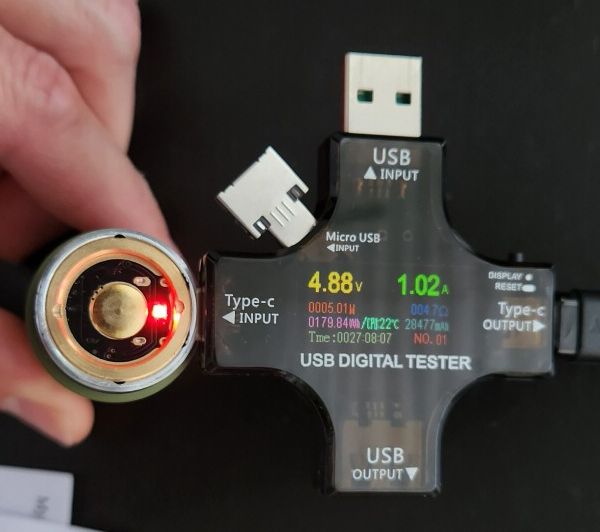
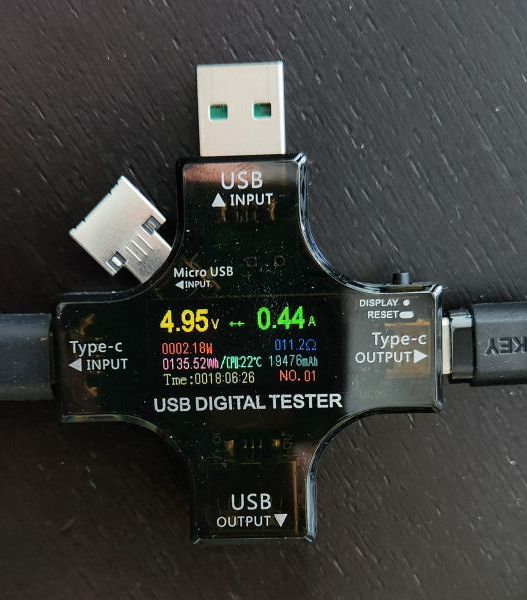
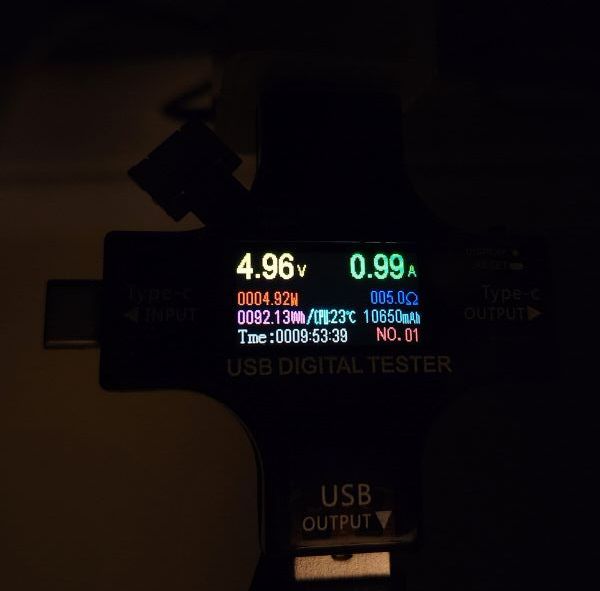
With the AUX switch LEDs set to off, I measured the standby drain for the electronic switch as fluctuating between 15 and 19 uA, averaging to 17 uA. For a 3500mAh cell, that would translate into over 23.5 years before the cell would be fully drained – which is ridiculously low, and not at all a concern. Regardless, I recommend you store the light locked out at the tailcap when not in use to prevent accidental activation (which also disables the standby drain).
With the AUX switch RGB LEDs activated on the Low output setting, I measured the current drain as 34 uA. For a 3500mAh cell, that would give you over 11 and half years before a cell would be fully drained. This is similarly low enough to not be a concern, and could be useful as a signaling indicator for you (with the electronic lockout in place).
With the AUX switch LEDs activated on the High output setting, I measured the current drain as 450 uA. For a 3500mAh cell, that would give you almost 11 months of continuous runtime before draining the cell. That is very good as an impromptu Moonlight mode.
I haven’t measured it, but the smooth Ramping minimum current drain would presumably be higher than the AUX High mode. So this side switch on Hi could be considered a way to extend runtime with an extra (albeit much dimmer) coloured “Moonlight mode” by using the Aux switch emitters.
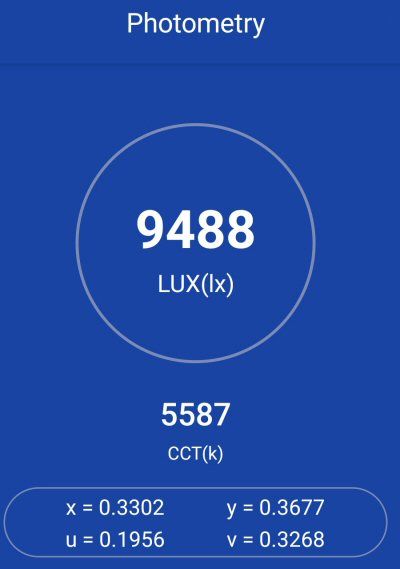
Emitter Measures
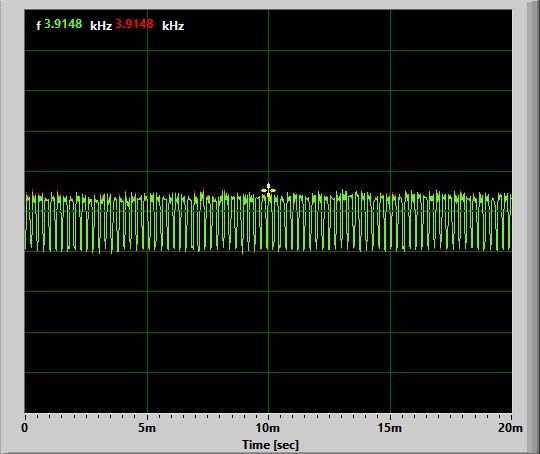
In this section, I directly measure key emitter characteristics in terms of colour temperature, tint, and colour rendition. Please see my Emitter Measures page to learn more about what these terms mean, and how I am measuring them. As tint in particular can shift across levels, I typically stick with the highest stably regulated level for all my reported measures.
As explained on that page, since I am using an inexpensive uncalibrated device, you can only make relative comparisons across my reviews (i.e., don’t take these numbers as absolutely accurate values, but as relatively consistent across lights in my testing).
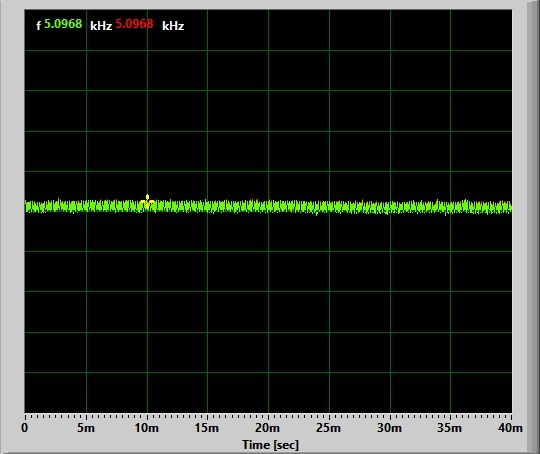
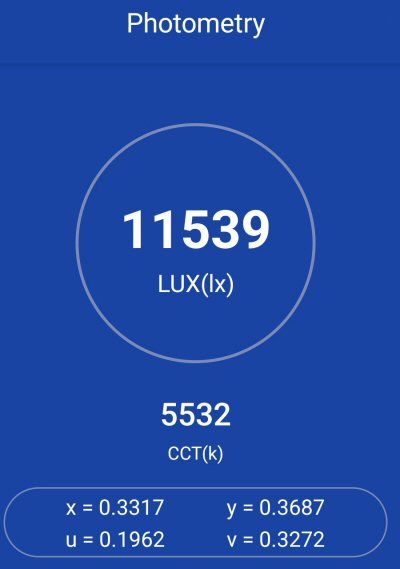
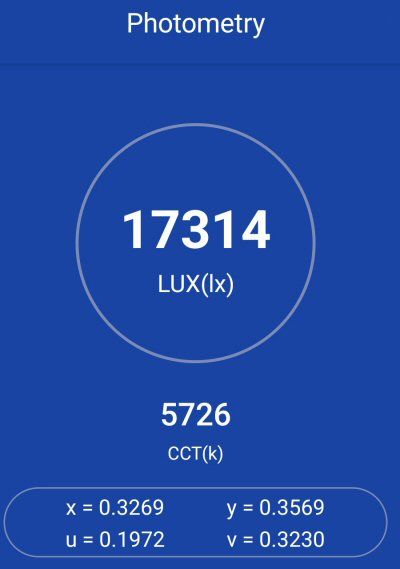
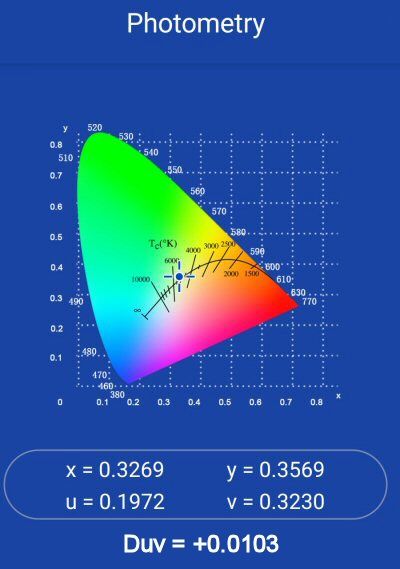
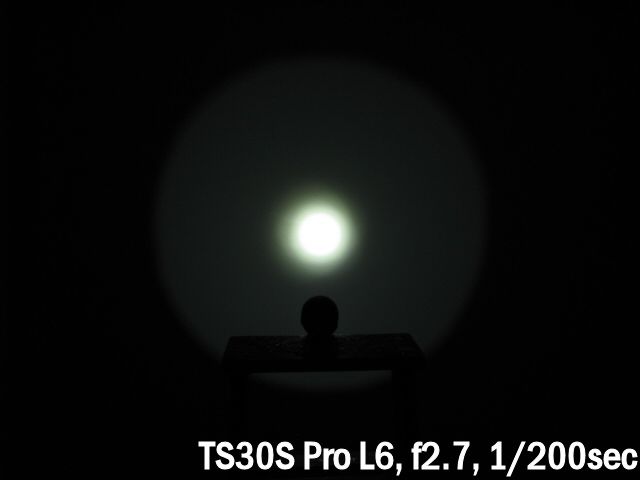
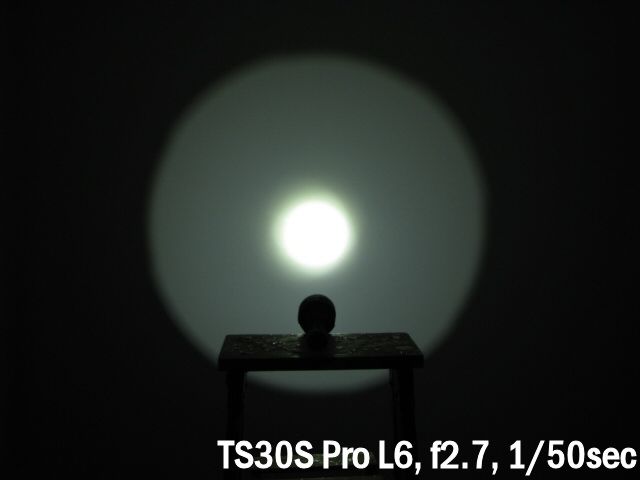
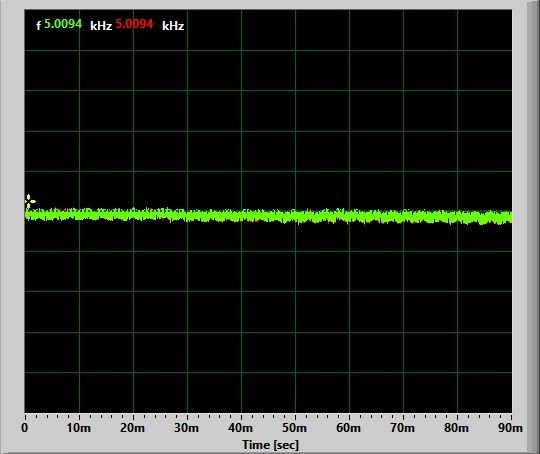
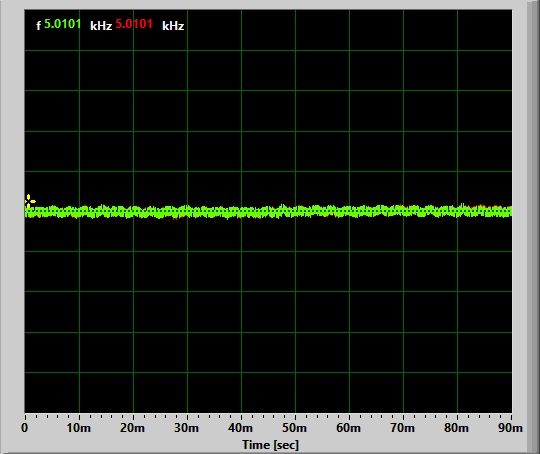
D1 on L6:
.jpg)
.jpg)
The key measures above are the colour temperature of ~5700K, and a slight positive tint shift (+0.0101 Duv) to greenish-yellow at this temperature. For CRI (Ra), I measured a combined score of 71.
These results are consistent with the specs.
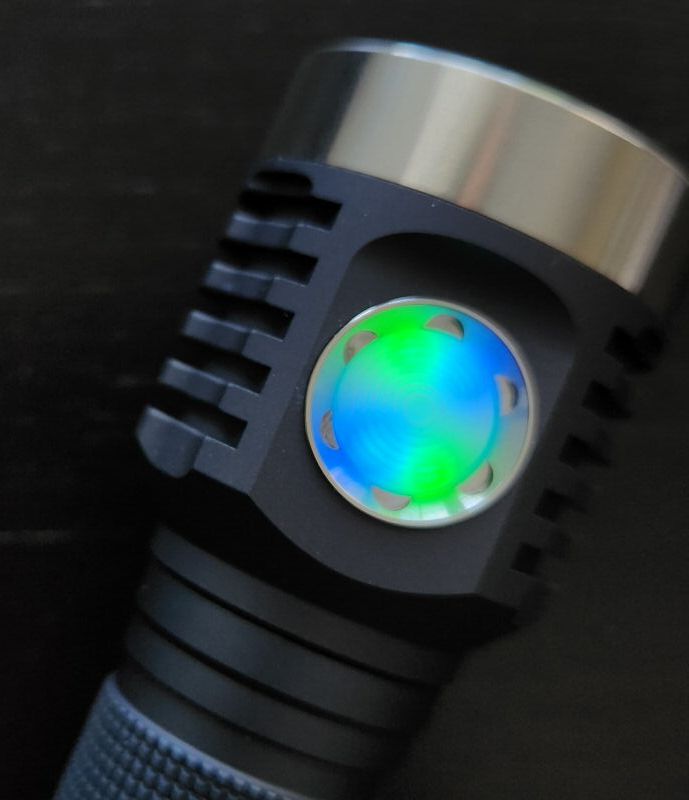
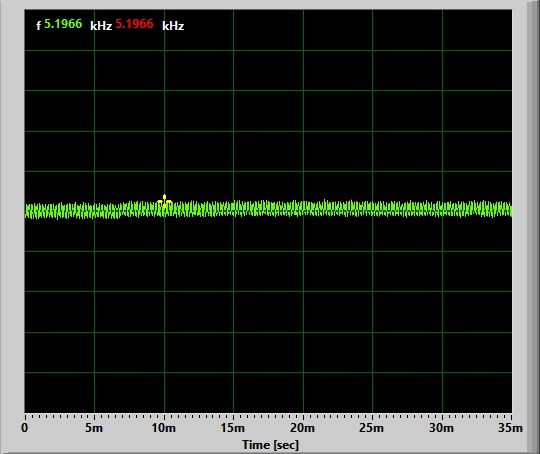
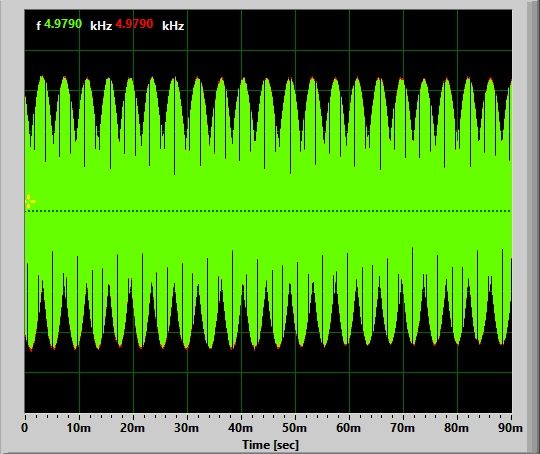
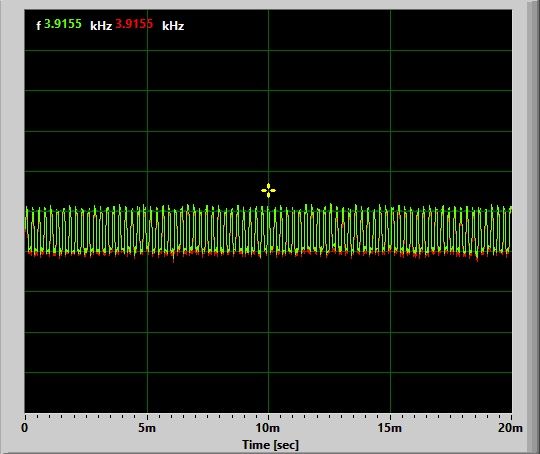
Just out of curiosity, I thought I’d measure the AUX switch LEDs set to blue and green.
Blue Button:
.jpg)
.jpg)
The simple Light Master lightmeter that I am using is not rated for monochromatic sources, but the reading above is very consistent with a dedicated blue light – it is well off the blackbody radiation curve (Planckian locus) at the blue end of the spectrum.
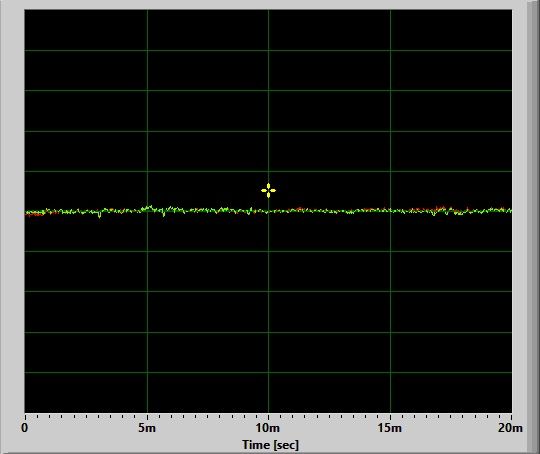
Green Button:
.jpg)
.jpg)
Again, we are well off the Planckian locus in the green area of the colour spectrum.
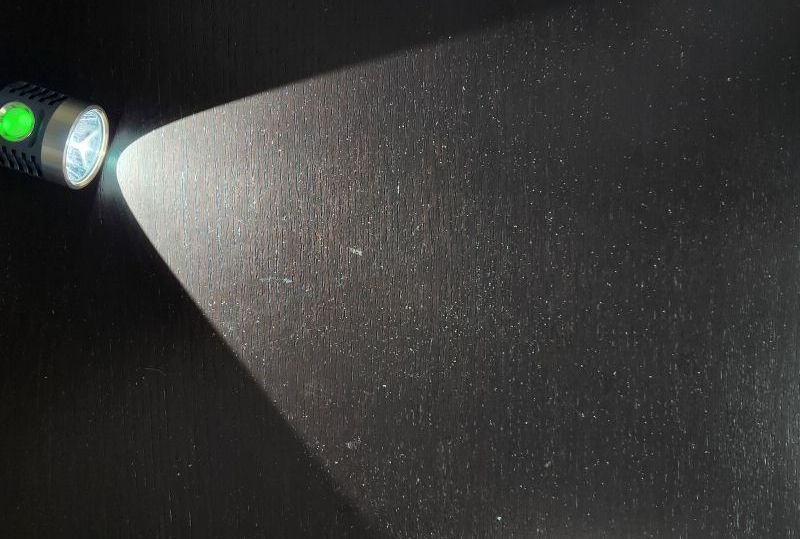
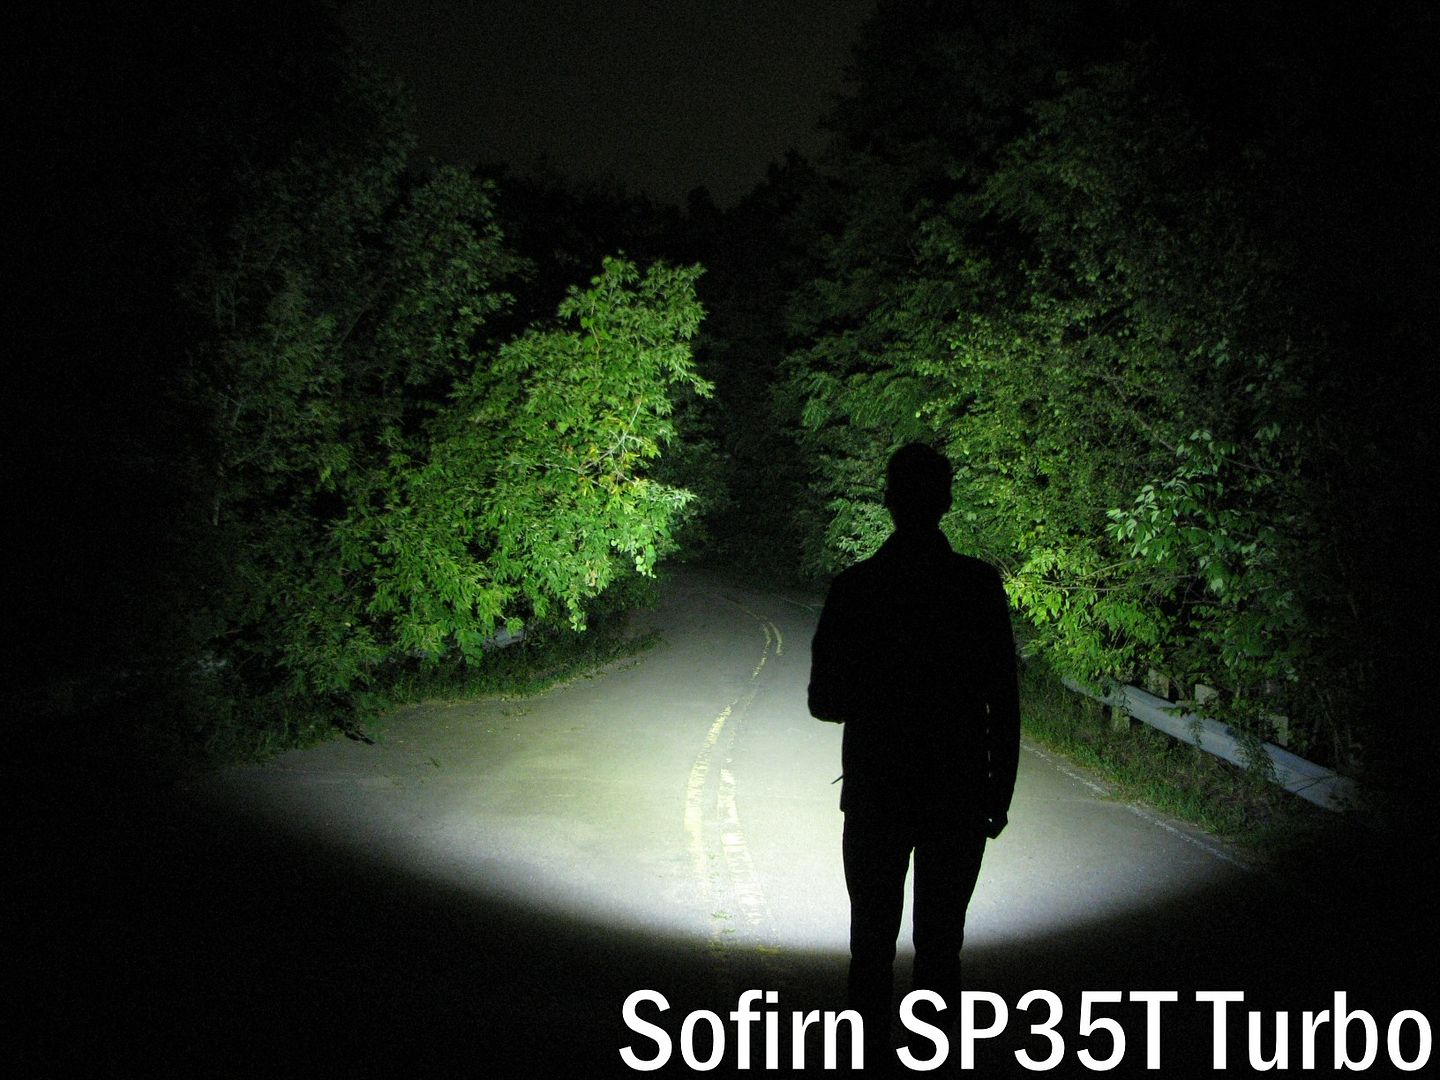
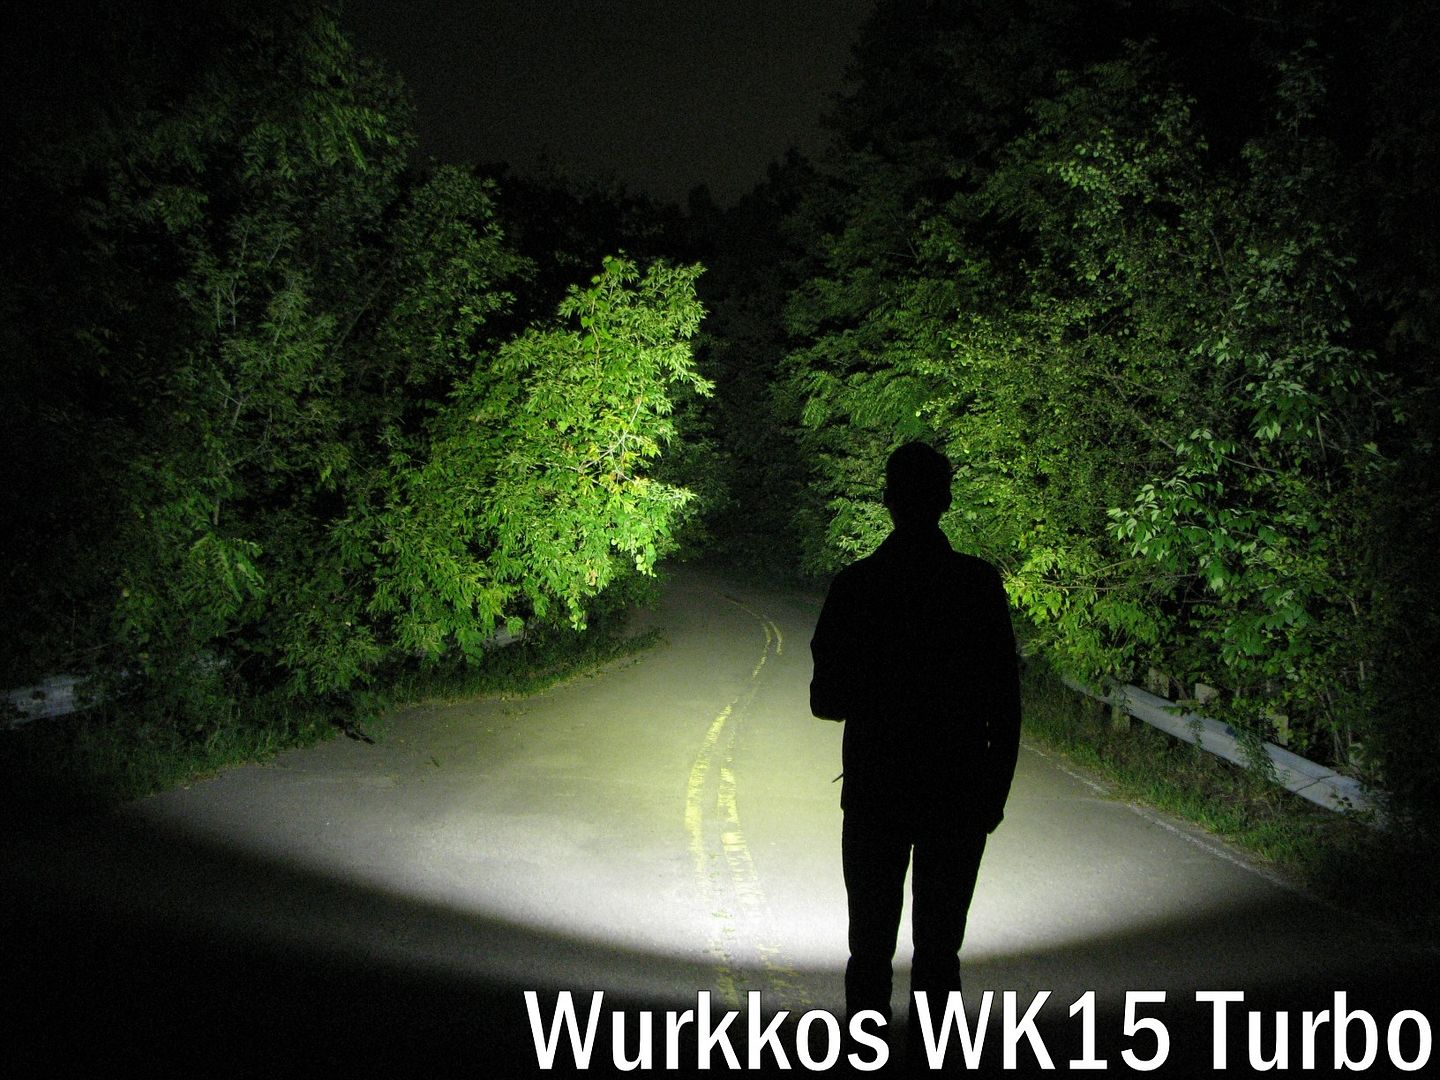
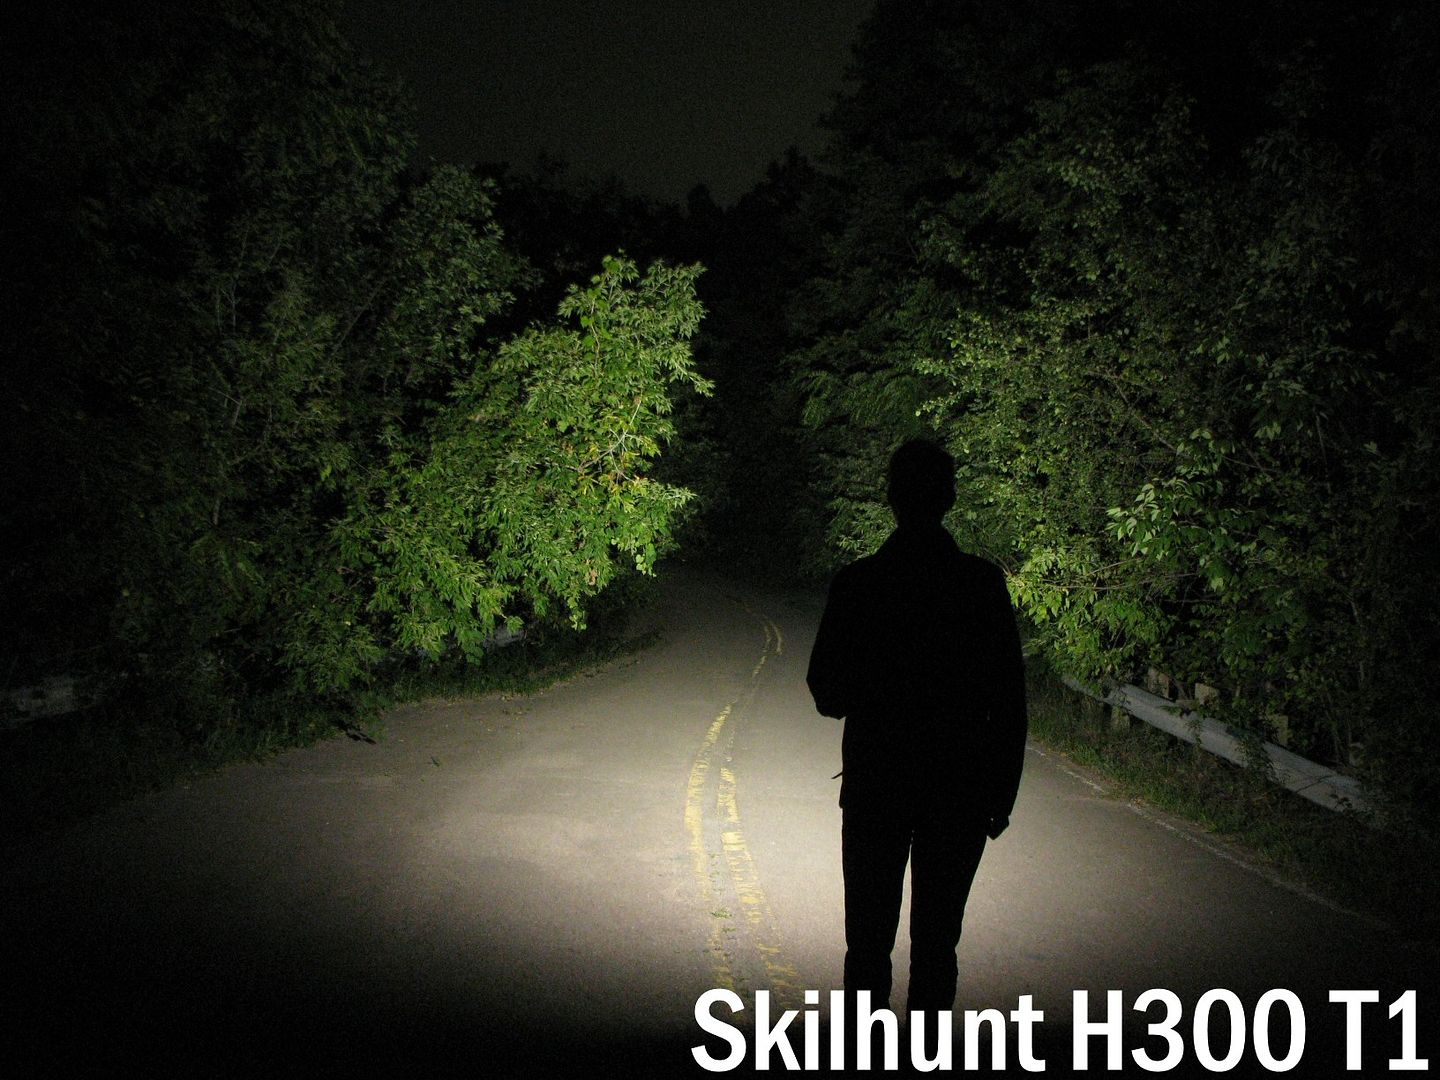
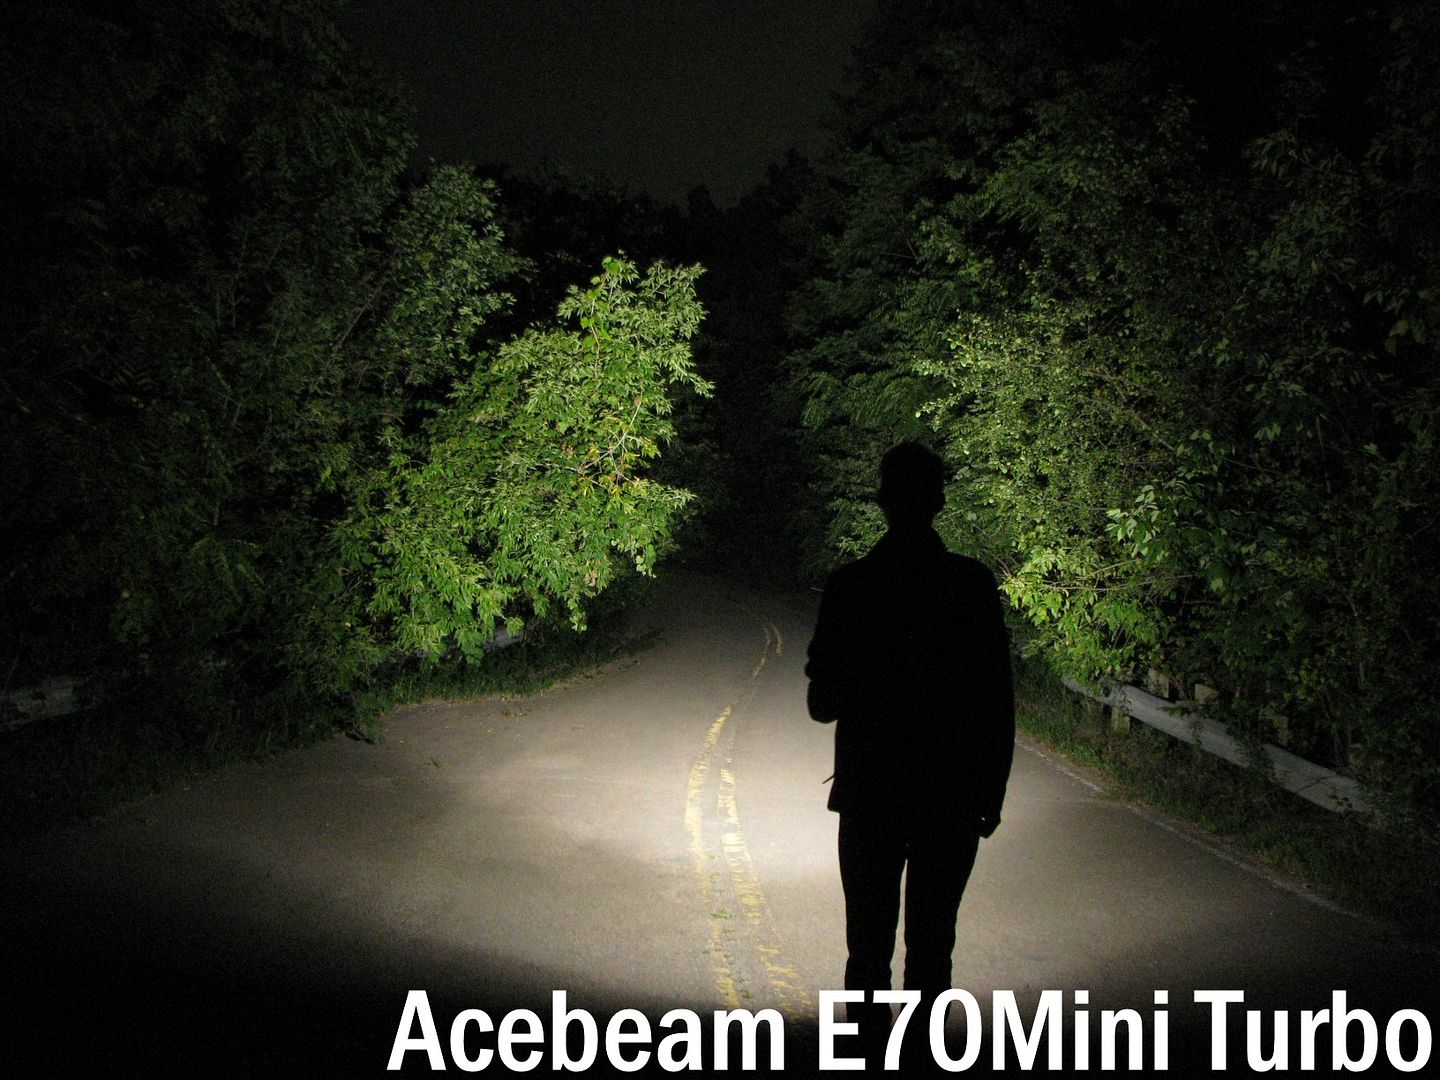
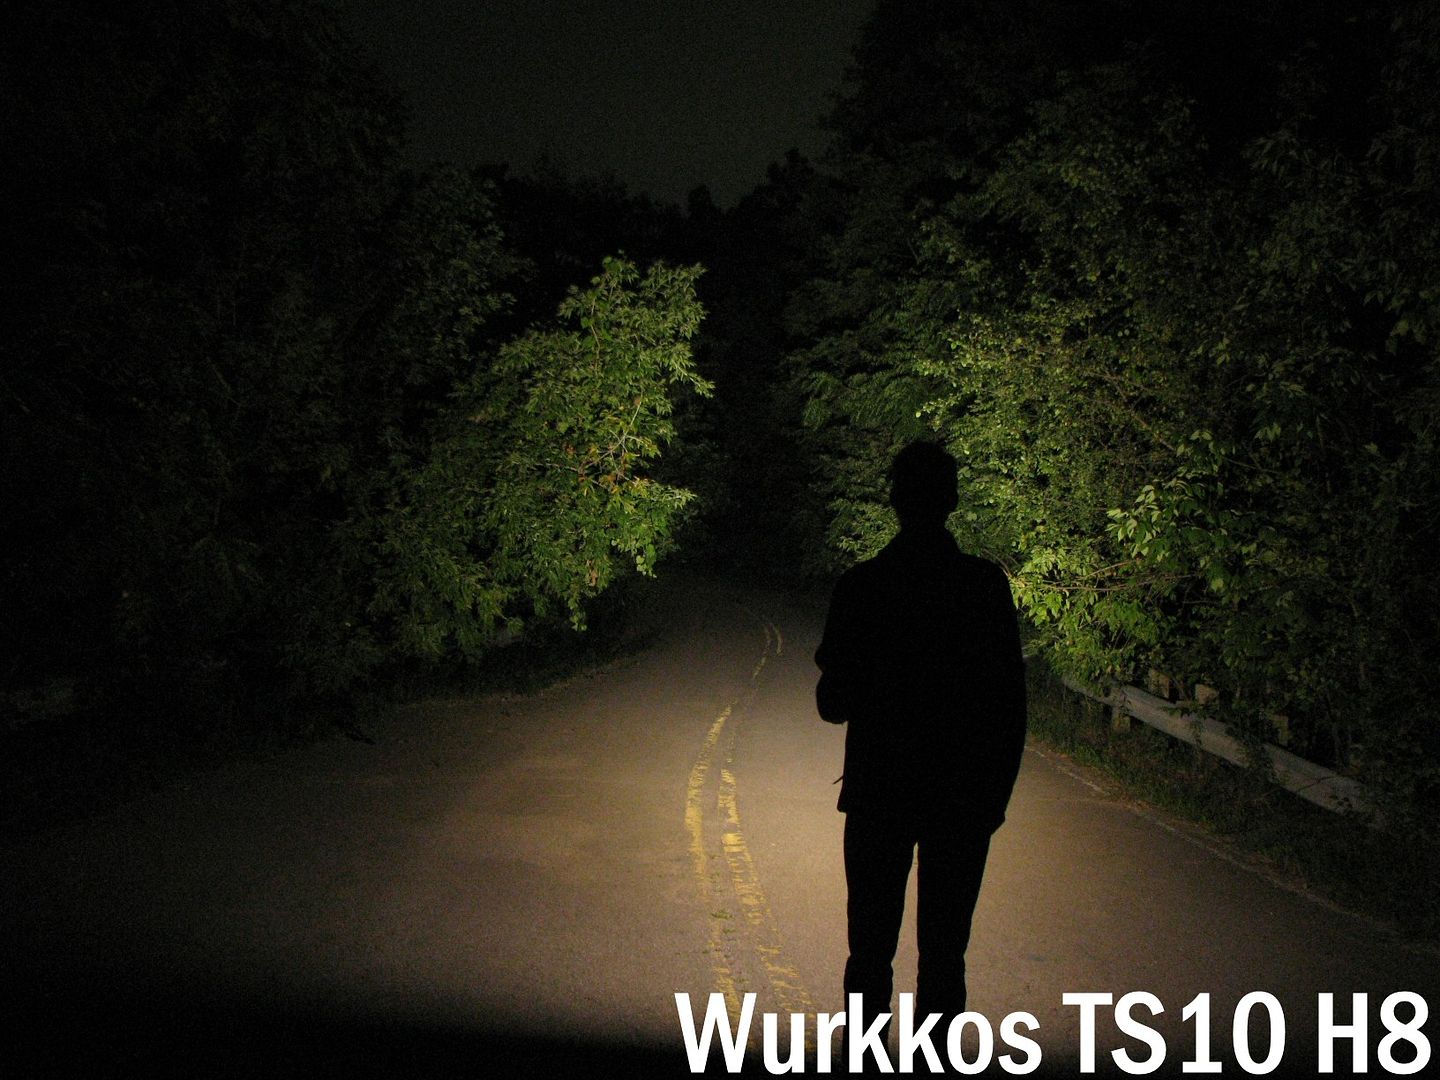
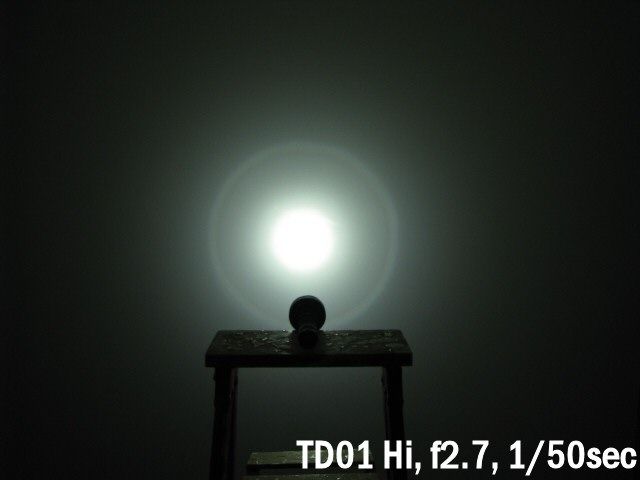
Beamshots
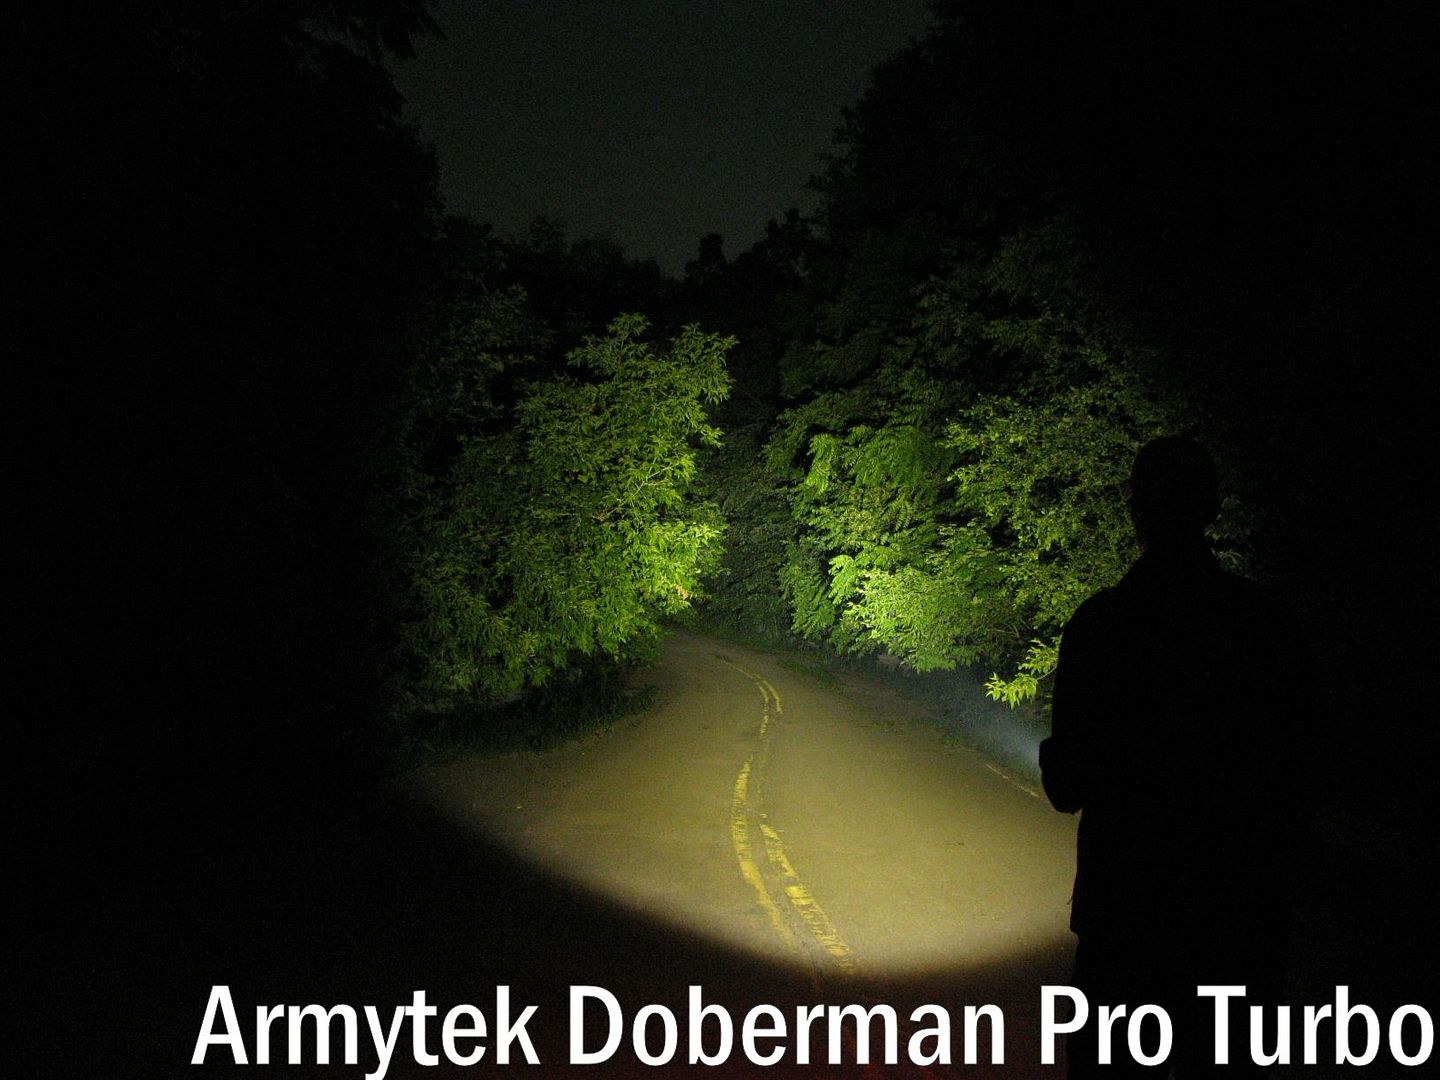
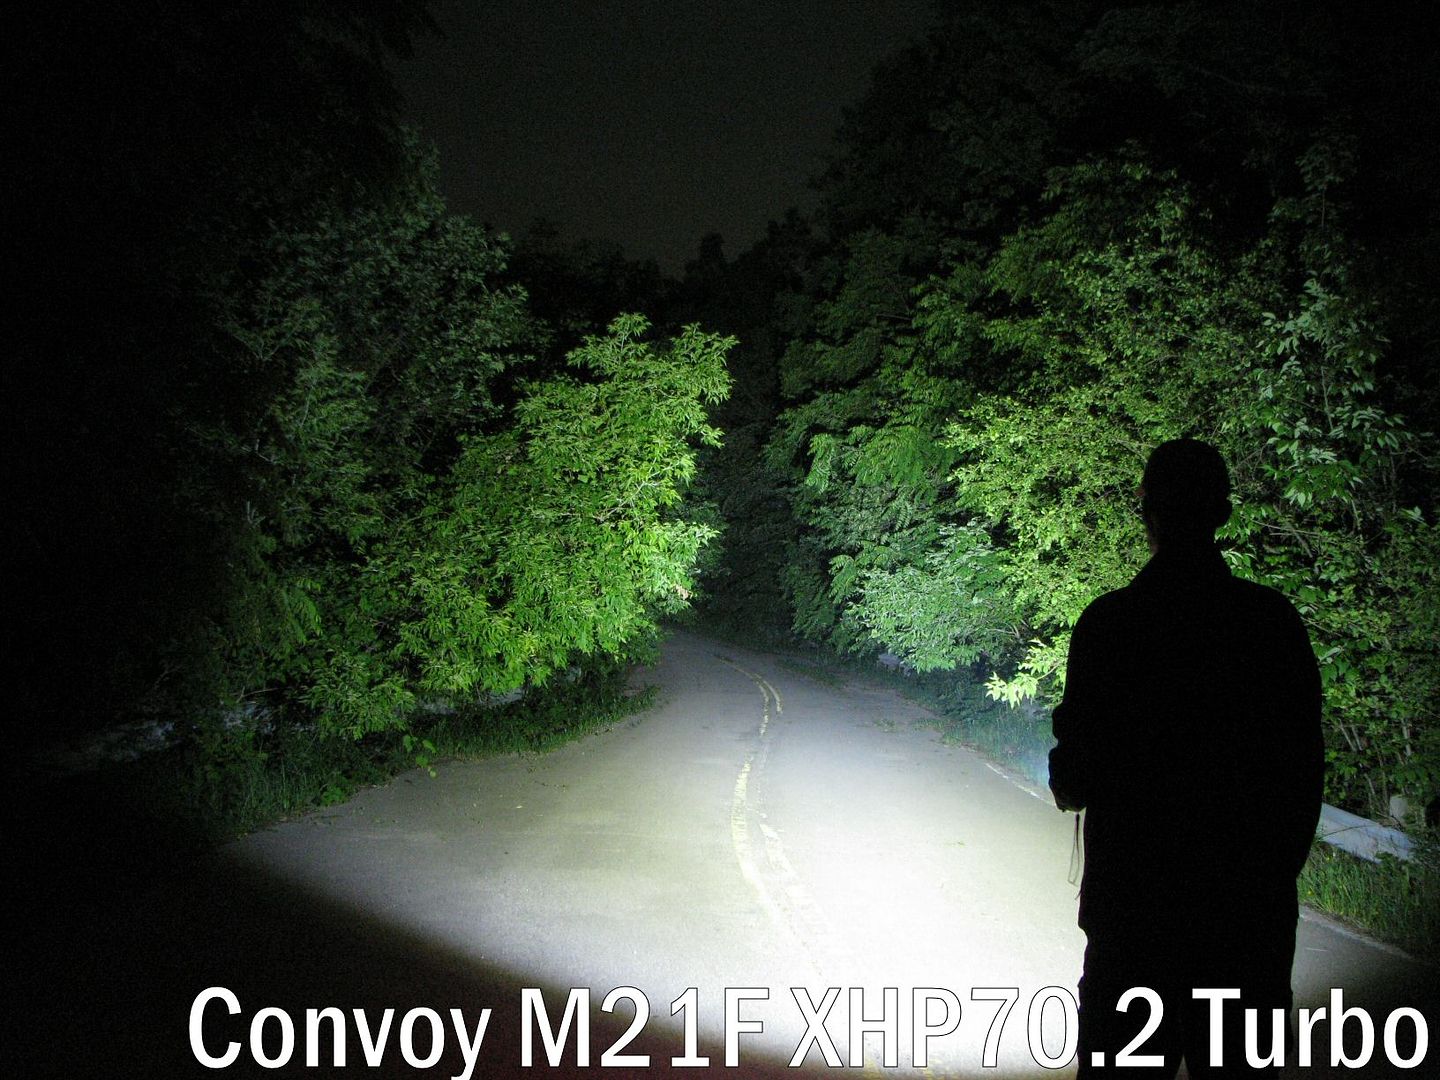
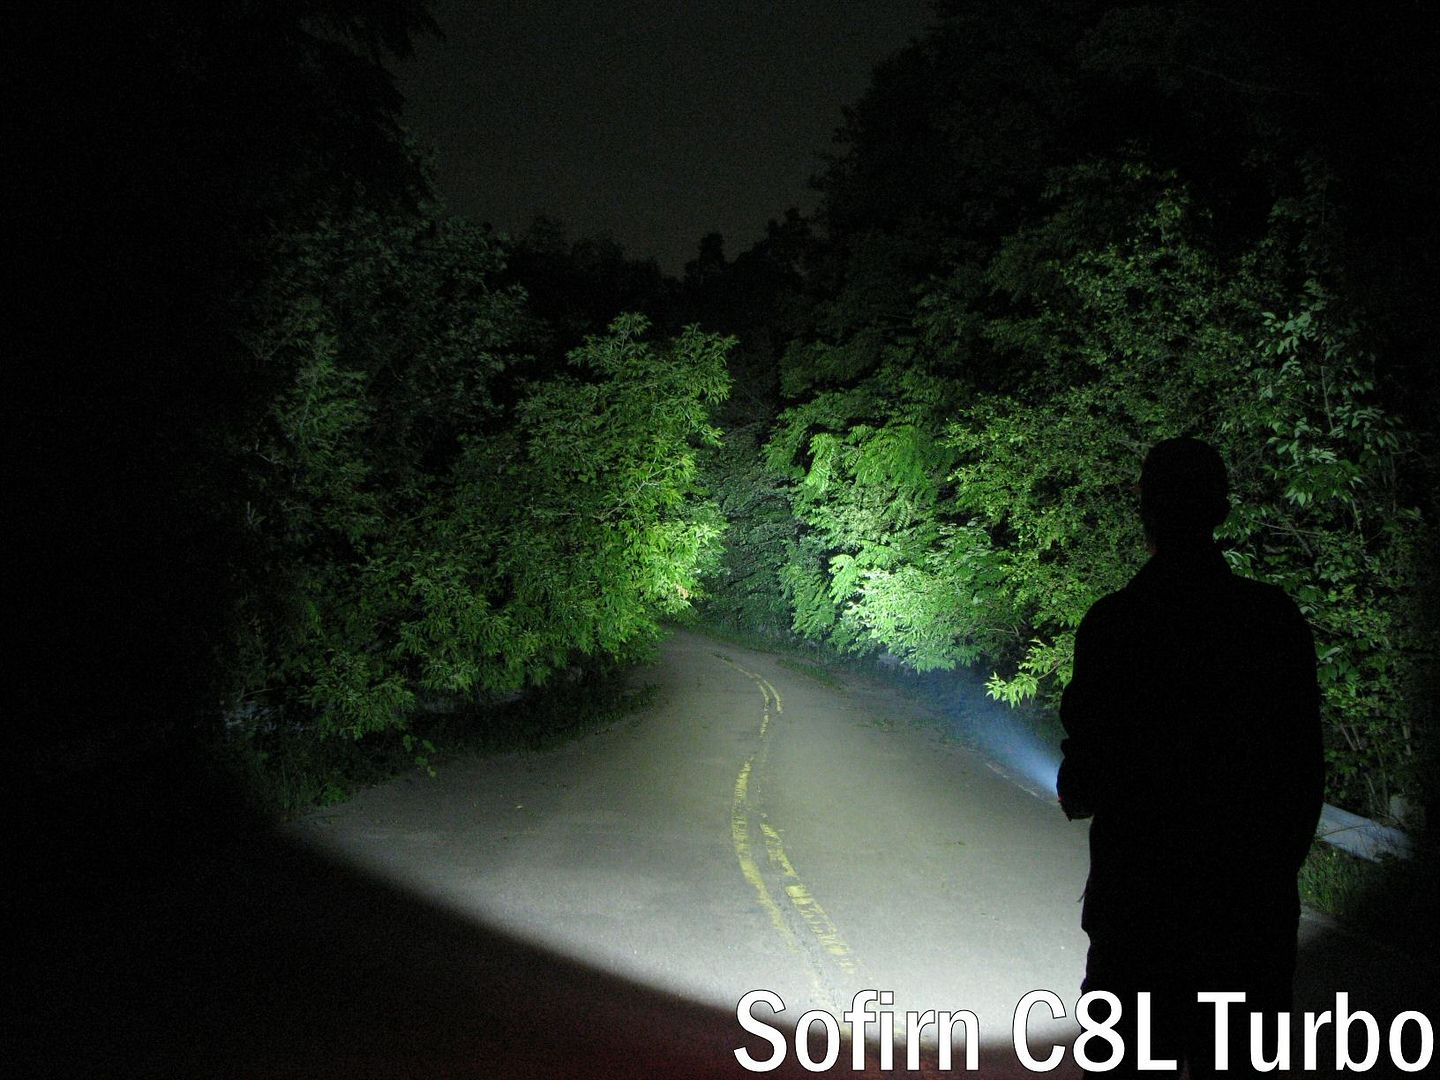
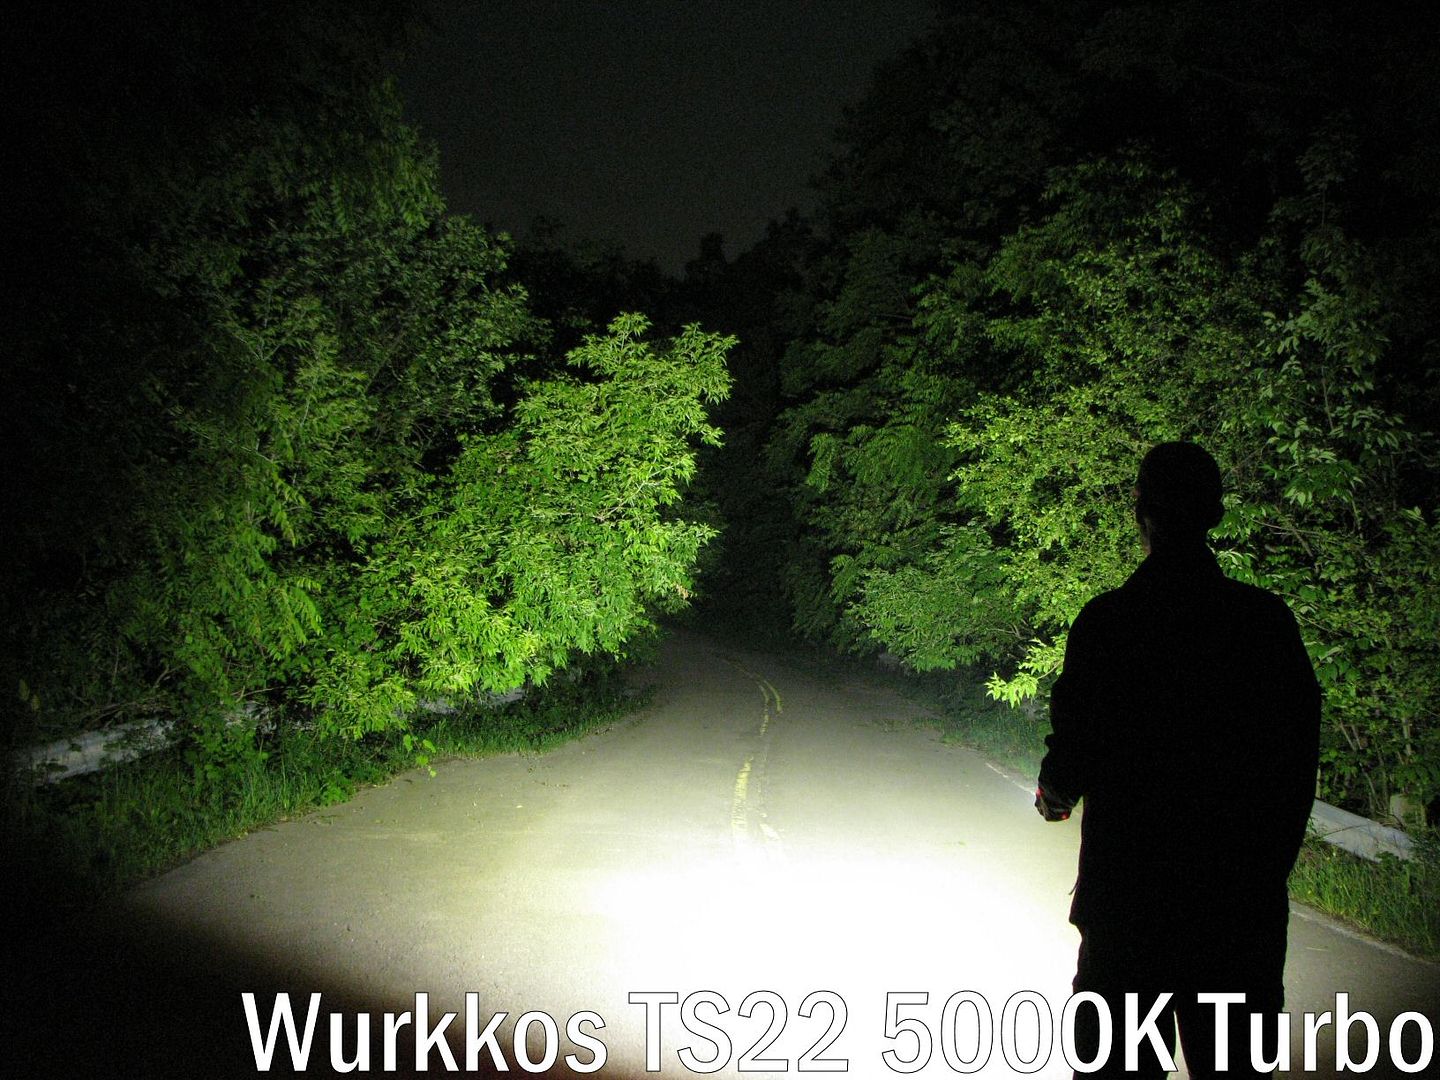
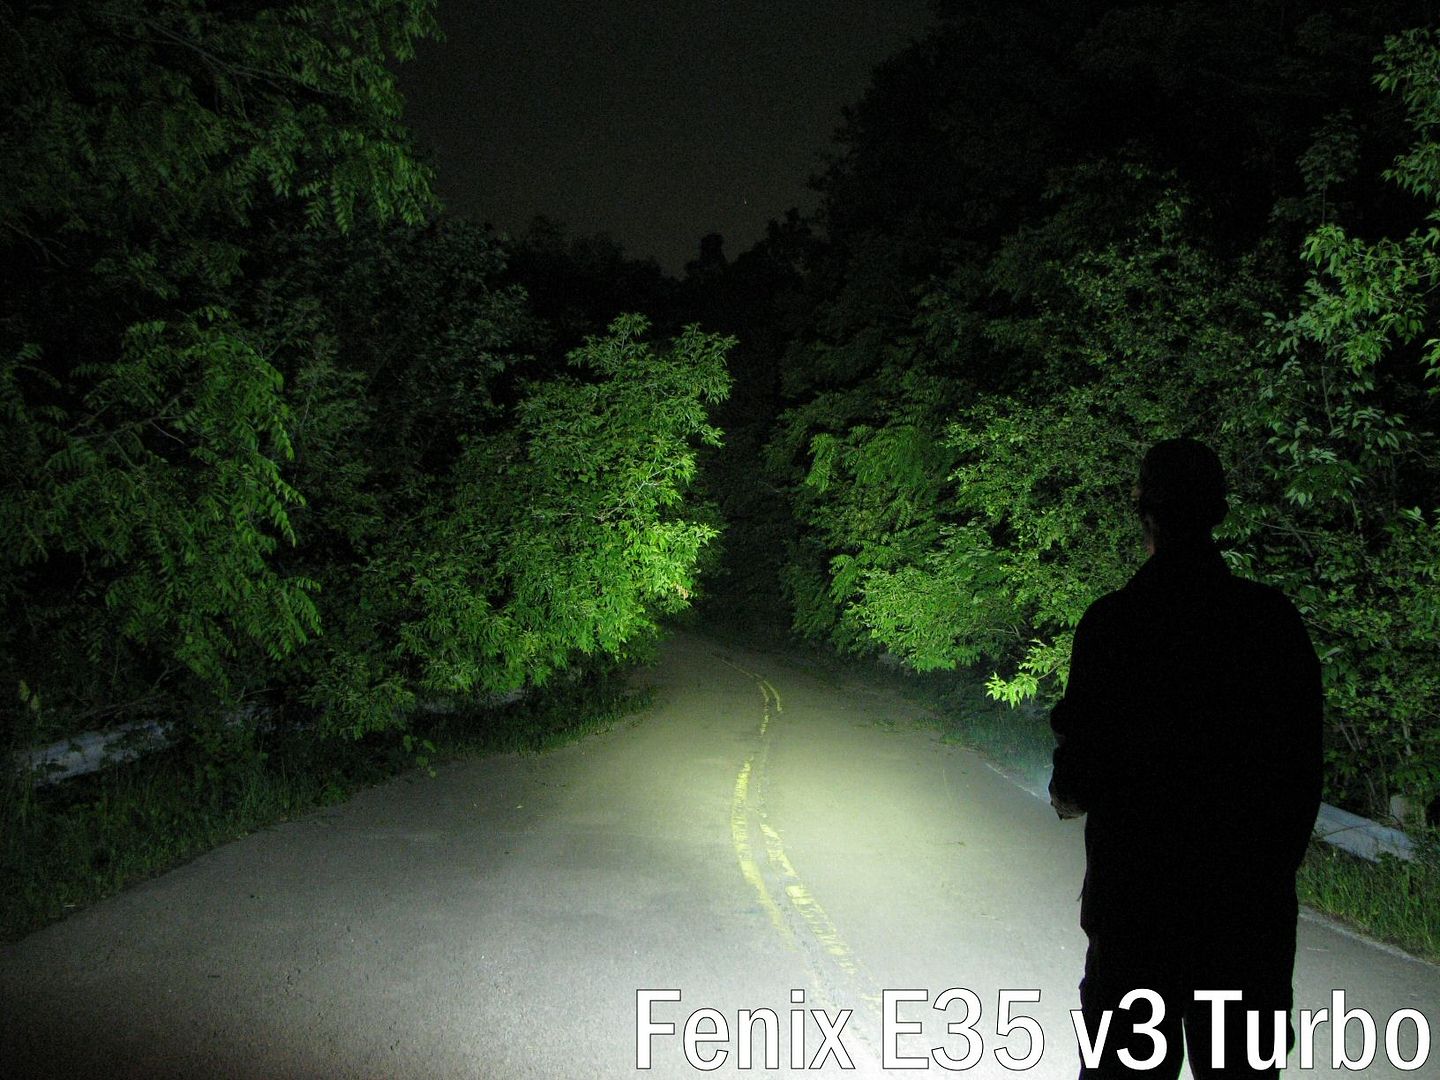
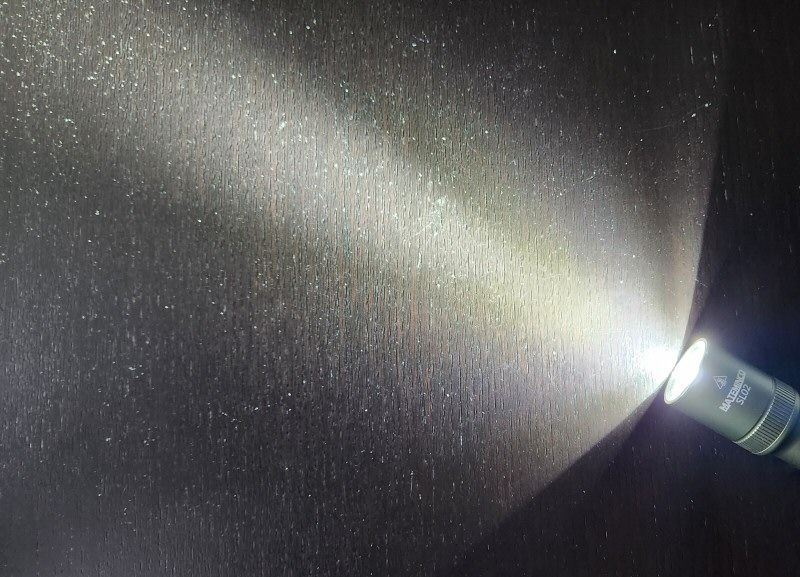
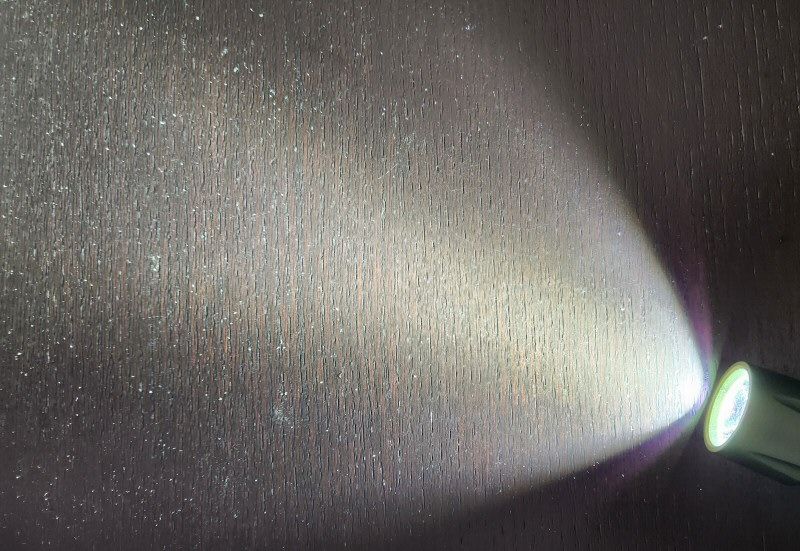
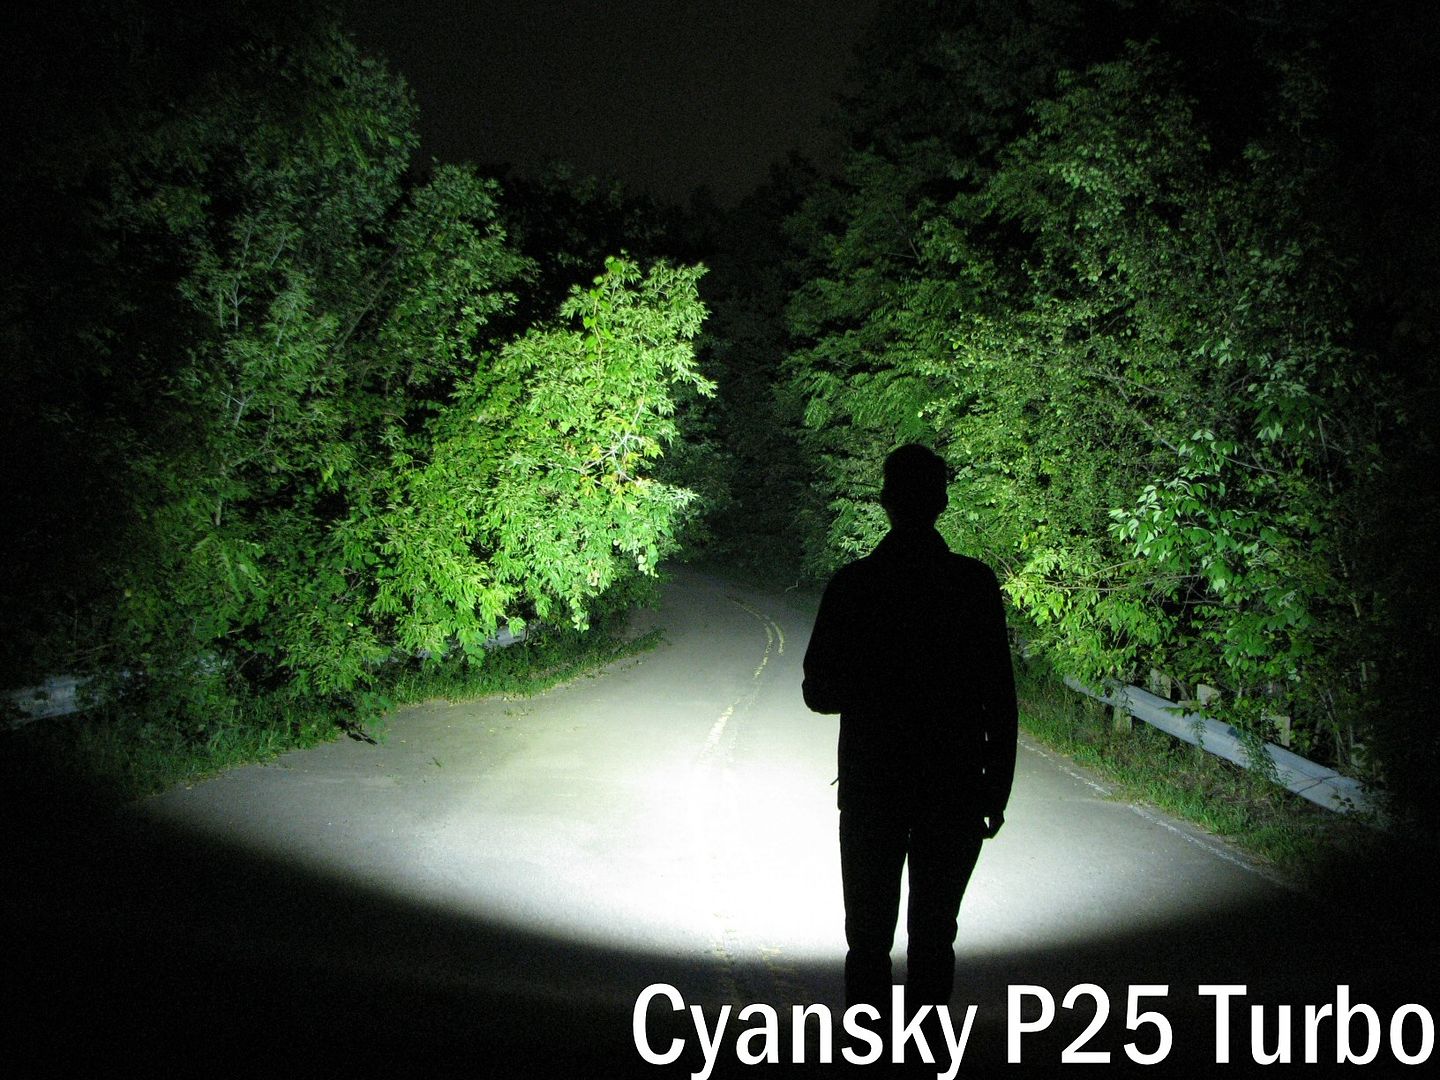
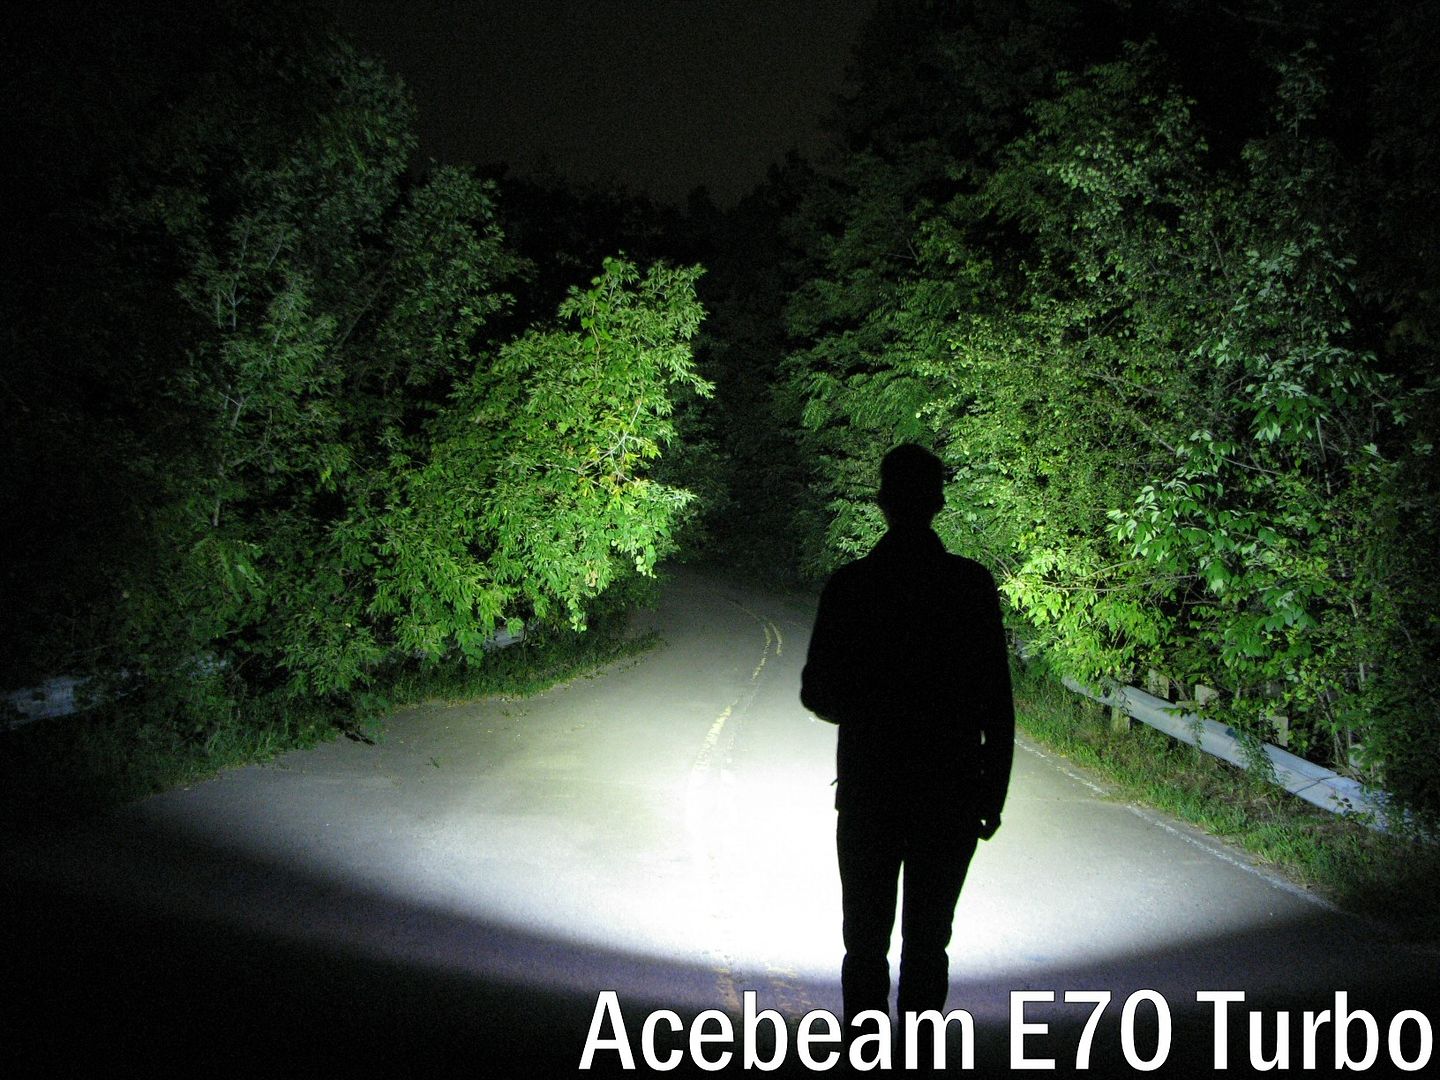
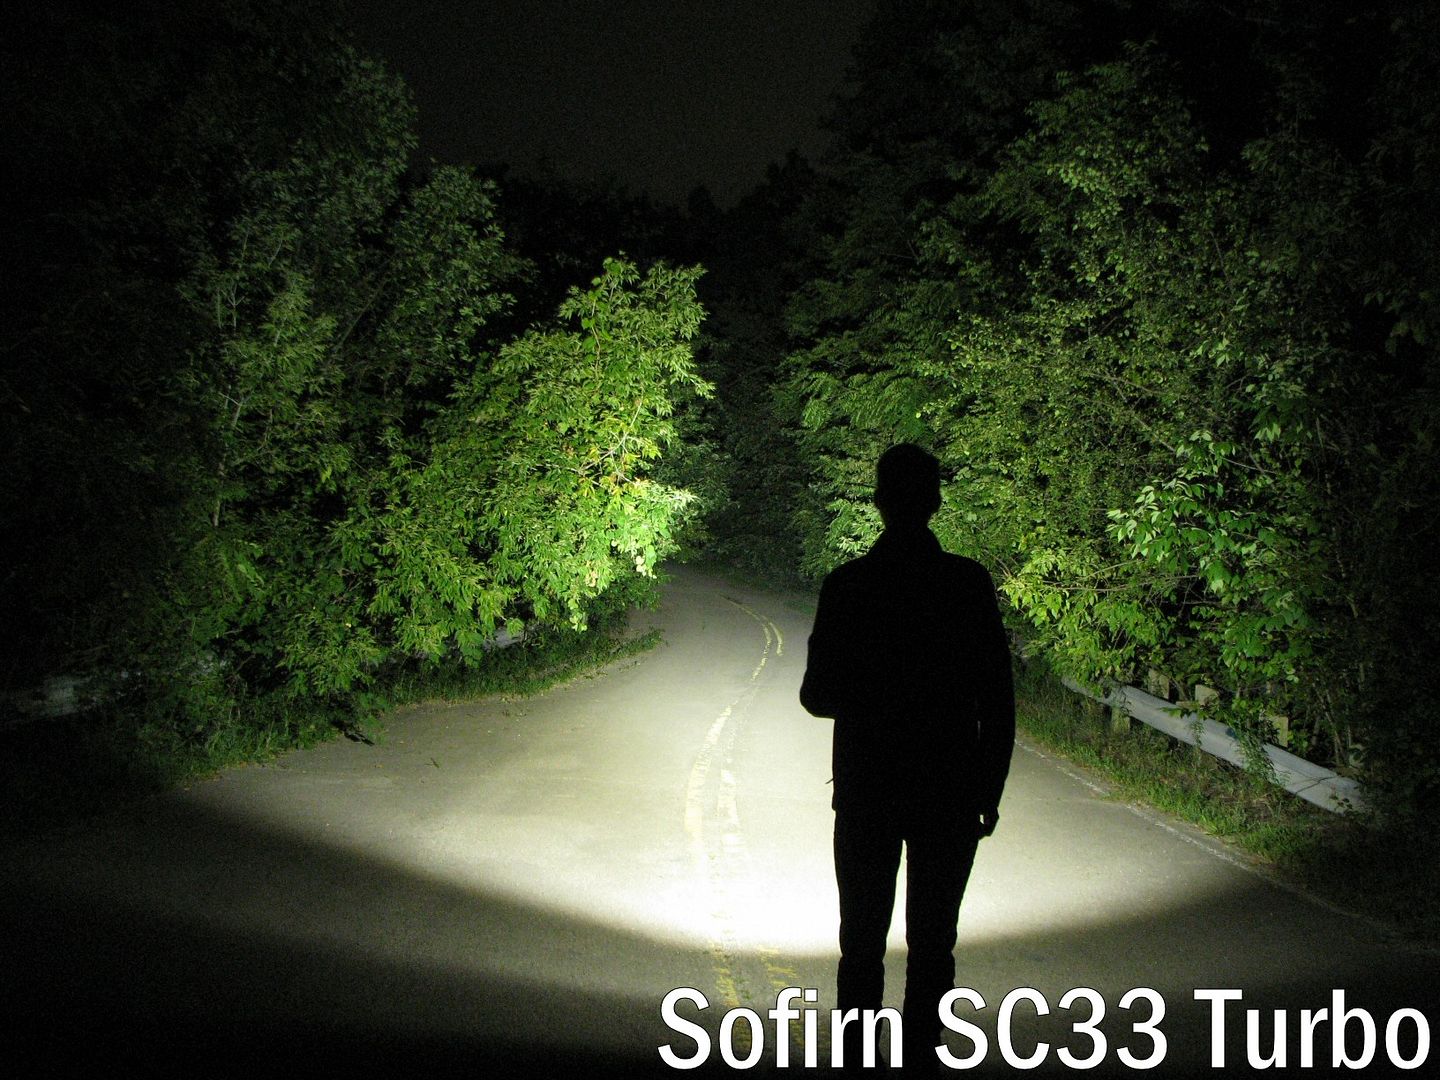
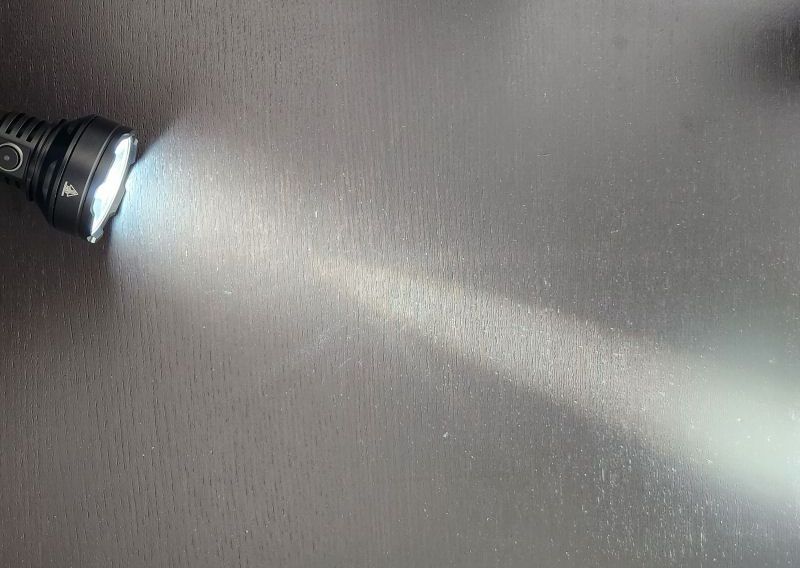
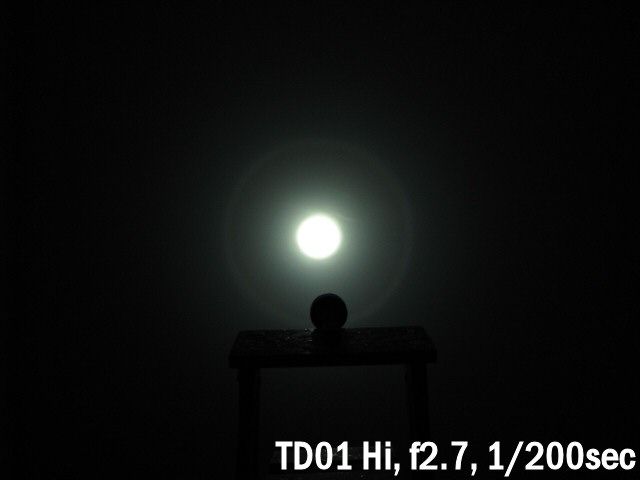
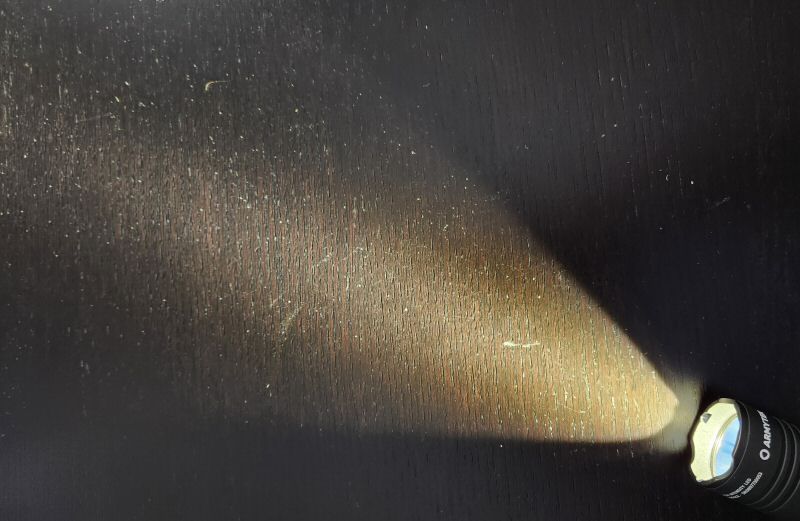
All long-distance outdoor beamshots are taken on my Canon PowerShot S5 IS at f/2.7, 1 sec exposure, ISO 400, daylight white balance. The tree at the centre of the hotspot is approximately 90 meters (~100 yards) from the camera. Note the road dips down and turns away in the distance, out of the camera’s sight line. Learn more about my outdoor beamshot locations here.
Click on any thumbnail image below to open a full size image in a new window. You can then easily compare the overall beams by switching between tabs.
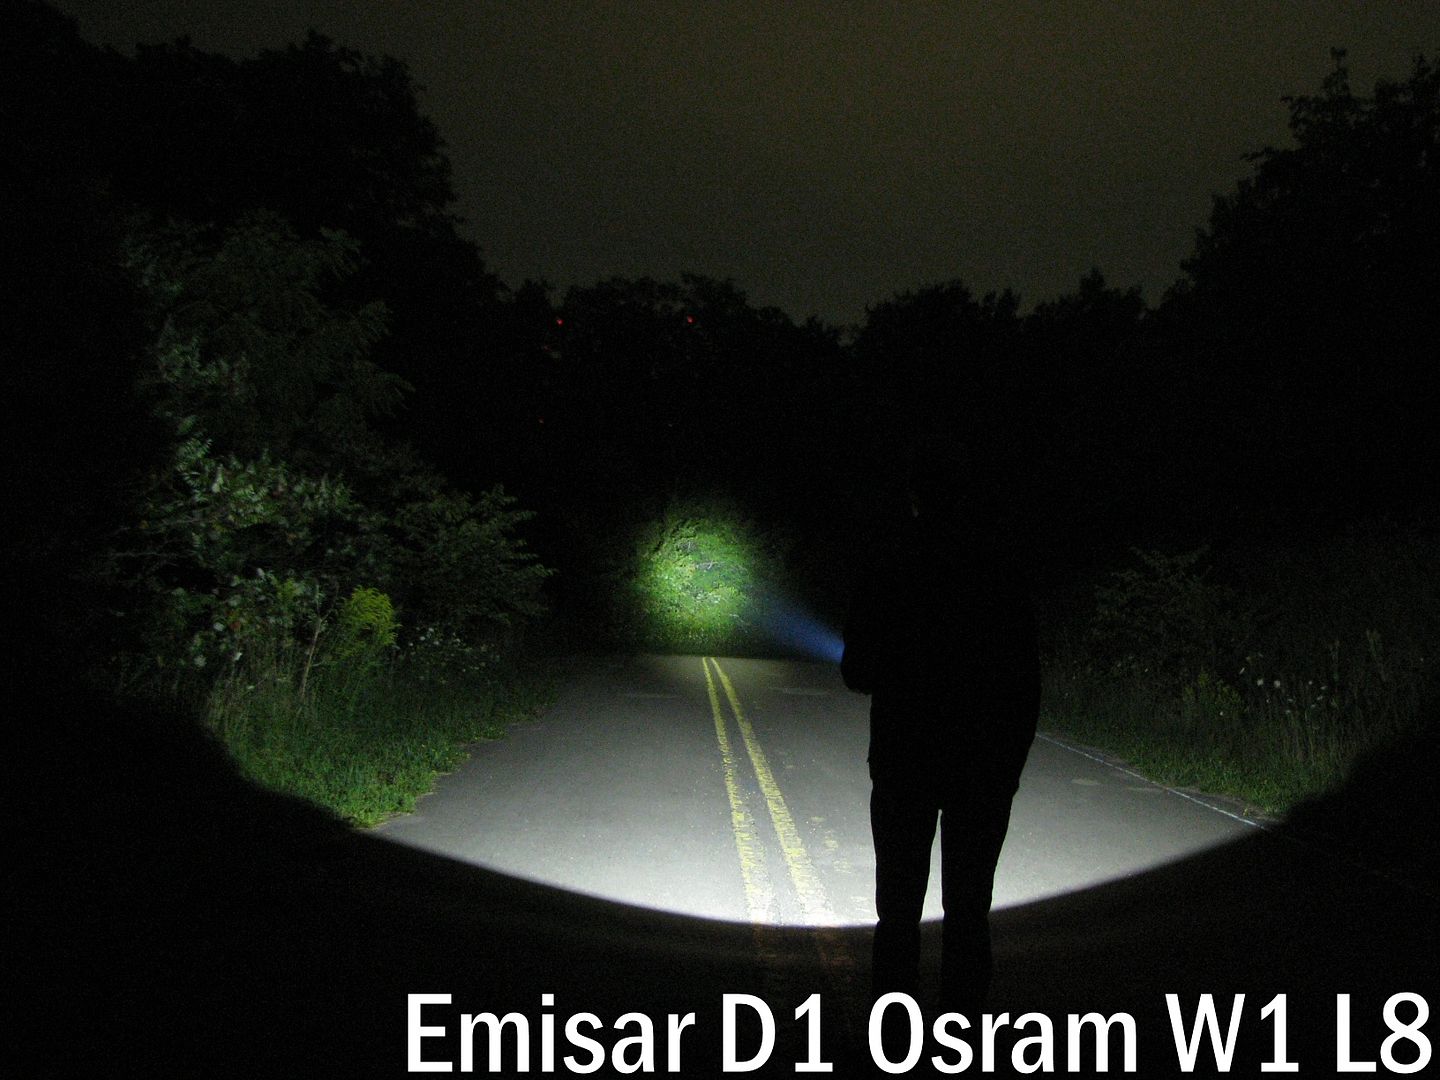
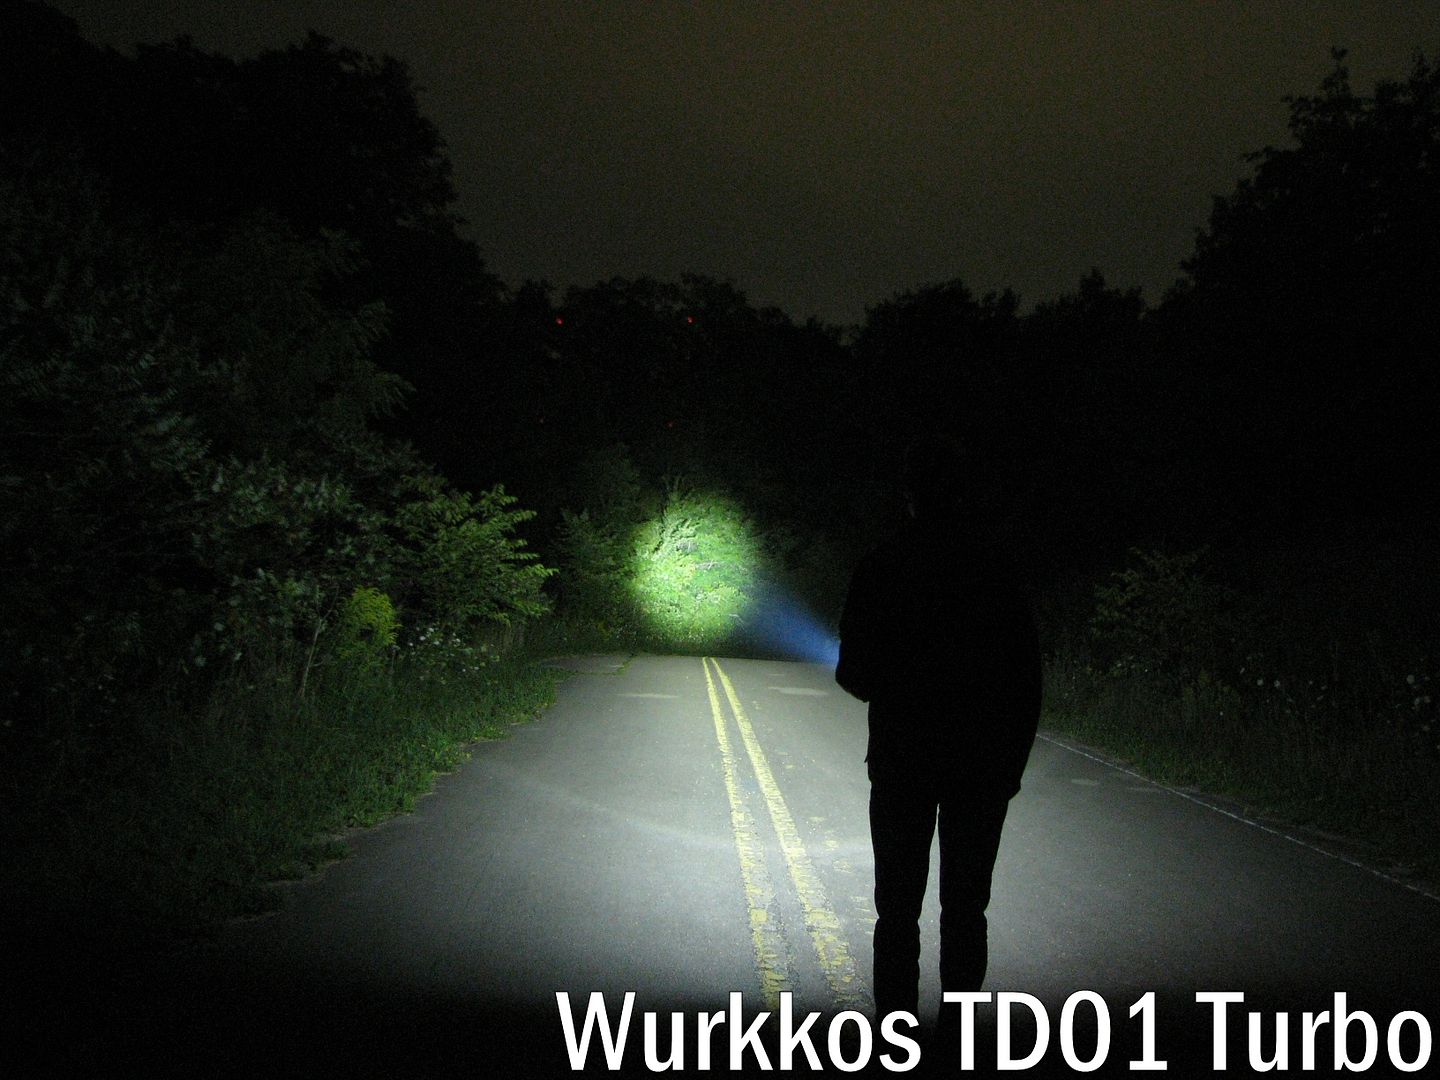
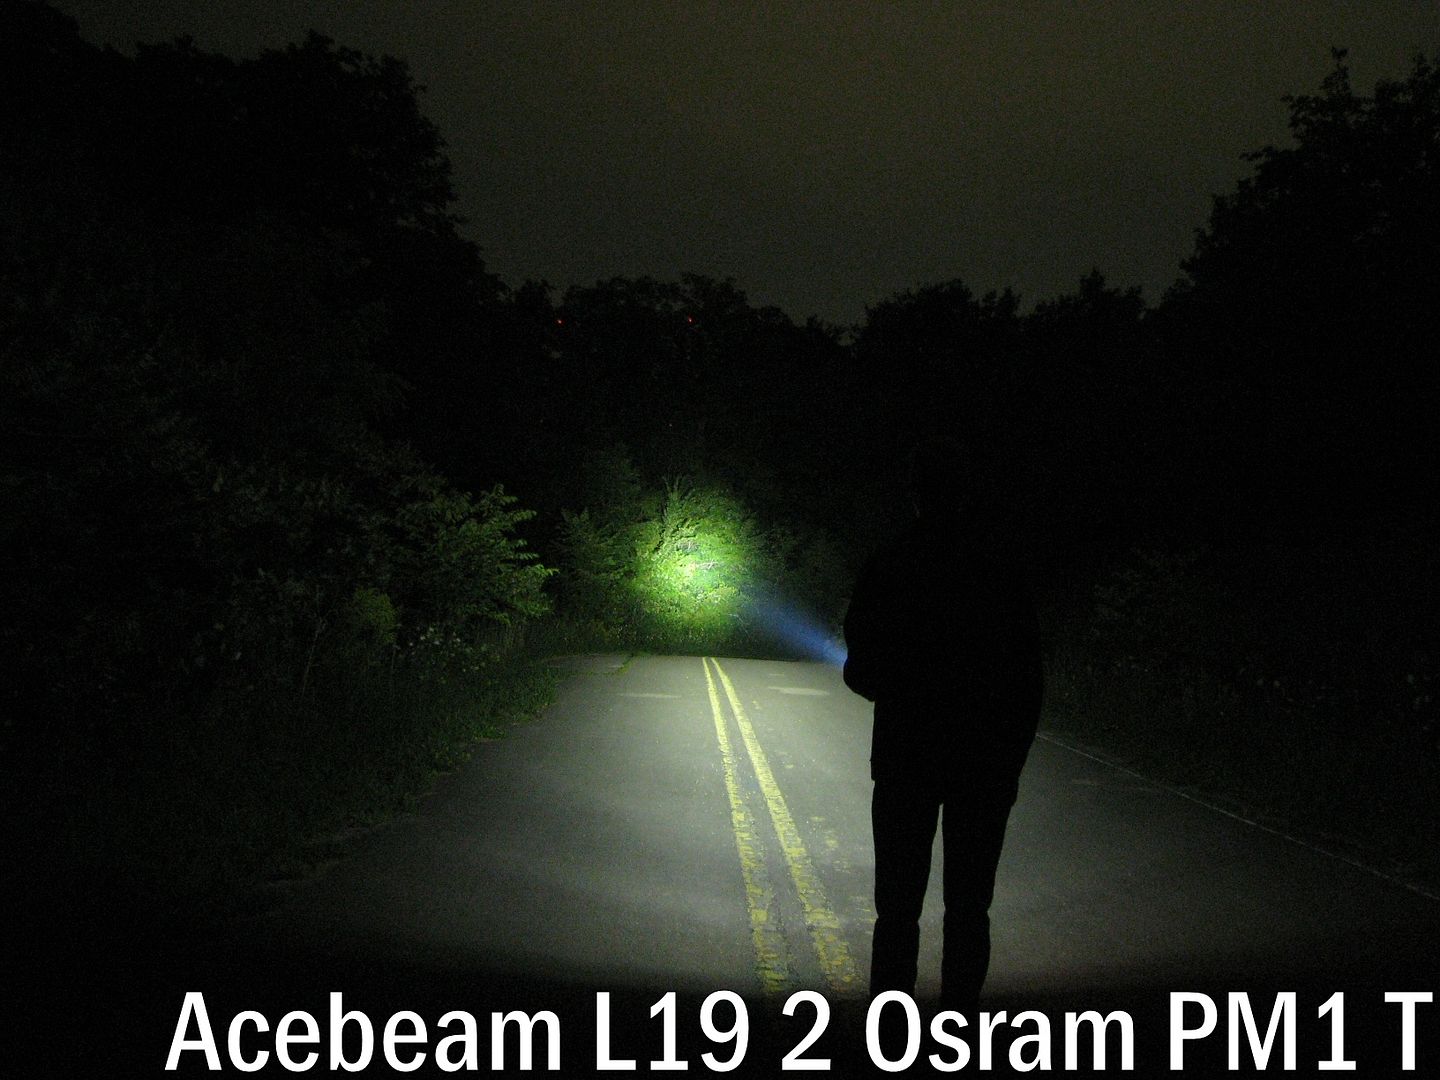
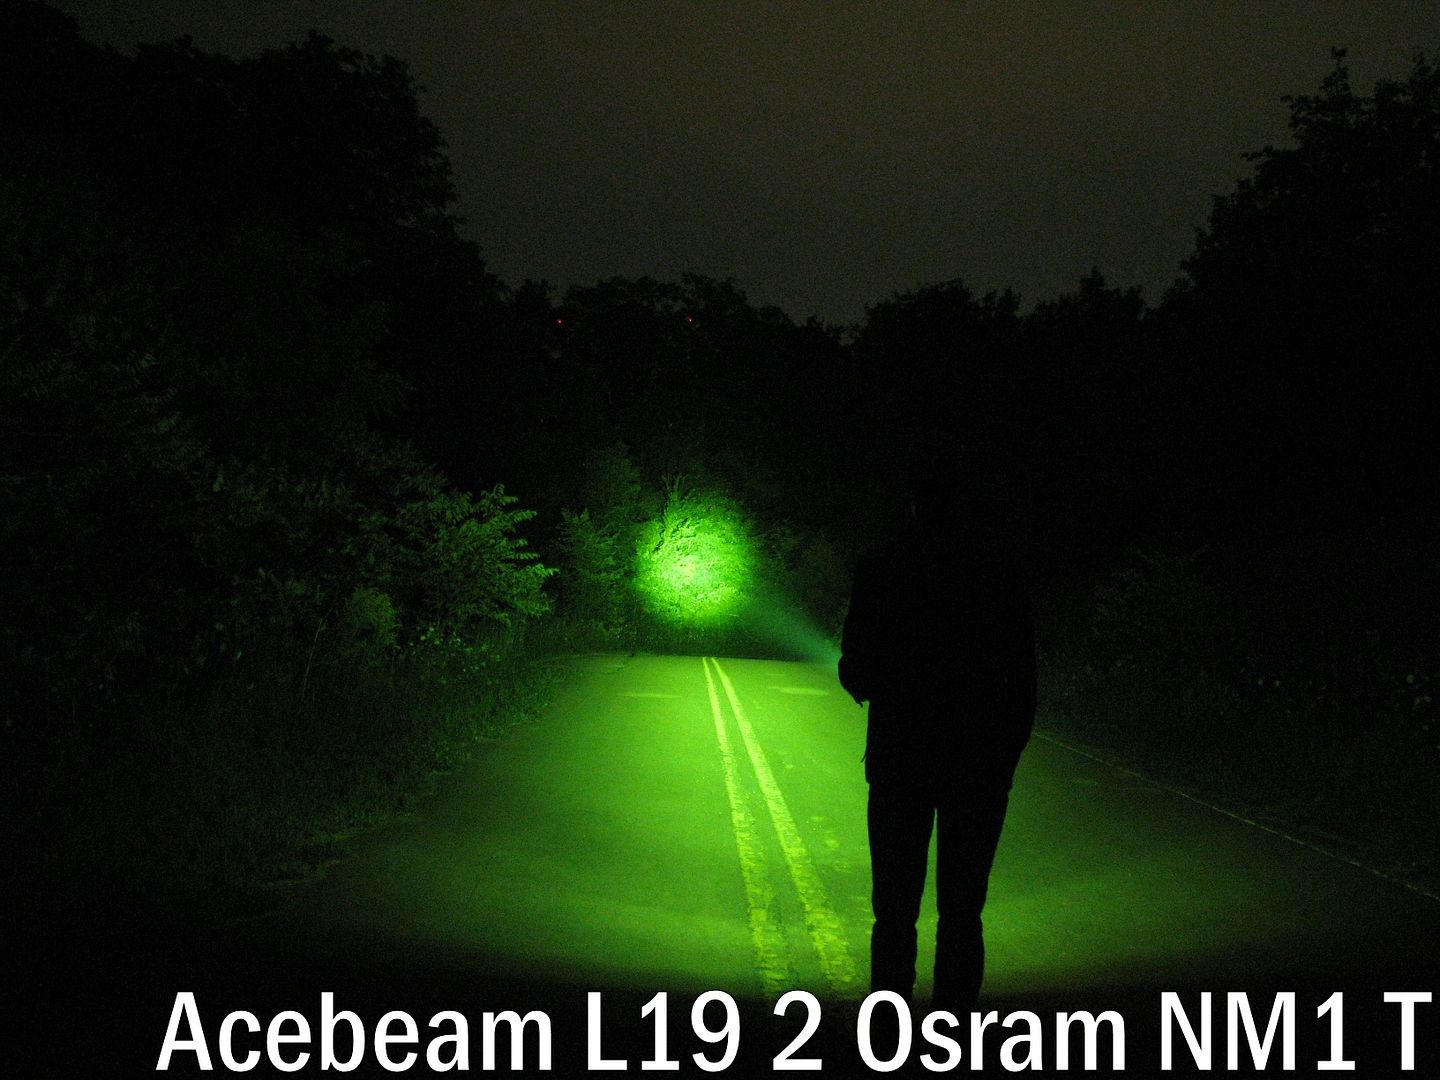
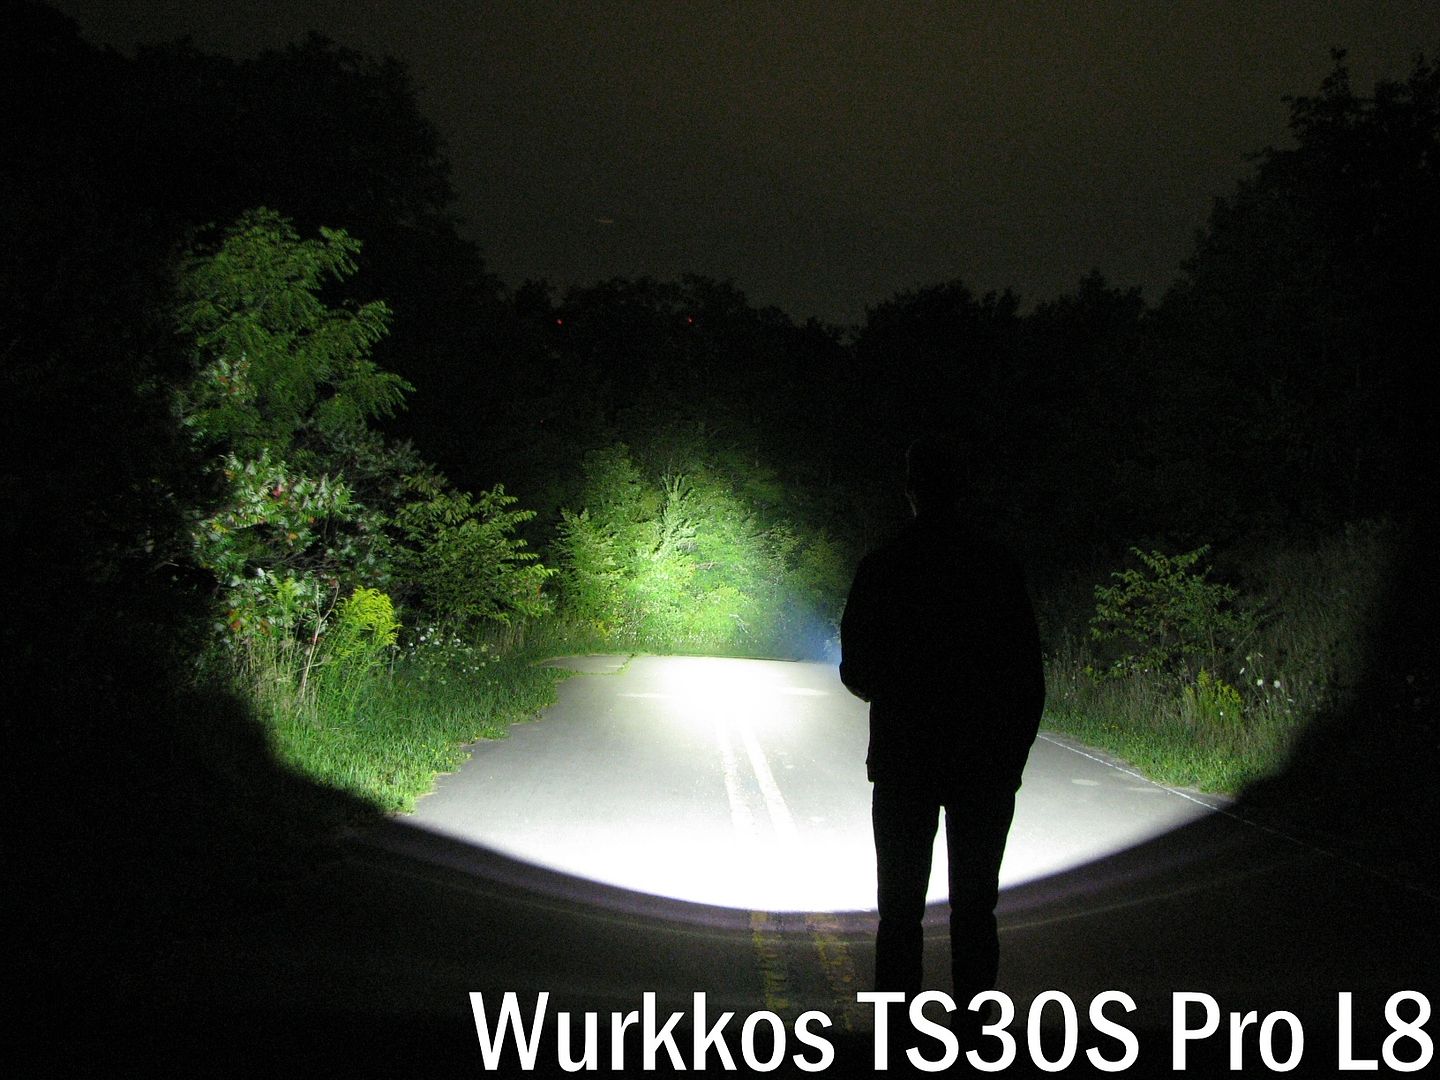

To help illustrate the hotspots better, I’ve also cropped the raw pictures around the centre of the frame. As before, click on any thumbnail below to open a full size image in a new window.
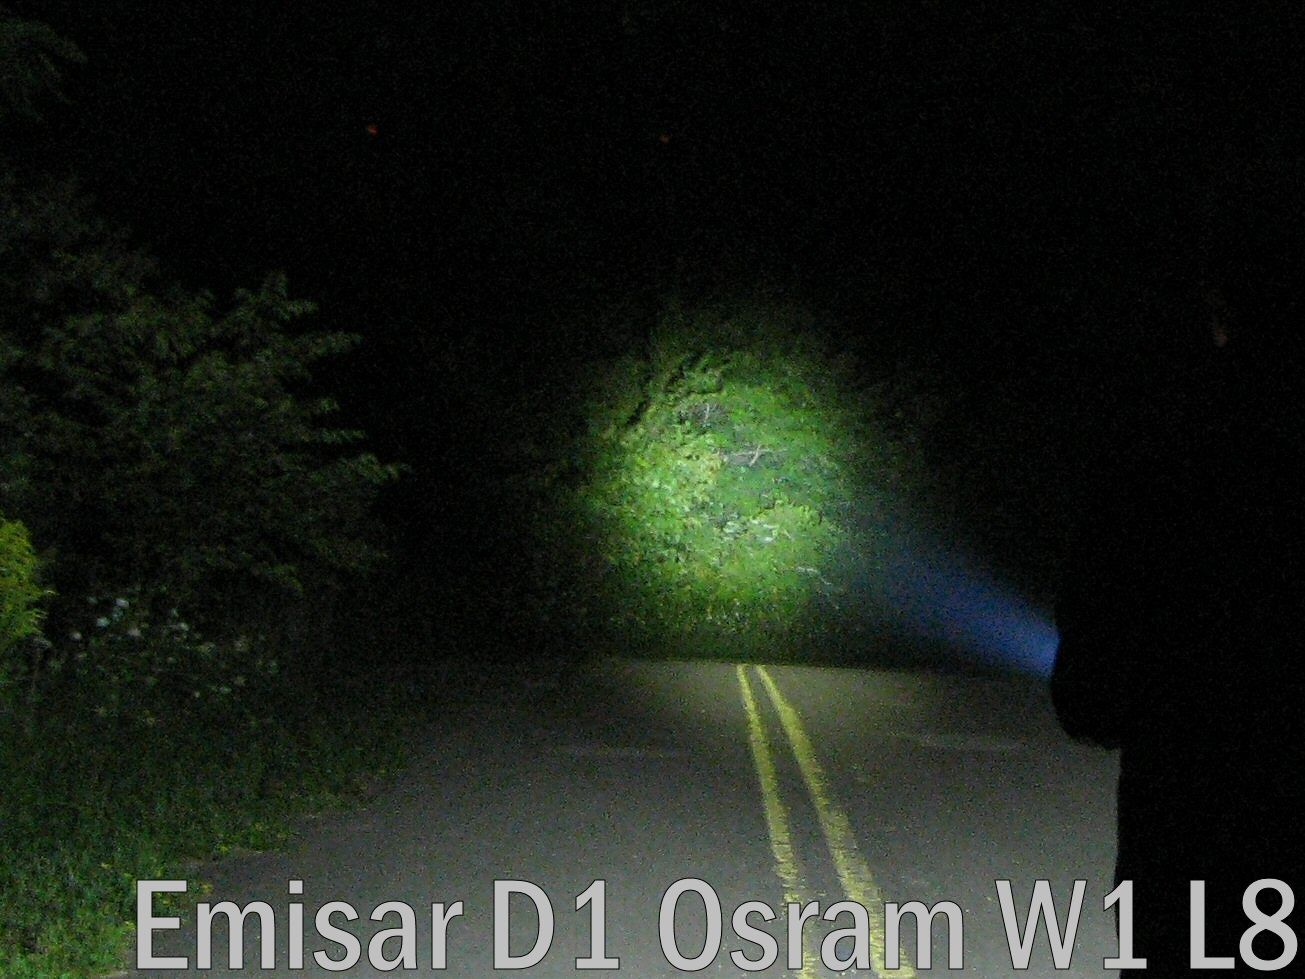
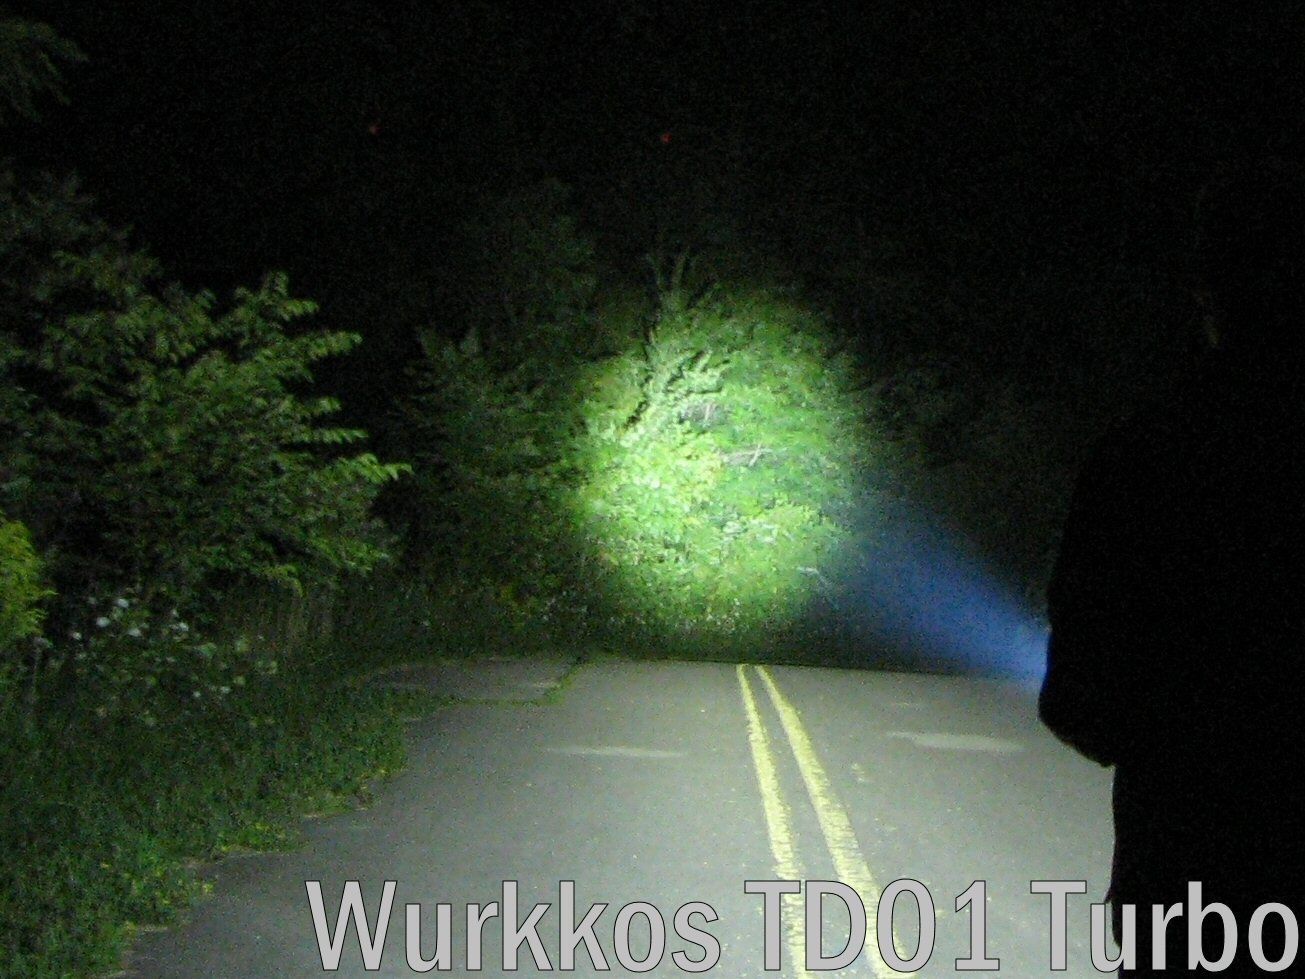
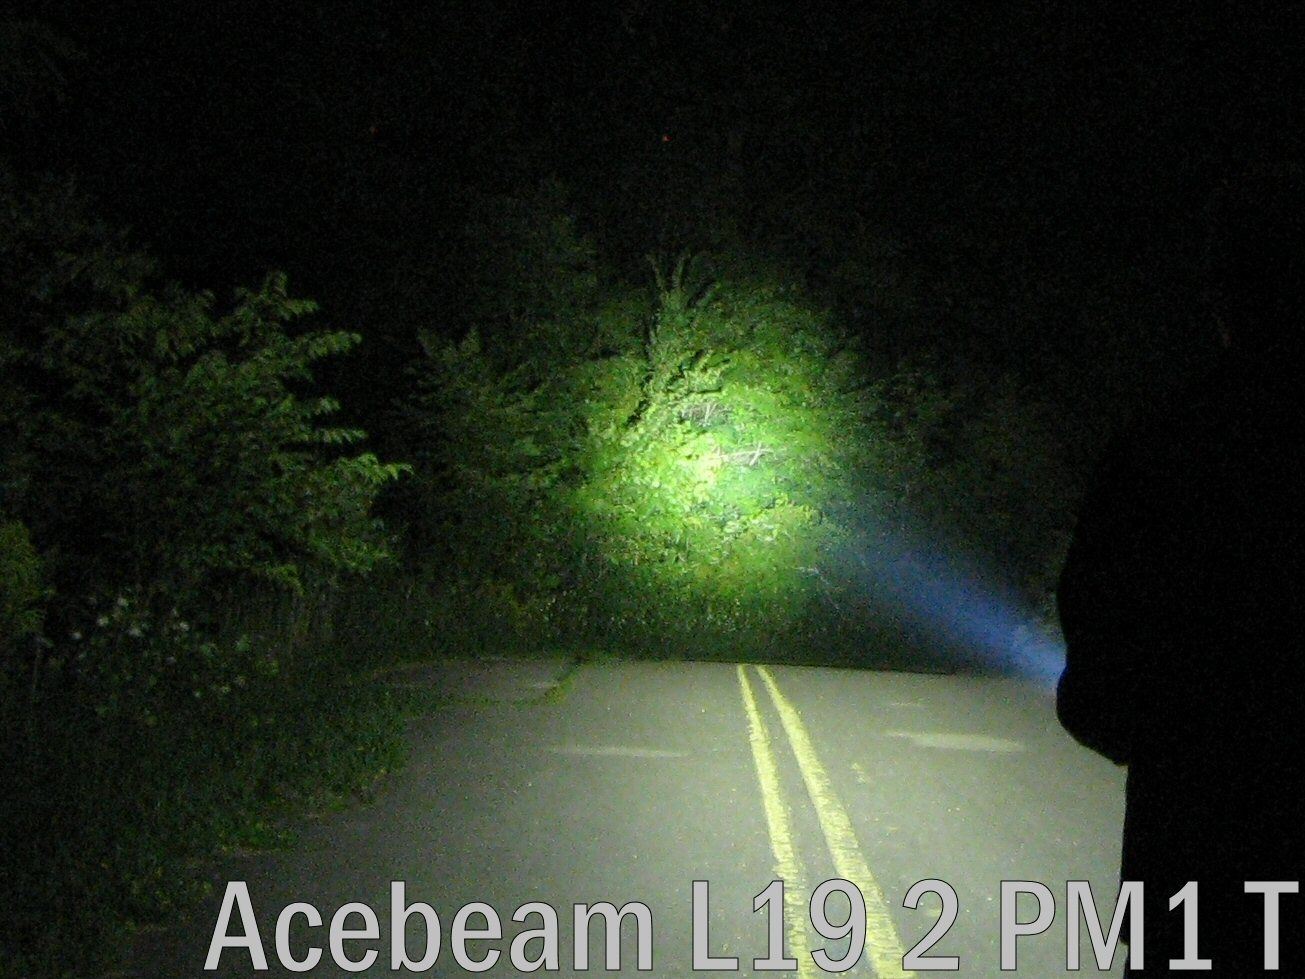

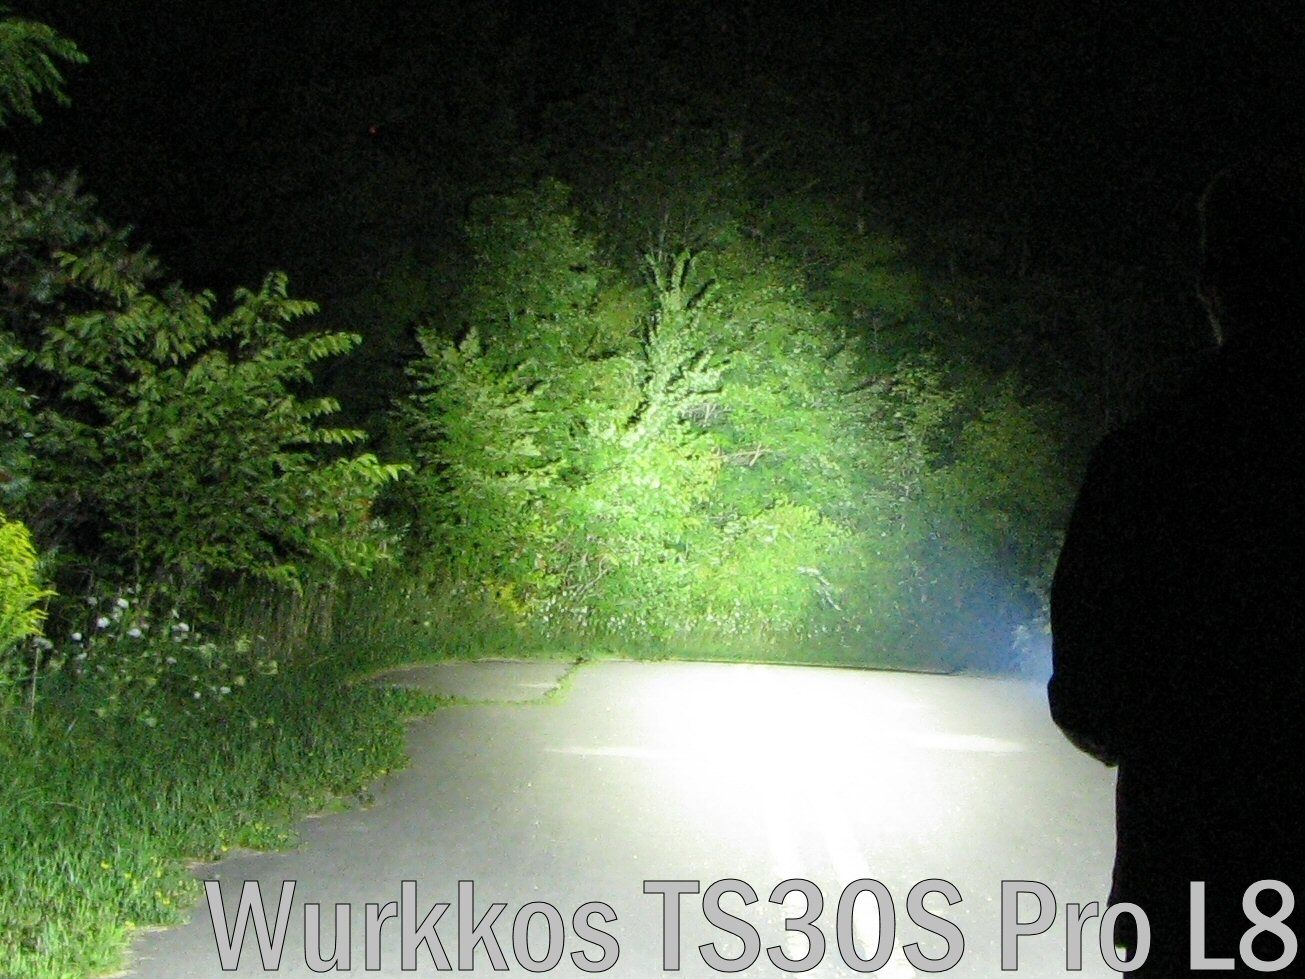

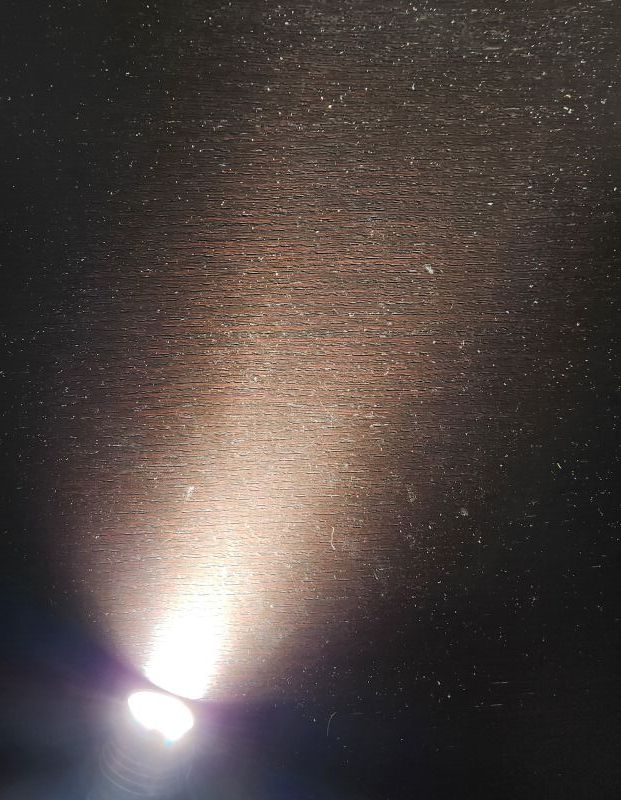
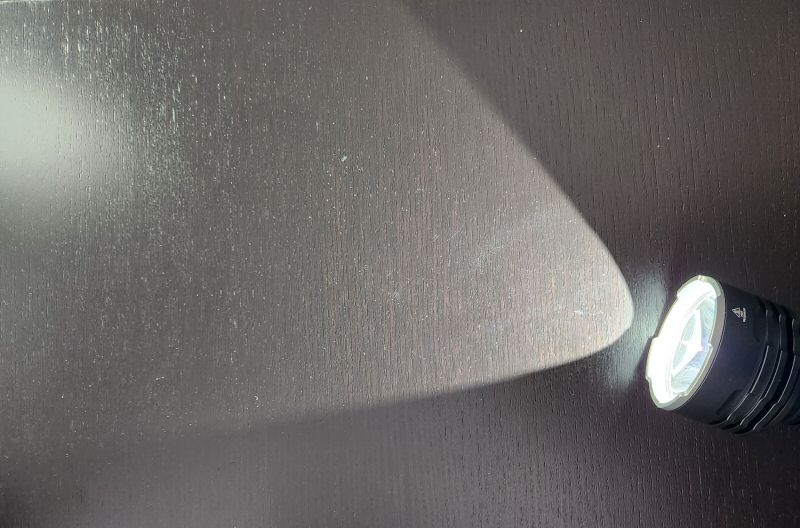
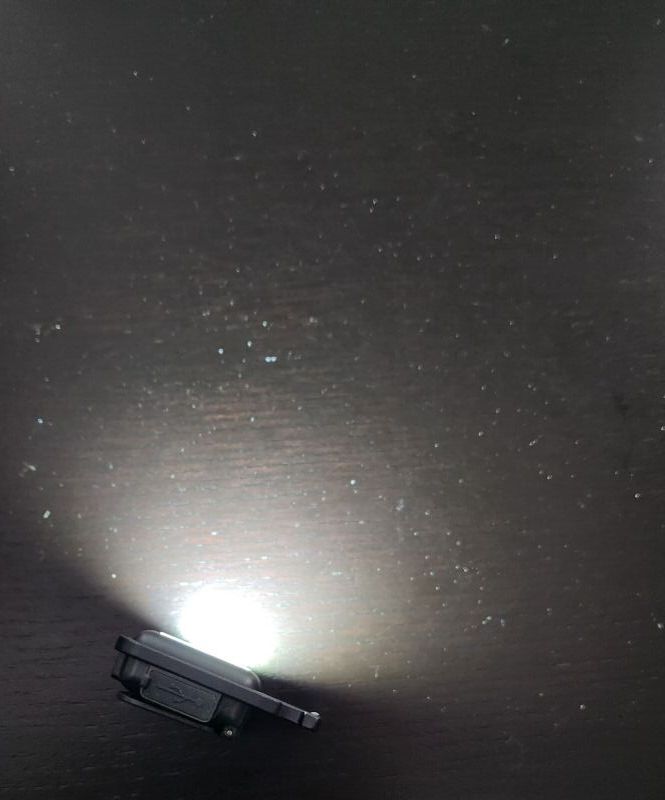
As you can see above, the W1 produces a very focused beam, with excellent throw of the hotspot.
Testing Results
My summary tables are generally reported in a manner consistent with the ANSI FL-1 standard for flashlight testing. In addition to the links above, please see my output measures page for more background.
All my output numbers are based on my home-made lightbox setup. As explained on that methodology page, I have devised a method for converting my lightbox relative output values to estimated lumens. Note that my lightbox calibration runs higher than most hobbyists today, but I’ve kept it to remain consistent with my earlier reviews (when the base calibration standard was first established). On average though, I find my lumen estimates are ~20% higher than most other modern reviewers.
My Peak Intensity/Beam Distance are directly measured with a NIST-certified Extech EA31 lightmeter.
D1 Testing Results
| Mode | Spec Lumens | Estimated Lumens @0sec | Estimated Lumens @30 secs | Beam Intensity @0sec | Beam Intensity @30secs | Beam Distance @30secs | PWM/Strobe Freq | Noise Freq | Charging Current <3V | Charging Current >3V | Parasitic Drain | Weight w/o Battery | Weight with Battery | CCT (K) | Duv | CRI |
|---|---|---|---|---|---|---|---|---|---|---|---|---|---|---|---|---|
| Switch Green LED (High) | - | 0.07 | 0.07 | - | - | - | No | No | - | - | 91 g | - | - | - | - | |
| Smooth Ramp Min | - | 0.87 | 0.87 | - | - | - | No | No | - | - | ~18 uA | 91 g | - | - | - | - |
| L1 | - | 1.1 | 1.1 | - | - | - | No | No | - | - | ~18 uA | 91 g | - | - | - | - |
| L2 | - | 10 | 10 | - | - | - | No | No | - | - | ~18 uA | 91 g | - | - | - | - |
| L3 | - | 40 | 40 | - | - | - | No | No | - | - | ~18 uA | 91 g | - | - | - | - |
| L4 | - | 120 | 120 | - | - | - | No | No | - | - | ~18 uA | 91 g | - | - | - | - |
| L5 | - | 240 | 240 | - | - | - | No | No | - | - | ~18 uA | 91 g | - | - | - | - |
| L6 | - | 420 | 420 | - | - | - | No | No | - | - | ~18 uA | 91 g | - | 5,695 | 0.0101 | 71 |
| L7 | - | 660 | 650 | - | - | - | No | No | - | - | ~18 uA | 91 g | - | - | - | - |
| L8 | 900 | 950 | 890 | 123,000 cd | 117,000 cd | 684 m | No | No | - | - | ~18 uA | 91 g | - | - | - | - |
| Candle | - | - | - | - | - | - | No | No | - | - | ~18 uA | 91 g | - | - | - | - |
| Bike Strobe | - | - | - | - | - | - | 1.3 Hz | No | - | - | ~18 uA | 91 g | - | - | - | - |
| Party Strobe | - | - | - | - | - | - | 20 Hz | No | - | - | ~18 uA | 91 g | - | - | - | - |
| Tactical Strobe | - | - | - | - | - | - | 10.3 Hz | No | - | - | ~18 uA | 91 g | - | - | - | - |
| Lightning | - | - | - | - | - | - | No | No | - | - | ~18 uA | 91 g | - | - | - | - |
| Beacon | - | - | - | - | - | - | 1.3 Hz | No | - | - | ~18 uA | 91 g | - | - | - | - |
| SOS | - | - | - | - | - | - | 0.52 Hz | No | - | - | ~18 uA | 91 g | - | - | - | - |
Max output specs seem consistent with the rated max output. And my calibrated lux light meter actually reports slightly higher peak throw than the specs indicate – well done!
To view and download full testing results for all modern lights in my testing, check out my Database page.
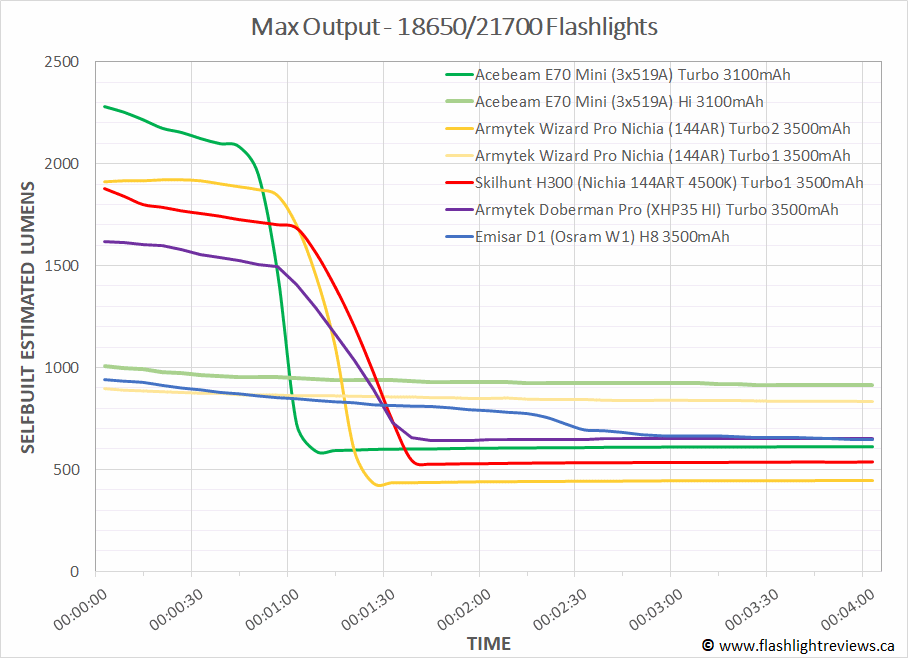
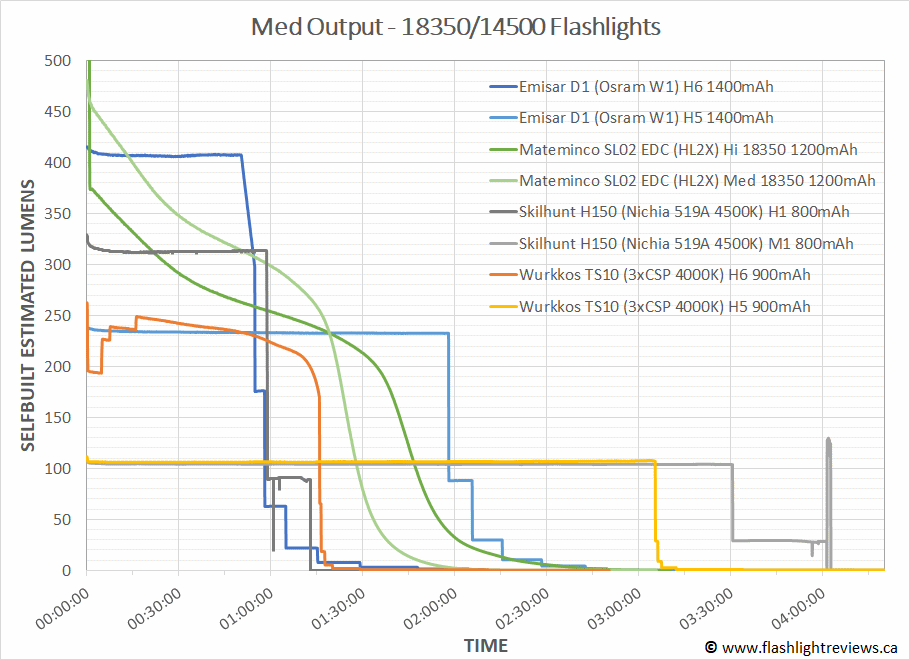
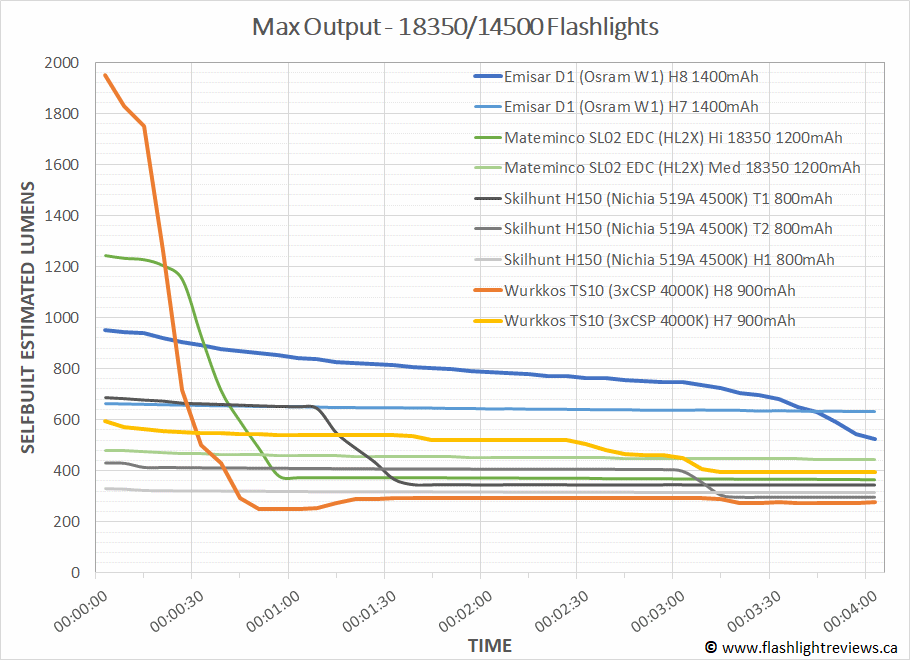
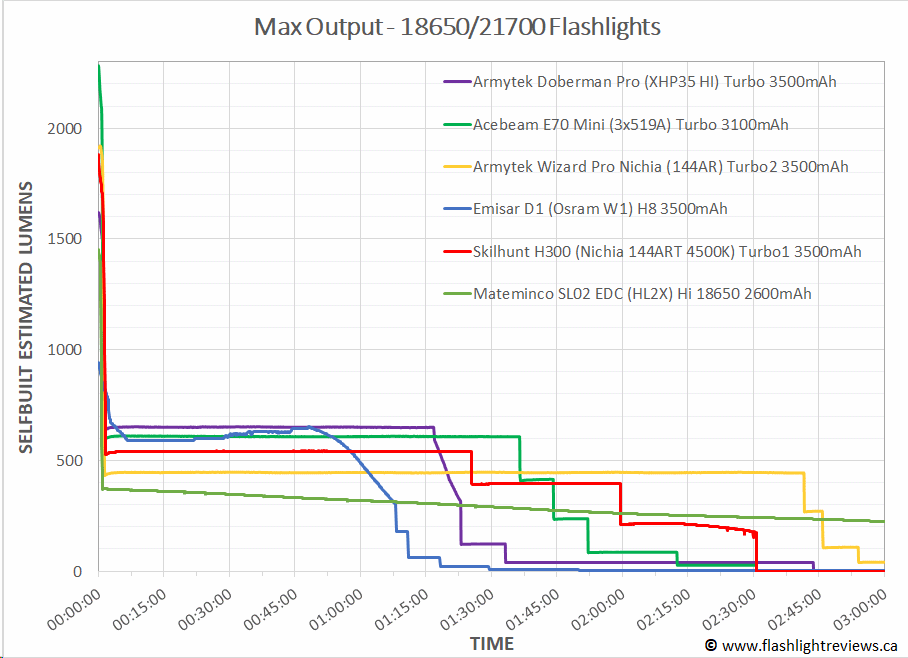
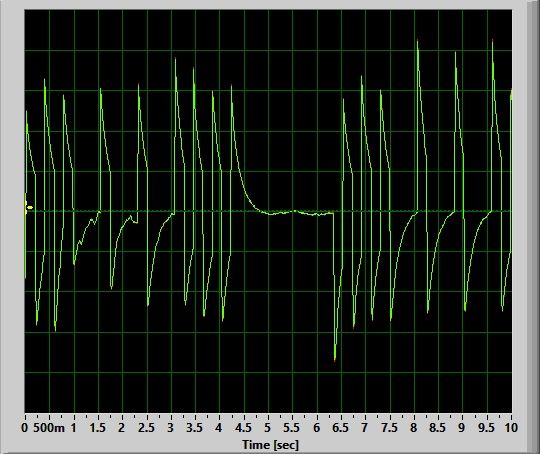
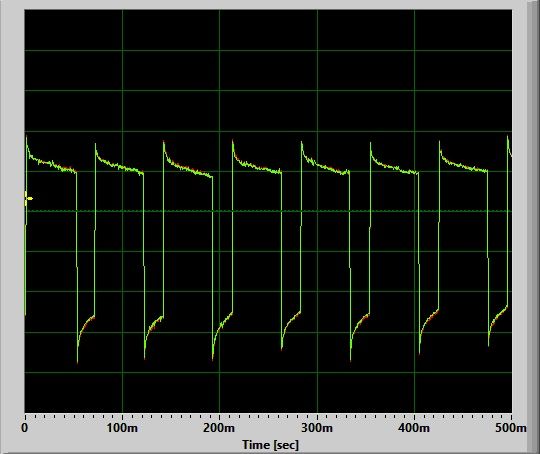
Runtimes
As always, my runtimes are done under a small cooling fan, for safety and consistency. To learn more about how to interpret runtime graphs, see my runtimes methodology page. Note that on average, my lightbox’s calibration seems to be ~20% higher than most modern reviewers.
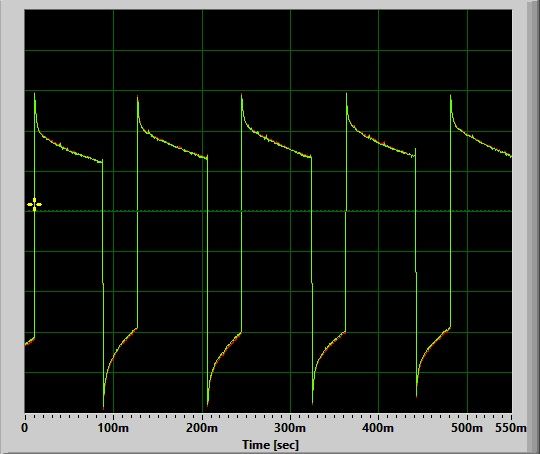
The D1 didn’t come with its own battery, so I used a lightly used Armytek 3500mAh cell for comparison purposes in the main runtimes below.
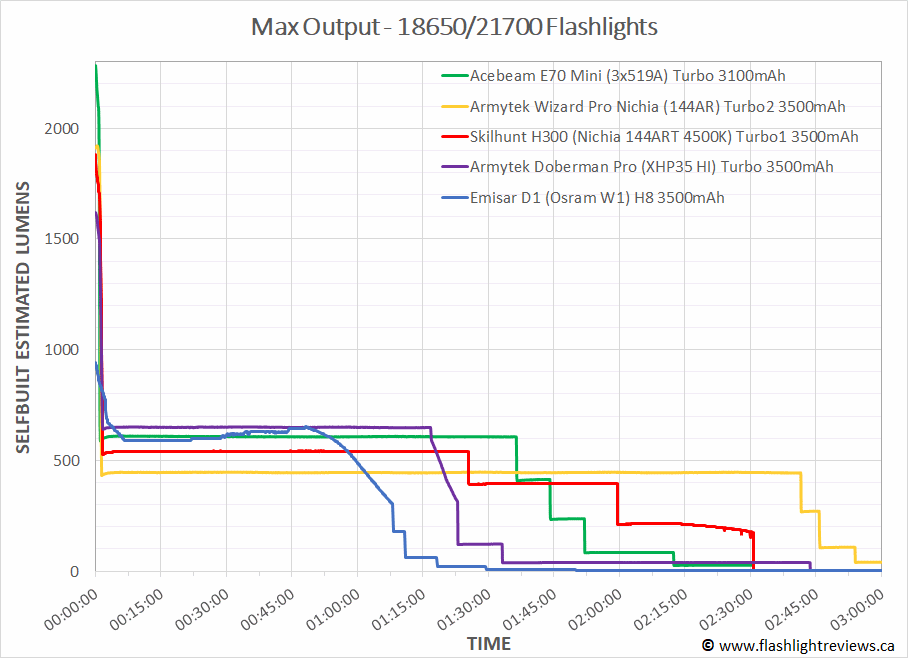
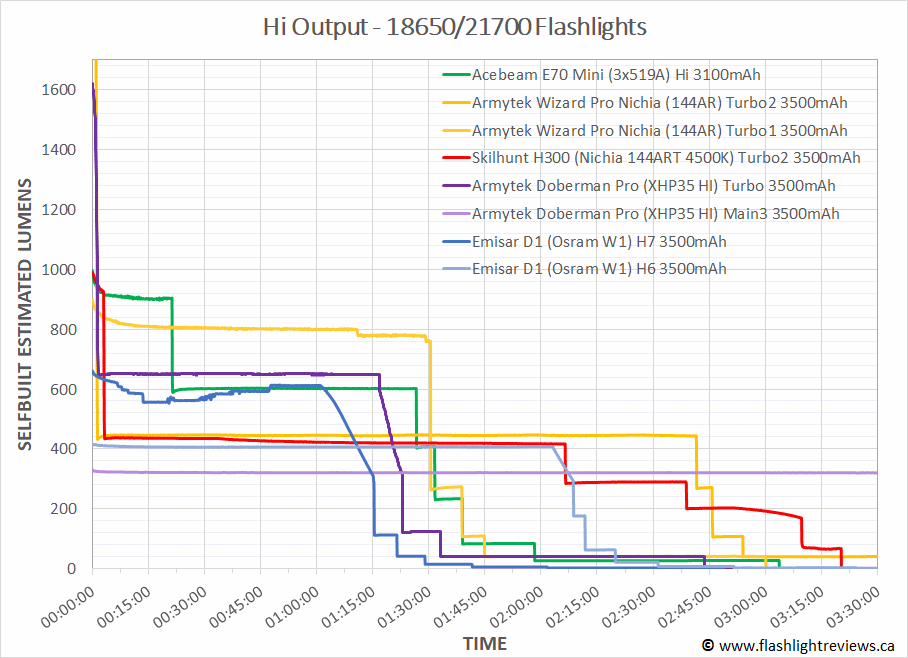
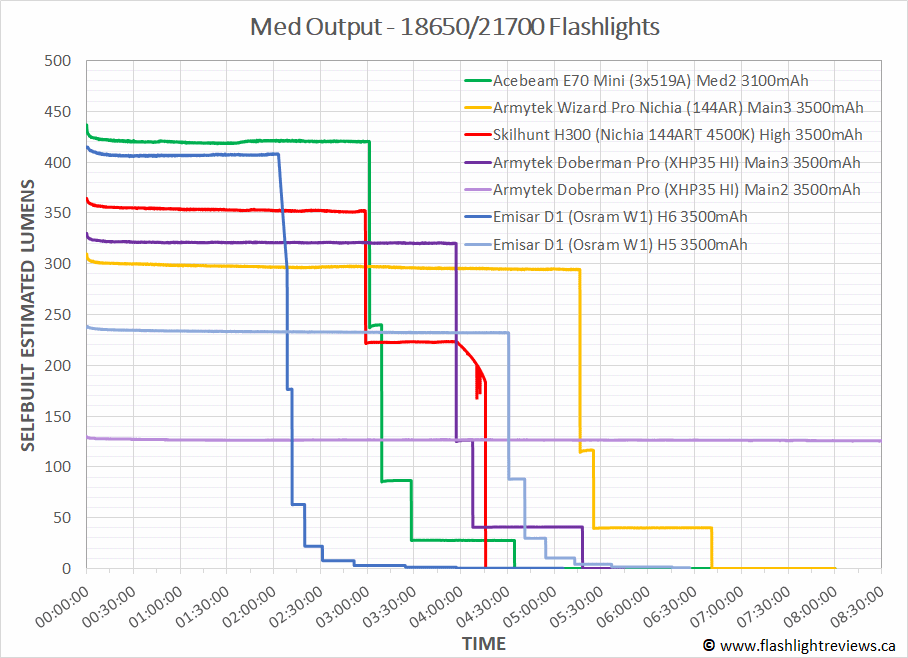
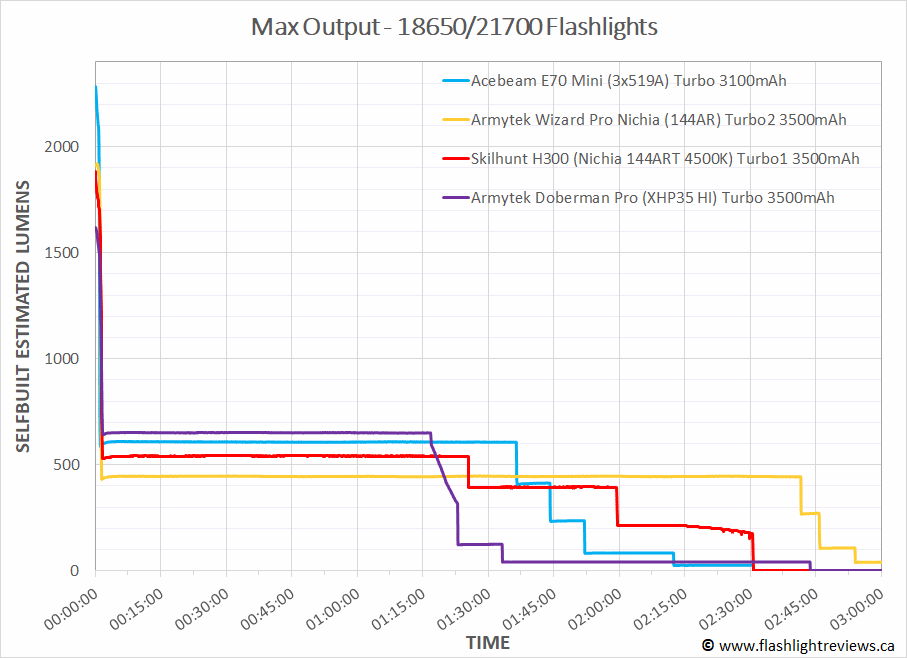
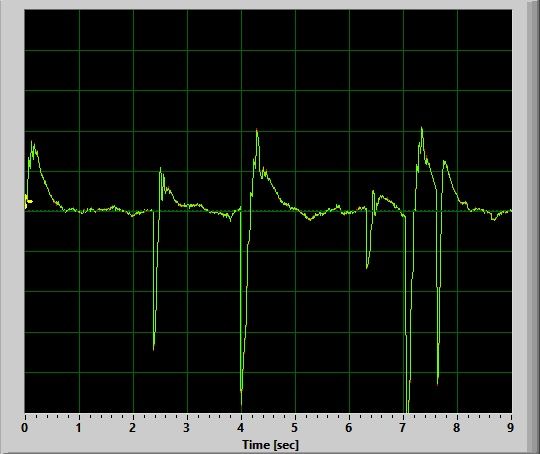
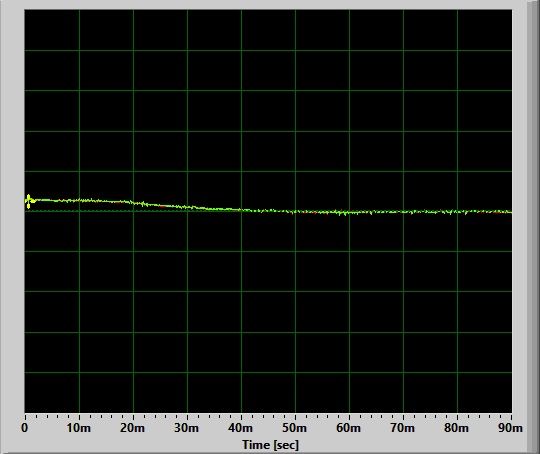
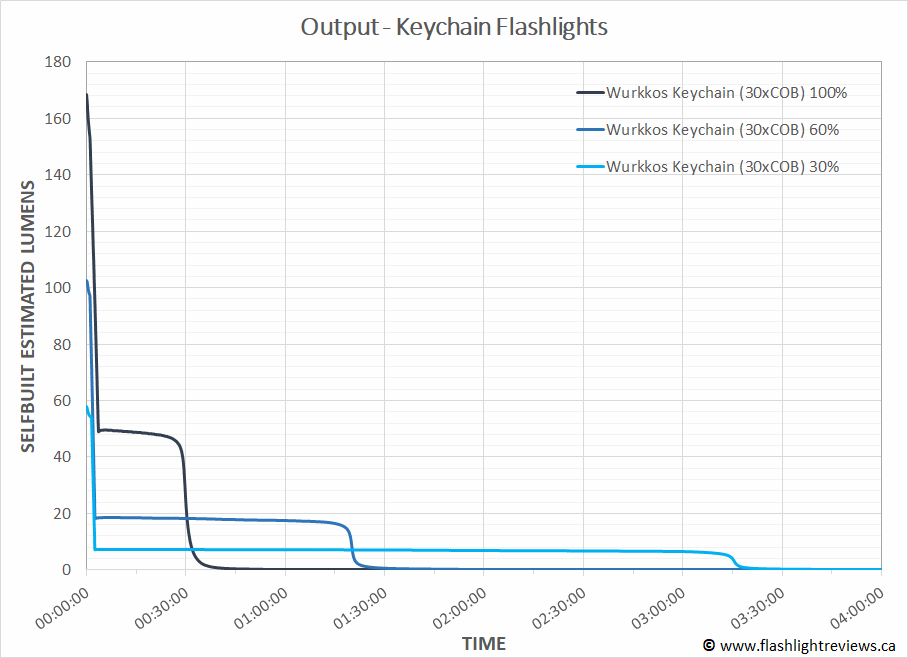
The highest two levels show a generally well-regulated sustained output around ~600 estimated lumens for about an hour so (after step-down in the case the L8 max output). Lower levels are completely flat-regulated. These results show that Hank is using a very good fully-regulated linear driver on the D1, at least with this emitter choice. The same would be true for other relatively low voltage emitters, whereas higher output emitters would require a boost circuit (and would thus perform differently).
The overall output/runtime efficiency of the Osram W1 seems decent enough in my testing, although it under-performs against some emitters in competing lights (e.g., the Cree XHP35, Nichia 144AR). As this is my first example of this emitter, I don’t really know what to expect – but these results seem reasonable. There are always higher output or more efficient emitters you can choose – but with reduced throw, of course.
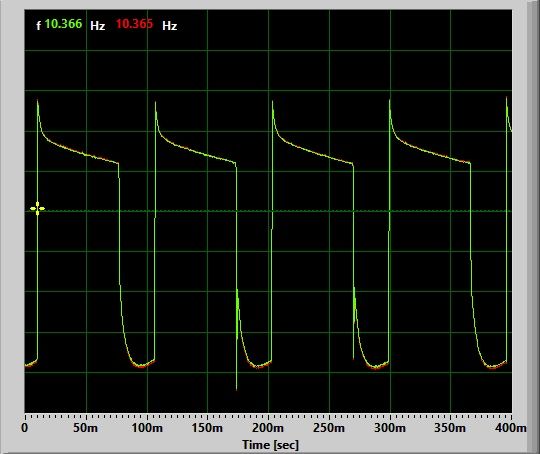
As always, the light will have to step-down on the highest output level at some point, but it does so gradually in this case. Like the D4K, I am impressed by how high the step-down level is, and how well regulated.
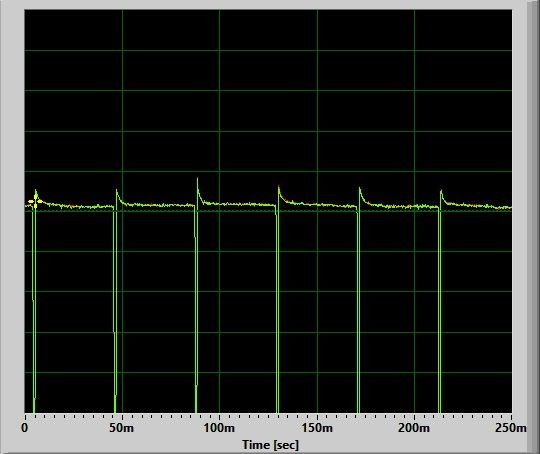
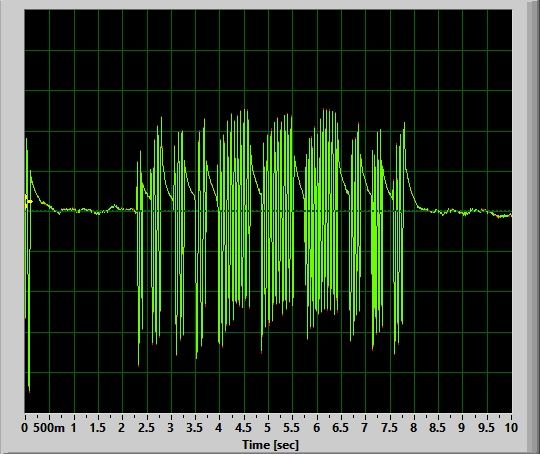
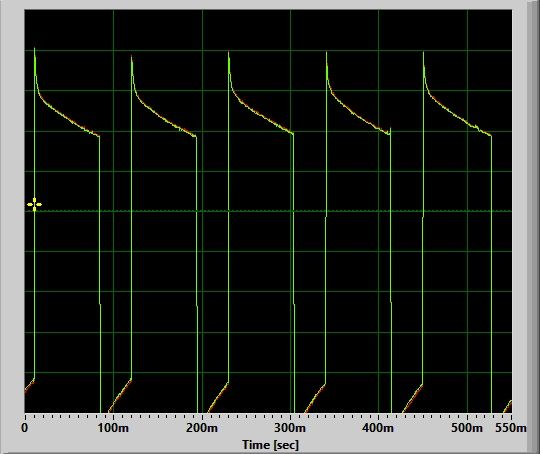
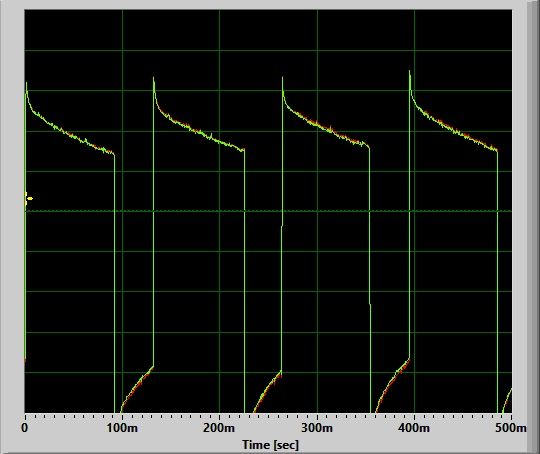
To better show this initial step-down pattern, I’ve done some additional runtimes with another new cell, a Vapcell F38 3800mAh 18650 battery. The Armytek and Vapcell batteries are differentiated below by their rated capacity – 3500mAh vs 3800mAh.
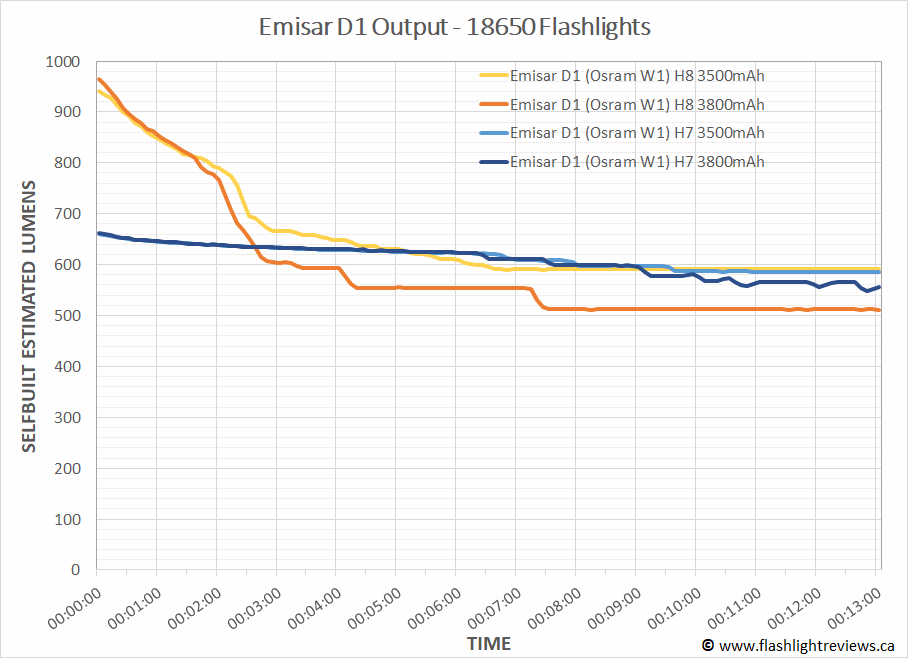
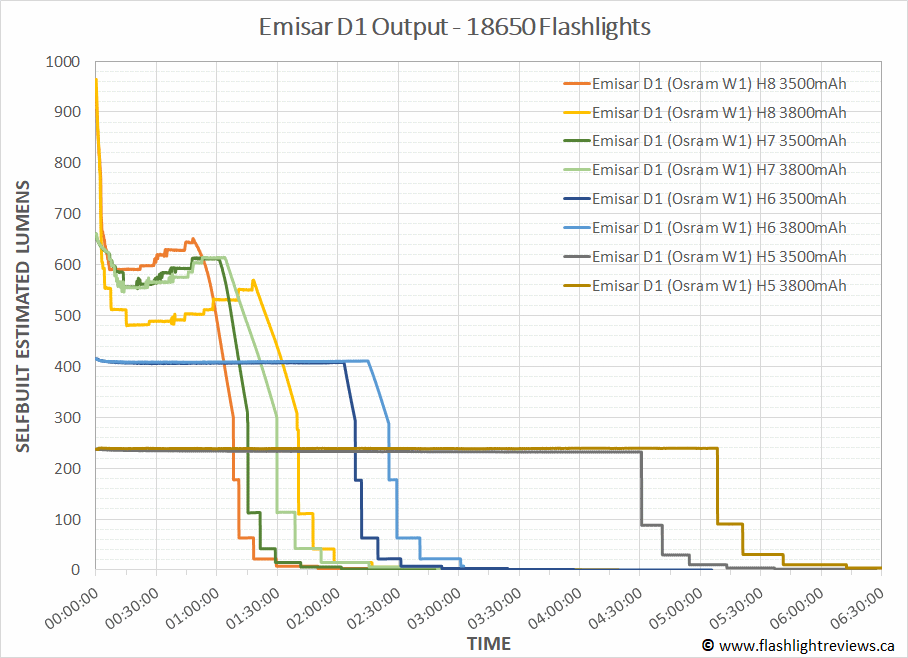
The higher capacity Vapcell batteries consistently run proportionately longer than the lower capacity Armytek. However, as also seen on the D4K, they appear to step-down to a lower level on max output as well. This is likely due to the typical trade-off with higher capacity cells – they cannot handle high drain quite as well (i.e., high capacity and high drain are typically mutually exclusive, in my experience). Note that Hank advises the use of high drain cells only in the D1 – I’m simply using these batteries for consistency to my other reviews.
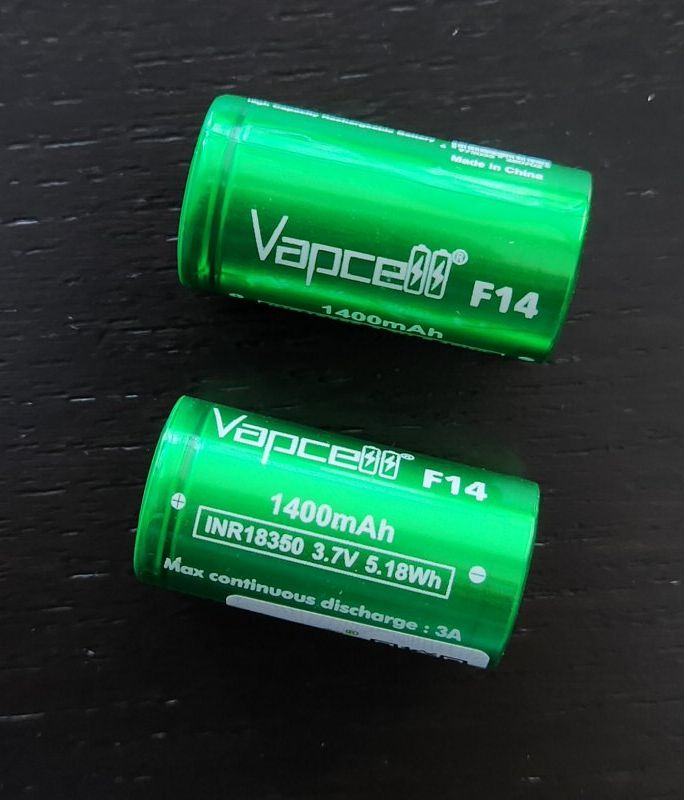
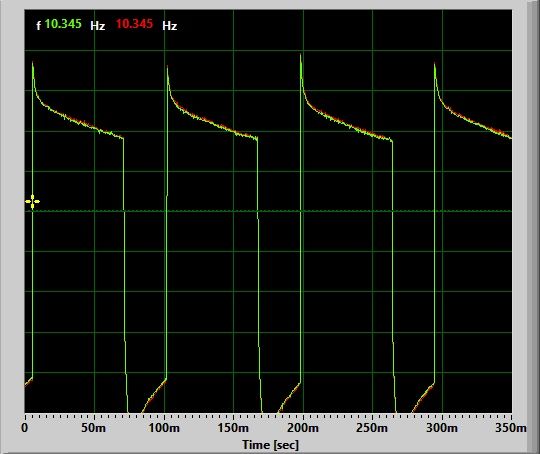
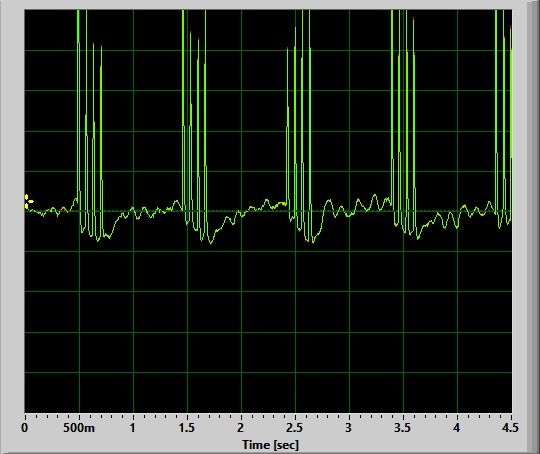
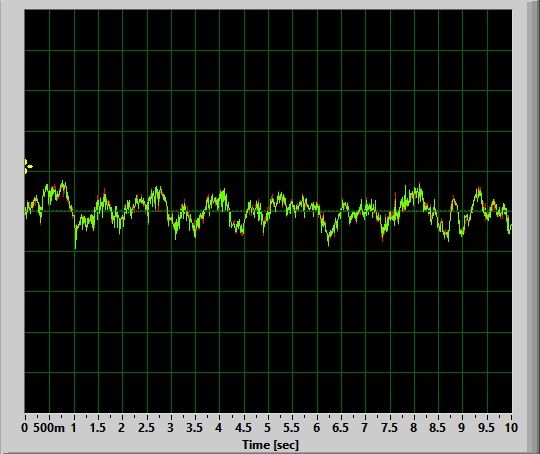
Now let’s see how it performs against other lights on 18350/14500, using a new Vapcell F14 18350 1400mAh battery:
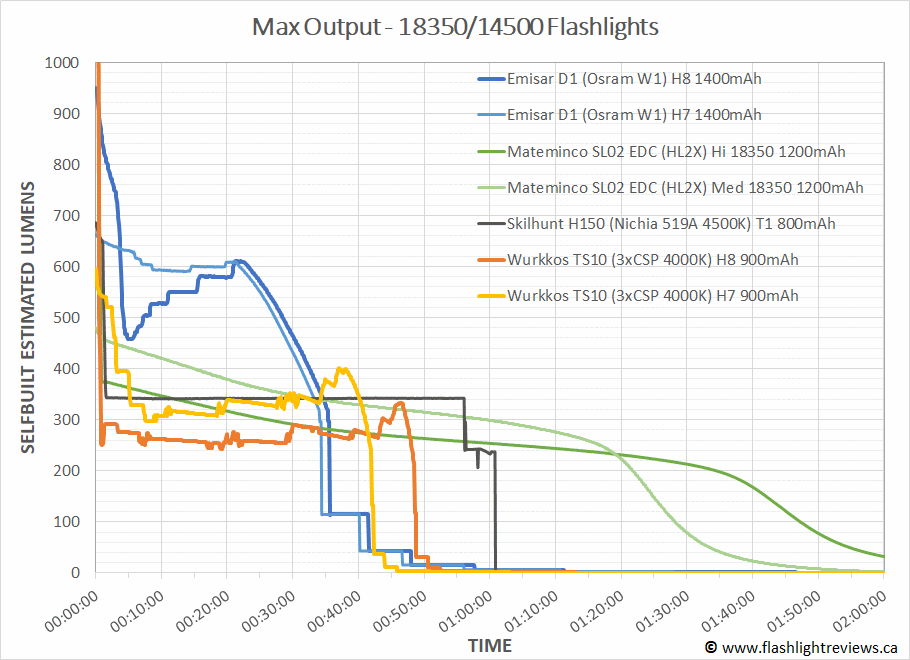
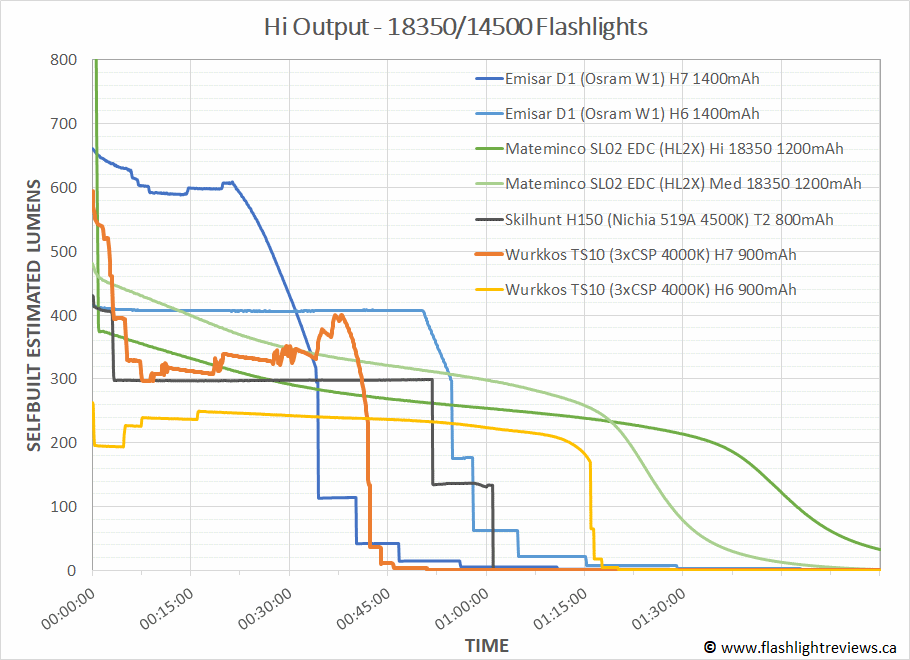
The 18350 Vapcell wasn’t able to match the relatively high step-down level on max that the 18650 cell could, which isn’t too surprising. But it is still able to sustain the max mode for an impressive duration before stepping down.
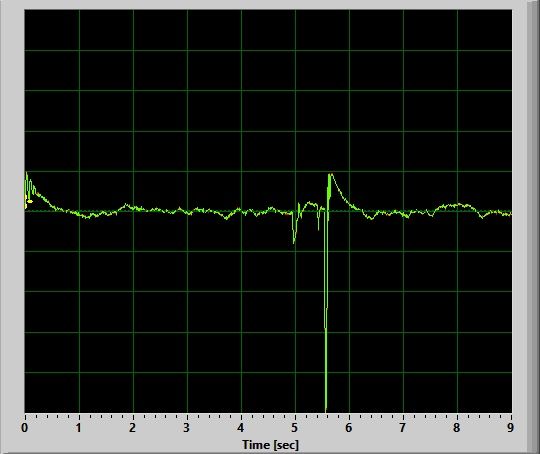
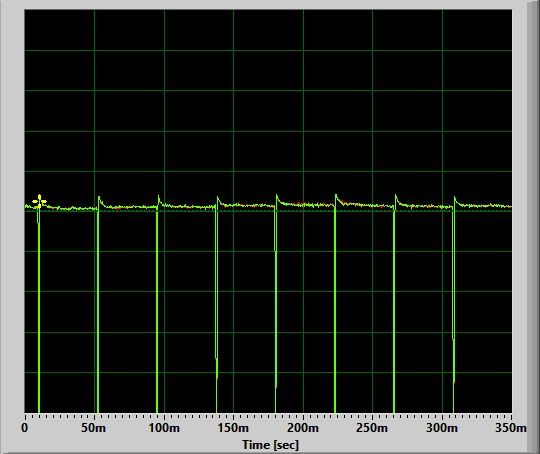
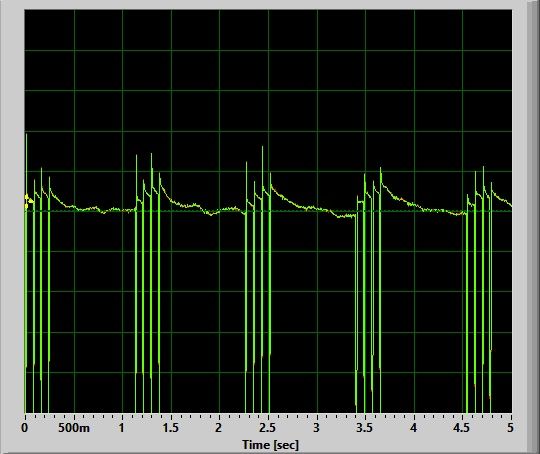
Here’s a close-up of the first few mins:
Pros and Cons
| Pros | Cons |
|---|---|
| Good physical build with a lot of possible customizations - especially for the main emitter. | No in-light charging feature. |
| Appears to use a good driver, giving you better regulated output and step-down levels than other Anduril lights running on simple linear FET drivers. | While the light steps-down on Max, it does so gradually and stabilizes at a higher than expected level. This can be convenient, but I note it since it is different from most lights (i.e., may not be what you expect). |
| Even with the regulated driver, there is still a decent dynamic range of output levels - although without the <1 lumen moonlight levels now.. | Body walls seem a bit thin (although still structurally sound), and threads come non-lubed. |
| Unbelievably good throw with the W1 emitter, with a very clean beam profile. | Anduril interface can be intimidating. |
| AUX LEDs are a nice feature for the switch button, and can serve as a reasonably effective ultra-low "Moonlight" mode. | |
| Surprisingly affordable given it is basically a custom light (on a standardized form factor). |
Overall Rating

Preliminary Conclusions
Like the D4K I recently reviewed, this D1 is a very strong performer from Hank. I love the small form factor, especially with the options for 18350/18500 body tubes. I’ve always had a fondness for tiny thrower lights, as a complement to a general-purpose light. This configuration of the D1 meets that desire perfectly – I’ve never had a light this small throw this far. And all that in an excellent build with the sophisticated Anduril user interface.
Circuit performance is excellent, with a fully-regulated linear driver coupled with this emitter, based on the performance shown above (i.e., fairly flat-regulated with excellent output/runtime efficiency). There seems to be a bit of trade-off here with the flat regulation – the Ramping minimum output is higher than most other Anduril lights I’ve tested (that typically use in contrast a simple non-regulated linear driver). But the side switch can serve as a reasonably effective and efficient additional ultra-low moonlight here. And in any case, I’m not looking for moonlight in a pocket thrower. 🙂
The sheer number of emitter options can be a bit dizzying here. Although I’m curious to how some of the other emitters perform, I’m not really looking for overall output or Hi CRI in a pocket thrower – its maximum throw I’m interested in, and the Osram W1 is just stellar in that regard.
And once again, I enjoy all the features and customization options that Anduril provides. The large number of modes and settings are great for providing options, and it isn’t that complex to manage once you get used it. Simply put, there is value in consistency. And so, the D1 and D4K make a great pair – a dedicated little thrower and an all-purpose general light.
Another great little light from Hank/Emisar – and quite reasonably priced, in my view.
Acknowledgement
The D1 was purchased from intl-outdoor.com for review. As always, all opinions are my own and the light received the same rigourous and objective testing as all other lights that I have reviewed. At the time of review, this light in this configuration (without battery) retails for ~$36 USD (~$50 CDN) shipped.


.jpg)


.jpg)


.jpg)
.jpg)
.jpg)
.jpg)
.jpg)
.jpg)


.jpg)
.jpg)


.jpg)
.jpg)


.jpg)
.jpg)
.jpg)
.jpg)


.jpg)
.jpg)


.jpg)
.jpg)