

Acebeam L19 v2.0

The Acebeam L19 v2.0 a very long-throwing hunting flashlight, featuring a TIR lens for maximum throw with minimal spill. Powered by a single included 21700 battery, the light features dual electronic and tactical switches.
- Introduction
- Manufacturer Specifications
- Package Details
- Build
- User Interface
- Circuit Measures
- Emitter Measures
- Beamshots
- Testing Results
- Runtimes
- Pros and Cons
- Overall Rating
- Preliminary Conclusions
- Acknowledgement
Introduction
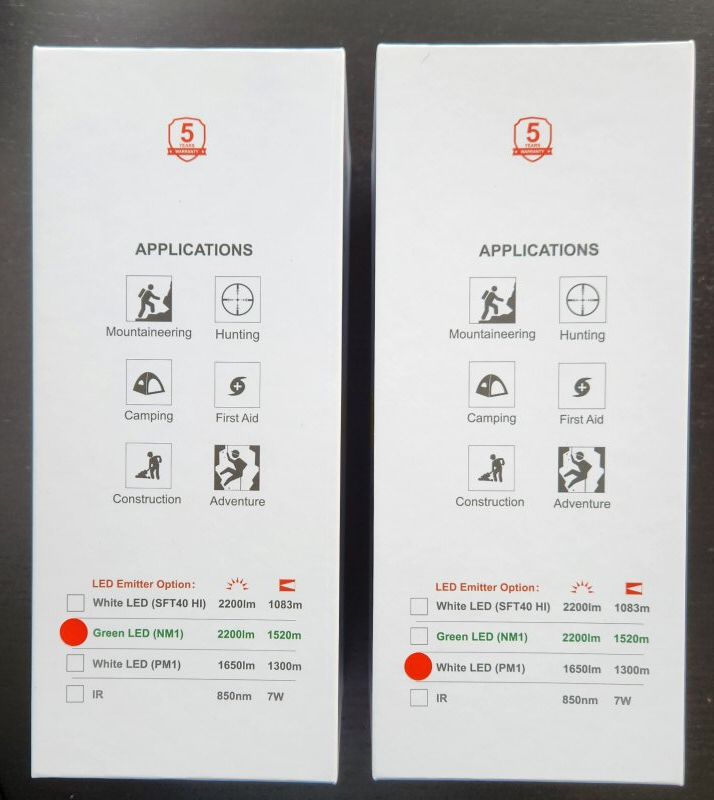
Catching up on my backlog, today we have the L19 v2.0 from Acebeam. It is a long-range hunting-style flashlight that can throw a beam of up to 1520m, or 2200 lumens (depending on which emitter you select). The basic model features the low-profile Luminus SFT40 (HI 6500K) which throws up to 1083m with 2200 lumens. However, for an increased cost, you can also select the Osram PM1 white emitter for 1300m at a reduced 1650 lumens. Alternatively, if you are willing to go monochromatic, you can get the Osram NM1 green emitter for max throw of 1520m at the full 2200 lumens. There is also apparently an IR emitter option as well. Acebeam thoughtfully sent both Osram emitter (white and green) editions for comparison testing.
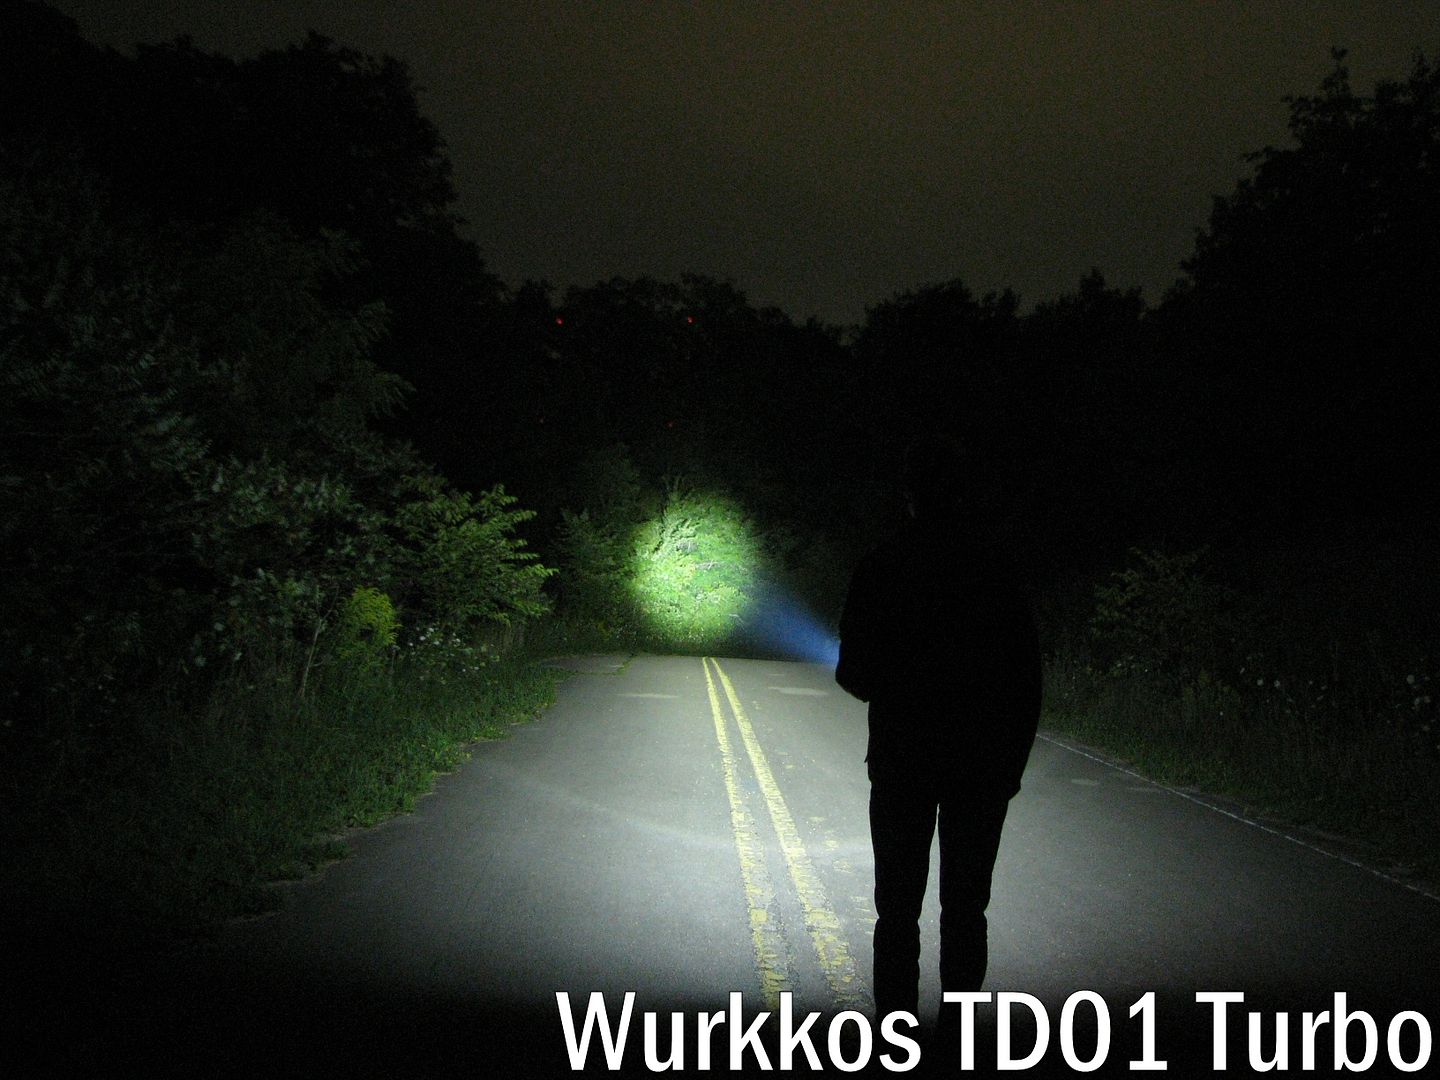
Physically, the light reminds me of the Wurkkos TD01 I recently reviewed, although it is a bit longer and more substantial in feel. Like that light, there is a tailcap physical forward clicky switch, coupled with an electronic side switch in the head. The interface on the L19 is fairly unique though, as I will explain below.
Let’s see how it compares in my testing.
Manufacturer Specifications
Note: as always, these are simply what the manufacturer provides for the samples provided for testing – scroll down to see my actual runtimes.
| Maker | Acebeam | Acebeam |
|---|---|---|
| Model | L19 V2.0 | L19 V2.0 |
| Emitter | Osram PM1 | Osram NM1 |
| Tint | White | Green |
| Mode | Turbo | Turbo |
| Max Output (Lumens) | 1,650 | 2,200 |
| Min Output (Lumens) | 1 | 2 |
| Max Runtime | 94 days | 94 days |
| Max Beam Intensity (cd) | 422,407 cd | 577,600 cd |
| Max Beam Distance (m) | 1,300 m | 1,520 m |
| Constant Levels | 6 | 6 |
| Flashing | Strobe | Strobe |
| Battery | 1x21700 | 1x21700 |
| Weight (w/o battery) | 205 g | 205 g |
| Weight (with battery) | 284 g | 284 g |
| Length | 163.8 mm | 163.8 mm |
| Head Diameter | 60.0 mm | 60.0 mm |
| Body Diameter | 25.4 mm | 25.4 mm |
| Waterproof | IP68 5m | IP68 5m |
Package Details
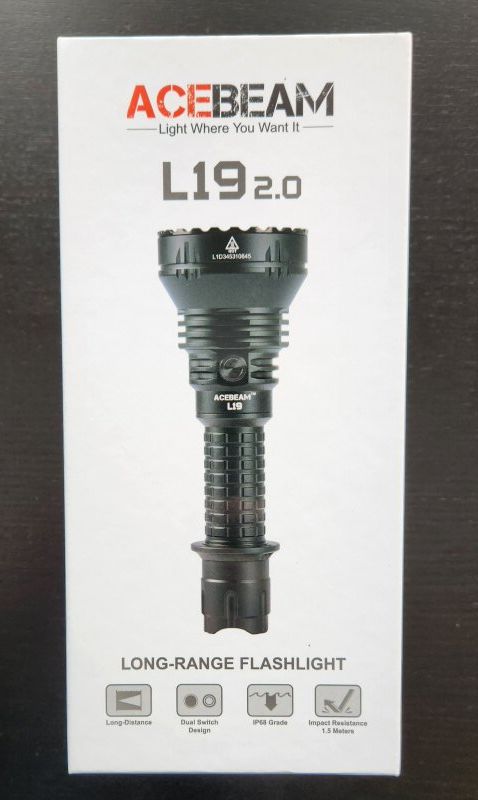
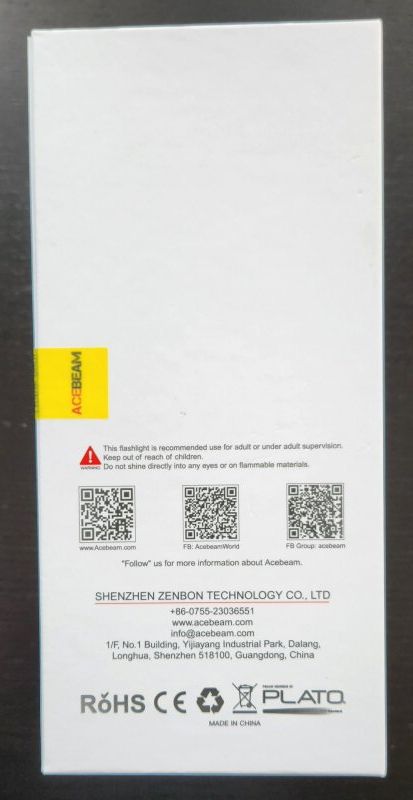
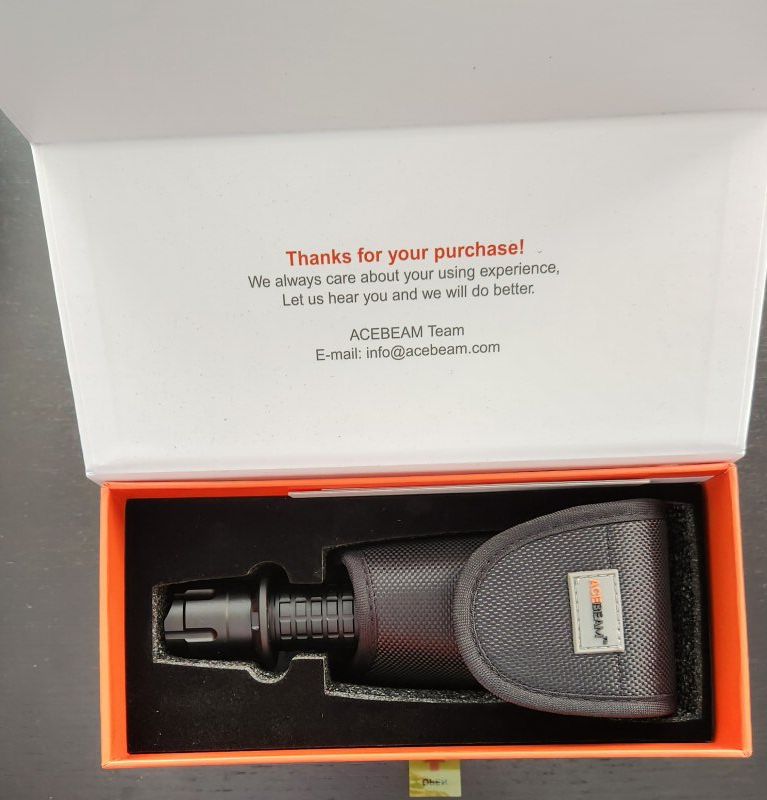
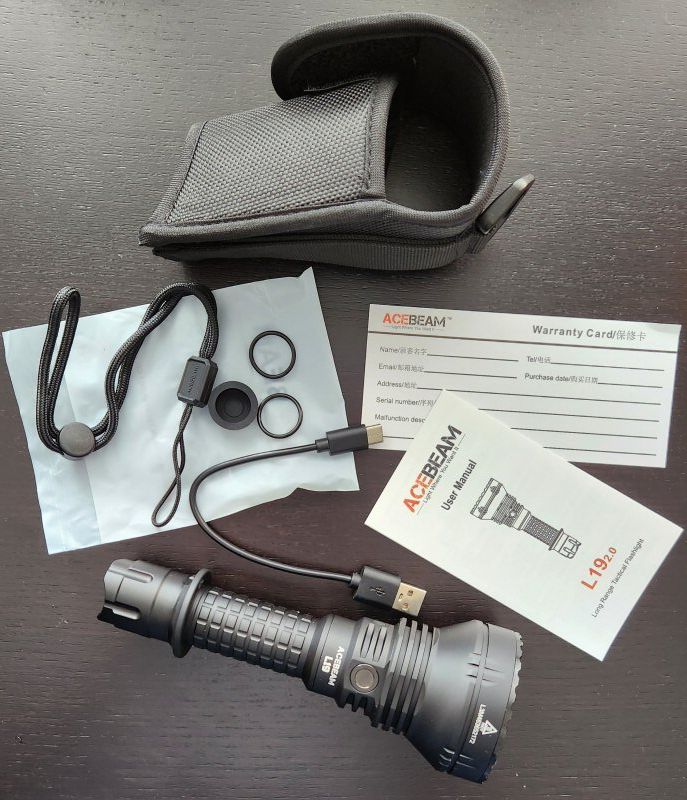
The L19 v2.0 comes in nice retail packaging, similar to other higher-end Acebeam. The hard-sided box comes with a magnetic closing flap. There are a lot of printed specs on the back, with everything secured in cut-out foam. Inside the box, I found:
- Acebeam L19 v2.0 flashlight
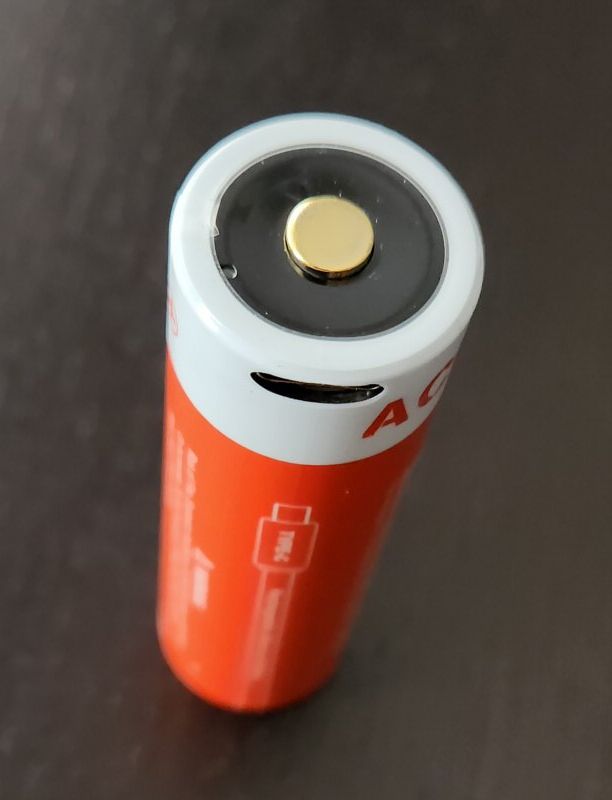
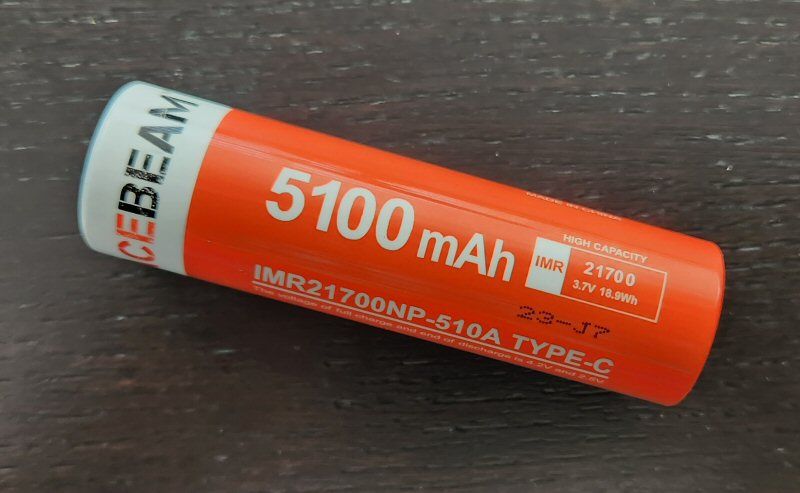
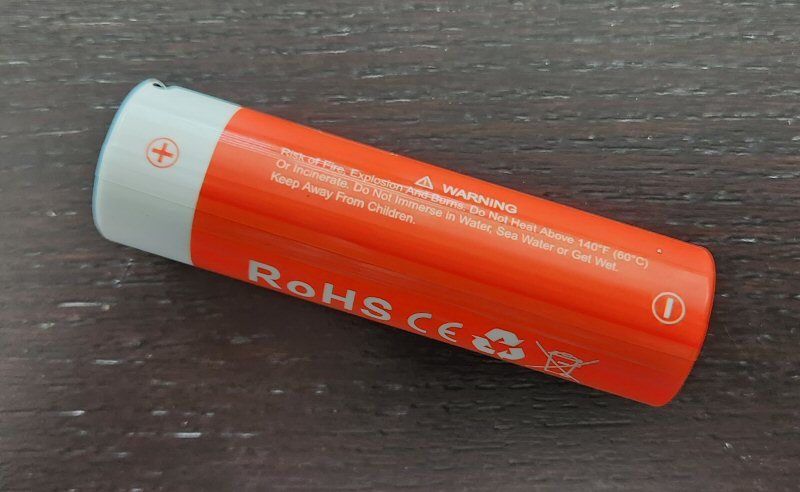
- Acebeam-branded 5100mAh 21700 battery with USB-C charging port
- Belt holster
- Wrist lanyard
- USB-C charging cable
- 2 Spare O-rings
- Switch boot cover
- Manual
- Warranty card
This is a good package – I particularly like the included belt holster. These large head lights tend not to fit well into after-market holsters, so this is very convenient.
Build
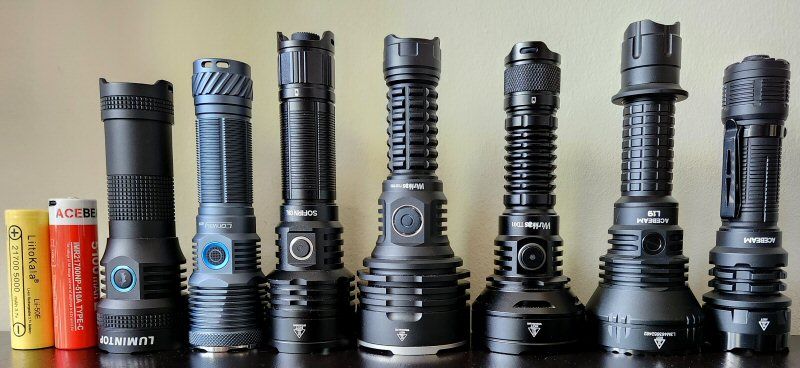
From left to right: LiitoKala 21700 (5000mAh), Acebeam 21700 USB-C (5100mAh), Lumintop D3, Convoy M21F, Sofirn C8L, Wurkkos TS30S Pro, Wurkkos TD01, Acebeam L19 V2.0, Acebeam P17.

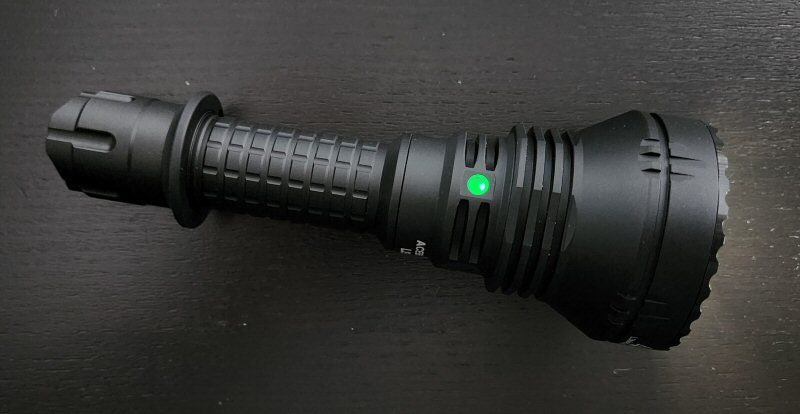
As previously mention the L19 v2.0 longer and a bit more substantial than the “budget” Wurkkos TD01. I do find the L19 somewhat top-heavy, due to the substantial TIR optic in the head.
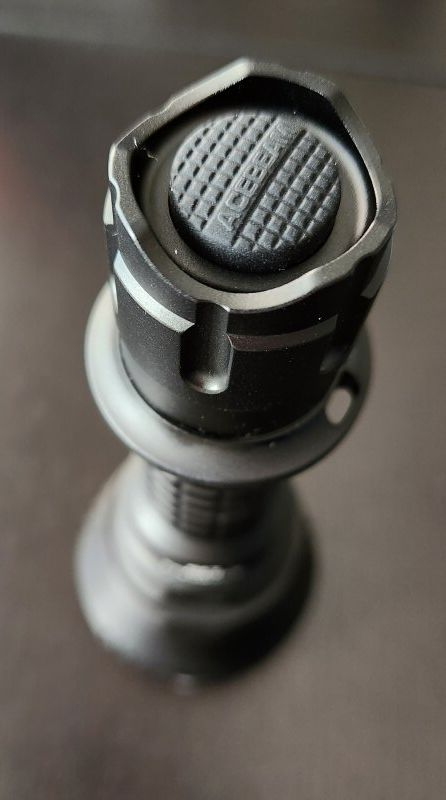
The dual switch design is a little unusual. You do have a standard protruding forward physical clicky switch in the tail for on/off operation – but in Turbo/Strobe only. This switch is independent of the side electronic switch, which provides the full range and functions of the light. The switches do not work together – each controls the light separately, with the tailswitch taking priority. Scroll for down to the User Interface section more more info.
Feel and traverse of the main Tactical clicky switch is good, for both momentary (half-press) and clicked-on. The secondary Function switch is electronic, with a typical minimal traverse and feel. The side switch is flush with the light, and is hard to find by touch alone (although you can find by process of elimination, since the other side remains rounded with metal fins).
The unique dual switch arrangement requires a double-walled tube connecting the tailcap to the head (i.e., one to the carry the current from the tailcap switch, one to allow the electronic side switch to work). This design means that it is not possible to physically lock out the light – current is always available through the screw threads. There is an electronic lockout instead, which works for both switches (scroll for down for the User Interface section). Since the primary Tactical switch protrudes, tailstanding is not possible, and accidental activation is easy.
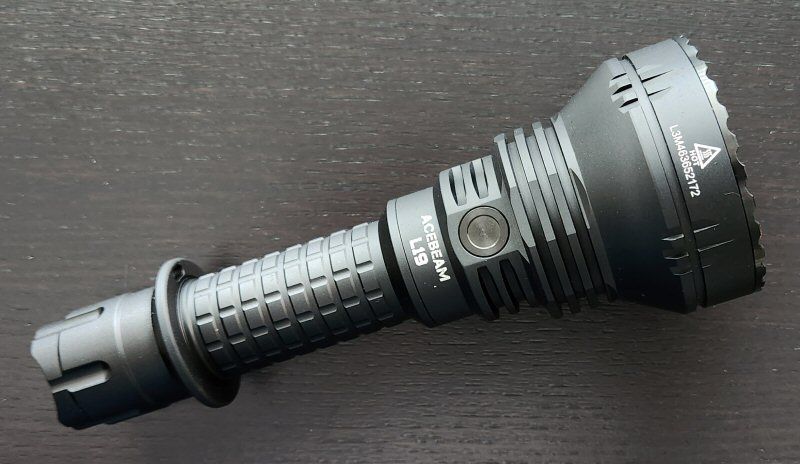
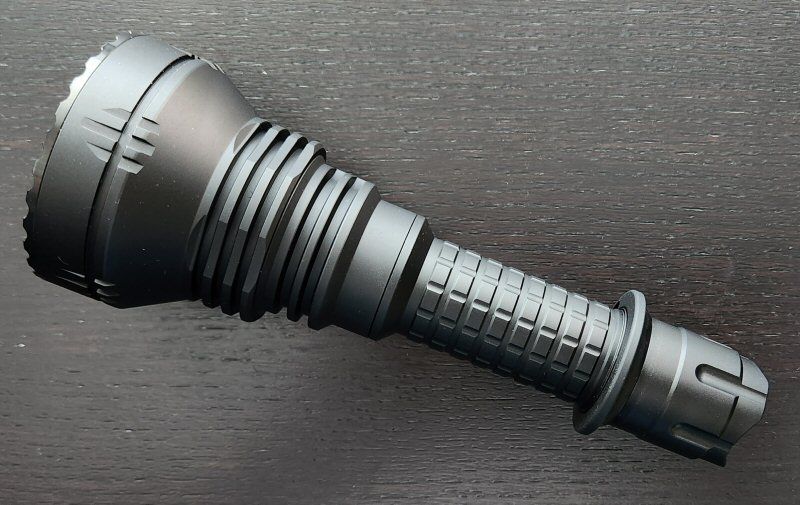
There is a grip ring just above the tailcap, allowing for a tactical cigar-type grip. There are cut-outs on the side of the grip ring for using the wrist lanyard. The body has decent grip, with cut-outs along the length and on the head. The light can roll fairly easily, given the large and relative smooth head – I recommend you headstand the light when not in use.
Anodizing is standard black, and looks to be excellent quality (it is rated as type III – Hard Anodized). It feels relatively thick, and is actually somewhat grippy, with a matte finish. It seems to very high quality, and I didn’t notice any flaws on my sample. There is an indicator light showing battery status when the light is first turned on.
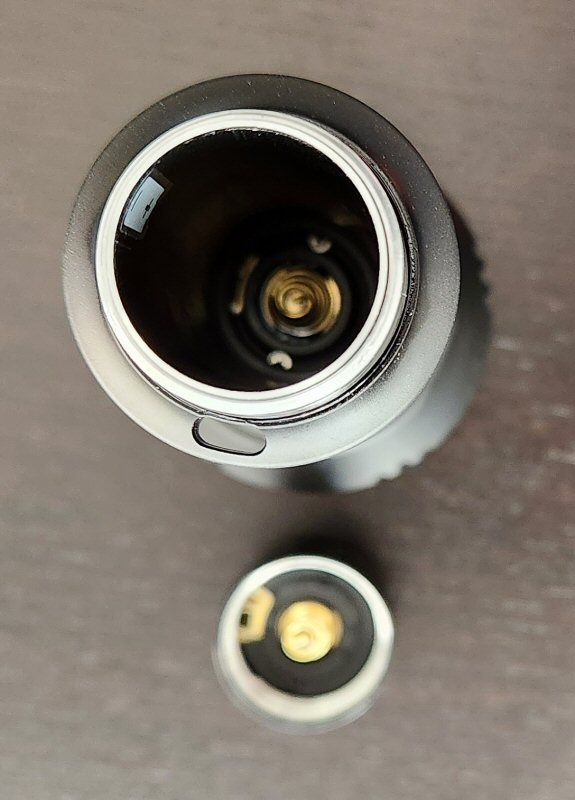
As you can see above, there are springs in both the tail and the head, ensuring the cell is held securely in place.
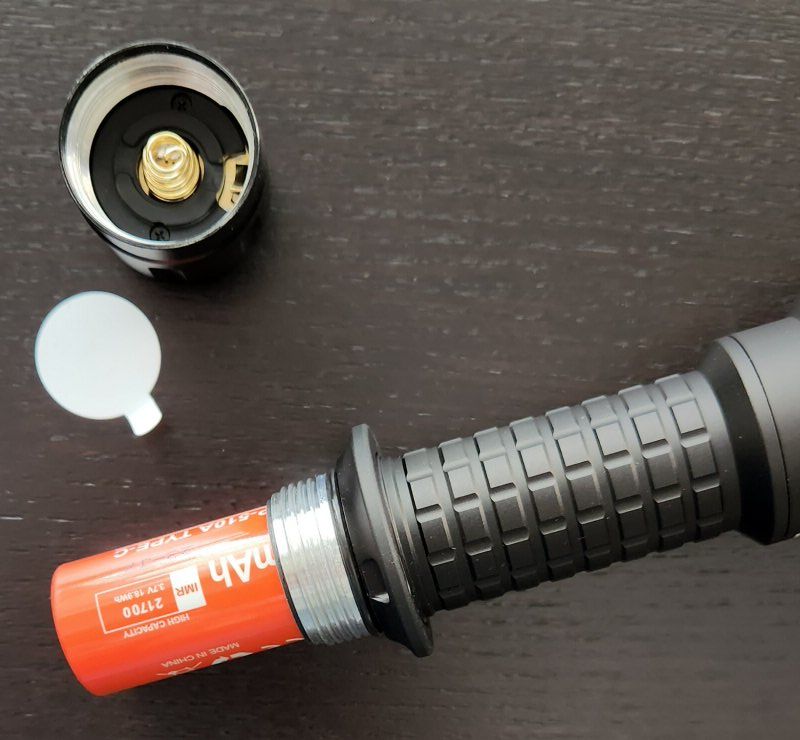
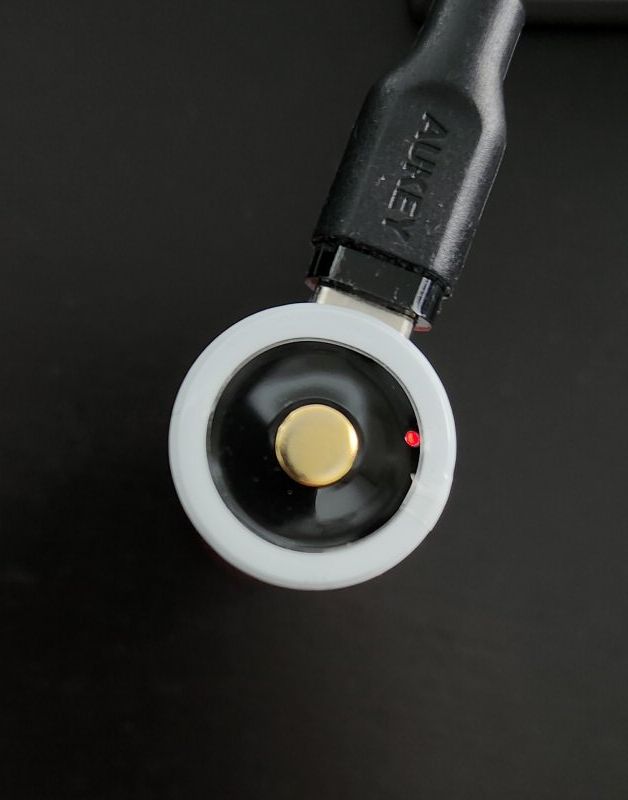
Like the Acebeam P17, simply remove the 5100mAh cell and charge it through the integrated USB-C port directly on its positive terminal.

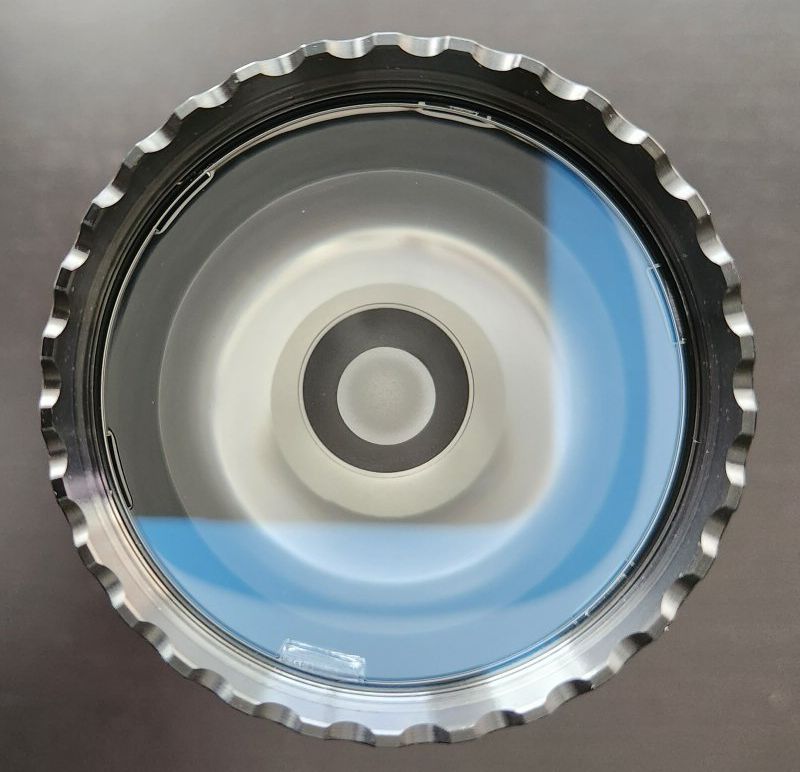
White Osram:
_20230810_165913.png)
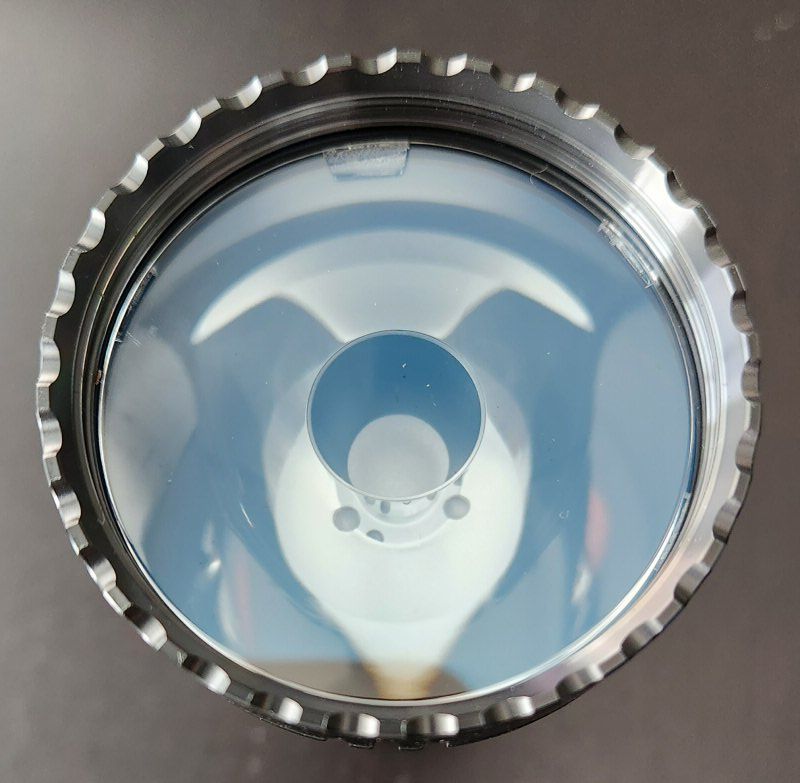
Green Osram:
_20230810_165033.png)
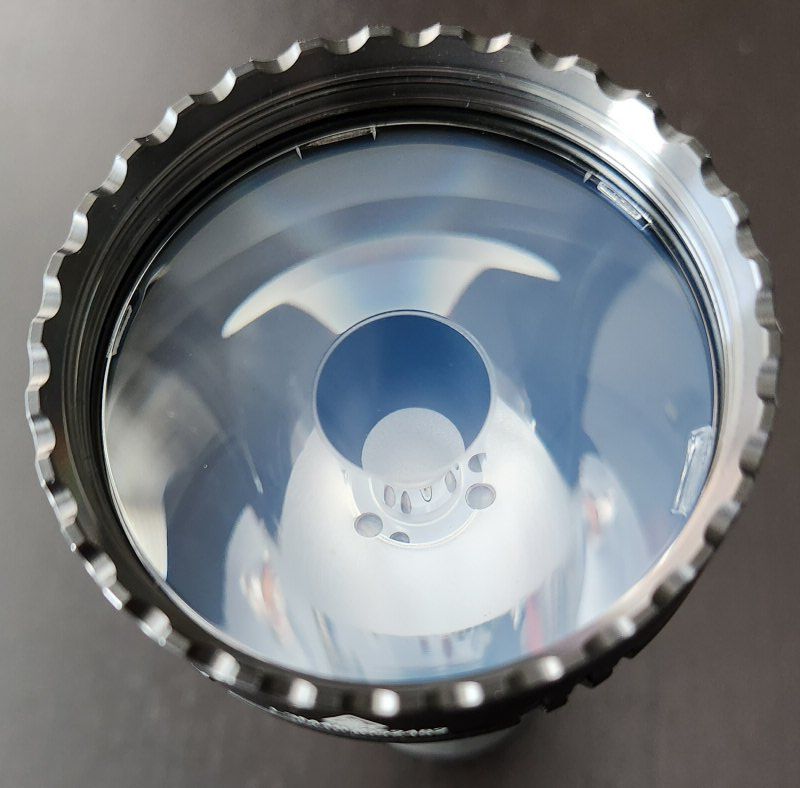
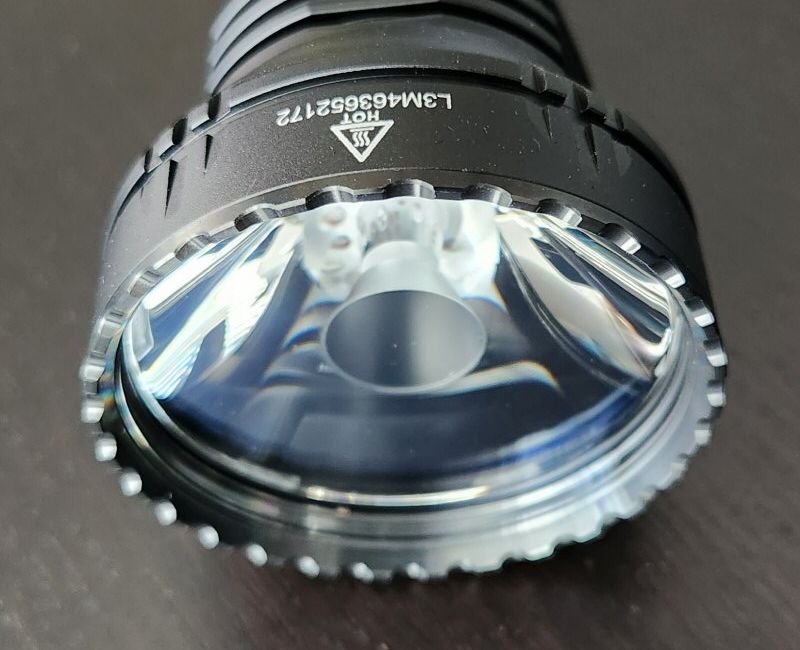
The L19 v2.0 uses a distinctive large TIR optic, similar to the TD01 I recently reviewed (except with a thinner centre “column”). I’ve taken pics from a lot of angles above, so you can see how it generally obscures the emitter. Both the white and green Osram emitters are shown above.
The bezel is crenelated black aluminum – with a larger number of crenelations than typical, but they are not too aggressive (so you can still headstand stably). Scroll down for outdoor beamshots.
User Interface
The L19 v2.0 has a pretty unique user interface, with the tactical tailcap switch and side electronic switch functioning independently, and the tailswitch taking precedence. What I mean by that is that if you turn the light on by the side switch, clicking the tailcap doesn’t turn it off – it simply turns on the Turbo mode (with another tailcap click required to exit back to the previous side-switch setting). Let’s walk through everything in sequence.
Side switch available levels: Moonlight, Low, Mid1, Mid2, High, Turbo, Strobe.
Tactical switch available levels: Turbo, Strobe.
From OFF:
- Tail switch, partial-press: Momentary On in Turbo mode.
- Tail switch, single-click: Turns On in Turbo mode.
- Side switch, press-and-hold: Turns On in Moonlight mode.
- Side switch, press-and-hold >5 secs: Locks out the light (press-and-hold again for 4 secs to unlock the light.
- Side switch, single-click: Turns On in last memorized mode (excluding Moonlight and Turbo modes, no mode memory for those).
- Side switch, double-click: Turns On in Turbo.
- Side switch, triple-click: Turns On in Strobe.
Since the switches control the light independently, the functioning of the light depends on which switch was used to activate:
From ON by the Tail switch:
- Tail switch, press-and-hold: Strobe.
- Tail switch, single-click: Turns Off.
- Side switch, press-and-hold or single-click: Nothing.
From ON by the Side switch:
- Tail switch, press-and-hold: Momentary On in Turbo (i.e., functions as if Off at the Tail switch, and Tail switch takes priority over the Side switch).
- Tail switch, single-click: Constant On in Turbo (again, functions as if Off at the Tail switch).
- Side switch, press-and-hold: Steps up to the next non-Turbo constant output mode (in sequence, Lo > Mid1 > Mid2 > High).
- Side switch, single-click: Turns Off.
- Side switch, double-click: Jumps to Turbo (or jumps back to memorized mode from Turbo).
- Side switch, triple-click: Jumps to Strobe.
Battery indicator:
When first activating the light with either switch, the indicator on the opposite side of the Side switch shows the battery voltage:
- Solid green: ~30-100%
- Solid red: ~10-30%
- Flashing red: <10%
That’s an unusually large range for solid green – most lights show a flashing green to differentiate lower charge status.
Mode memory:
Yes, when activating by the Side switch.
Shortcuts:
- Side switch, press-and-hold (from Off): Moonlight.
- Side switch, double-click: Jumps to Turbo (or jumps back to memorized mode from Turbo).
- Side switch, triple-click: Jumps to Strobe.
Low voltage warning:
Not that I’ve noticed.
Lockout mode:
Yes, by pressing-and-holding the Side switch for more than 5 secs from Off (main beam will flash 3 times). Because of dual-wall design, no physical tailcap lockout is possible.
Reviewer Comments:
This is clearly intended primarily as a tactical light. But the dual switch interface takes a bit of getting used to. Case in point: when locked out electronically, the light cannot be turned On at the tailcap. But if you click the Tail switch into the On position, you will now not be able to unlock the light by the Side switch (i.e., need to have the Tail switch in the Off position to unlock the light). This gave me a bit of pause when I first encountered it out of the box – I needed to read the manual to troubleshoot the problem.
During regular use it also feels a little wonky to have the physical Tail switch take precedence over the electronic one when not in lockout (i.e., jump to Turbo when On by the side switch). And again, you have to click the Tail switch Off before you can regain control using the Side switch. A bit quirky, without a clearer tactile or visual indication of the status of each of the switches.
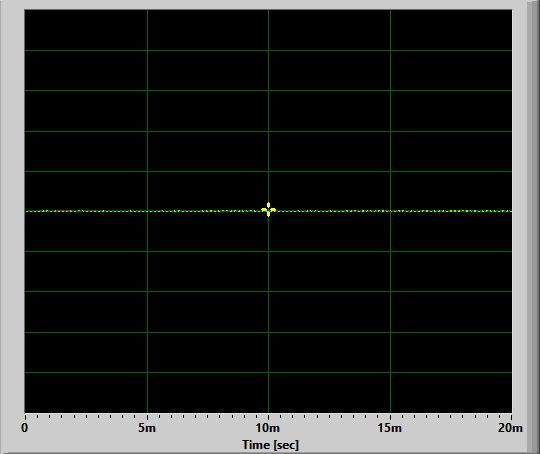
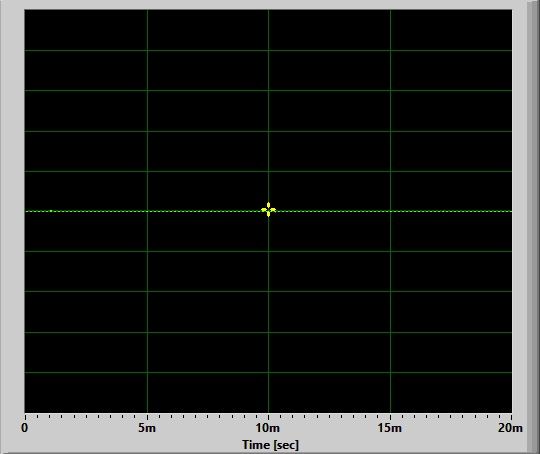
Circuit Measures
No Pulse-Width Modulation (PWM):
Moon:
Low:
Mid1:
Mid2:
High:
Turbo:
There is no circuit noise or any sign of PWM on any level – the L19 v2.0 is perfectly flat current-controlled. 🙂
Strobes:
Strobe (White LED sample):
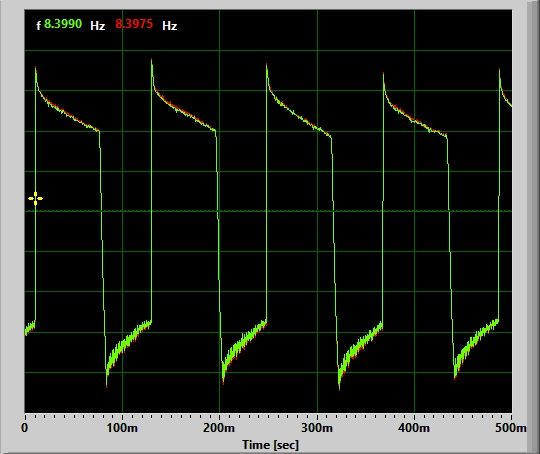
Strobe (Green LED sample):
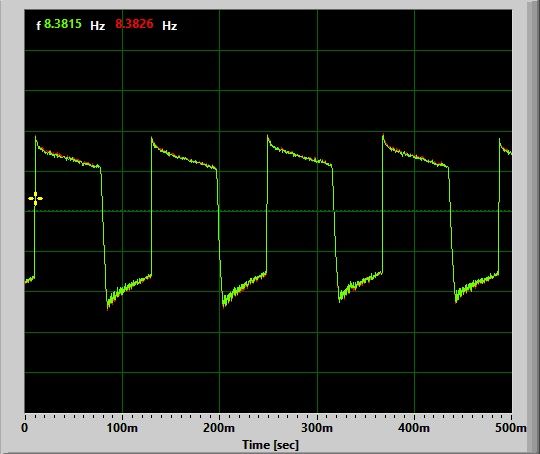
Strobe is a consistent 8.4 Hz on both my samples.
There is no SOS or Beacon mode on the L19.
Charging:
The L19 v2.0 comes with Acebeam’s 21700 5100mAh battery with a built-in charging port. There is a small LED on the positive terminal of the battery, which shows red when the cell is charging, and green when it is fully charged. In my testing, resting voltage of the cell was ~4.19V at termination.
Resting voltage <3.0V
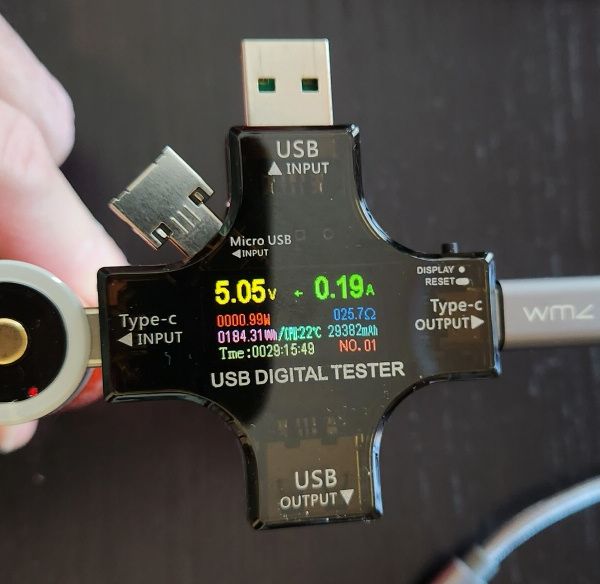
Resting voltage >3.0V
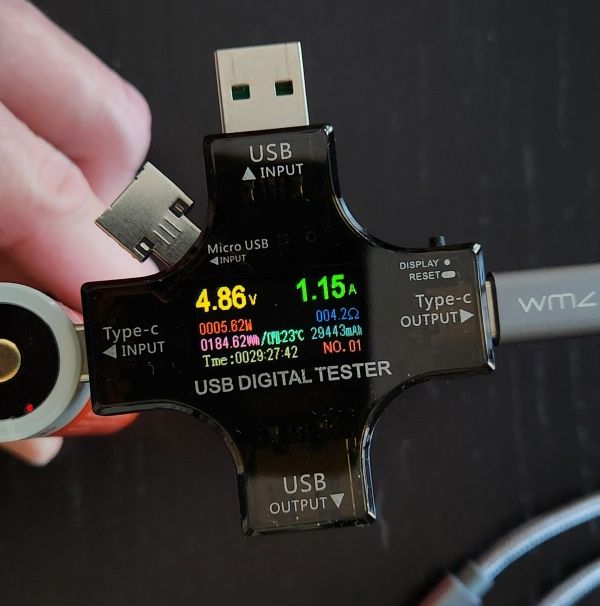
Like the P17, which shares the same cell, the Acebeam 21700 5100mAh battery shows an initial low USB-C charging current of ~0.20A when the cell is heavily depleted (<3.0V resting), which jumps up to ~1.15A once the cell is >3.0V resting. This two-current charging is a good design, and indicates a safe integrated charging circuit. The max charging rate is a bit lower than most lights/batteries in this class, but much better than the original version of this battery (e.g., E70).
Standby / Parasitic Drain:
I measured the standby current as 0.195 mA. This is a reasonably low standby drain, and it would take just over 3 years to fully drain the cell.
Emitter Measures
In this section, I directly measure key emitter characteristics in terms of colour temperature, tint, and colour rendition. Please see my Emitter Measures page to learn more about what these terms mean, and how I am measuring them. As tint in particular can shift across levels, I typically stick with the highest stably regulated level for all my reported measures.
As explained on that page, since I am using an inexpensive uncalibrated device, you can only make relative comparisons across my reviews (i.e., don’t take these numbers as absolutely accurate values, but as relatively consistent across lights in my testing).
L19 White on Med:
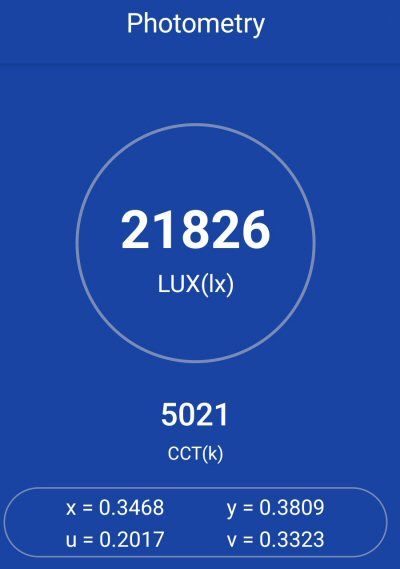
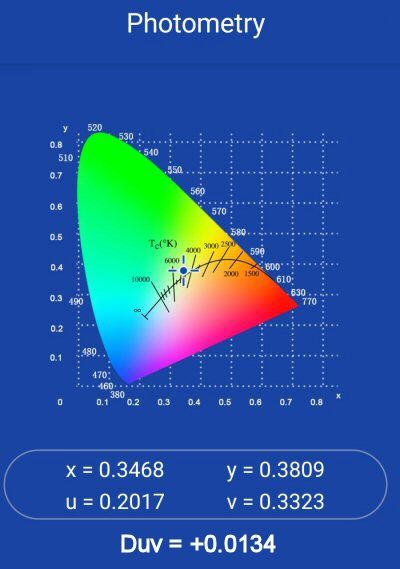
The key measures above are the colour temperature of ~5020K, and a noticeably positive tint shift (+0.0134 Duv) to greenish-yellow at this temperature. For some reason, I was not able to get a CRI (Ra) measurement on my light sensor.
This is my first Osram PM1 emitter, but these values are consistent with the rated specs for a cool white emitter, and match my visual experience of this light.
Let’s see how the green L19 compares – keeping in mind these budget light sensors were NOT designed for monochromatic light sources.
L19 Green on Med:
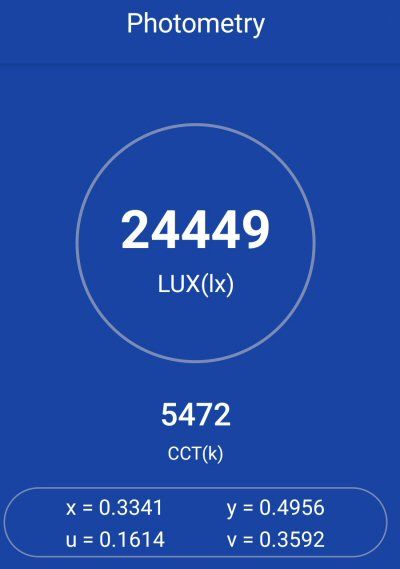

The key measures above are the colour temperature of ~5475K, and an extremely positive tint shift (+0.0611 Duv) to green at this temperature. There would be no point in trying to measure CRI (Ra), since it doesn’t apply for coloured emitters.
This is my first Osram NM1 emitter, but these values are consistent with the rated specs for a green emitter, and match my visual experience of this light.
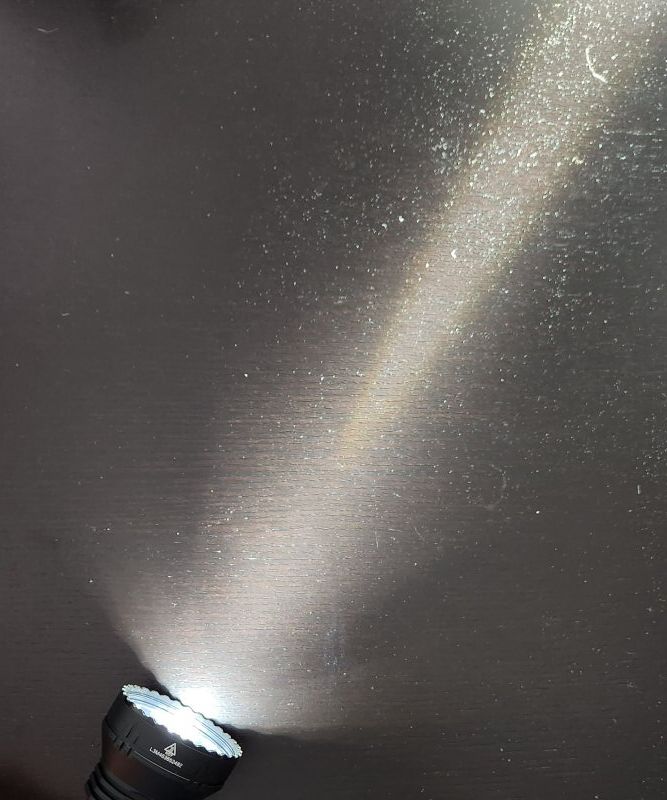
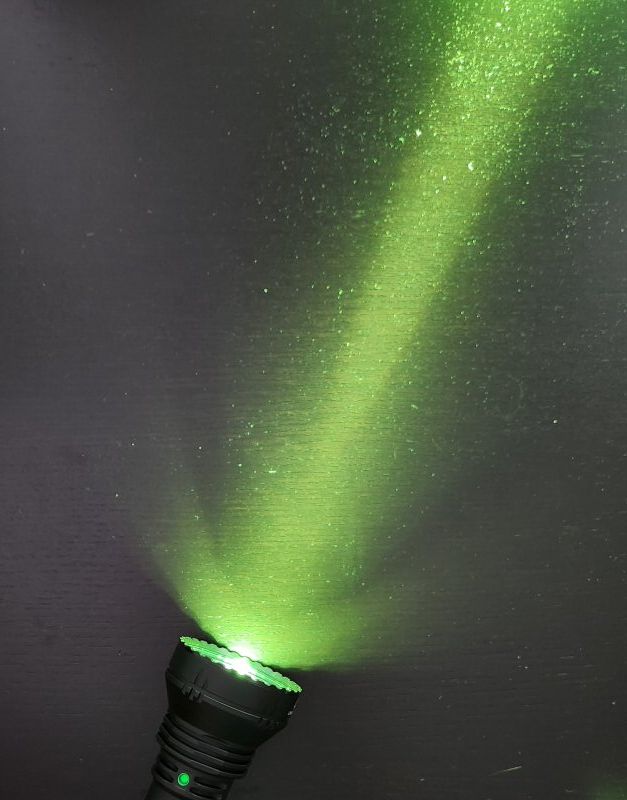
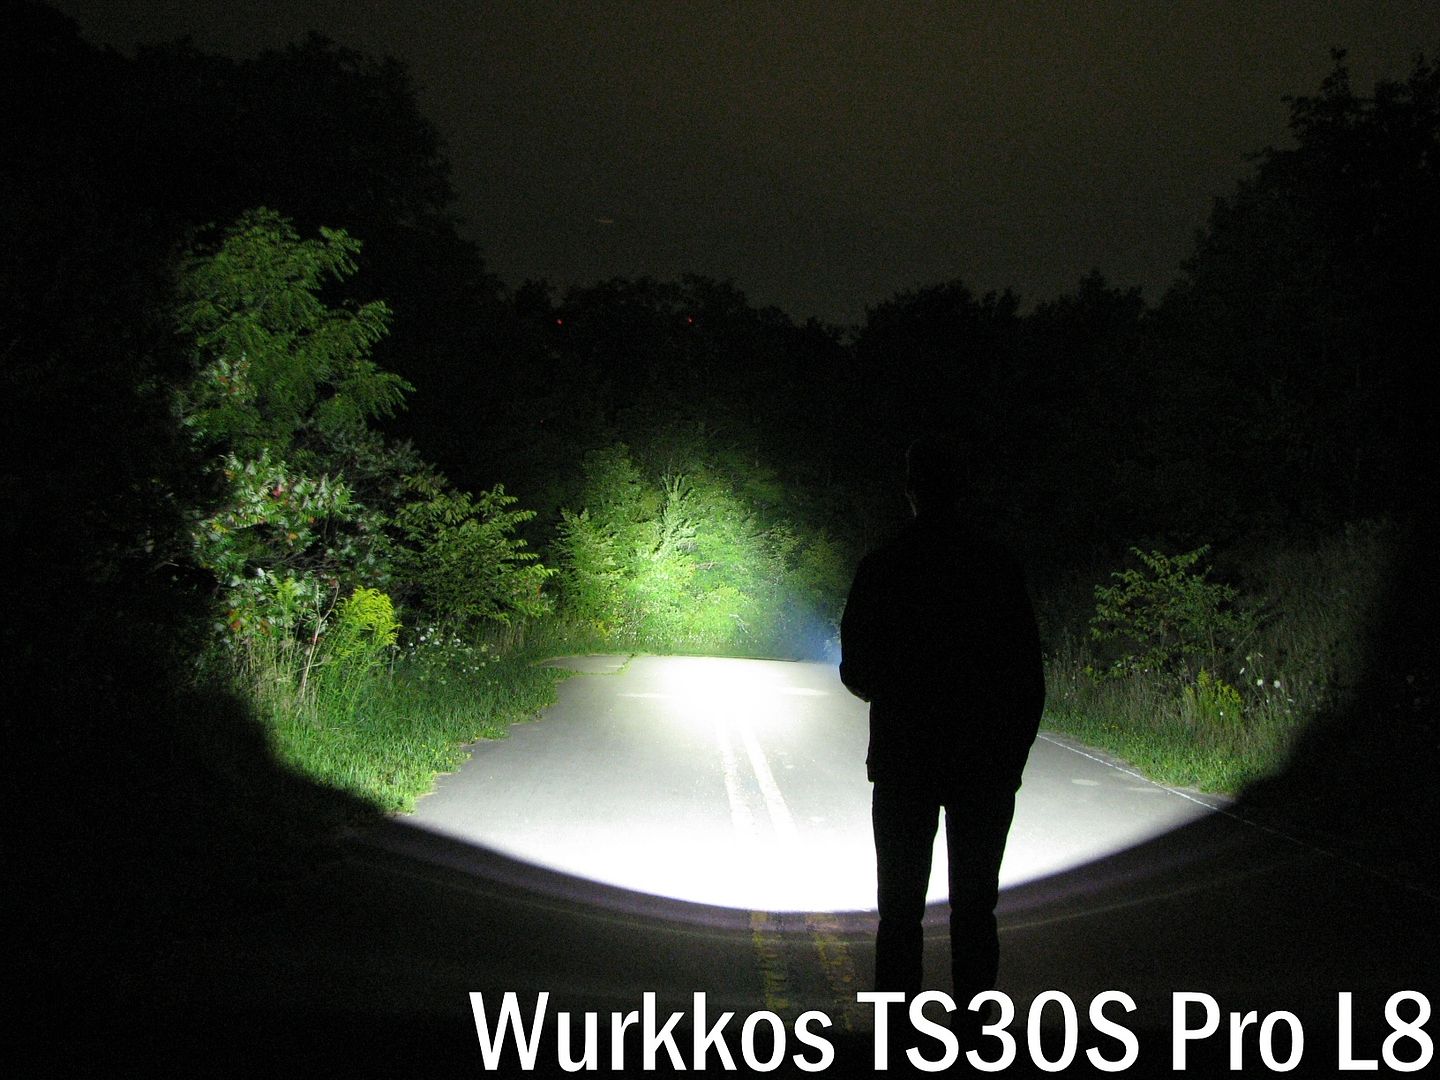
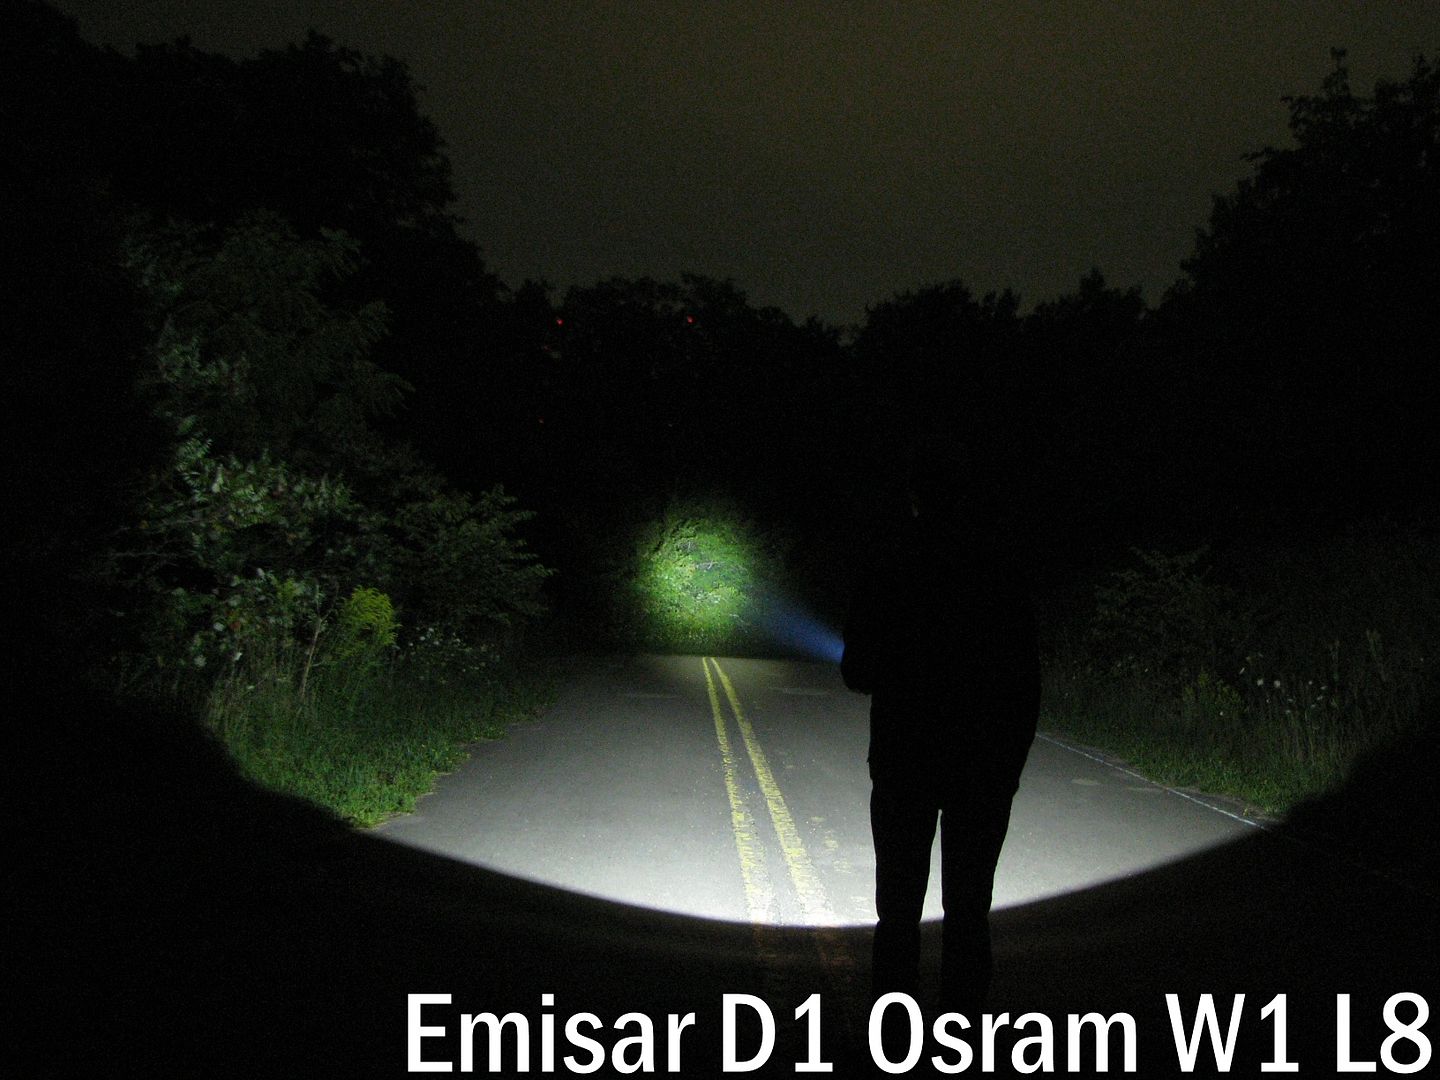
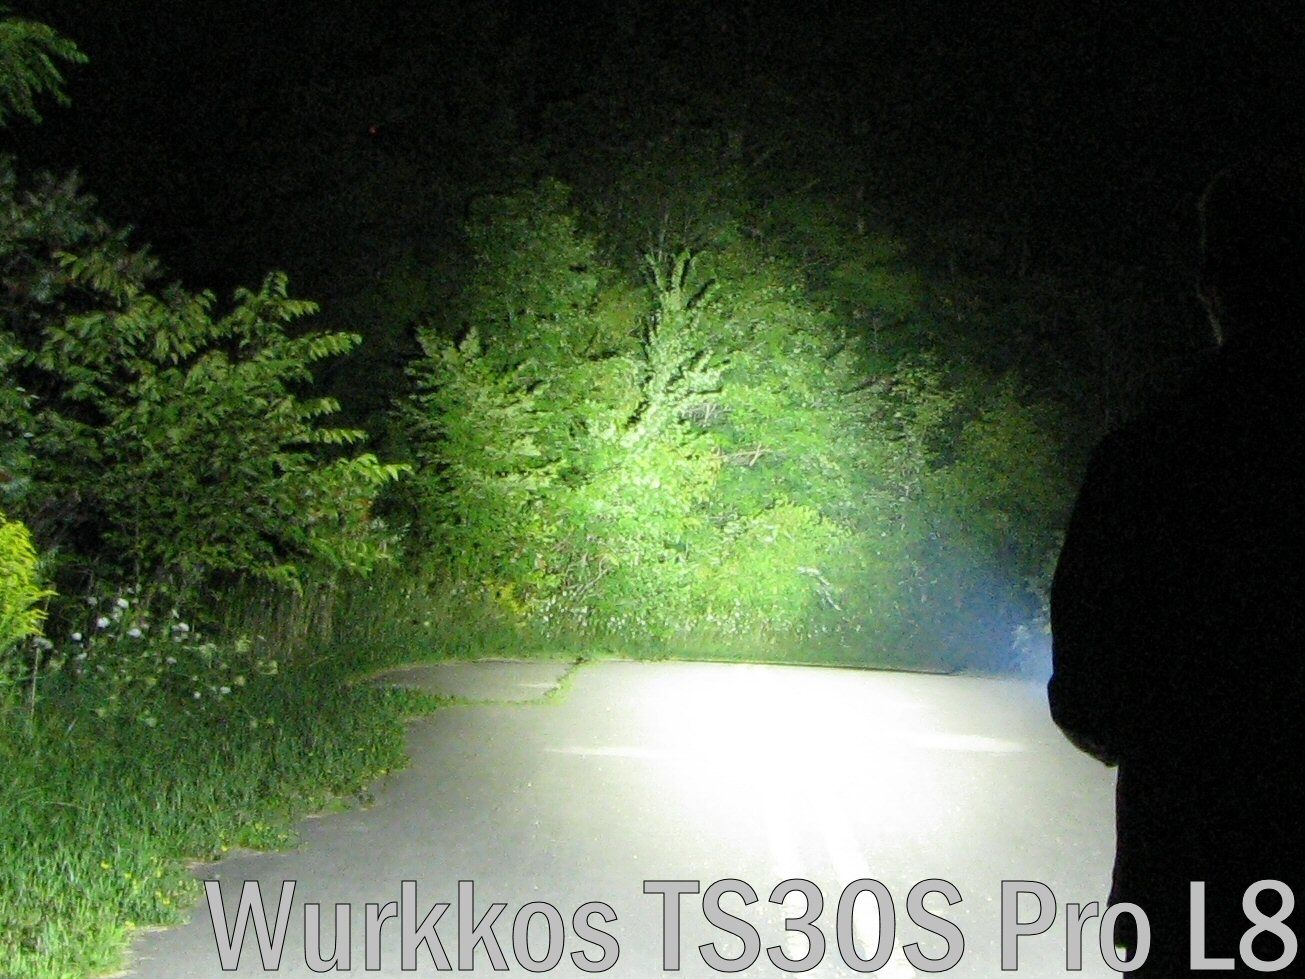
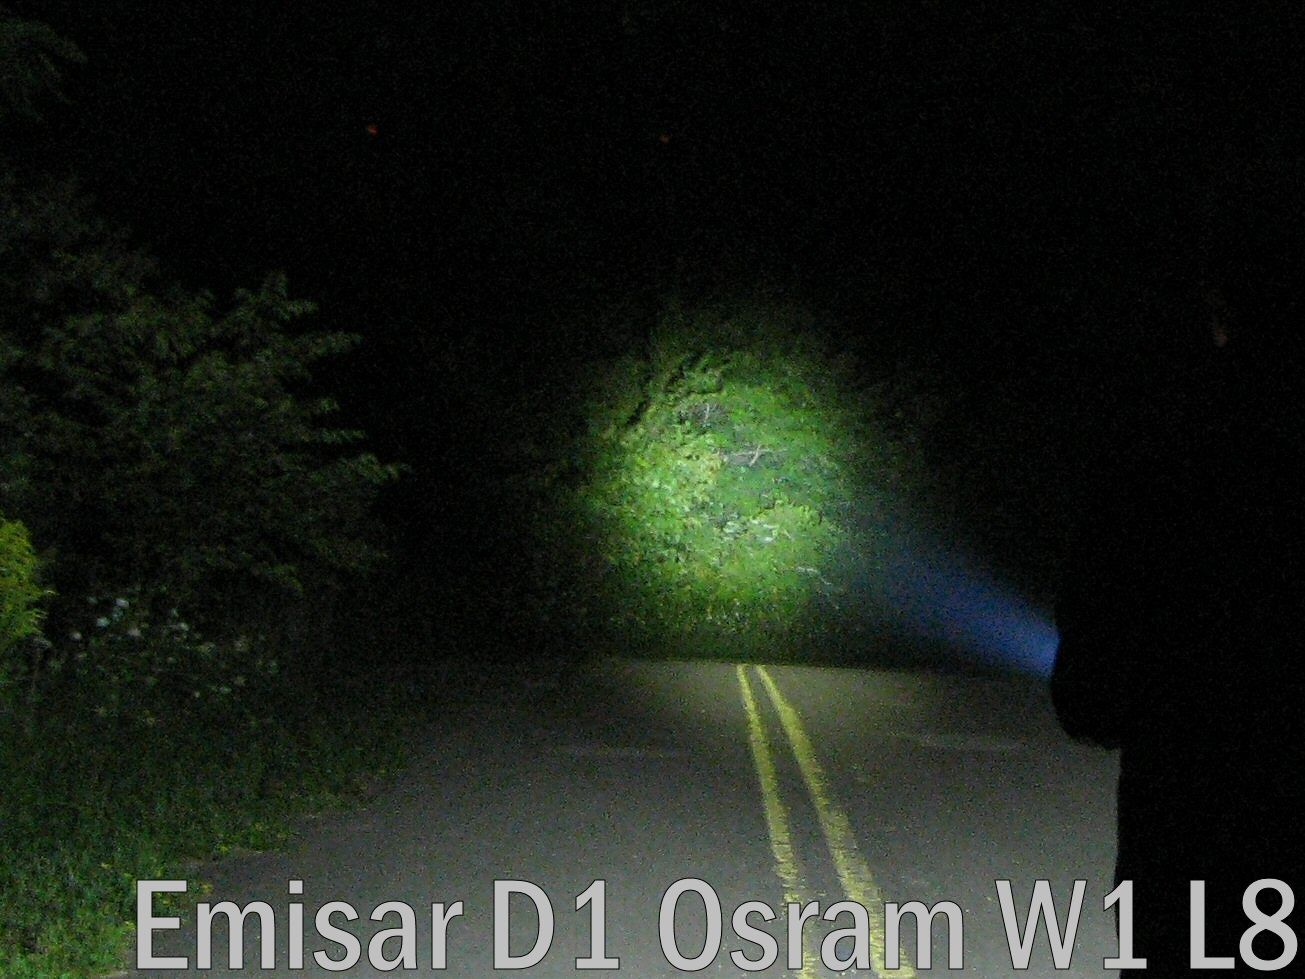
Beamshots
All long-distance outdoor beamshots are taken on my Canon PowerShot S5 IS at f/2.7, 1 sec exposure, ISO 400, daylight white balance. The tree at the centre of the hotspot is approximately 90 meters (~100 yards) from the camera. Note the road dips down and turns away in the distance, out of the camera’s sight line. Learn more about my outdoor beamshot locations here.
Click on any thumbnail image below to open a full size image in a new window. You can then easily compare the overall beams by switching between tabs.
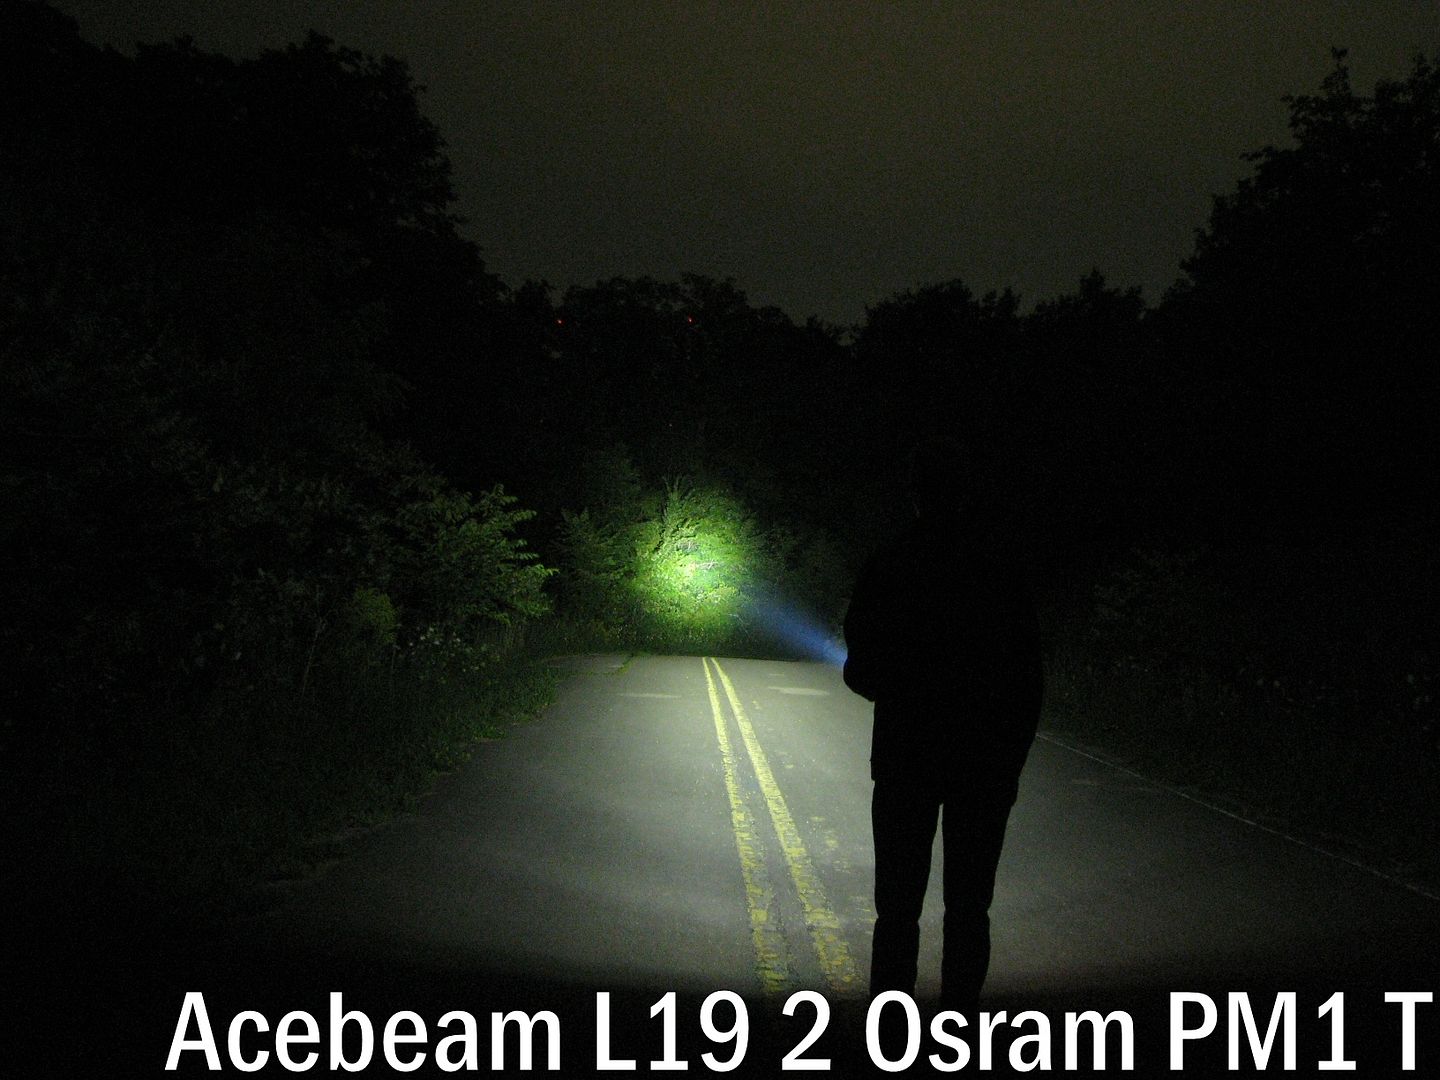
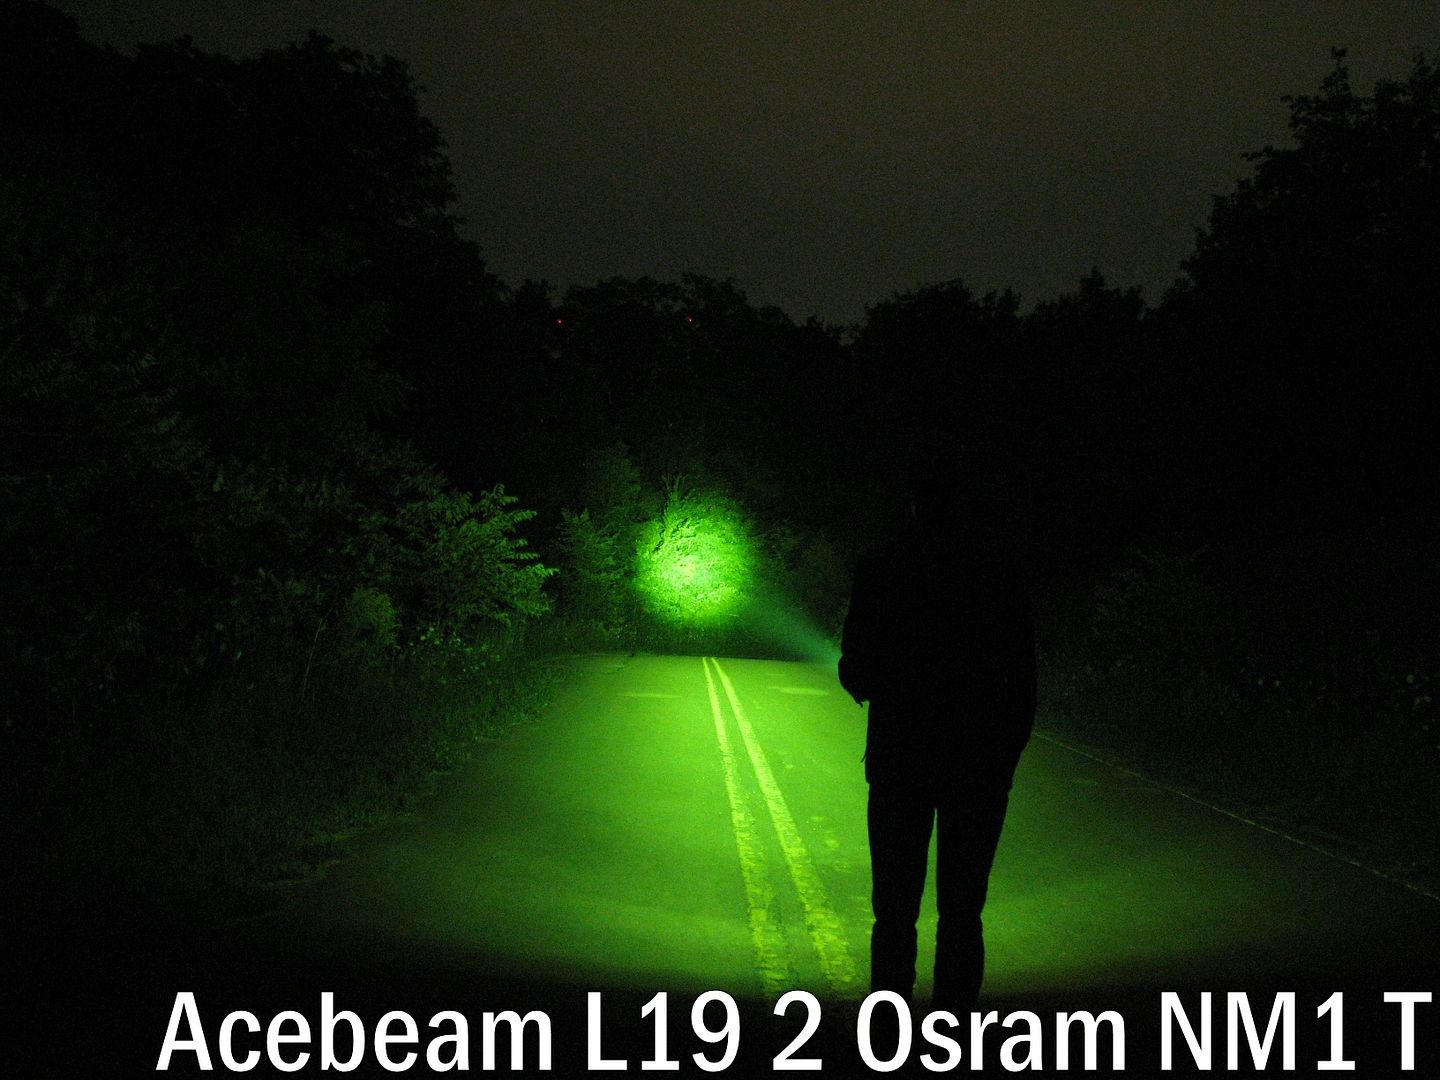

“T” refers to Turbo mode in the L19 beamshots above.
To help illustrate the hotspots better, I’ve also cropped the raw pictures around the centre of the frame. As before, click on any thumbnail below to open a full size image in a new window.
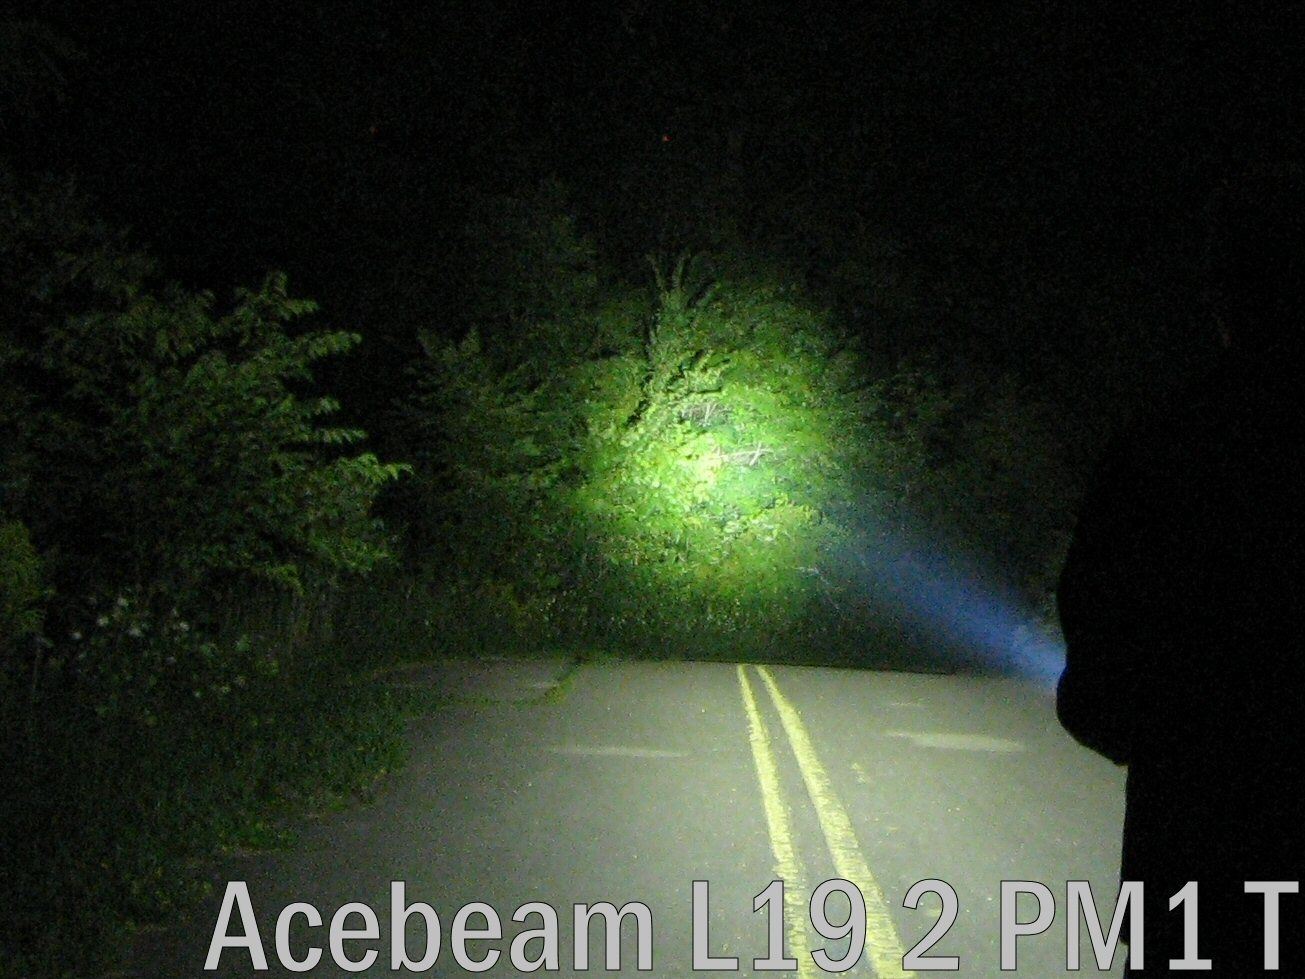

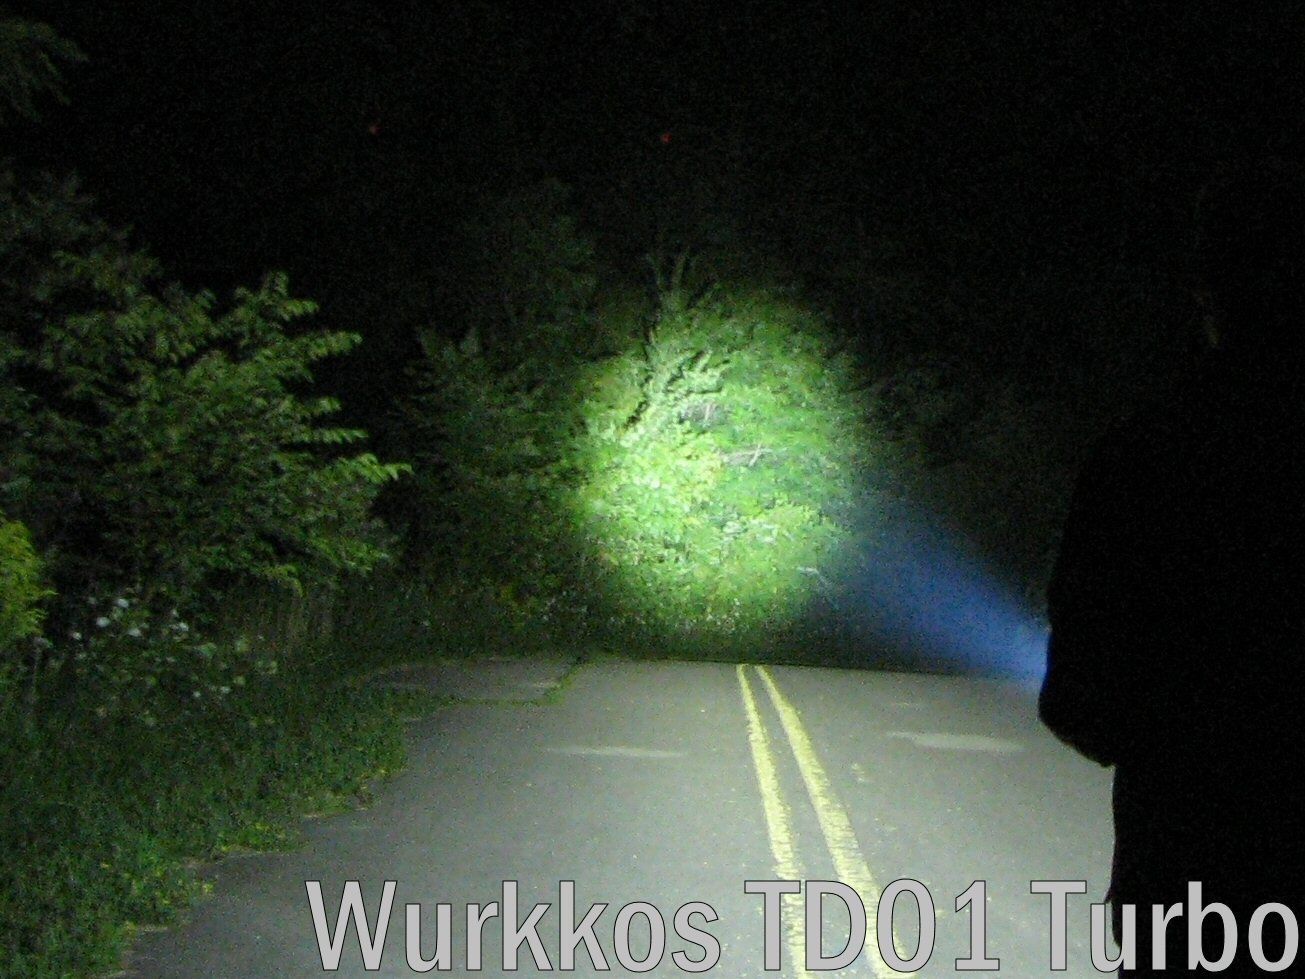

As you can see above, the L19 v2.0 is an incredibly focused thrower. It is throwier than the TD01, with a smaller hotspot and a bit less light in the periphery. Like the TD01, it also has some beam rings in the near spill of the periphery.
Testing Results
My summary tables are generally reported in a manner consistent with the ANSI FL-1 standard for flashlight testing. In addition to the links above, please see my output measures page for more background.
All my output numbers are based on my home-made lightbox setup. As explained on that methodology page, I have devised a method for converting my lightbox relative output values to estimated lumens. Note that my lightbox calibration runs higher than most hobbyists today, but I’ve kept it to remain consistent with my earlier reviews (when the base calibration standard was first established). On average though, I find my lumen estimates are ~20% higher than most other modern reviewers.
My Peak Intensity/Beam Distance are directly measured with a NIST-certified Extech EA31 lightmeter.
L19 v2.0 Testing Results
| Tint | Mode | Spec Lumens | Estimated Lumens @0sec | Estimated Lumens @30 secs | Beam Intensity @0sec | Beam Intensity @30secs | Beam Distance @30secs | PWM/Strobe Freq | Noise Freq | Charging Current <3V | Charging Current >3V | Parasitic Drain | Weight w/o Battery | Weight with Battery | CCT (K) | Duv | CRI |
|---|---|---|---|---|---|---|---|---|---|---|---|---|---|---|---|---|---|
| White | Moonlight | 1 | 0.08 | 0.08 | - | - | - | No | No | 0.20 A | 1.15 A | 195 uA | 204 g | 284 g | - | - | - |
| White | Low | 60 | 100 | 100 | - | - | - | No | No | 0.20 A | 1.15 A | 195 uA | 204 g | 284 g | - | - | - |
| White | Med1 | 220 | 290 | 290 | - | - | - | No | No | 0.20 A | 1.15 A | 195 uA | 204 g | 284 g | - | - | - |
| White | Med2 | 470 | 530 | 530 | - | - | - | No | No | 0.20 A | 1.15 A | 195 uA | 204 g | 284 g | - | - | - |
| White | High | 870 | 930 | 900 | - | - | - | No | No | 0.20 A | 1.15 A | 195 uA | 204 g | 284 g | 5,020 | 0.0134 | - |
| White | Turbo | 1,650 | 1,750 | 1,600 | 365,000 cd | 342,000 cd | 1,170 m | No | No | 0.20 A | 1.15 A | 195 uA | 204 g | 284 g | - | - | - |
| White | Strobe | 900 | - | - | - | - | - | 8.4 Hz | No | 0.20 A | 1.15 A | 195 uA | 204 g | 284 g | - | - | - |
| Green | Moonlight | 1 | 0.08 | 0.08 | - | - | - | No | No | 0.20 A | 1.15 A | 195 uA | 204 g | 284 g | - | - | - |
| Green | Low | 120 | 115 | 115 | - | - | - | No | No | 0.20 A | 1.15 A | 195 uA | 204 g | 284 g | - | - | - |
| Green | Med1 | 330 | 340 | 340 | - | - | - | No | No | 0.20 A | 1.15 A | 195 uA | 204 g | 284 g | - | - | - |
| Green | Med2 | 700 | 660 | 660 | - | - | - | No | No | 0.20 A | 1.15 A | 195 uA | 204 g | 284 g | - | - | - |
| Green | High | 1,250 | 1,300 | 1,250 | - | - | - | No | No | 0.20 A | 1.15 A | 195 uA | 204 g | 284 g | 5,475 | 0.0611 | - |
| Green | Turbo | 2,200 | 2,250 | 2,100 | 465,000 cd | 439,000 cd | 1,325 m | No | No | 0.20 A | 1.15 A | 195 uA | 204 g | 284 g | - | - | - |
| Green | Strobe | 900 | - | - | - | - | - | 8.4 Hz | No | 0.20 A | 1.15 A | 195 uA | 204 g | 284 g | - | - | - |
Impressively, my L19 v2.0 samples seem to be fairly accurate for output measures – although I know my lightbox’s relative calibration is generously high for modern high-output lights. Moonlight mode is actually dimmer than the specs indicate, which is great.
My NIST-calibrated luxmeter is accurately calibrated to an absolute standard, and reports slightly lower beam intensity on Turbo than the specs. But this is still an incredibly impressive showing – the green L19 is the furthest throwing light I’ve tested.
To view and download full testing results for all modern lights in my testing, check out my Database page.
Runtimes
As always, my runtimes are done under a small cooling fan, for safety and consistency. To learn more about how to interpret runtime graphs, see my runtimes methodology page. Note that on average, my lightbox’s calibration seems to be ~20% higher than most modern reviewers.
The Acebeam P17 provides a great comparable here, as it has exactly the same battery. As you see above, the Osram emitters in the L19 are clearly being driven harder at the maximum settings, given the lower runtimes. They are also much lower output emitters, compared to the XHP70.3. But this difference becomes less noticeable at lower drive levels, such as the Med mode runs above.
The green Osram NM1 emitter certainly seems to have an output advantage of over the white PM1. But its hard to know how much to trust that result, as my home-made lightbox was never calibrated for monochromatic light sources.
You also see a nice regulated pattern here, unlike the competing budget Wurkkos TD01 model. And there is a less pronounced step-down on max compared to most other lights. Here is an extended view of the first minutes, to better show the difference:
 These results show the improved driver performance on L19 compared to the TD01.
Pros and Cons
| Pros | Cons |
|---|---|
| One of the furthest throwing lights I've tested, thanks to the TIR optic. | User interface is unusual, with independent action of the side electronic switch and tactical physical clicky switch. |
| Multiple emitter options, allowing a good range of choices. | Light cannot tailstand, and rolls easily on its side. |
| Circuit is fully voltage-regulated, with excellent efficiency. | Physical lockout is not possible, only electronic lockout. |
| The light has a solid build with good handfeel, although there are some small issues (see Cons). |
Overall Rating

Preliminary Conclusions
The Acebeam L19 v2.0 is clearly a more sophisticated build with better performance than the budget TIR-based Wurkkos TD01 that I previously reviewed – and so earns a higher rating above. Of course, it is also significantly more expensive as well.
While the TD01 had a very decent budget build, the hand feel and machining of the L19 is top-notch. The specific TIR optic and range of emitter options here allows for even greater focused throw (which is the whole point of these lights, after all). The improved circuit on the L19 also translates into better performance (i.e., greater sustained high output, and better regulated output over time, compared to the TD01). It’s also great to see Acebeam meet (or nearly meet) their published performance specs on these lights – something you don’t typically see with the budget makers.
The one area that I’m not convinced is entirely an upgrade on the L19 is the user interface – specifically, the independent functionality of the two switches. I understand this is unchanged from the v1.0 of this light, but it is new to me. And I appreciate this is primarily intended as a tactical light, with the physical clicky switch. But the interaction of switches in unusual. And while clear enough once you get used to it, there is something to be said for a simpler (and more consistent) overall user interface. This is especially true if you have many lights, or if you routinely loan your lights out to other people. The innovative UI here also necessitated a dual-wall body tube without thread anodizing, which means that you cannot physically lockout the light and need instead to rely on an electronic lockout (which is not my preference). Taken together, these quirks knock half-a-star off a top rating on my subjective scale.
This is my first experience of the low-profile Osram PM1 and NM1 emitters, and my experience is quite positive for both of them. The white PM1 clearly outperforms the standard low-profile Luminus SFT40 emitter for peak throw, which is what these lights are all about. But it is the green NM1 that really impressed me – noticeably greater throw and overall output, for equivalent runtime.
Despite all my years of reviewing, this is actually the first high-output hunting-style light with a green LED that I have tested. I had expected this to be less-than-practical in night time use, given the limitations of the monochromatic source. But a funny thing happens after you have been running the light for >30 secs or so outdoors – yours eyes begin to adapt to the tint, and it starts to seem subjectively significantly “whiter”. It soon feels like you are simply seeing the world more in black-and-white and shades of gray, rather than in the overwhelming shades of green when you first activate the light. This is actually quite practical for looking for contrasts or reflective objects. Of course, if you run the light for more than several minutes expect to experience a comparable rebound effect once you turn the light off – the world looks decidedly purple for awhile. It will take a similar amount of time for your brain and photoreceptors to adapt back to the current ambient light temperature and tint.
If you are looking for maximum throw with a standard LED, the L19 v2.0 is certainly a top contender in this class. I’ve impressed with the quality of the TIR optic, and its ability to throw a focused beam. Another quality light series from Acebeam.
Acknowledgement
The L19 v2.0 samples were supplied by Acebeam for review. As always, all opinions are my own and the light received the same rigourous and objective testing as all other lights that I have reviewed. At the time of review, this light retails for ~$120-135 USD depending on the emitter selected (~$160-180 CDN).