Acebeam Defender P17

The P17 is a high quality tactical flashlight featuring fairly high output and very good throw, running on a single included 21700 battery. Also features both tactical and general user interface options.
- Introduction
- Manufacturer Specifications
- Package Details
- Build
- User Interface
- Circuit Measures
- Emitter Measures
- Beamshots
- Testing Results
- Runtimes
- Pros and Cons
- Overall Rating
- Preliminary Conclusions
- Acknowledgement
Introduction
Following on my Acebeam E70 review, I thought it would be worth examining their larger tactical 1×21700 light, the Defender P17.
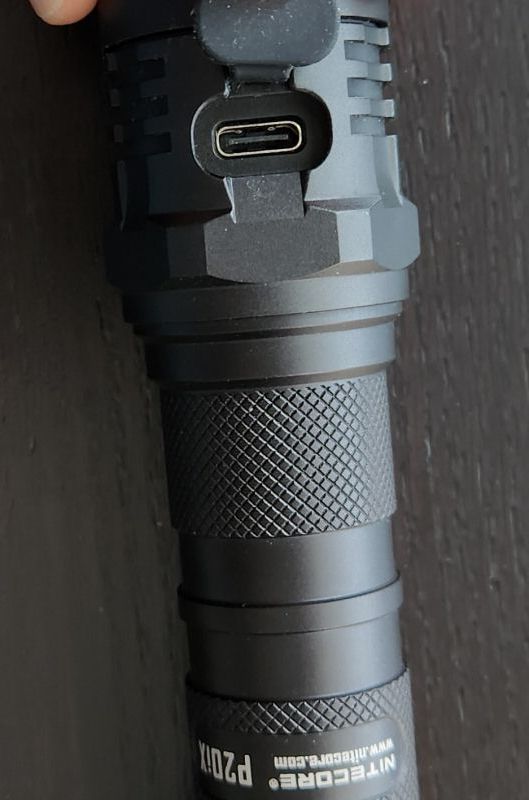
Featuring the Cree XHP70.3 HI emitter in cool white, the P17 has a reported maximum output of 4900 lumens, and beam distance of 445 meters thanks to the larger head. It also features a dual tactical tail switch similar to the Nitecore P20iX that I recently reviewed. This allows easy one-handed access to instant Turbo and/or Strobe.
Although billed for tactical use (e.g., law enforcement, security, search and rescue, hunting, etc.), this design is frankly very generally useful for all outdoor activities where a rugged build is desired.
Let’s see how it compares in my testing.
Manufacturer Specifications
Note: as always, these are simply what the manufacturer provides – scroll down to see my actual testing results.
| Feature | Specs |
|---|---|
| Maker | Acebeam |
| Model | P17 |
| Emitter | XHP70.3 HI |
| Tint | 6500 K |
| Max Output (Lumens) | 4,900 |
| Min Output (Lumens) | 3 |
| Max Runtime | 20 days |
| Max Beam Intensity (cd) | 49,506 cd |
| Max Beam Distance (m) | 445 m |
| Constant Levels | 5 |
| Flashing | Strobe/SOS |
| Battery | 1x21700 |
| Weight (w/o battery) | 154 g |
| Weight (with battery) | 227 g |
| Length | 147 mm |
| Head Diameter | 41 mm |
| Body Diameter | 26 mm |
| Waterproof | - |
Package Details
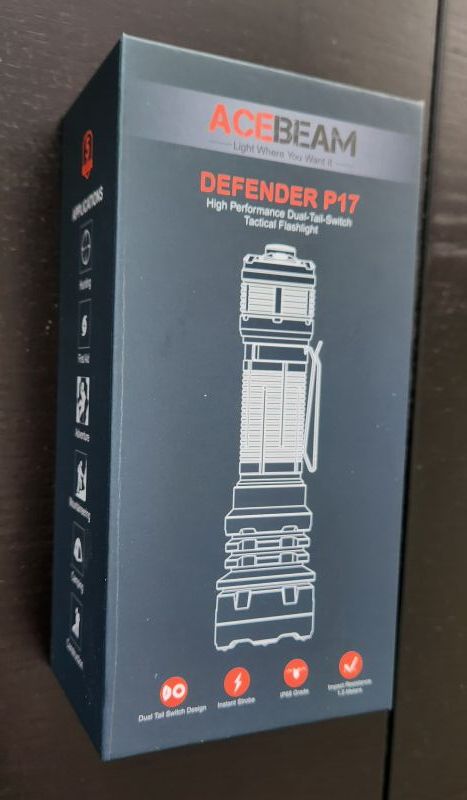


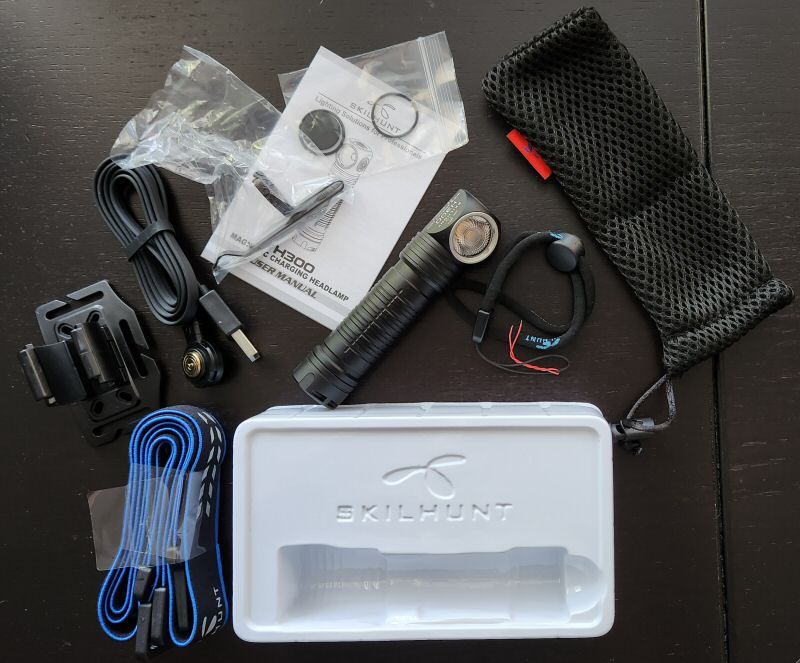
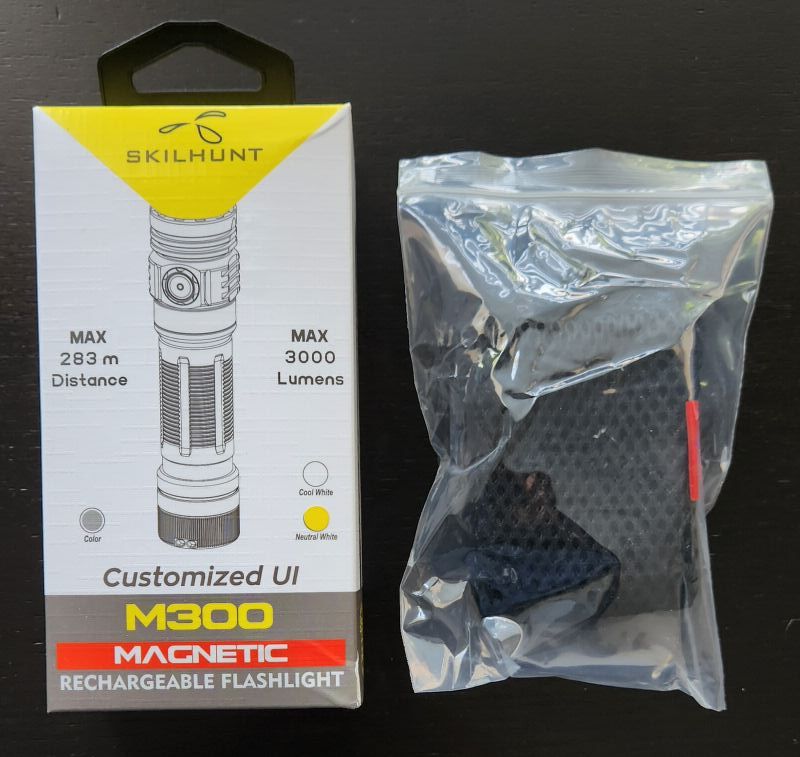
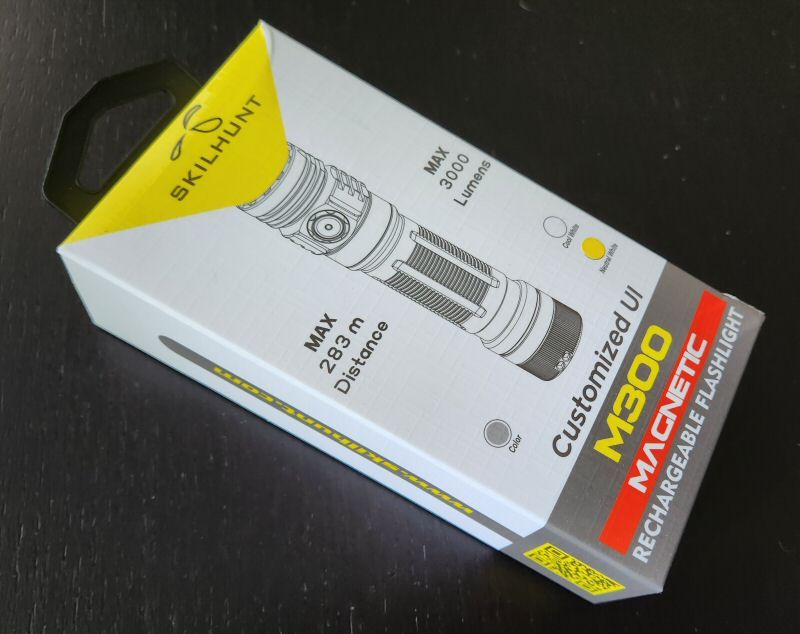
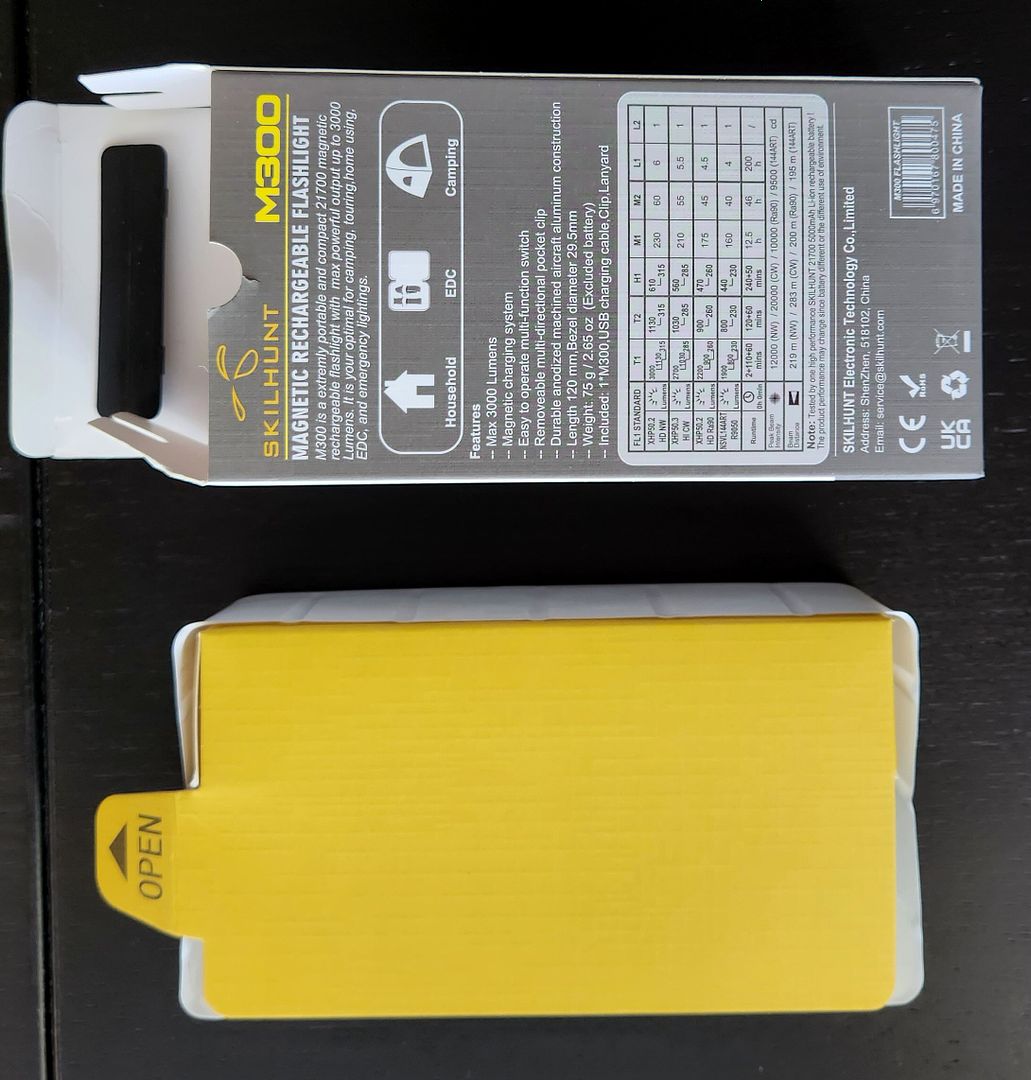
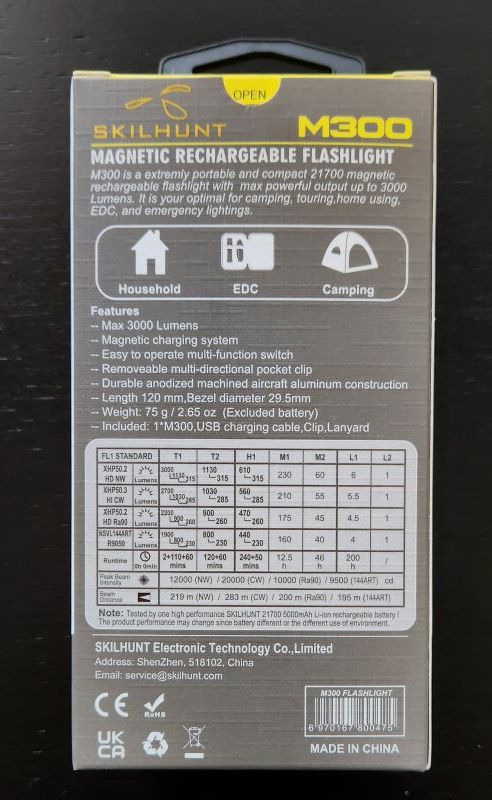
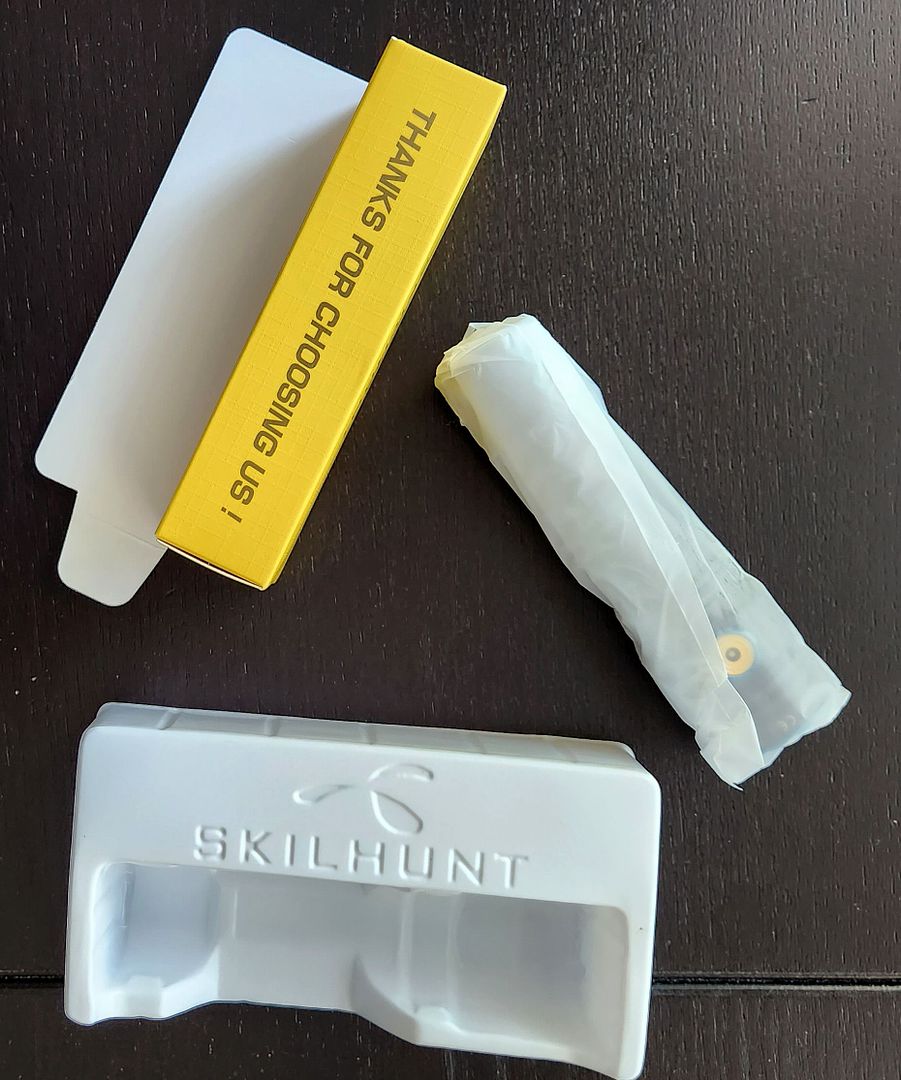
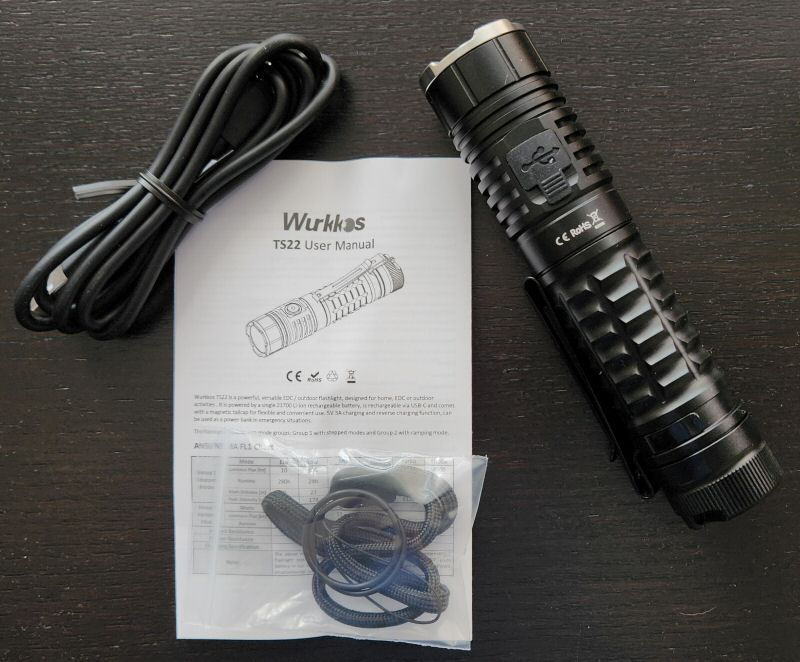
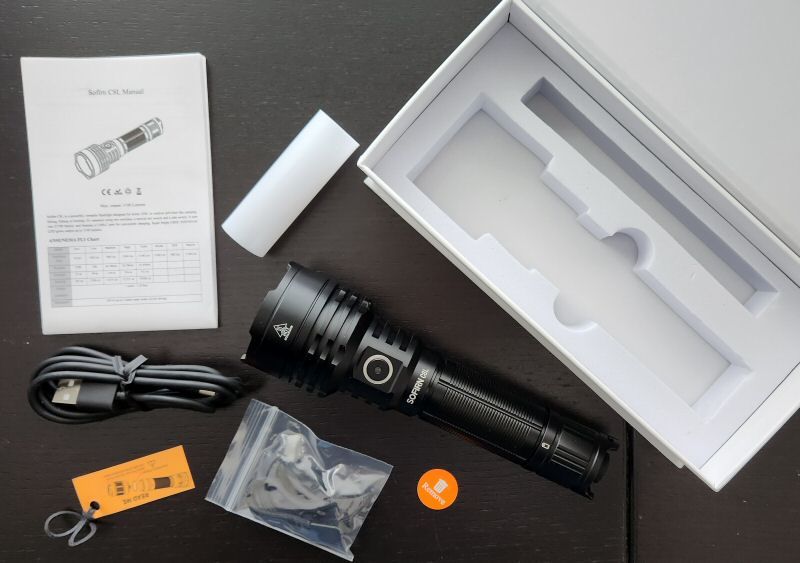
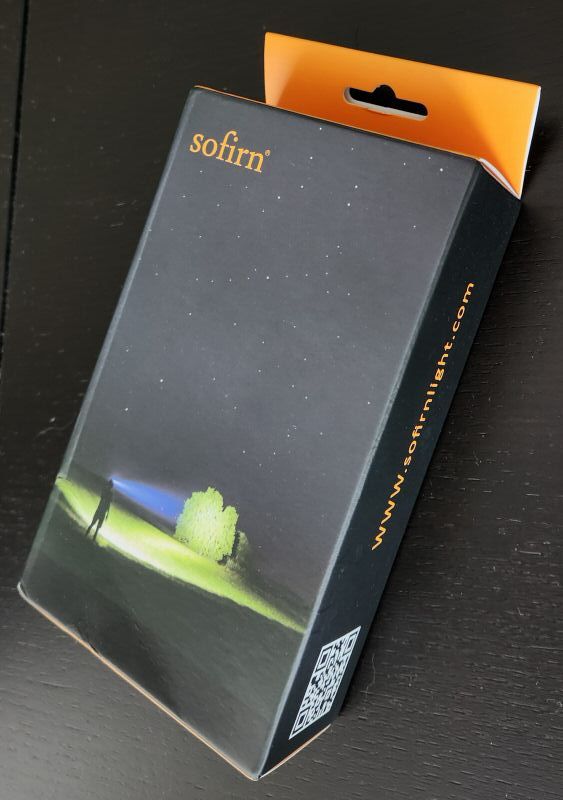
The light comes in a good quality hard-sided box, with magnetic closing flap. There are printed specs all along the box. Inside, you have cut-out foam for the light and accessories.
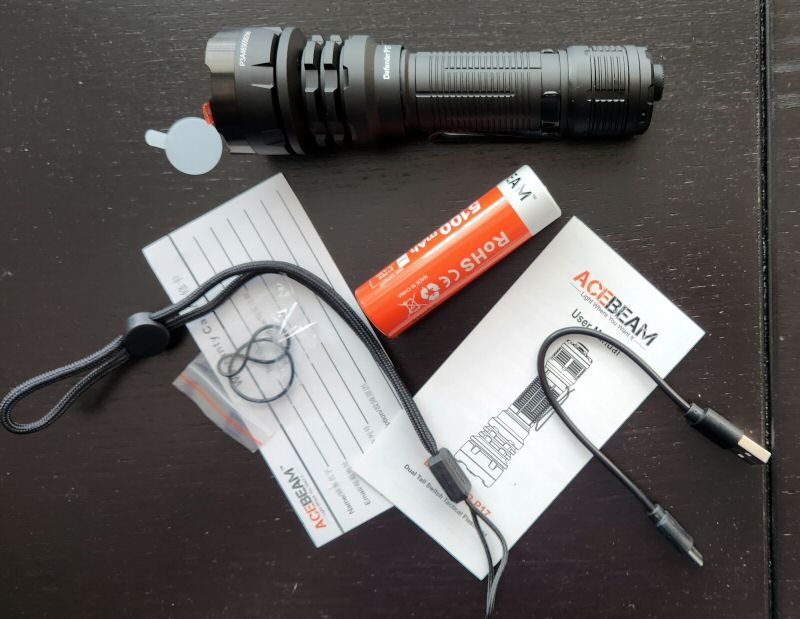
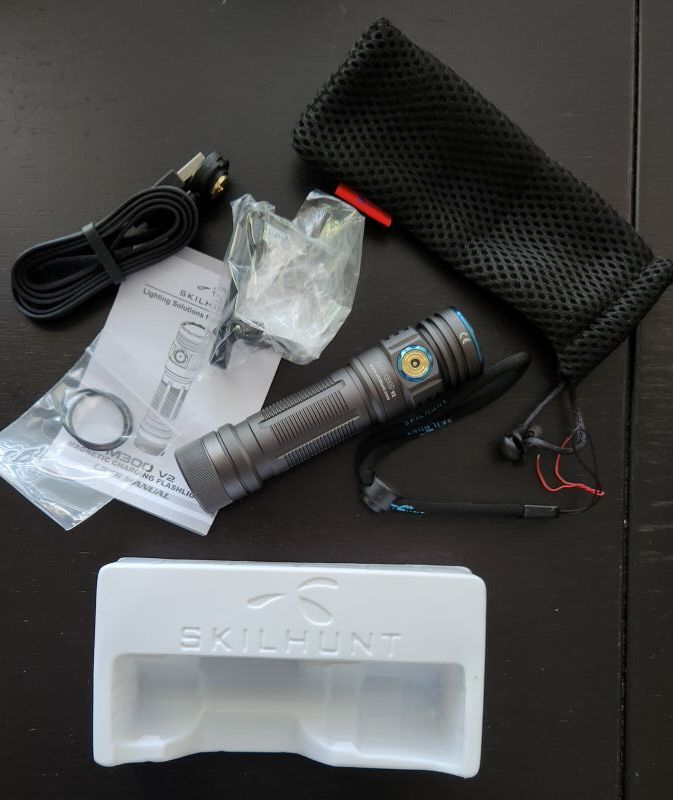
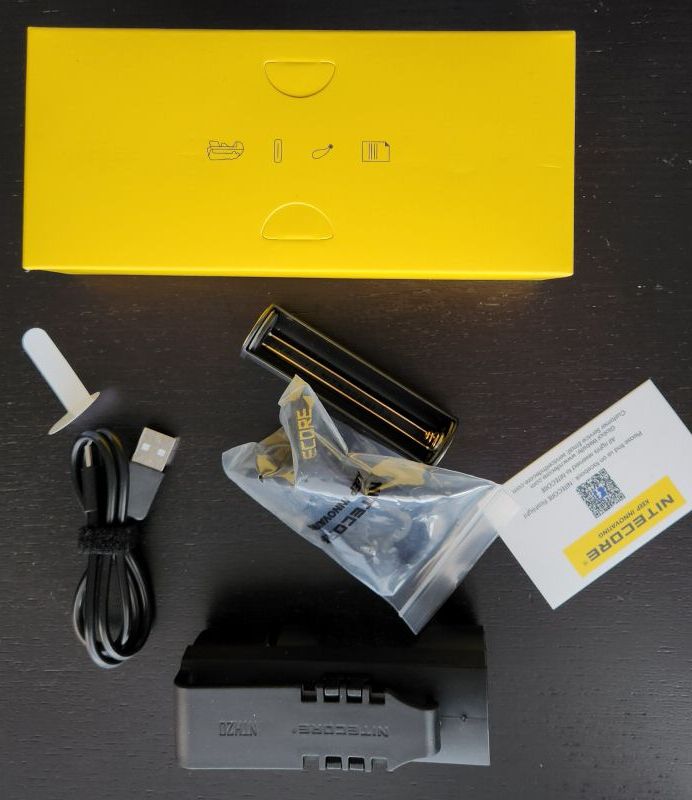
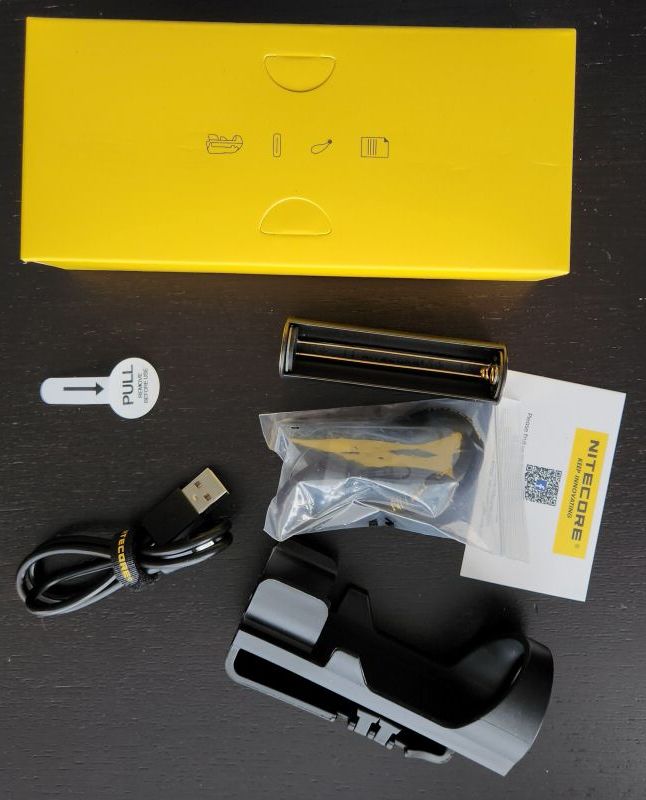
Inside the box, I found:
- Acebeam Defender P17 flashlight with pocket clip attached
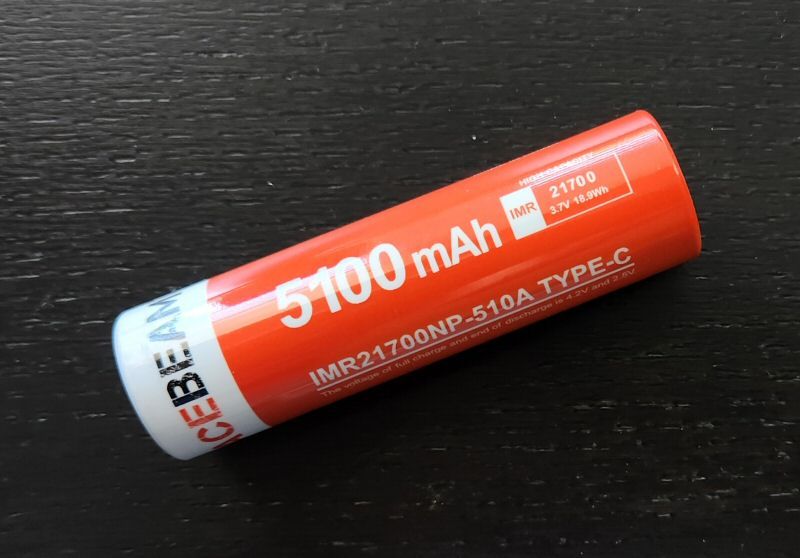
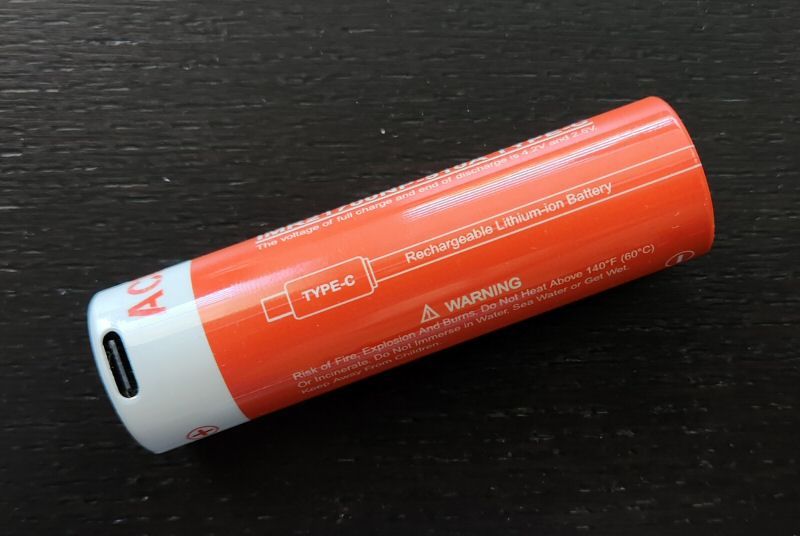
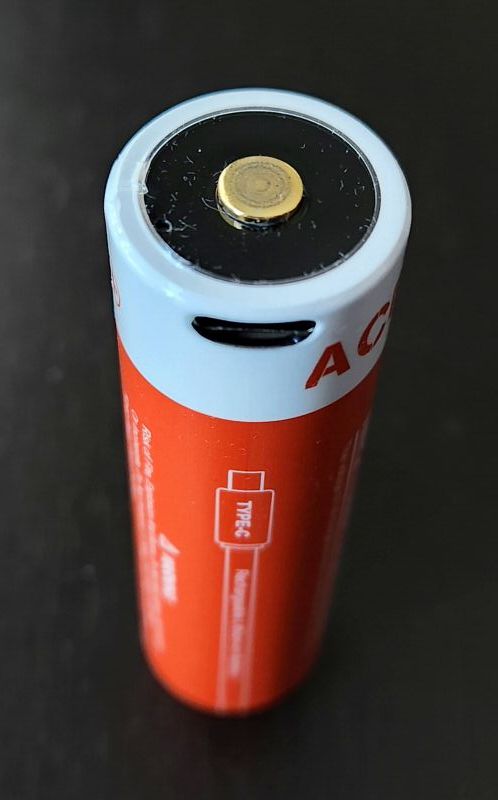
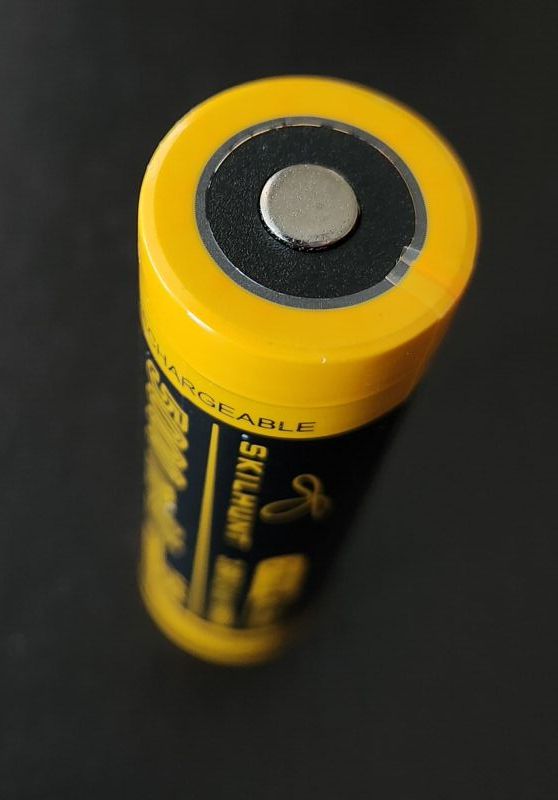
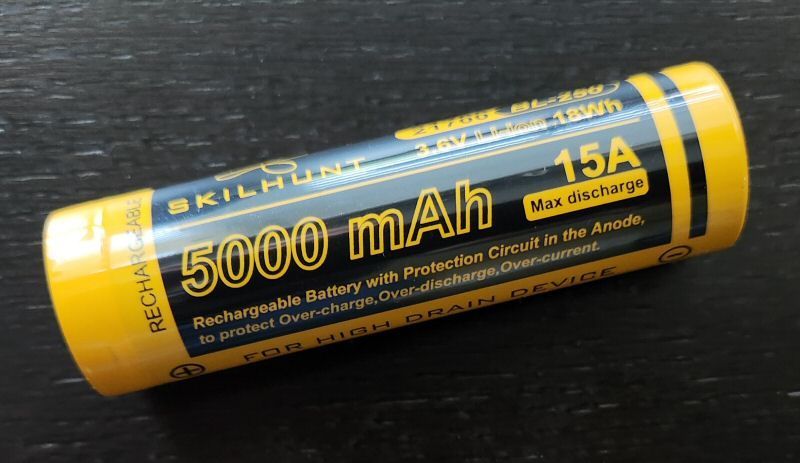
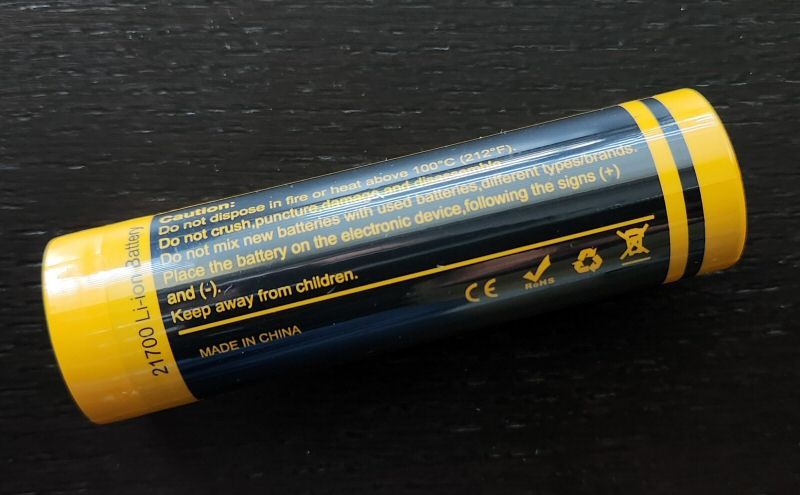
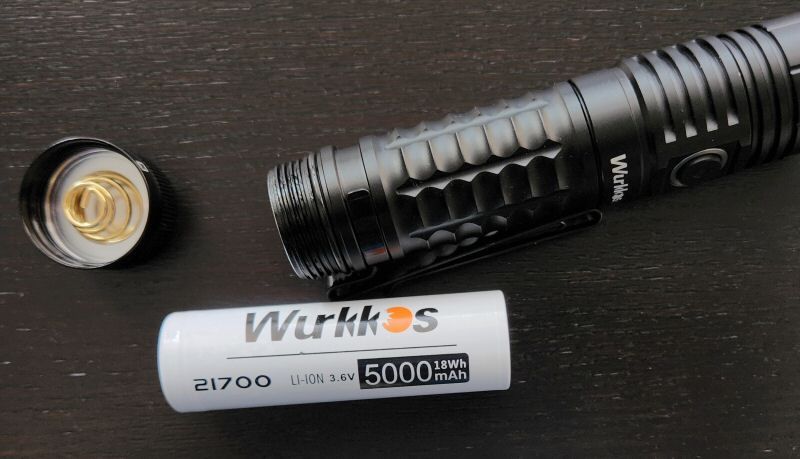
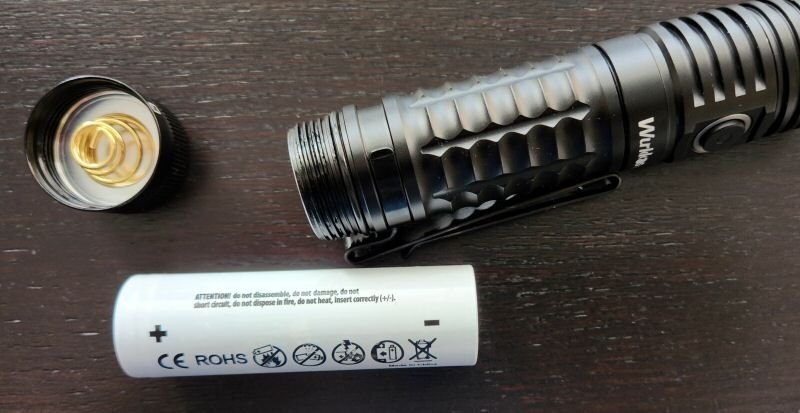
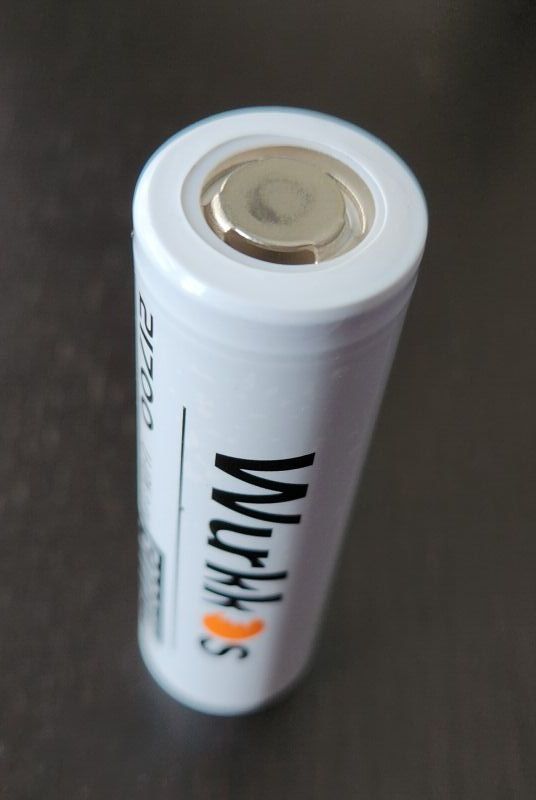
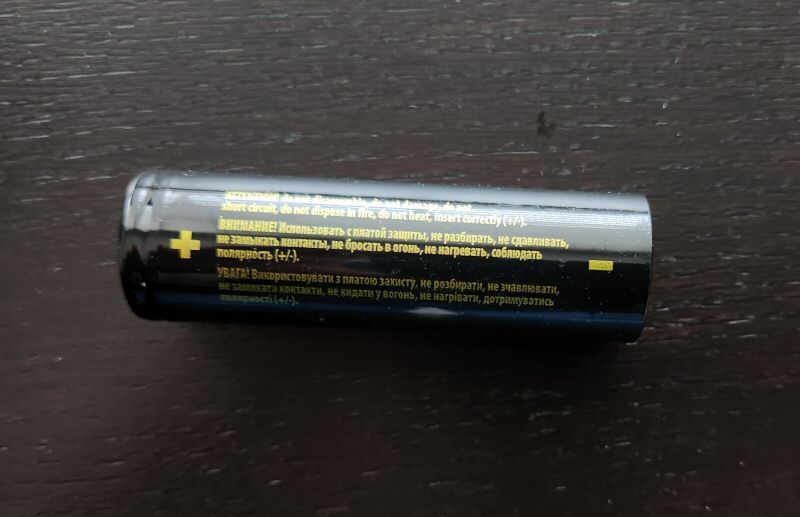
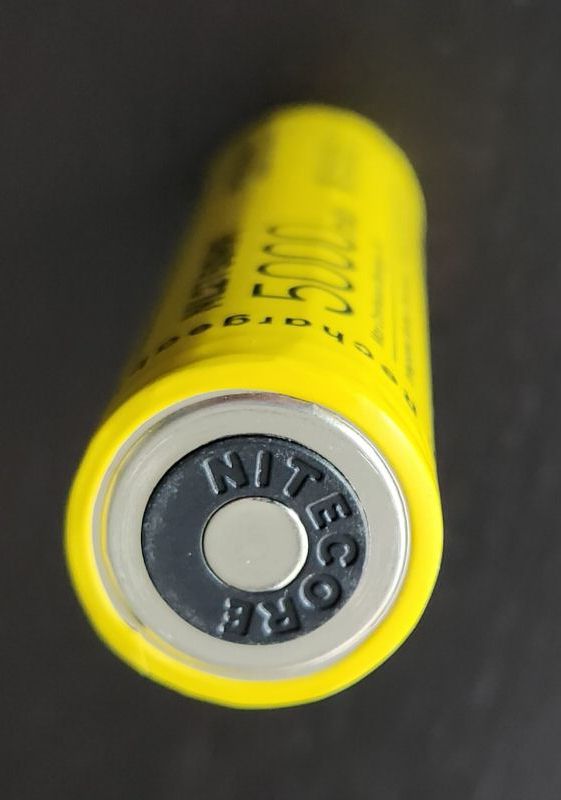
- Acebeam 5100mAh 21700 battery with USB-C charging port
- Wrist lanyard
- USB-C charging cable
- 2 Spare O-rings
- Manual and warranty card
It’s a decent package, consistent with other lights of this class. As always, I would have liked to have seen a holster, but at least they included a good quality bi-directional pocket clip.
Build
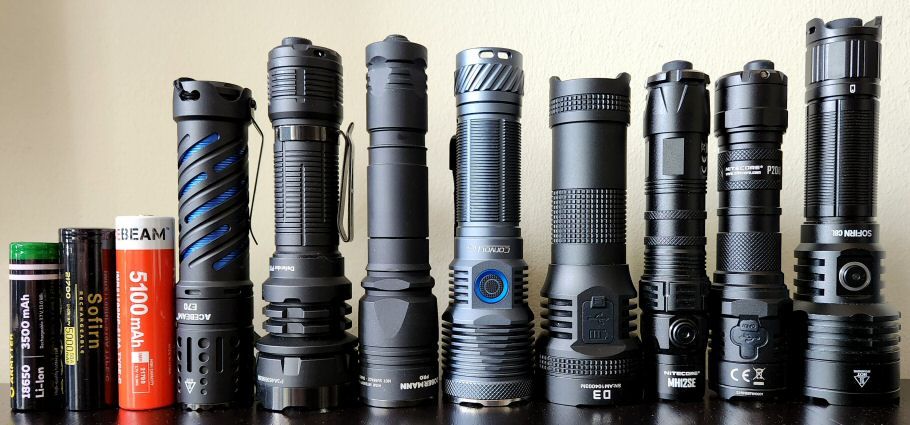
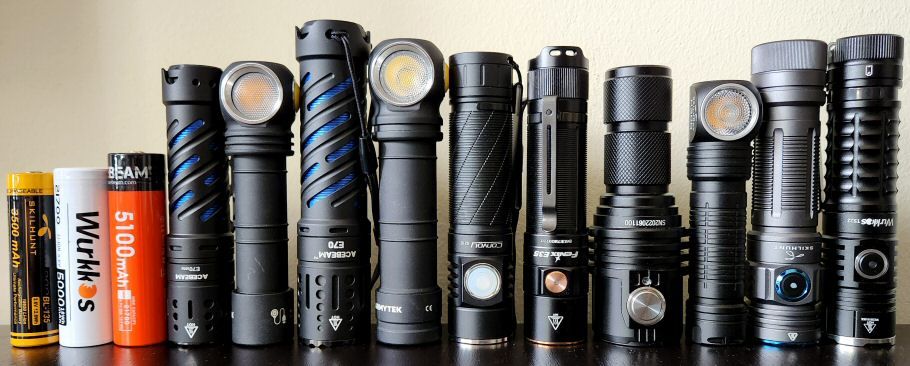
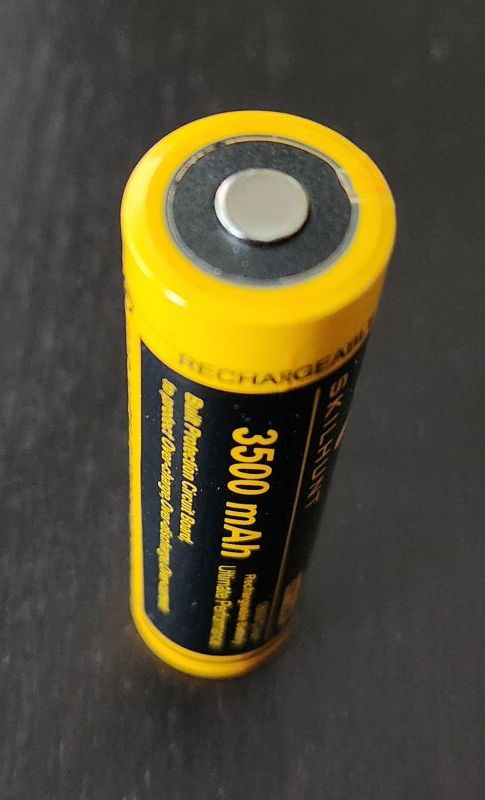
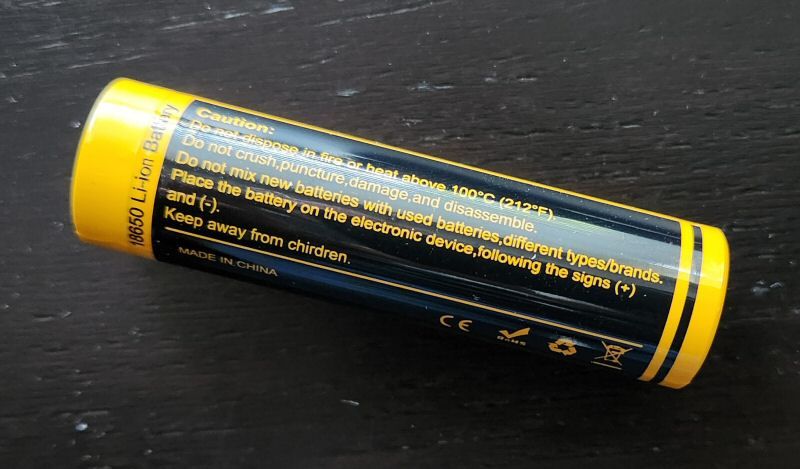
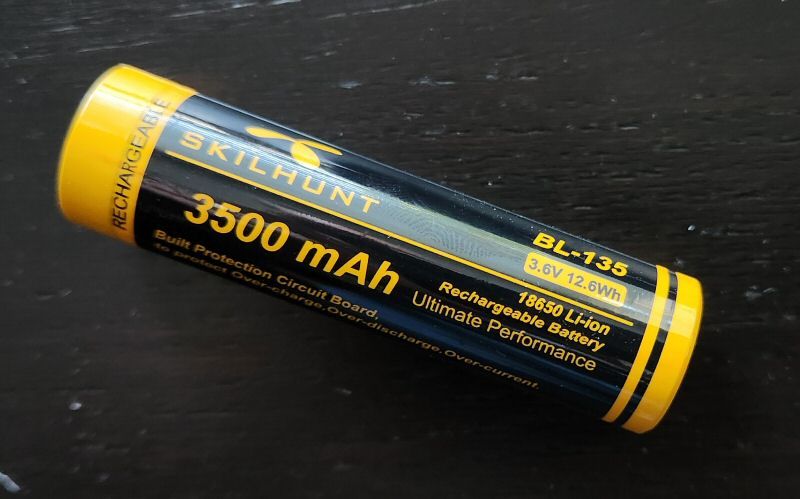
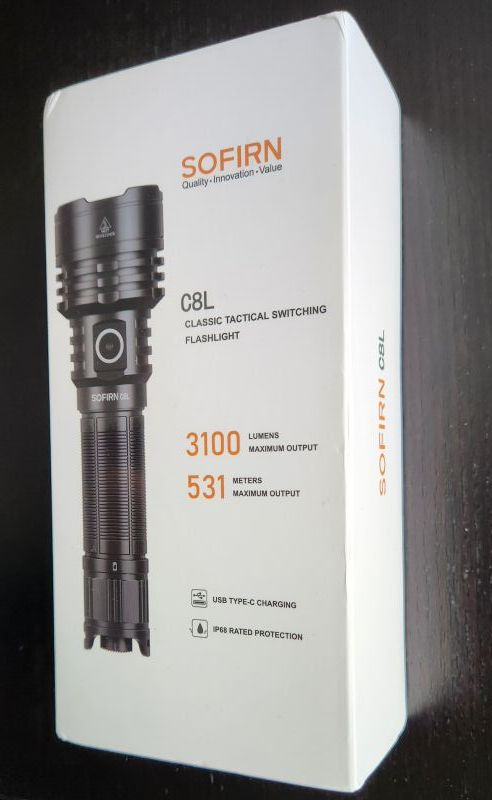
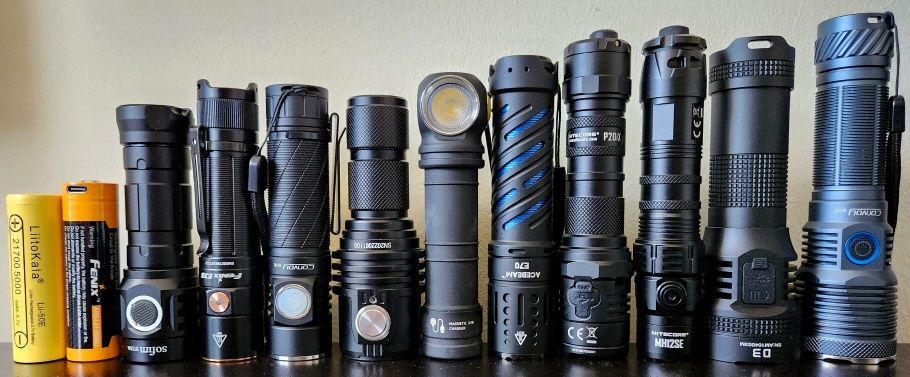
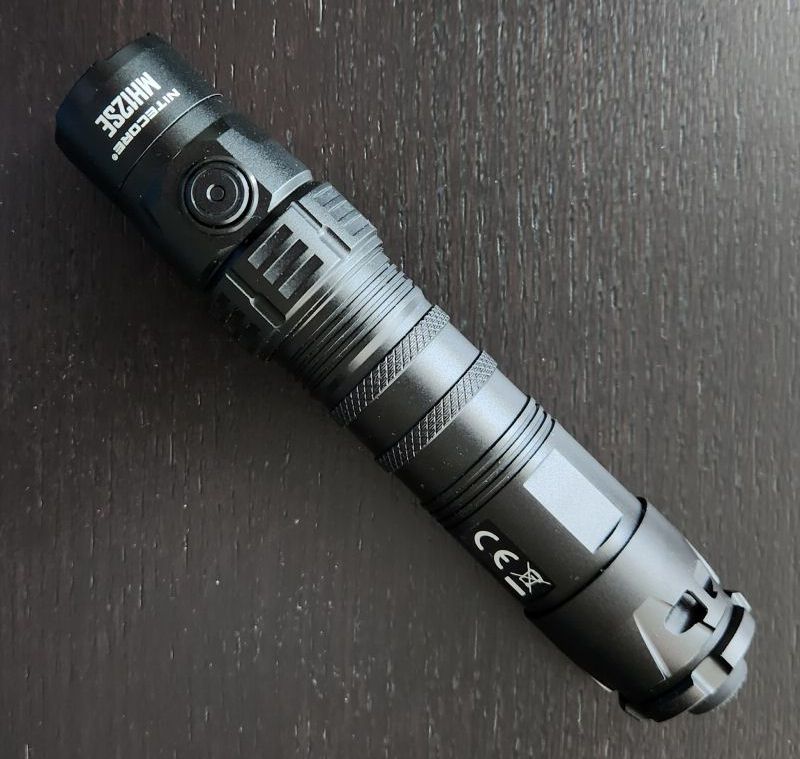
From left to right: Armytek 18650 (3500mAh), Sofirn 21700 (5000mAh), Acebeam 21700 USB-C (5100mAh), Acebeam E70, Acebeam P17, Armytek Doberman Pro, Convoy M21F, Lumintop D3, Nitecore MH12SE, Nitecore P20iX, Sofirn C8L.
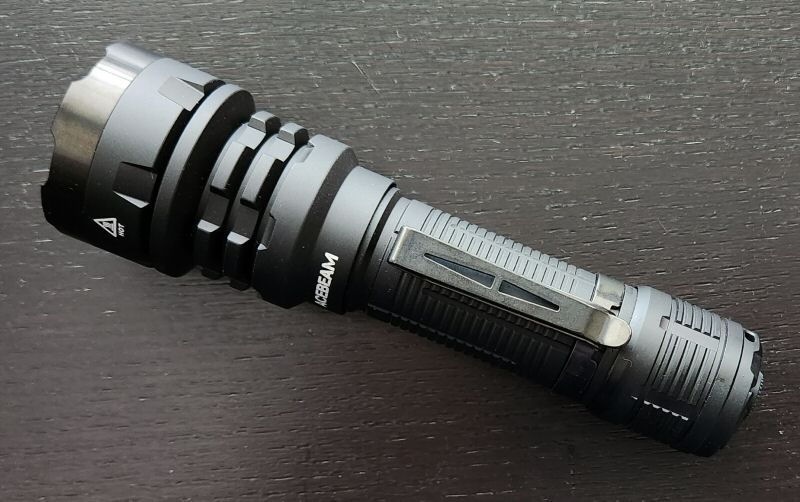
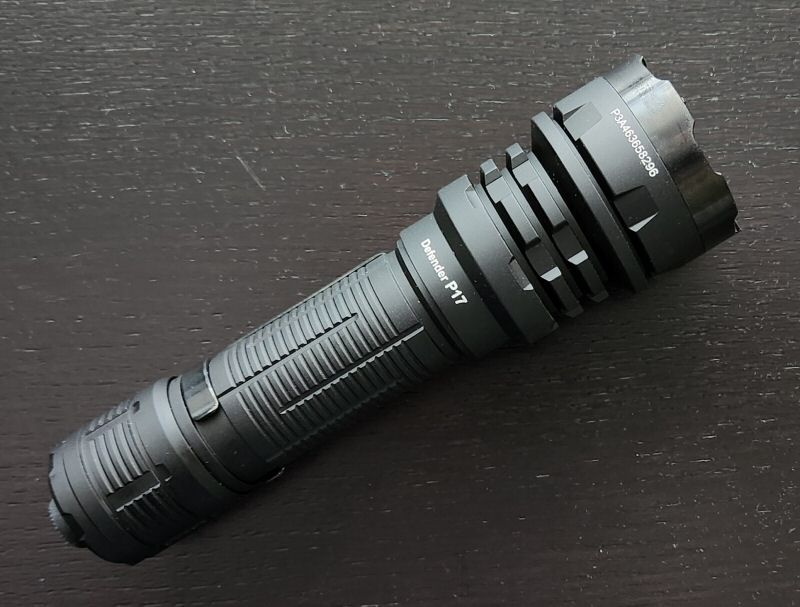

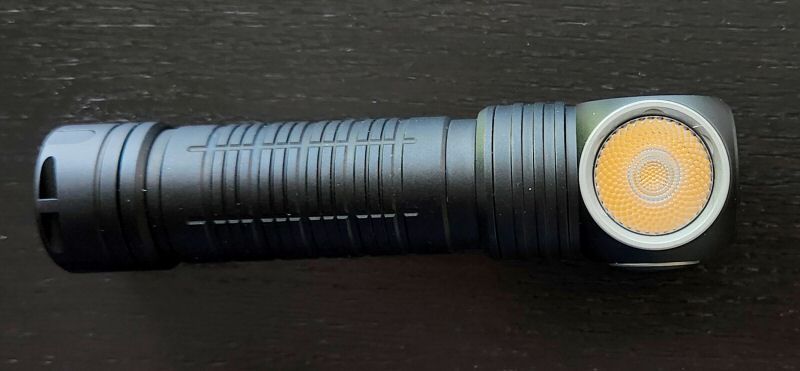
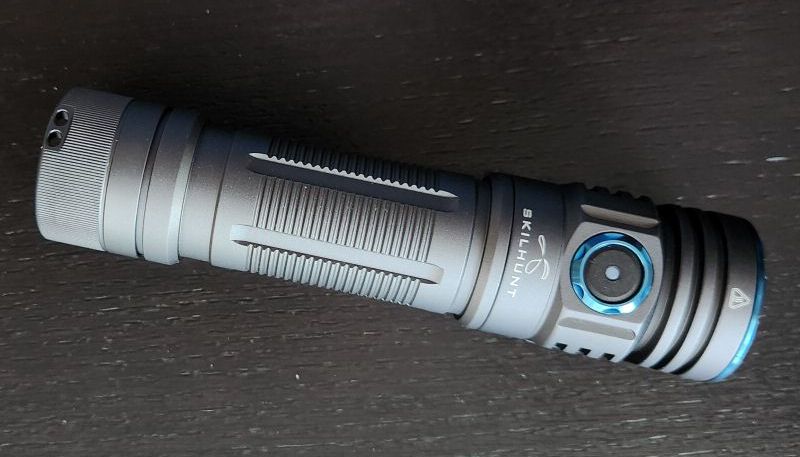
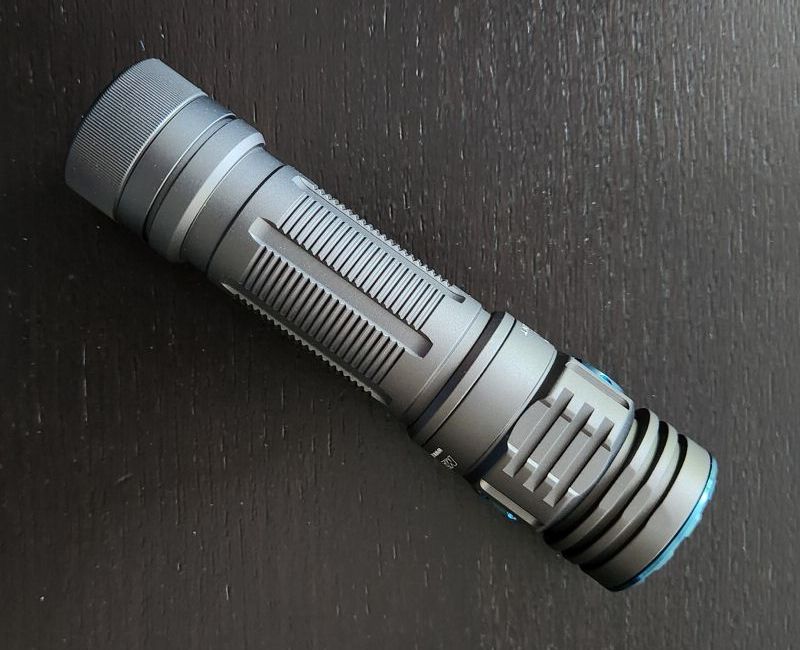
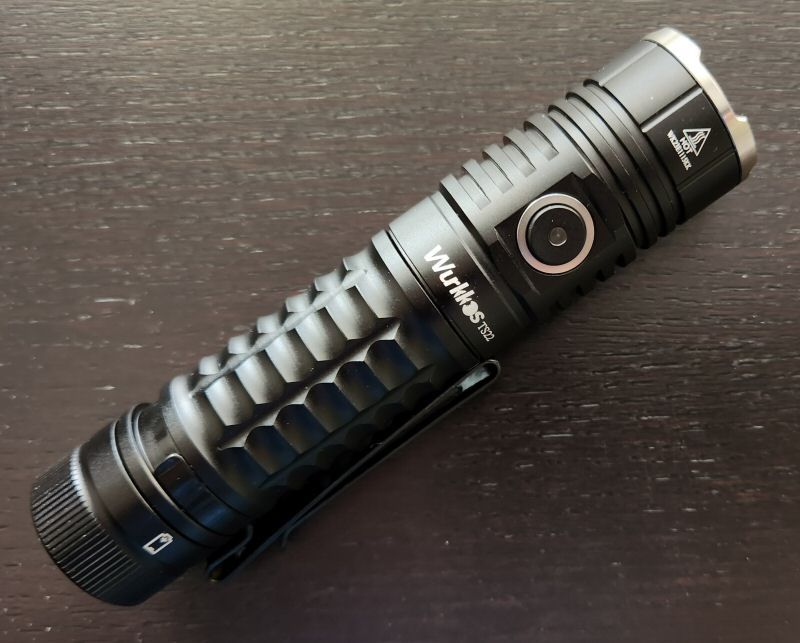
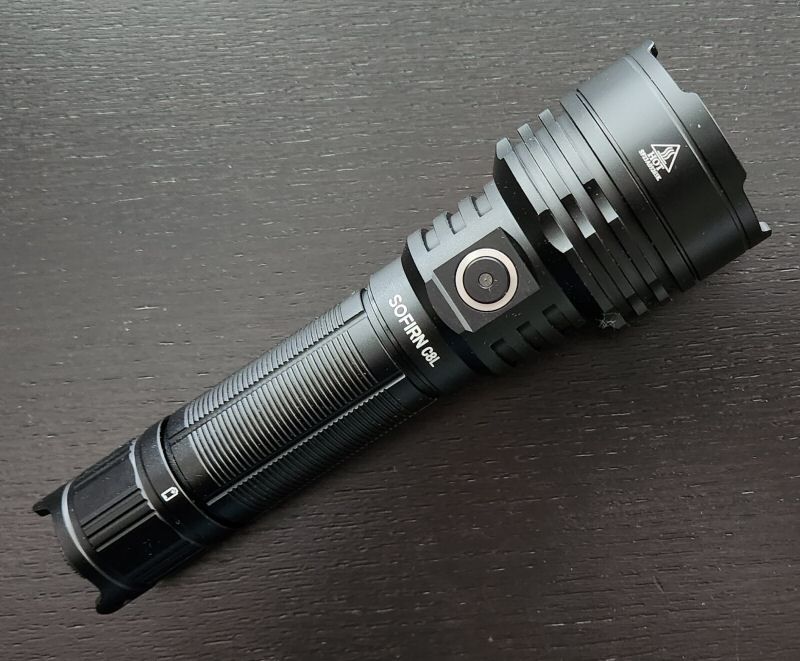
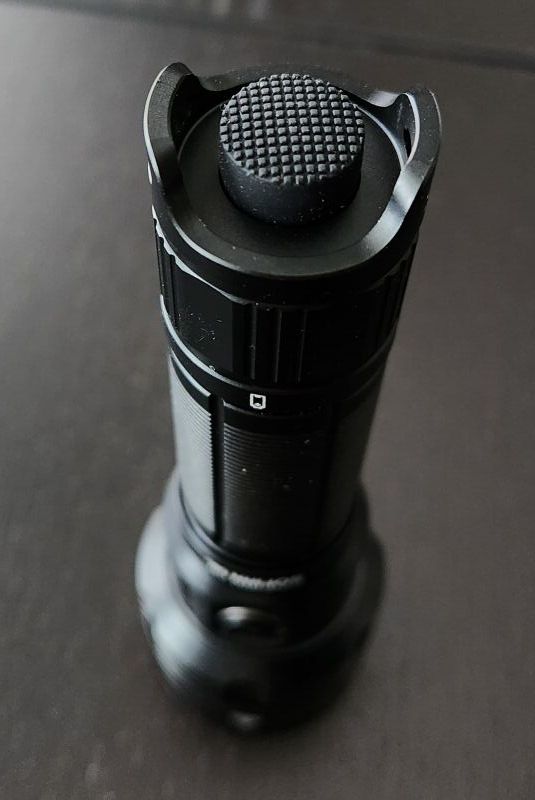
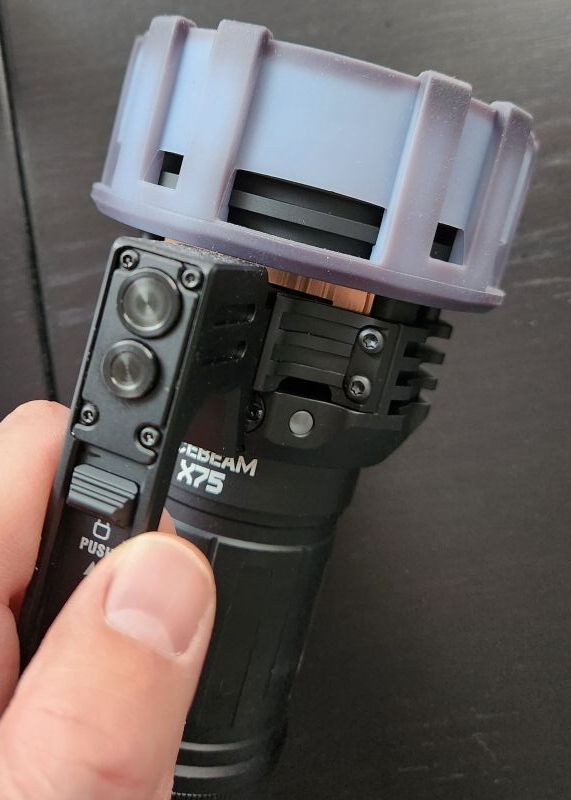
The P17 is larger than most flashlights in this class, due to the larger head, dual-wall body, and dual switch tailcap. But I find it very well balanced, and quite comfortable to hold in the hand – although I do have large hands.
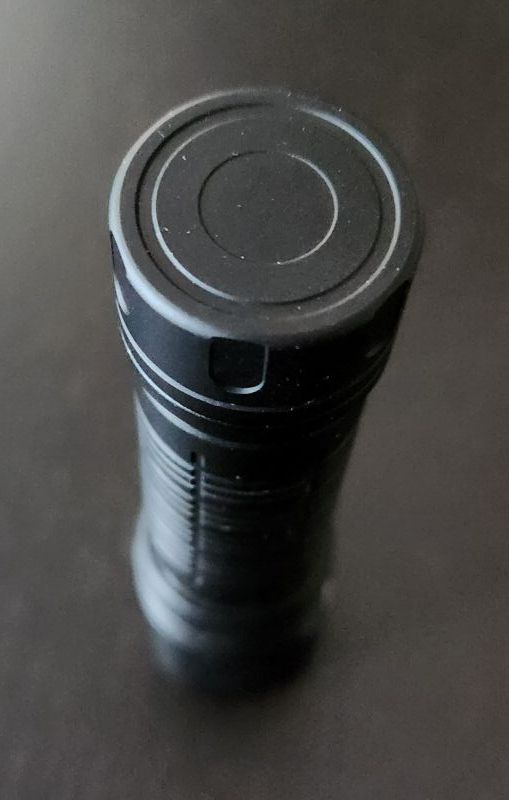
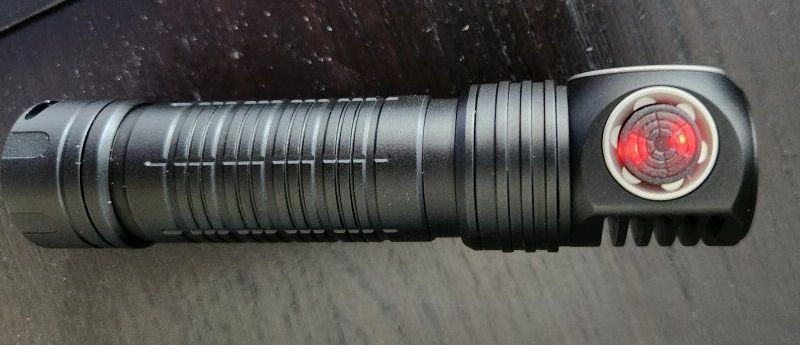
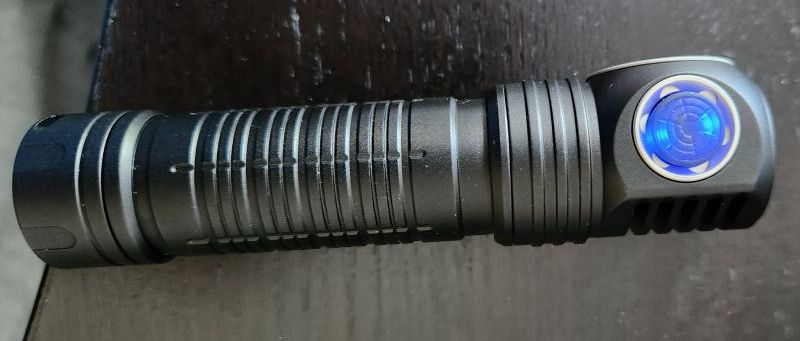
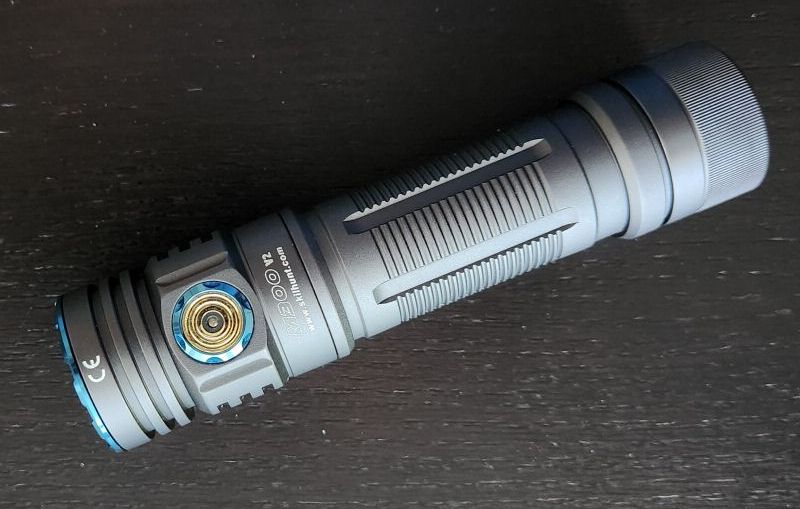
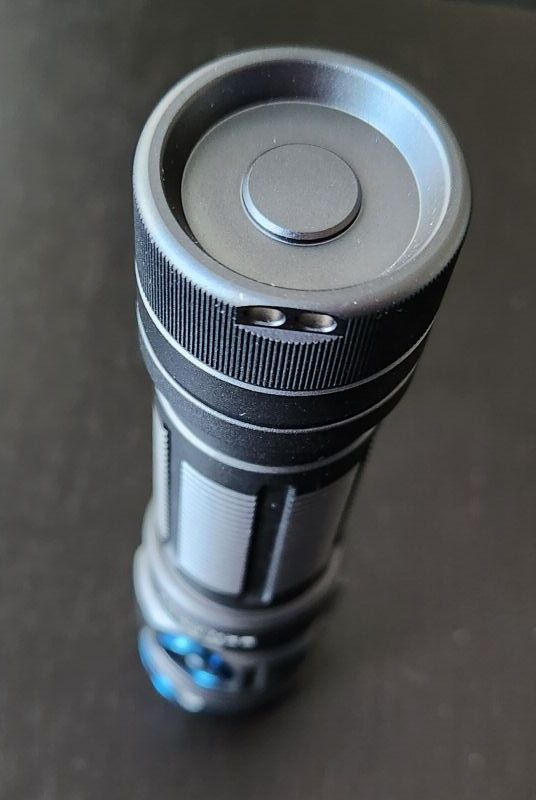
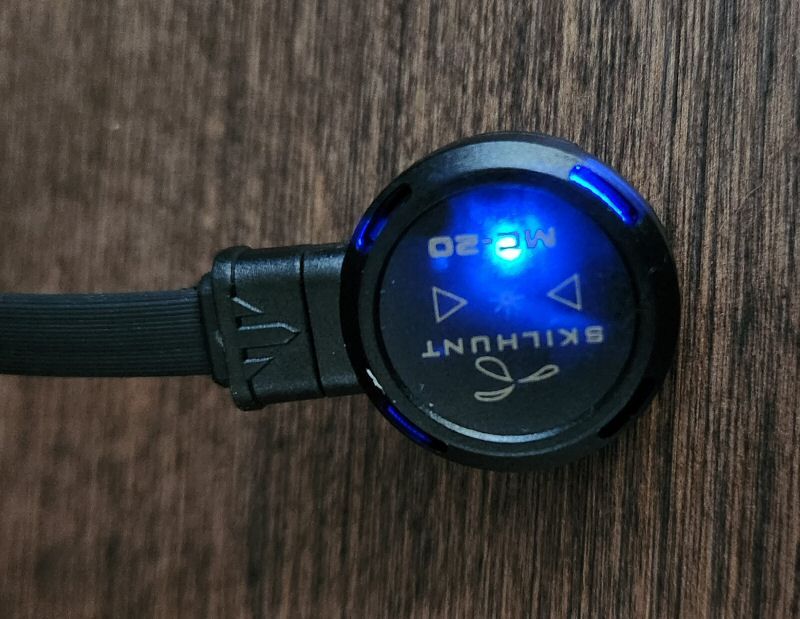
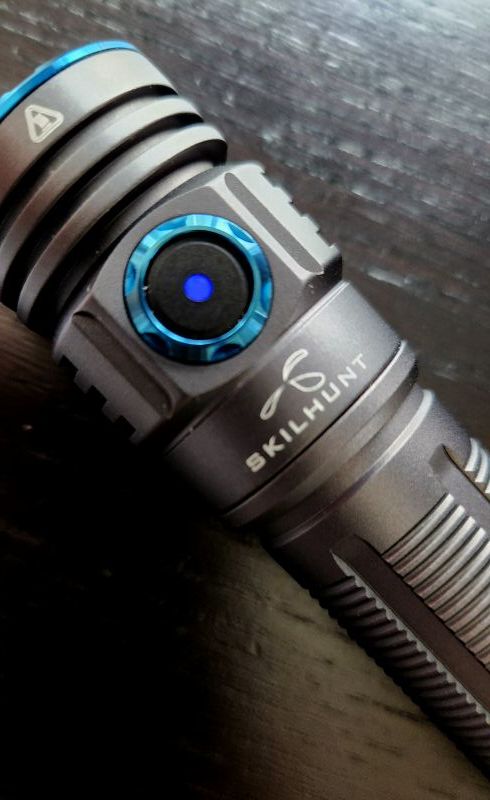
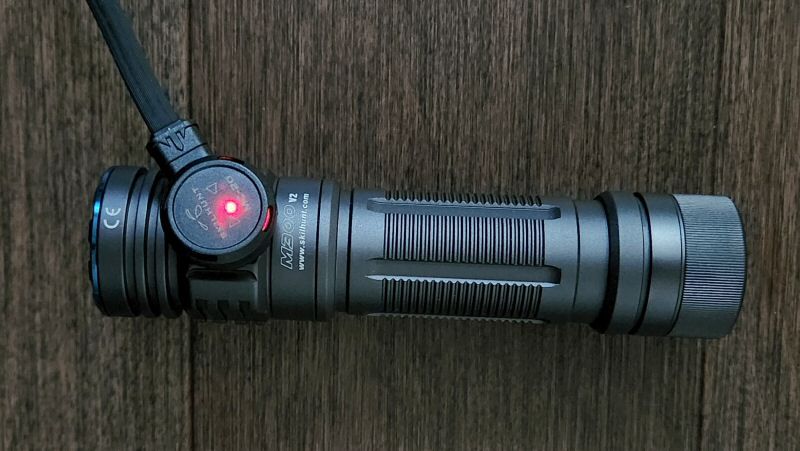
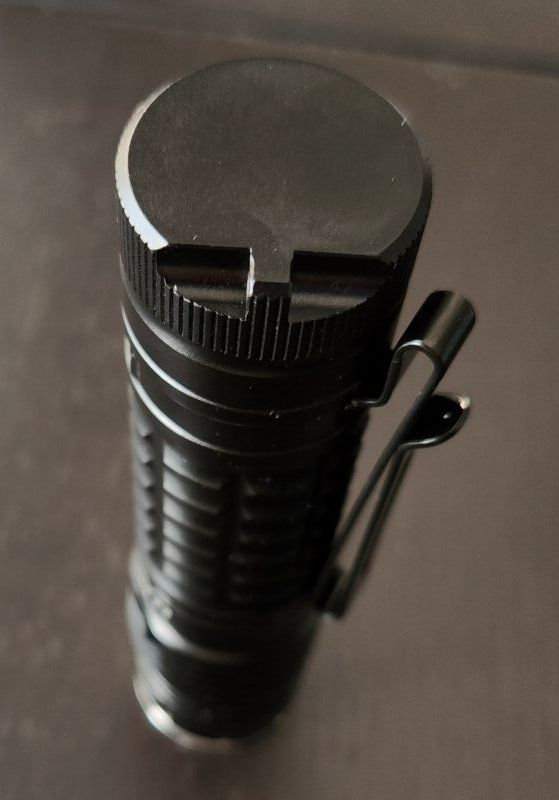
As I mentioned in my Nitecore P20iX review, I’ve always liked this dual tailcap switch arrangement – a number of makers have used it over the years. You have a standard protruding forward physical clicky switch as your main switch for on/off operation and signaling (the “Tactical Switch” in Acebeam’s terminology), with a recessed secondary electronic switch to cycles modes (the “Function Switch”). This is a very “tactical” style arrangement, but I find it just generally very functional. With the wide use of single electronic switches in most lights now, it is great to go back to a primary physical clicky while also keeping the functionality of the electronic switch.
Feel and traverse of the main Tactical clicky switch is good, for both momentary (half-press) and clicked-on. The secondary Function switch is electronic, and I found it easy enough to access given its slightly protruding nature. It too has good feel and resistance.
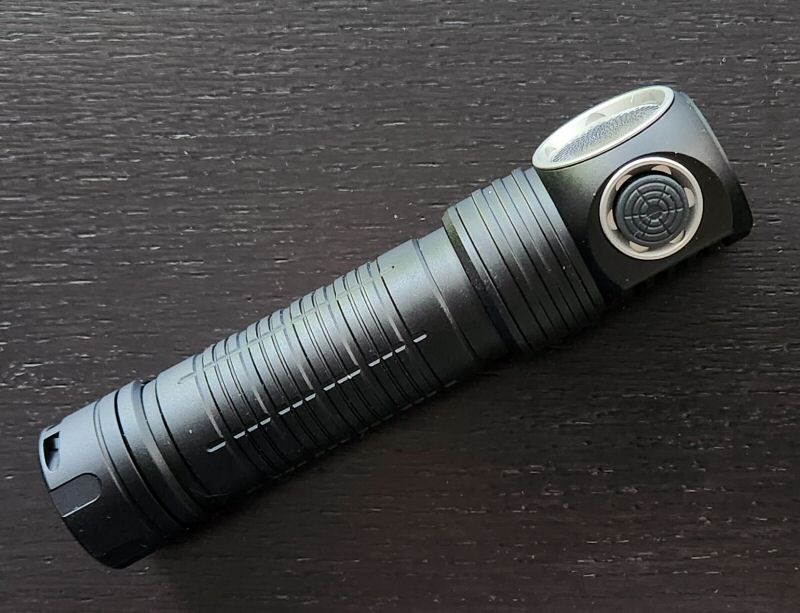
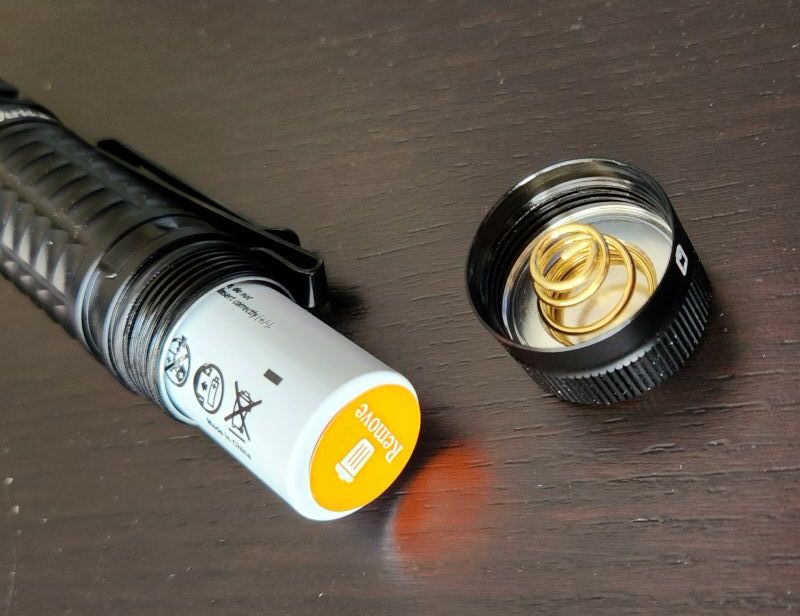
Since the primary Tactical switch protrudes, tailstanding is not possible, and accidental activation is easy. So as always, I strongly recommend you keep the light stored locked out at the tailcap when not in use. A simple twist of the tailcap will do the job, thanks to breaking of the contact with the inner tube. There are cut-outs on the side of the tail for using the wrist lanyard. The attached bi-direction pocket/belt clip fits on securely, and is designed for either bezel-up or bezel-down carry.
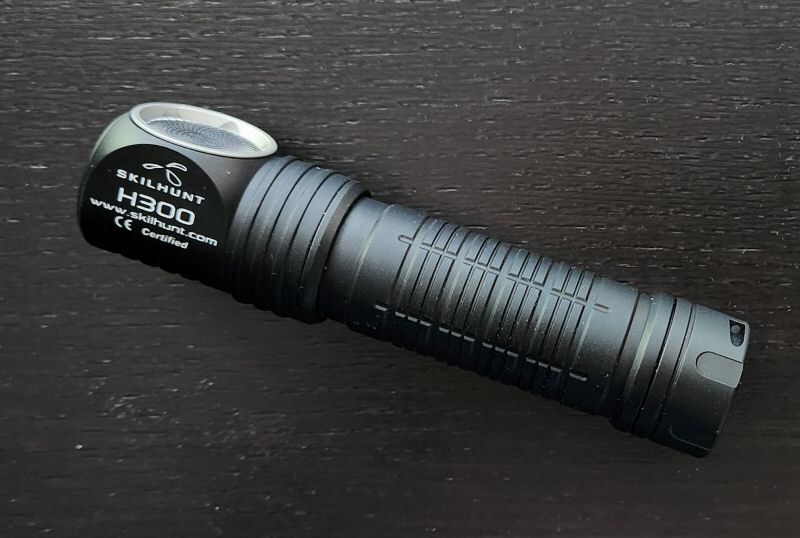
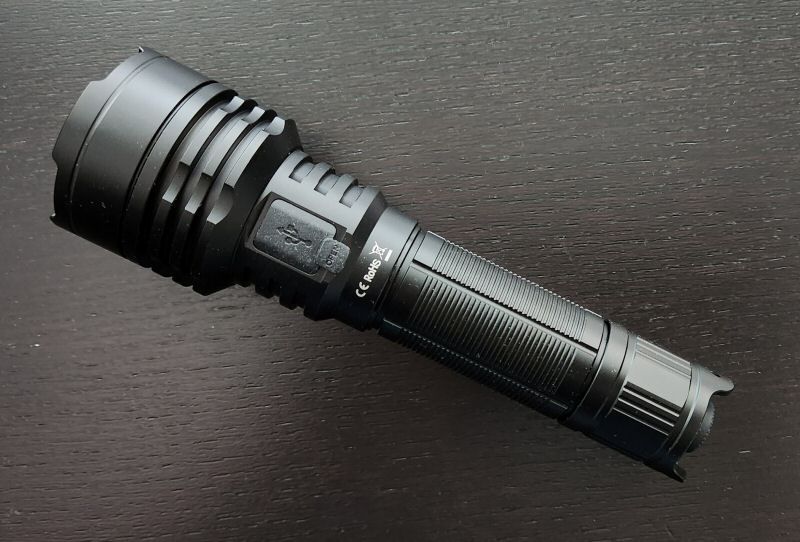
The body has good grip, with all the reeling and cut-outs along the length and on the head. The light can roll, even with the flat cut-outs in the head, but the clip really helps prevent it (I recommend you leave the clip on).
Anodizing is a dark gray, and looks to be excellent quality. It feels relatively thick, and is actually somewhat grippy, with a matte finish. It is advertised as type III (Hard Anodized), and I fully believe that – it feels very high quality. I didn’t notice any flaws on my sample.
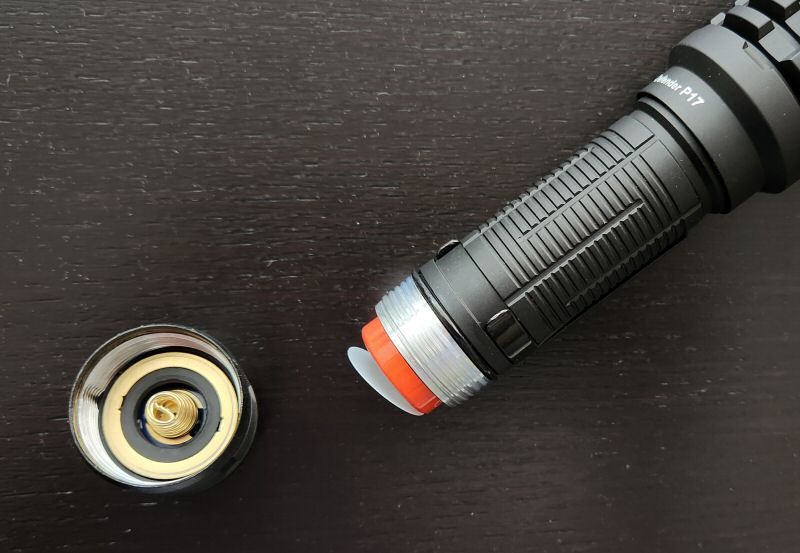
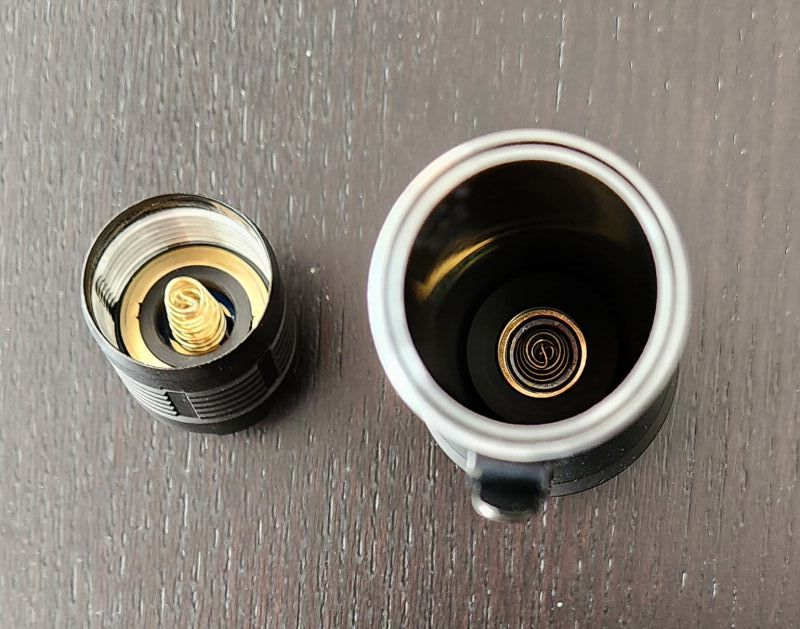
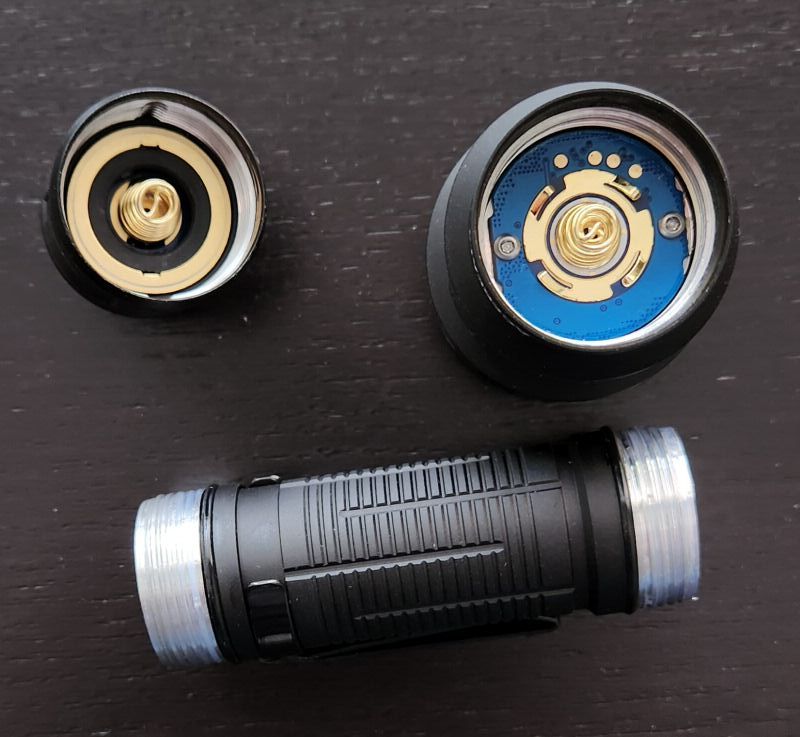
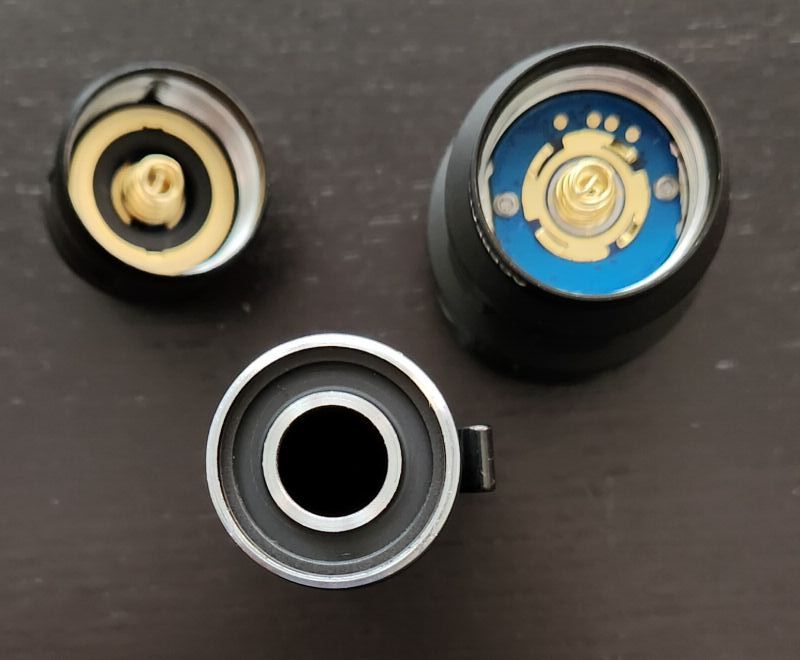
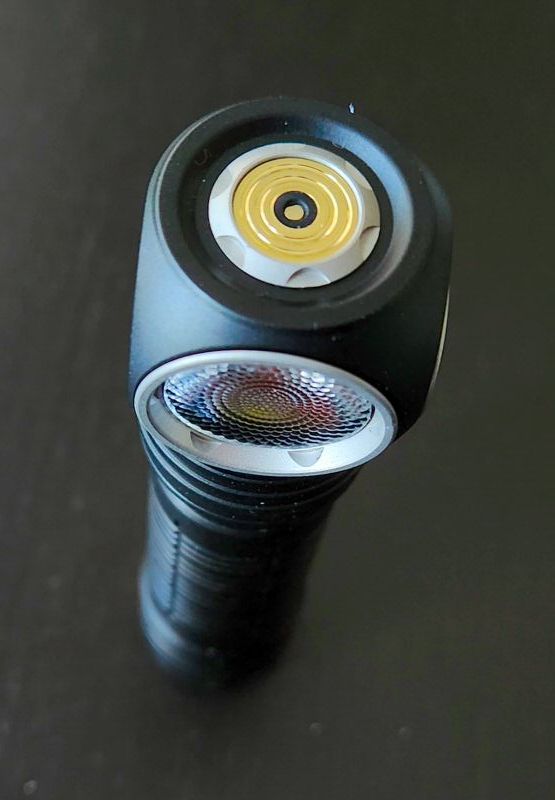
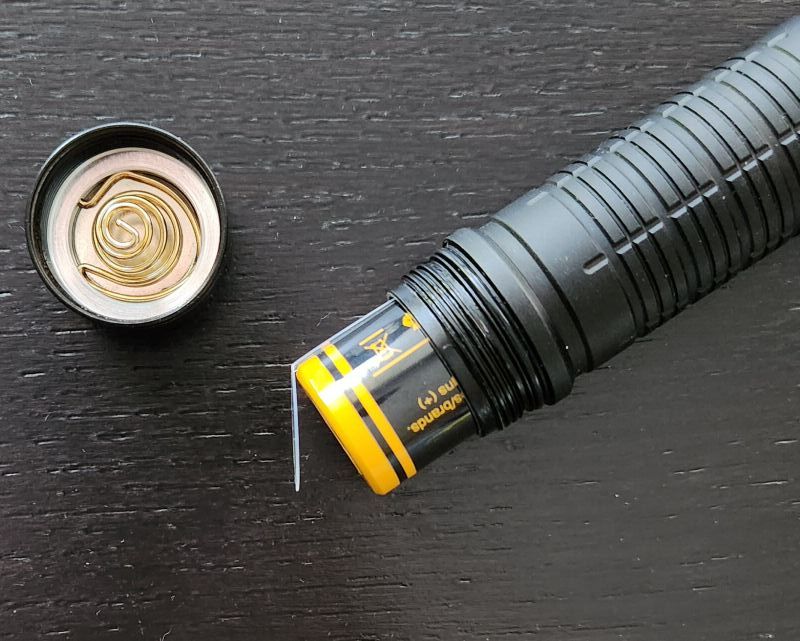
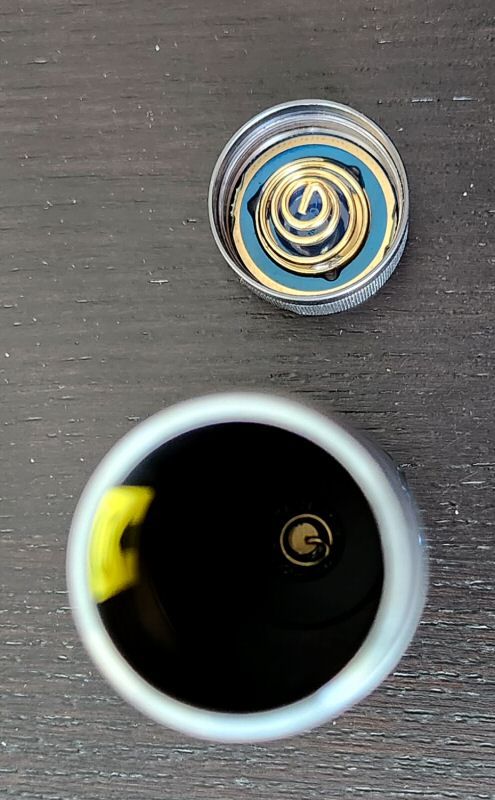
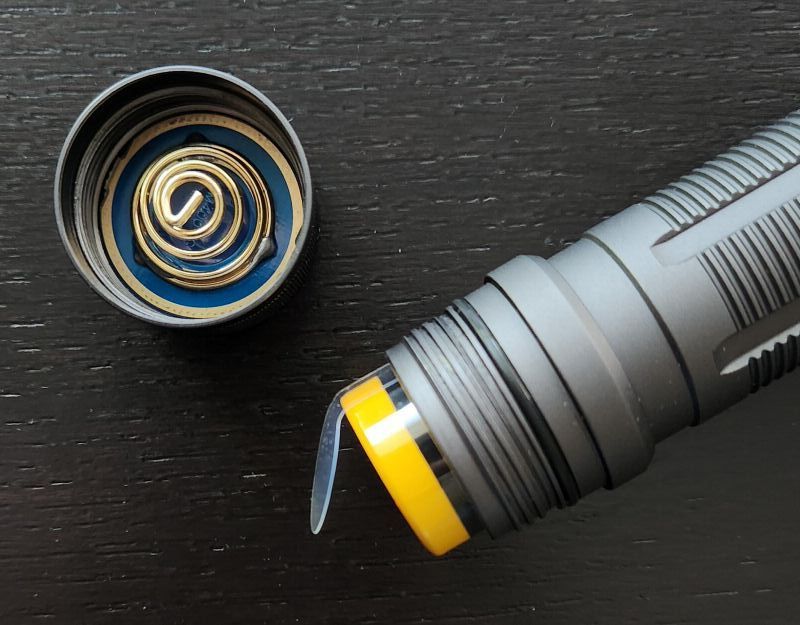
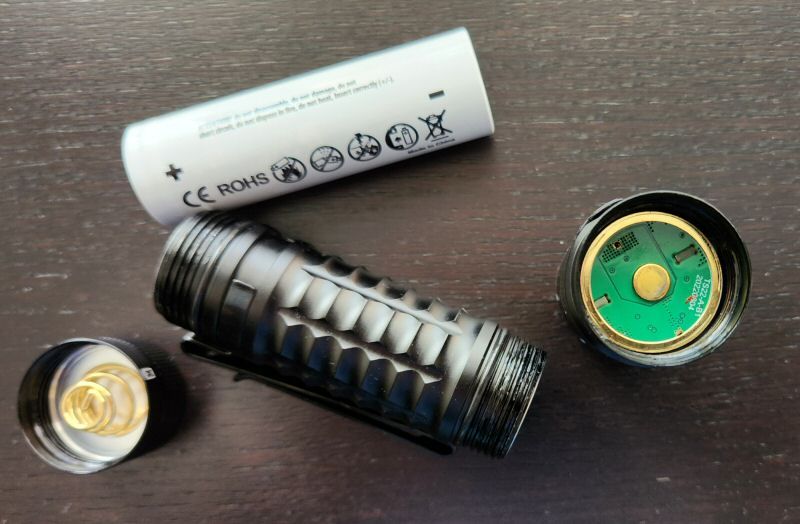
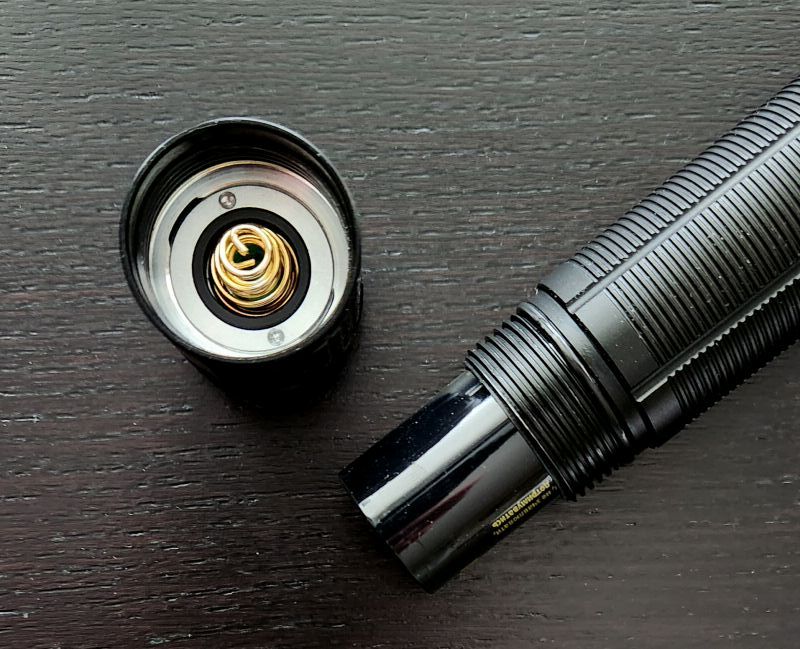
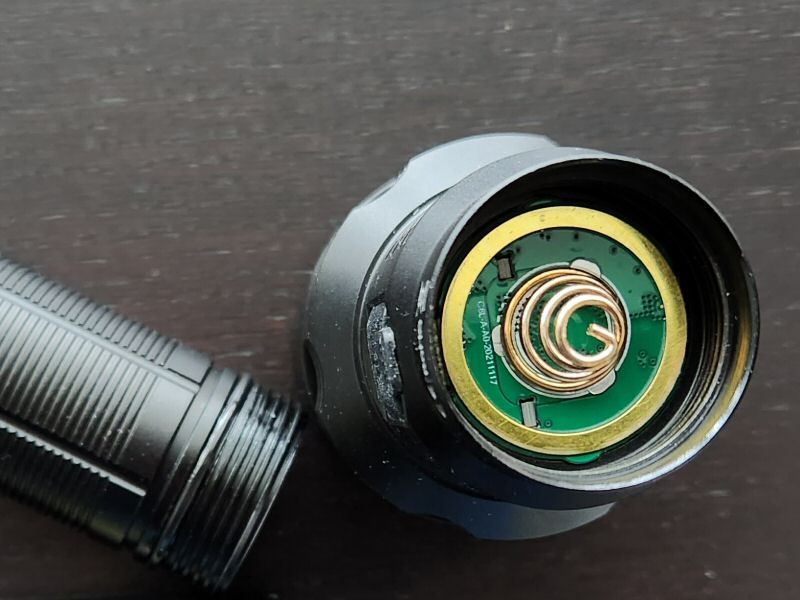
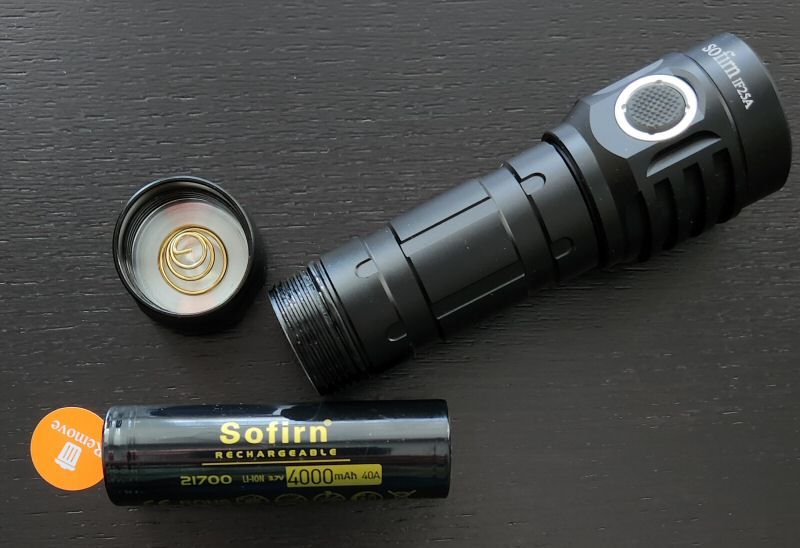
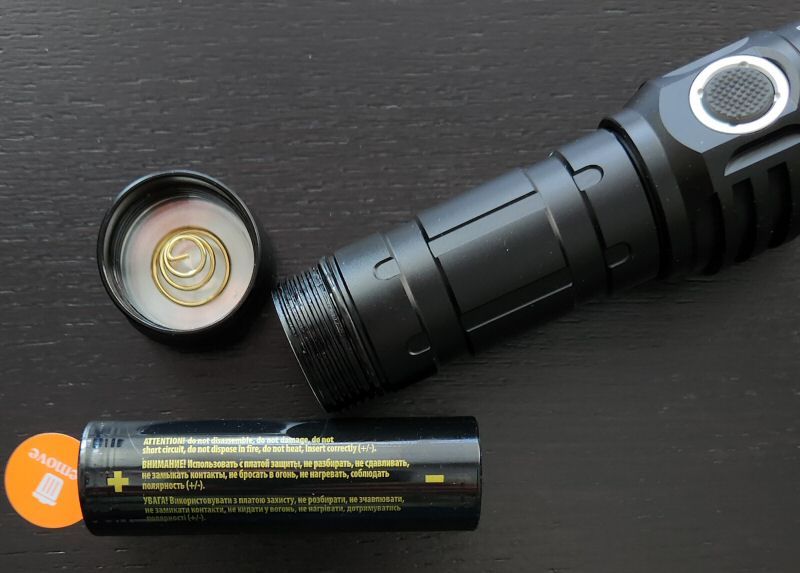
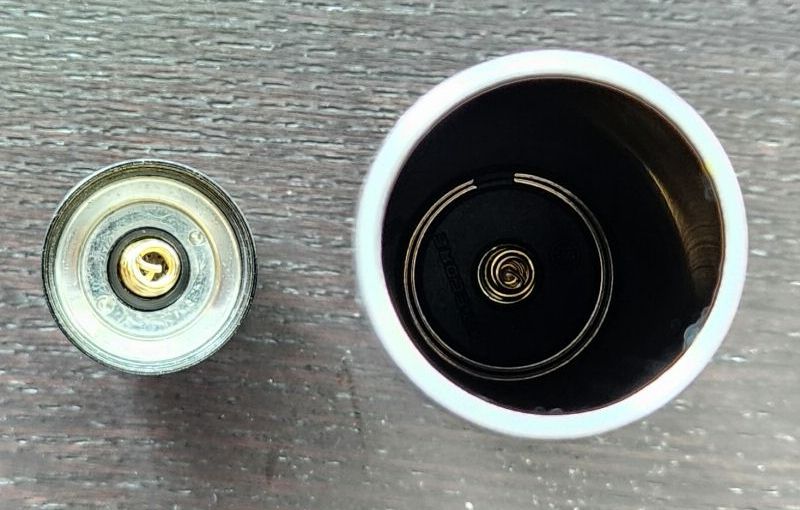
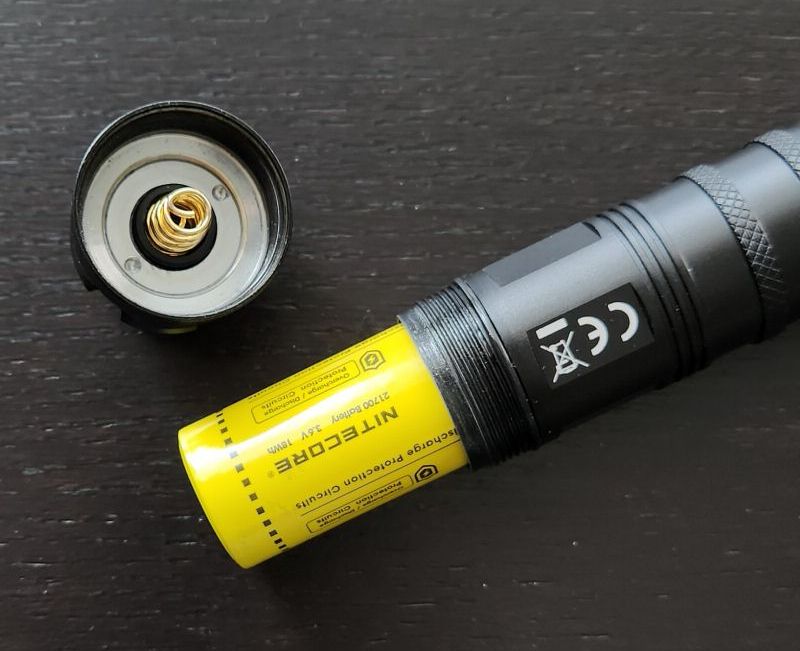
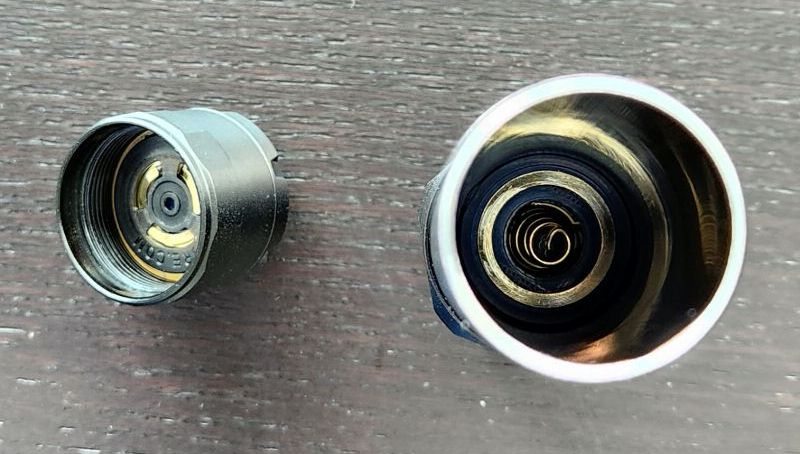
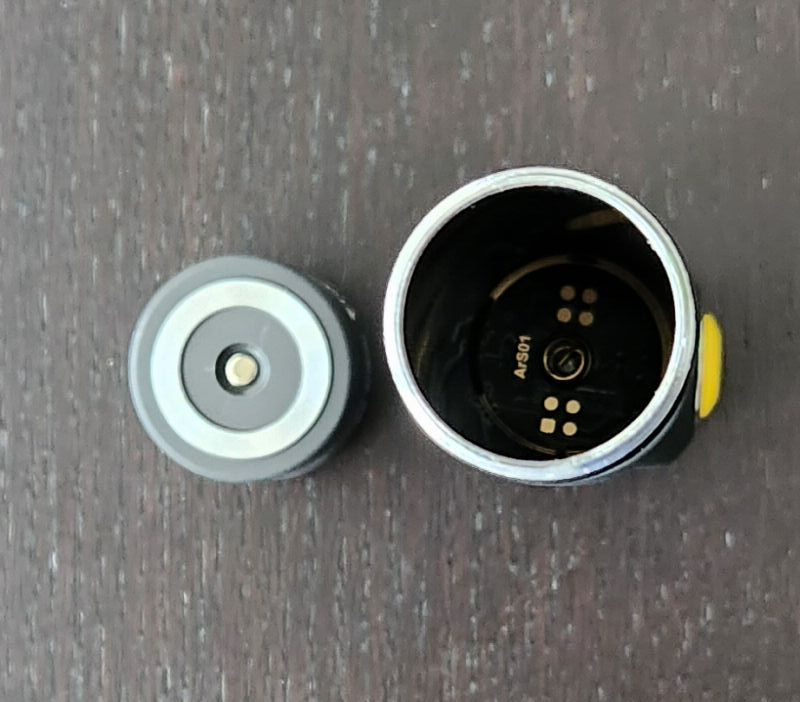
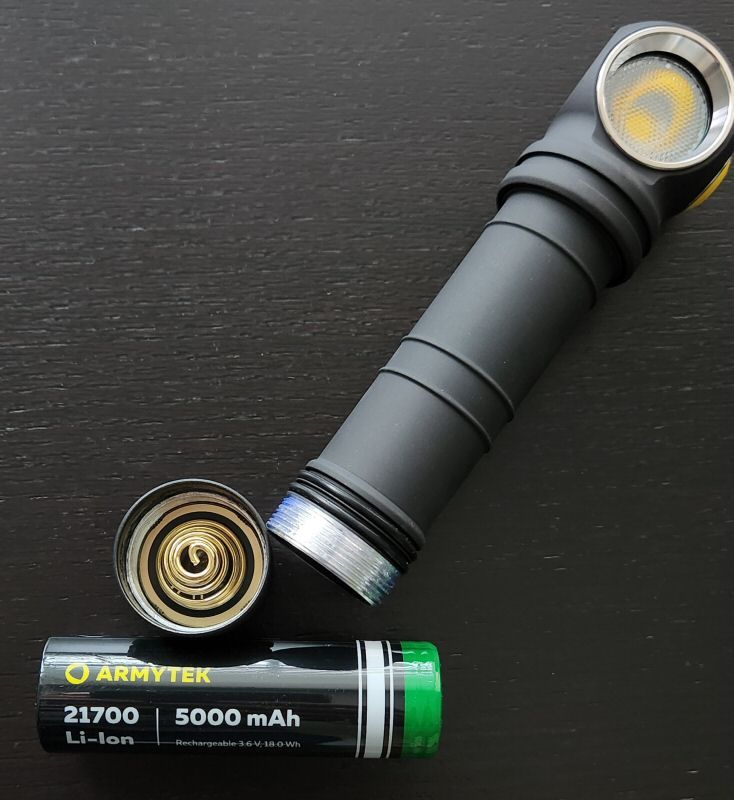
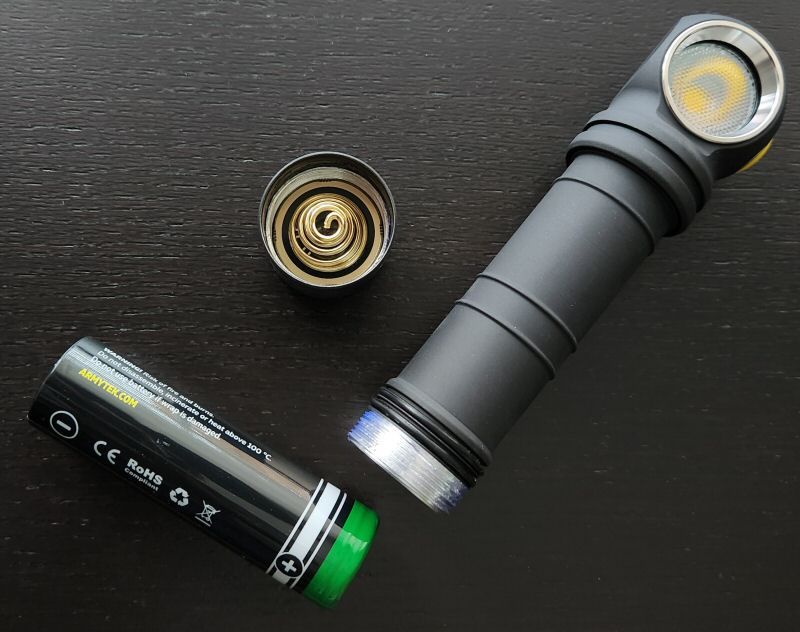
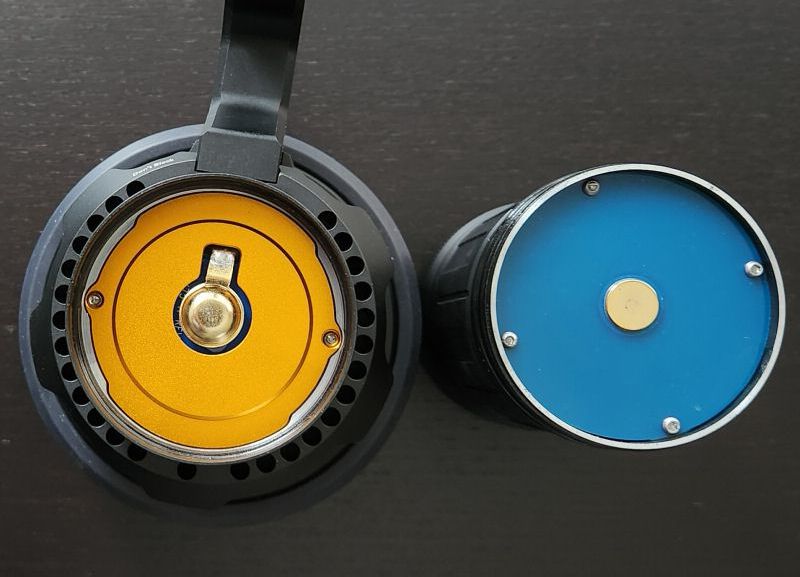
As you can see above, there are springs in both the tail and the head, ensuring the cell is held securely in place.
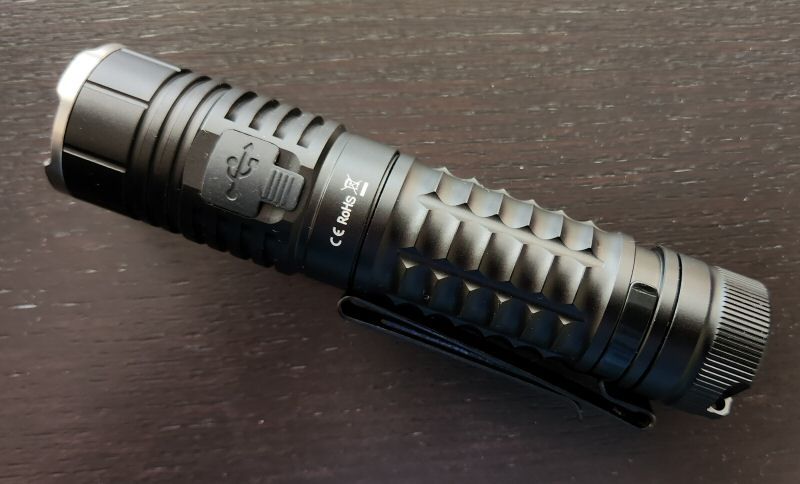
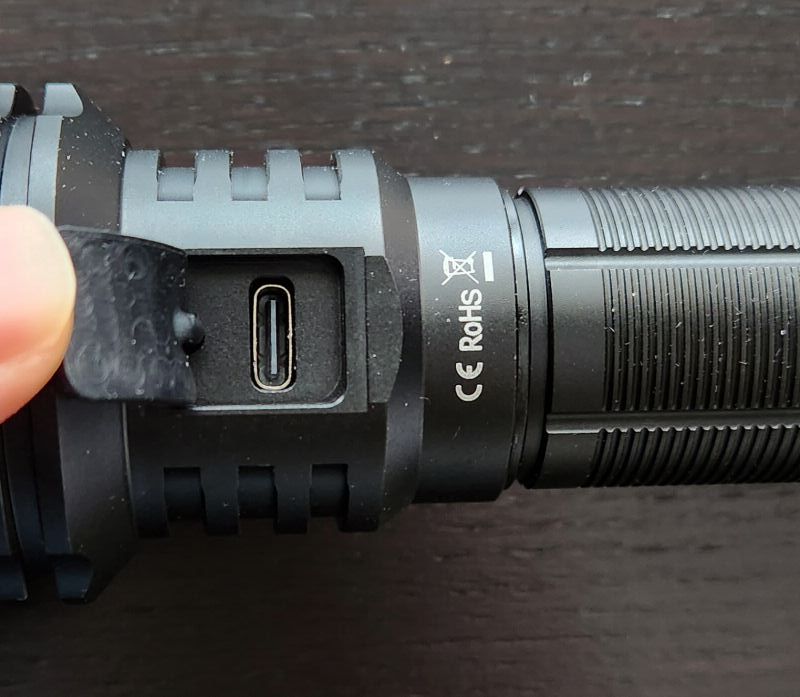
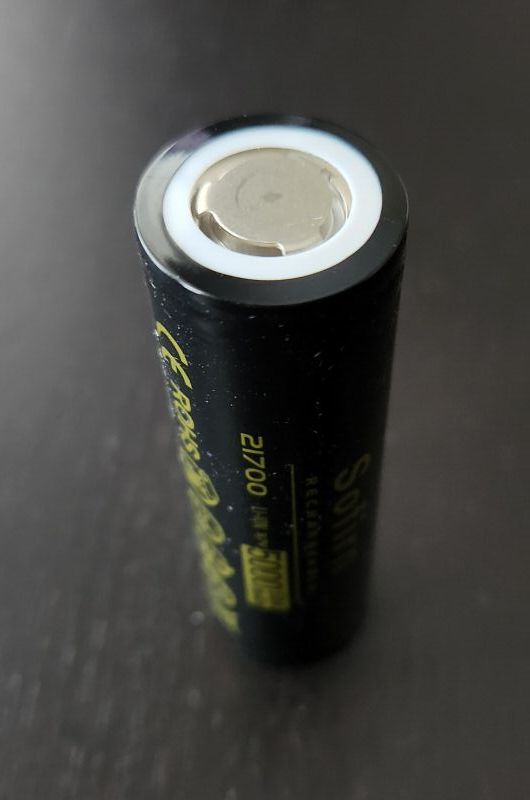
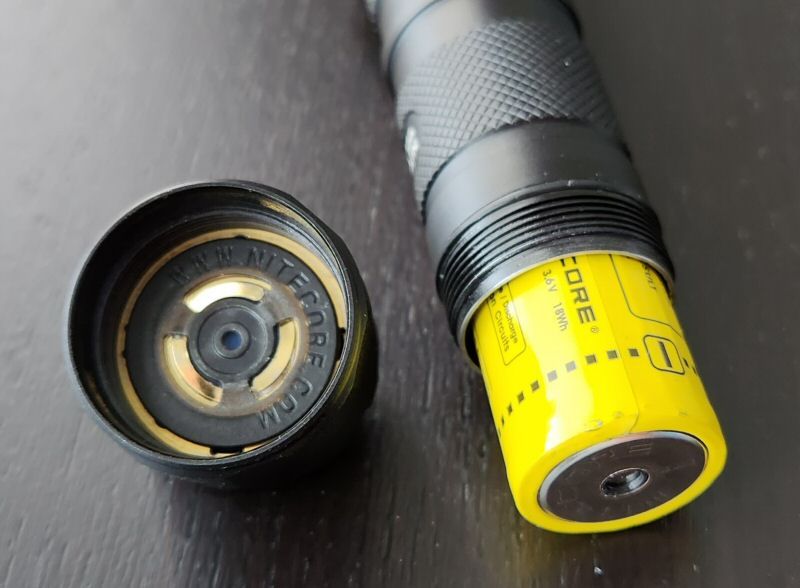
Like the P20iX, the dual switch arrangement in the tailcap requires a double-walled tube connecting the tailcap to the head (i.e., one to the carry the current, one to allow signalling). Unlike the P20iX though, no proprietary cell is needed – because the charging circuit is built into the battery, instead of the flashlight. Like the Acebeam E70, simply remove the 5100mAh cell and charge it through the USB-C port directly on its positive terminal. And special bonus, no need to worry about the waterproofness of a built-in charging dock on this light.
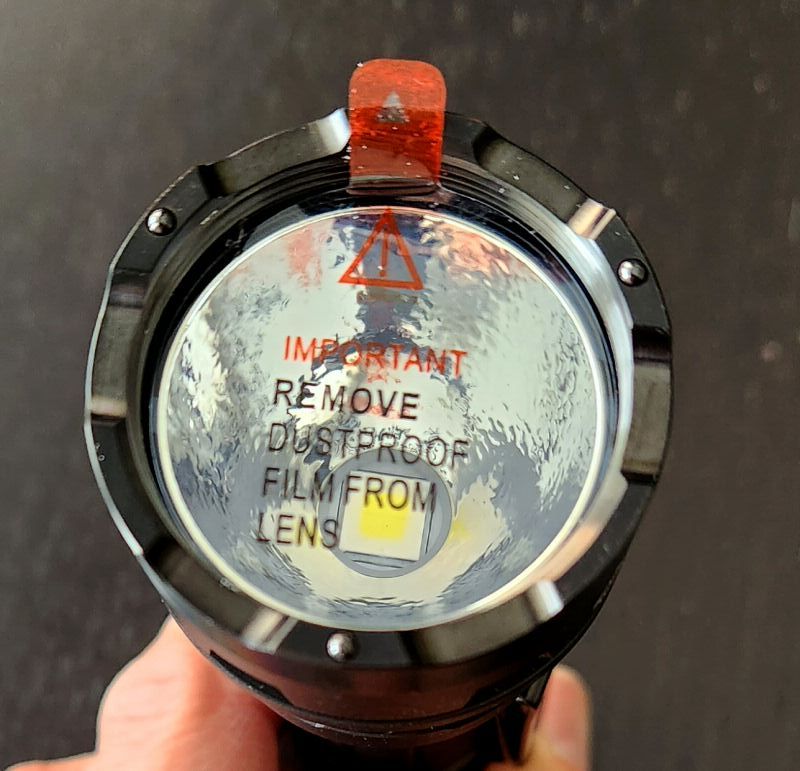
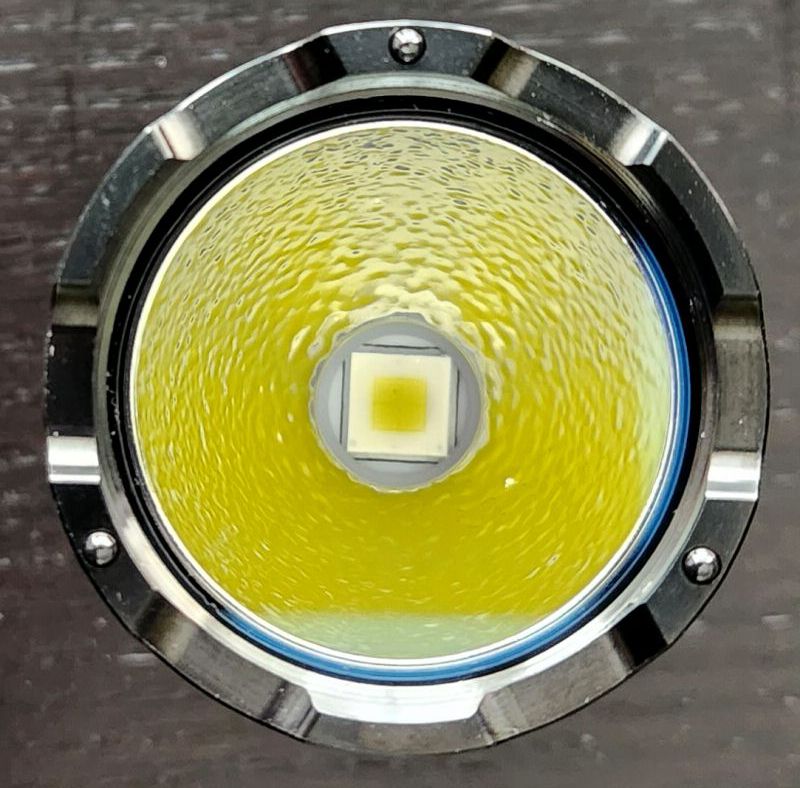
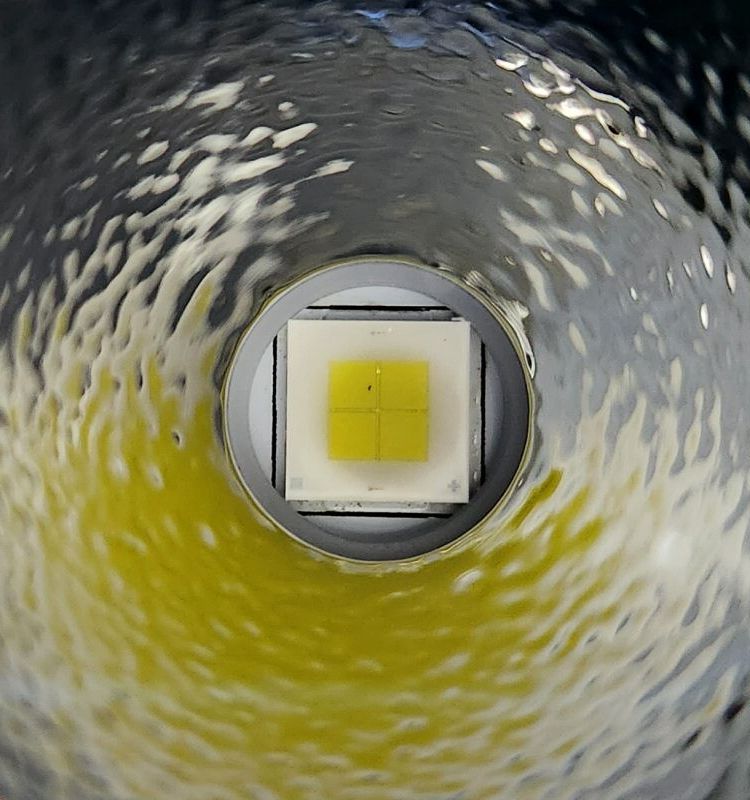
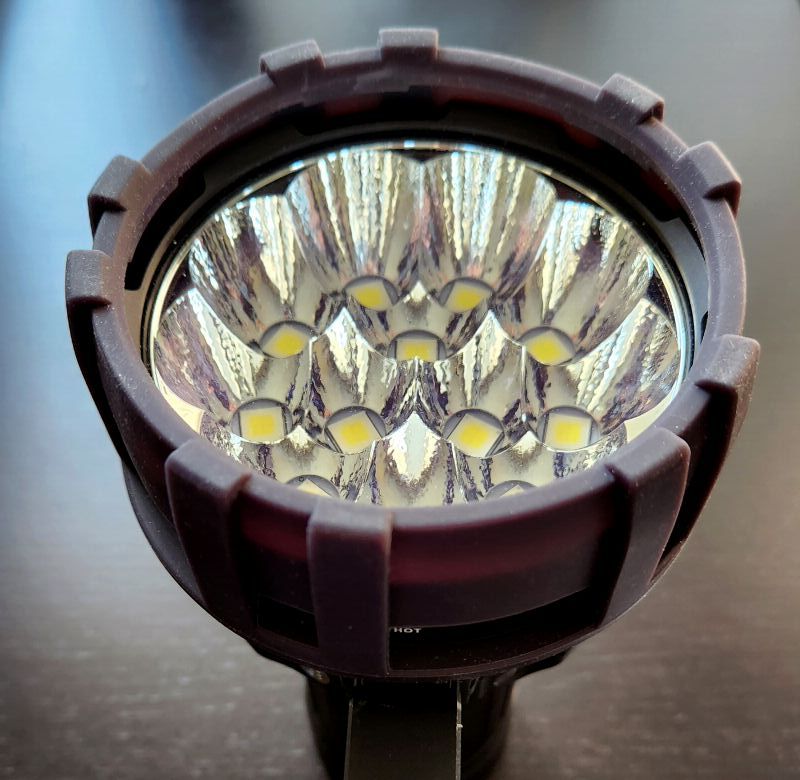
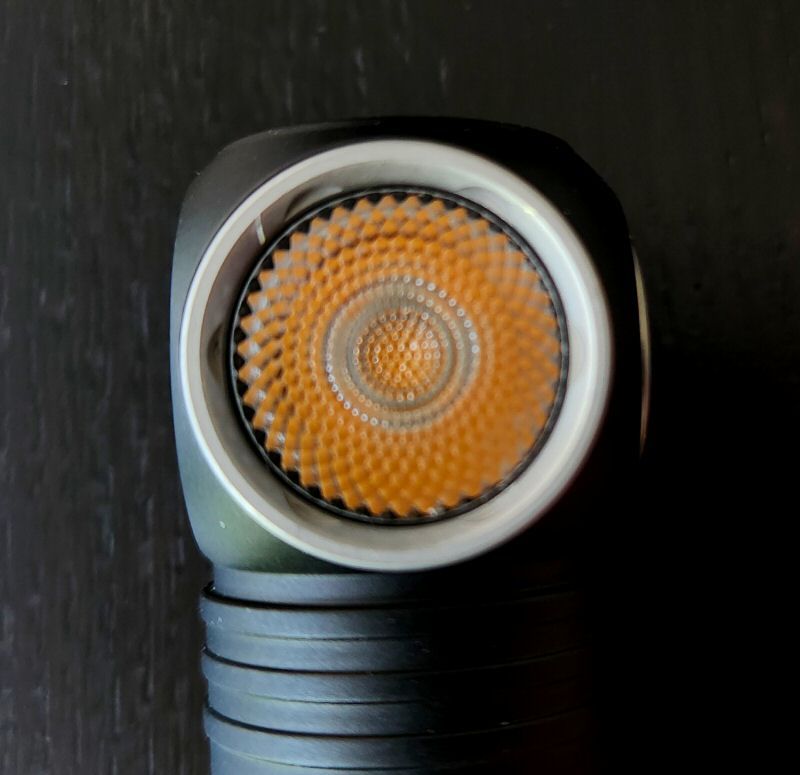
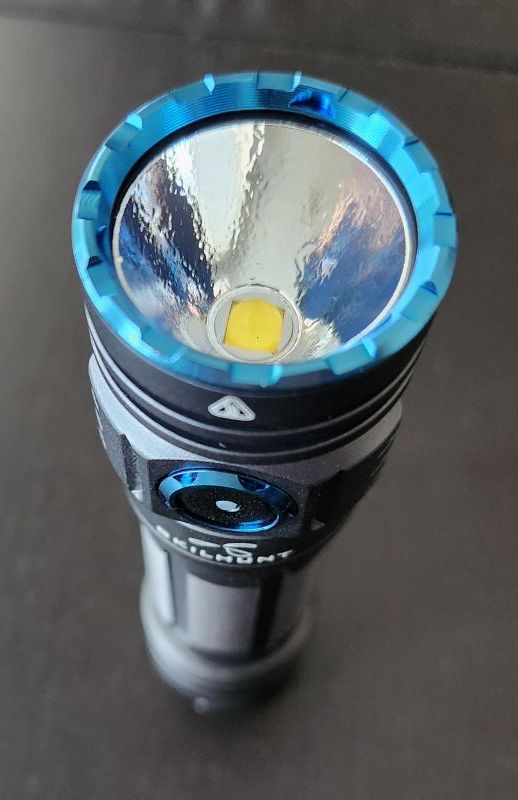
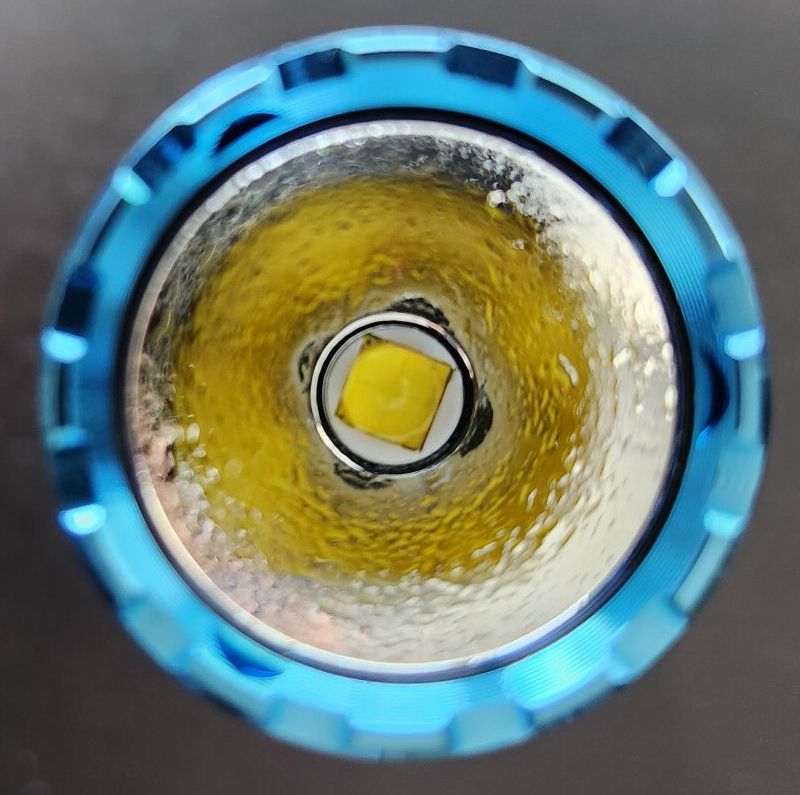
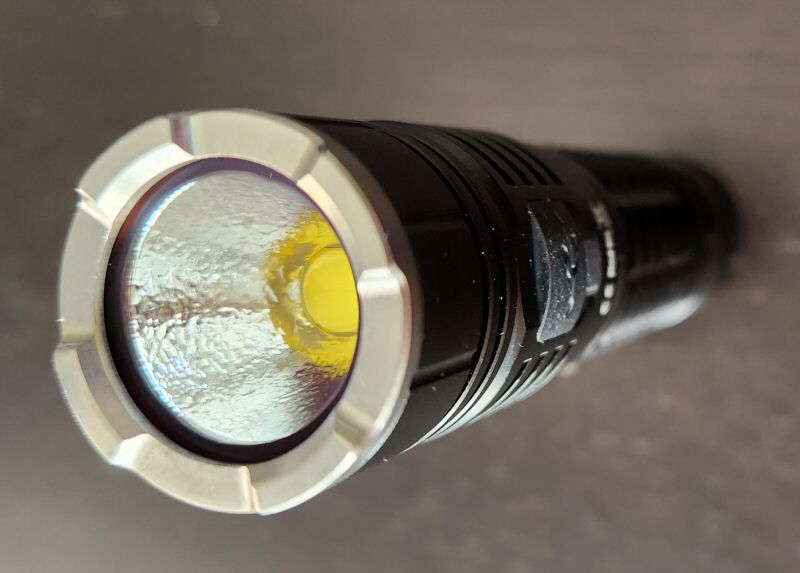
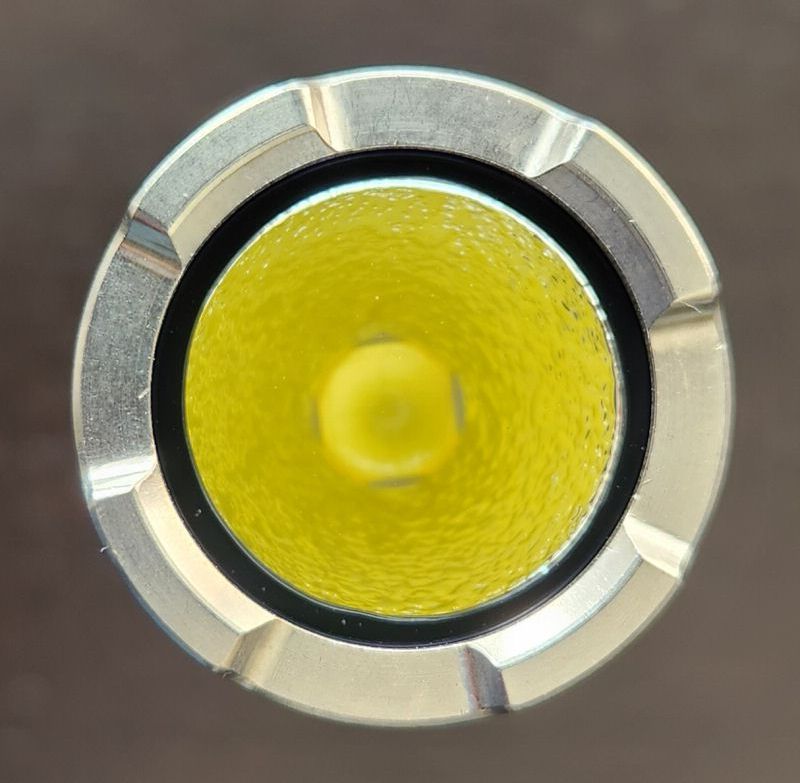
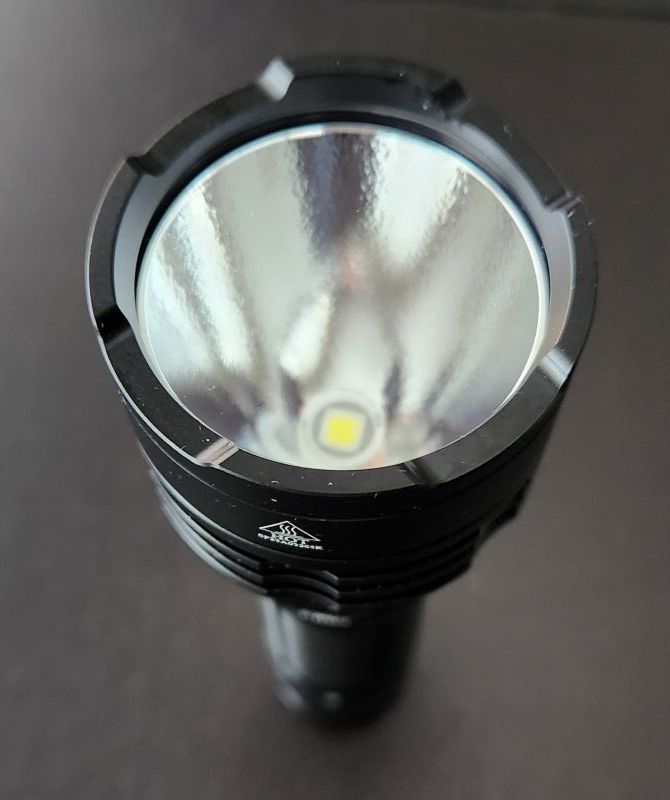
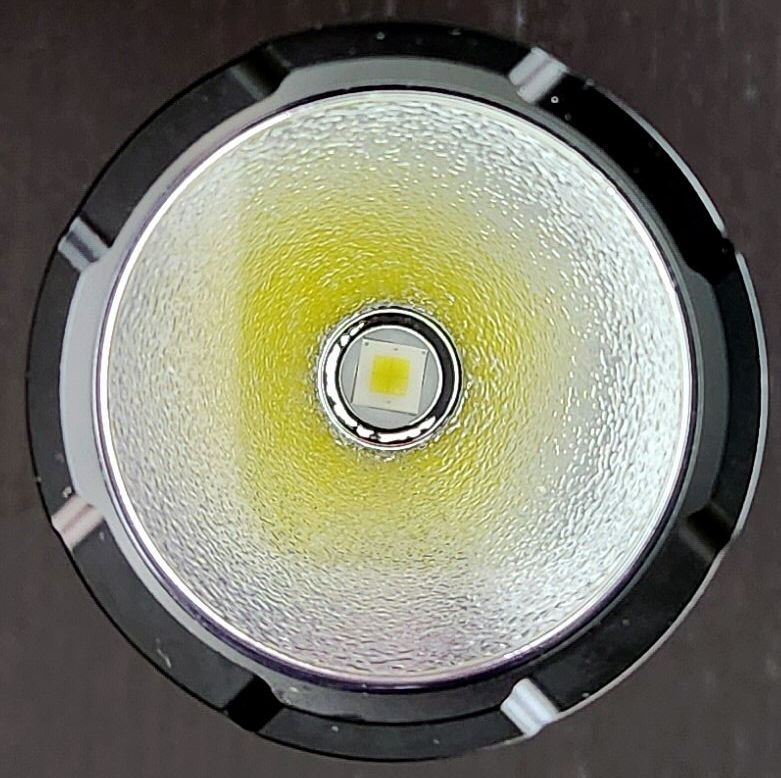
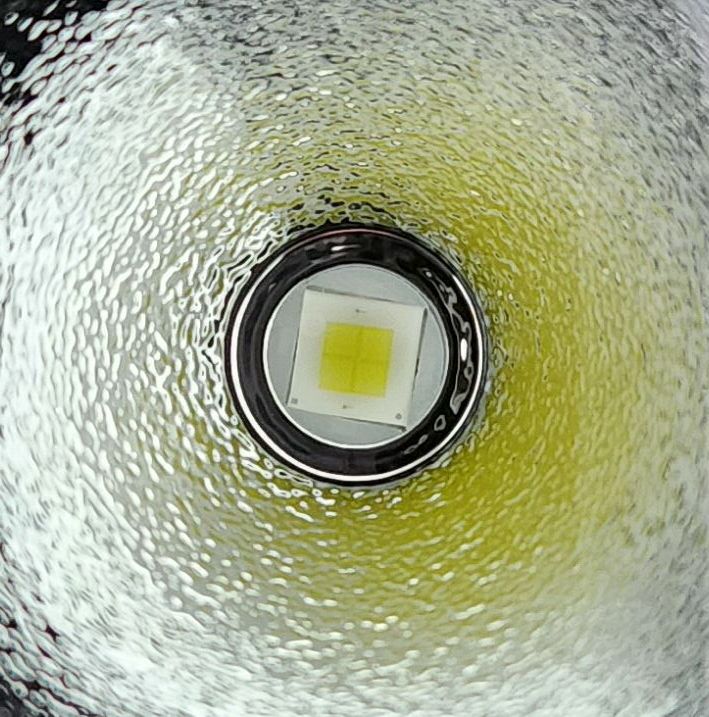
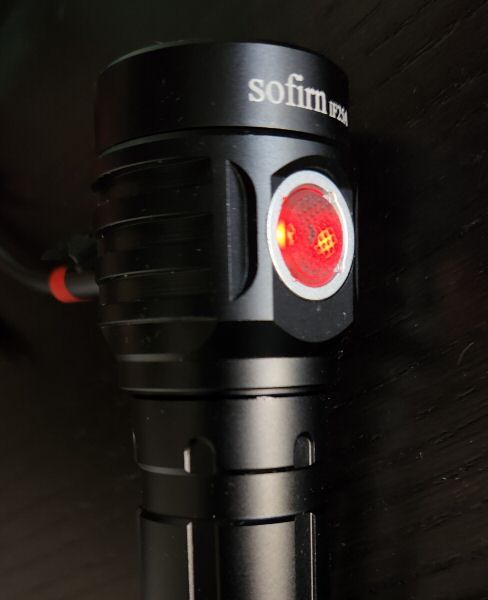
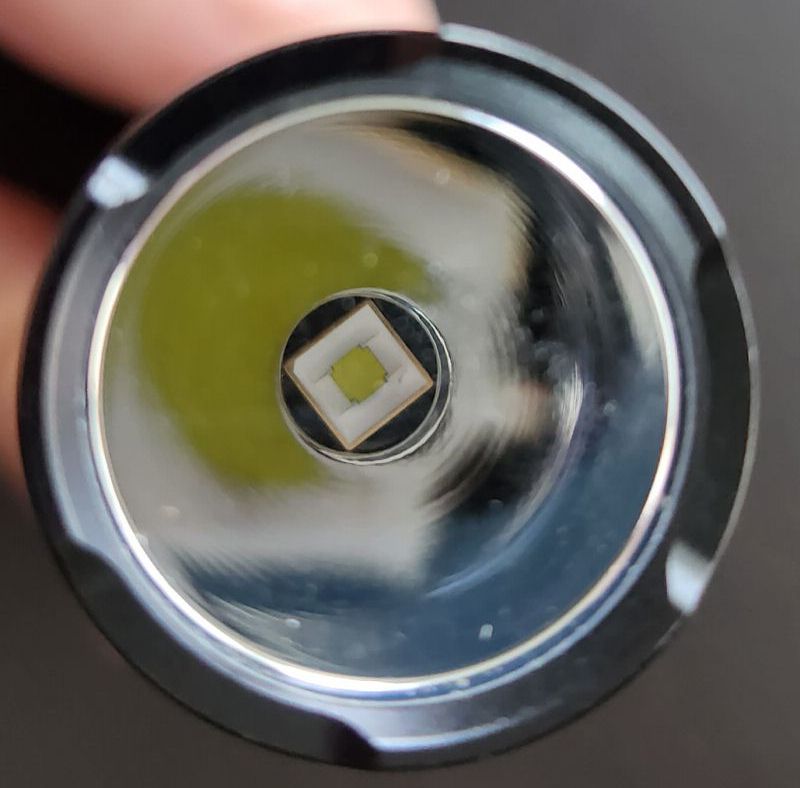
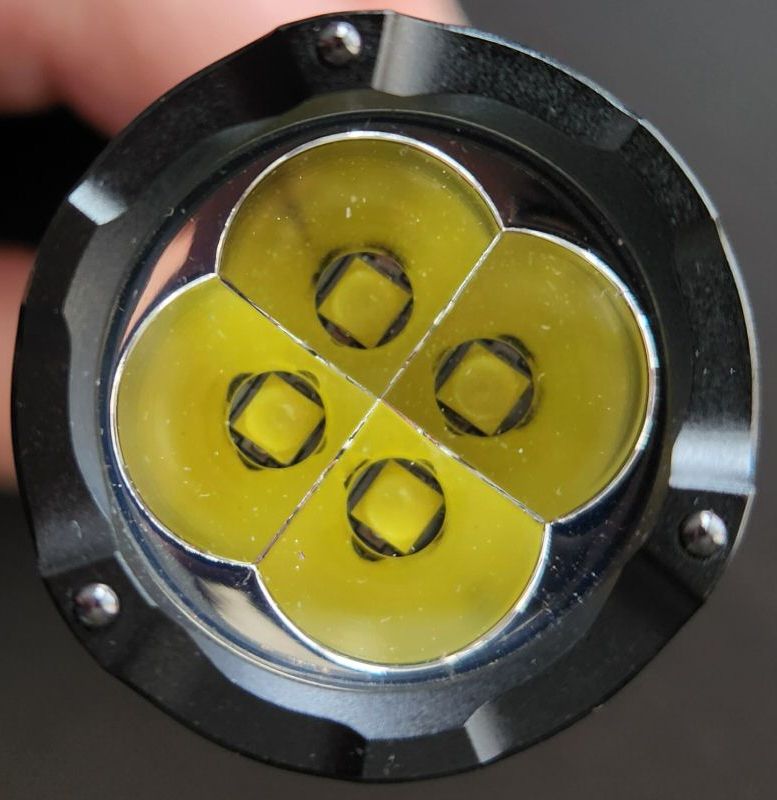
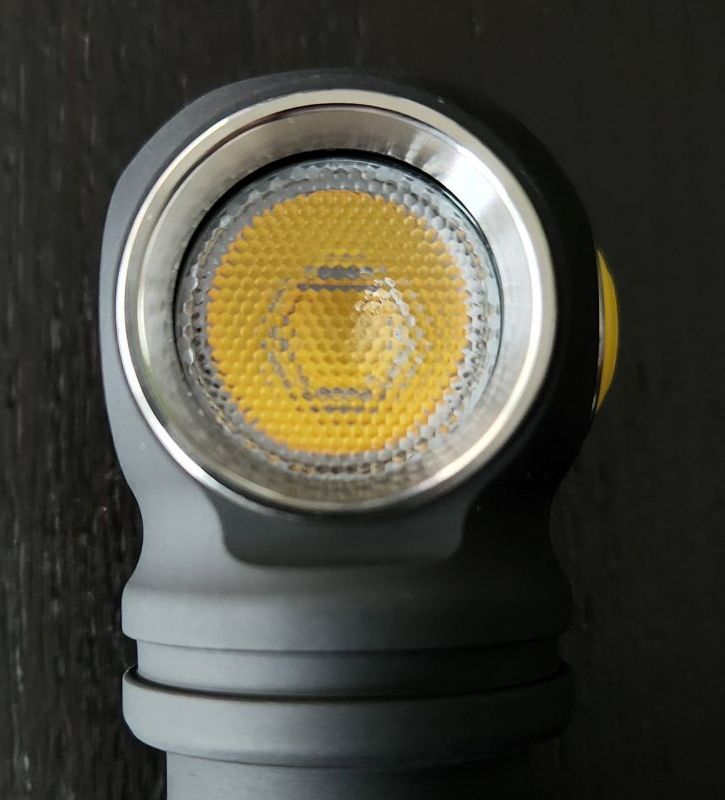
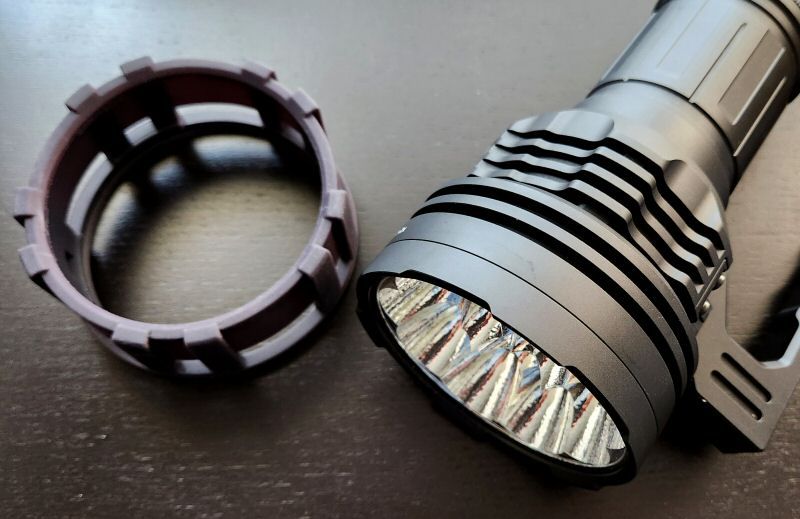
The P17 comes the low-profile XHP70.3 HI emitter, which I prefer over the domed 70.2 HD emitters as it shows far less chromatic aberration (and has slightly better throw). As you can see above, there seems to be a small speck on the flat emitter dome in my sample, but it is not affecting the beam. The reflector is moderate orange peel (OP), to help minimize chromatic variation. I don’t notice any significant colour temperature/tint shifting across the beam – which is rather throwy thanks to the large head (scroll down for emitter measures and beamshots). There is a mild greenish anti-reflective (AR) coating on the lens (which I prefer).
The stainless steel bezel has relatively mild crenelations, but with an unusual feature – 3 integrated round beads of high-strength silicon nitride ceramic on the protruding ends. This allows it to be used as a strike bezel, for example to break glass. At the same time, these beads are rounded, so it won’t rip a hole in your clothing (much appreciated), and still allows the light to headstand. Thanks to the crenelations and beads, you can tell if the light is on when headstanding.
User Interface
The P17 has three available mode sets, referred to as Daily Mode, Tactical Mode, and Special Mode. Unfortunately, some of the mode and level instructions in the manual are not clear, so I will describe everything in detail below. But first, I will explain how you switch between them.
Mode Switching (between Daily, Tactical and Special modes)
- From Off, press-and-hold down the Function switch for at least 3 secs
- Without releasing the Function switch, click the Tactical switch.
- Release the Function switch. Light enters “breathing mode” while it waits for you to select the Mode set (the main LED has a slow fade-in and fade-out repeatedly, which looks like “breathing” – to be honest, I find it rather relaxing).
- Click the Function switch to advance through the three mode settings, which are identified as follows:
- Strobe – Tactical mode (also called “Tactical Mode 1” in the manual)
- High level – Special mode (also called “Tactical Mode 2”)
- SOS – Daily mode
- Click the Tactical switch to turn off and accept the mode setting.
And now, here is what you get with each of the three mode sets:
Daily Mode (available levels: Ultra-Low, Low, Med, High, Turbo, SOS)
Daily Mode, from OFF:
- Partial depress Tactical switch: Momentary On (i.e., turns Off when released).
- Single-click Tactical switch: Turns On in last memorized mode used.
- Press-and-hold Function switch: Momentary Ultra-Low. If you keep holding the switch down for >3 secs, it will stay locked On when you release the switch.
- Single-click Function switch: Nothing but a single flash of Ultra-Low (i.e., there is no single-click option – the Function switch acts as a momentary press-and-hold only, see above).
Daily Mode, from ON:
- Single-click Tactical switch: Turns Off
- Press-and-hold Function switch >1 sec: Turns on SOS.
- Single-click Function switch: Advances through modes in sequence from Low > Med > High > Turbo.
Tactical Mode (available levels: Low, Med, Hi, Turbo, Strobe)
Tactical Mode, from OFF:
- Partial depress Tactical switch: Momentary On in last memorized constant output mode.
- Single-click Tactical switch: Turns On in last memorized constant output mode.
- Press-and-hold Function switch: Momentary Strobe. If you keep holding the switch down for >3 secs, it will stay locked On when you release the switch.
- Single-click Function switch: Nothing but a single flash of Strobe (i.e., there is no single-click option – the Function switch acts as a momentary press-and-hold only, see above).
Tactical Mode, from ON:
- Single-click Tactical switch: Turns Off.
- Press-and-hold Function switch >1 sec: Turns On Strobe.
- Single-click Function switch: Advances through modes in sequence from Low > Med > High > Turbo.
Special Mode (available levels: Ultra-Low, Low, High)
Special Mode, from OFF:
- Partial depress Tactical switch: Momentary On at High level.
- Single-click Tactical switch: Turns On at High level.
- Press-and-hold Function switch: Momentary On at High level. If you keep holding the switch down for >3 secs, it will stay On when you release the switch.
- Single-click Function switch: Nothing but a single flash of High (i.e., there is no single-click option – the Function switch acts as a momentary press-and-hold only, see above).
Special Mode, from ON:
- Single-click Tactical switch: Turns Off.
- Press-and-hold Function switch: Nothing, except when you release the switch it advances you through modes as explained below (i.e., there is no press-and-hold option in this mode, just a click option).
- Single-click Function switch: Advances though modes as follows: High > Low > Ultra-Low.
Short-cuts:
- To Ultra-Low: In Daily mode, press-and-hold or click the Function switch from Off.
- To Hi: In Special mode, press-and-hold Function switch from Off, or click the tactical switch from Off.
- To Strobe: In Tactical mode, press-and-hold Function switch from Off.
- To SOS: In Daily mode, press-and-hold Function switch from Off.
Mode memory:
Yes, but only in Daily Mode and Tactical Model, for constant output levels (i.e., Strobe and SOS are accessed by the Function switch). There is no memory for the Special Mode, which always activates in High.
Strobe/Blinking modes:
Yes, for Strobe and SOS – but they are located on separate Mode sets.
Low voltage warning:
Yes. As the battery drains, the light steps down in levels. Once the light reaches the Low level, the main LED starts to flash 3 times every 30 secs.
Lock-out mode:
Yes, but only by physically locking out the light at the tailcap.
Reviewer Comments:
There are a few surprising quirks with this triple-mode interface.
First off, it seems odd that a “tactical” light has no dedicated mode option (or even a short-cut) to jump to Turbo (just the High level, in the Special mode set). But this might become somewhat clearer when you check out the runtimes below. In any case, you can access Turbo by cycling through the main sequence in Daily mode or Tactical Mode – and have the light memorize this choice.
Personally, I plan to use this light in Daily Mode exclusively, as this is that the mode set with access to widest range of levels (i.e., everything except Strobe).
That said, I’m not crazy that the Function switch works differently depending on whether the light is On or Off. Furthermore, it’s odd that the various Modes sets are inconsistent in this regard – that is, when the Function switch acts as a clicky (typically only when On), or when it acts as press-and-hold (always when Off, sometimes when On). Specifically, the Daily and Tactical Mode sets assign a special function to a press-and-hold when On (SOS or Strobe, respectively), but Special Mode doesn’t (i.e., just acts like a long click). They might as well have put a Beacon option in Special mode, just for the sake of consistency if nothing else. Indeed, I would have preferred a Beacon option in Daily mode, as I’ve always found SOS a bit silly (but it does a similar enough job).
I certainly like that the Daily mode gives an option to activate from Off into Ultra-Low – I always look for a way to jump to that mode from Off. And quirks aside, I do like having a physical forward clicky back as the main switch – call me old-school.
Circuit Measures
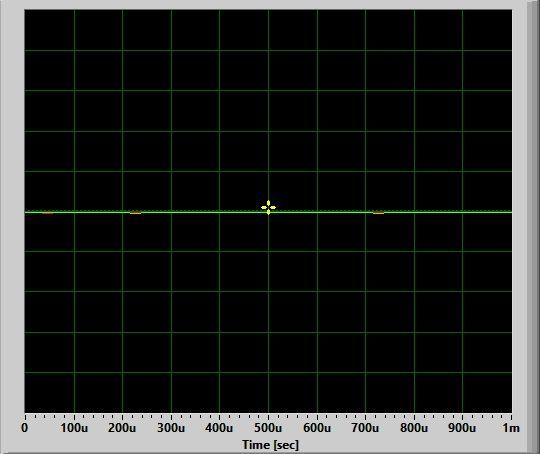
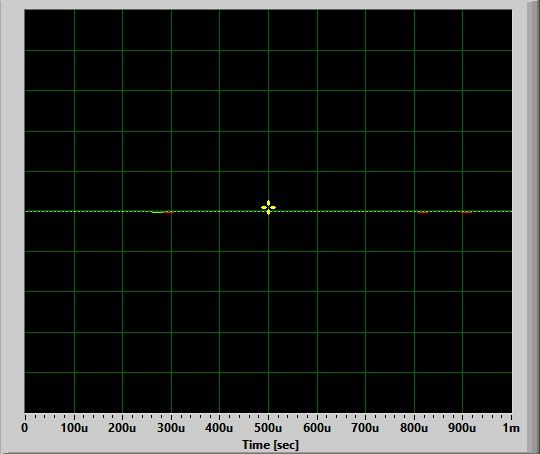
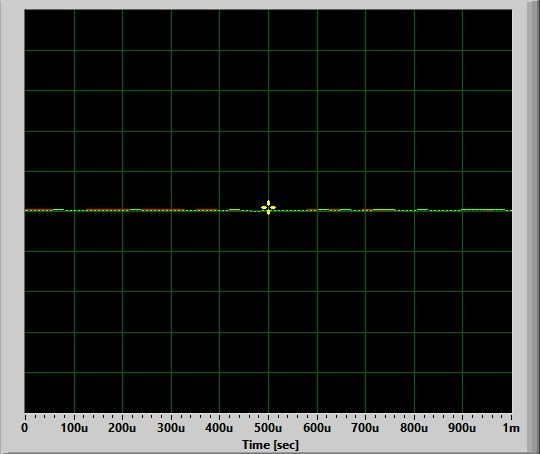
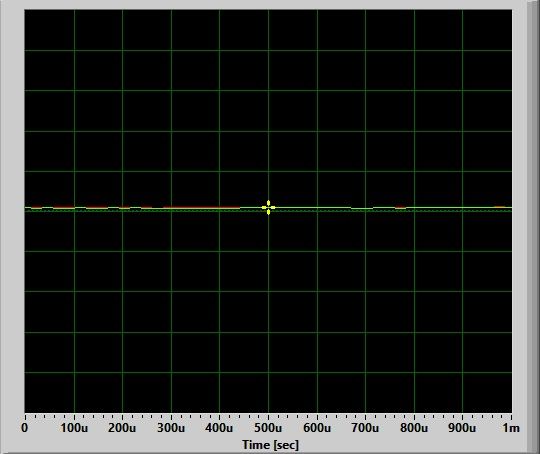
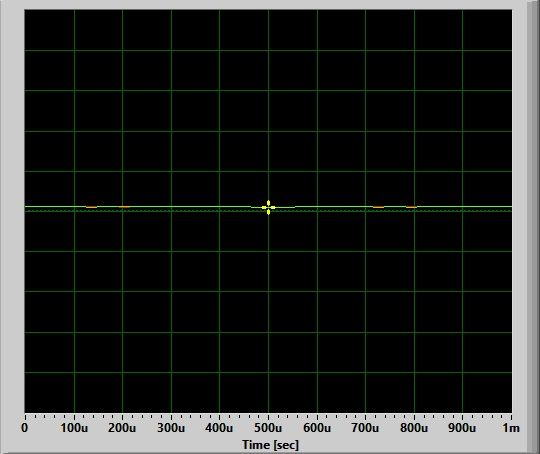
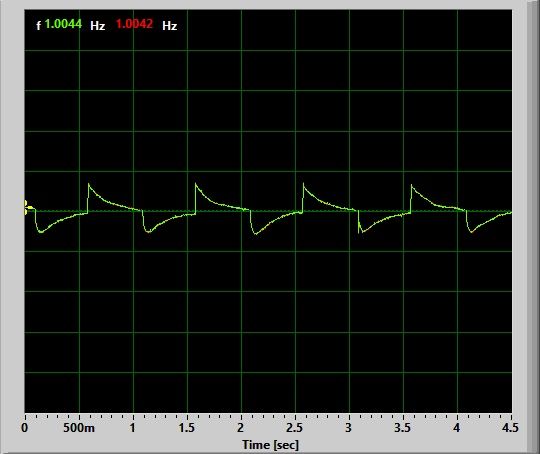
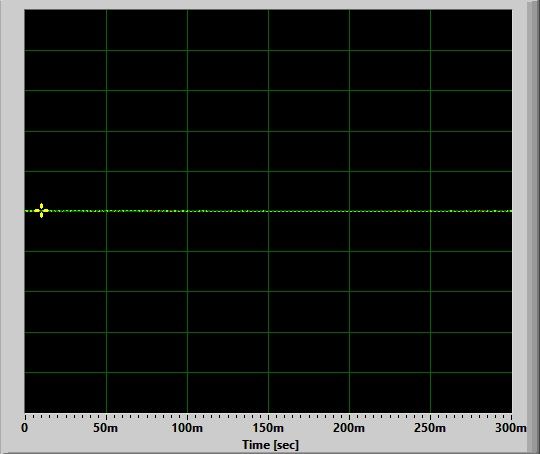
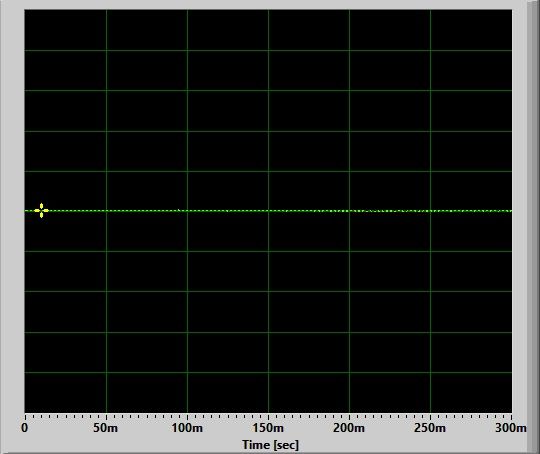
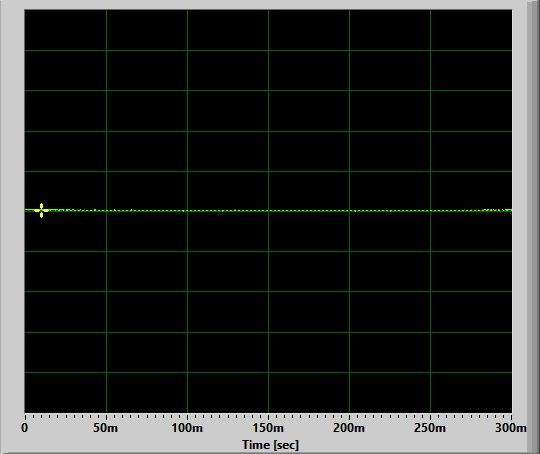
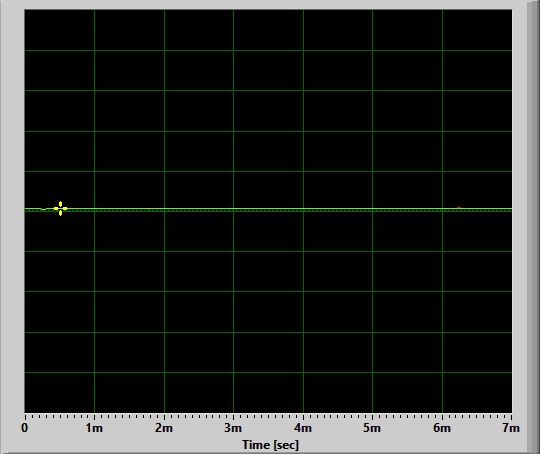
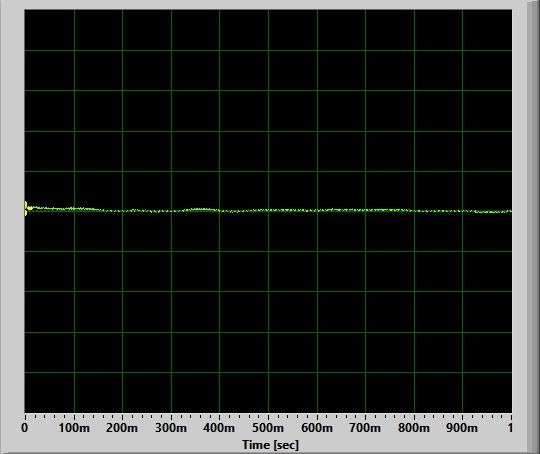
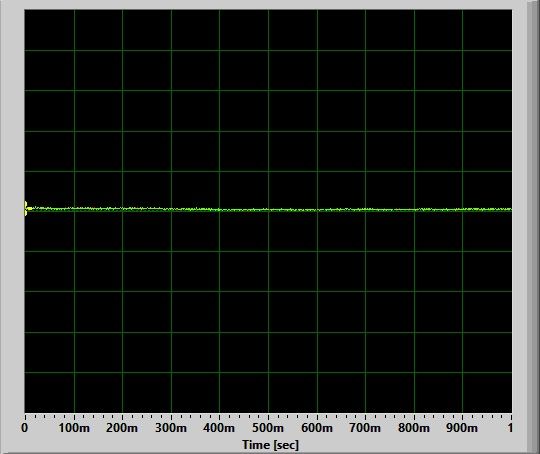
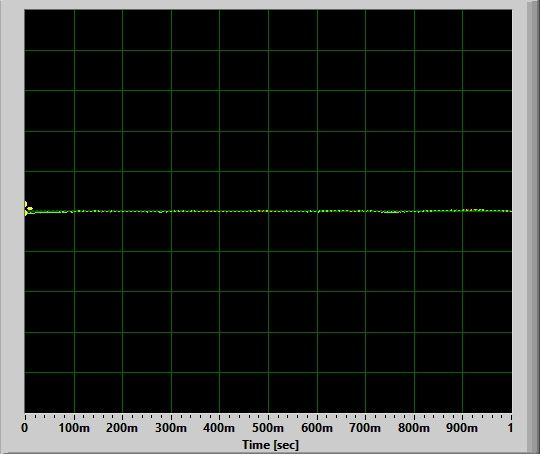
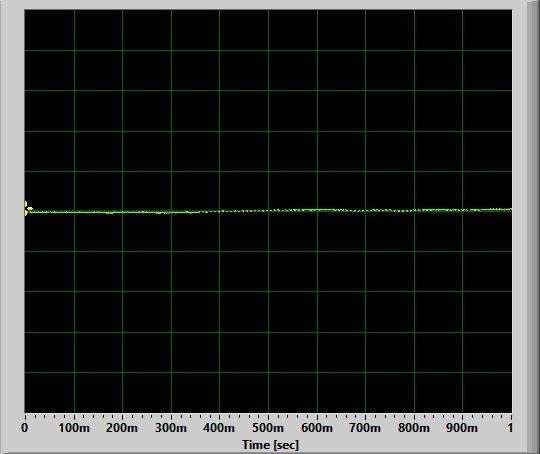
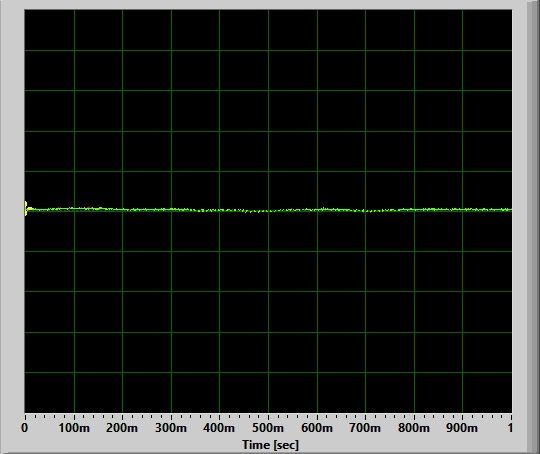
Pulse-Width Modulation (PWM):
Ultra-low:

Low:
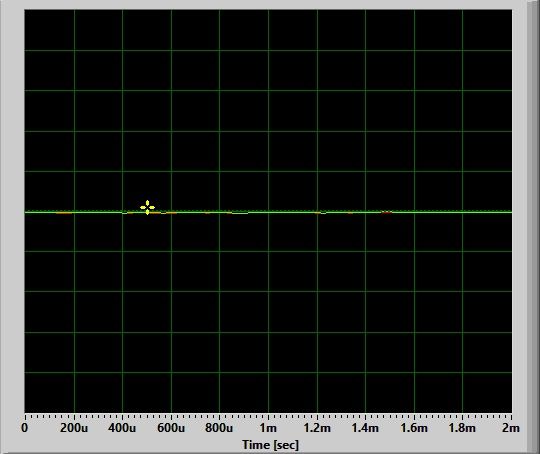
Medium:

Hi:

Turbo:

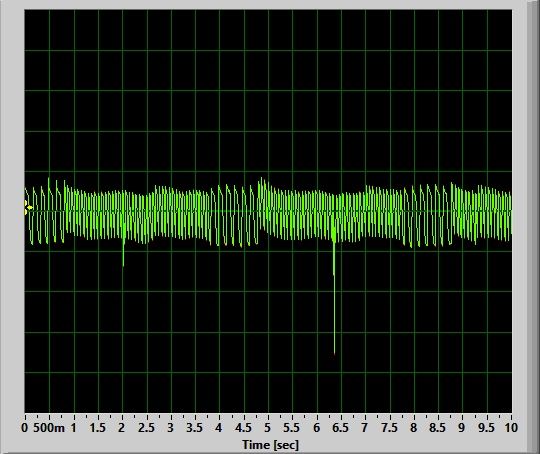
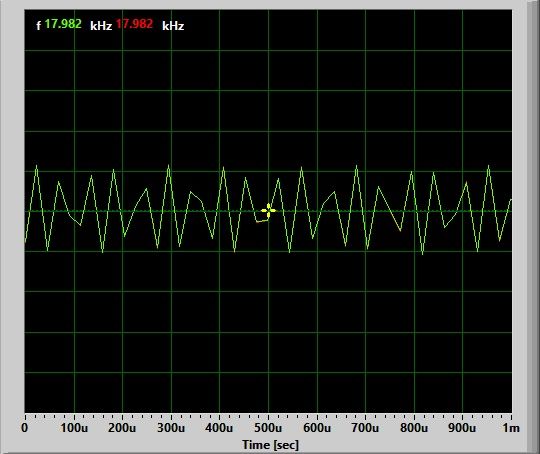
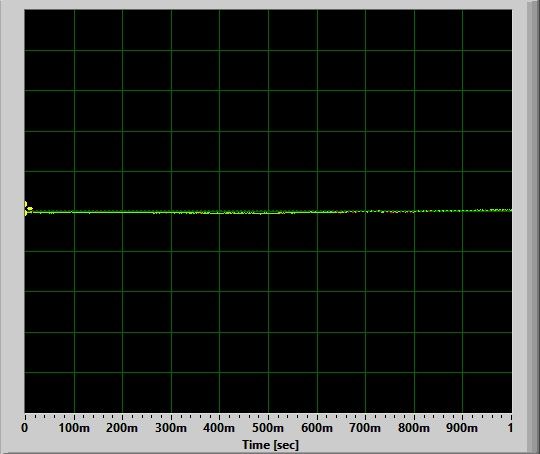
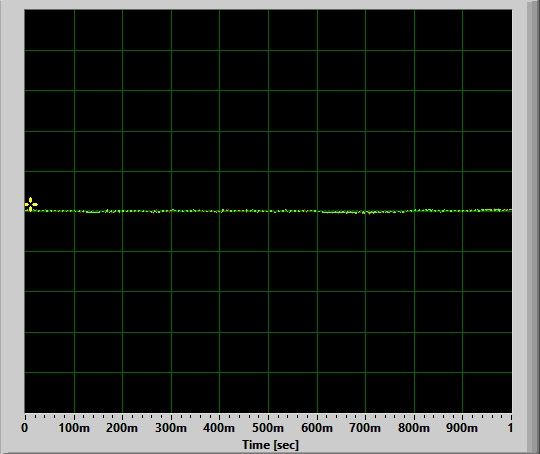
There is no sign of PWM on any level – the circuit appears to be fully current-controlled. This is also no sign of high-frequency noise at any level. This is refreshing – although PWM is very rare nowadays, it is not uncommon to see some (visually-undetectable) circuit noise.
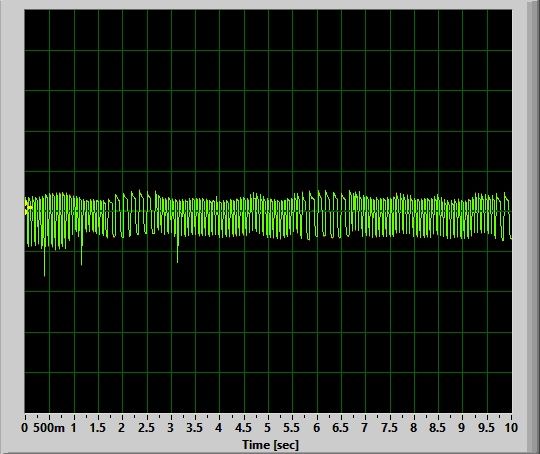
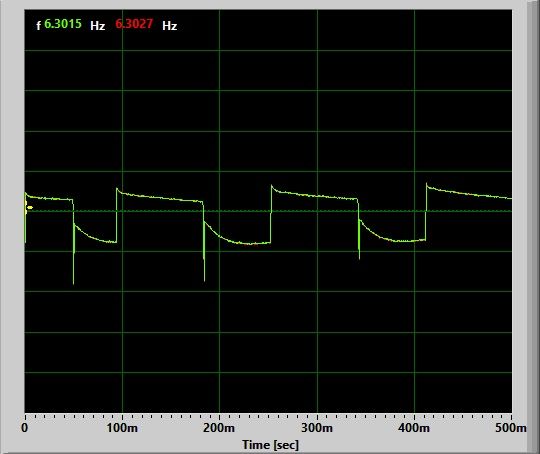
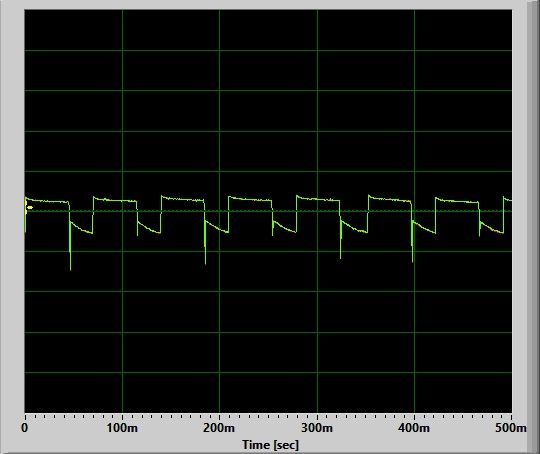
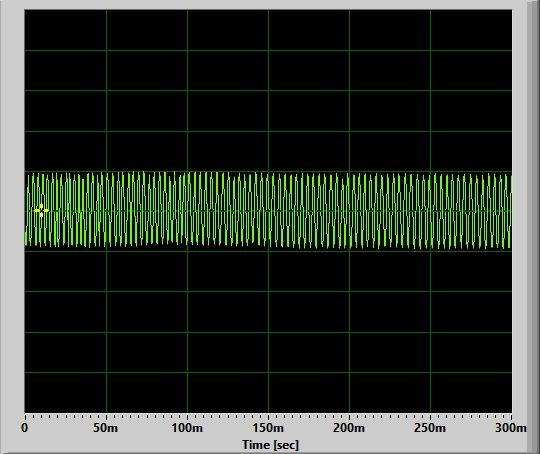
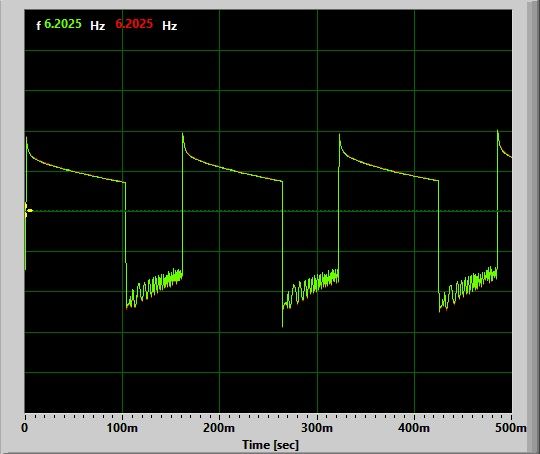
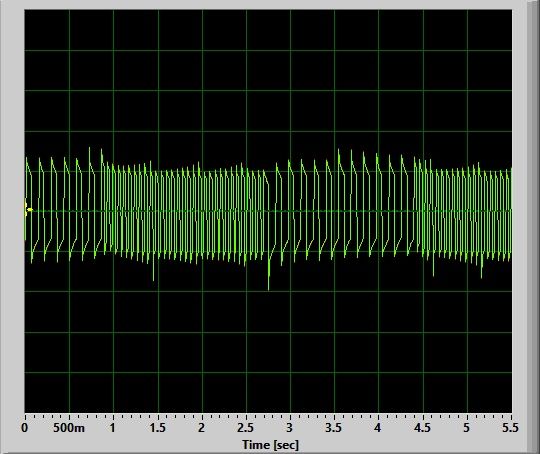
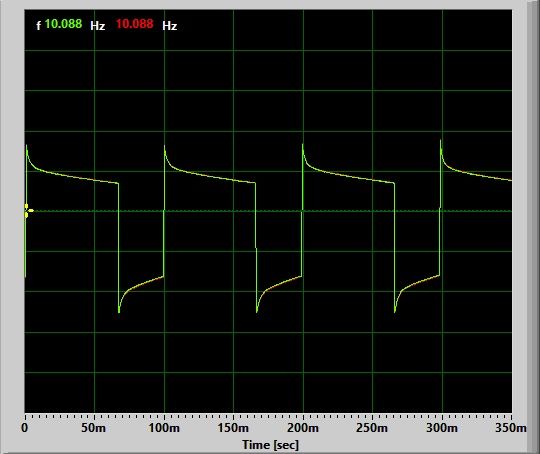
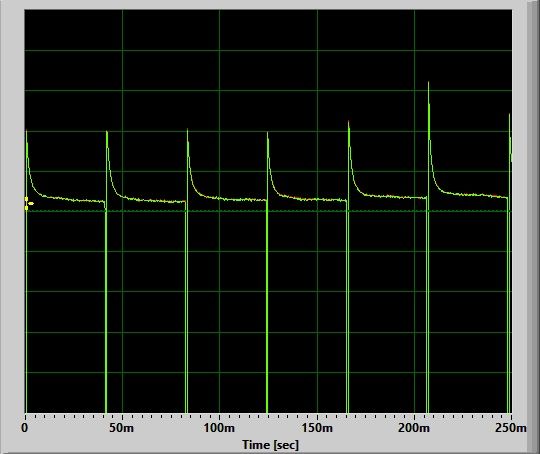
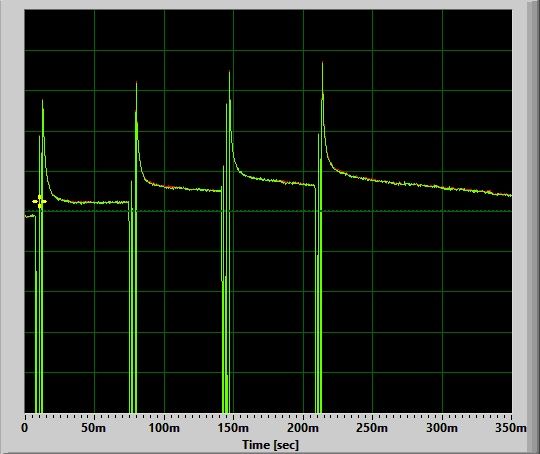
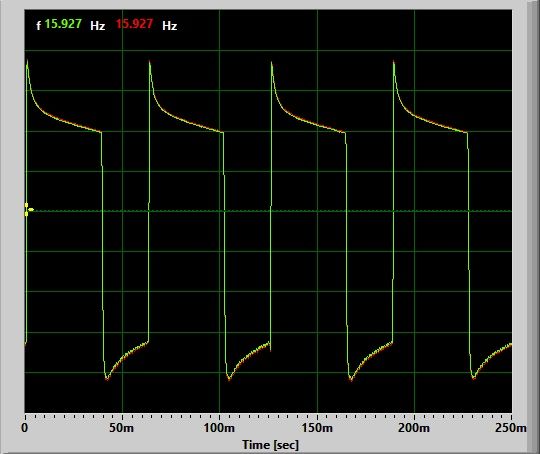
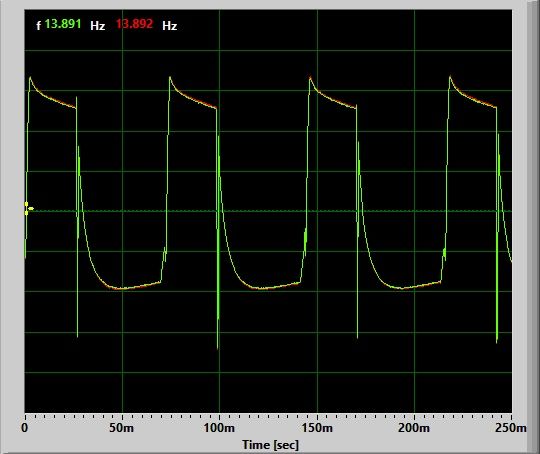
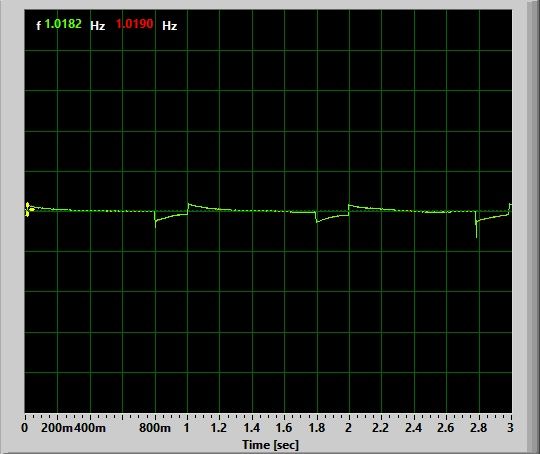
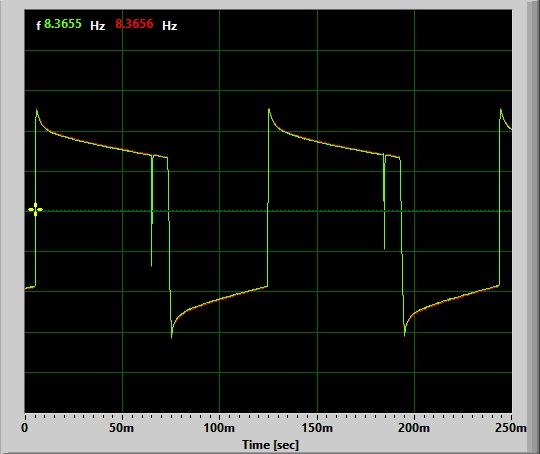
Strobes:
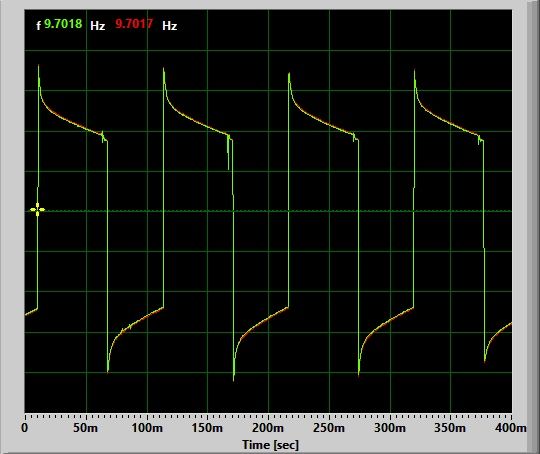
Strobe:
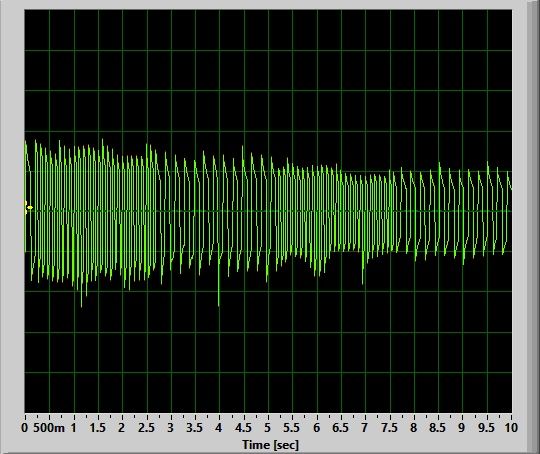
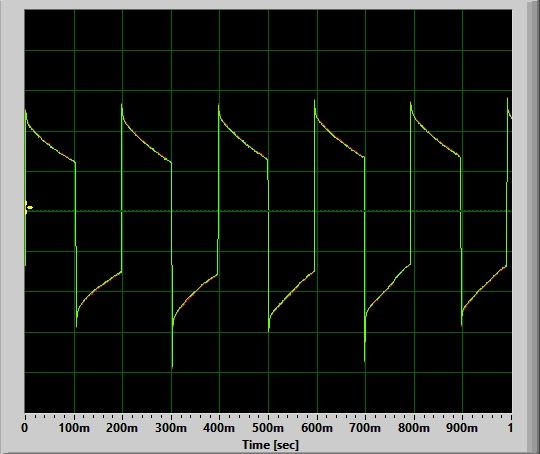
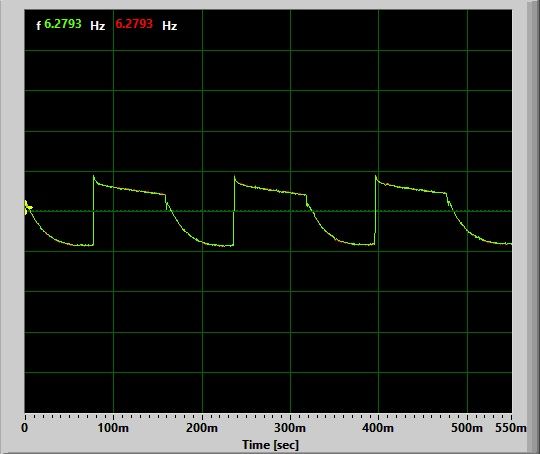
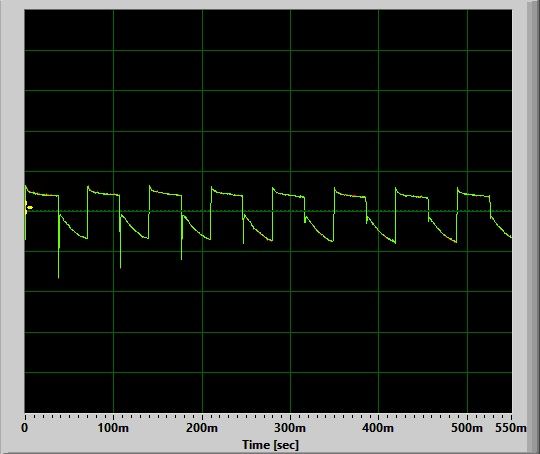
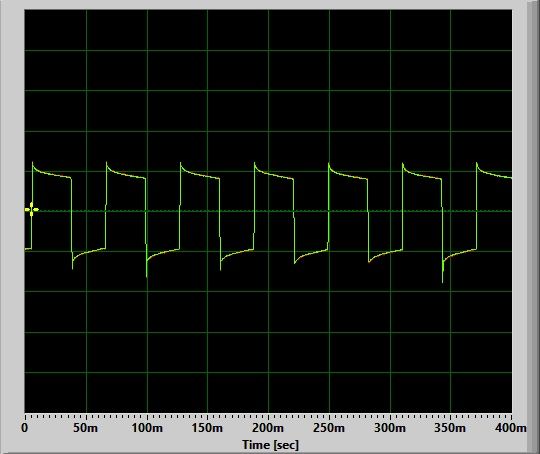
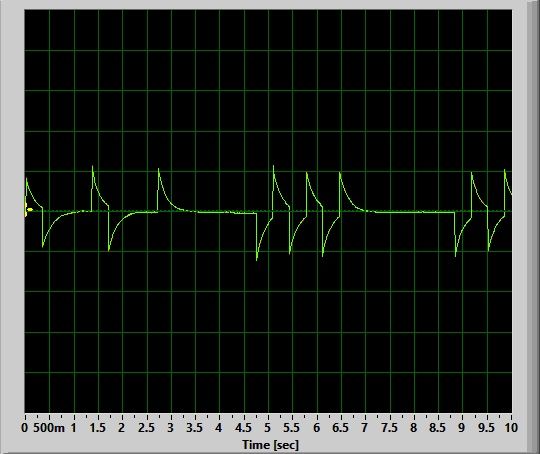
Strobe alternates between 5 Hz and 10 Hz strobes every 2.5 secs.
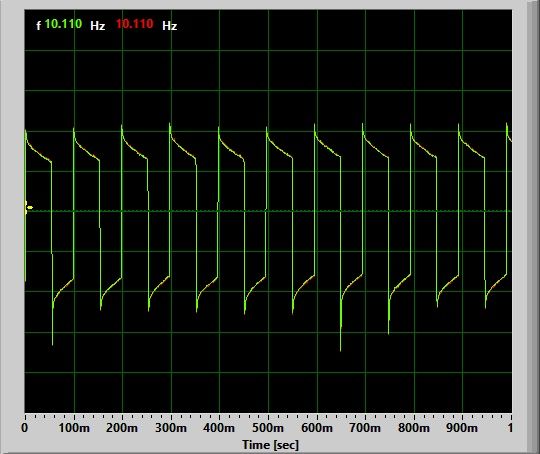
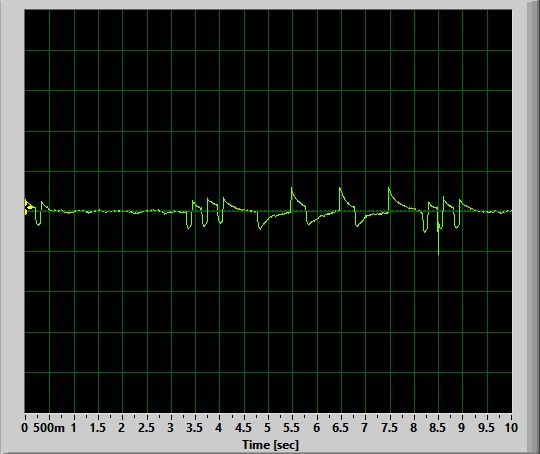
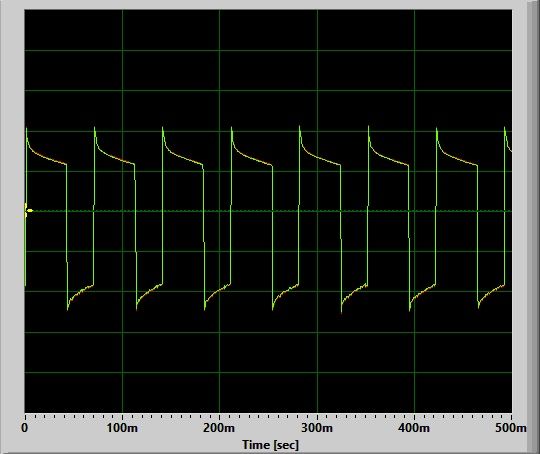
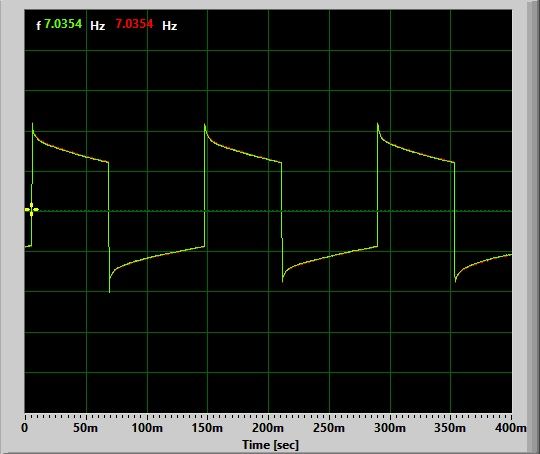
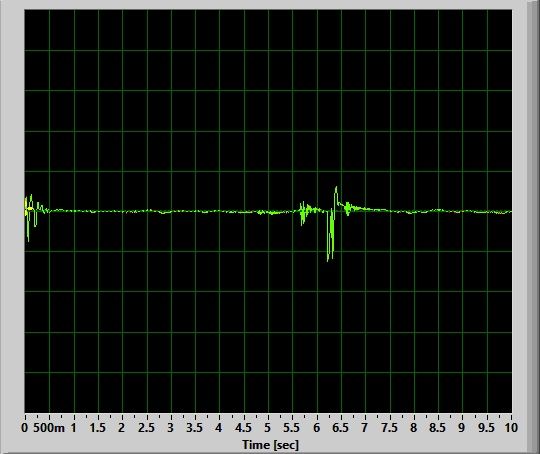
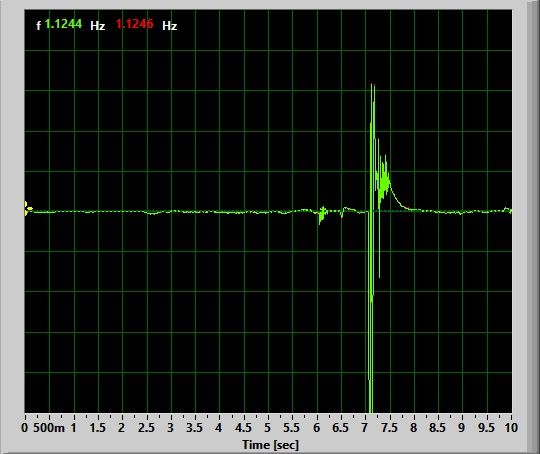
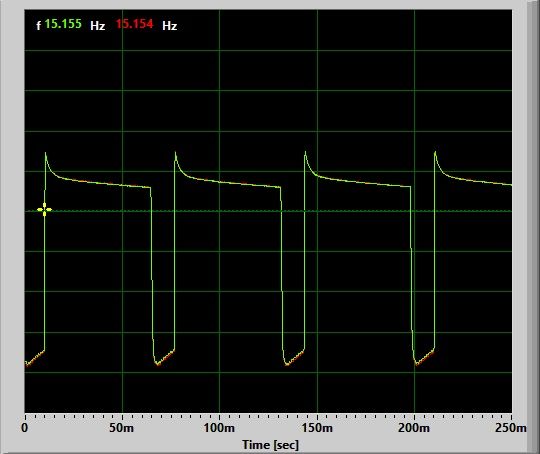
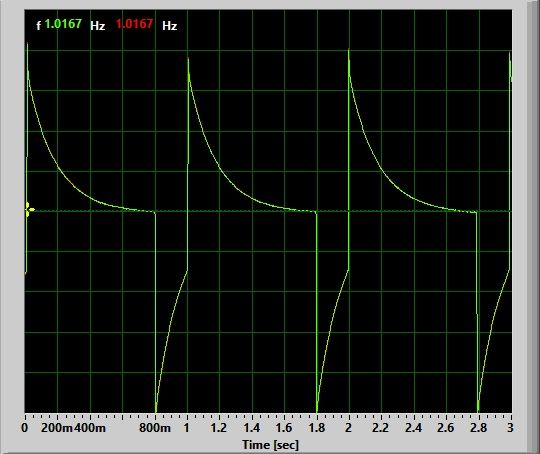
SOS:
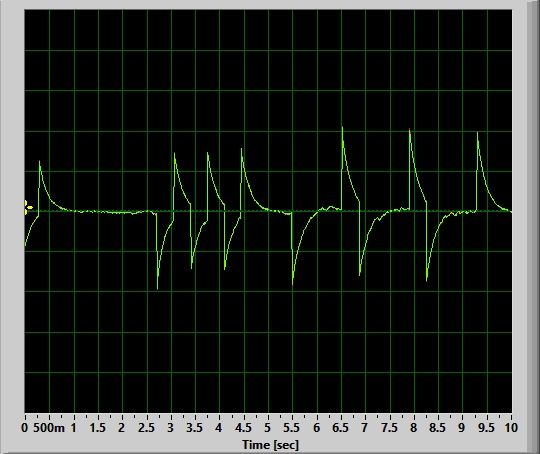
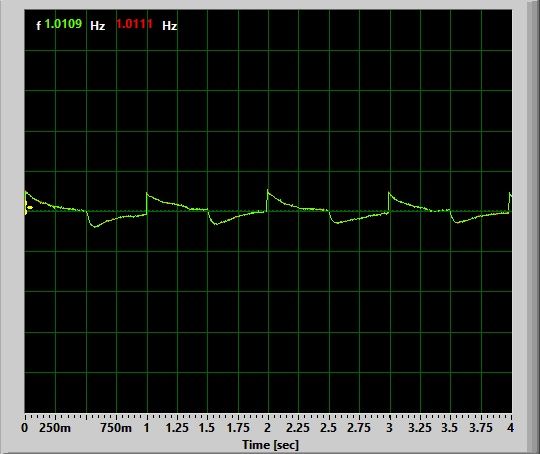
A fairly typical SOS mode.
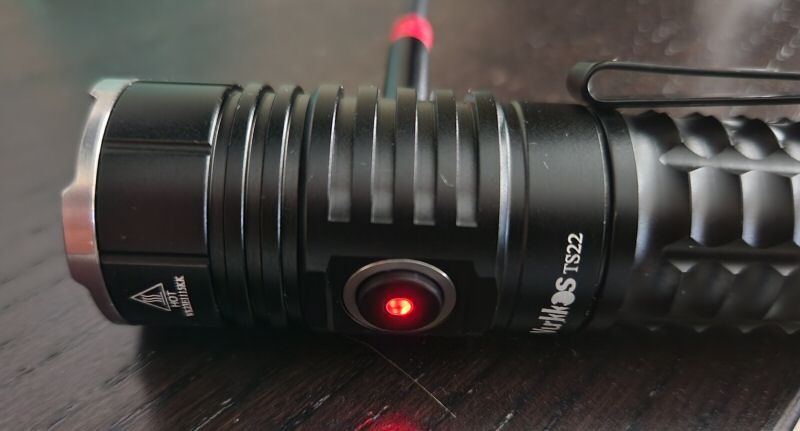
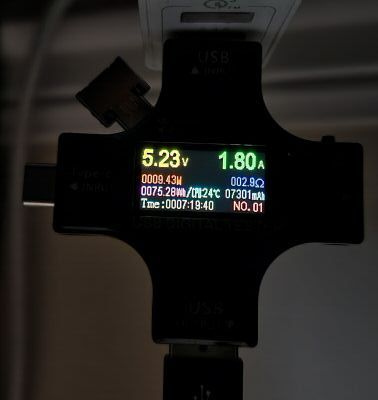
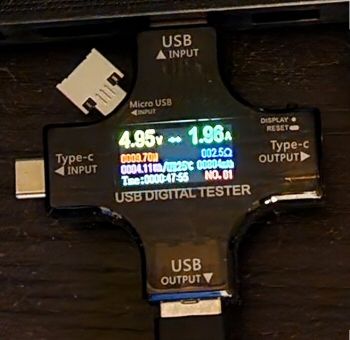
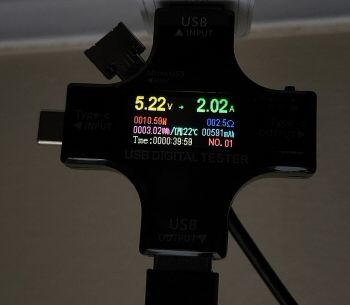
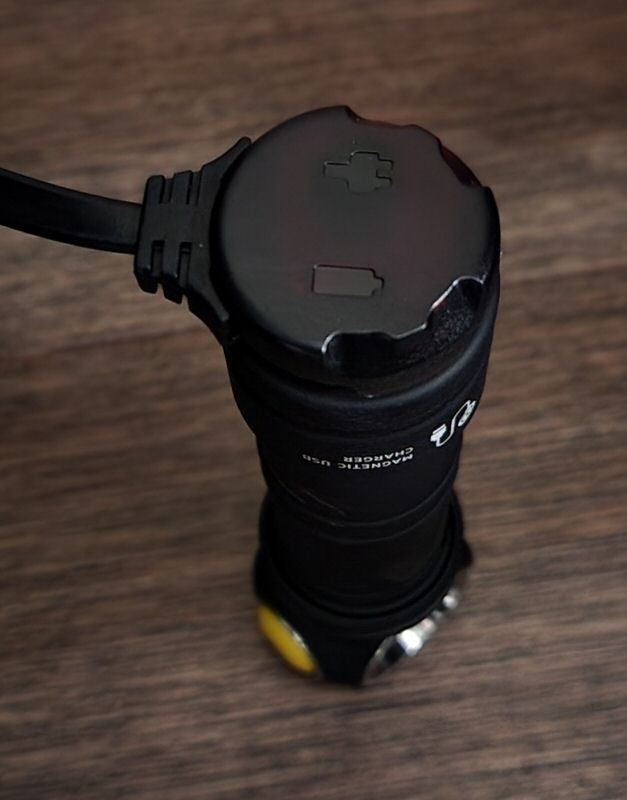
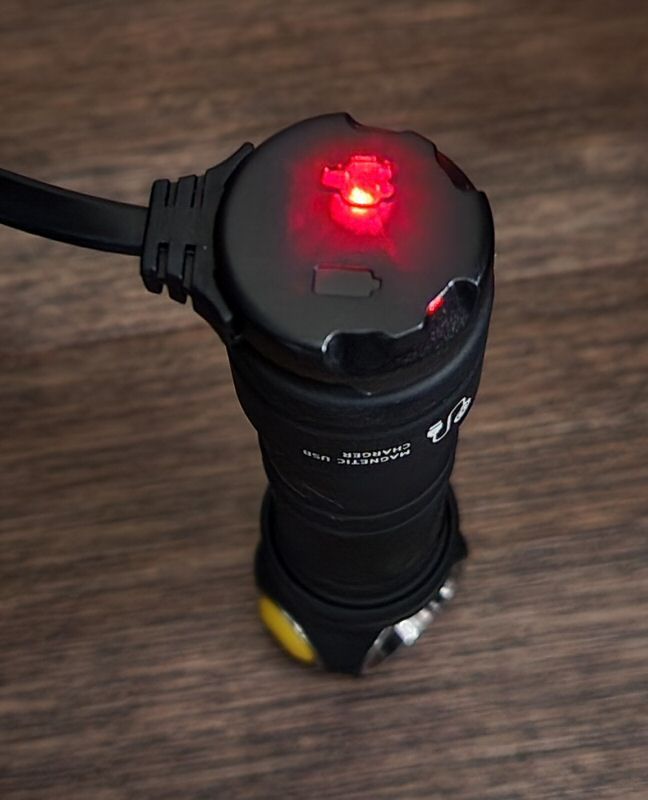
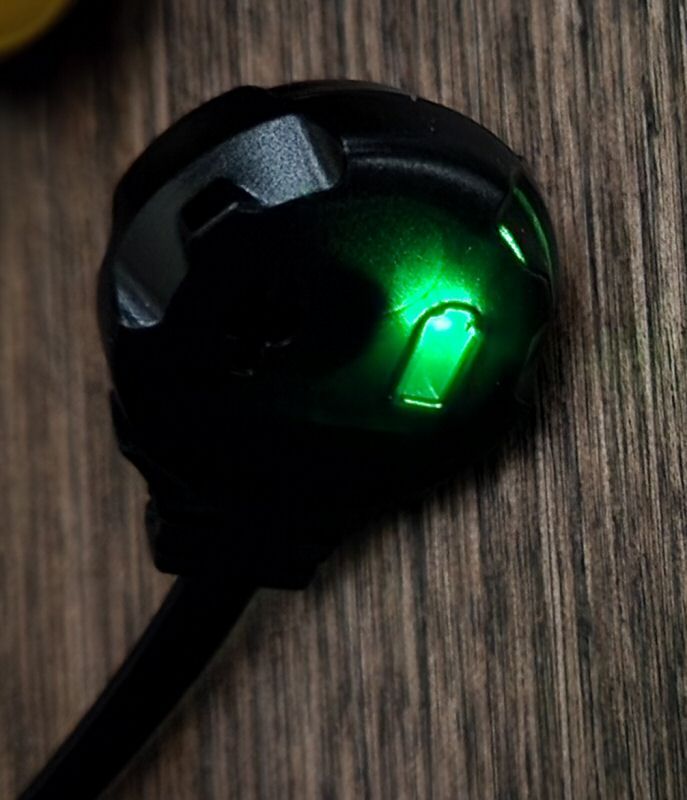
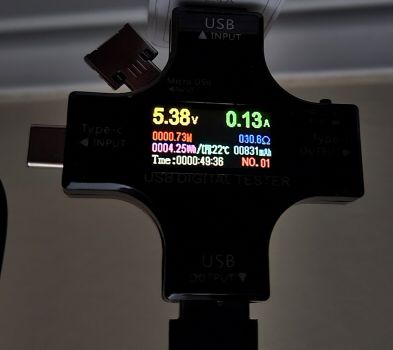
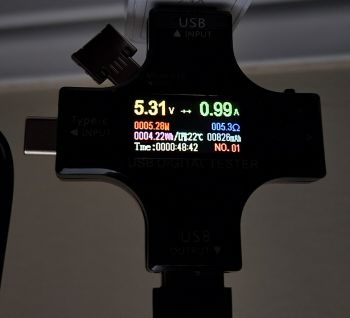
Charging:

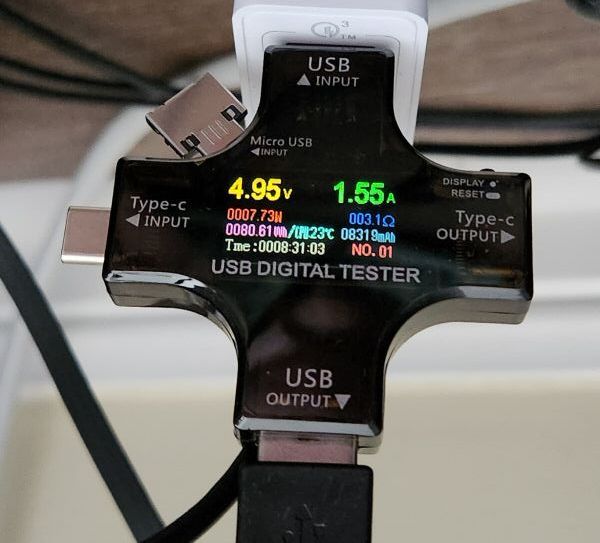
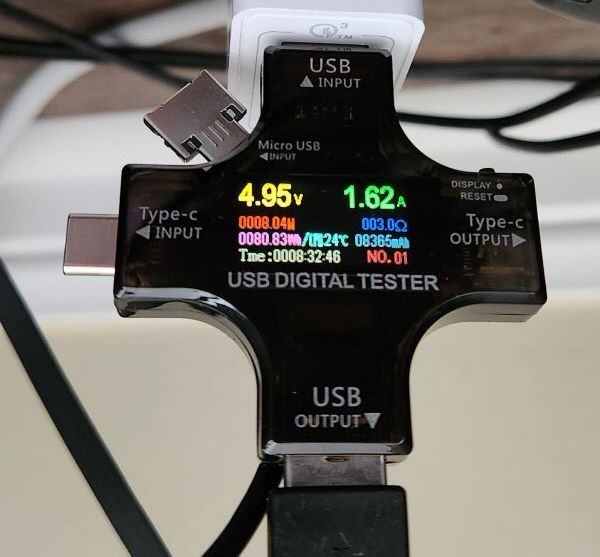
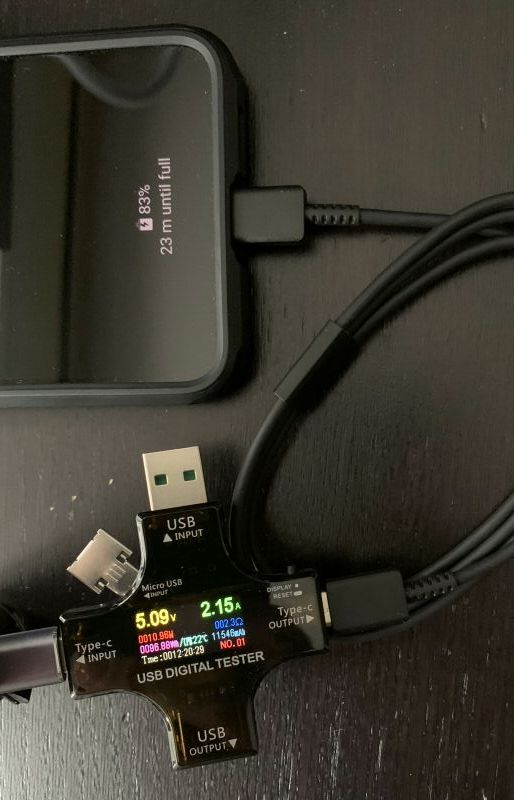
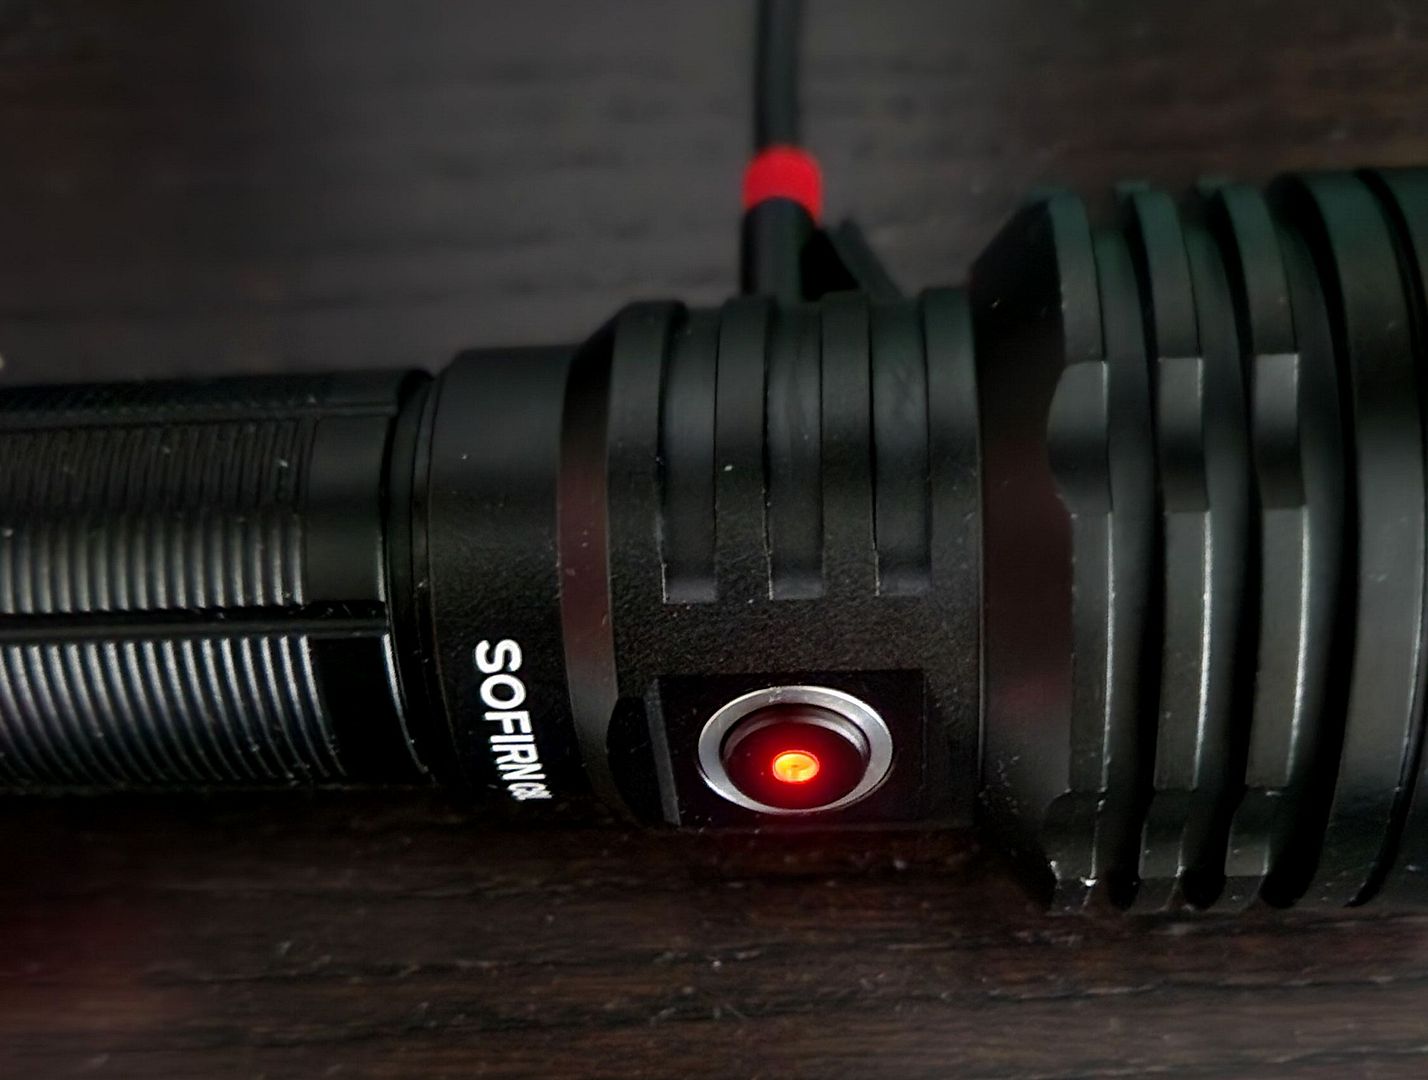
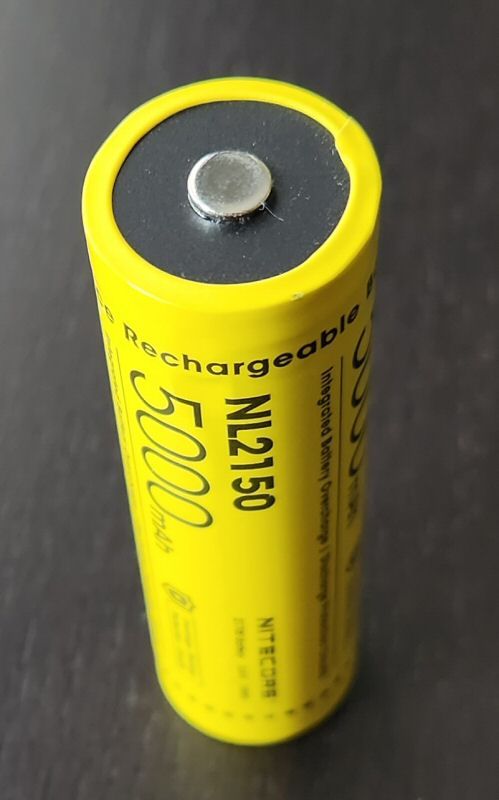
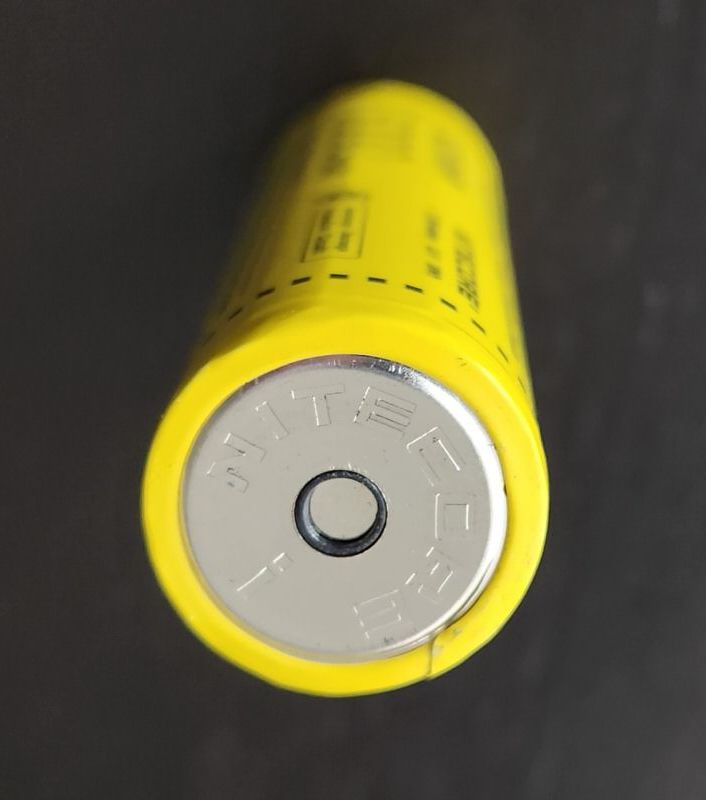
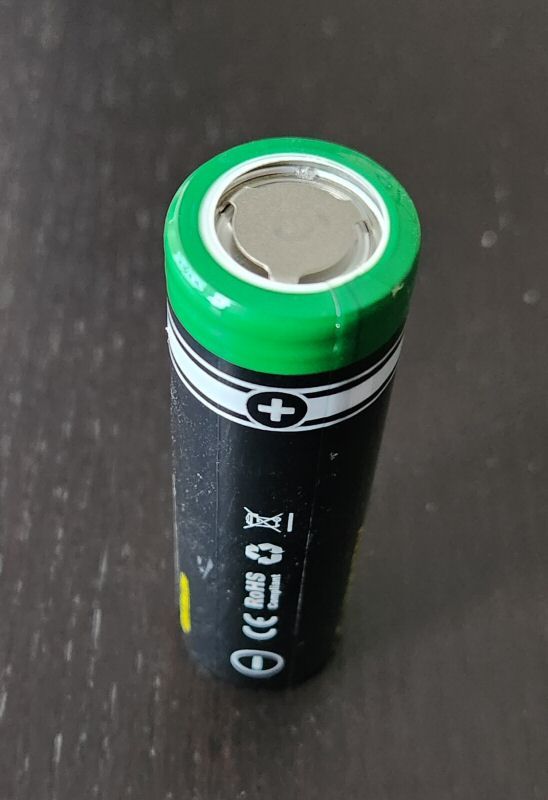
The P17 comes with Acebeam’s 21700 battery with a built-in charging port. There is a small LED on the positive terminal of the battery, which shows red when the cell is charging, and green when it is fully charged. In my testing, resting voltage of the cell was ~4.19V at termination.
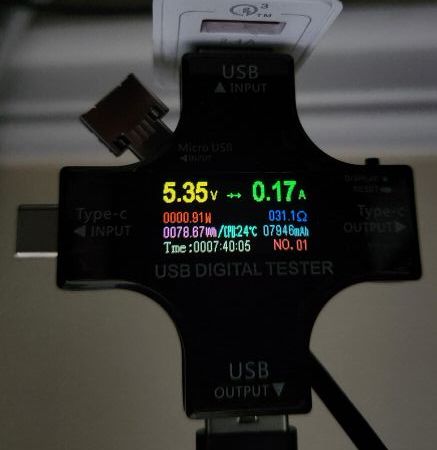
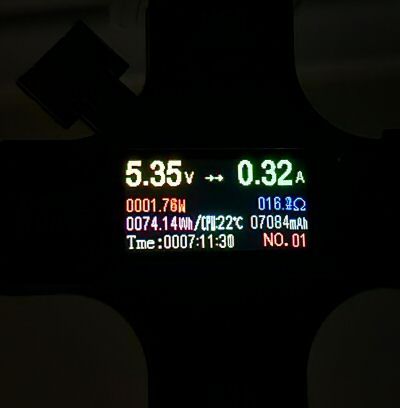
Resting voltage <3.0V
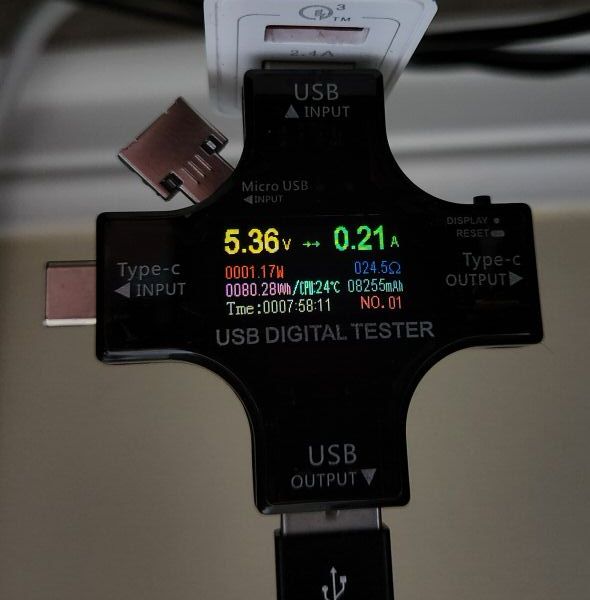
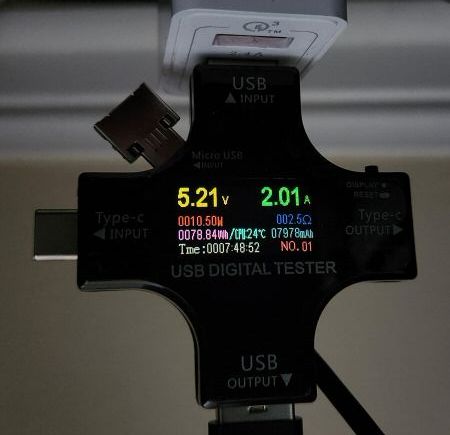
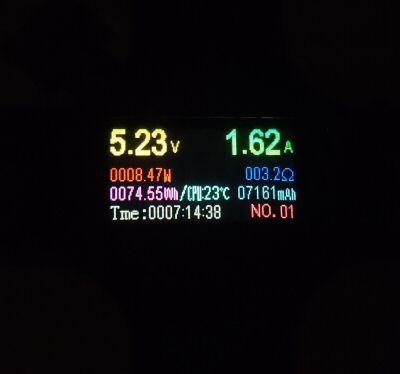
Resting voltage >3.0V

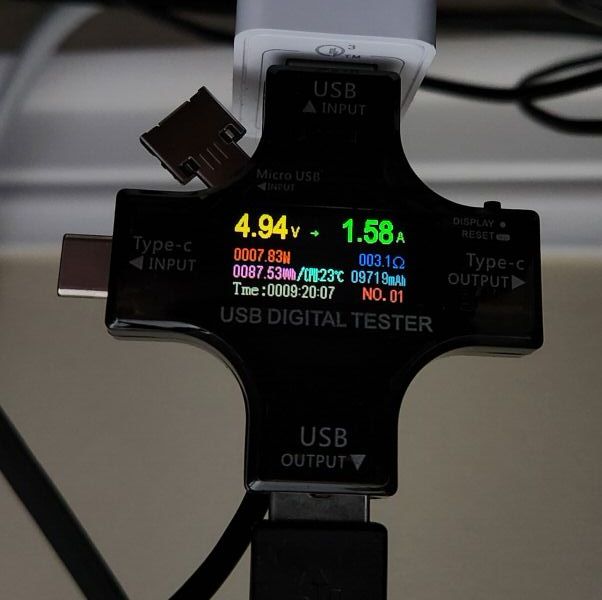
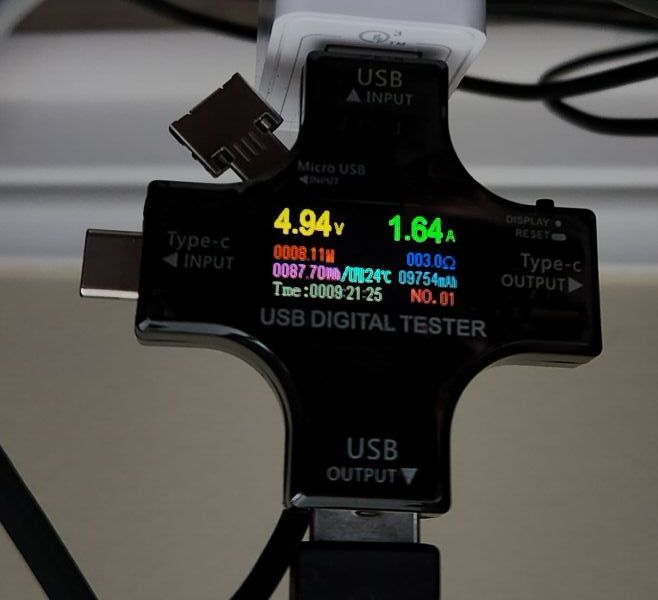
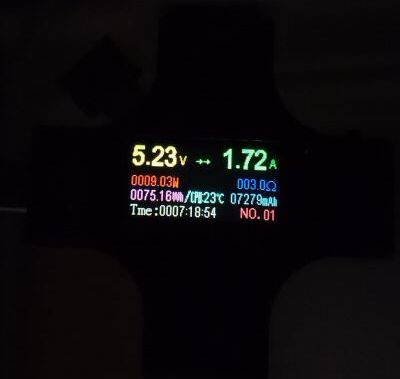
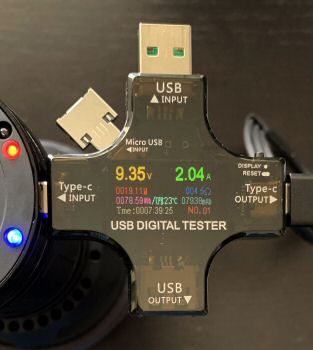
The Acebeam 21700 5100mAh battery shows an initial low USB-C charging current of ~0.20A when the cell is heavily depleted (<3.0V resting), which jumps up to ~1.2A once the cell is >3.0V resting. This two-current charging is a good design, and indicates a safe integrated charging circuit. The max charging rate is a bit lower than most lights/batteries in this class, but much better than the original version of this battery when I tested on the E70.
Standby / Parasitic Drain:
I measured the standby current as 0.19 mA. This is a reasonably low standby drain, and it would take just over 3 years to fully drain the cell. Regardless, I always recommend you physically lockout the light at the tailcap to prevent accidental activation when not in use.
Emitter Measures
In this section, I directly measure key emitter characteristics of my sample in terms of colour temperature, tint, and colour rendition. Please see my Emitter Measures page to learn more about what these terms mean, and how I am measuring them. As tint in particular can shift across levels, I typically stick with the highest stably regulated level for all my reported measures.
As explained on that page, since I am using an inexpensive uncalibrated device, you can only make relative comparisons across my reviews (i.e., don’t take these numbers as absolutely accurate values, but as relatively consistent across lights in my testing).
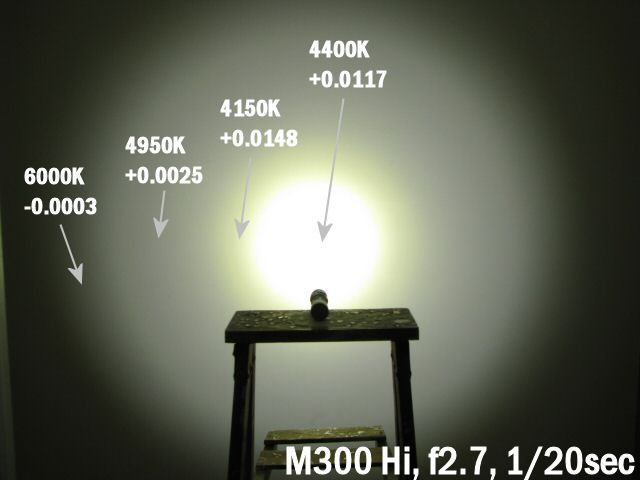
P17 on High:
.jpg)
.jpg)
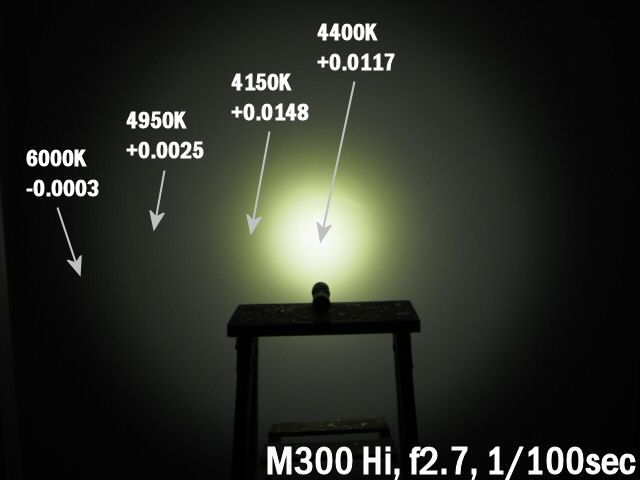
The key measures above are the colour temperature of ~5565K, and a slight positive tint shift (+0.0115 Duv) toward greenish-yellow at this temperature. For CRI (Ra), I measured a combined score of 66.
These values are very consistent with the rated specs for the cool white white XHP70.3 HI emitter on my sample, and match my visual experience of this light. As mentioned previously, I see no obvious chromatic variation in the beam of my sample.
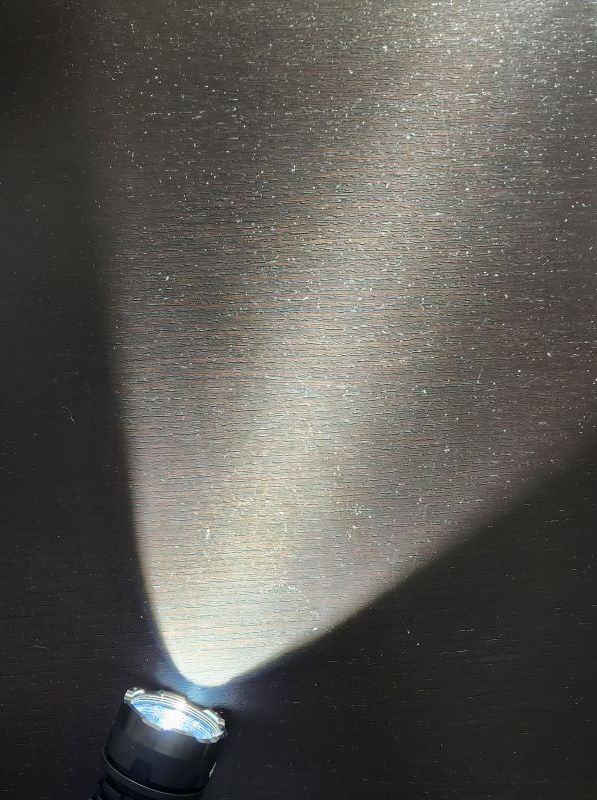
Beamshots
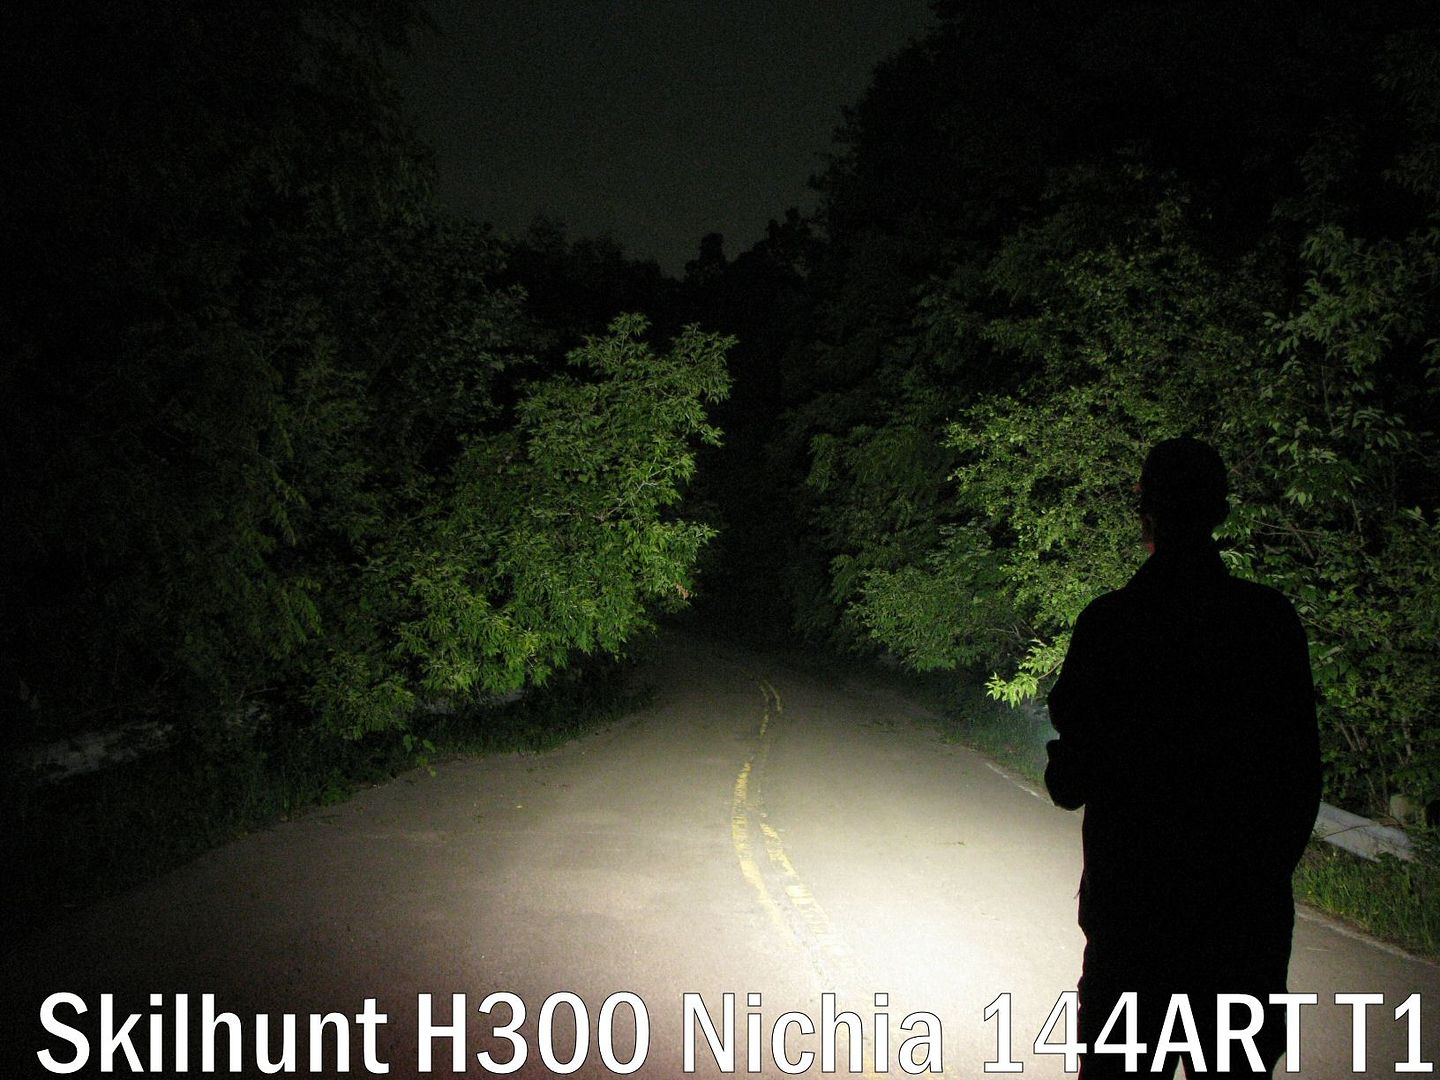
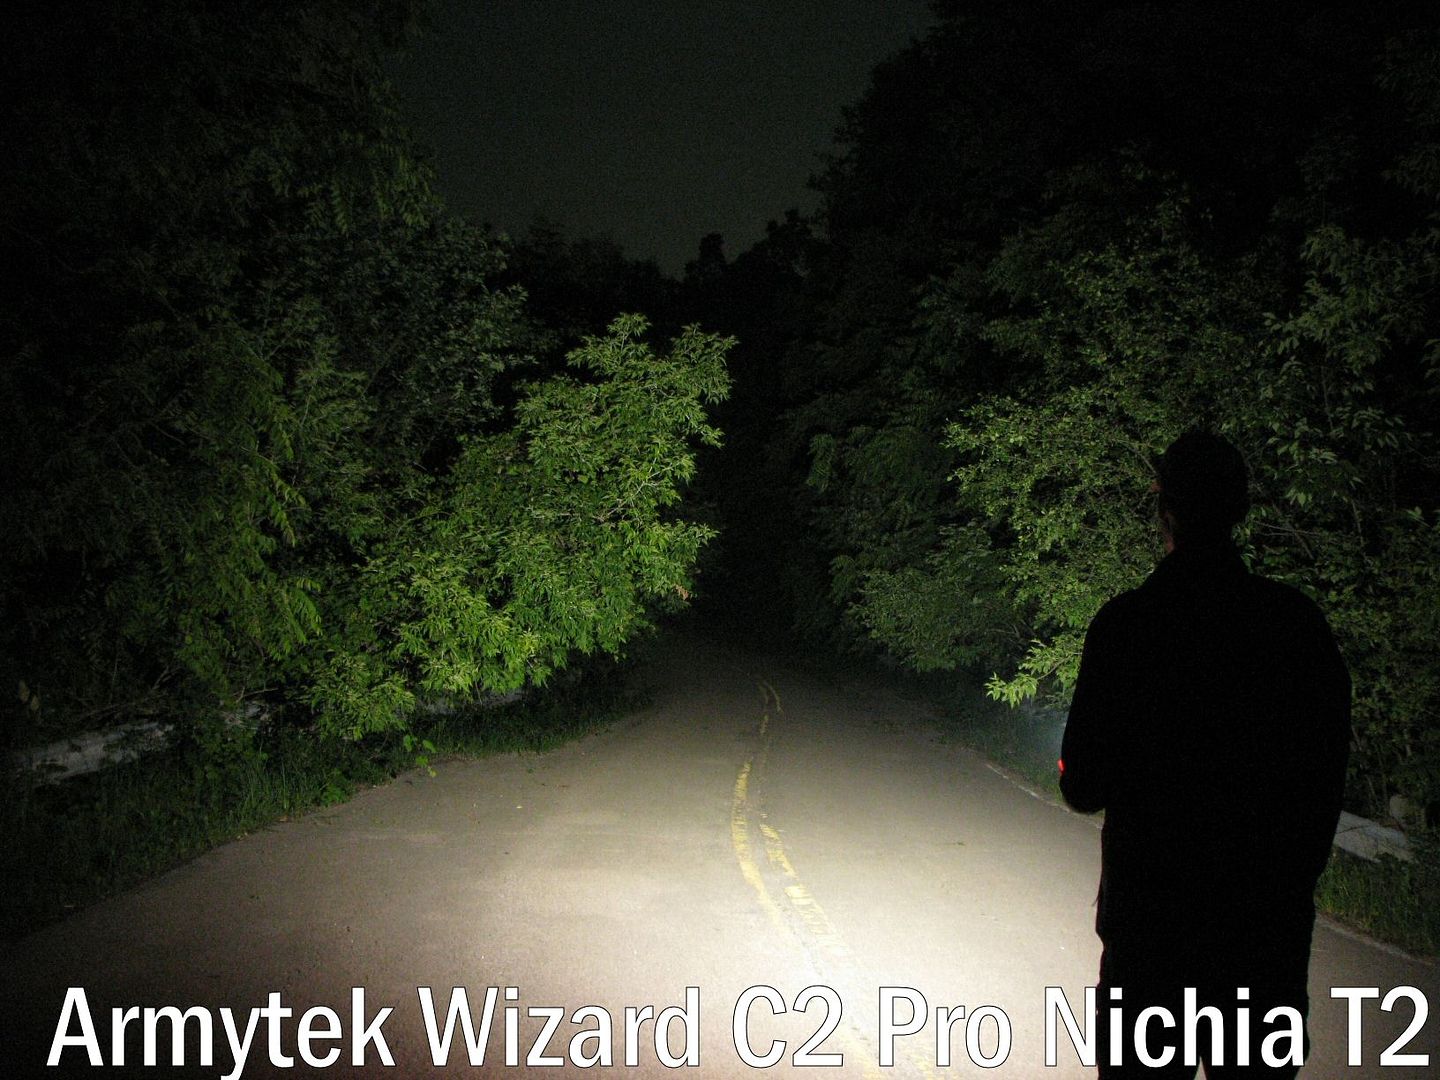
All outdoor beamshots are taken on my Canon PowerShot S5 IS at f/2.7, 0.5 secs exposure, ISO 400, daylight white balance. The bend in the road is approximately 40 meters (~45 yards) from the camera. Learn more about my outdoor beamshots here (scroll down for the floody light position used in this review).
Click on any thumbnail image below to open a full size image in a new window. You can then easily compare beams by switching between tabs.
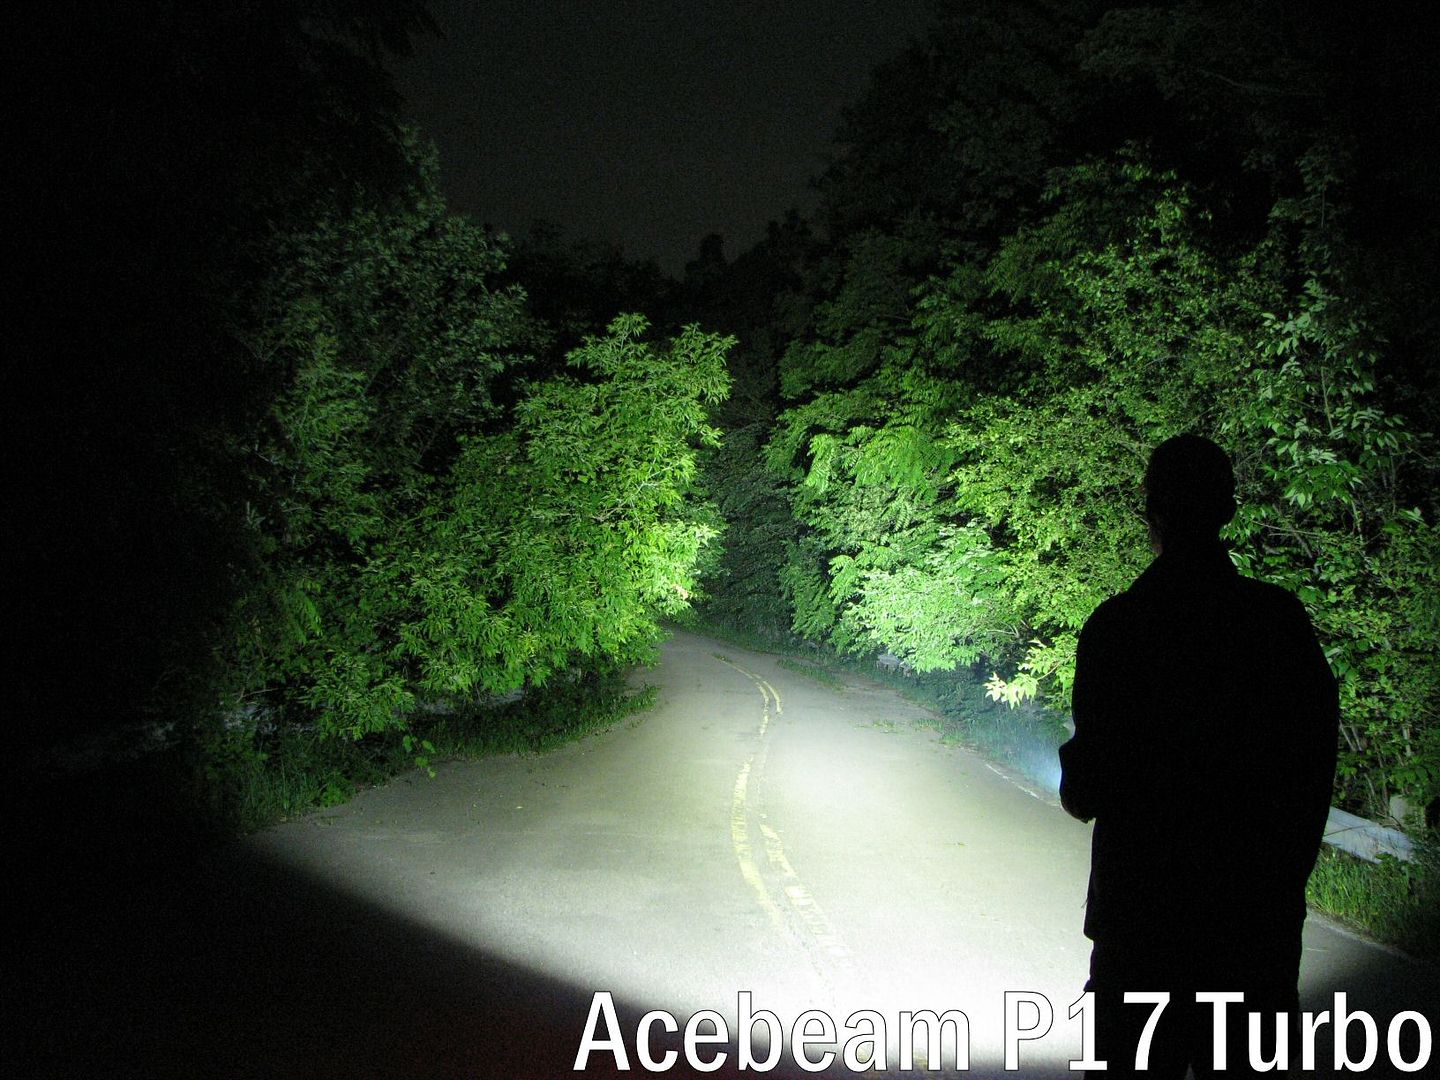
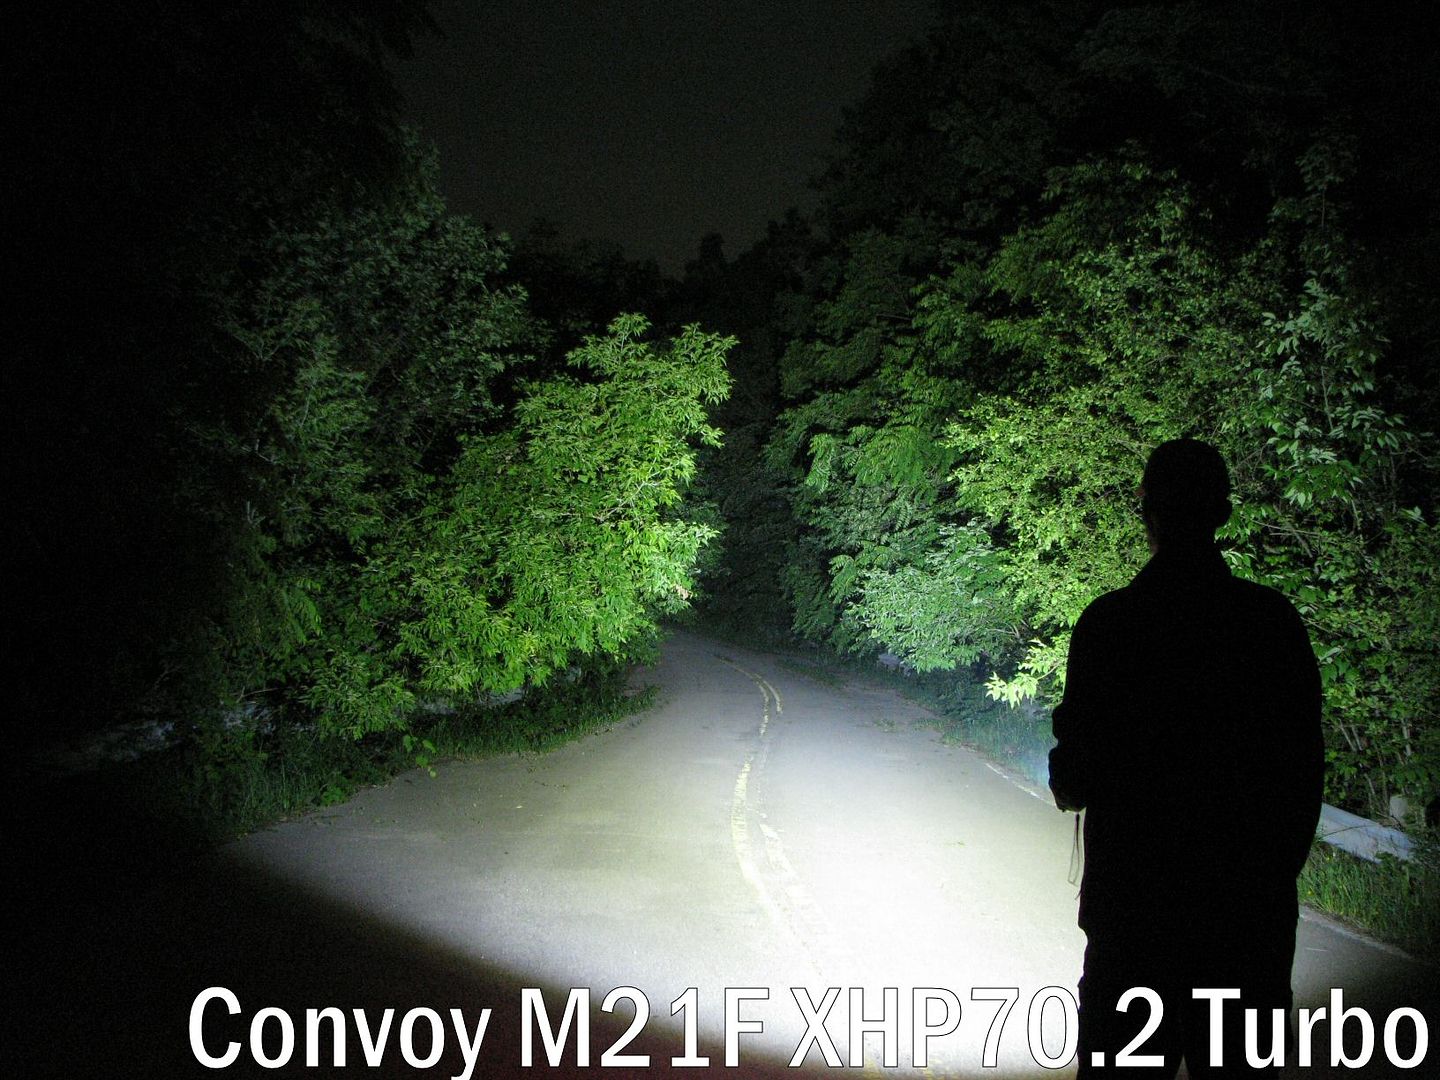
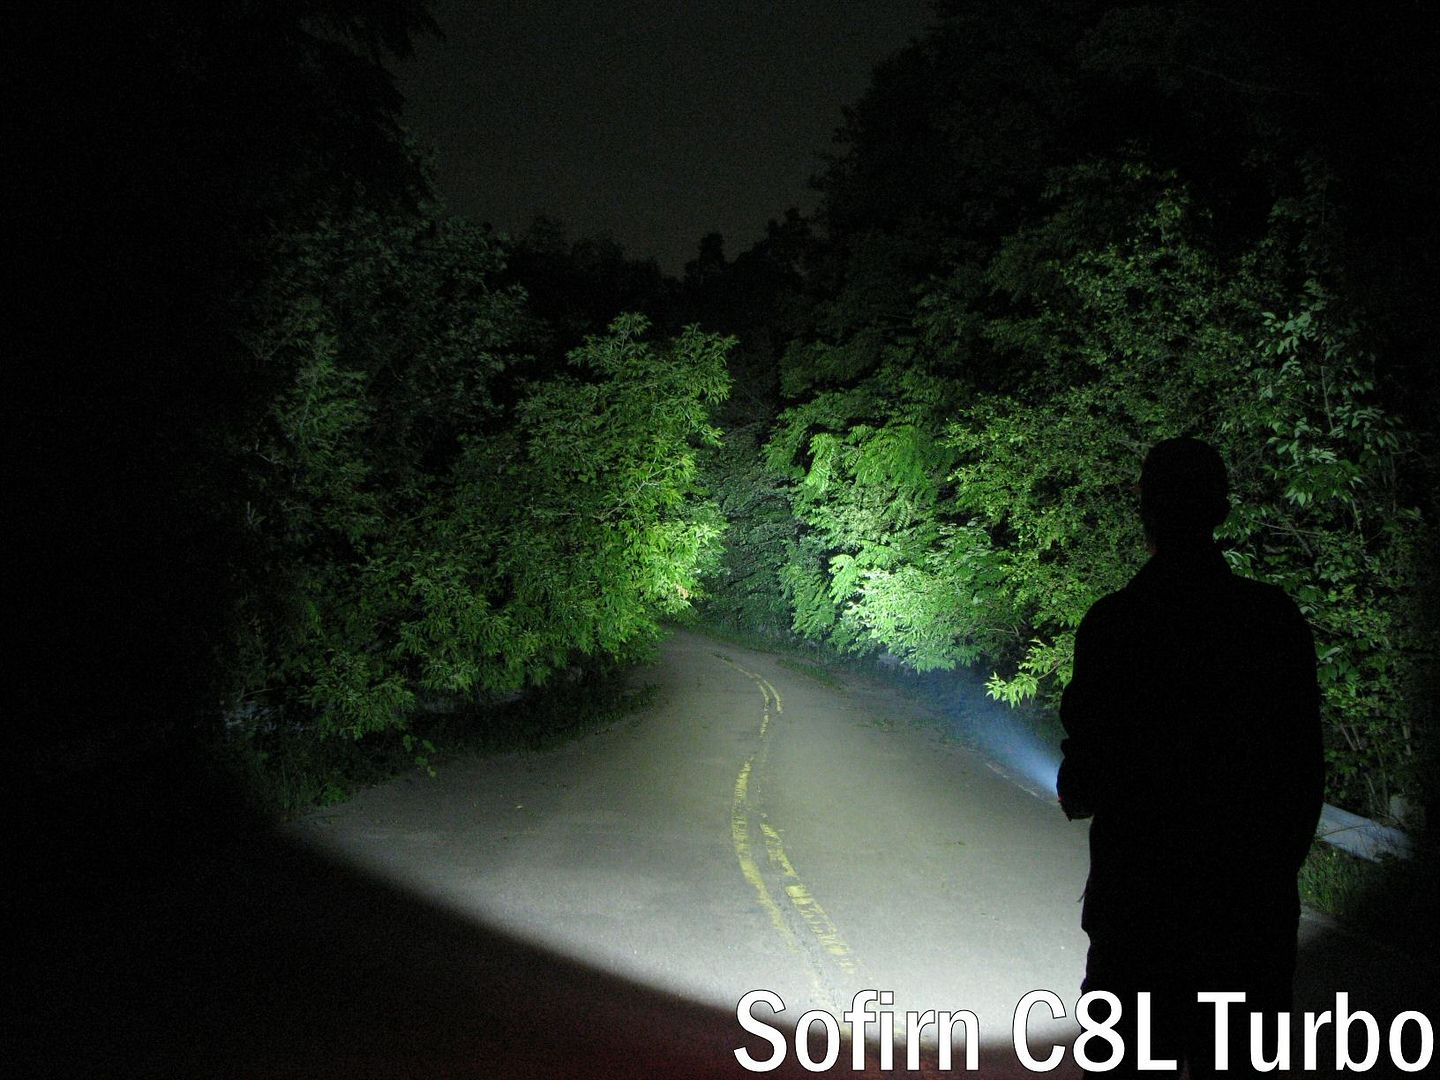
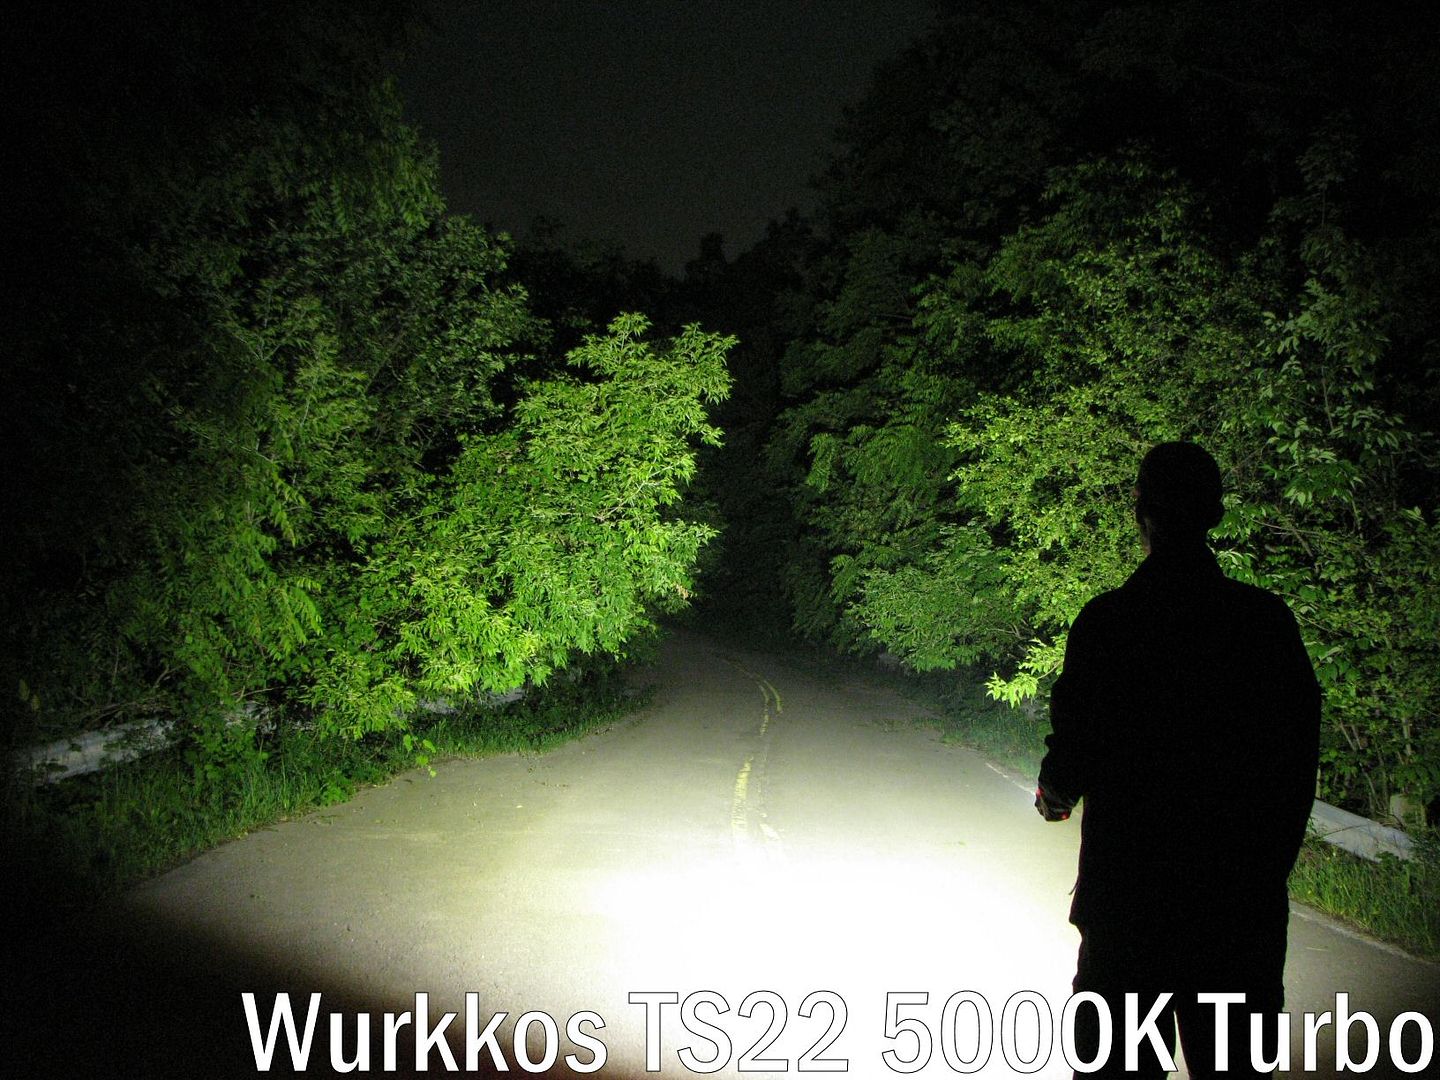

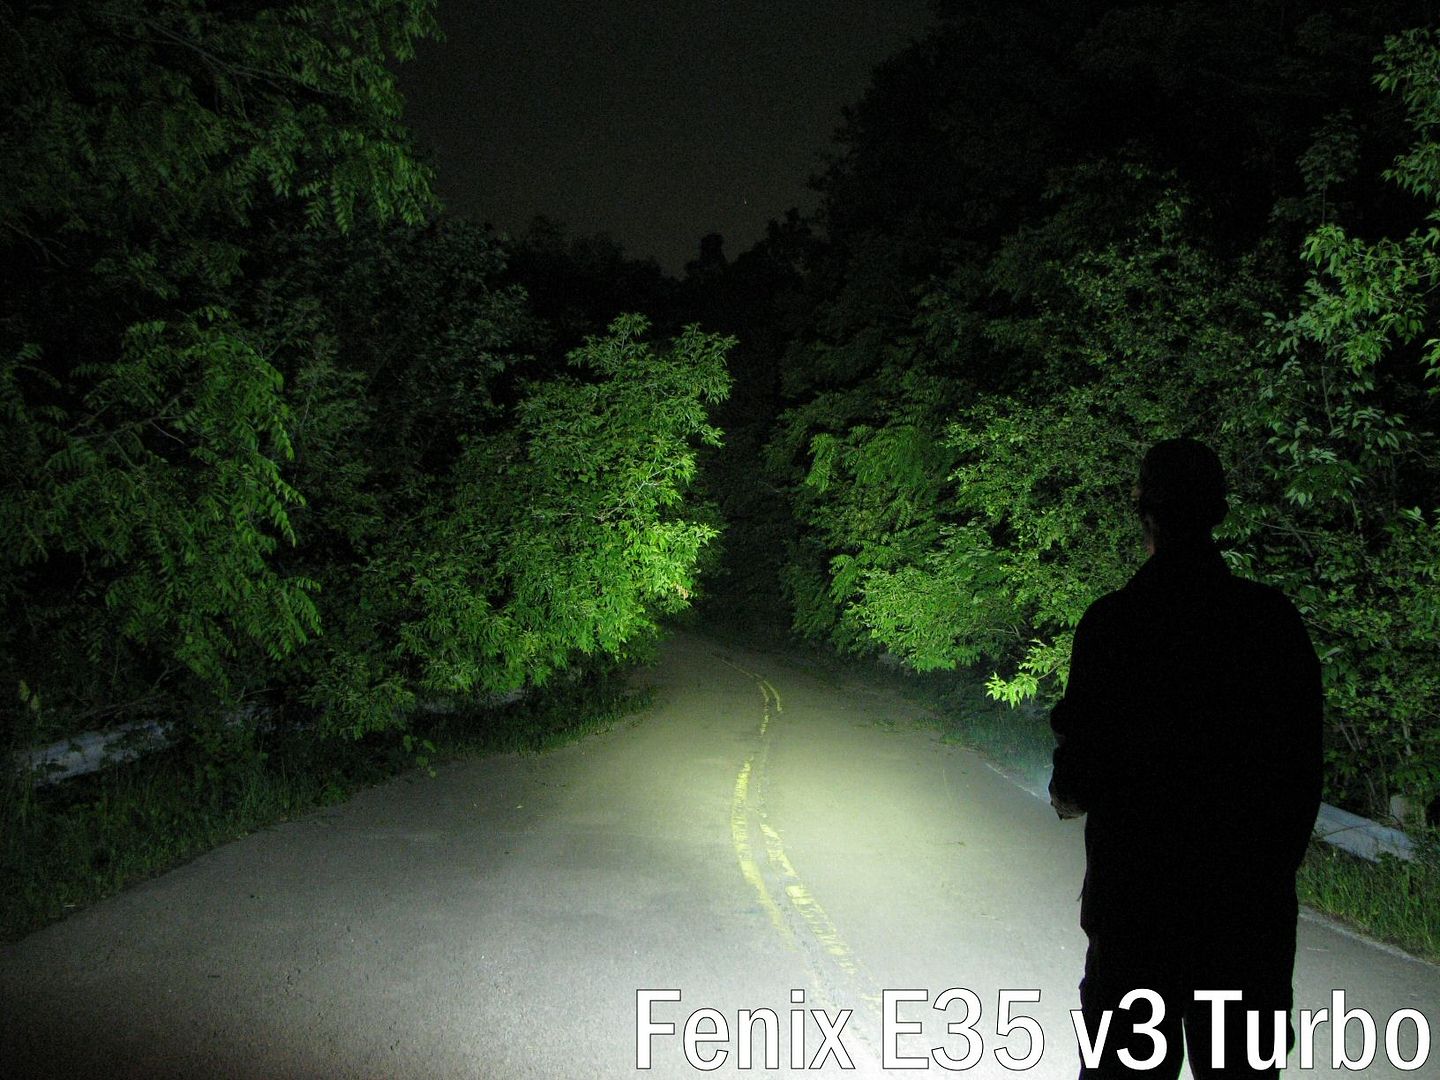
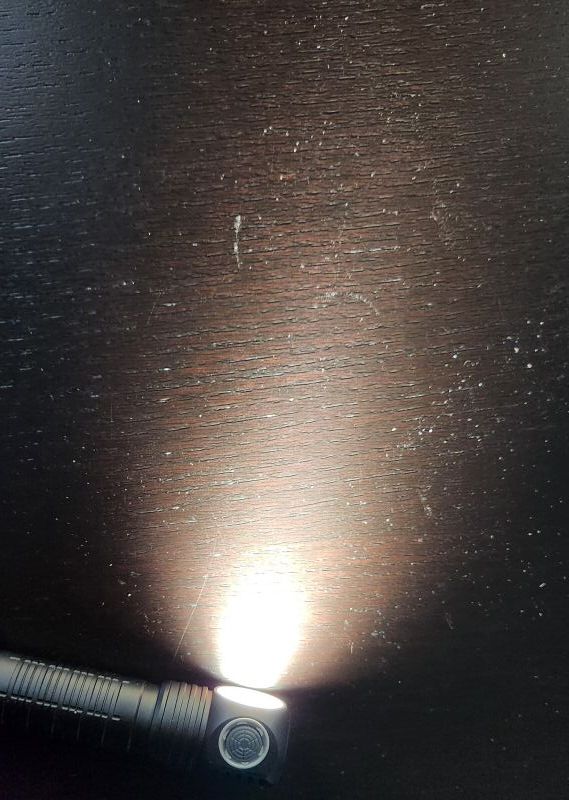
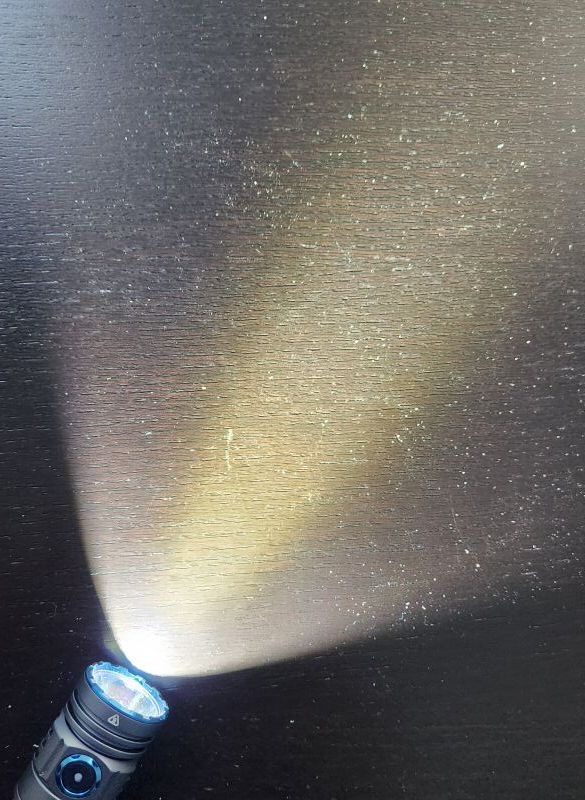
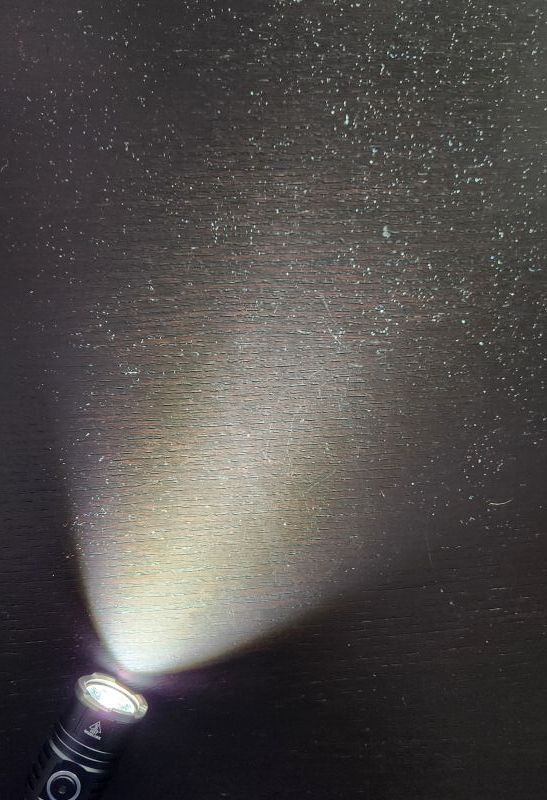
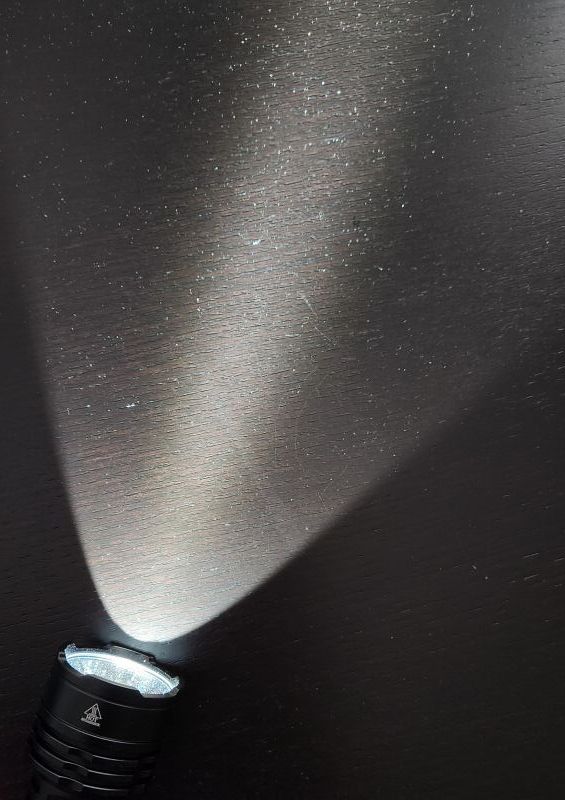
As you can see above, the P17 has a throwy beam, with an impressive amount of overall output. This gives you the best of both worlds. It is a super nice beam profile, without artifacts or noticeable chromatic variations.
Testing Results
My summary tables are generally reported in a manner consistent with the ANSI FL-1 standard for flashlight testing. In addition to the links above, please see my output measures page for more background.
All my output numbers are based on my home-made lightbox setup. As explained on that methodology page, I have devised a method for converting my lightbox relative output values to estimated lumens. My Peak Intensity/Beam Distance are directly measured with a NIST-certified Extech EA31 lightmeter.
P17 Testing Results
| Mode | Spec Lumens | Estimated Lumens @0sec | Estimated Lumens @30 secs | Beam Intensity @0sec | Beam Intensity @30secs | Beam Distance @30secs | PWM/Strobe Freq | Noise Freq | Charging Current <3V | Charging Current >3V | Parasitic Drain | Weight w/o Battery | Weight with Battery | CCT (K) | Duv | CRI |
|---|---|---|---|---|---|---|---|---|---|---|---|---|---|---|---|---|
| Ultra-Low | 3 | 3.1 | 3.1 | - | - | - | No | No | 0.21 A | 1.2 A | 0.19 mA | 153 g | 233 g | - | - | - |
| Low | 90 | 115 | 115 | - | - | - | No | No | 0.21 A | 1.2 A | 0.19 mA | 153 g | 233 g | - | - | - |
| Med | 580 | 570 | 565 | - | - | - | No | No | 0.21 A | 1.2 A | 0.19 mA | 153 g | 233 g | - | - | - |
| High | 2,200 | 2,300 | 2,250 | - | - | - | No | No | 0.21 A | 1.2 A | 0.19 mA | 153 g | 233 g | 5,565 | 0.0118 | 66 |
| Turbo | 4,900 | 5,250 | 4,950 | 48,700 cd | 44,100 cd | 420 m | No | No | 0.21 A | 1.2 A | 0.19 mA | 153 g | 233 g | - | - | - |
| Strobe | 2,000 | - | - | - | - | - | 5-10 Hz | No | 0.21 A | 1.2 A | 0.19 mA | 153 g | 233 g | - | - | - |
| SOS | 2,000 | - | - | - | - | - | No | No | 0.21 A | 1.2 A | 0.19 mA | 153 g | 233 g | - | - | - |
At all levels, there is a remarkably good concordance between published specs and what my lightbox reports.
My NIST-calibrated luxmeter reports slightly lower beam distance measures, but that is not uncommon in my testing. It’s still an impressive amount of throw.
I don’t really expect to see a Moonlight mode in a light like this, but the ~3 lumen Ultra-Low mode is quite reasonable.
To view and download full testing results for all modern lights in my testing, check out my Database page.
Runtimes
As always, my runtimes are done under a small cooling fan, for safety and consistency. To learn more about how to interpret runtime graphs, see my runtimes methodology page.


The runtime results show you the benefit of having a good thermal mass – The P17 shows very impressive stable regulation on the High level without step-down. No other light in my testing to date has managed the feat of sustained flat output of >2200 lumens for over an hour.
Further, the Turbo mode is quite reasonable too: ~5000 lumens output to start, dropping down within minutes to a stable flat ~1300 lumens for nearly 2 hours.
Taken together, this may help to explain why the Special Mode (aka “Tactical mode 2”) goes automatically to High and not Turbo. High is the fully sustained high output level.
In any case, the P17 shows impressive output/runtime efficiency and regulation on all levels, consistent with an excellent current-controlled driver. I never get tired of seeing those perfectly flat output runtimes. Performance of the XHP70.3 HI emitter in this light is very consistent with other good quality lights running XHP70.2 HD lights in my testing (although I greatly prefer the XHP70.3 HI for its improved beam profile).
You can see the low-voltage warning coming on during the final Low level step-down (~115 lumens). At this point, the LED flashes three times every 30 secs – which is picked up by the sampling frequency of my DMM light meter as those irregular drops to zero at the end of the Med runtime above.
Pros and Cons
| Pros | Cons |
|---|---|
| Light has excellent output/runtime efficiency, at all levels, with the High mode as a particular stand-out. | Turbo step-down level is lower than the defined High level. |
| Circuit shows very good flat regulation, with thermally-mediated step-down on Turbo only. | There is no mode set when Turbo comes on by default (either has mode memory, or High mode on activation). |
| Uses a dual tail switch design, with the option of three Mode sets | Lacks a true Moonlight mode, but has a very good low level. |
| Exceptionally good build quality and hand feel. | |
| Great beam profile, with good balance between throw and flood, without chromatic aberrations. |
Overall Rating

Preliminary Conclusions
There are some lights that you just pick up for the first time and go, “Oh, yeah.” By which I mean, there is an ineffable quality that just immediately tells you they got this light right. The P17 is one of those lights.
If I were to break down what that means to me, it starts with the handfeel – which is itself a complex term that includes overall heft, weight balance across the light as it fits in your hand (for both overhand and underhand carry), switch placement and feel, and the tactile feel of the surface of the light itself (i.e., just the right gripiness). That later point is not just the type or degree of knurling (although that is important) or other grip items like cut-outs and clips – good quality thick anodizing can often have a more “grippy” texture (e.g., Armytek is a good example of this). This light gets all of those features just right in my view.
Next is the beam pattern when you turn it on. To be sure, sometimes you want a very focused beam, and sometimes you may want full flood. But often you are looking for a good balance between relative throw and spill – the later involving both how wide and how bright the spill beam is. And then finally how “pretty” the beam is (i.e., lack of aberrations across the range of the beam, including a lack of chromatic variations). Again, as the beamshots above show, this light just really seems to really find that sweet spot – with fantastic output levels to boot.
As I started to handle the light though, I found some of the user interface choices a bit odd. For example, I’m used to having multiple mode sets on “tactical” dual switch lights, and the Daily mode here is generally well suited to my needs. But typically there is a dedicated “tactical” mode where the light always comes on at the maximum output level, with the option for a high-frequency strobe depending on which switch is used. But this light doesn’t do that – the Tactical mode has mode memory (so the light comes on in the last memorized output level), without so much as even a shortcut to Turbo. There is a secondary tactical mode – called the Special mode here – that ditches the level memory, but comes on at the lower High level (and has no strobe option).
I still think this arrangement is odd, but after my runtime tests I can understand why they choose the High level (instead of Turbo) for the non-memorized Special mode set: The P17 is an outstanding performer at the High level. It is in fact the only light I’ve tested so far that can stably produce >2200 lumens in a fully flat-regulated level for over an hour. If you opted for ~5000 initial lumens on Turbo, you would have to put up with the fact that the light quickly steps down to a (very common) lower ~1300 lumen level for its extended run.
This unusual UI is really why I’ve knocked half a star off – everything else about the light, including output/runtime efficiency and regulation, make this light a top performer in the high-output class of 1×21700 lights. Another great showing from Acebeam, and a real pleasure to handle and use!
Acknowledgement
The P17 was supplied by Acebeam for review. As always, all opinions are my own and the light received the same rigourous and objective testing as all other lights that I have reviewed. At the time of review, this light retails for ~$120 USD (~$160 CDN).


.jpg)
.jpg)


.jpg)
.jpg)


.jpg)
.jpg)


_gqcpyHhAQFEUfdCdkfN1WV.jpg)
_dwN9eNAEDNm458XnsQY3a2.jpg)
_05.JPG)
_05_sT82YVKHUit9Y5nmYpDhrZ.JPG)
_05_6xufWKrQKnW4MEhtSH4zdz.JPG)
_05.JPG)
_05_3qpnSz17JCXCDo3FBwuk5N.JPG)
_05_konN9xoDtcwHtsox8aAfSt.JPG)


_izDJyxp3schuNrvzuqDL3R.jpg)
_1wy2GfKaRtimb8QpybBuSZ.jpg)
.JPG)
.JPG)
.JPG)
.JPG)


_20230319_140329.png)
_20230319_140317.png)
_20230319_140309.png)
_20230319_140322.png)
_20230319_140422.png)
_20230319_140443.png)
_20230319_140538.png)
_20230319_140551.png)
_20230319_140709.png)
_20230319_140718.png)
_20230319_140804.png)
_20230319_140907.png)


_uC3SHbWjRQg1edDgcJsnAj.jpg)
_5CormVqaoM1FaVaTwLp9AD.jpg)


_20230319_140937.png)
_20230319_140953.png)
_20230319_140945.png)
_20230319_141000.png)
_20230319_141213.png)
_20230319_141220.png)
_20230319_141232.png)
_20230319_141429.png)
_20230319_141417.png)
_20230319_141601.png)
_20230319_141543_94w3ykRJgTHyW9ehoowy5X.png)


_oef98m7GQxsMeYD1bcYsxM.jpg)
_3YWnwJNnJHD7PRHFnLiMzT.jpg)
_05_47zC7WAoZEVj353B8um7Ux.JPG)
_05.JPG)


_wtNckiQHzZEgwy398fP7nz.jpg)
_4fo18JqnQbithUkrBeEBys.jpg)
_05_spqisJcT7JPWnpYvYy6No5.JPG)
_05.JPG)


_20230422_155350.jpg)
_20230422_160844.jpg)
_6F4vhPheU81QV6GX4UDR2M.jpg)
_fzj446dc7A4jj9CmpMzAnG.jpg)
_05.JPG)
_05.JPG)
_05.JPG)
_05_4fk1545tpMVUrrgHqXqtUc.JPG)